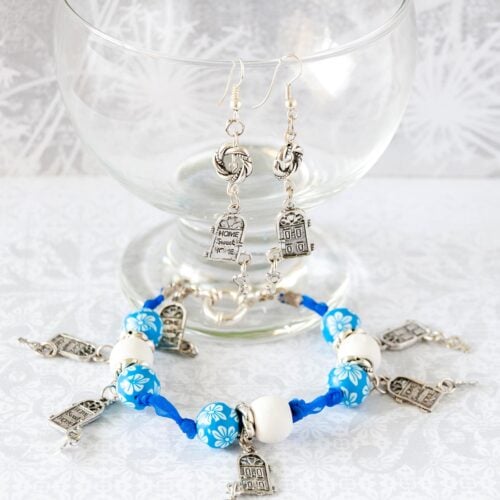
DIY beaded ribbon bracelet with pendants and Earrings
Wooden beads, organza ribbon, and cute pendants – that’s all you need for this sweet bracelet and earrings. Craft your style with a ribbon bracelet diy and cute earrings! Let’s add some charm to your accessories collection. Easy, fun, and totally you! Let’s create together!
Equipment
- scissors
- Flat Nose Pliers
- Bent-nose pliers
- Yarn or embroidery needle
Ingredients
- Wooden beads size and color of your choice
- Ring Spacer
- Cute door with key pendants or your favorite pendants
- Organza ribbon complementary color to your beads
- Clasps and jump rings
- Fold-over crip ends.
- Clear nail polish optional for knot securing
Instructions
STEP 1: PREPARE YOUR WORKSPACE
- Set up a clean, well-lit workspace with all your materials within reach. This will make the crafting process more enjoyable and organized.
STEP 2: MEASURE AND CUT THE RIBBON
- Begin by measuring the organza ribbon to your desired bracelet length. It’s essential to consider how tightly or loosely you want the bracelet to fit.
- Add an extra 2-3 inches to the measured length. This extra length will be used for tying knots and attaching the clasps.
STEP 3: THREAD THE RIBBON
- Thread one end of the ribbon through the eye of a large needle if your ribbon is thick. This makes it easier to string the beads and pendants.
STEP 4: STRING THE BEADS AND PENDANTS
- Start by using a yarn needle and insert around 2 inches of the ribbon through the hole.
- Select the first bead and slide it to the center of the ribbon.
- Next, add a separator, which could be a smaller wooden bead or a metal spacer ring like I did. This keeps your beads and pendants evenly spaced.
- The pattern I used was 2 beads, 1 spacer; then 3 beads, 2 spacer and then again 2 beads, 1 spacer leaving around a half inch between each group.
- Make an overhand knot before and after each group of beads. Pull it tight, ensuring the beads don’t slide around.
- If you want to add extra security, you can use a tiny drop of clear nail polish on the knot to hold it in place.
- Repeat the pattern: knot, wooden bead, spacer, bead, knot until you’ve reached your desired bracelet length.
STEP 5: ADD THE PENDANTS
- Open a 6mm jump ring with your flat nose pliers and insert the pendant.
- Insert one spacer in the jump ring and close the jump ring.
- Repeat with all spacers.
STEP 6: ATTACH CLASPS
- Measure your bracelet around your wrist and mark where you want the clasp to be. Make a tight knot on each end before your mark.
- Use fold-over crimp ends on the string ends.
- Place them just before the mark but after the knot because he clasps.
- Placing the ribbon in the cord crimp end, tightened them with a flat nose plier to secure the ribbon well.
- With your pliers, open a little bit one jump ring, enough to insert the cord end ring.
- Insert the fold-over crimp end and a clasp piece on each end.
- Closed the jump ring again.
STEP 7: TRIM EXCESS RIBBON
- Carefully trim any excess ribbon, ensuring the ends are neat and not fraying.
- With a match or lighter, carefully heat the ends to secure them and avoid future fraying.
STEP 8: FINAL TOUCHES
- Take a moment to admire your creation. Adjust the beads and pendants if necessary to ensure they’re evenly spaced.
- DONE!!!! Woot wootLISTO!!! Yupiiiiiiii
STEP 9: MAKE MATCHING EARRINGS.
- Using the sabe spacers used for the bracelet, insert one eye pin on each side.
- With a round-nosed pliers make a loop with the wire left on both ends.
- Using jump rings connect one eye pin loop to the pendant and the other eye pin loop to the earring hooks.
- You are done!