DIY Halloween Door Hanger
Craft a spooky-cute DIY Halloween Door Hanger with wooden letters, paint, felt and ribbon. Easy, fun, and perfect for your Halloween decor!
Equipment
- Hot glue gun and glue sticks
- Paintbrush
- scissors
- Markers, Pen, or pencil for tracing
Ingredients
- Wooden letters spelling “BOO”
- Black acrylic paint
- White felt – for ghosts
- Black felt – for eyes and mouth details
- Orange polka dot ribbon – or your favorite spooky one for the hanger
- Liquid glue – Optional for the eyes but you can use hot glue too.
Instructions
Step 1: Paint the Letters
- Start by grabbing your wooden letters and giving them a good coat of black acrylic paint.
- I painted all sides and edges to keep everything nice and sleek.
- Let them dry completely before moving on to the next step.
Step 2: Make the Spooky Ghosts
- While your letters are drying, it’s time to bring the spooky ghosts to life! I hand-drew a cute little ghost shape on paper first (feel free to get creative with their shapes!), then used that as a stencil.
- Cut the little ghost with your scissors.
- Trace your ghost onto white felt and cut them out.
- Also, cut out black felt eyes and mouths for each ghost.
- Glue those little faces onto your ghosts.
- I drew the wavy lines of the flying sheets of the ghosts but this is totally optional.
- And look at that, they’ve got personality!
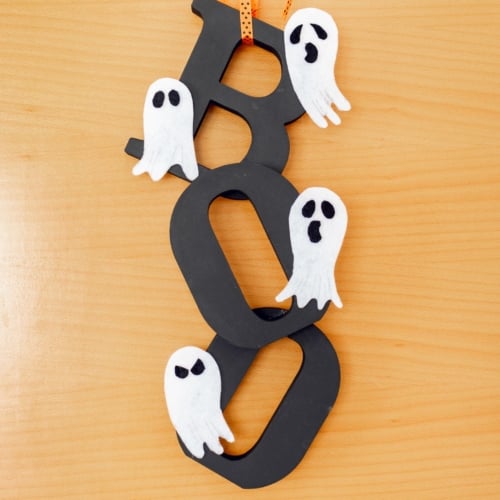
Step 3: Assemble the “BOO”
- Once your letters are dry, arrange them in a vertical stack. I went for an asymmetric look by slightly overlapping the center “O” over the “B” and the last “O.” This gives it a fun, 3D feel!
- Use your hot glue gun to glue the letters together in this vertical formation.
- Make sure everything is secure before moving on.
Step 4: Add the Ghosts
- I glued mine onto the letters in a way that made them look like they were floating around.
- You can play around with their positions to make it your own, but I loved how they looked scattered across the letters.
Step 5: Attach the Ribbon
- To finish it off, grab your orange polka dot ribbon. I looped mine through the top of the letter “B” and tied a knot, creating the hanger.
- The bright ribbon pops against the black letters and really gives the door hanger a festive feel!
Step 6: Hang It Up
- And that’s it! Your DIY Halloween Door Hanger is ready to spook up your front door.
- Hang it up, step back, and enjoy your spooky-cute door hanger.
- Me hanging the Halloween Door Hanger on my door
- There you go!