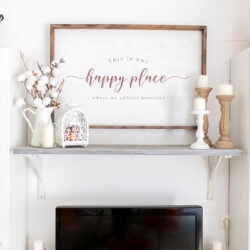
Diy Oversized Rustic Wood Sign (Also Reversible)
Not only is this Oversized Rustic Wood Sign gorgeous but it is also reversible without losing the Farmhouse look. The perfect touch for your rustic home decor.
Equipment
- Drill and wood drill bit
- Screwdriver
- Hammer
Ingredients
- Pinewood boards as follows below
- Plywood as follows below
- Wood Stain
- White furniture acrylic paint
- Brown/walnut color acrylic paint
- Grey acrylic paint
- Wood headless nails
- Screws
- About 10 L shaped Hook Screws
- Brushes the cheapest the better
- Sandpaper 150 grit
- Piece of cloth.
- Felt Optional
- Your favorite sentiment stencil since mine was large I had it cut in a shop, and if you don’t have a cutting machine or a place to get it cut fo you, you can order a custom vinyl decal on Etsy!
- Drill
- A towel.
- Transfer tape – or masking tape if you don’t have it.
Instructions
STEP 1: PREP WORK
- Firstly and most importantly, make sure the plans are right for your local store sizes. Mine are in millimeters so if you need to use a converter to the metrics you are most familiar with.
- My wood sign is in total 900 mm X 600 mm (35,43 In X 23,62 In)
- Most likely your local store can cut your wood for you.
- So once you have all your supplies ready, clean them up to avoid dust and grease.
- All the supplies gather together for the rustic wood sign
- STEP 1: STAINING THE WOOD SIGN BACKING
- Using your favorite wood stain, paint all your backing plywood. I created mine for this specific piece because I found out that the brands I can find here, usually affect the white paint I use on top. So I diluted a brown acrylic paint with 1 part water and 1 part paint.
- Let it dry.
- Take your frame pieces and let’s make it look worn out.
- On a plate pour some white and grey paint separately.
STEP 2: START CREATING THE WEATHERED LOOK ON YOUR FRAME BOARDS
- Firstly, with grey acrylic paint apply rough and uneven strokes all along the boards. You are going to dry brush on a thin coat of paint.
- No perfection here, just creates strokes here and there.
- When you are done it should look something like this:
- Once the paint dries, do exactly the same but with the white paint. In my experience, if your paint is fast drying, by the time you finish the last board, you can start over with the first right away.
- Set aside to let them dry very well now.
STEP 3: DRY BRUSH PAINT YOUR WOOD SIGN BACKING BOARD.
- Going back to the backing, I started painting with white using my dry brushing technique to achieve a distressed wood look.
- Apply as many coats as you like. I wanted it really white but still be able to see imperfections from the color base.
- Let it dry very well.
STEP 4: SAND OFF THE PAINT FROM YOUR FRAME BOARDS
- Now that your frame pieces are dry, you are going to sand them with your 150-grit sandpaper.
- Sand it like you want to remove all that paint. When you are done the boards should look like the remaining paint is all damaged.
- Clean your boards well to remove all the dust from sanding.
- Time to stain your pieces. Apply your wood stain and then rub it with a piece of cloth.
- Stain the frame boards over the sanded frame boards
- Let them dry.
STEP 5: PREPARE YOUR STENCIL
- Take your backing board back and let’s apply the stencils. As I mentioned, I designed mine but I had it cut in a shop. I have a cutting machine but I didn’t want to puzzle it up.
- You can also find gorgeous stencils in craft stores.
- Once cut I weeded out all the stencil paper that didn’t belong to the design.
- Then used masking tape (because I didn’t have that much transfer tape) and applied it to the stencil with the help of my scraper.
STEP 6: APPLY THE STENCIL AND PAINT
- Remove the backing paper of the stencil carefully and then stick it to the towel. This helps remove the excessive stickiness of the stencil material so it won’t leave glue remains on the wood. This step is optional. I found that most stencil vinyl here is very strong and leaves glue on my signs and I don’t like it.
- Remove the backing paper of the stencil carefully and then stick it to the towel. This helps remove the excessive stickiness.
- Place the stencil on the board making sure it’s straight and centered. I secured the design using the scraper and removed the masking tape.
- If you like the design you can snag the file for free right here!
- Paint your stencil with your brown acrylic paint and tel it dry.
STEP 7: ASSEMBLE THE FRAME.
- Lay down your pieces to form the shape of your frame. Longer boards should go top and bottom and the shorter ones should go left and right.
- Longer boards should go over the end of the shorter ones as shown below.
- To make it easier to screw the frame together (I don’t have a nail gun so I went for screws) I drilled 2 holes on each end of the long pieces to mark the path of the screw. Use a drill tip smaller than the screw you are going to use.
- Apply some glue and screw your pieces together.
- Set aside and let the glue dry for a while.
- When it’s dry you need to create the back frame that will house your wood sign.
- For this, you will set your wood sticks the same way as your main frame but this time you will just glue and nail them in place.
- Align your frame pieces with the outer edge of the main frame. Apply wood and use clamps to secure your pieces in place.
- Once dry, nail it on a few spots just to double secure it.
- Your frame is done!
- Now to keep your wood sign in place, you can use L-shaped Hook Screws if you are on a budget.
- Just drill carefully some holes to mark the path of your hooks on at least 3 spots on the long sides and 2 on the short ones.
- Then screw your hooks in place all the way down!
STEP 8: FINISH WOOD SIGN BACKING BOARD
- So, now, let’s work on our backing board. With the help of a hook, peel off the stencil. Be careful so you don’t damage or scratch the wood.
- Once your design is revealed again, sand it very well and distress some places as you see fit.
- Clean your board well and seal it or varnish it. Let it dry.
STEP 9: ASSEMBLE THE RUSTIC WOOD SIGN
- It’s time to fit your gorgeous wood sign in.
- Place your wood sign facing down
- Turn all your hooks over the board to secure them. If they are a bit lose, just cut small pieces of felt and put them between the board and the hook so your board doesn’t get scratched.
- WOOHOO!!!!! Your Oversized Rustic Wood Sign is all ready to rock!