How to Make a wrapping paper bag for Valentine's Day
Learn how to make a heartfelt, DIY Valentine’s Day gift with a personalized wrapping paper bag with this detailed tutorial. Perfect for adding a personal touch to your presents!
Equipment
- Scissors and/or Cutter
- Paper Hole Puch
Ingredients
- Craft Paper
- Glue or double-sided tape
- Acrylic Paint – I used red and white}
- A sponge
- A heart cutout
- 5 mm ribbon
Instructions
- Firstly, cut a piece of craft paper, I usually use 2 to 3 times the size of the gift.
- Fold it leaving just half an inch at the end.
- Then fold that half-inch over the previews one and glue them. You can use glue or double sided tape.
- Make sure no glue leaks on the inside and let it dry for a few minutes.
- Now fold each side of the bag in the same width. In this case, I folded in 2 inches. A trick I use is I fold it both ways so it is easy to manipulate it in the next step.
- Using the folding lines tuck down each side.
- Now, you should have something like this:
- Now fold the bottom of the bag in about 1/3 of the height.
- I stopped here to decorate. I did it here so I know the structure of the bag while painting.
- Unfold the bag and get your heart cutout shape, paint, and sponge.
- Put some paint on a piece of paper/paper plate.
- Touch the paint with the sponge and get rid of the excess tapping on the paper
- Using your cutout as your template, tap around the edges on top of your paper bag.
- The fun part is that it doesn’t have to be perfect!
- Do it with the red and white paint playing around with positions and overlapping them.
- Let it dry for about one hour.
- This is a messy work haha. But that’s the best part!
- Make sure to wash your hands before continuing though.
- Okay Back to the folding part. Remember we left it folding 1/3 of the height of the bag?
- Good!
- Open the bottom still folded and fold the inner parts like in the pictures.
- Make sure the line that goes in the center keeps going straight from end to end along with the folding inner line.
- Then fold the lateral sides towards the center again following the folding center line creating a diamond shape like follows:
- Then fold the flaps inwards one overlapping the other, like this
- Glue the flaps making sure not to stick to the inside parts. The bag wouldn’t open.
- My trick is I only apply glue to those triangles on the flaps.
- Ok, we are almost done!
- Fold the top opening of the bag at about an inch.
- Then open the bag and fold it inwards.
- You should have now something like this
- Now, using a regular paper hole punch, make the holes for the ribbon handles.
- Lastly, for your bag’s handles, cut a strip of your favorite ribbon and pass it through the holes until both ends get together inside the bag
- Finally, make a knot and TADAAAAA!!!!!
- Overhead view of the wrapping paper bag
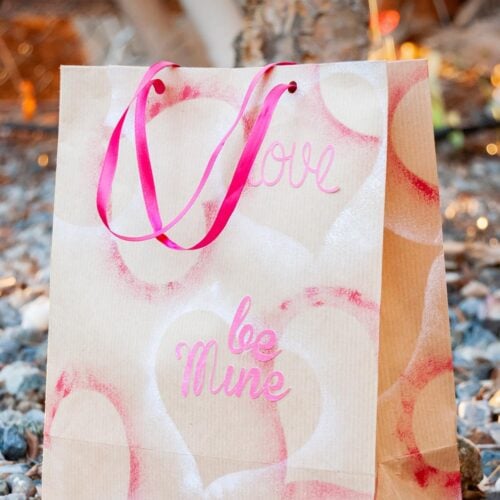
- As a final touch, I added some cutout love messages. This is totally optional and you can add anything you want! Imagination is the limit.
- There you have it! A cute and full-of-love gift wrapping paper bag!