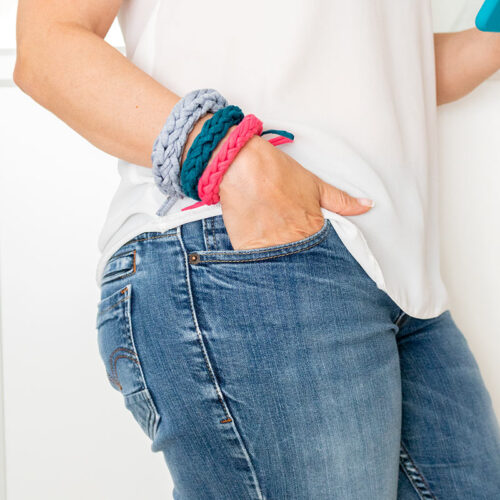
5-min DIY Finger Knitted Bracelet with Jersey T-Shirt
Bored with your regular accessory? Knit yourself a finger knitted bracelet with jersey t-shirt yarn, in just 5 minutes, even less! Learn more here.
Equipment
- scissors
- Your hands!
Ingredients
- Jersey T-Shirt Yarn or your favorite type of material, like yarn, your favorite fabric, cord, or anything yarn-like.
- * Ornaments or beads are optional.
Instructions
METHOD 1: TWO-FINGERS.
- Get your jersey t-shirt yarn and we are now going to weave the strip in and out of our fingers.
- Firstly, we hold one end of the jersey yarn on your palm and secure it with your thumb just like in the pic.
- Then weave the strip in and out of our fingers, first behind your ring finger and then in front of your pinky.
- Next, go around the pinky and come back and loop back in front of your ring finger.
- Come back around from behind of the pinky side to the front to make a big loop.
- Now, take your weaved loops and go over your finger and big loop like the picture below.
- Repeat with the ring finger. Pull a little bit of the t-shirt yarn to adjust it, It’s not necessary to make it too tight
- When you get to the end, or at the end of your first chain make a new loop from the back to the front and start the process all over again!
- Every now and then, take your starting tail and gently pull, while your chain is still securely placed on your fingers so it makes the chain more defined and it gives you a better idea of how long you need to make your chain.
- Once you’ve decided you have a long enough chain length, cut the t-shirt yarn leaving a few centimeters and carefully pull the loops off your fingers, making sure you don’t undo any of the chains by losing the loops.
- You are going to get 2 loops.
- Take the end you just cut and slip it into both loops.
- Pull all the way through, and carefully tug the end making a tight knot.
- Lastly, tie off your bracelet with a knot.
- Cut off excess tails!
- You are done!!!!
METHOD 2: THREE FINGERS.
- Again, the first thing we do is to secure one end of the jersey yarn just like in the pic.
- Then weave the strip in and out of our fingers, first behind your middle finger, in front of your ring finger, and then behind your pinky.
- Come back and loop back in front of your pinky finger, behind the ring finger, and in front of the middle finger.
- Come back around from behind of the pinky side to the front to make a big loop.
- Now take your weaved loops and go over your finger and big loop like the picture below.
- Then move to the next finger and then the next. Pull a little bit of the yarn to adjust it, It’s not necessary to make it too tight.
- Make a new loop from behind of the pinky side to the front and start the process all over again!
- Every now and then, take your starting tail and gently pull, while your chain is still securely placed on your fingers so it makes the chain more defined and it gives you a better idea of how long you need to make your chain.
- Keep checking out the length and see how long you need to make your chain, depending on your wrist size.
- Once you’ve decided you have a long enough chain length, cut the yarn leaving a few centimeters, and carefully pull the loops off your fingers, making sure you don’t undo any of the chains by losing the loops.
- You are going to get 3 loops. Put them together.
- Take the end you just cut and slip it into both loops.
- Pull all the way through, and carefully tug the end making a tight knot.
- So you have the chain ready.
- Lastly, tie off your bracelet with a knot.
- Cut off excess tails!
- You are done!!!!
METHOD 3: FOUR FINGERS.
- Again, the first thing we do is to secure one end of the yarn just like in the pic.
- Then start off with weaving behind the pointer finger (first finger), in front of the middle, behind the ring, and in front of the pinky finger.
- Then wrap it around and behind the pinky, then in front of the ring, and behind the middle, and then in front of the pointer.
- Come back around from behind of the pinky side to the front to make a big loop (from the pinky to the pointer)
- Now take your weaved loops and go over your finger and big loop like the picture below.
- Then move to the next finger and then the next. Pull a little bit of the yarn to adjust it, It’s not necessary to make it too tight.
- Make a new loop from behind of the pinky side to the front and start the process all over again!
- Every now and then, take your starting tail and gently pull, while your chain is still securely placed on your fingers so it makes the chain more defined and it gives you a better idea of how long you need to make your chain.
- Keep checking out the length and see how long you need to make your chain, depending on your wrist size.
- Once you’ve decided you have a long enough chain length, cut the jersey yarn leaving a few centimeters, and carefully pull the loops off your fingers, making sure you don’t undo any of the chains by losing the loops.
- The chain still attached to my fingers but long enough to finish
- You are going to get 4 loops. Put them together.
- Take the end you just cut and slip it into both loops.
- Pull all the way through, and carefully tug the end making a tight knot.
- So you have the chain ready.
- Lastly, tie off your bracelet with a knot.
- Cut off excess tails!
- You are done!!!!
- There you go. These super cute, easy, and fun to make jersey t-shirt finger knitted bracelets are ready to rock your outfit!