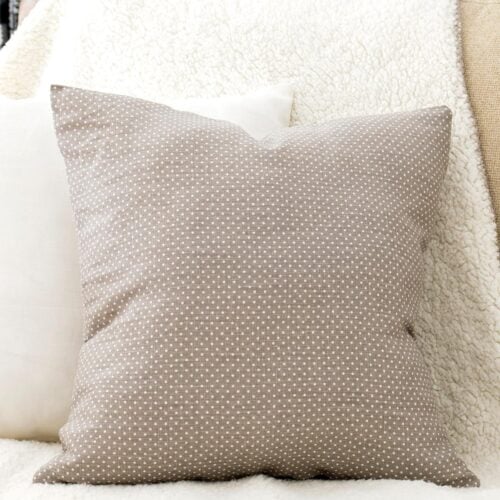
DIY 10-minute Envelope Pillow Cover Tutorial
The easiest and quickest way ever to make a pillow cover in just a few minutes! Learn how to sew an envelope pillow cover using one piece of fabric.
Equipment
- Sewing Machine
Ingredients
- Your favorite fabric.
- A pillow of course, :p
- Matching-color thread.
- Sewing machine or needle If you are going hand-sew
- Measuring tape or ruler
Instructions
You will need to cut your fabric like follows:
- 100% means your pillow’s size (hem allowance only on top and bottom because you are folding sides).
- 75% means the percentage of the front size you will use for the back panels. You can use less but I love thick hems on the ends and large overlap. SO you can adjust as you like you can use 65% for example if you like thin hems.
- In a life example if your pillow is 16x16 Inches, your 100% would be about 16 x 16.6 Inches and then your back panels (75%) would be about 12 x 16.6 Inches. Sum all the widths and you have the length of you main piece.
- From there, it’s just about folding and stitching basically. Double fold your hems and then fold and stitch the pillow cover.
- Let’s go to the details shall we?
- Once you cut your fabric with the right measurements, make sure you marked well your folding lines.
- Iron Your Fabric. This isn’t necessary, but it will make your sewing job so much easier if you do!
- Fold the fabric with right sides together. Fold one of the short sides over, make sure it's straight, then fold the other side over. Pin in place close to the folding line.
- Work on the hems: as I mentioned I love thick hems, so I made it a little less than 1 inch. So measure it, fold it once and fold it again. Iron it. Pin it. Sew it. Repeat on the other end.
- Lay them in place to make sure you like it or if you want to give more or less to the hems.
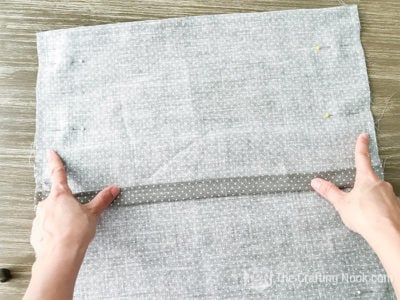
- Check the width; it should be the width of the pillow (16” in my case). Adjust until it's right, and pin along the top and bottom.
- When everything is ok there, then sew two straight lines (I do reverse the machine and go over each finished end again for reinforcement since that's where the pillow gets the most abuse from inserting and removing the pillows, but that takes maybe an extra 5 seconds). Did I mention this was a super easy project?
- I like zig-zag stitching along the edges to avoid fraying.
- Turn the envelope pillow cover right side out, stuff it with a pillow, and enjoy your finished work.
