DIY Cardstock paper flowers in Branches for Spring
Learn how to make these beautiful DIY Cardstock paper flowers in Branches with ease and start decorating your own home for Spring.
Equipment
- Cutting machine (like silhouette or Cricut machine)
- Quilling tool
- Scissors *optional
Ingredients
- Lots of natural branches
- Cute papers or cardstock – colored cardstock is the cutest.
- Hot glue gun and glue sticks
- A cute vase
- Ribbon optional
- Flower templates: you can find some cute free paper flower templates over at Bird Cards
Instructions
STEP 1: PREP WORK
- Found these branches in front of the house about to be picked up by the trash truck and I knew I would come up with something for them LOL.
- I was so lucky to find Bird Cards’s site. She shares all kinds of cut files for free and these flowers I used belongs to her, if you want to snag the paper flower free svg files you can!
- I prepared the design on my silhouette studio. Then played with them like a puzzle so I could fit as many as possible in one 12×12″ sheet of paper ‘cardstock.
- I cut a bunch of these flowers. You can cut them in slightly different sizes and shades.
- I cut one whole mat of one paper and a whole other with another paper. You can make more or less depending on how many branches or how big they might be.
STEP 2: CREATING THE PAPER FLOWERS
- Then using a quilling tool {you can also use a big needle, cut the top of where you insert the thread, or just with your hands} I started to make paper flowers by rolling the flower strip from the external end.
- At some point, I removed the tool and finished with my hands. I made them all first and then let them unroll a bit so they get a more natural look.
- Then at the end, you will see a small circle that is made to secure the bottom of the flower. You glue it to the flower and keep every loop in place.
- A cute flower is ready!
- As you can see it creates in a simple way, layers of petals that look like cute little blossoms.
- You can push down carefully the small petals to make them look more open.
- And here I have my bunch of beautiful flowers!
STEP 3: ASSEMBLING THE FLOWER BRANCHES BOUQUET
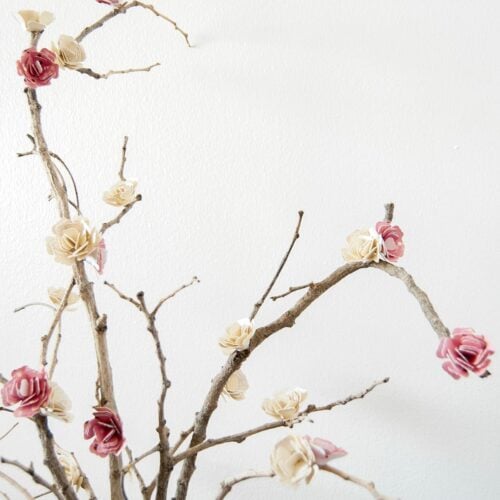
- I started to glue the flowers all over the branches mostly on the branch collars switching colors. That way the paper flowers blossom look almost real at a distance.
- Keep gluing a few paper flowers in different spots on the branches. Do this so it looks like a blooming branch.
STEP 4: MAKE YOUR BOUQUET IN A CUTE VASE
- Once you have all your branches finished, use your favorite vase and arrange the branches as you like.
- Place it in your favorite spot or decorate your chosen space.
- And that’s it! Enjoy!