DIY Cardstock paper flowers in Branches for Spring
This post may contain affiliate links. Please read our Disclosure Policy.
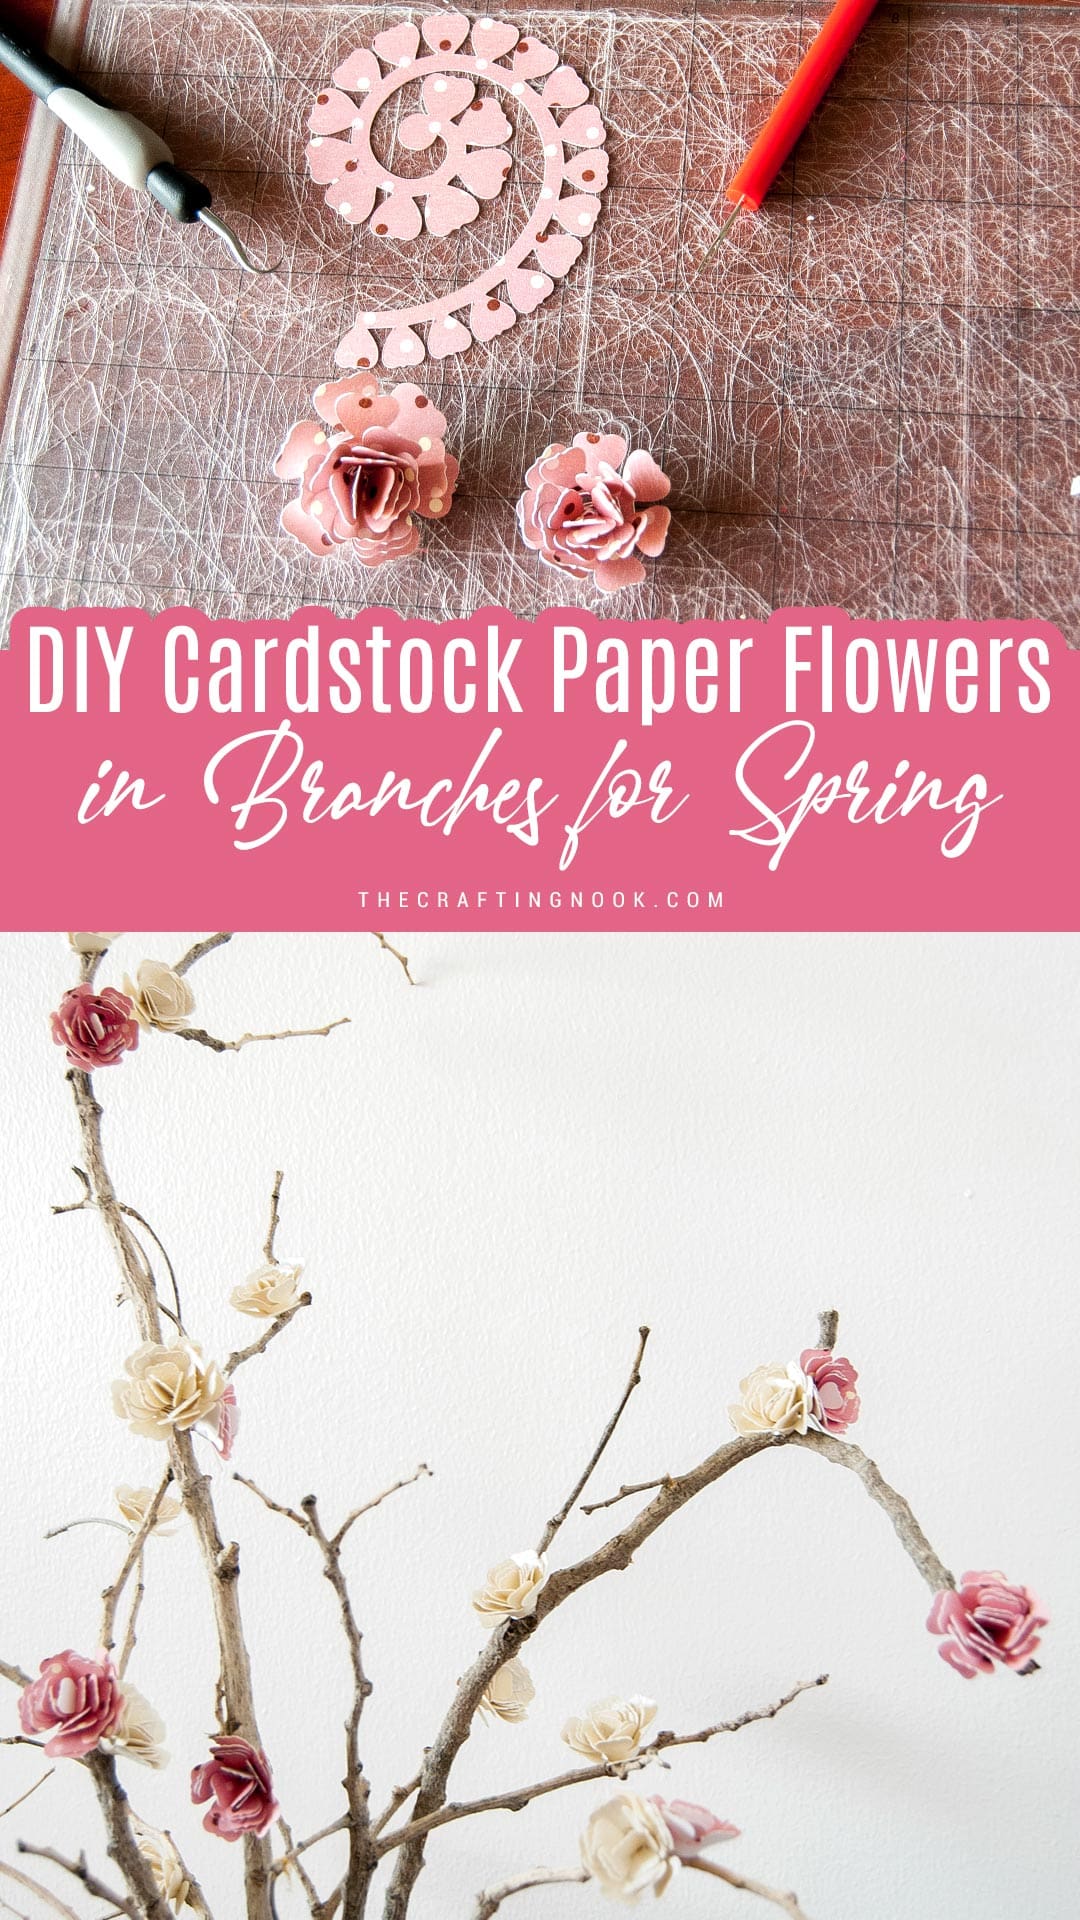
Learn how to make these beautiful DIY Cardstock paper flowers in Branches with ease and start decorating your own home for Spring.
I made some cute blossom cardstock paper flowers in branches for my mom’s desk. It’s a cute, easy, and warm DIY home decor and it’s also a project that is part of my lovely Silhouette Challenge Group.
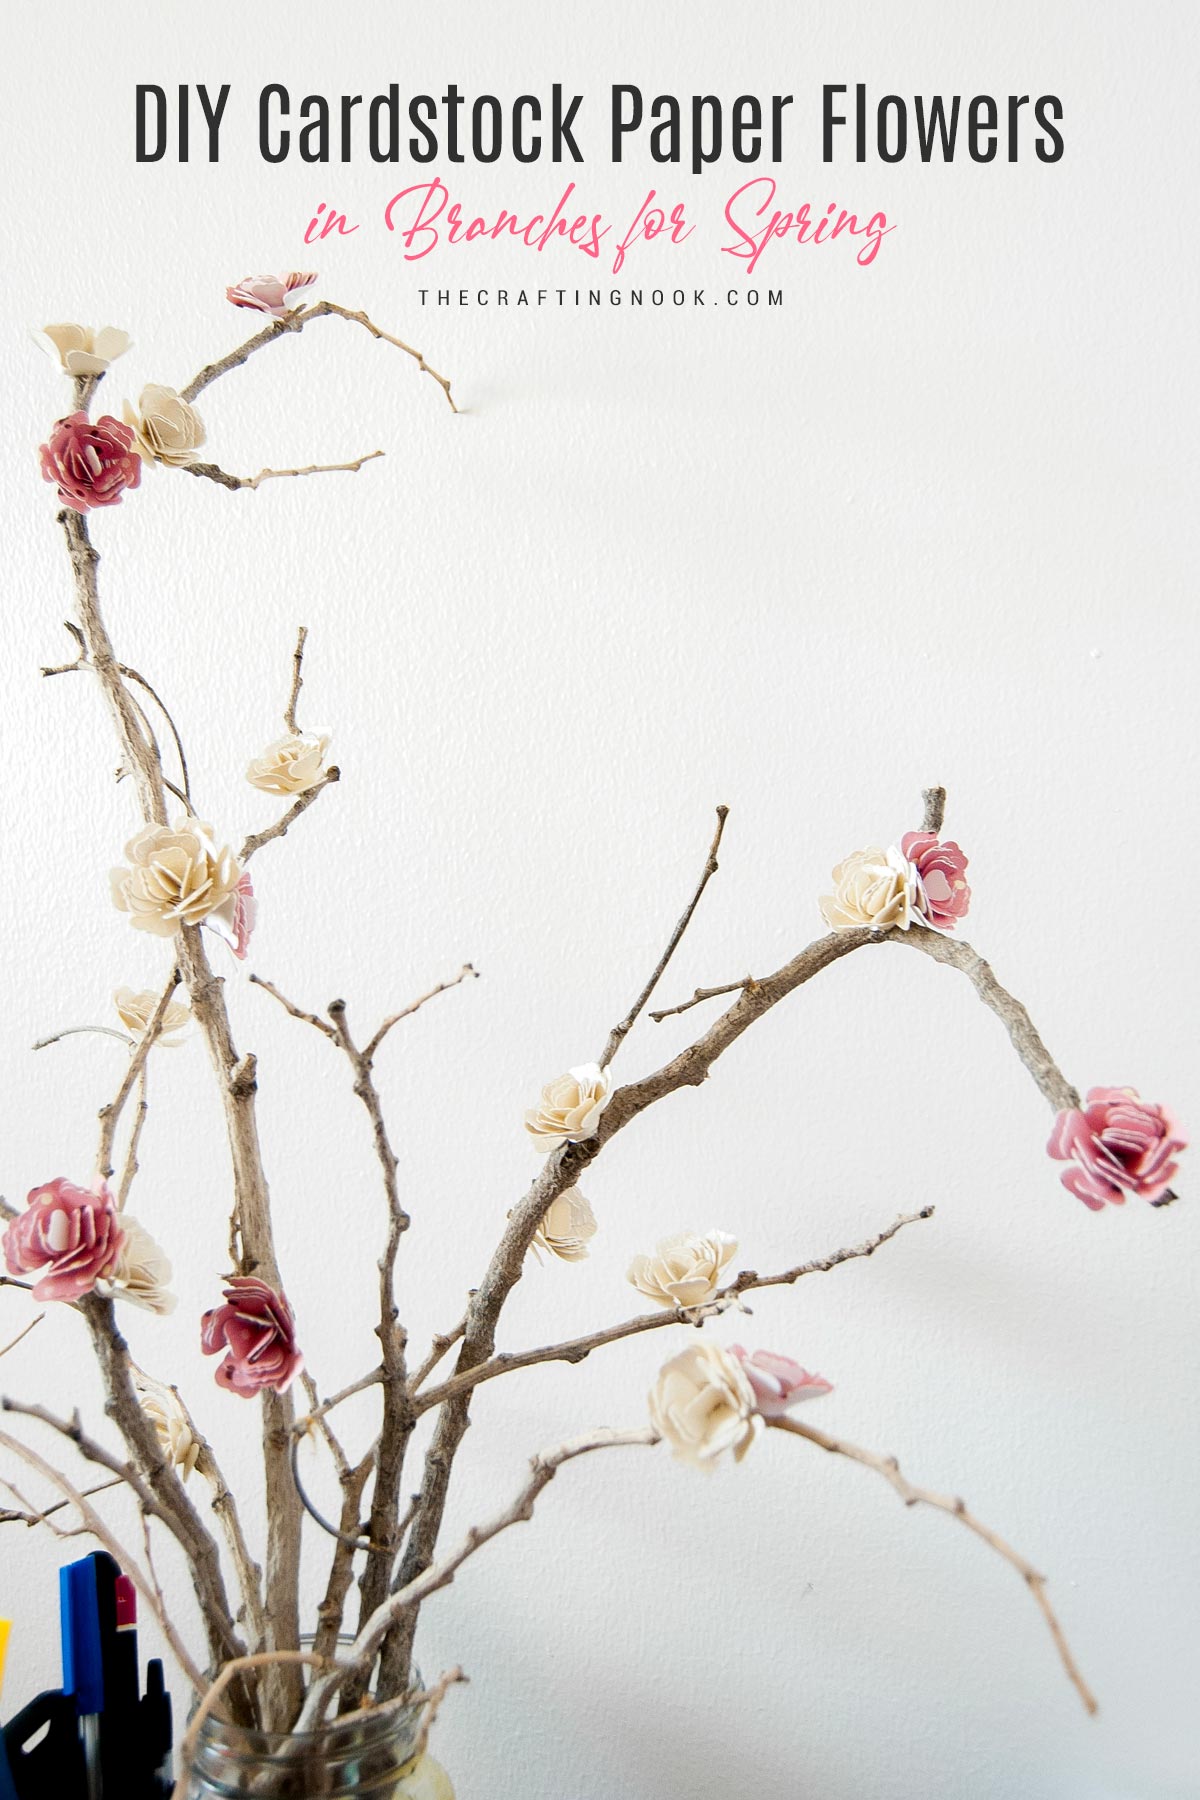
Table of Contents
Cardstock Paper Flowers Tutorial in Branches Tutorial
This paper flower blossom craft is super fun to make too. I love paper flowers and these ones are one of my favorites.
Paper flowers can bring color and life to any room. They don’t wilt or fade like real flowers would over time, so they’re perfect for weddings, birthdays, baby showers, and why not? for our own home decor!
This blog post shows you how to make beautiful cardstock paper flowers. All you need is some basic crafting supplies like cardstock and tacky glue or hot glue and of course your cutting machine!
They can be made quickly and easily customized. I’ll show you how to make them in different colors and they can be made in different sizes too. Once you get the hang of it, you can make a whole bunch of flowers in less than an hour!
How to make Cardstock paper flowers in branches
So, feeling like learning how to make these cute and super easy Blossom Paper Flowers in Branches???
Let’s go!
Supplies:
- Lots of natural branches
- Cute papers or cardstock – colored cardstock is the cutest.
- Hot glue gun and glue sticks
- A cute vase
- Ribbon optional
- Flower templates: you can find some cute free paper flower templates over at Dinosaur Mama.
Tools:
- Cutting machine (like silhouette or Cricut machine)
- Quilling tool
- Scissors *optional
Instructions:
Before we begin, be sure to follow us on Pinterest, Facebook, Instagram, and YouTube, and also sign up for our email list (at the end of this post), so you’ll never miss a post!
Step 1: Prep work
Found these branches in front of the house about to be picked up by the trash truck and I knew I would come up with something for them LOL.

I was so lucky to find Dinosaur Mama site. She shares all kinds of cut files for free and these flowers I used belongs to her, if you want to snag the paper flower free svg files you can!
I prepared the design on my silhouette studio. Then played with them like a puzzle so I could fit as many as possible in one 12×12″ sheet of paper ‘cardstock.
I cut a bunch of these flowers. You can cut them in slightly different sizes and shades.
I cut one whole mat of one paper and a whole other with another paper. You can make more or less depending on how many branches or how big they might be.

Step 2: Creating the Paper Flowers
Then using a quilling tool {you can also use a big needle, cut the top of where you insert the thread, or just with your hands} I started to make paper flowers by rolling the flower strip from the external end.


At some point, I removed the tool and finished with my hands. I made them all first and then let them unroll a bit so they get a more natural look.

Then at the end, you will see a small circle that is made to secure the bottom of the flower. You glue it to the flower and keep every loop in place.


Tadaaaa… a cute flower is ready!
As you can see it creates in a simple way, layers of petals that look like cute little blossoms.
You can push down carefully the small petals to make them look more open.

And here I have my bunch of beautiful flowers!

Step 3: Assembling the flower branches bouquet
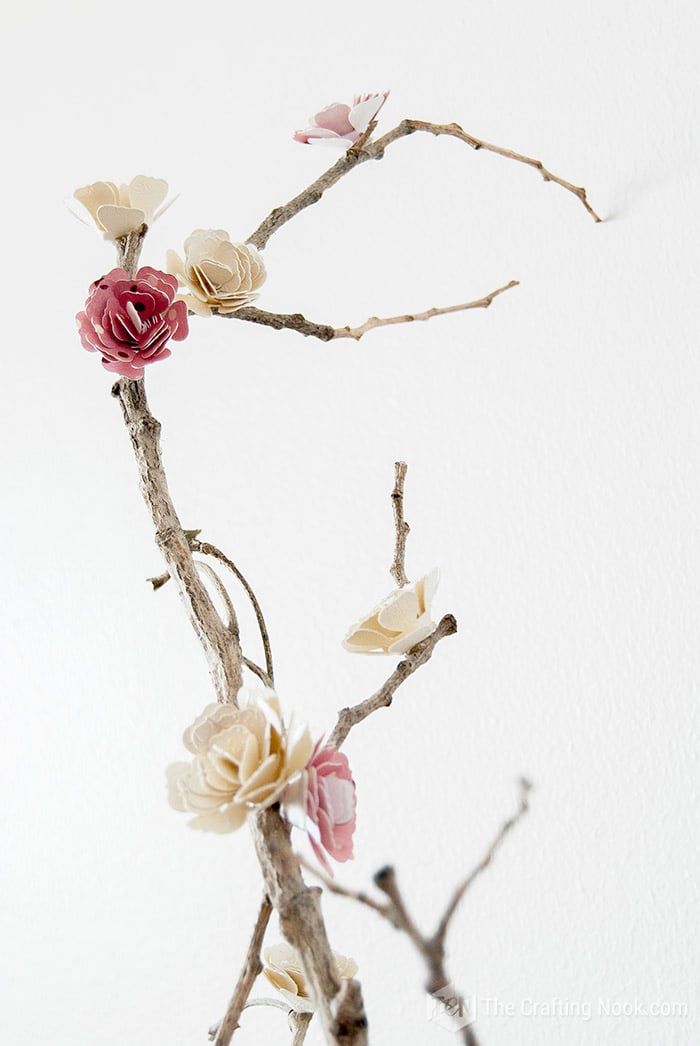
I started to glue the flowers all over the branches mostly on the branch collars switching colors. That way the paper flowers blossom look almost real at a distance.

Keep gluing a few paper flowers in different spots on the branches. Do this so it looks like a blooming branch.
Step 4: Make your bouquet in a cute vase
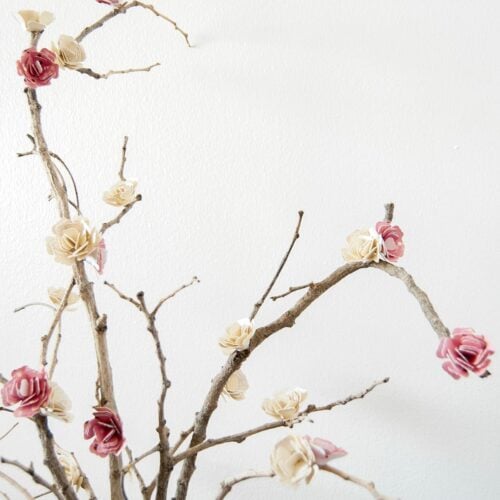
Once you have all your branches finished, use your favorite vase and arrange the branches as you like.
Place it in your favorite spot or decorate your chosen space.
My brother had made a cute stained vase for my mom too so we used it for the branches and my mom Loved it… So much so that she put it on her office desk =D.
And that’s it!
Crafting Tips
- Try using textured or patterned cardstock to add visual interest and dimension to your flowers.
- Creating flowers in different sizes adds depth and realism to your bouquet. Mix small, medium, and large blooms for a more dynamic arrangement.
- If your branches are too long or have too many offshoots, don’t be afraid to trim them down to size to achieve the desired look for your arrangement.
- Keep in mind where you’ll be displaying your bouquet and choose paper colors and flower shapes that complement the space.


Quilling Tool and Alternatives
If you’re new to paper crafting, or just haven’t heard of a quilling tool, well, a quilling tool is a small hand tool that you can use to make paper coils quickly and easily.
Quilling tools have a metal tip with a small slot. To use the tool, insert the end of a paper strip into the slot, and turn the tool to roll up the paper. The slot holds the paper in place while you twist the tool.
If you don’t have a quilling tool available, you can substitute an embroidery needle cutting the top of where insert the thread.
Frequently Asked Questions
For this specific diy paper flower, the best paper is 65 lb scrapbook paper but you can use pretty much any kind of paper, plain cardstock, and colorful paper that is sturdy enough that it won’t rip.
In the final step when assembling your paper flowers, you’ll need glue to secure them. When it comes to the best glue for paper flowers, you have two options:
Hot glue gun. Hot glue is a great option since it sets up so quickly.
Quick-drying craft glue is another good option. I tend to use UHU glue for most paper crafting projects but I’ve heard great things about tacky glue too.
To prevent the paper flowers from unraveling, be sure to secure the end of each paper strip with glue after rolling it up. This will help keep the flower shape intact.
No worries! You can easily find free printable flower templates online and cut them out by hand. It may take a bit more time and precision, but the results can still be beautiful.
Yes, you can! Paper flowers can be displayed in a variety of ways, such as in vases, on wreaths, or as table centerpieces. Get creative and experiment with different display options to suit your style and space.
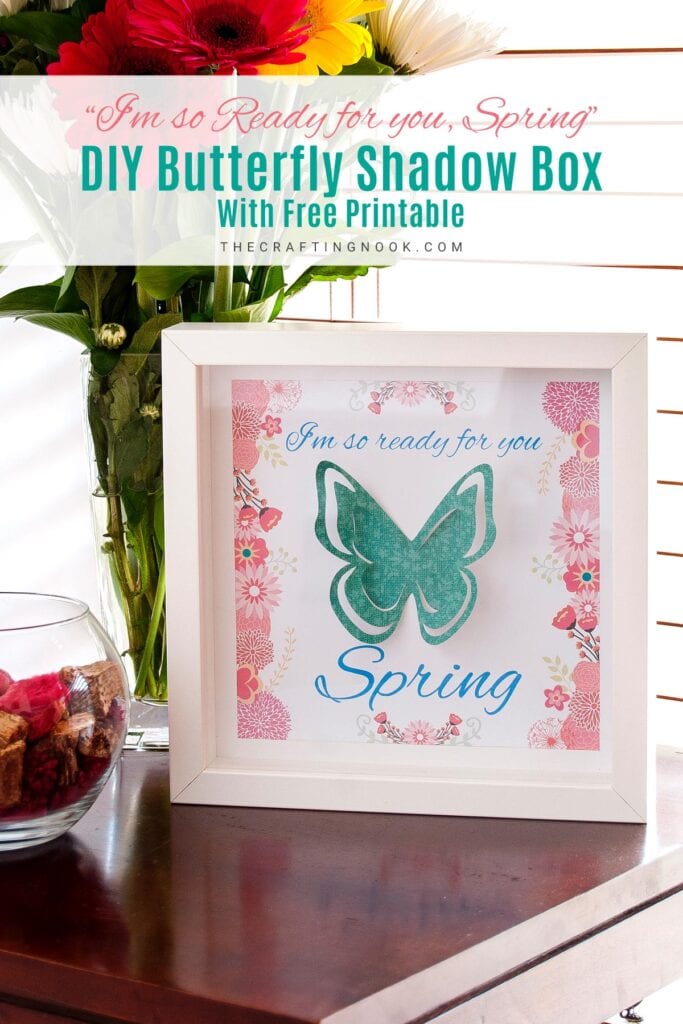
More Sprink Project Ideas to Try
If you liked this Cute DIY Cardstock paper flowers in branches tutorial, you might also love these other Easy Spring Craft projects too:


Want to Check Out More Silhouette Projects?
My Silhouette Challenge buddies and I are all sharing projects on our blogs today, so peruse the projects below for a wealth of Silhouette inspiration!
1. Create & Babble 2. // Tried & True // 3. unOriginal Mom // 4. Mama Sonshine // 5. Adventures in All Things Food & Family // 6. The Outlandish Momma // 7. Whats Next Ma // 8. Silhouette School // 9. Creative Ramblings // 10. Practically Functional // 11. Two Purple Couches // 12. Simply Kelly Designs // 13. The Crafting Nook // 14. Architecture of a Mom // 15. The Sensory Emporium // 16. Ginger Snap Crafts // 17. Mabey She Made It
Some other paper flowers I love from my favorite bloggers:
- Make Paper Cherry Blossom Flowers by Jennifer Maker.
- DIY Giant Crepe Paper Roses by Studio DIY.
- DIY Coffee Filters Flowers by All Things Heart and Home.
- Tissue Paper Flowers by Lia Griffith.
- Crepe Paper Flowers by As Simple as That!
✂️ Tutorial
DIY Cardstock paper flowers in Branches for Spring
Tools
- Cutting machine (like silhouette or Cricut machine)
- Quilling tool
- Scissors *optional
Supplies
- Lots of natural branches
- Cute papers or cardstock – colored cardstock is the cutest.
- Hot glue gun and glue sticks
- A cute vase
- Ribbon optional
- Flower templates: you can find some cute free paper flower templates over at Bird Cards
Instructions
STEP 1: PREP WORK
- Found these branches in front of the house about to be picked up by the trash truck and I knew I would come up with something for them LOL.
- I was so lucky to find Bird Cards’s site. She shares all kinds of cut files for free and these flowers I used belongs to her, if you want to snag the paper flower free svg files you can!
- I prepared the design on my silhouette studio. Then played with them like a puzzle so I could fit as many as possible in one 12×12″ sheet of paper ‘cardstock.
- I cut a bunch of these flowers. You can cut them in slightly different sizes and shades.
- I cut one whole mat of one paper and a whole other with another paper. You can make more or less depending on how many branches or how big they might be.
STEP 2: CREATING THE PAPER FLOWERS
- Then using a quilling tool {you can also use a big needle, cut the top of where you insert the thread, or just with your hands} I started to make paper flowers by rolling the flower strip from the external end.
- At some point, I removed the tool and finished with my hands. I made them all first and then let them unroll a bit so they get a more natural look.
- Then at the end, you will see a small circle that is made to secure the bottom of the flower. You glue it to the flower and keep every loop in place.
- A cute flower is ready!
- As you can see it creates in a simple way, layers of petals that look like cute little blossoms.
- You can push down carefully the small petals to make them look more open.
- And here I have my bunch of beautiful flowers!
STEP 3: ASSEMBLING THE FLOWER BRANCHES BOUQUET
- I started to glue the flowers all over the branches mostly on the branch collars switching colors. That way the paper flowers blossom look almost real at a distance.
- Keep gluing a few paper flowers in different spots on the branches. Do this so it looks like a blooming branch.
STEP 4: MAKE YOUR BOUQUET IN A CUTE VASE
- Once you have all your branches finished, use your favorite vase and arrange the branches as you like.
- Place it in your favorite spot or decorate your chosen space.
- And that’s it! Enjoy!
Share and PIN ME!!!
What do you think??? Isn’t it a cute Mother’s Day Gift??? Have you made paper flowers blossom like these???
Til’ next time…


FREE WORKBOOK
Keeping your Sweet Home Organized
Learn how to create intentional habits and simple routines to Keep Your Home Organized. Plus freebies, printables, exclusive content, and tips.
Disclaimer: By clicking on the “Yes” button above you are giving me your consent to collect and use your information according to the law and My Policy Privacy. Zero Spam I promise!
This decor is so romantic and cute! When you look from a certain distance, the flowers don’t even look fake. I love it!
I still can’t figure out how to cut the flowers without scissors…. what did you use???
Love it!!!
These are gorgeous – Love it1 Thanks so much for linking this up to the Friday Frenzy.
Thanks for linking to Create Link Inspire at The Crafty Blog Stalker. You have been featured and pinned! Thank you for sharing.
–Katie, TheCraftyBlogStalker.com
Yayyyy how exciting and sweet surprise! Thanks so much for the feature!!!
XOXO
This is beautiful. Thanks for sharing.
Thanks so much Shirley!!!
That is beautiful!
Thanks so much!
XOXO
These are really gorgeous! I’ve been thinking about doing a branch like this for my foyer. Pinning to remember.
Yayyyy That’s so cool. Happy to inspire. If you make them I would love to see them. I always enjoy seeing things inspired by the blog!
XOXO
Beautiful! Love the flowers, love the branches and love the whole project! Thanks for sharing with us!
Awwww Thanks so much Ladies! I’m so glad. You both rock!!!
XOXO
Love these! I’ve been wanting to make paper flowers. I pinned it :)
Yayy Lauren! I’m glad you like it. Appreciate the pin love!
XOXO
Hello Camila,
They look so beautiful:)thanks for sharing:)
Thanks so much! XOXO
That’s beautiful! Very elegant! These flowers must have required lots of patience… But worth the effort as it’s a beautiful addition to a room. I’ never made paper flowers but may try these. I’ll keep the idea in a corner of my mind. Thank you!
Thanks so much France, It looks harder than it is. It does take it’s time but it’s kind of fun LOL. I’m glad you like it! Thanks so much for your sweet visit!
XOXO
How fun! They are gorgeous!! Thank you so much for sharing them with ys! :) Pinning, Have a great weekend!
Thanks Marti! Glad you like them! XOXO
I have bookmarked this idea. Great centerpiece idea. thanks for sharing
Thanks Kate. Glad you like it!
XOXO
So pretty! I love that you put them on branches!
Yayyy Thanks Jeanie! I’m glad you like it!
XOXO
Love how your flowers turned out and they look wonderful on the branches! You rocked the challenge this month!
Awww Thansk so much Kelly! I’m so thrilled that you like it! Yayyy!
XOXO
Cami,
Your paper flowers are beautiful! Kinda reminds me of the dogwood blooms in the spring. In addition to creating an arrangement, I can see taking your design and adding the flowers to a gift box or on a hair clip for our daughters. Terrific idea!
Hi Michele! Thanks so much for such a lovely comment! Those are great ideas too! I might take them LOL!
XOXO
Barato, fino y elegante. Muy buen gusto. Me encanta!
Muchisimas gracias! Me encanta que te guste! Espero verte pronto por aca!
Besitos!
Cami, these flowers are so lovely! I too love visiting Bird’s Cards site, she is so super talented and generous! I really like the way you placed your flowers…so realistic! Now I’ll have to keep an eye out for the right branches while I walk my dog!
Yes, Bird’s Cards is amazing. She is talented indeed!… You will love how the branches look in the house!!!
XOXO Thanks so much for stopping by!
These are so beautiful and rustic I love it!
Thanks Rachel, I’m so glad!
XOXO
This is so pretty Cami! Love it!
Thanks Ritchil, And they are so easy to make! XOXO Thanks for the sweet visit!
Cam, am in love!!. It’s so amazing. Almost real like. Once you print it out, you need to cut out each pattern properly right?.. So many twists and turns. It’s time consuming right?. Is that the Paint program in the 4th pic in this post?.. I love projects like these. Extremely beautiful ♡
Hi Naznin, Thanks so much for your sweet comment. Actually no, I have a machine called Silhouette Cameo that cuts it for me. I juts place the paper or cardstock in the cutting mat and it does all the job! AMAzing right? I’m glad you like this project!!! you should take a look at the other blogger’s Silhouette projects, they are amazing!
XOXO
Hey Cam, thanks for making it clear. I read about the Silhouette Cameo in your binder post, on which I had commented yesterday but I didn’t quite understand. But now I googled it and watched how it works on Youtube and man I am impressed. It’s super duper simple and so freaking amazing!!. I love making cards for my family/friends. It’s pretty perfect for me. It’s totally neat!.
I never actually seen a quilling tool before — way cool! I’m sure I’ve got an old needle sitting around that I could adapt to that until I invest in a “real” one..
Thanks Sharon, Quilling tool is not an expensive tool, as far as I know. But you can definitely make you own. I did it before having this one. What I did was using a sharpie marker body case and inserted the needle in the back part and used some super bonder ad toilet paper inside the case to keep the needle in place. Since rolling the paper doesn’t take too much effort it worked. But then I preferred a proper one LOL.
Glad you like the project!
XOXO
Great project! I bet they make your mother happy each time she sees them! ;)
~ Ashley
I definitely hope so Ashley! I made it with lots of love!
XOXO
I love the look of these! They really do look real from far away. :) Plus, adding them to a real branch is just genius. I might have to borrow that idea!
Hey Kristy, It would honoured me if you feel inspired to make this project. It looks so nice inside the house!!! Thanks so much for your sweet visit!
XOXO