DIY Christmas Ornament Snow Globe for Memory Keepsake
Do you have photos that you love but can’t find a meaningful way to display them? We got the perfect project for them. Make your own Christmas ornament snow globe for a memory keepsake. Learn more here.
Equipment
- Hot glue gun + glue sticks
- Scissors and craft knife
Ingredients
- Faux snow – to make it look like a winter wonderland scene.
- Jingle bells
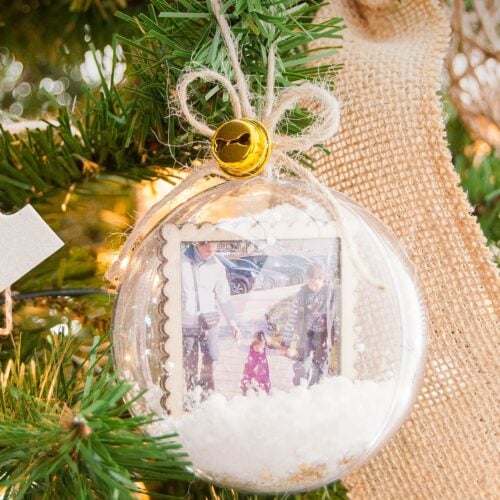
- Clear plastic ornament {those that open in half size of your choice I used 3inchesornaments}
- Printed photos
- Glitter {snow-like and gold}
- Twine
- Wooden mini frames {usually scrapbook supplies and make sure fit into the crystal balls}
- Clear elastic Nylon.
Instructions
Step 1: Making the Inner Frames
- Cut your photos to fit inside the mini frames, testing the size as you go.
- Once the photos are ready, apply hot glue to the frame and glue the photo face down.
- Repeat this on both frames so each photo is sealed between the front and back.
- Cut a small strip of clear nylon thread, about 2 inches long.
- Glue the nylon thread to the back of one of the frames.
- Apply hot glue to the back of the frame and photo, then glue it to the second frame to seal everything together.
- Double-check that the finished frame fits inside the clear ornament before moving on.
- Repeat this process with the remaining photos and frames.
Step 2: Assembling the Snow Globe Ornament
- Pour a small amount of faux snow into one half of the clear ornament.
- Add glitter if desired. I used white snow-like glitter, gold glitter, and a few star accents.
- Insert the nylon thread through the ornament opening, adjusting it so the photo frame hangs freely without touching the sides.
- Place the second half of the ornament back on.
- Repeat these steps for the remaining ornaments.
Step 3: Adding the Rustic Hanger and Bow
- Cut two pieces of twine for each ornament: one for the hanger and one for the bow.
- Slide a small jingle bell onto the bow piece of twine, positioning it in the center.
- Tie the bow, keeping the bell centered.
- For the hanger, slide the twine through the ornament’s top opening and tie a knot.
- Position the knot inside the opening, then use small dabs of hot glue to secure the bow in place
- Your snow globe photo ornament is finished and ready to hang on the tree or gift as a keepsake.
Notes
Quick tip: You can add a tiny dab of hot glue to make sure it won’t easily open or a tiny piece of clear adhesive tape on the bottom.