
DIY Farmhouse style Window Frames Tutorial
These Farmhouse style window frames are a great way to decorate our home, fun to style and so easy to make it. learn how to make yours right here!
Equipment
- Drill
- Screwdriver
- Kreg Jig pocket holes tool kit
Ingredients
Pinewood boards:
Large Window Frame.
- 2 X - 18mm x 34mm x 800mm
- 2 X - 18mm x 34mm x 632mm
- 1 X - 18mm x 18mm x632mm
- 4 X - 18mm x 18mm x 357mm
Small Window Frames.
- 4 X - 18mm x 34mm x 600mm
- 4 X - 18mm x 34mm x 332mm
- 2 X - 18mm x 18mm x332mm
- 4 X - 18mm x 18mm x 257mm
General materials
- Flat straight braces.
- Wood glue
- Flat corner braces optional
- Screws size depends on the boards you use
- Wood Stain I used diluted latex paint 50-50
- White latex paint
- Sandpaper
- Cotton cloth
- Brushes
- Plastic or paper plates
- Plastic sheet for protection
- Measuring tape
Instructions
- Firstly prepare your working space and sand slightly your wood boards to remove any imperfections and possible splinters.
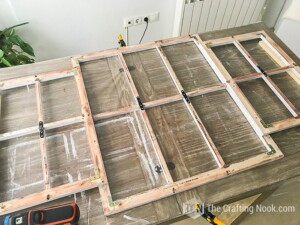
- Present pieces to make sure all the pieces fit as planned.
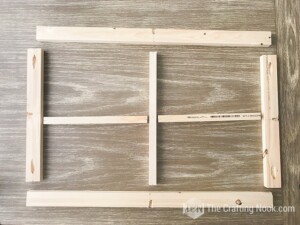
- Draw your marks for pocket holes and center marks as follow:
- All lines should meet when you present the pieces. This will ensure that when you drill the screws everything will fit.
- Using your keg-jig or your favorite pocket hole tool, make the pocket holes that you marked.

- I didn’t make the pocket holes on the internal boards because I thought it might break my boards so I went for the frame boards even though it created a small carve on the edges. But when I hung it it’s not visible at all.
- Once done with the pocket holes, it’s time assemble the frames.
- Start with the frame drilling your screws in and then fit the inner pieces. Use glue to secure each piece better.
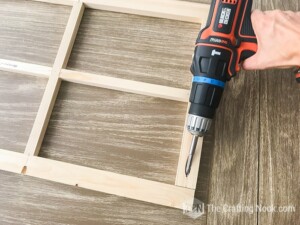
- I used a flat straight brace to secure inner pieces joints.
- Your first window frame is finished. Now create the other 2 if you are making my setup.
- The next step is painting your frames.
- Stain the frames first. I created my own stain mixing latex paint and water 1:1 ratio. I used the brown I love you can use your favorite stain.
- Apply the stain and then rub it with a cotton cloth.
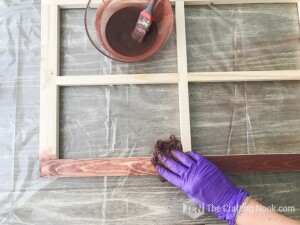
- Let them dry for a couple hours.
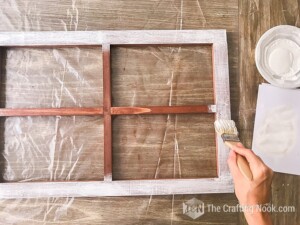
- Then using your white latex paint, apply dry brush technique to create the rustic farmhouse style.
- Dry brushing is super easy. You can check out my blog post where I share the full detailed step-by-step.
- But for now, pour a little bit of paint on a plastic plate.
- Then very gently dab the tip of your dry paintbrush into the paint and dabbed it on a piece f paper or paper towel to remove excess paint.
- You want to keep the tip of your paintbrush slightly wet but not oversaturated with paint, so I suggest starting off with just a tiny bit of paint and adding more as you get comfortable with the technique.
- Use short, quick brush strokes in both directions (along the wood grain and across them) to give it a textured and accent the wood lines.
- When you finished each frame let them dry for a couple more hours.
- Now you need to sand your pieces. Here there’s no perfect spot. Sand as much as you need to get the look you want or like. As I mentioned I might sand mine some more to revel more base color so it stands out more from the wall. So be free, be creative.
- Now the last step is amounting them and hang them.
- I decided to place the large frame on top of the smaller ones.
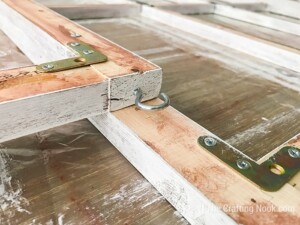
- On the back, drill some screws to secure the position you want your frames to stay.
- Take advantage of the spaces behind boards to screw your hooks. I set them facing the same directions so it would be easier to hang.
- Now just pick your perfect spot and hang it away!!!