DIY Glittered Snowflake Paper Ornaments for Christmas
Using paper cardstock, glue, and glitter that can be found at the grocery, craft, or dollar store, you can make the prettiest snowflake paper ornaments to decorate your home for the holiday season.
Equipment
- Cutting machine – Silhouette or Cricut
- scissors
Ingredients
- White 180g cardstock.
- Mod podge or White Glue
- White glitter {I used one that looks a lot like know}
- Foam brush
- Nylon thread or ribbon if you want.
- Optional* A large squared container to apply the glitter and then put it back on the pack.
Instructions
STEP 1: DESIGN YOUR SNOWFLAKE PAPER ORNAMENTS
- First I chose a pretty snowflake template from the Silhouette store (You can find really cute free and very inexpensive different designs there).
- If you don’t have a cutting machine, you can buy some cute paper snowflakes at your local craft store. Is this your case? Then skip steps 1 and 2 and jump to step 3.
- Decided and adjusted to the size I wanted in the Silhouette Studio. Made some about 11 Inches and some 8 inches. I wanted to have little snowflakes for the upper part of the tree and large snowflakes for the bottom.
STEP 2: CUT YOUR DESIGN
- I set it to heavy cardstock on the settings and adjusted the blade and prepared my mat.
- I had to cut one at a time.
- Make sure you have a hole for the hanger or just use a paper hole punch.
- Sent to the cutting machine.
- Once cut I started pealing off all the external card stock from the mat.
- Then carefully pulled out the snowflake using my hook tool to avoid any piece from tearing.
- If the machine cuts it well you won’t have any problems. and most of the remains will stay on the mat.
- I removed all those remaining pieces from the mat and set a new piece of cardstock and sent it to cut again.
STEP 3: ADD GLITTER TO THE PAPER SNOWFLAKES
- I protected my table with some paper and started spreading the glue all over the snowflake.
- Then I transferred the snowflake to the plastic container and applied abundant glitter all over to cover the whole thing.
- I also pressed the glitter down softly with my fingers to make sure it stays.
- Carefully I took one point of the snowflake and removed all the glitter excess. Patting softly always over the container.
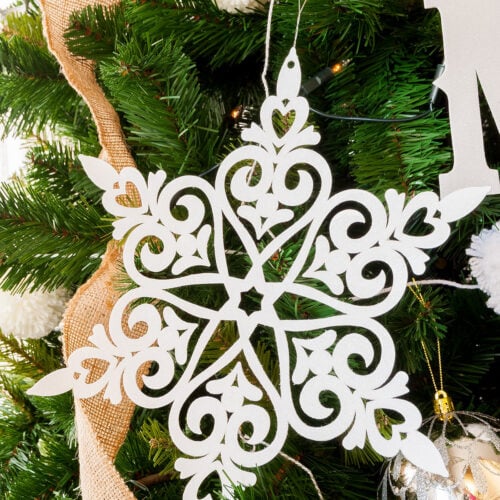
- There you go! what a cute Glittered Paper Snowflake Ornament we got!
STEP 4: LET IT DRY WELL.
- I the paper snowflakes dry on a table and start over the process with the next snowflake until I finish them all.
- I let them dry overnight.
STEP 5: HANG YOUR BEAUTIFUL SNOWFLAKES PAPER ORNAMENTS
- Cut some strings of nylon thread (or whatever you want to use to than them), insert it on the snowflakes through the hole for hanging and make a knot with both ends.
- There you go!!!! Hang and enjoy!!