DIY Glittered Snowflake Paper Ornaments
This post may contain affiliate links. Please read our Disclosure Policy.
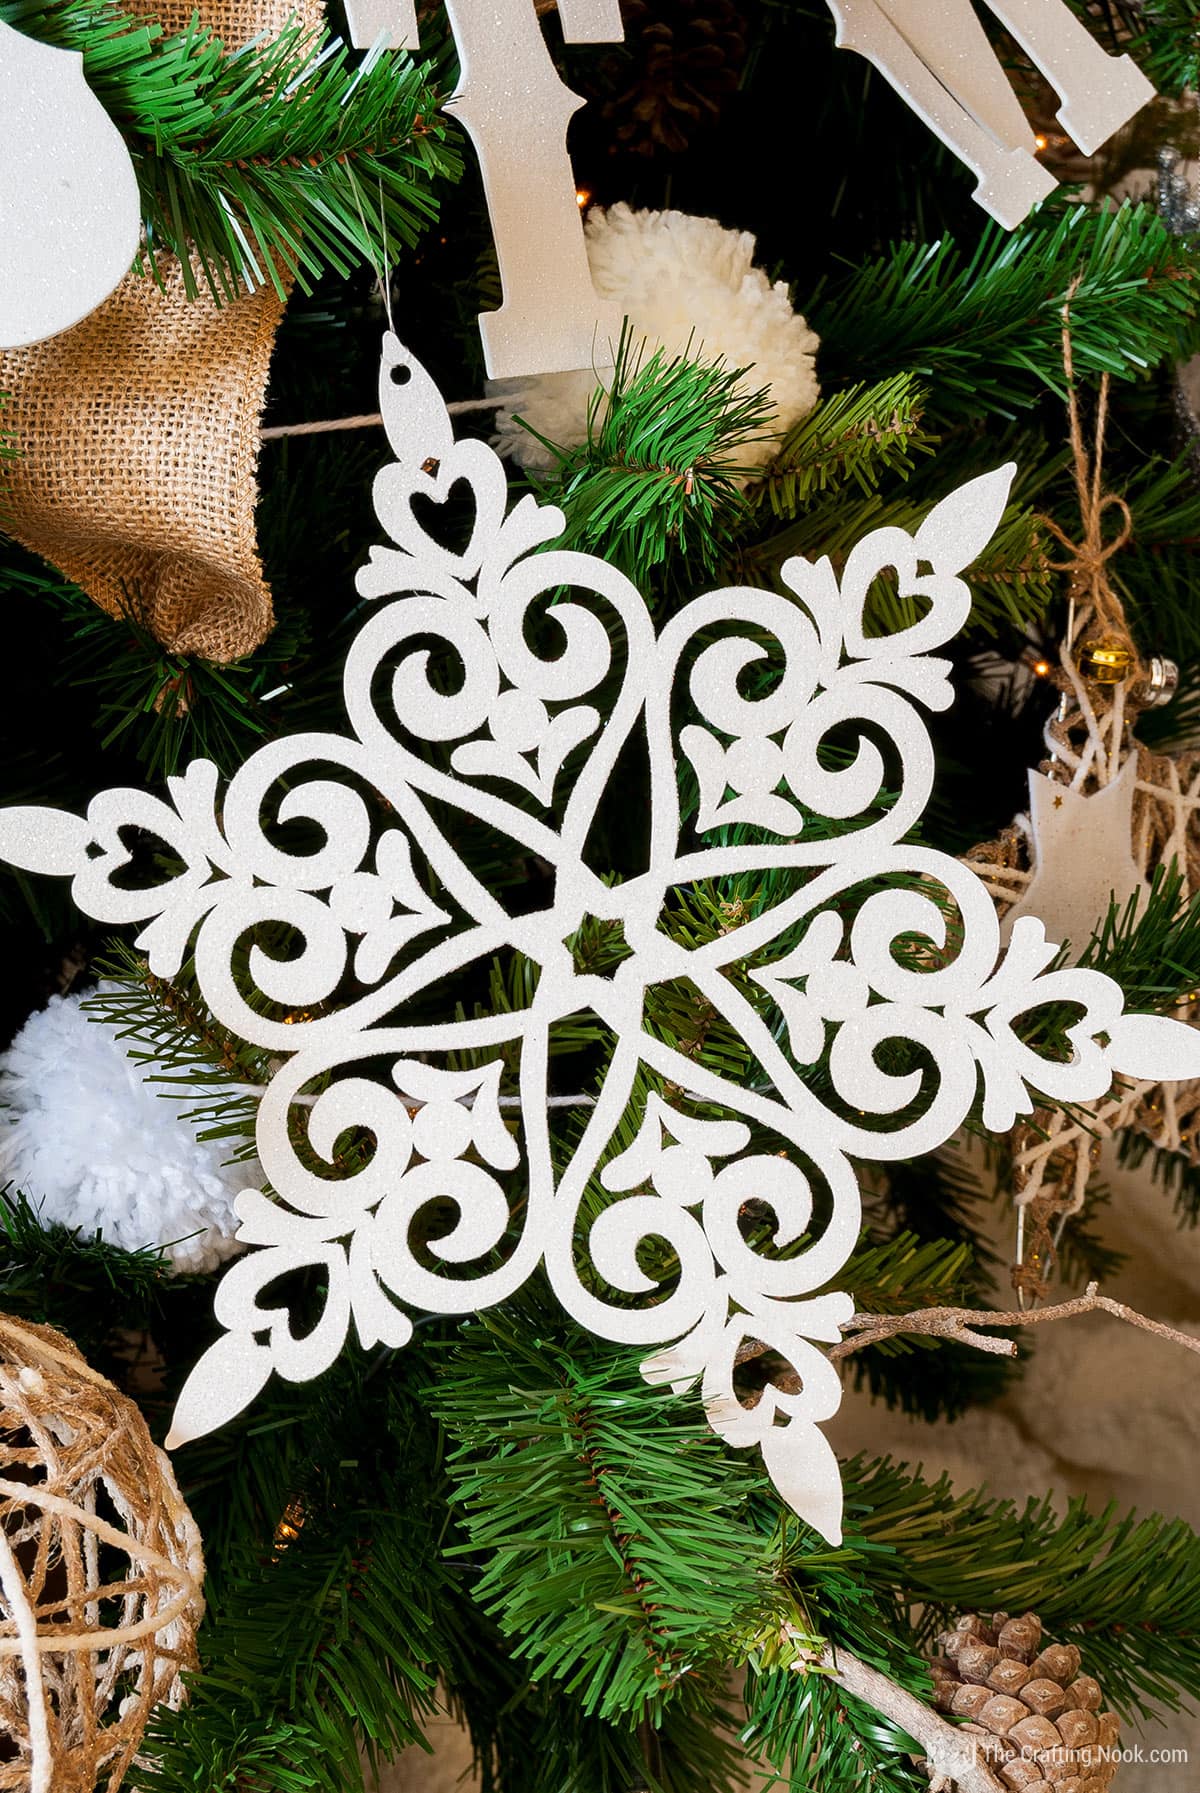
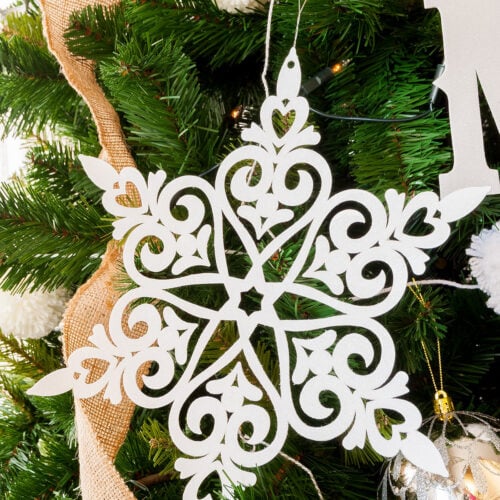
Using paper cardstock, glue, and glitter that can be found at the grocery, craft, or dollar store, you can make the prettiest snowflake paper ornaments to decorate your home for the holiday season.
As soon as Halloween is behind me, the first thing I do before anything else is to decide how I want to decorate the house for Christmas. You know by now that Christmas is my favorite time of year.

Table of Contents
Christmas Glittered Snowflake Paper Ornaments Tutorial
Every year, I like to change up my holiday decor and I usually do this with a color scheme. Usually, I come up with this scheme early in November after mulling over a few colors until I finally make up my mind.
In the past, I have used traditional red and green, pastels the next, and this year, it is all about rustic, white, and hints of gold.
With only a few supplies you will make your Christmas tree sparkle and gorgeous in no time. I made 8 in total: 5 larger {about 11 Inches} for the half bottom and 3 smaller {about 8-9 Inches} for the half top.
It took me about 10 minutes to make each one, cut, glue, glitter, dry, hanger, hang. That’s pretty much it!
The best part?
… I mean besides quick and easy?
It’s absolutely inexpensive because you probably have glue and glitter and home and if not those supplies are not expensive anyway.

To be honest, I wanted to make these for a long time. I’ve seen many trees using snowflakes but those pre-made, store-bought ones are a bit expensive sometimes.
I mean if you are looking for some fancy and pretty ones. I thought to myself, I could make them with less than what a single one would cost and if next year I don’t want them anymore then that’s it, not much of a loss.
Besides, let’s face it, when you look at the tree you can’t tell that those were made with cardstock, can you?
Also, I had made some similar snowflakes before but with a different shape and style, all full of color and layered. This time I wanted something more winter wonderland kind of style for my Christmas decor.
How to make Snowflake Paper Ornaments
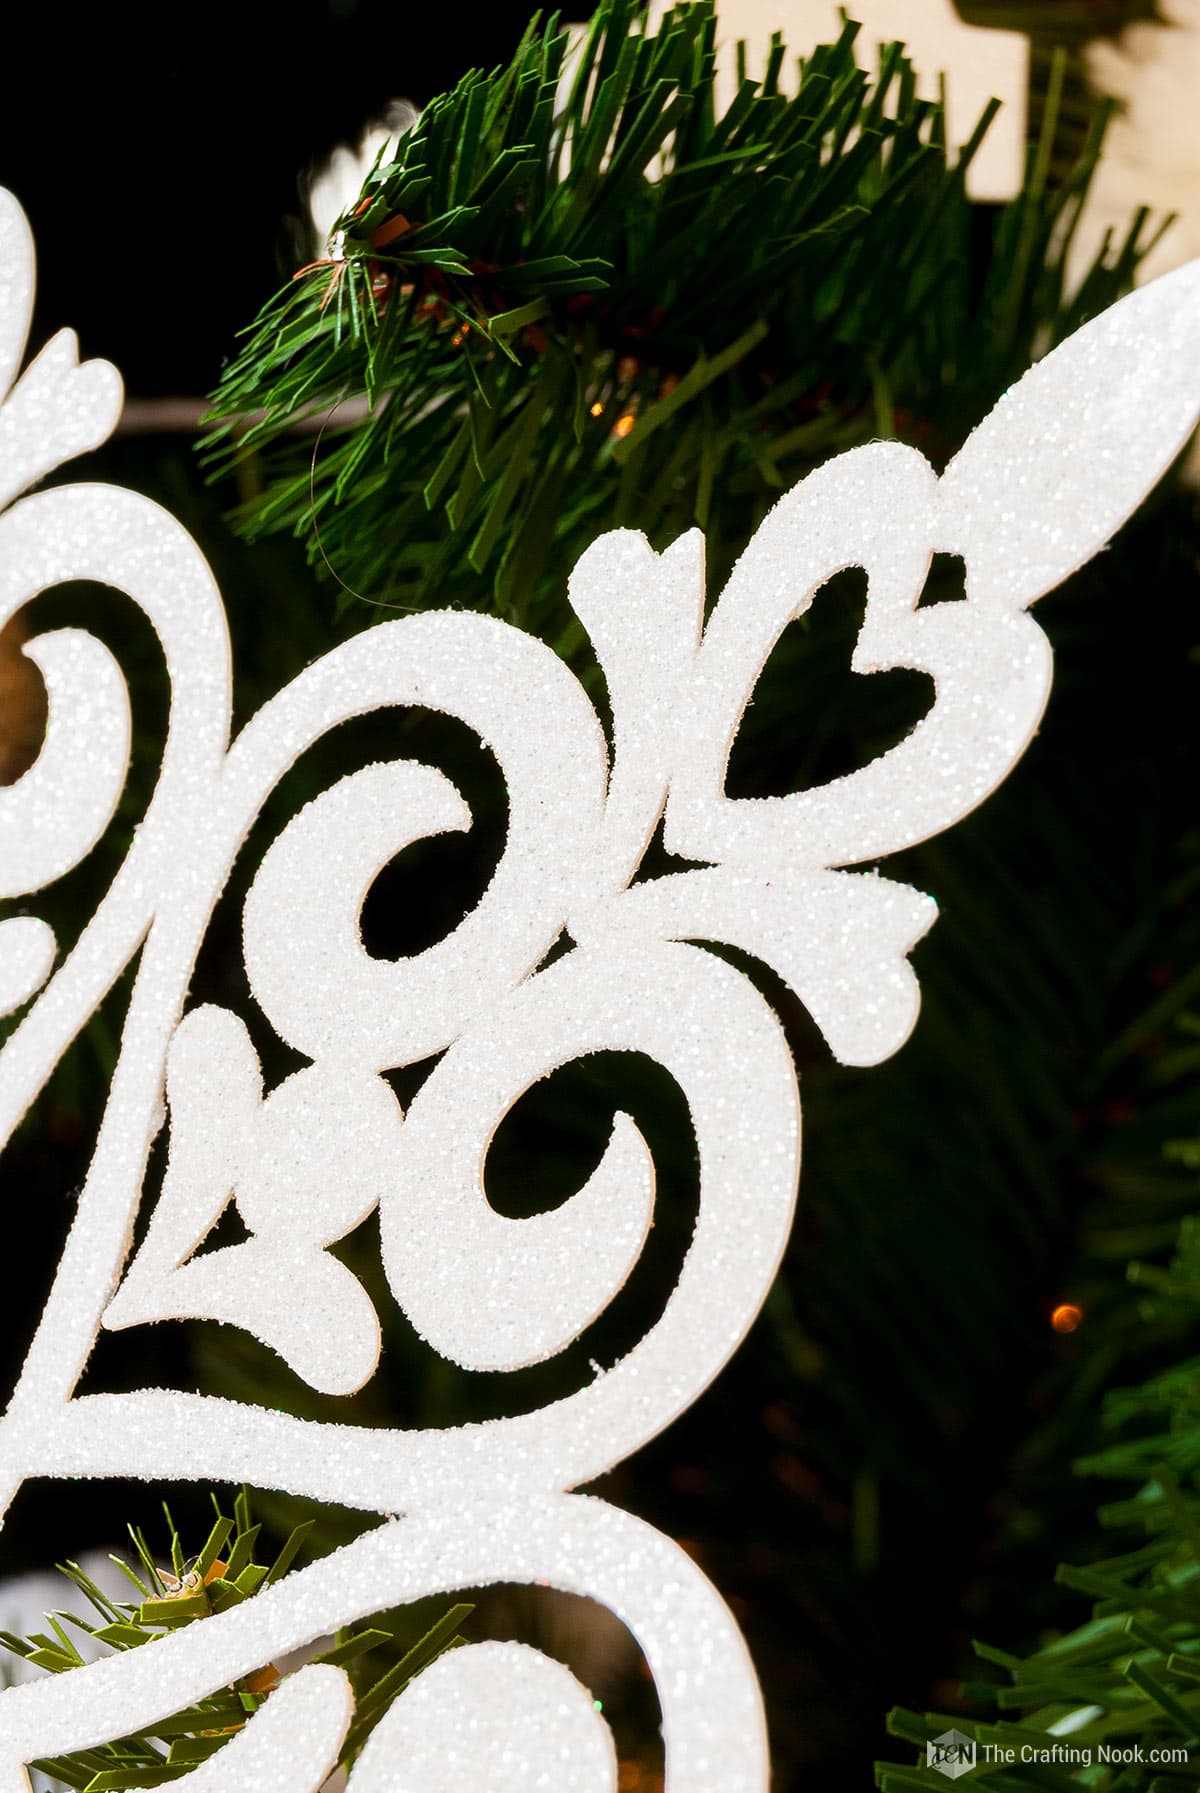
These handmade ornaments are the perfect addition to your Christmas tree when you feel like there’s something missing or that you need to fill some spots.
These Easy Christmas Glittered snowflake paper ornaments are so super easy to make and It’s also a fun craft to work with kids and even make the cutest gift. Either if you have a cutting machine or found some paper snowflakes in a shop you can always get this done.
Before we begin, be sure to follow us on Pinterest, Facebook, Instagram, and YouTube, and also sign up for our email list (at the end of this post), so you’ll never miss a post!
Here we go!
Supplies:
- White 180g cardstock.
- Mod podge or White Glue
- White glitter {I used one that looks a lot like know}
- Foam brush
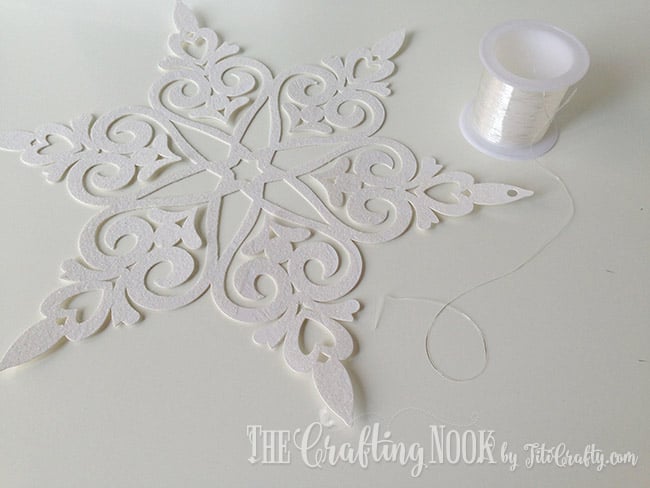
- Nylon thread or ribbon if you want.
- Optional* A large squared container to apply the glitter and then put it back on the pack.
Tools:
- Cutting machine – Silhouette or Cricut
- Scissors
Instructions:
Follow these easy step-by-step instructions.
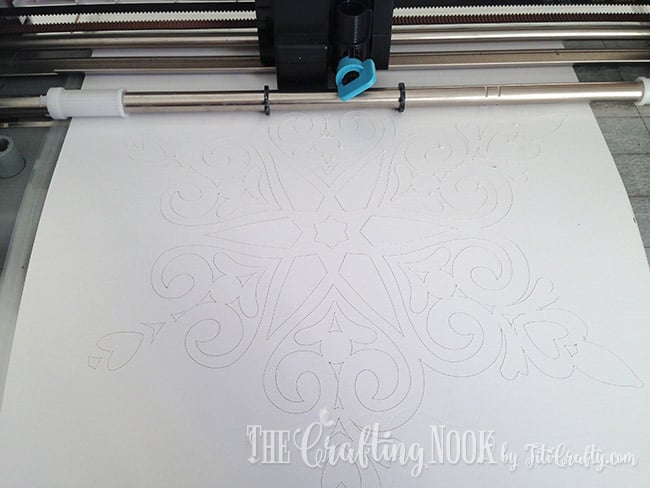
Step 1: Design your Snowflake Paper Ornaments
First I chose a pretty snowflake template from the Silhouette store (You can find really cute free and very inexpensive different designs there).
If you don’t have a cutting machine, you can buy some cute paper snowflakes at your local craft store. Is this your case? Then skip steps 1 and 2 and jump to step 3.
Decided and adjusted to the size I wanted in the Silhouette Studio. Made some about 11 Inches and some 8 inches. I wanted to have little snowflakes for the upper part of the tree and large snowflakes for the bottom.
Step 2: Cut your design
I set it to heavy cardstock on the settings and adjusted the blade and prepared my mat.
I had to cut one at a time.
Make sure you have a hole for the hanger or just use a paper hole punch.

Sent to the cutting machine.
Once cut I started pealing off all the external card stock from the mat.
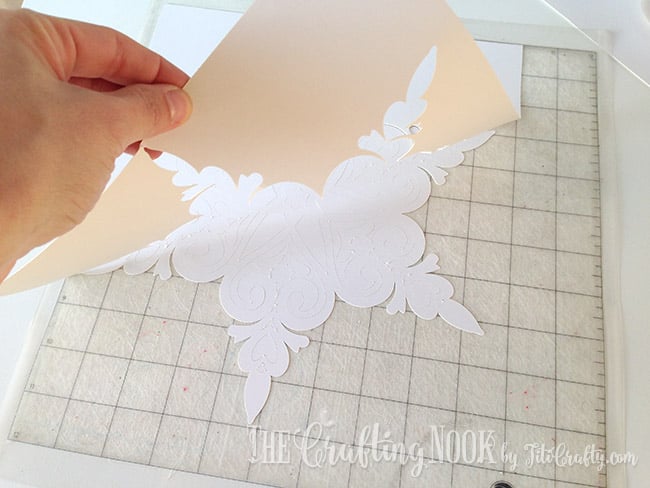
Then carefully pulled out the snowflake using my hook tool to avoid any piece from tearing.
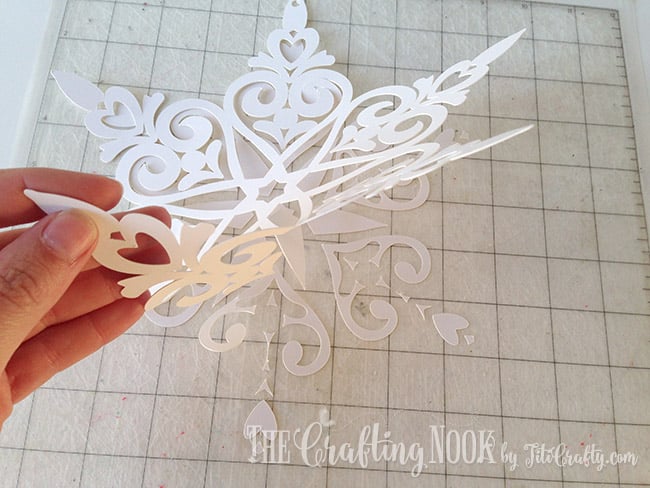
If the machine cuts it well you won’t have any problems. and most of the remains will stay on the mat.

I removed all those remaining pieces from the mat and set a new piece of cardstock and sent it to cut again.
Step 3: Add Glitter to the Paper Snowflakes
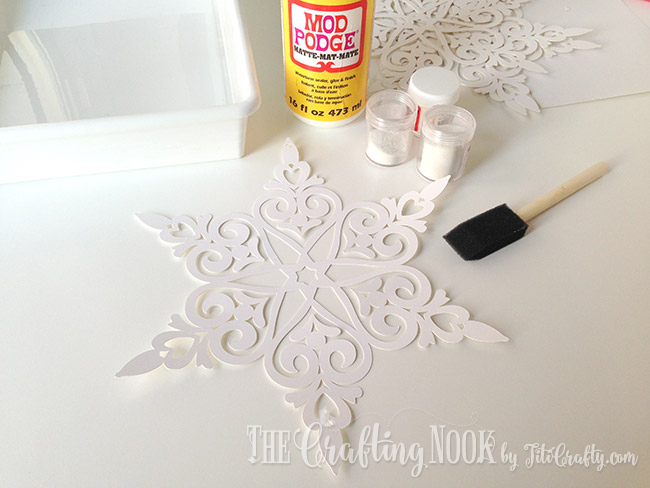
I protected my table with some paper and started spreading the glue all over the snowflake.

Then I transferred the snowflake to the plastic container and applied abundant glitter all over to cover the whole thing.

I also pressed the glitter down softly with my fingers to make sure it stays.

Carefully I took one point of the snowflake and removed all the glitter excess. Patting softly always over the container.
There you go! what a cute Glittered Paper Snowflake Ornament we got!

Step 4: Let it Dry well.
I the paper snowflakes dry on a table and start over the process with the next snowflake until I finish them all.
I let them dry overnight.
Step 5: Hang your beautiful snowflakes paper ornaments
Cut some strings of nylon thread (or whatever you want to use to than them), insert it on the snowflakes through the hole for hanging and make a knot with both ends.


There you go!!!!
8 Super Easy Christmas Glittered paper snowflake ornaments for your cute tree!

Now it’s time to hang them!!!!
Crafting Tips
If you are planning on reusing your product over and over again, I recommend using a Clear Glitter Sealer Spray Paint. It provides additional protection for your sparkling Glitter projects preventing Glitter from flaking and fading while maintaining the Glitter’s radiance.
Use a large container to apply the glitter. That way you contain the mess easier and also can return the glitter to their containers easier with the of a small funnel.
I learned that although mod podge was and is great for this project, white wood glue is even better. It not only sticks the glitter well, but it also helps harden the cardstock a little bit so it gets sturdier.
To store these, I recommend piling them up, right against the wrong carefully and then putting them in a zip-lock bag removing the air as much as possible. Any bag will do but zip-lock bags are the best.


Hope you enjoyed this tutorial and brought you some inspiration to make some of these soon!
Frequently Asked Questions:
For this project, in particular, I recommend heavy-weight cardstock, which is harder to cut but is more sturdy for decorating. But there are so many ways to make paper snowflakes. To cut some with scissors, you can use a variety of lightweight paper—wrapping paper, tissue paper, or crepe paper—which is lighter and easy to cut but more fragile for decorating.
I used supper-fine white (snowy effect) glitter. But you can use your favorite glitter depending on your decoration theme.
This specific design, unless you are super patient and good with a craft knife (or x-acto knife), I think not. But there are many other snowflake designs you can definitely cute with scissors or craft knives and then glitter them. You just have to google snowflake template or snowflake shape and choose your favorite.
In my opinion, pretty much any glue will do, Mod Podge, normal white glue, and even, white wood glue.
I recommend spray sealer all the way. Mod podge is good but while you apply it, it will rub off some of the glitter. I’ve heard people using hair spray too, but I haven’t tested that yet.
More Christmas Ornaments to Try
If you like this cute snowflake paper ornaments tutorial, you might also LOVE these other Christmas project ideas too:


✂️ Tutorial
DIY Glittered Snowflake Paper Ornaments for Christmas
Tools
- Cutting machine – Silhouette or Cricut
- scissors
Supplies
- White 180g cardstock.
- Mod podge or White Glue
- White glitter {I used one that looks a lot like know}
- Foam brush
- Nylon thread or ribbon if you want.
- Optional* A large squared container to apply the glitter and then put it back on the pack.
Instructions
STEP 1: DESIGN YOUR SNOWFLAKE PAPER ORNAMENTS
- First I chose a pretty snowflake template from the Silhouette store (You can find really cute free and very inexpensive different designs there).
- If you don’t have a cutting machine, you can buy some cute paper snowflakes at your local craft store. Is this your case? Then skip steps 1 and 2 and jump to step 3.
- Decided and adjusted to the size I wanted in the Silhouette Studio. Made some about 11 Inches and some 8 inches. I wanted to have little snowflakes for the upper part of the tree and large snowflakes for the bottom.
STEP 2: CUT YOUR DESIGN
- I set it to heavy cardstock on the settings and adjusted the blade and prepared my mat.
- I had to cut one at a time.
- Make sure you have a hole for the hanger or just use a paper hole punch.
- Sent to the cutting machine.
- Once cut I started pealing off all the external card stock from the mat.
- Then carefully pulled out the snowflake using my hook tool to avoid any piece from tearing.
- If the machine cuts it well you won’t have any problems. and most of the remains will stay on the mat.
- I removed all those remaining pieces from the mat and set a new piece of cardstock and sent it to cut again.
STEP 3: ADD GLITTER TO THE PAPER SNOWFLAKES
- I protected my table with some paper and started spreading the glue all over the snowflake.
- Then I transferred the snowflake to the plastic container and applied abundant glitter all over to cover the whole thing.
- I also pressed the glitter down softly with my fingers to make sure it stays.
- Carefully I took one point of the snowflake and removed all the glitter excess. Patting softly always over the container.
- There you go! what a cute Glittered Paper Snowflake Ornament we got!
STEP 4: LET IT DRY WELL.
- I the paper snowflakes dry on a table and start over the process with the next snowflake until I finish them all.
- I let them dry overnight.
STEP 5: HANG YOUR BEAUTIFUL SNOWFLAKES PAPER ORNAMENTS
- Cut some strings of nylon thread (or whatever you want to use to than them), insert it on the snowflakes through the hole for hanging and make a knot with both ends.
- There you go!!!! Hang and enjoy!!
Some Snowflake Crafts I love from my favorite bloggers:
- How to Make Paper Snowflakes & Ornaments Using Doilies by Diane over at In my Own Style
- How to Make a Paper Snowflake Christmas Ornament by Katie over at The Crafty Blog Stalker
- Make Paper Snowflakes by Ananda over at A Piece of Rainbow
Share and PIN ME!

Til’ next time…


FREE WORKBOOK
Keeping your Sweet Home Organized
Learn how to create intentional habits and simple routines to Keep Your Home Organized. Plus freebies, printables, exclusive content, and tips.
Disclaimer: By clicking on the “Yes” button above you are giving me your consent to collect and use your information according to the law and My Policy Privacy. Zero Spam I promise!