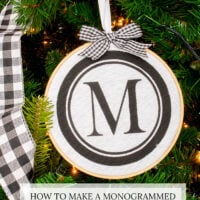
DIY Monogrammed Embroidery Hoop Ornaments for Christmas
These monogrammed embroidery hoop ornaments are cute, fun, and easy to make. Make them as gifts for your friends and family or for your Christmas Tree. Either way, these DIY monogrammed embroidery hoop ornaments make the best personalized touch for your Holiday season decor.
Equipment
- Scraper
- Ruler
- Brush
- scissors
- A cutting machine –Silhouette Cameo or Cricut.
Ingredients
- Embroidery hoop – the size of your choice
- White cotton canvas fabric – or your favorite one
- Black fabric paint – or your chosen color
- Vichy or buffalo check Ribbon – black and white or your favorite one
- White Ribbon or alternatively baker’s twine for hanger.
- A piece of pipe cleaner.
- Contact paper or stencil material
- Transfer Tape
Instructions
PREPARING THE DESIGN
- Firstly cut a piece of your fabric 1 inch larger than your embroidery hoop.
- Create your design on your cutting machine app and send it to cut using the most basic vinyl setting you have and still lower the force just a bit just in case so it won’t cut through the backing.
- Cut the necessary contact paper or stencil vinyl and place it on your mat. Insert it into your machine and let’s cut!
- Once the design was cut, using the hook tool peel away the negative space, so all that remains on the vinyl backing is the design.
- Then I cut bigger pieces of transfer paper and applied them to each design and smooth it down using a scraper tool.
- Time to apply my designs to the fabric. Make sure it’s really clean and without dust.
- Here comes the tricky part. Just the scrapper was not enough for me. I used a ruler and scrapped really hard the design onto the fabric.
- Then carefully start lifting the transfer paper and make sure that all the vinyl is adhered down on the fabric. If something is coming back on the transfer paper, place it back and rub again the vinyl firmly and try lifting it again. Help with your hook or even nails to make it stay on the fabric.
- Go really slowly and carefully. Don’t rush this. Once you removed all the transfer paper, using your scraper or ruler rub a little more on critical spots such as tips, corners, and any tricky spots.
- Repeat with each design. I made 4.
- Once you are ready, it’s time to paint.
- Paint your design making sure you don’t paint outside the design. Don’t forget to protect your working surface with a piece of plastic. I used a zip-Lock the size of the fabric.
- I like makings strokes always towards the center of the available space rather than against the vinyl to avoid the paint pushing the paint underneath the protected area. Not always it’s possible but I do this whenever I can.
- When you are ready let it dry.
- Then carefully peel off your contact paper or vinyl. Your design should be ready and gorgeous.
ASSEMBLING THE EMBROIDERY HOOP ORNAMENT
- Take the embroidery hoop apart and for now, place the inner hoop on a flat surface.
- Place the fabric on top of the inner circle hoop as centered as possible. In my design, this was fairly easy since it was rounded.
- Press the outer hoop in place over the fabric on top of the hoop.
- Tighten the screw on the embroidery hoop and pull the fabric until it’s tight. Be careful in this step to not distort the design.
- With your buffalo check ribbon make a cute bow.
- Decide which Ould be the front side of the bow and insert your piece of pipe cleaner on the back through the bow knot.
- Carefully, cut all the remaining fabric around the back of your embroidery hoop.
- Cut a string of ribbon and pass it through the embroidery hoop screw space. Make a tight knot with the ends to create the hanger.
- Then place the bow on the front right where the screw is and tighten it with the pipe cleaner on the back. I do it like this so I don’t have to glue it and damage the embroidery hoop.
- There you go! One cute monogrammed embroidery hoop ornament ready for the Christmas tree.
- You can make it in any size, with any design you like. Imagination is the limit!