DIY Paper Heart Shadow Box for Valentine’s Day
Make this Valentine’s special! Create a heartfelt Paper Heart Shadow Box with our easy tutorial. Cherish love in every layer.
Equipment
- Cutting Machine – Silhouette Cameo or Cricut will work.
- Cutter or Scissors
- A ruler
Ingredients
- White cardstock
- Red cardstock.
- Glue and gold glitter.
- Foam double-sided tape.
- A Shadow Box frame.
Instructions
STEP 1: PREPARING THE DESIGN
- The first thing I did was create the design using the frame’s measures.
- I represented the empty hearts as red since that would be the color that would be behind everything.
- I used gold{ish} color to represent the gold glitter heart. And the gray lines for the white hearts.
- I made a copy of the design and converted everything into simple lines, all in black. Remove any grouping or compound path so I can export the design as a .dxf file. This type of file is accepted by Silhouette Studio.
- I opened my Silhouette Studio app and opened the .dxf file.
- I gave the design style again just so I don’t forget what is what.
- Then I divided the design into two. One with all the hearts that would be layered and the other that would have the hollow hearts and the “I” and “U” letters.
- For this last one, I added a squared line with the exact measures of the inner area of the frame.
- *Please keep in mind that these freebies are for personal use only, no commercial purposes are allowed, and neither is copying parts or its total. Enjoy!
STEP 2: SEND TO CUT THE DESIGN
- Load the mat with the chosen cardstock for each layer to the machine.
- Set it up correctly according to the type of cardstock you are using on the Silhouette stucio app.
- Adjust the knife as recommended. If it doesn’t cut properly with recommended settings, adjust as needed.
- Sent to cut one design at a time.
- Look how cute the hearts look!!!!
STEP 3: ASSEMBLING THE LAYERS
- So, ok it’s time to assemble the pieces.
- I cut a frame to use around the red cardstock. This piece should be the same size as the sample page that comes with the frame. Set this aside.
- I took my white cut cardstock with the hollow hearts and recreated the design with the cutout hearts to match the original design.
- Then using the foam double-sided tape I place each heart in place. I wanted them separated from the base, so used a double layer of tape LOL.
- I went one by one making sure they kept them aligned and straight.
- Then for the last heart, I applied regular glue, spread with my fingers, and poured some glitter!!!!!!
- I let it dry for a few minutes.
- I went back to the red cardstock. Carefully I applied double-sided tape in the corners and different places making sure not to put any tape where the hollow hearts would be.
- Again carefully, I placed the heart pattern on top of the red cardstock as centered as possible.
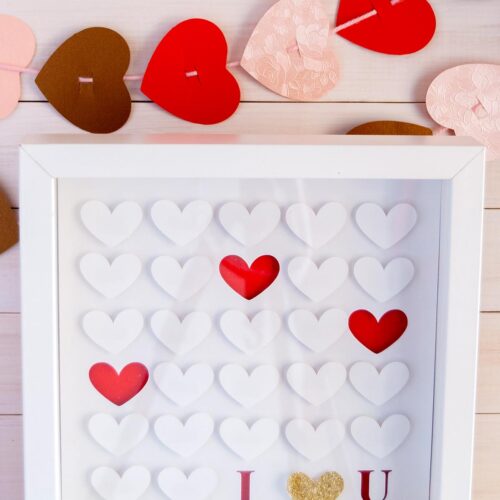
- close view of finished Paper Heart Shadow Box design
- When the gold heart was dry, I applied some foam tape and put it between the “I” and “U”.
- The design is ready!!!!
STEP 4: ASSEMBLING THE SHADOW BOX
- Time to put it in the frame facing down.
- I closed the frame and voila!!!