DIY Paper Heart Shadow Box for Valentine’s Day
This post may contain affiliate links. Please read our Disclosure Policy.
Make this Valentine’s special! Create a heartfelt Paper Heart Shadow Box with our easy tutorial. Cherish love in every layer.
Valentine’s Day is around the corner and love is in the air already. It’s time to get inspired and decorate our home even if it’s just a spot like a mantel or something.

Table of Contents
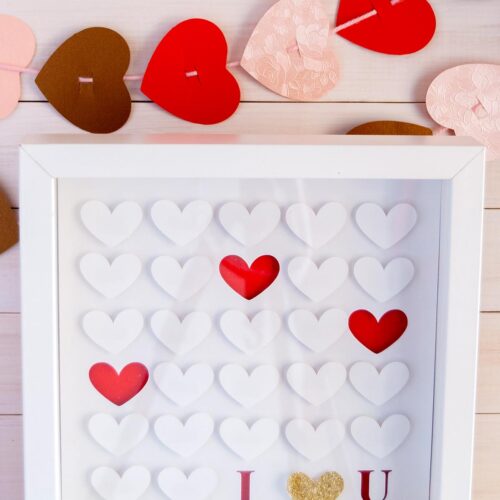
DIY Valentine’s Day Paper Heart Shadow Box
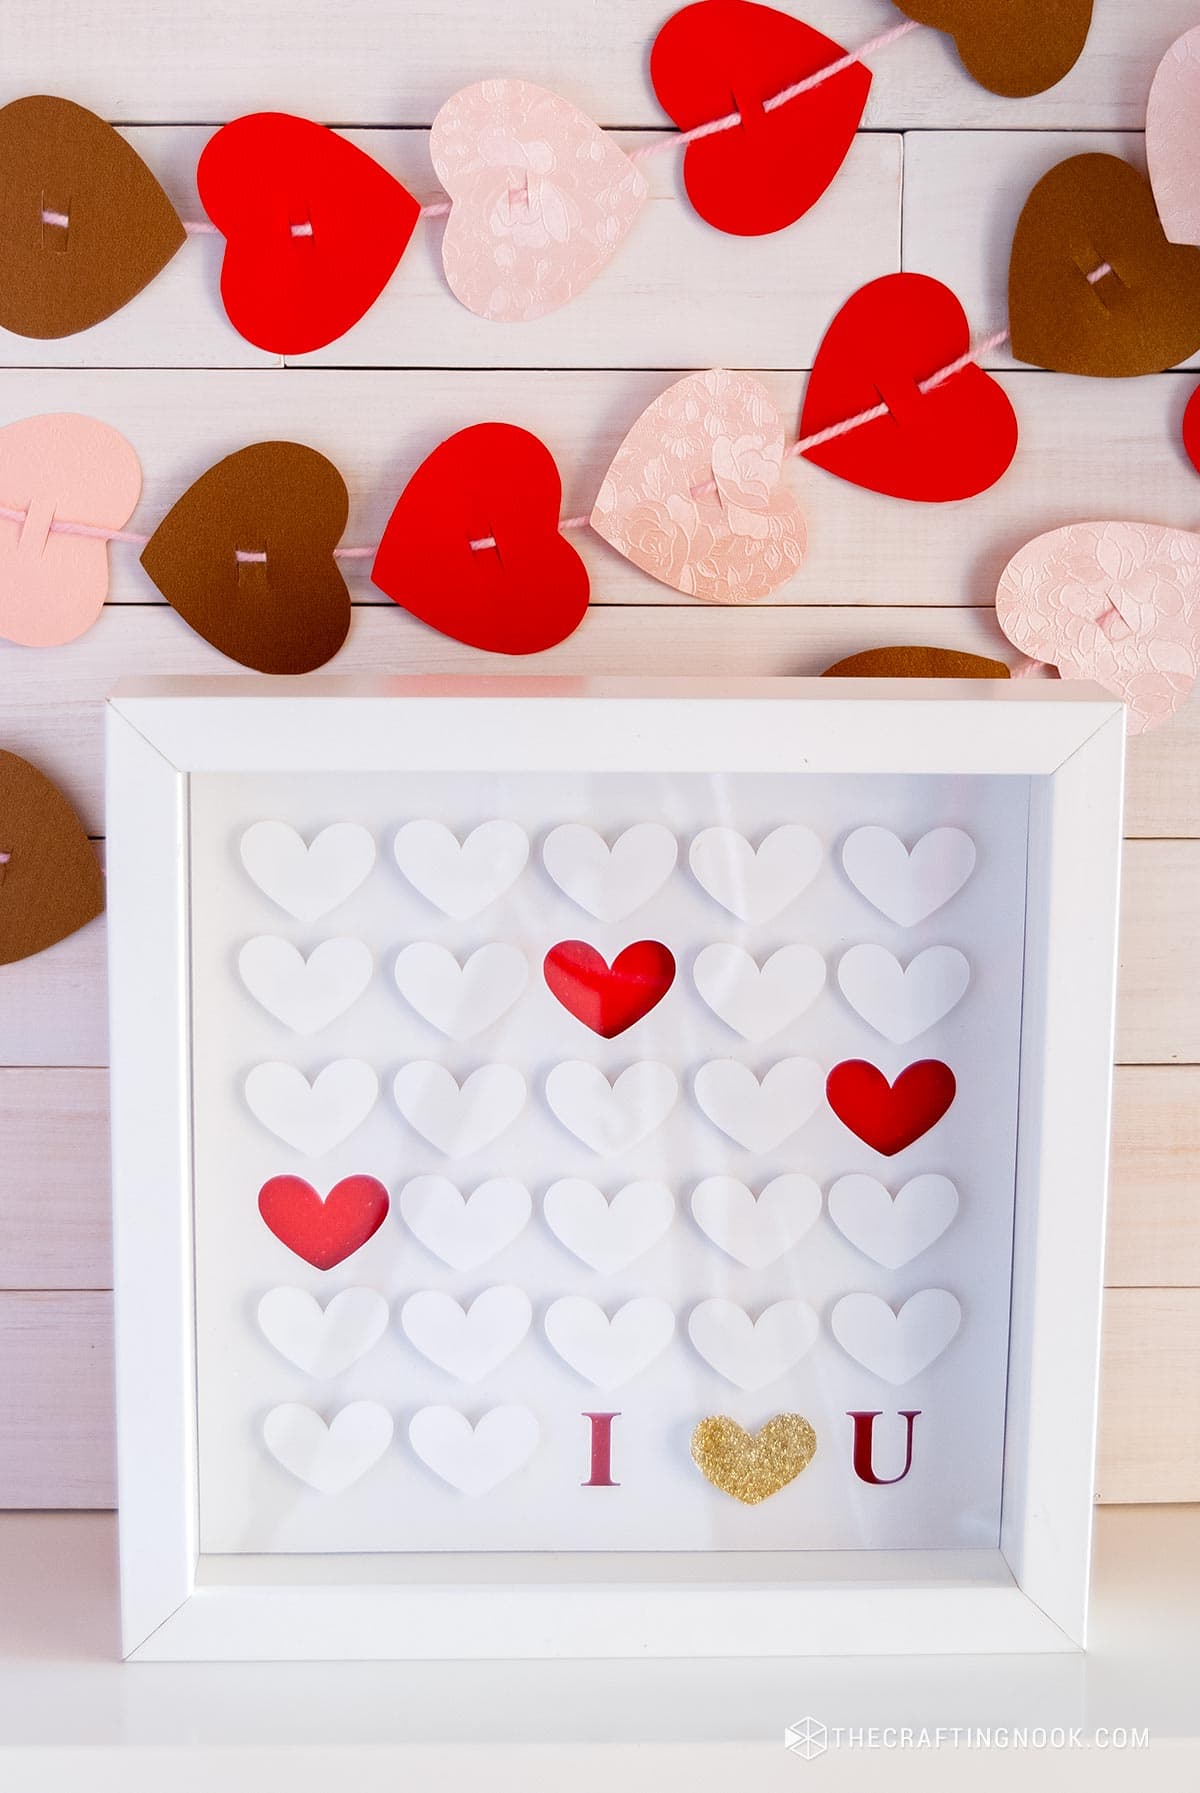
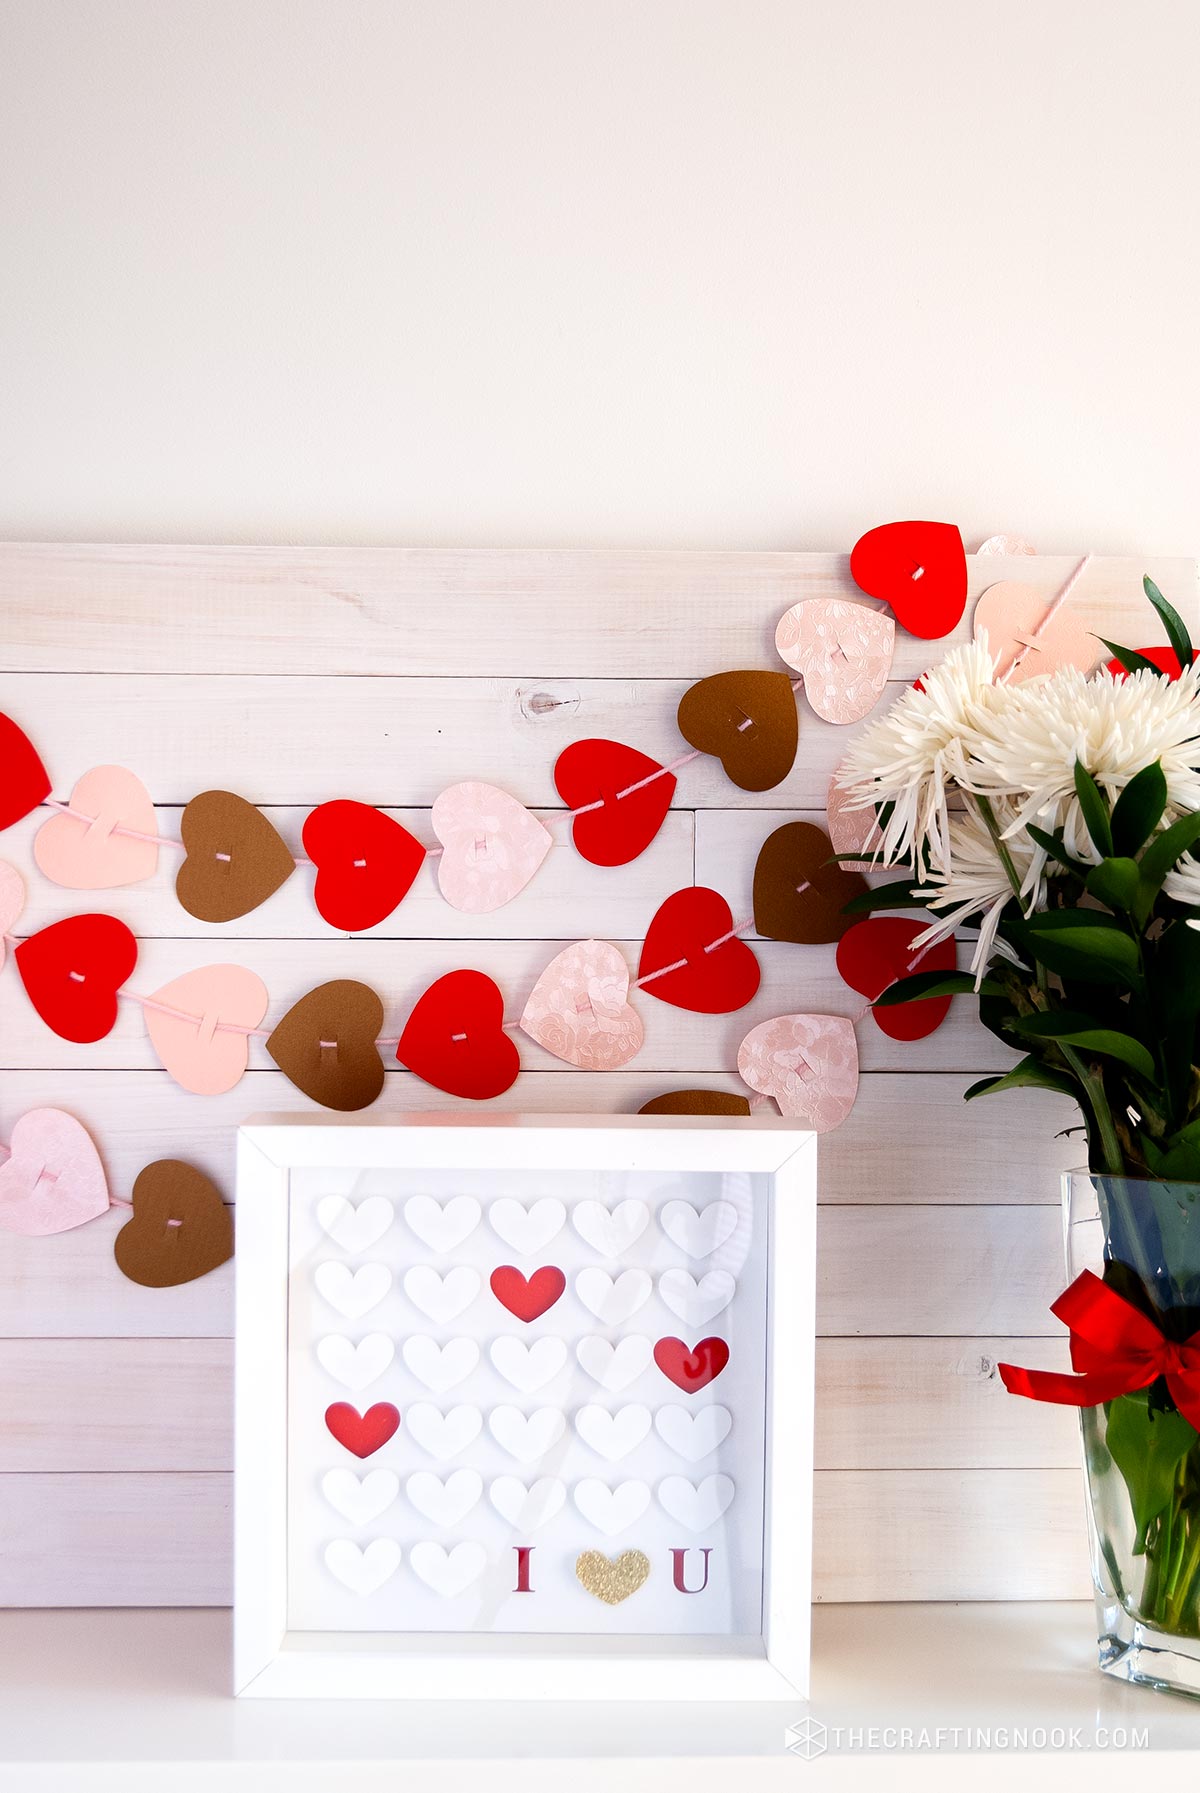
I’m keeping my mantel tradition so I’m working on different crafts to make it pretty. Today I’m sharing this cute and super easy-to-make layered Paper Heart Shadow Box.
I love this shadow box frame with all my heart. If you have been around for a while you probably noticed already LOL. The possibilities are endless. Love that I can make layered crafts or 3D shapes in it. You will probably see a lot more crafts with this frame in the feature!
How to Make a Paper Heart Shadow Box
Supplies:
- White cardstock
- Red cardstock.
- Glue and gold glitter.
- Foam double-sided tape.
- A Shadow Box frame.
Tools:
- Cutting Machine – Silhouette Cameo or Cricut will work.
- Cutter or scissors.
- A ruler
Instructions:
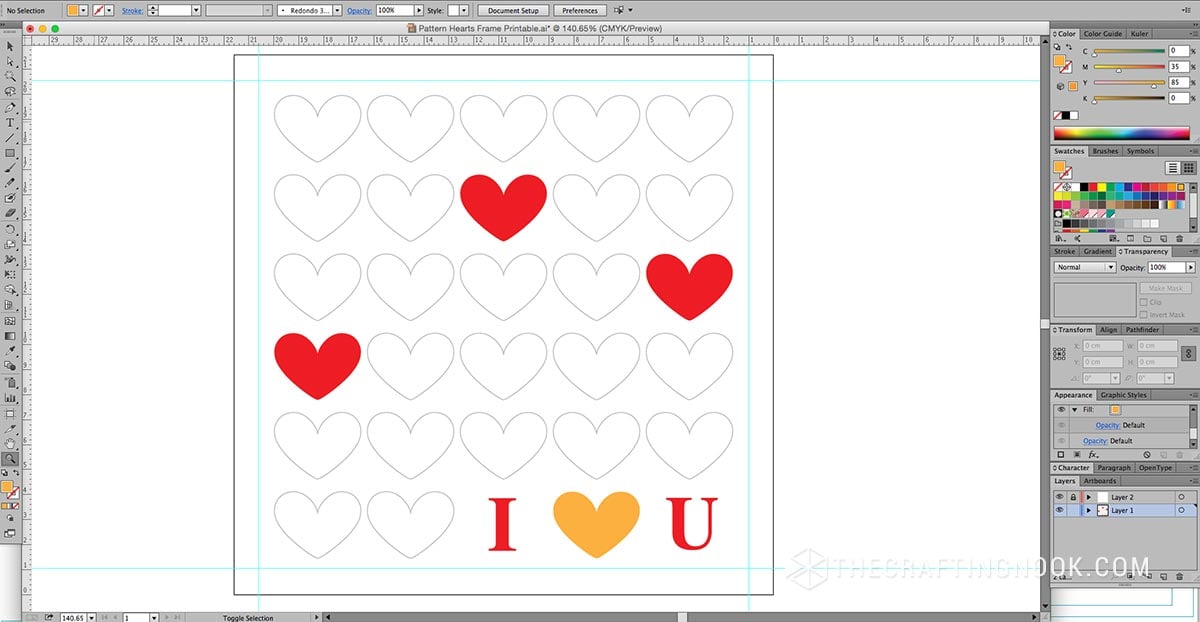
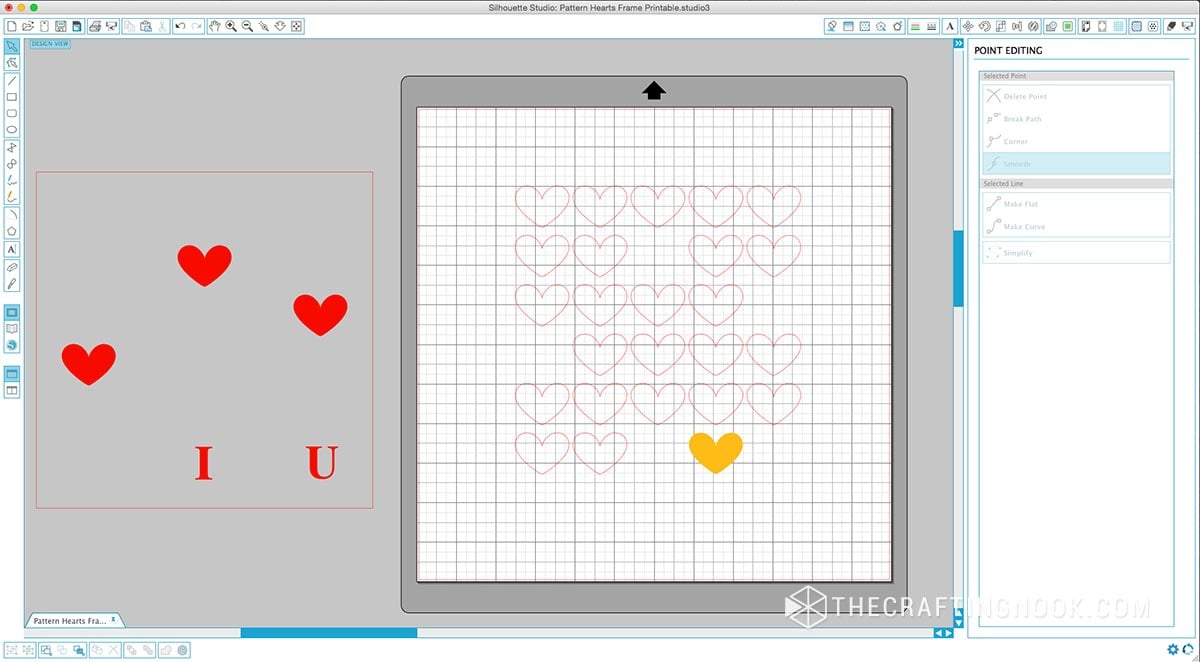
Step 1: Preparing the design
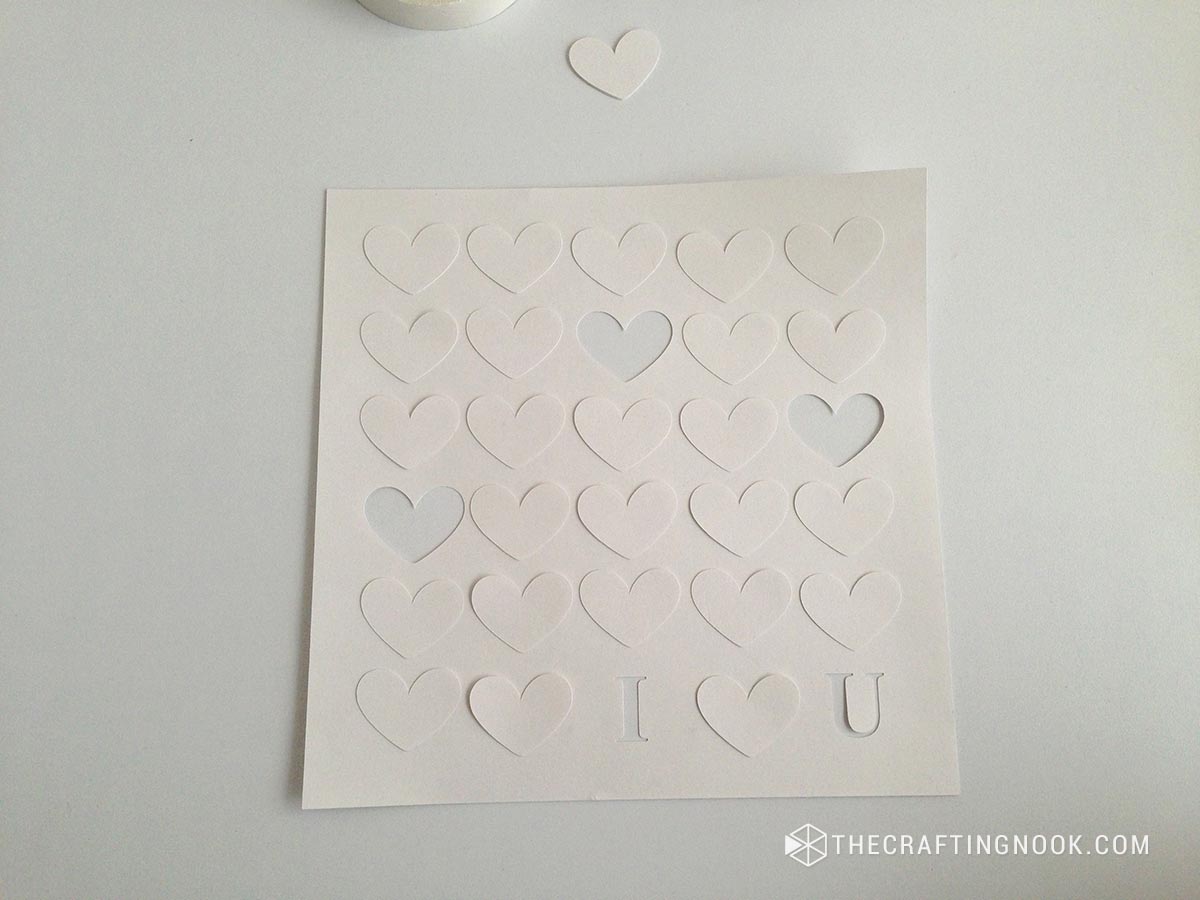
The first thing I did was create the design using the frame’s measures.
I represented the empty hearts as red since that would be the color that would be behind everything.
I used gold{ish} color to represent the gold glitter heart. And the gray lines for the white hearts.
I made a copy of the design and converted everything into simple lines, all in black. Remove any grouping or compound path so I can export the design as a .dxf file. This type of file is accepted by Silhouette Studio.
I opened my Silhouette Studio app and opened the .dxf file.
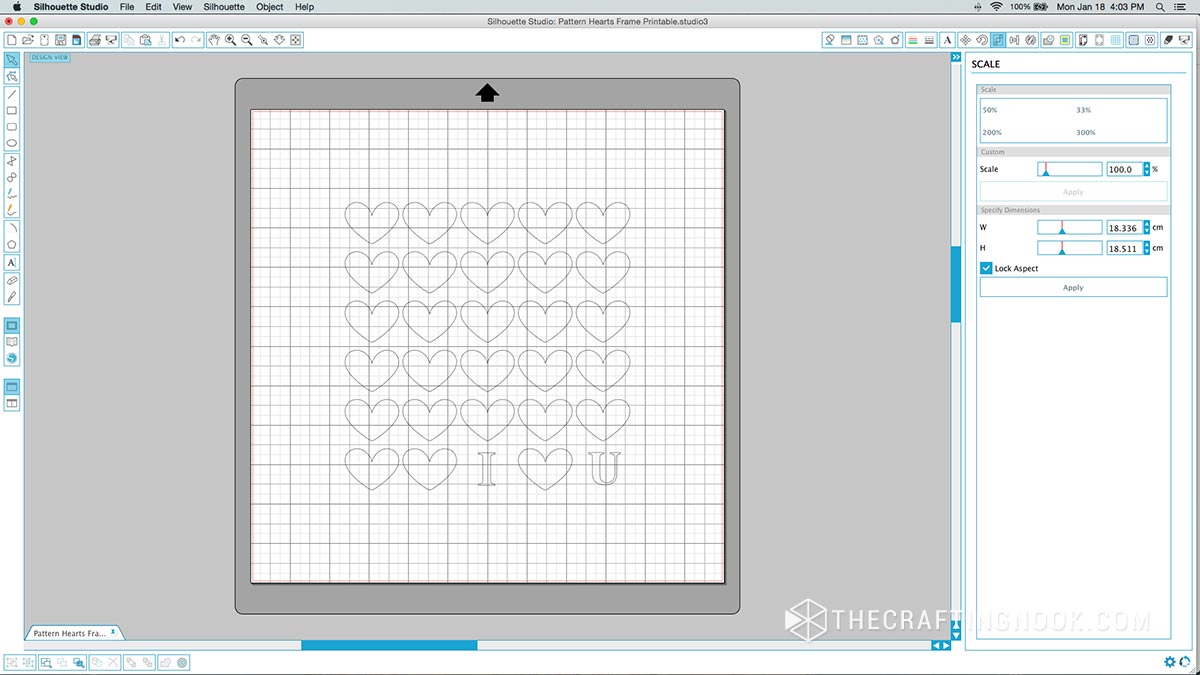
I gave the design style again just so I don’t forget what is what.
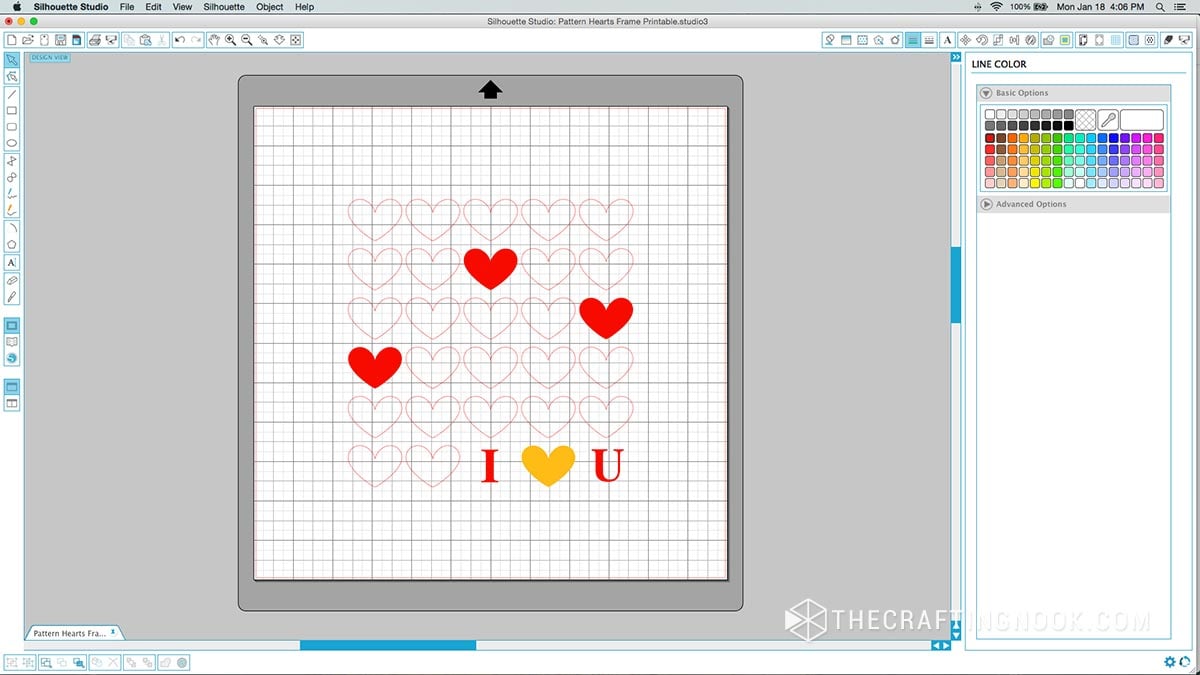
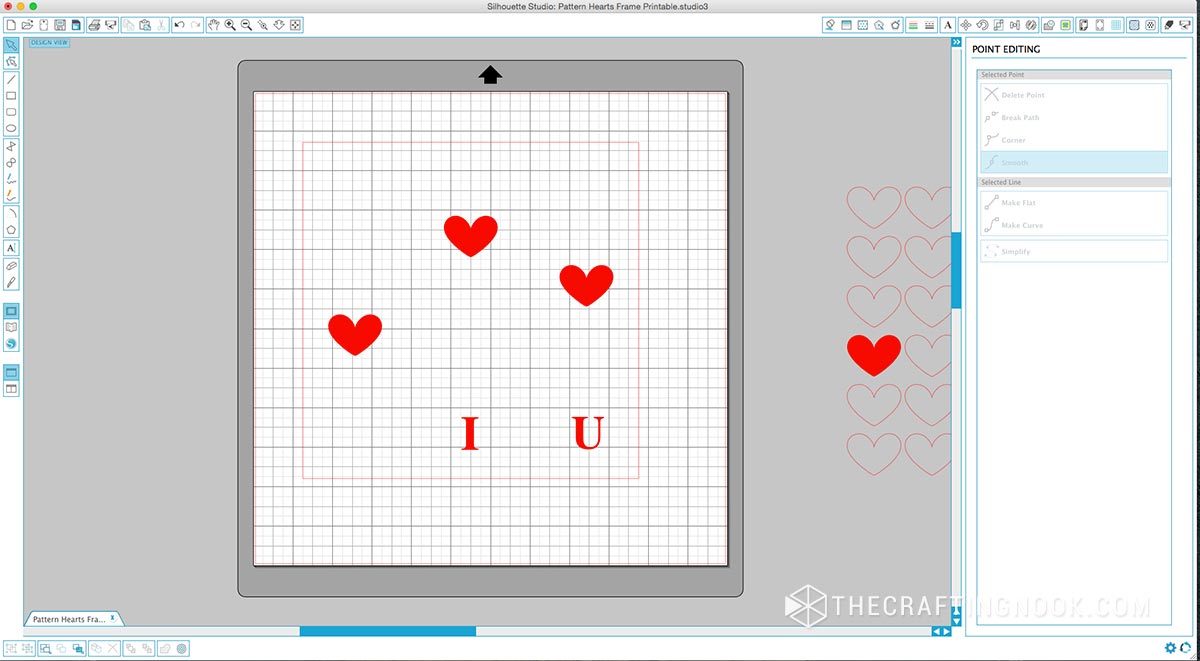
Then I divided the design into two. One with all the hearts that would be layered and the other that would have the hollow hearts and the “I” and “U” letters.
For this last one, I added a squared line with the exact measures of the inner area of the frame.
You can get the cut file HERE
and you can also snag the printable version HERE
*Please keep in mind that these freebies are for personal use only, no commercial purposes are allowed, and neither is copying parts or its total. Enjoy!
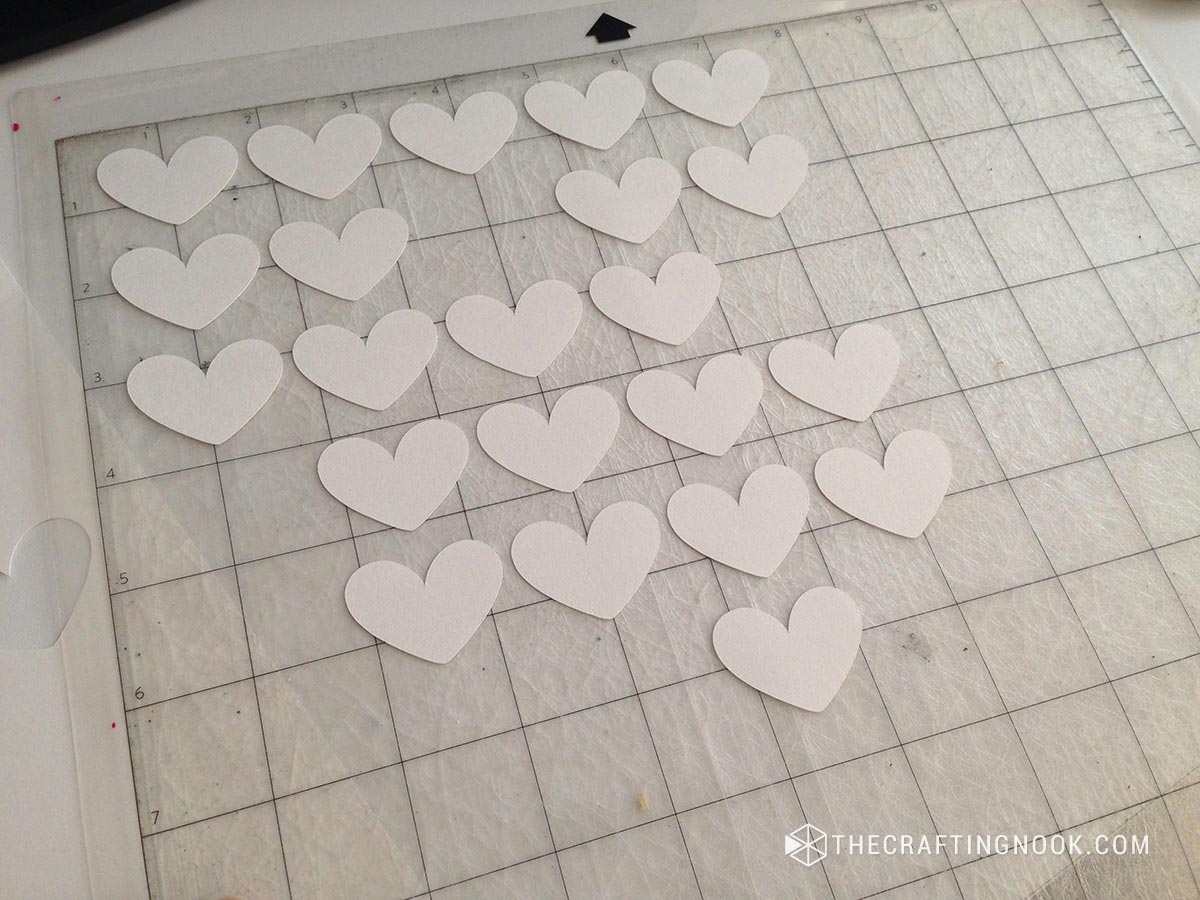
Step 2: Send to cut the design
Load the mat with the chosen cardstock for each layer to the machine.
Set it up correctly according to the type of cardstock you are using on the Silhouette stucio app.
Adjust the knife as recommended. If it doesn’t cut properly with recommended settings, adjust as needed.
Sent to cut one design at a time.

Look how cute the hearts look!!!!
Step 3: Assembling the layers
So, ok it’s time to assemble the pieces.
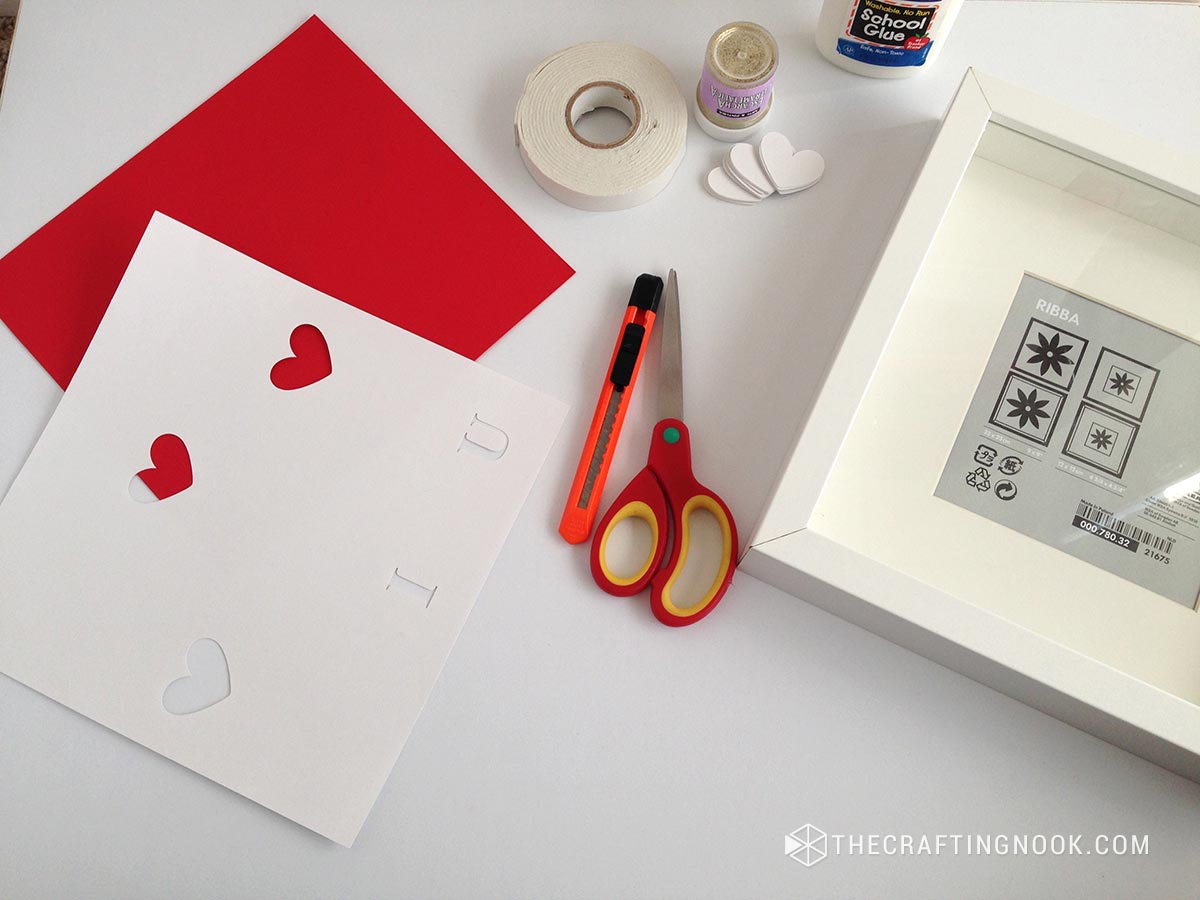
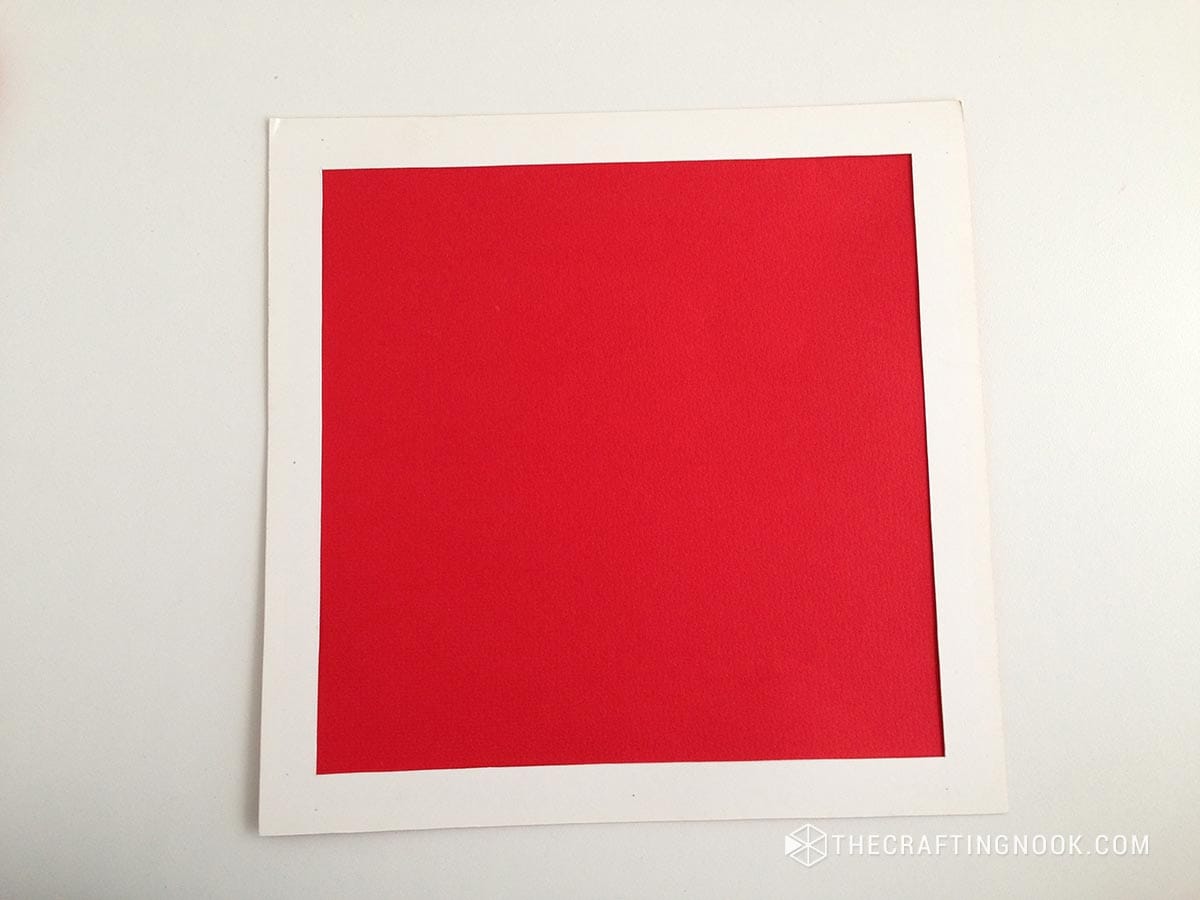
I cut a frame to use around the red cardstock. This piece should be the same size as the sample page that comes with the frame. Set this aside.
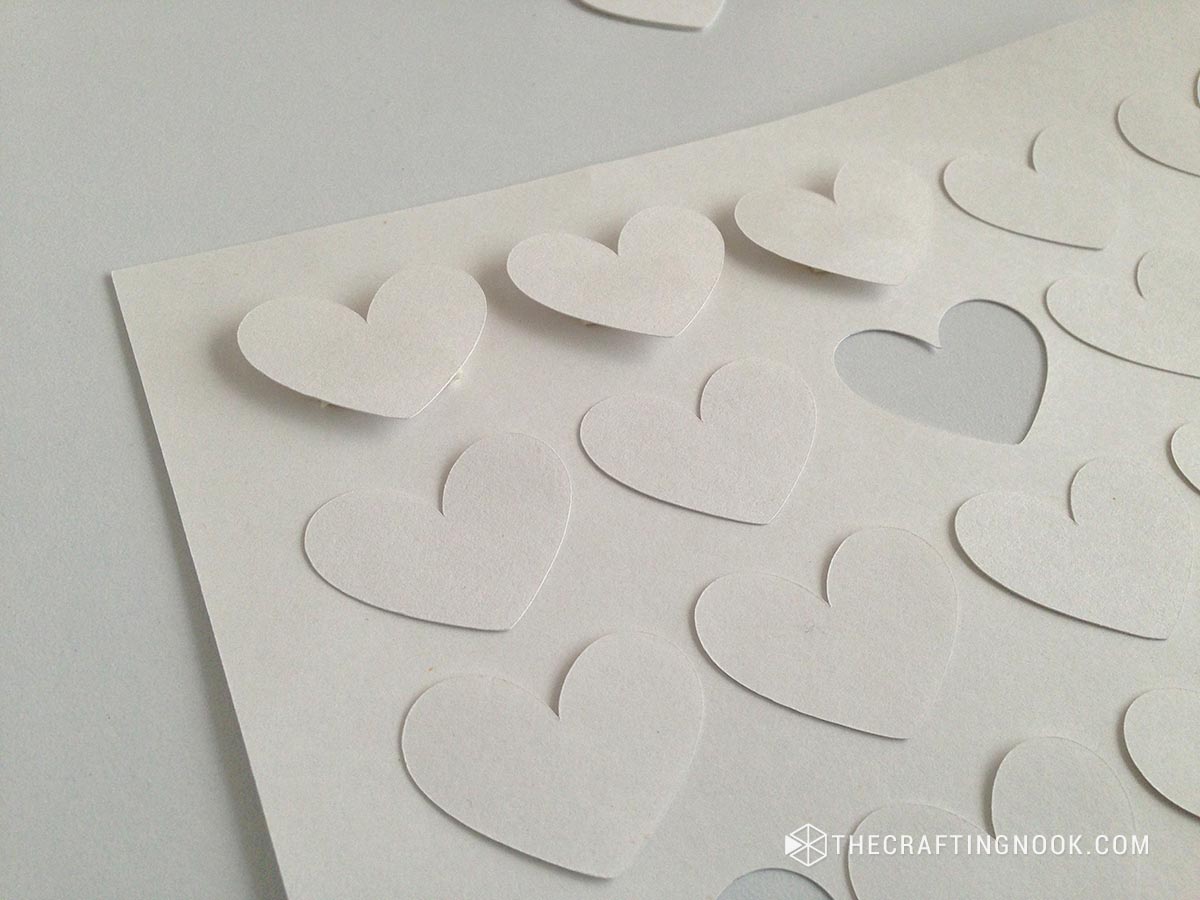
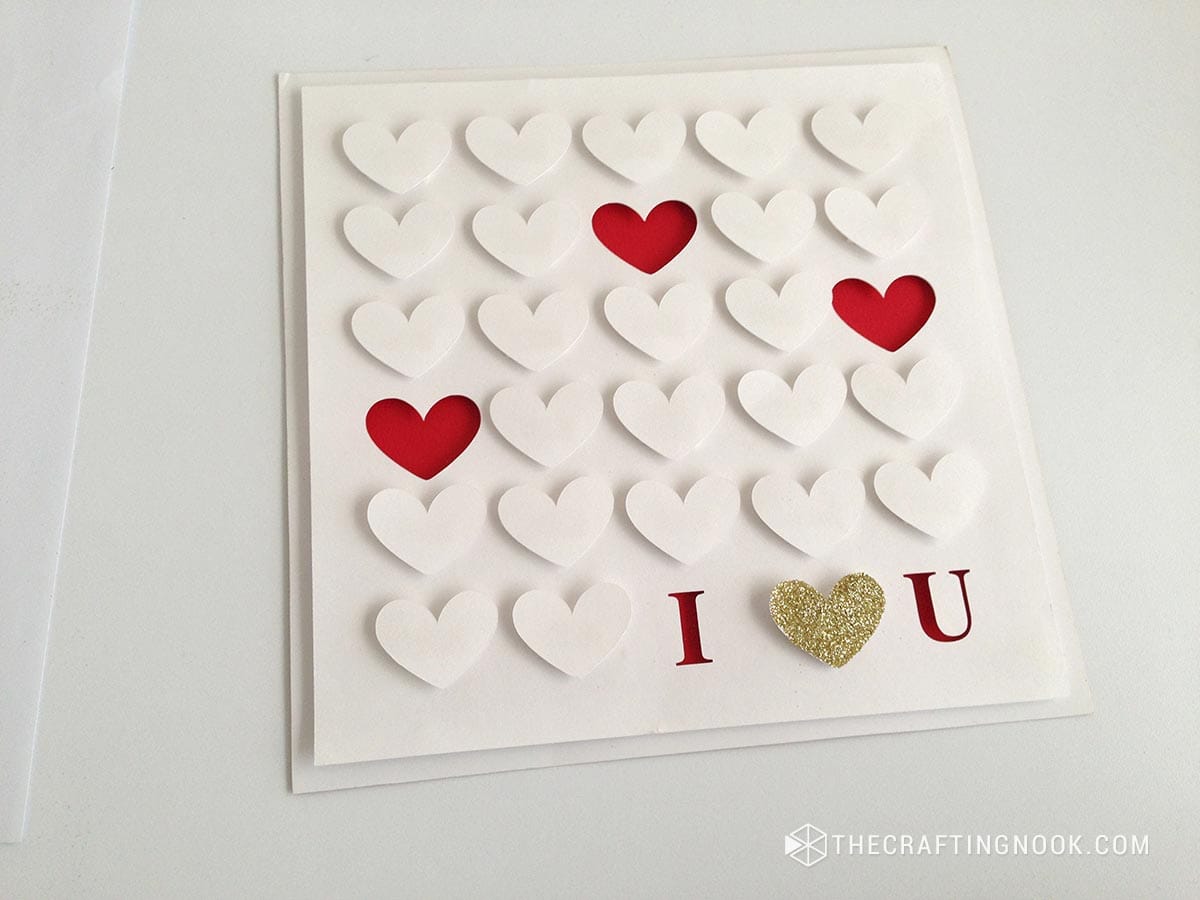
I took my white cut cardstock with the hollow hearts and recreated the design with the cutout hearts to match the original design.
Then using the foam double-sided tape I place each heart in place. I wanted them separated from the base, so used a double layer of tape LOL.
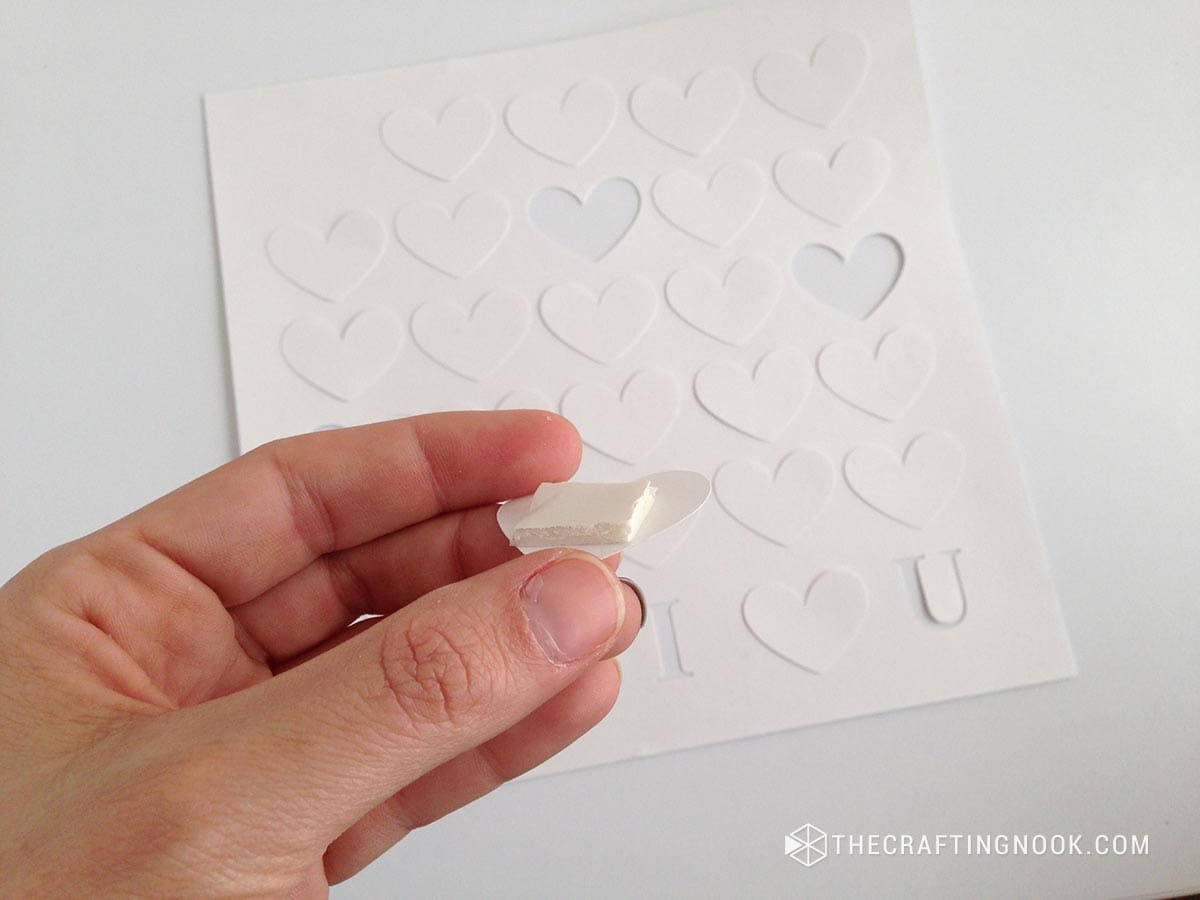
I went one by one making sure they kept them aligned and straight.
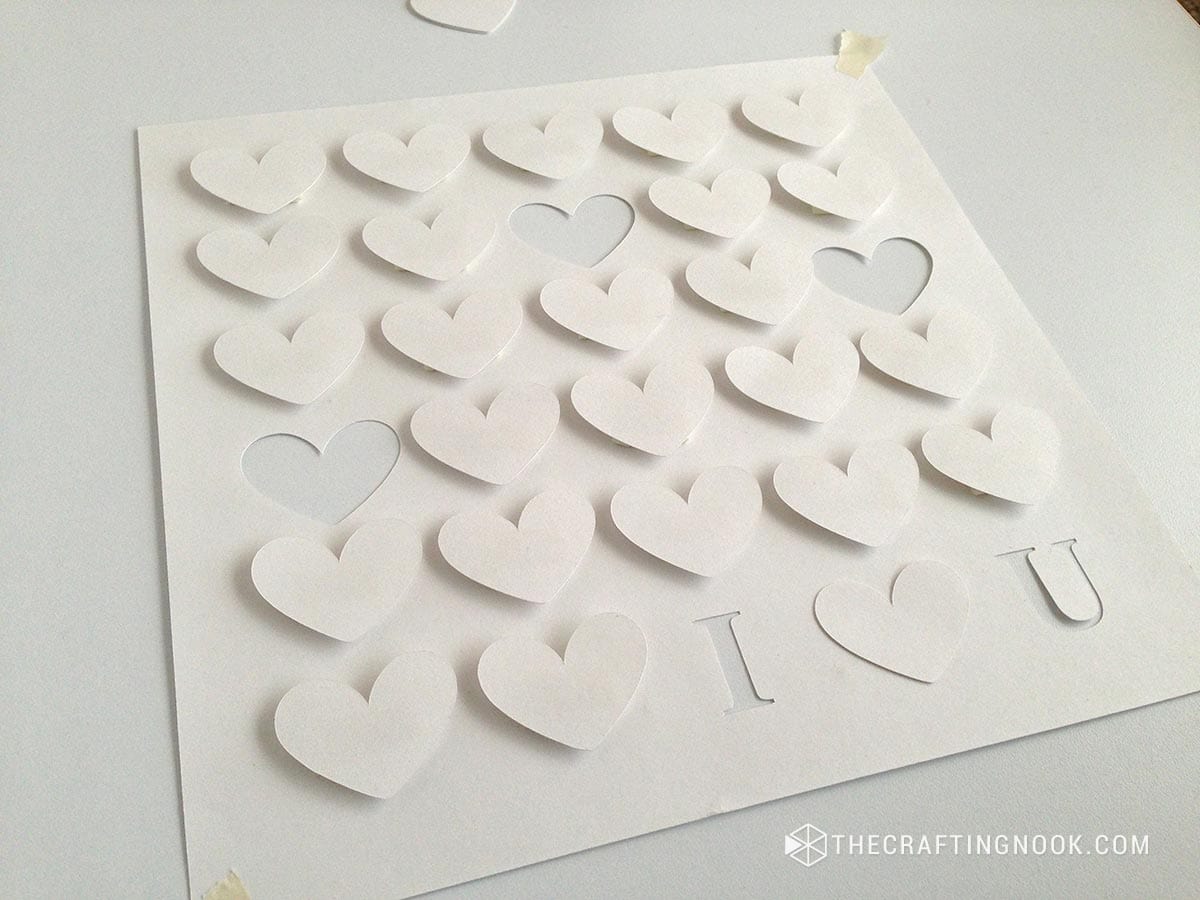
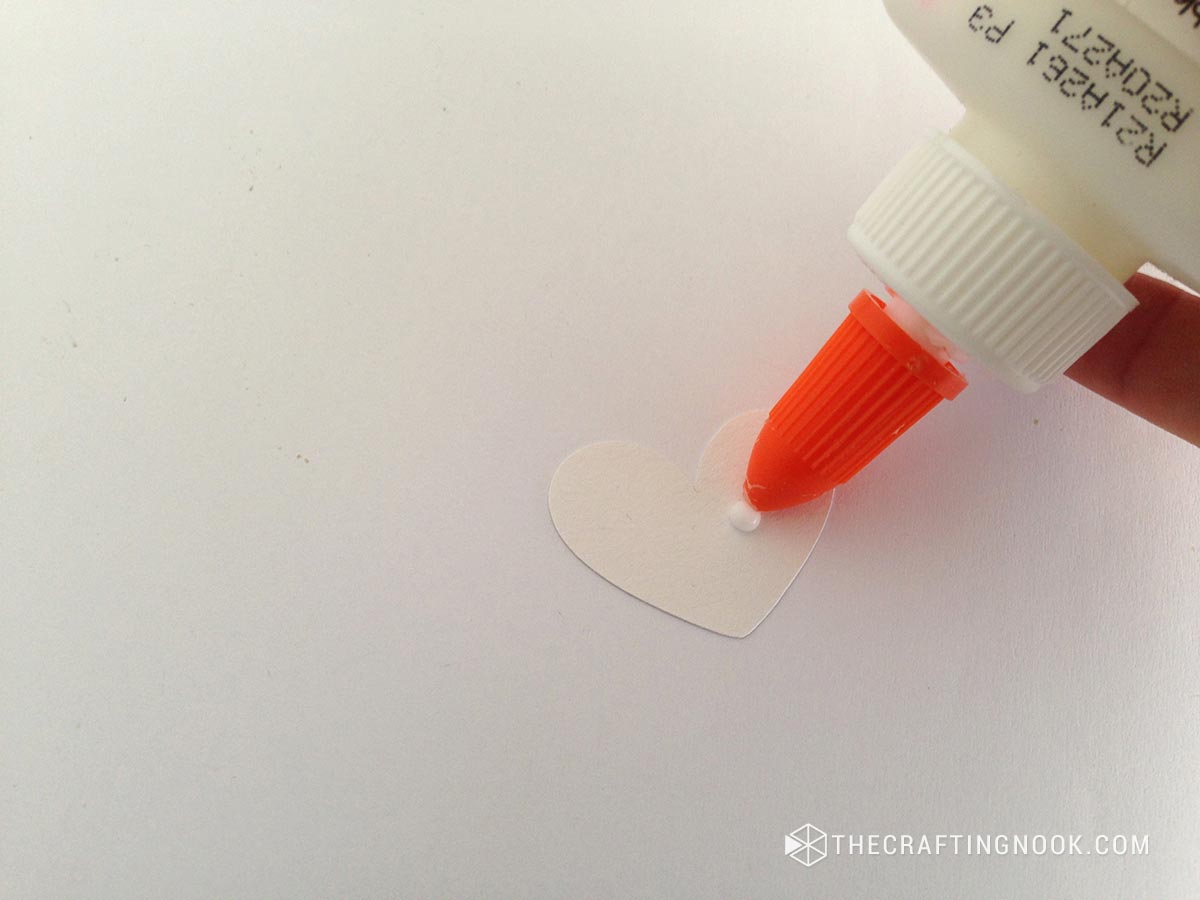
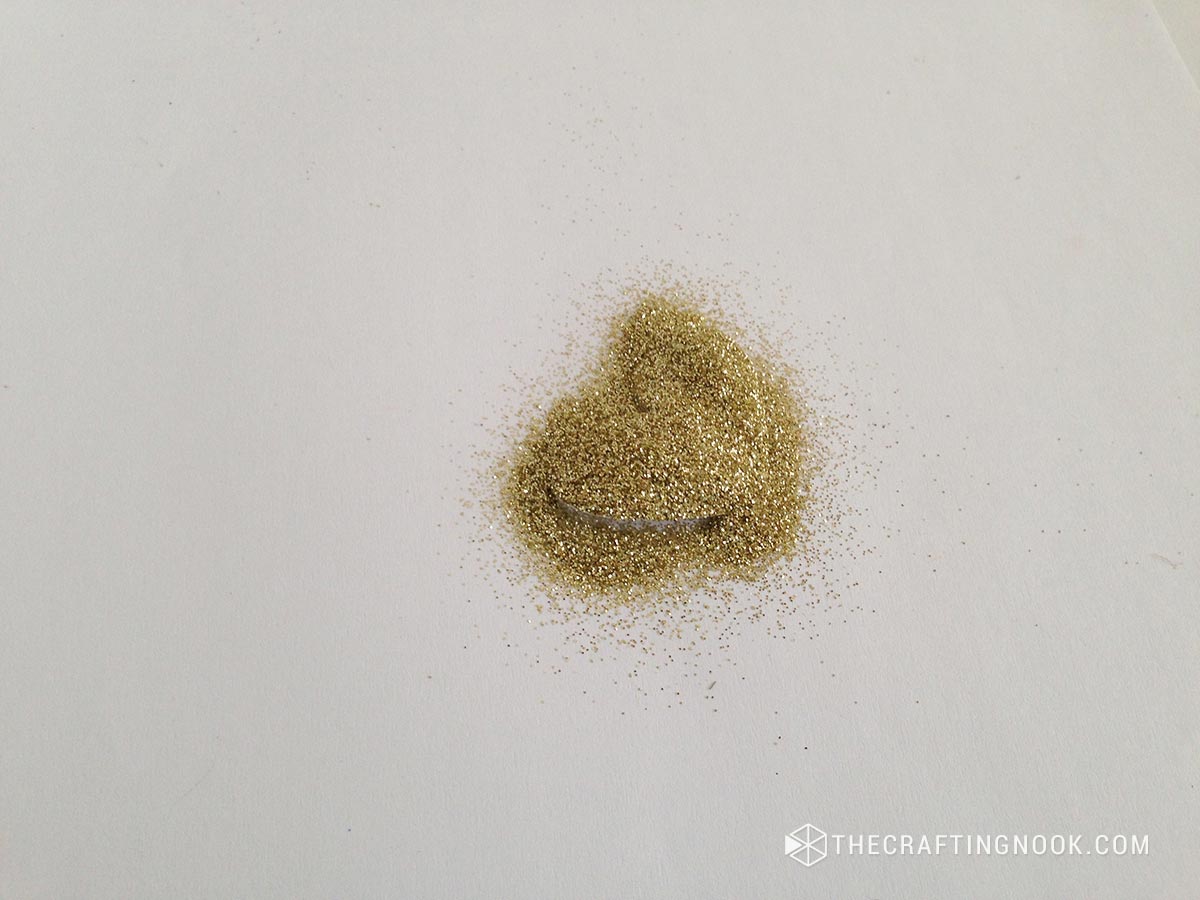
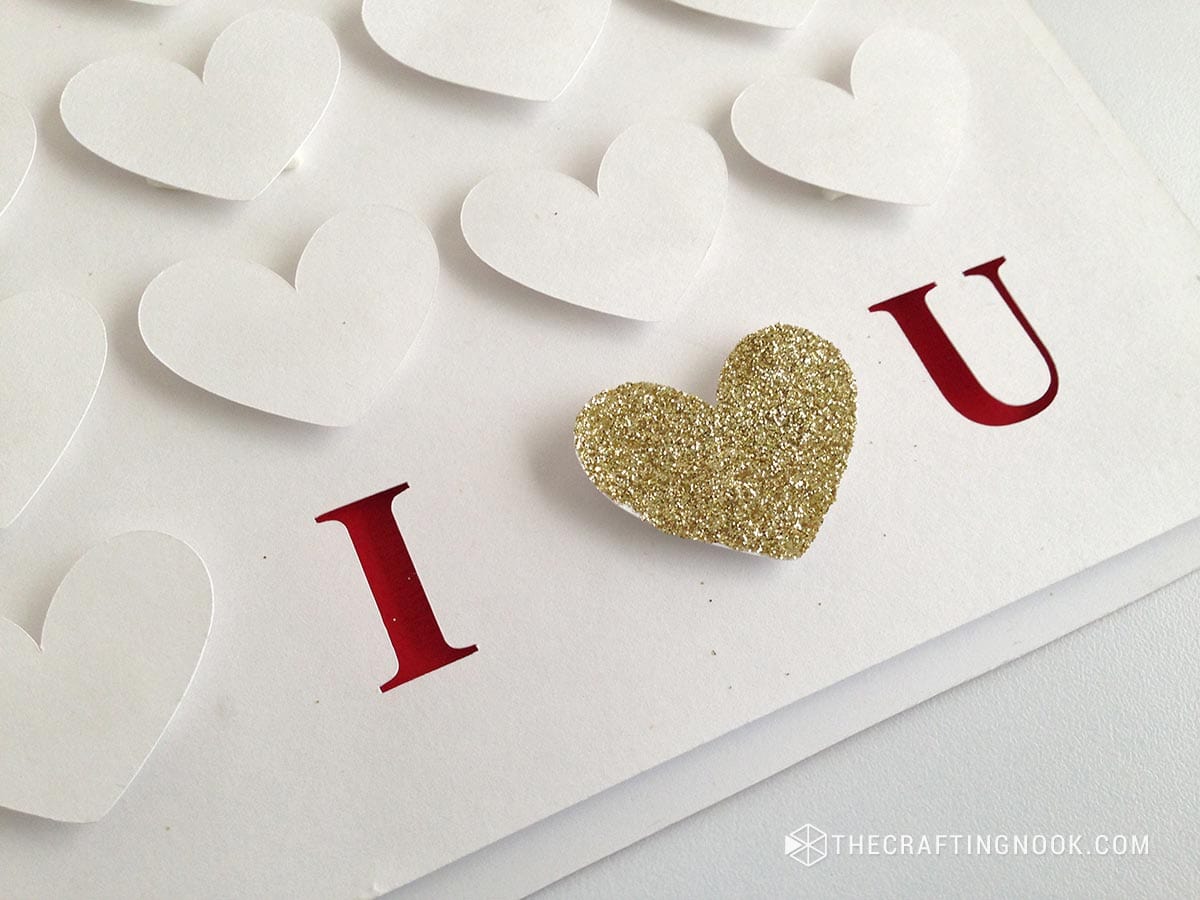
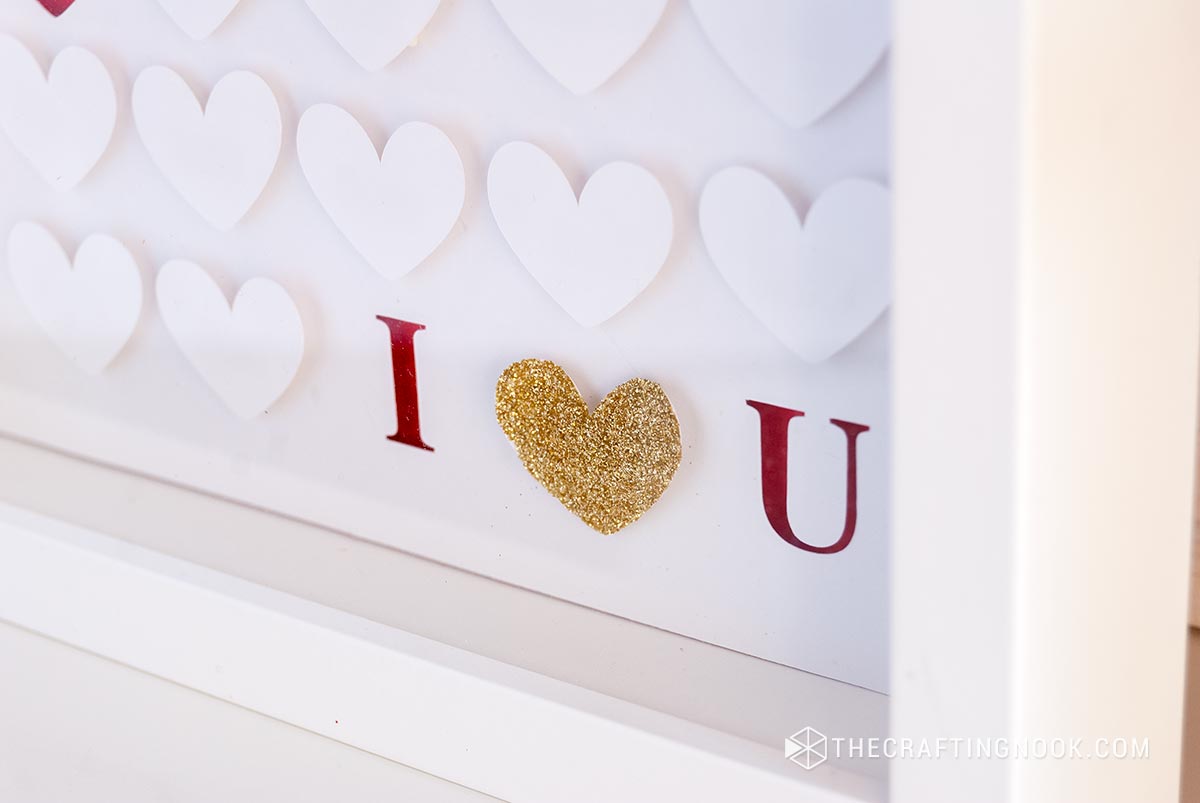
Then for the last heart, I applied regular glue, spread with my fingers, and poured some glitter!!!!!!
I let it dry for a few minutes.
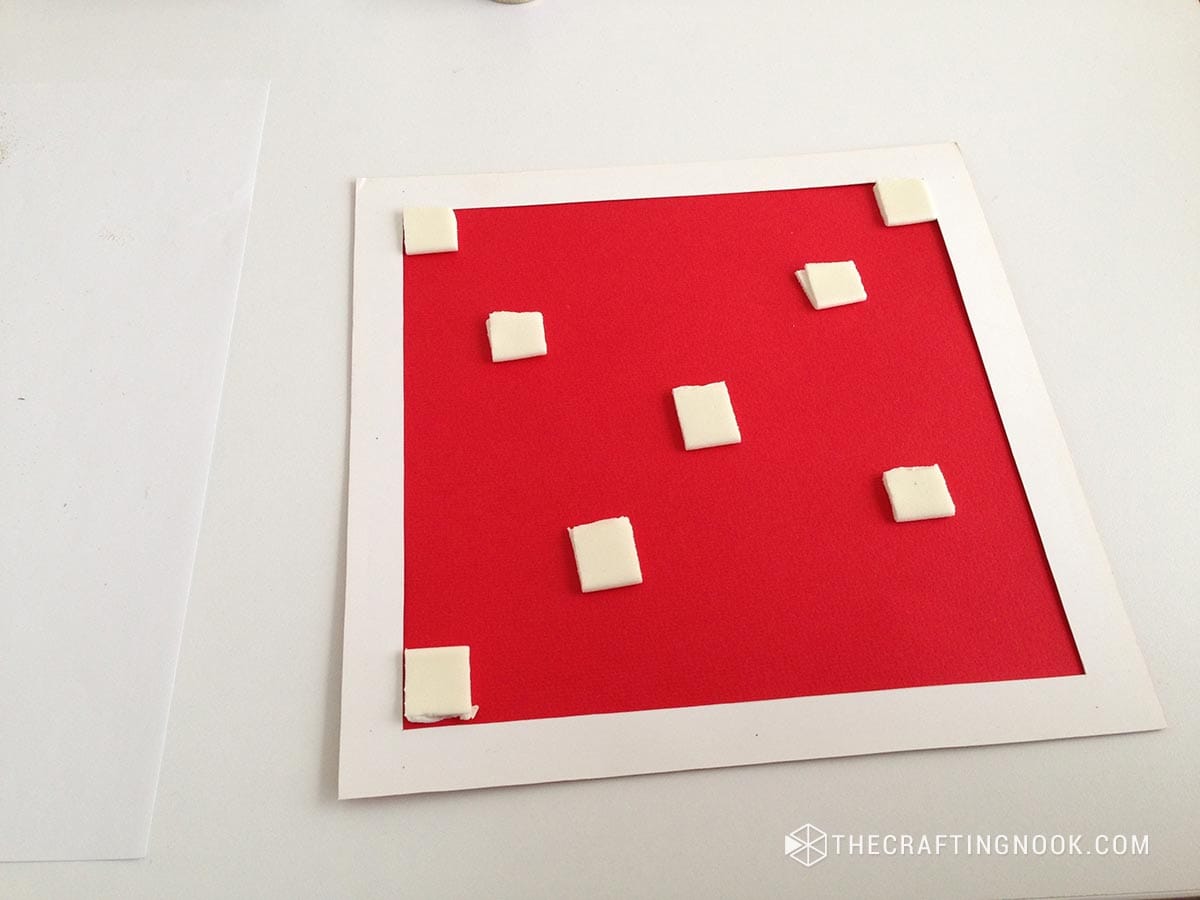
I went back to the red cardstock. Carefully I applied double-sided tape in the corners and different places making sure not to put any tape where the hollow hearts would be.
Again carefully, I placed the heart pattern on top of the red cardstock as centered as possible.
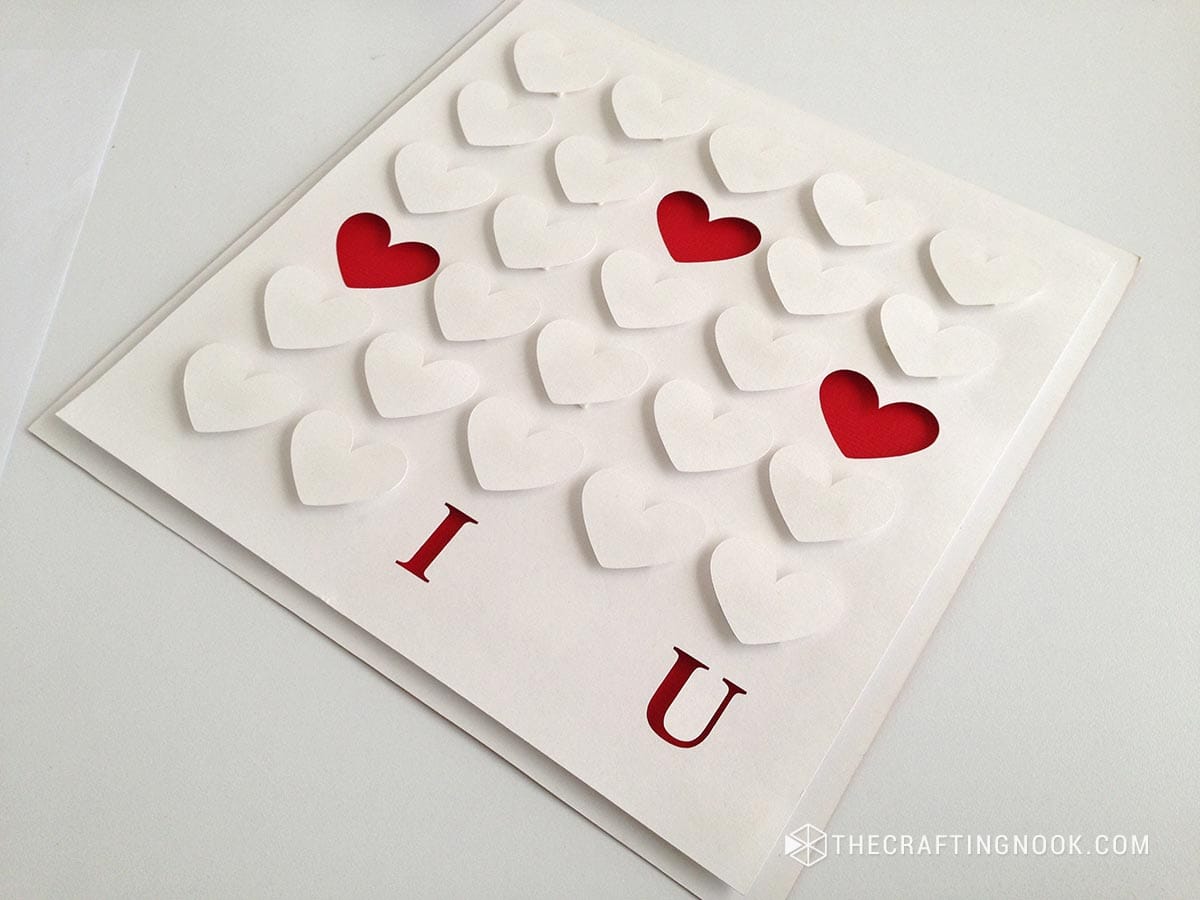
When the gold heart was dry, I applied some foam tape and put it between the “I” and “U”.

The design is ready!!!!
Step 4: Assembling the shadow box
Time to put it in the frame facing down.
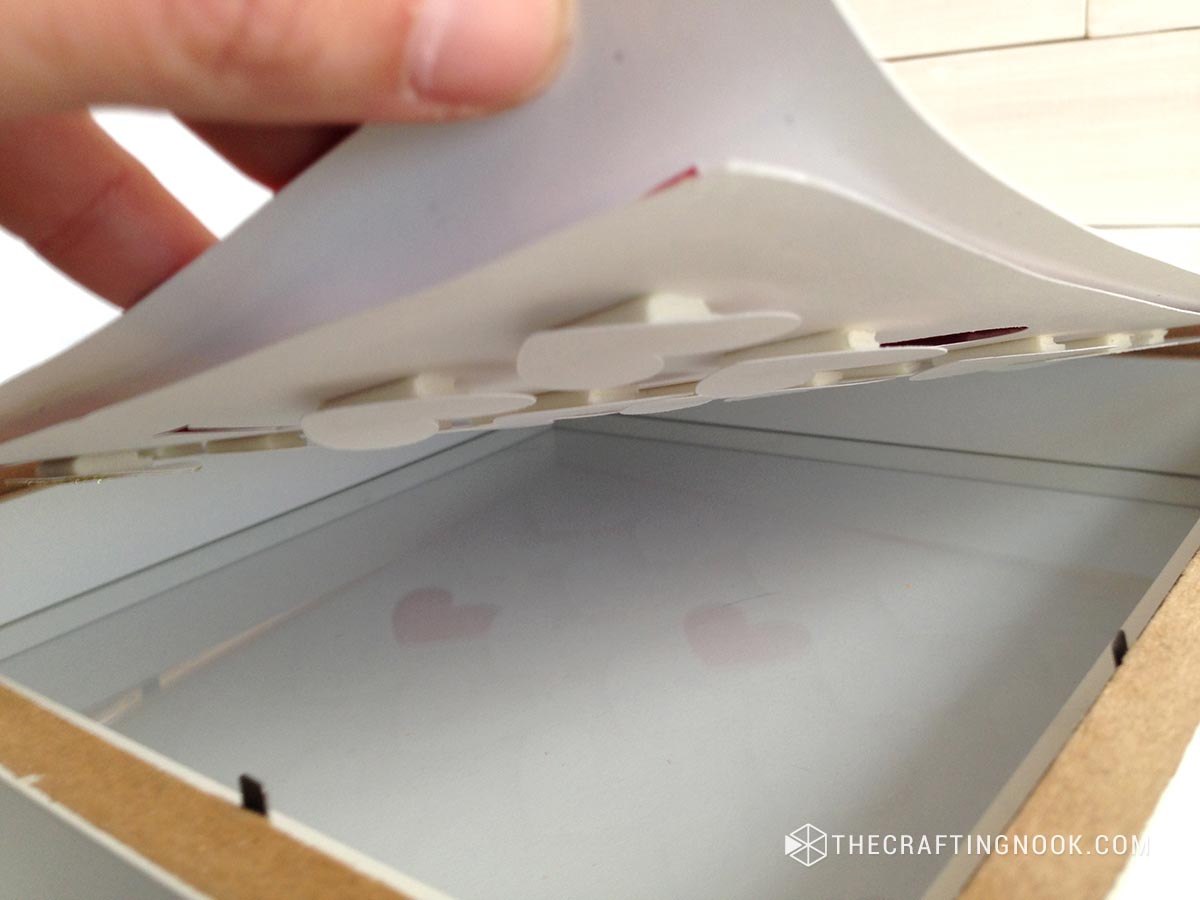
I closed the frame and voila!!!

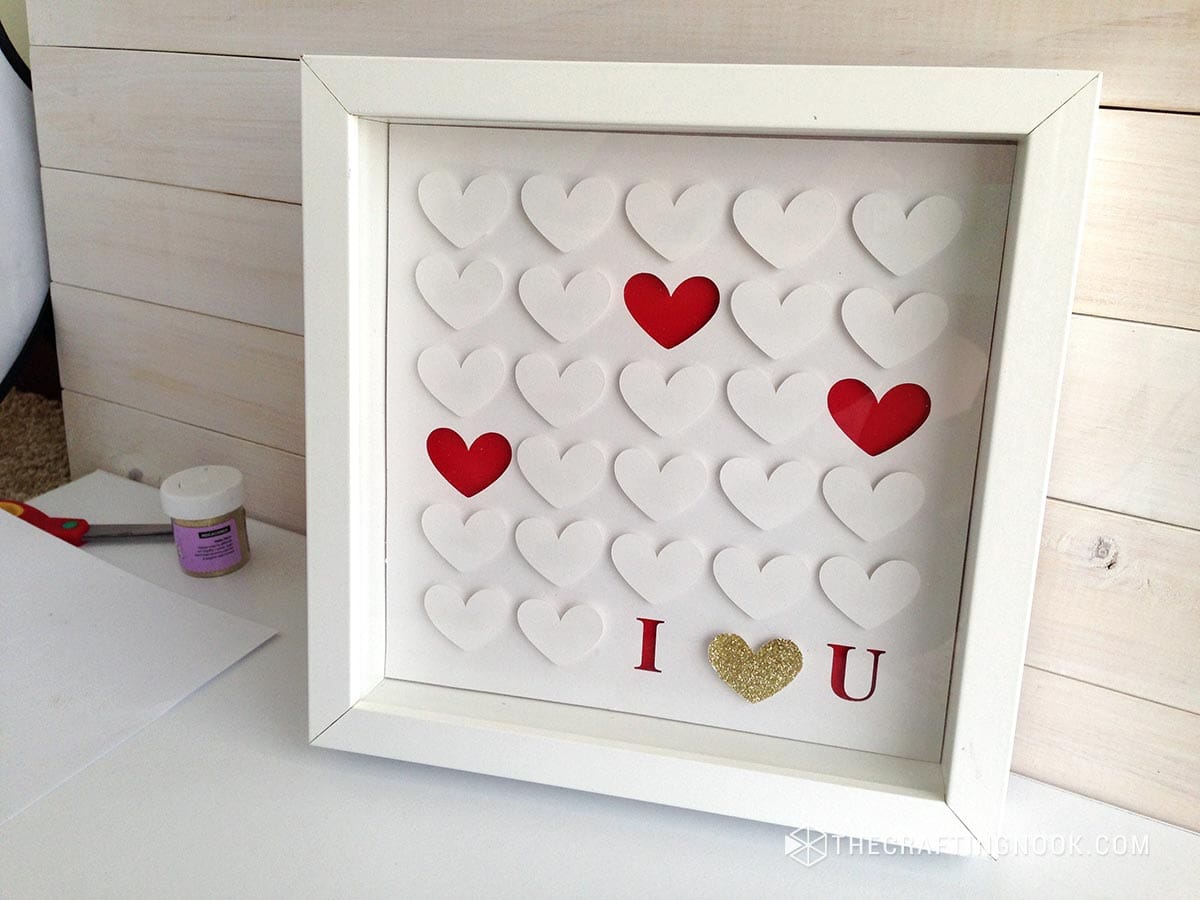
I LOVE how it turned out! It doesn’t take too much to make and it really makes your mantel or any table stand out!
Crafting Tips:
- You could add tiny LED fairy lights between layers or all around the frame for a dreamy touch.
- Consider experimenting with varied heart sizes, not just the typical ones. Play with proportions for a visually dynamic outcome.
- Create a 3D effect by varying the thickness of the foam double-sided tape.

Frequently Asked Questions
I recommend opting for medium-weight cardstock; it strikes the right balance for cutting and layering.
Take your time, use sharp scissors, and make small, precise cuts for intricate details.
Substitute with craft foam squares or layers of cardstock for a similar effect. You can use glue or hot glue.
You can cut by hand with scissors and/or a craft knife. The key is in the patience and making sure these are very sharp and cut carefully.
MORE VALENTINE’S DAY CRAFTS TO TRY
If you like this DIY Paper Heart Shadow Box tutorial, you might also love these other Valentine’s Day project ideas too:


✂️ TUTORIAL
DIY Paper Heart Shadow Box for Valentine’s Day
Tools
- Cutting Machine – Silhouette Cameo or Cricut will work.
- Cutter or Scissors
- A ruler
Supplies
- White cardstock
- Red cardstock.
- Glue and gold glitter.
- Foam double-sided tape.
- A Shadow Box frame.
Instructions
STEP 1: PREPARING THE DESIGN
- The first thing I did was create the design using the frame’s measures.
- I represented the empty hearts as red since that would be the color that would be behind everything.
- I used gold{ish} color to represent the gold glitter heart. And the gray lines for the white hearts.
- I made a copy of the design and converted everything into simple lines, all in black. Remove any grouping or compound path so I can export the design as a .dxf file. This type of file is accepted by Silhouette Studio.
- I opened my Silhouette Studio app and opened the .dxf file.
- I gave the design style again just so I don’t forget what is what.
- Then I divided the design into two. One with all the hearts that would be layered and the other that would have the hollow hearts and the “I” and “U” letters.
- For this last one, I added a squared line with the exact measures of the inner area of the frame.
- *Please keep in mind that these freebies are for personal use only, no commercial purposes are allowed, and neither is copying parts or its total. Enjoy!
STEP 2: SEND TO CUT THE DESIGN
- Load the mat with the chosen cardstock for each layer to the machine.
- Set it up correctly according to the type of cardstock you are using on the Silhouette stucio app.
- Adjust the knife as recommended. If it doesn’t cut properly with recommended settings, adjust as needed.
- Sent to cut one design at a time.
- Look how cute the hearts look!!!!
STEP 3: ASSEMBLING THE LAYERS
- So, ok it’s time to assemble the pieces.
- I cut a frame to use around the red cardstock. This piece should be the same size as the sample page that comes with the frame. Set this aside.
- I took my white cut cardstock with the hollow hearts and recreated the design with the cutout hearts to match the original design.
- Then using the foam double-sided tape I place each heart in place. I wanted them separated from the base, so used a double layer of tape LOL.
- I went one by one making sure they kept them aligned and straight.
- Then for the last heart, I applied regular glue, spread with my fingers, and poured some glitter!!!!!!
- I let it dry for a few minutes.
- I went back to the red cardstock. Carefully I applied double-sided tape in the corners and different places making sure not to put any tape where the hollow hearts would be.
- Again carefully, I placed the heart pattern on top of the red cardstock as centered as possible.
- close view of finished Paper Heart Shadow Box design
- When the gold heart was dry, I applied some foam tape and put it between the “I” and “U”.
- The design is ready!!!!
STEP 4: ASSEMBLING THE SHADOW BOX
- Time to put it in the frame facing down.
- I closed the frame and voila!!!
Hope you like this cute and easy project. Let me know your thoughts in comments!
Share and PIN ME!!!

Til’ next time…


FREE WORKBOOK
Keeping your Sweet Home Organized
Learn how to create intentional habits and simple routines to Keep Your Home Organized. Plus freebies, printables, exclusive content, and tips.
Disclaimer: By clicking on the “Yes” button above you are giving me your consent to collect and use your information according to the law and My Policy Privacy. Zero Spam I promise!
Do you still have the cut file for this still? Its adorable!
Hey there! Tank you so much! Yes, I just fixed the download links!
Kind Regards,
Cami
Soooo pretty! Holly :)
THANK YOU So much!!!!
Hugs
I love your beautiful Valentine’s Day Frame! It is a feature at this week’s Craft Frenzy Friday linky party at Mom Home Guide! Thanks for sharing your frame at our party!
OOOHHH Thank you so so much! I’m honored and so excited!!!!
THANK YOUUUUU
Hugs
This looks really lovely!
Thanks!!! =D
I love it displayed in front of the strung hearts garland. Pretty arrangement!
Thank you so much!!!! I’m so happy you like it!!!
Hugs
I love this!! Such a cute Valentine’s idea! Would love to see you at my craft party which is new Thursdays at 7pm EST. I pin every instruction post! Have a great rest of the week!
Thank you so so much!!!!!
XOXO
Lovely !!!!
Anna
Thank you so much!!!!
Hugs