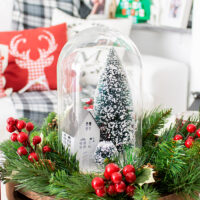
DIY Winter Scene Diy Christmas Cloche Centerpiece
This super cute Winter Scene Diy Christmas Cloche Centerpiece is crazy easy to make, perfect for a night craft, and even involves kids in the activity.
Equipment
- scissors
- Pencil
Ingredients
- A piece of white cardstock about the size of your dome
- Faux snow.
- A small house – I used one from my Christmas Village Tutorial but any house will do.
- Bottle Brush Trees
- Metallic light strings.
- White glue
- Cloche Glass Dome
- Greenery stems
- Berries stems
- A wooden tray.
Instructions
STEP 1: PREP WORK
- Firstly, gather all your supplies, clean your glass dome, and make your paper house (if you decide to go for it).
- The paper house can be found as a cut file to download on my Christmas Village post here if you want to download it and also the full tutorial on how to assemble it. You can also print it out and cut it with a cuter.
STEP2: CREATE THE BASE FOR THE CLOCHE
- Now, get your white cardstock and draw the contour of your dome.
- You need to cut a couple of millimeters towards the center instead of along the line you draw. This is so it fits inside the dome.
STEP 3: SNOW YOUR BASE
- Then apply generously your glue and spread it all over your circle. I used my finger since I love to get my hands dirty LOL. You can use a foam brush if you prefer.
- This is the messy part. Be very gentle or get your whole house full of faux snow LOL. Pour slowly your faux snow over the glue. Cover everything and add some more.
- Very gently and slowly give small taps to press down the faux snow.
- Set it aside and let dry completely.
STEP 4: START CREATING YOUR CLOCHE SCENE
- Once dry, place your snowy circle on your dome base as centered as possible.
- Then style your elements as you like. I started with the trees and then the house.
STEP 5: ADD YOUR LIGHT STRING
- Ok, now here comes the very tricky part (at least for me LOL). The light string!
- I started by the tip (first light bulb/led) since the wire is metallic I bent it so it could go under the paper house.
- Then I started shaping it going around the house and trees until I got only the last string of wire and the battery switch.
- The tricky part is that since the wire is metallic as it moves, it drops things until you get it right. LOL, I did it like 3 times before I got it right.
STEP 6: PUT THE DOME BACK IN PLACE
- When you get your light string in place, it’s time to put in place your glass dome. Do it very carefully as it might touch the string and might move things.
- You are done with the cloche!
- Turn the light on and off and see the magic!!!
STEP 7: PUT TOGETHER THE CENTERPIECE
- The final step is to put some greenery stems around the border of your wooden tray leaving empty the center so you can put your Christmas cloche There. If your greenery is like mine (very fluffy, use small wood blocks, books or boxes to rise your dome a little bit.)
- Then just to add a little pop of color insert a few berries stems among the greenery and your centerpiece is complete.
- I put my Winter Scene Christmas Cloche Centerpiece on my coffee table and placed a candle on each side.