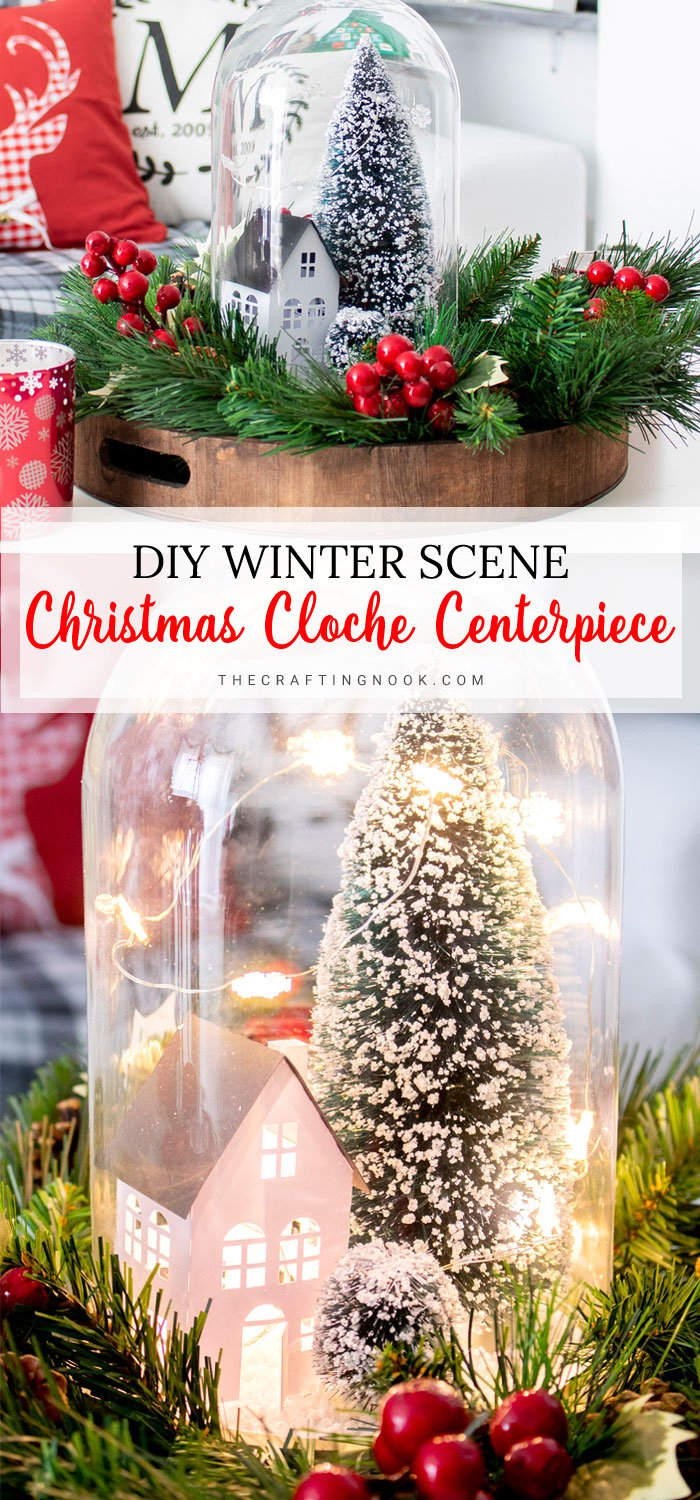
DIY Winter Scene Christmas Cloche Centerpiece
This post may contain affiliate links. Please read our Disclosure Policy.
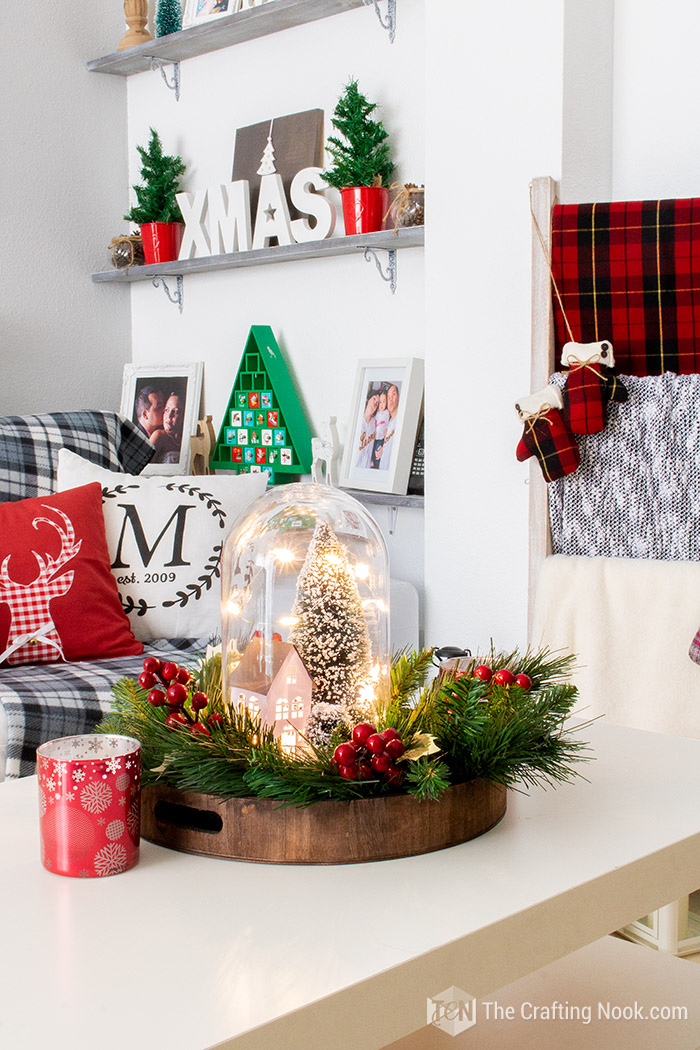
This super cute Winter Scene Diy Christmas Cloche Centerpiece is crazy easy to make, perfect for a night craft, and even involves kids in the activity.
Ok, I know it doesn’t snow where I live but there’s nothing wrong with dreaming of a snowy winter scene, right?
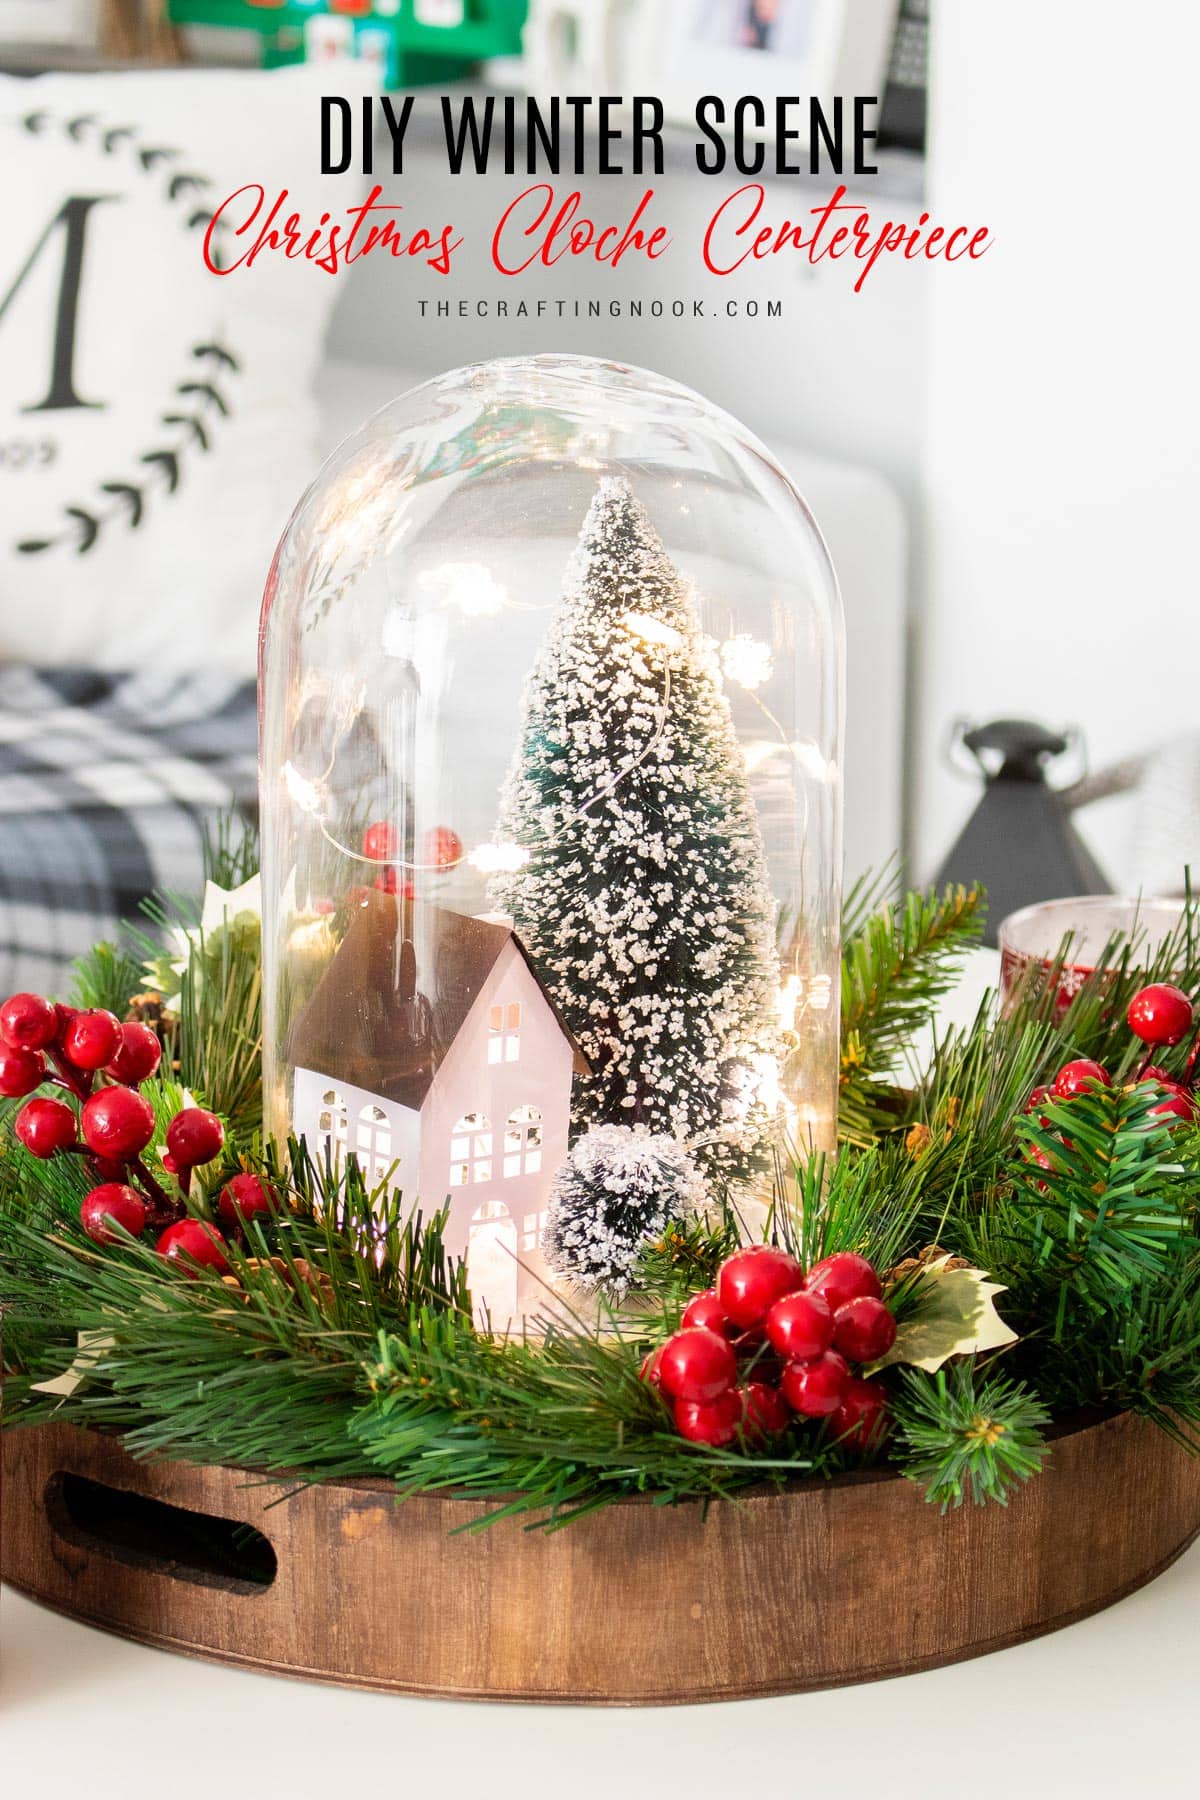
Table of Contents
Winter Scene Christmas Cloche Centerpiece
I’ve had this glass dome for a long time and I’ve wanted to make a Christmas cloche since I bought it! It’s so pretty and elegant.
Winter Scene Cloches have become a decor idea because they can turn anything you put inside them into a gorgeous highlighted decoration. Of course, you can use some for Holiday season decor, too!
I prefer using only winder details and leaving the Christmas touch to the outside of the centerpiece.

Cloches can be used as different kinds of decorations such as centerpieces, mantel, and windowsill decorations or you can just put them everywhere you like throughout the whole home.
The elements used for this Christmas Cloche Centerpiece are usually among your Christmas decorations so it’s probably you don’t need to buy anything except for the glass dome if you don’t have one.
Super easy and fun to make, this Winter Scene Christmas Cloche Centerpiece is a perfect craft to make with kids too. It’s so relaxing. Although the light string is a bit tricky you will have lots of fun with this holiday decor.
The best part is that you might be able to find everything you need at your local dollar store.
How to Make A Christmas Scene Dome
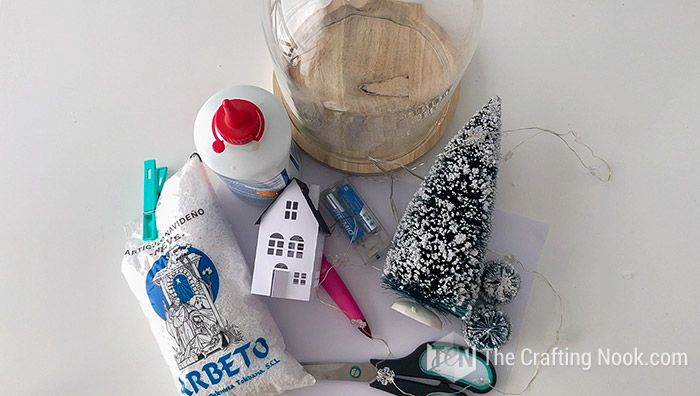
Supplies:
- A piece of white cardstock or cardboard (about the size of your dome)
- Fake snow.
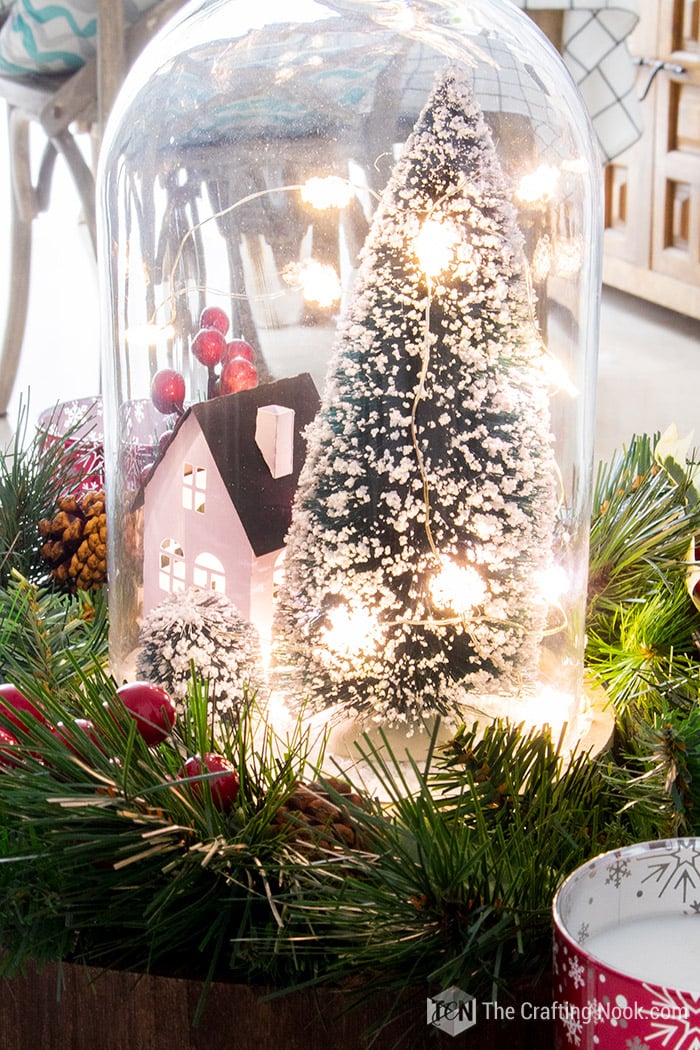
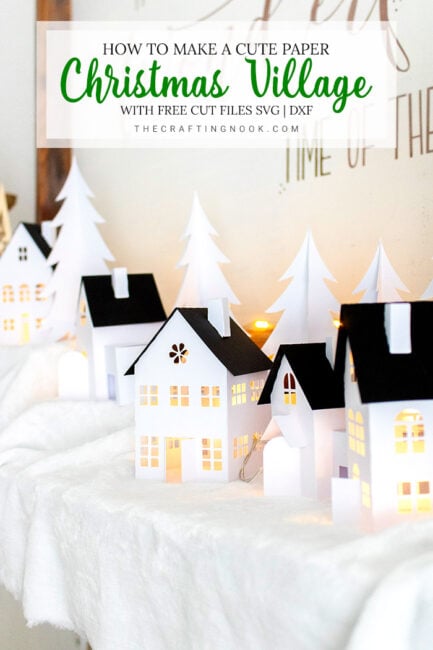
- A small house – I used one from my Christmas Village Tutorial but any house will do.
- Bottle Brush Trees
- Metallic light strings.
- White glue
- Cloche Glass Dome
- Greenery stems
- Berries stems
- A wooden tray.
Tools:
- Scissors
- Pencil
Instructions:
Step 1: Prep Work
Firstly, gather all your supplies, clean your glass dome, and make your paper house (if you decide to go for it).
The paper house can be found as a cut file to download on my Christmas Village post here if you want to download it and also the full tutorial on how to assemble it. You can also print it out and cut it with a cuter.
Step2: Create the Base for the Cloche
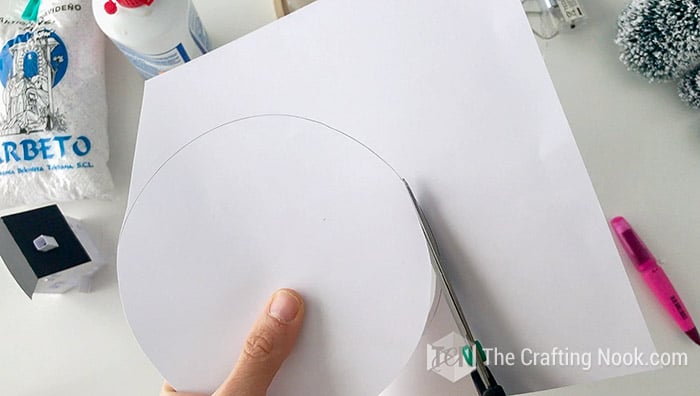
Now, get your white cardstock and draw the contour of your dome.
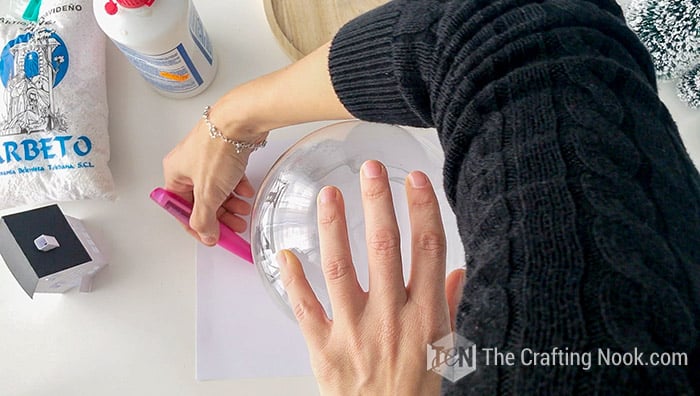
You need to cut a couple of millimeters towards the center instead of along the line you draw. This is so it fits inside the dome.
Step 3: Snow your base
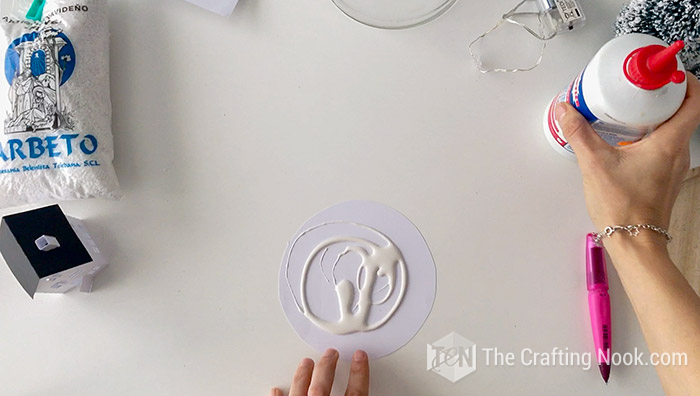
Then apply generously your glue and spread it all over your circle. I used my finger since I love to get my hands dirty LOL. You can use a foam brush if you prefer.
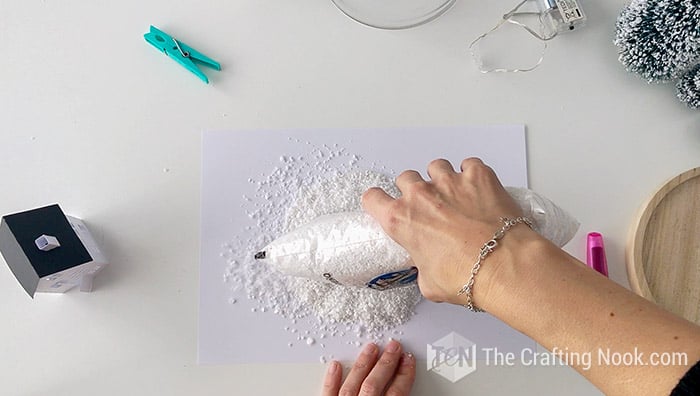
This is the messy part. Be very gentle or get your whole house full of faux snow LOL. Pour slowly your faux snow over the glue. Cover everything and add some more.
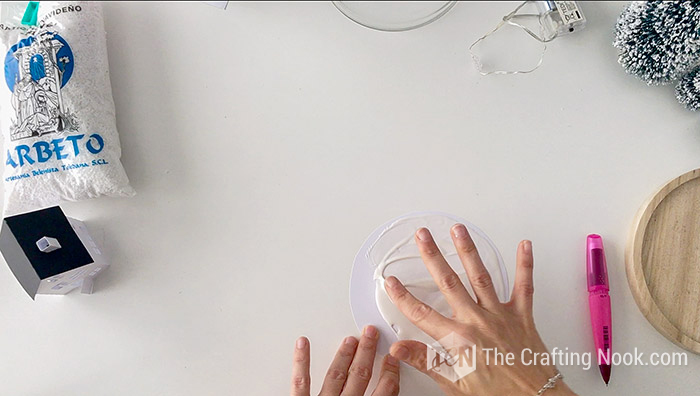
Very gently and slowly give small taps to press down the faux snow.
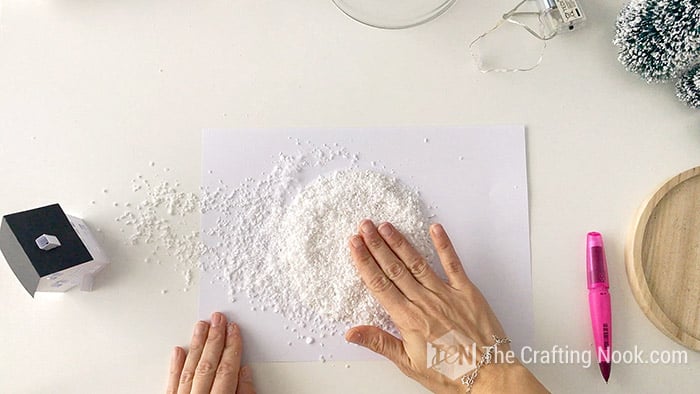
Set it aside and let dry completely.
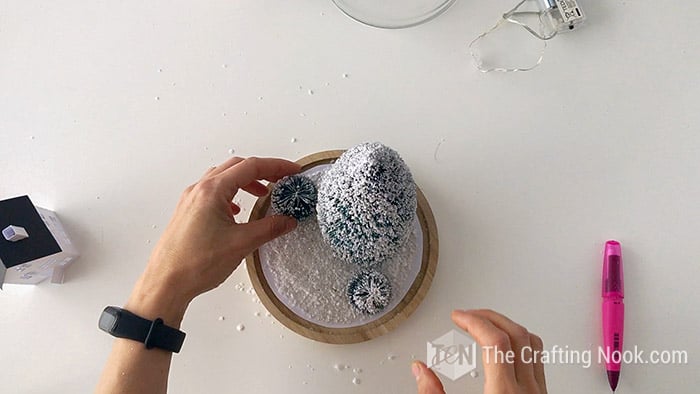
Step 4: Start creating your cloche scene
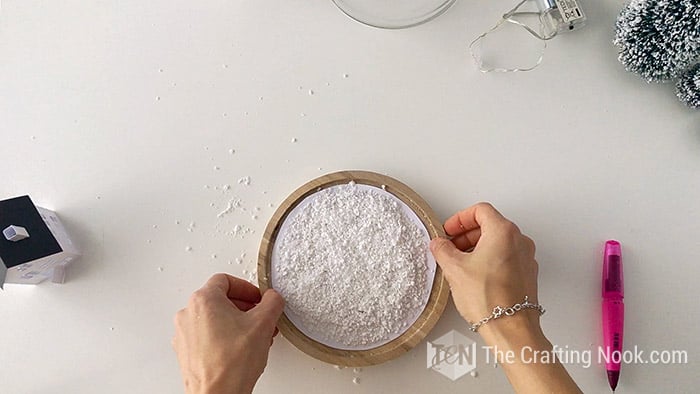
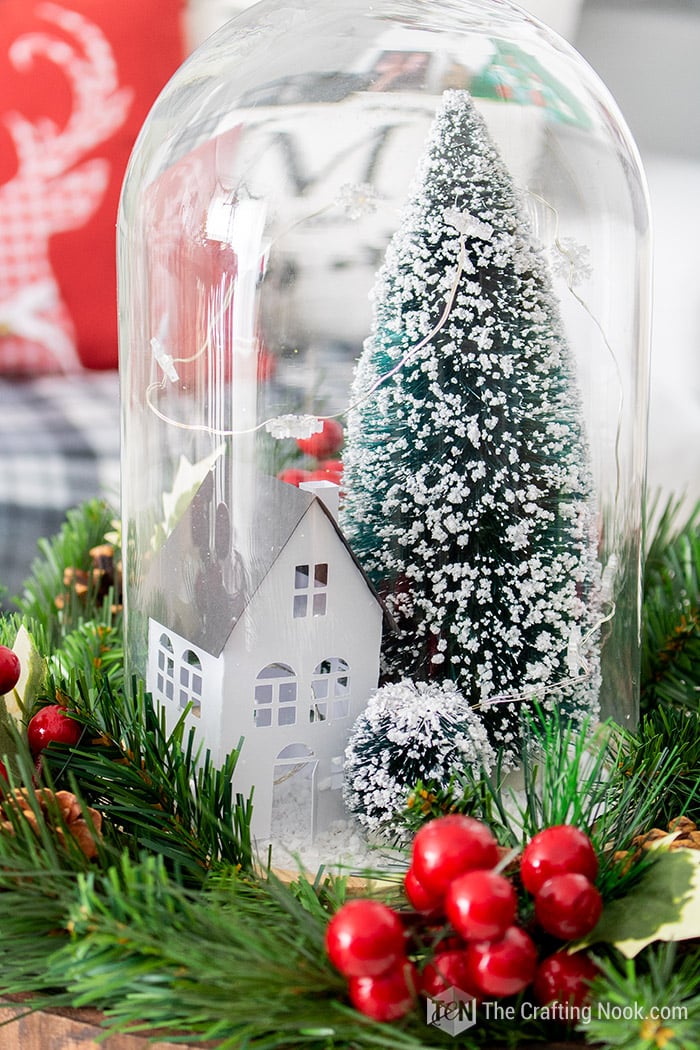
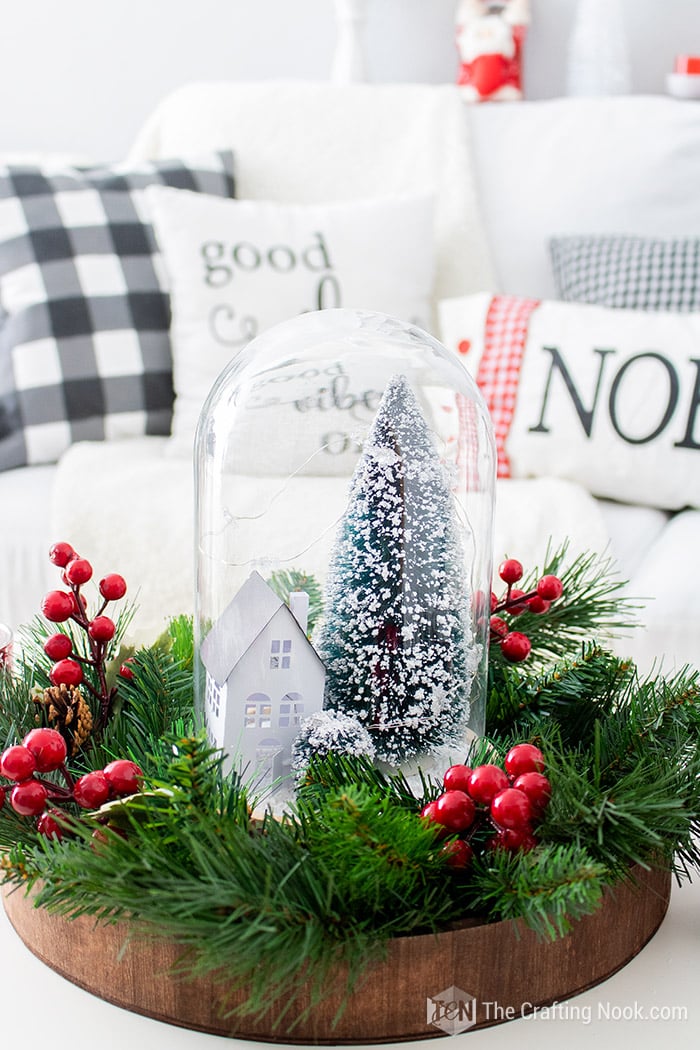
Once dry, place your snowy circle on your cloche base as centered as possible.
Then style your elements as you like. I started with the trees and then the house.
Step 5: Add your light string
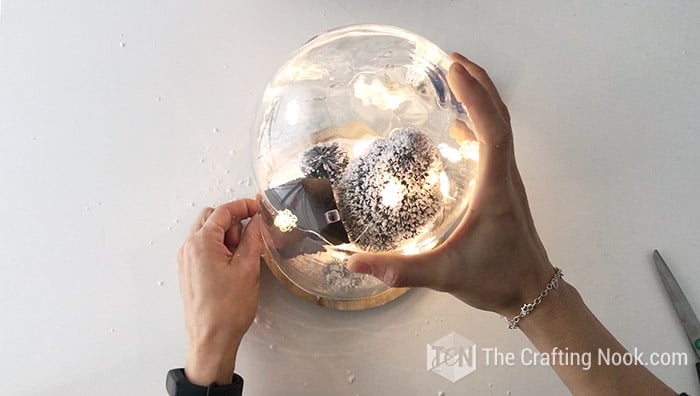
Ok, now here comes the very tricky part (at least for me LOL). The light string!
I started by the tip (first light bulb/led) since the wire is metallic, I bent it so it could go under the paper house.
Then I started shaping it going around the house and trees until I got only the last string of wire and the battery switch.
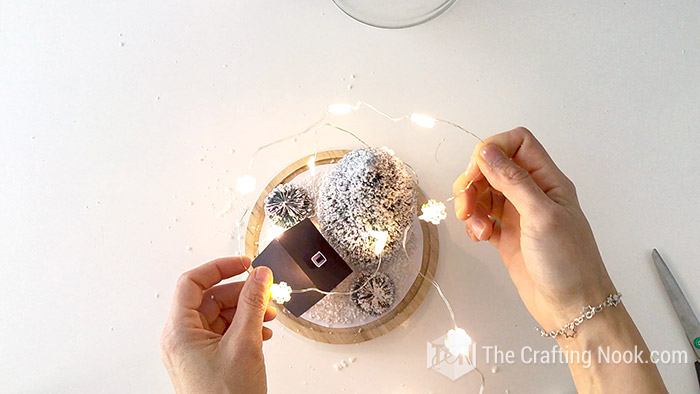
The tricky part is that since the wire is metallic as it moves, it drops things until you get it right. LOL, I did it like 3 times before I got it right.
Step 6: Put the dome back in Place
When you get your light string in place, it’s time to put in place your glass dome. Do it very carefully as it might touch the string and might move things.
When you finish, YAYYYY you are done!
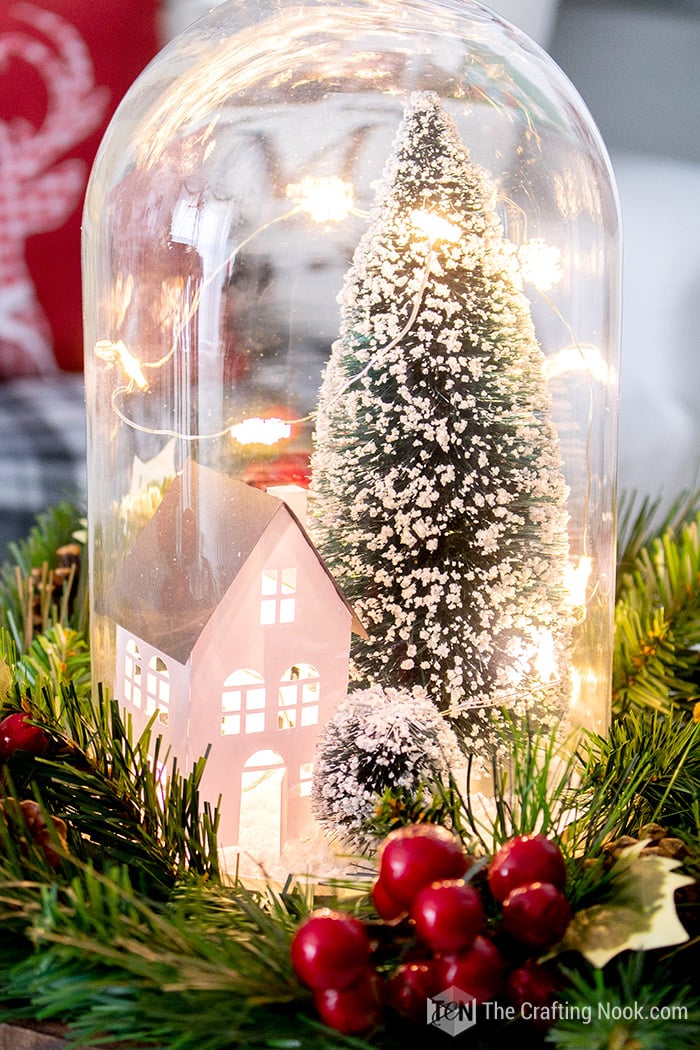
Turn the light on and off and see the magic!!!
How pretty is it? I absolutely love it!!!!
Step 7: Put together the centerpiece
The final step is to put some greenery stems around the border of your wooden tray leaving empty the center so you can put your Christmas cloche There. If your greenery is like mine (very fluffy, use small wood blocks, books or boxes to rise your dome a little bit.)
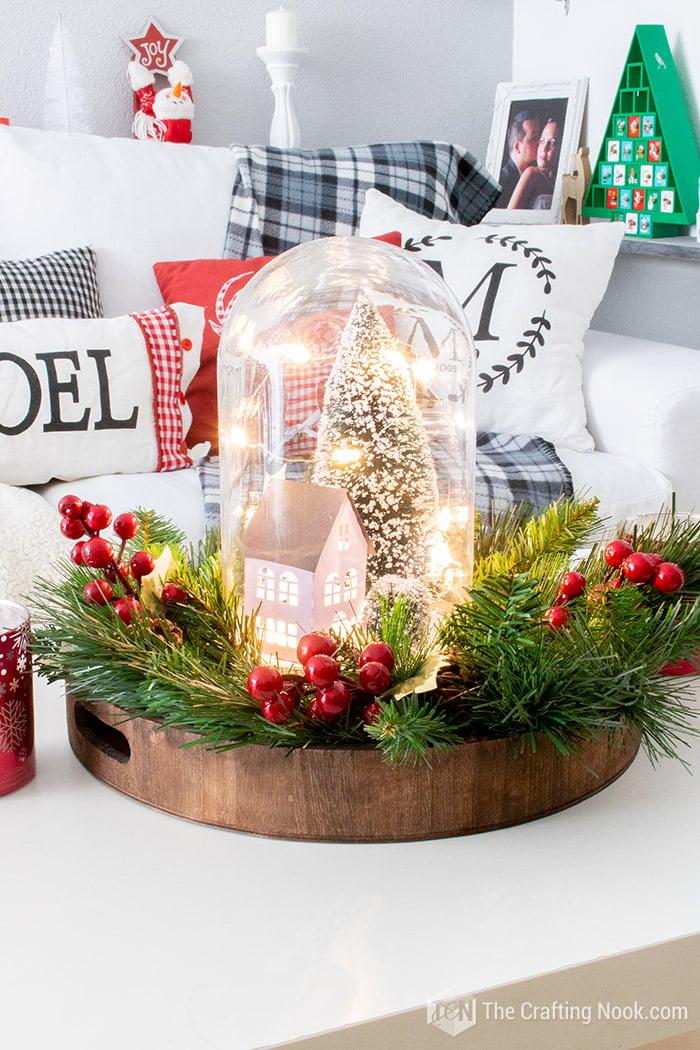
Then just to add a little pop of color insert a few berries stems among the greenery and your centerpiece is complete.
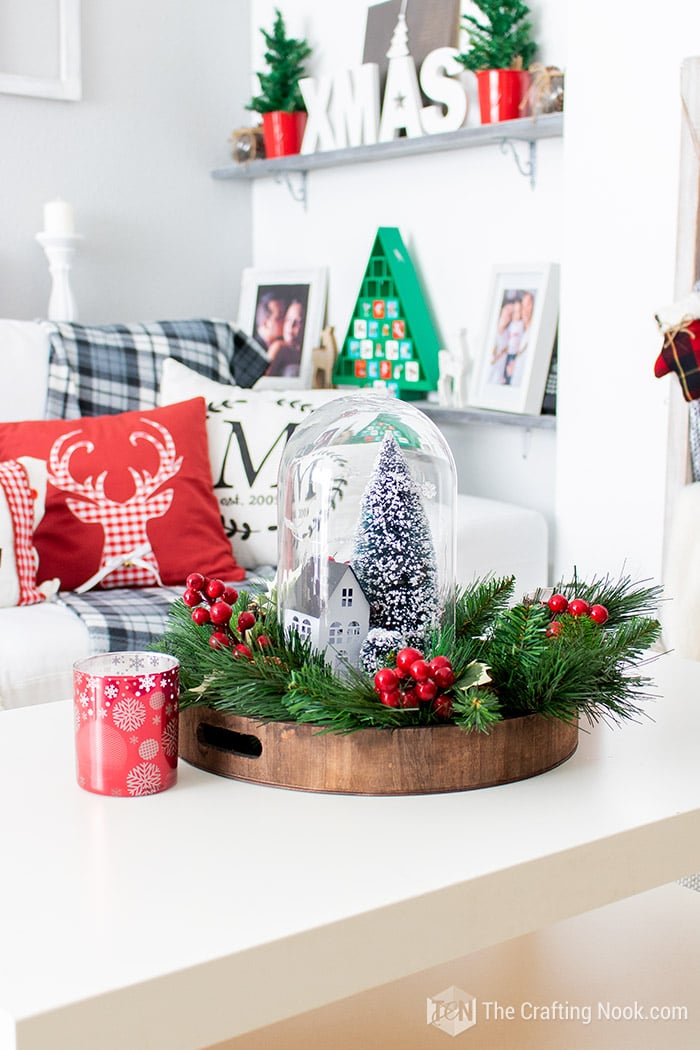
I put my Winter Scene Christmas Cloche Centerpiece on my coffee table and placed a candle on each side. Love how it sparkles.
LOVE it!
What do you think???
Hope you enjoyed today’s cute Christmas cloche project and that it inspires you to create one for yourself.
Frequently Asked Questions
There are so many things you can put in a cloche: artificial snow, assorted ornaments, vintage ornaments, little figurines, bottlebrush trees, pine branches, cute village houses, clay trees, mini Christmas trees, cute reindeer, pinecones, among other ideas.
Besides glass cloches, you can use any glass or plastic containers that are clear, mason jars, domes, canisters or anything similar that is clear glass.
Also, called Bell jars, a cloche – “klōsh” – is a glass domed cover used to protect plants from frost. The word itself is actually French for “bell”, which makes sense given the shape! Back in France, they used these as miniature greenhouses, and outdoor gardeners today may still use them to protect more fragile plants from the cold.
More Christmas Projects to Try
Loving this Christmas Cloche centerpiece tutorial, you might also love these other Christmas project ideas too:

✂️ Tutorial

DIY Winter Scene Diy Christmas Cloche Centerpiece
Tools
- scissors
- Pencil
Supplies
- A piece of white cardstock about the size of your dome
- Faux snow.
- A small house – I used one from my Christmas Village Tutorial but any house will do.
- Bottle Brush Trees
- Metallic light strings.
- White glue
- Cloche Glass Dome
- Greenery stems
- Berries stems
- A wooden tray.
Instructions
STEP 1: PREP WORK
- Firstly, gather all your supplies, clean your glass dome, and make your paper house (if you decide to go for it).
- The paper house can be found as a cut file to download on my Christmas Village post here if you want to download it and also the full tutorial on how to assemble it. You can also print it out and cut it with a cuter.
STEP2: CREATE THE BASE FOR THE CLOCHE
- Now, get your white cardstock and draw the contour of your dome.
- You need to cut a couple of millimeters towards the center instead of along the line you draw. This is so it fits inside the dome.
STEP 3: SNOW YOUR BASE
- Then apply generously your glue and spread it all over your circle. I used my finger since I love to get my hands dirty LOL. You can use a foam brush if you prefer.
- This is the messy part. Be very gentle or get your whole house full of faux snow LOL. Pour slowly your faux snow over the glue. Cover everything and add some more.
- Very gently and slowly give small taps to press down the faux snow.
- Set it aside and let dry completely.
STEP 4: START CREATING YOUR CLOCHE SCENE
- Once dry, place your snowy circle on your dome base as centered as possible.
- Then style your elements as you like. I started with the trees and then the house.
STEP 5: ADD YOUR LIGHT STRING
- Ok, now here comes the very tricky part (at least for me LOL). The light string!
- I started by the tip (first light bulb/led) since the wire is metallic I bent it so it could go under the paper house.
- Then I started shaping it going around the house and trees until I got only the last string of wire and the battery switch.
- The tricky part is that since the wire is metallic as it moves, it drops things until you get it right. LOL, I did it like 3 times before I got it right.
STEP 6: PUT THE DOME BACK IN PLACE
- When you get your light string in place, it’s time to put in place your glass dome. Do it very carefully as it might touch the string and might move things.
- You are done with the cloche!
- Turn the light on and off and see the magic!!!
STEP 7: PUT TOGETHER THE CENTERPIECE
- The final step is to put some greenery stems around the border of your wooden tray leaving empty the center so you can put your Christmas cloche There. If your greenery is like mine (very fluffy, use small wood blocks, books or boxes to rise your dome a little bit.)
- Then just to add a little pop of color insert a few berries stems among the greenery and your centerpiece is complete.
- I put my Winter Scene Christmas Cloche Centerpiece on my coffee table and placed a candle on each side.
Some of my favorite Christmas Home Decor from my favorite Bloggers:
- Cozy Farmhouse Christmas Home Tour at Night by Kristi over at Making it in the Mountains.
- A Farmhouse Cottage Christmas Home Tour by Bree over at Rain and Pine.
- Silver and Grey Classic Christmas Tour by Kelly over at The Lily Pad Cottage
Share and PIN ME
Til’ next time…


FREE WORKBOOK
Keeping your Sweet Home Organized
Learn how to create intentional habits and simple routines to Keep Your Home Organized. Plus freebies, printables, exclusive content, and tips.
Disclaimer: By clicking on the “Yes” button above you are giving me your consent to collect and use your information according to the law and My Policy Privacy. Zero Spam I promise!