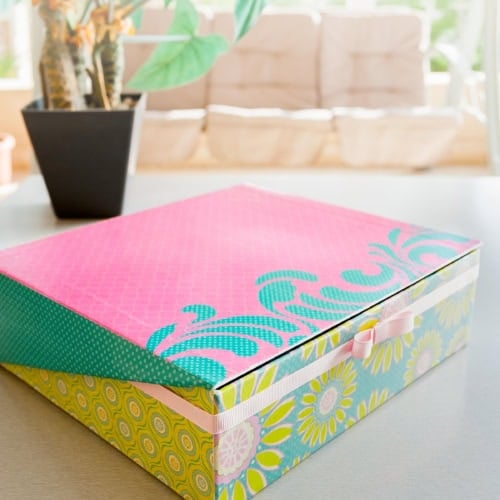
How to Mod Podge a Box with Scarpbook Paper
Learn how to Mod Podge a box with scrapbook paper in this easy DIY tutorial! Turn old boxes into stylish storage with a few simple steps.
Equipment
- scissors
- Hot glue gun and glue sticks
Ingredients
- A box – New or reused
- Scrapbook paper – or any pretty paper you have
- Mod Podge
- Foam brushes
- Ribbon optional
Instructions
- Firstly, start with the sides of the box. Add a layer of Mod Podge to one side of the box and line up the paper. With a scrapper make sure you remove air bubbles and the paper lays flat without any wrinkles. Continue the process all the way around the box.
- I usually cover 2 opposite sides first leaving a flap about an inch to fold them to the next side. And then I cover the other two sides with the paper in the same size as the space with no flaps.
- Then, leave about an inch of paper to fold to the inside of the box making sure every side is the same size so it looks nice.
- Using different but coordinated scrapbooking papers, it’s easy to make it fun and colorful.
- Next, when all the sides are covered, cover the top of the lid without a flap.
- Then go for the bottom. I just used plain white cardstock but you can use the paper you like the most.
- Let everything dry 30 minutes.
- Once you have the box and the lid ready, it’s time to seal.
- Apply a layer of mod podge on both the box and lid. I recommend using a cup or something to support the box and lid upside down so they can dry without touching anything.
- Let everything dry for about 2 hours or overnight.
- Lastly, I added the final touch: a cute pink ribbon and a simple bow. Starting on the back, about an inch from the edge of the box (or on the middle of the lid sides), apply hot glue in sections and glue the ribbon as straight as possible. Continue until you meet the other end of the ribbon on the back.
- On the front of the box glue the ribbon bow on the center of the ribbon.
- Since the inside was already all white I left it as it was. Depending on the purpose you are giving it, you could cover the inside of the box with felt so what you store, is safer.
- There you go! Your cute upcycled mod podge box is ready. You can use it for a number of things. Jewelry, craft supplies, important memories.
Notes
You probably notice this box has a particular shape, but the steps I’m explaining here work for common boxes just the same.