How to Paint an Upholstered Chair (an easy way)
Give your old chair a fresh new look! Learn how to paint an upholstered chair the easy way with chalk paint—I assure you, you don’t need reupholstery skills, primise!
Ingredients
- An Old Upholstered Chair – or even better one you have sitting around the house}
- Chalk Paint – I used Annie Sloan Old White for the chair and Annie Sloan French Linen for the upholstery
- Annie Sloan Clear Wax
- Paint Brush – I used a 2inch brush
- Wax Brush
- Fine grit sandpaper or Sanding Sponge
Instructions
Step 1: Prep the Chair
- Start by thoroughly cleaning the chair. Remove any dust, dirt, or grime from the frame and crannies and wipe any dust from the surface of the fabric. This will help the paint adhere better. If the fabric has any stains, try to spot clean them as much as possible.
Step 2: Paint the Chair Frame
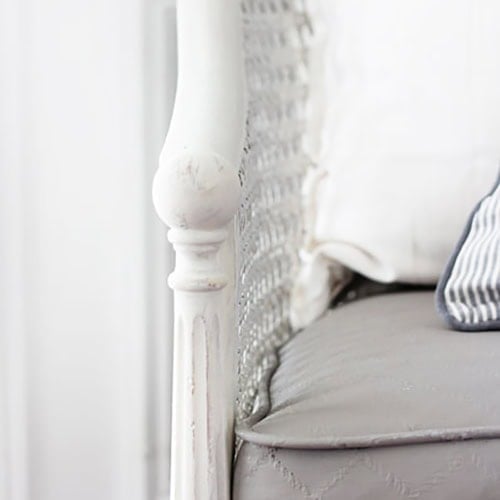
- All I did on the chair itself was take off the cushion and give the whole upholstered chair 2 coats of Annie Sloan Old White chalk paint and made sure to get every nook and cranny.
- You might need to bring out the painter’s tape for this part. I did end up dripping a few drops on the upholstery but I didn’t sweat it since I was going to paint the upholstery anyway.
- Let it dry for a few hours.
- The beauty of chalk paint is that you don’t really have to have a great painting technique. With chalk paint you’re going to see brush strokes, and that is ok. I think it adds to the character especially with older pieces.
Step 3: Apply Clear Wax
- After letting the chair dry (another great thing about chalk paint is it dries really fast) I gave the whole chair one coat of Annie Sloan clear wax to give it a more durable finish.
Step 4: Painting the Upholstery
- Then I took the cushion and started painting the upholstery. I was super nervous, but kept thinking the chair was only $15!
- I did take the cushion off the chair to paint it on the top side but I had horrible lighting in my garage, so for the back side I just flipped it over and painted it in the house so I could get a better photo for you all!
- So, when you try this make sure you take off the cushion and paint all sides. You might have to let dry some parts to move on to the next ones but like I said, this paint dries really fast.
- After the first coat I was a little worried since it was such a light coat and the design on the cushion was bleeding through…a lot, but after the second coat I was good to go..it was like magic!
- I let it dry for several hours.
Step 5: Distress for a Vintage Look (Optional)
- The chair was already starting to really come to life and I was already happy with the way it was turning out. But in order to give it even more of a vintage look I decided that after the chair was painted and fully dried I would distress it a bit with a sanding sponge.
- I have used many different techniques to distress or age furniture, but sandpaper is usually my go-to. The key is to pick areas where you feel the piece would naturally get worn over time. Edges are always a safe bet. Make sure not to be too rough with it, lightly go over the edges to give it a natural distressed look.
Step 6: Styling Your New Chair
- So after the painting and distressing, it was time for a little styling!
- When I was walking through Ikea on a mission to find something else I came across a couple of pillows that I thought would be perfect. I snagged them up along with a couple of pillow inserts and got to prettying (is that even a word?!) it up!
- Nothing says vintage farmhouse like a pretty French ticking pillow cover! I mix my pillows up often so not sure how long these two will stay here, but I really am loving them together in the space.
- Enjoy!