How to Paint an Upholstered Chair (an easy way)
This post may contain affiliate links. Please read our Disclosure Policy.
Give your old chair a fresh new look! Learn how to paint an upholstered chair the easy way with chalk paint—I assure you, you don’t need reupholstery skills, promise!
I’m so excited to welcome Holly from Life on Southpointe Drive to The Crafting Nook! Holly has an incredible talent for transforming everyday items into beautiful, one-of-a-kind pieces, and today she’s sharing one of her creative DIYs with us. If you’ve ever looked at an old upholstered chair and thought, “I wish I could give this a fresh new look,” then you’re in the perfect place! Holly will show you an easy way to paint an upholstered chair using chalk paint. So grab your old furniture, paint and brushes and let’s get inspired together!

Table of Contents
Painting Upholstery With Chalk Paint
Hey there The Crafting Nook readers! I’m Holly, I blog at Life on Southpointe Drive and I’m so excited to be guest posting today!
My passion is DIY and Home Decor and over at my blog, Life on Southpointe Drive, my goal is to inspire others to DIY the home of their dreams! I constantly have about three projects going on at any given time at my house and I just finished up one that I hope you’re going to love.
Today I am sharing with you How to Paint an Upholstered Chair!
I know you’re probably thinking…paint fabric?! That is the same thing I used to think until I was introduced a few years ago to the amazing chalk paint! It is usually my go-to for furniture projects and I love everything about it!
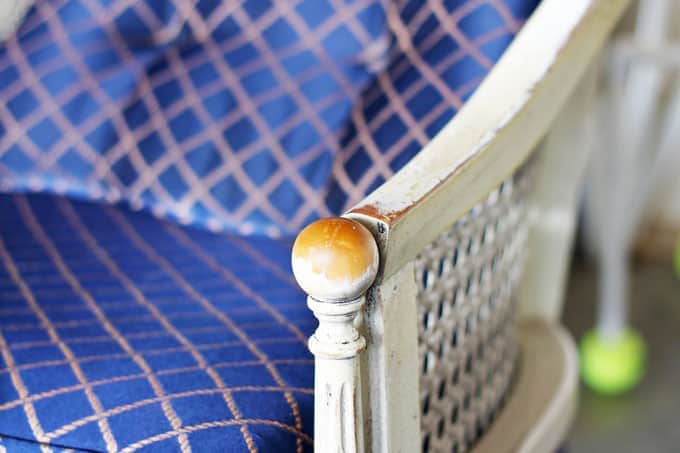
Something that has been on my list of things to learn how to do is reupholstery, but I’m not there yet…far from it! So when my mom found this old caneback chair at a thrift store for $15, I knew I had to do something to bring it back to life that didn’t involve reupholstering.
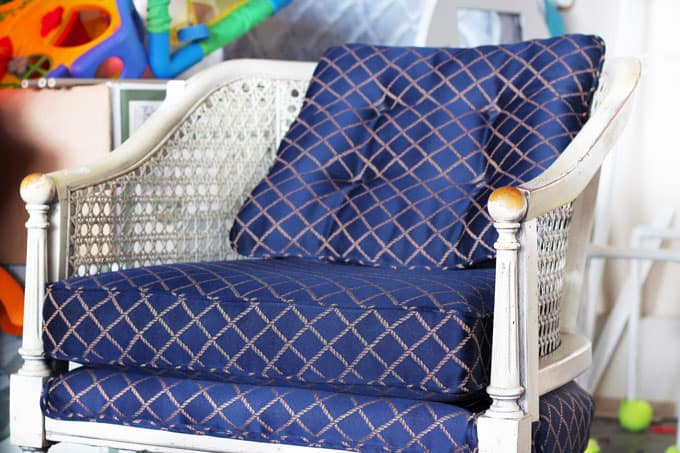
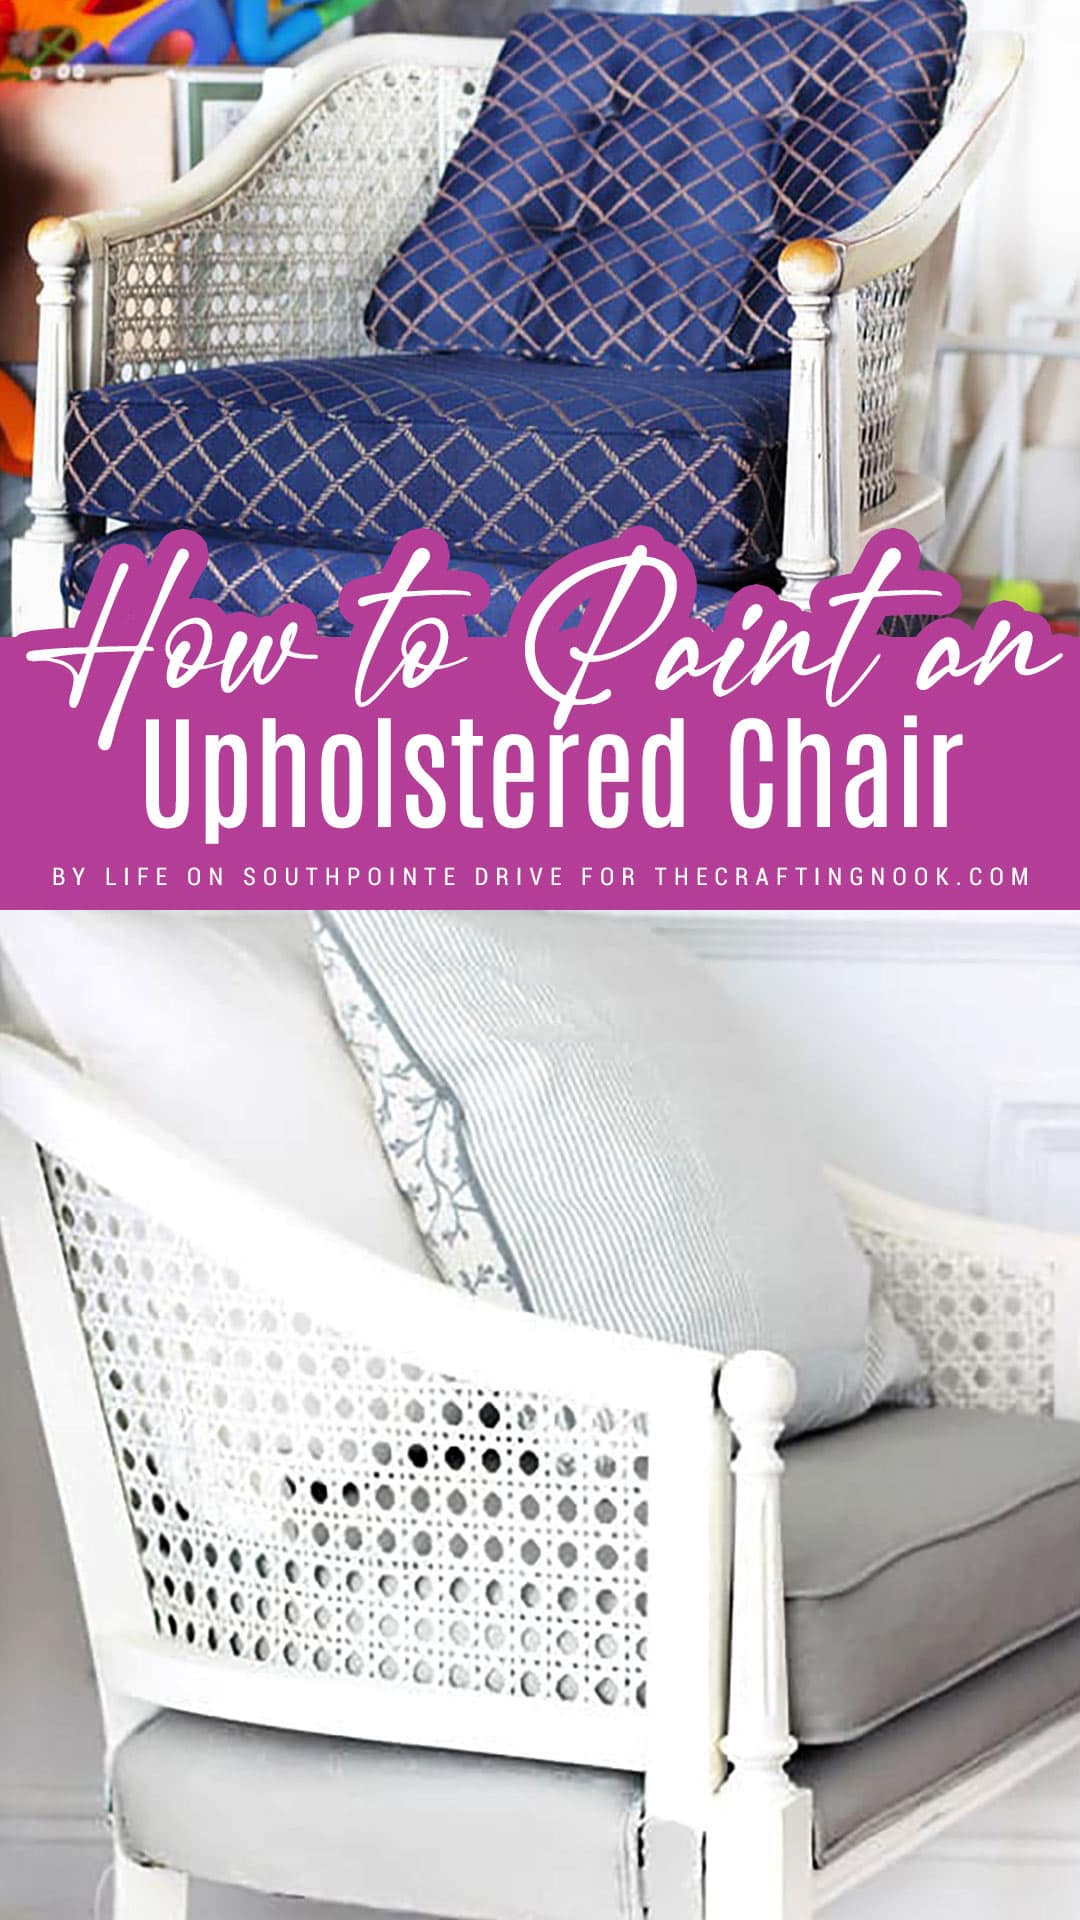
The before pic is nothing special and it was hard for me to see through the “not my style” upholstery. You can’t really tell in this picture, but the chair itself was a nasty off-white color.
My options at this point were to give reupholstery a try (which I have far from mastered) or try the whole chalk paint upholstery fabric trick! Many other bloggers have used chalk paint on their upholstered pieces and it turned out beautiful but this was my first attempt. I knew if I messed it up I would have to reupholster it but I thought I would give it a go!
Why Paint Upholstered Furniture?
Before we dive in, let’s talk about why painting an upholstered chair might be your new favorite DIY trick. Chalk paint is incredibly versatile and perfect for those who want to give their furniture a facelift without the hassle of reupholstering. Plus, it’s a great option if you have a piece that’s in good structural condition but has fabric that’s seen better days. With a few coats of paint, you can completely change the look and feel of a chair!
How to Paint an Upholstered Chair
If you’re looking for a super quick redo for your reupholstered pieces, this is it! This was a really quick project, and I finished it in around 2-3 hours.
So let’s get started:
Supplies:
- An Old Upholstered Chair – or even better, one you have sitting around the house}
- Chalk Paint – I used Annie Sloan Old White for the chair and Annie Sloan French Linen for the upholstery
- Annie Sloan Clear Wax
- Paint Brush – I used a 2inch brush
- Wax Brush
- Fine grit sandpaper or Sanding Sponge
Instructions:
So I am a really bad teacher because while painting the actual chair I forgot to snap some pics! But this is about painting the upholstery…so I guess I’m good!
Step 1: Prep the Chair
Start by thoroughly cleaning the chair. Remove any dust, dirt, or grime from the frame and crannies and wipe any dust from the surface of the fabric. This will help the paint adhere better. If the fabric has any stains, try to spot clean them as much as possible.
Step 2: Paint the Chair Frame
All I did on the chair itself was take off the cushion and give the whole upholstered chair 2 coats of Annie Sloan Old White chalk paint and made sure to get every nook and cranny.
You might need to bring out the painter’s tape for this part. I did end up dripping a few drops on the upholstery but I didn’t sweat it since I was going to paint the upholstery anyway.
Let it dry for a few hours.
The beauty of chalk paint is that you don’t really have to have a great painting technique. With chalk paint you’re going to see brush strokes, and that is ok. I think it adds to the character especially with older pieces.
Step 3: Apply Clear Wax
After letting the chair dry (another great thing about chalk paint is it dries really fast) I gave the whole chair one coat of Annie Sloan clear wax to give it a more durable finish.
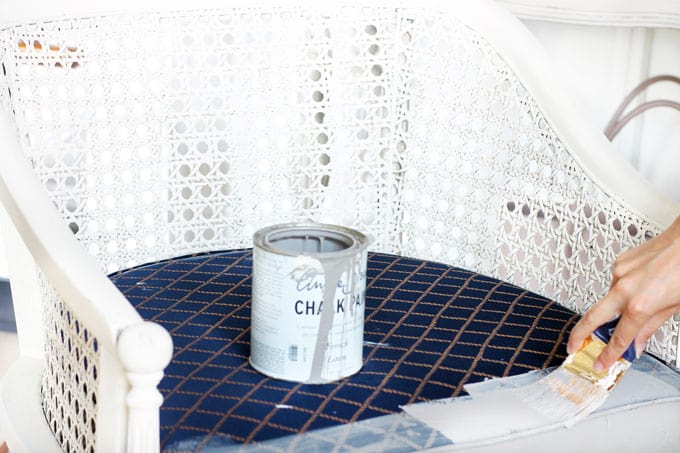
Step 4: Painting the Upholstery
Then I took the cushion and started painting the upholstery. I was super nervous, but kept thinking the chair was only $15!
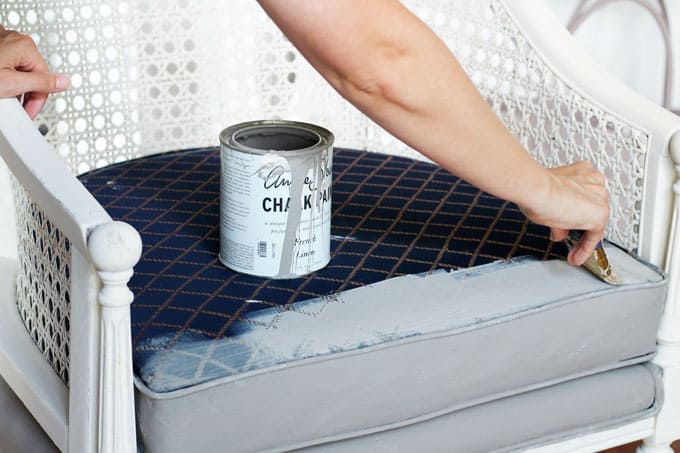
I did take the cushion off the chair to paint it on the top side but I had horrible lighting in my garage, so for the back side I just flipped it over and painted it in the house so I could get a better photo for you all!
So, when you try this make sure you take off the cushion and paint all sides. You might have to let dry some parts to move on to the next ones but like I said, this paint dries really fast.
After the first coat I was a little worried since it was such a light coat and the design on the cushion was bleeding through…a lot, but after the second coat I was good to go..it was like magic!
I let it dry for several hours.
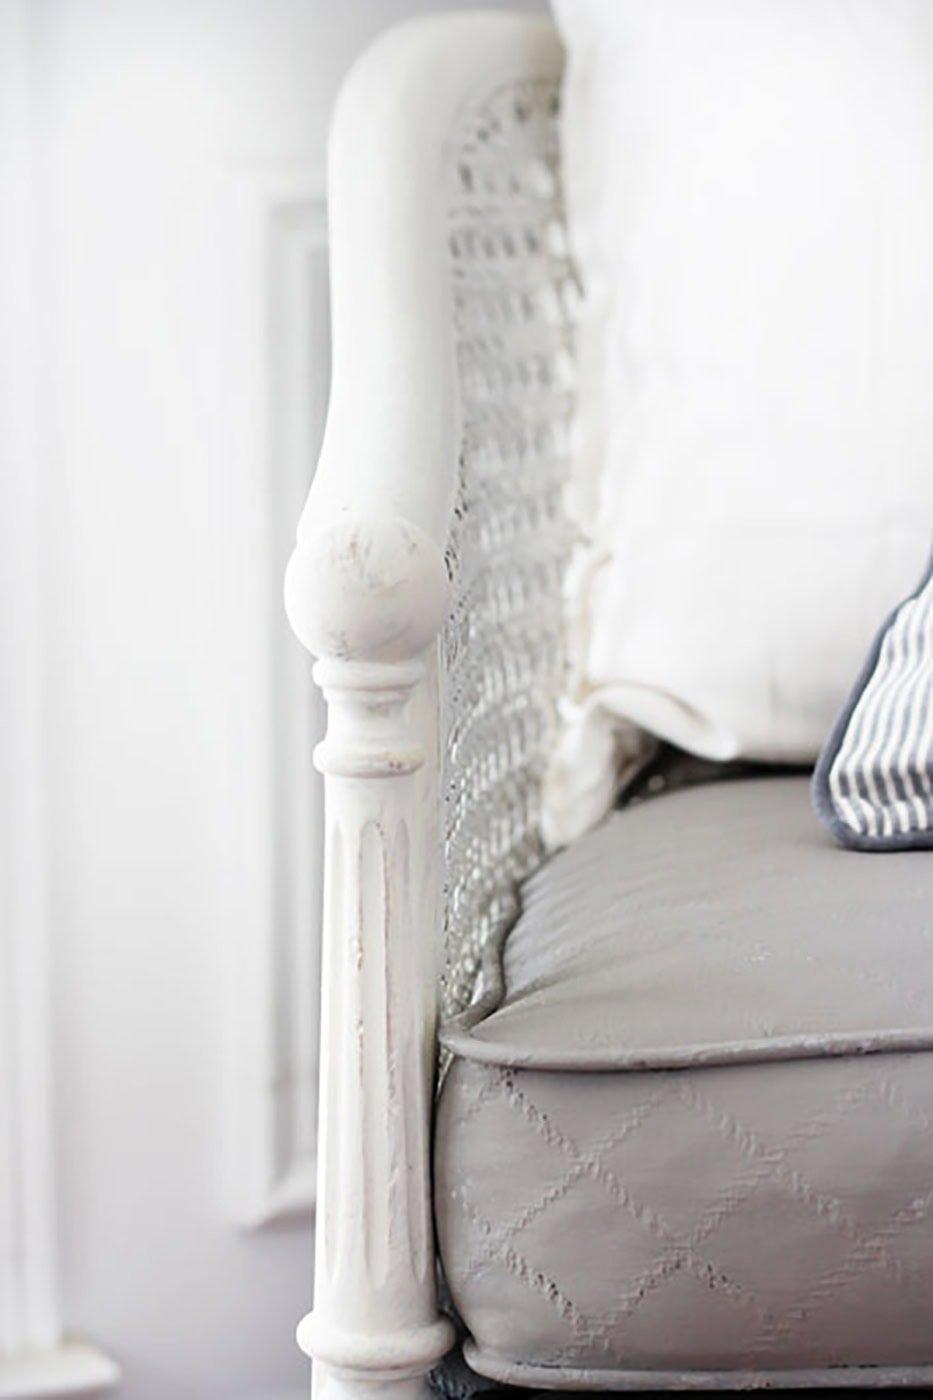
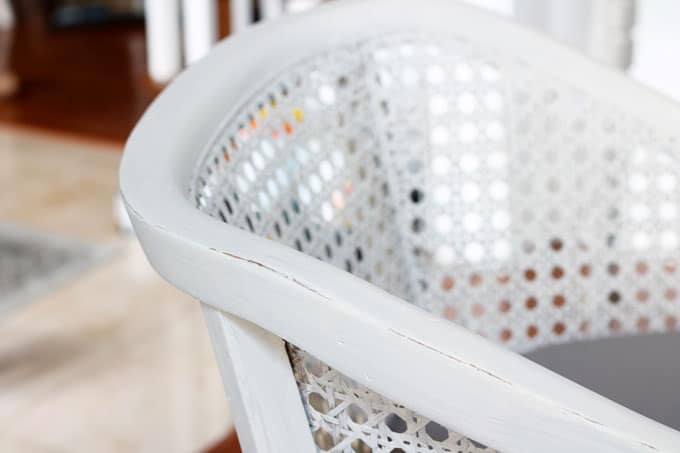
Step 5: Distress for a Vintage Look (Optional)
The chair was already starting to really come to life and I was already happy with the way it was turning out. But in order to give it even more of a vintage look I decided that after the chair was painted and fully dried I would distress it a bit with a sanding sponge.

I have used many different techniques to distress or age furniture, but sandpaper is usually my go-to. The key is to pick areas where you feel the piece would naturally get worn over time. Edges are always a safe bet. Make sure not to be too rough with it, lightly go over the edges to give it a natural distressed look.
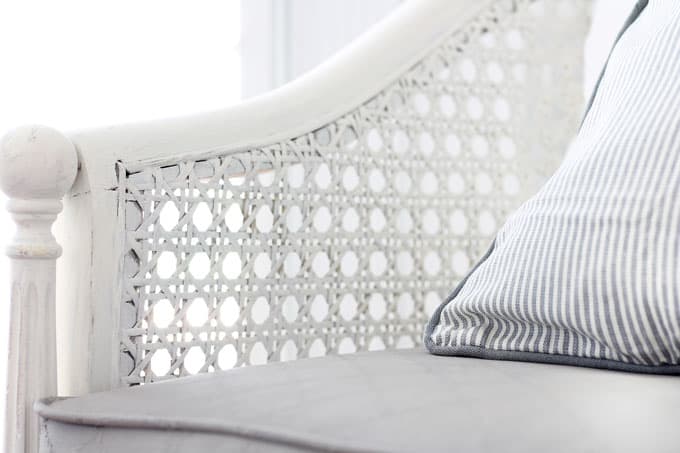
Step 6: Styling Your New Chair
So after the painting and distressing, it was time for a little styling!
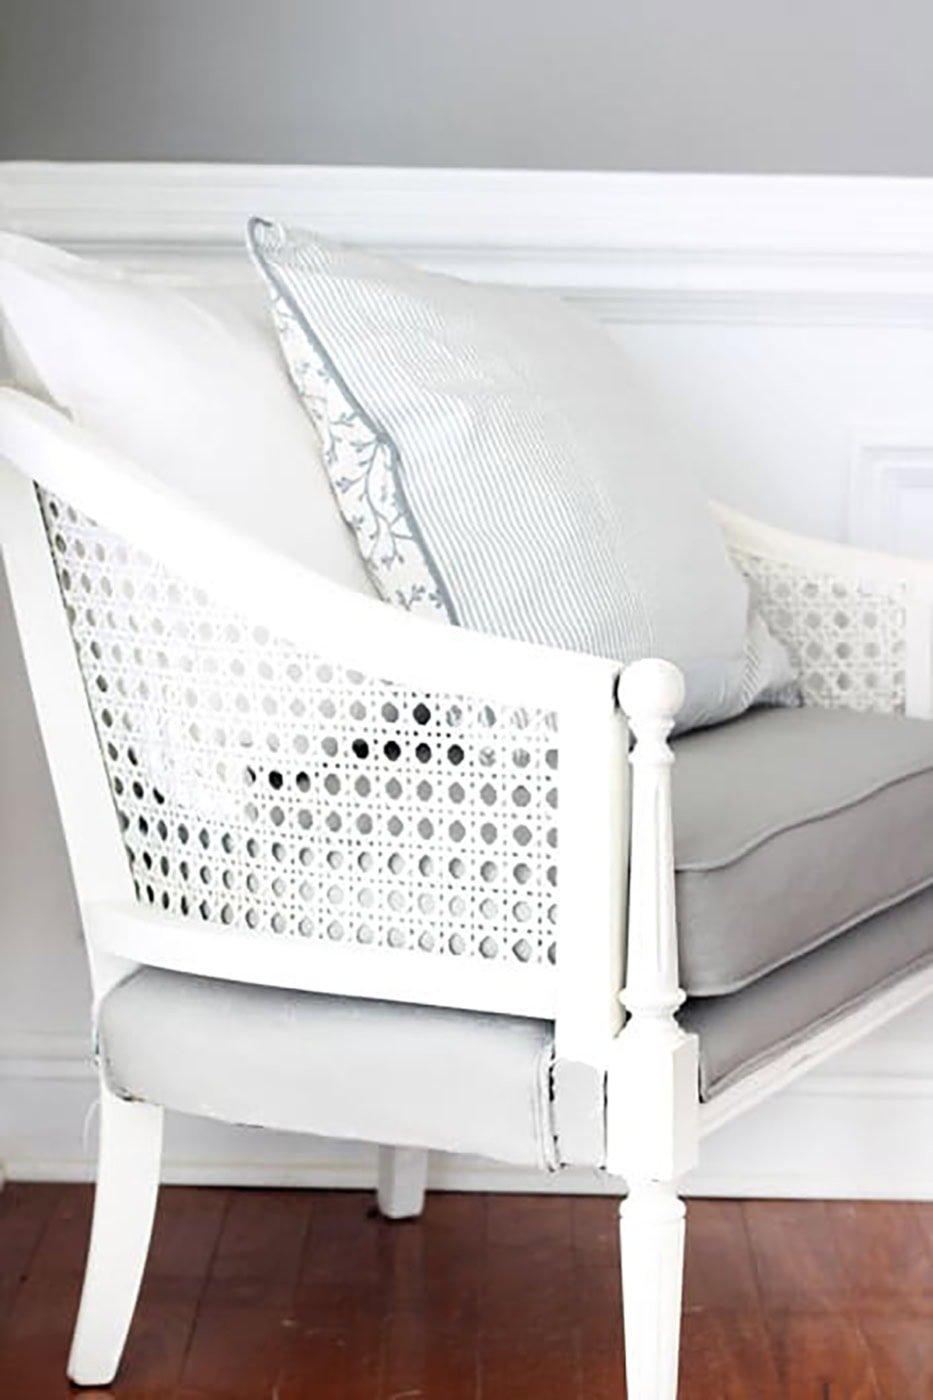
When I was walking through Ikea on a mission to find something else I came across a couple of pillows that I thought would be perfect. I snagged them up along with a couple of pillow inserts and got to prettying (is that even a word?!) it up!
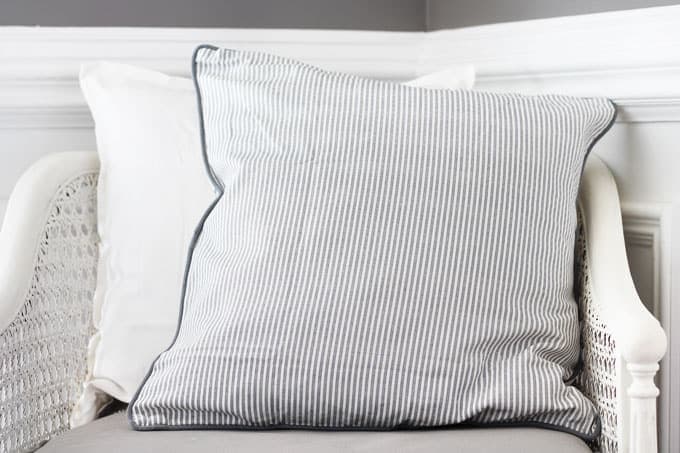
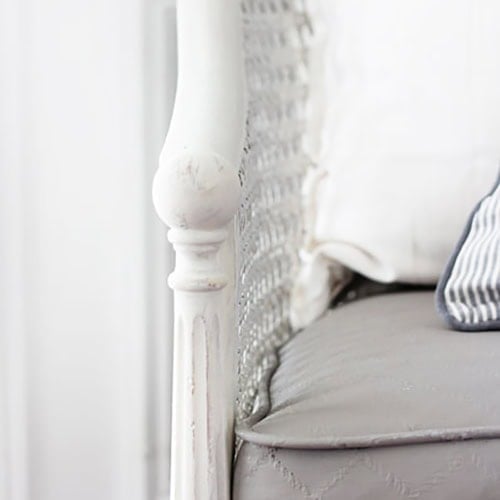
Nothing says vintage farmhouse like a pretty French ticking pillow cover! I mix my pillows up often so not sure how long these two will stay here, but I really am loving them together in the space.
Enjoy!

Crafting Tips
- To help the paint absorb into the fabric, you can lightly mist the upholstery with water before applying the paint.
- If you’re concerned about the texture, mix the chalk paint with a fabric medium. This will help maintain the softness and flexibility of the fabric while still achieving the painted look.
- Apply wax in small sections, working it into the fabric and paint with a circular motion. Buff each section immediately after applying the wax to get a smooth finish.
- Chalk paint and wax can have strong scents, so make sure to work in a well-ventilated area or use a fan to keep the air circulating.
- Before you start you can spray water on your fabric chair or sofa until the fabric is damp. This will help the first coat of paint to soak into the fabric. You can use a spray bottle or a paint sprayer.
I had someone ask me what the fabric now felt like since I have painted it, and the only way I can really describe it is that it has a leather consistency. For sure, I will say that even with the fabric painted it is still very comfy and the paint doesn’t crack when you sit on it. I was worried it would since it is paint, but I was so happy to find out that it is holding up nicely!
The upholstered chair has found a new home in my home office and it is fitting it quite perfectly!
Hopefully, you find this DIY project to be an easy one and you already have a chair or two in mind to try this out for yourself!
Make sure that if you’re looking for other affordable DIY projects, you hop over to my blog, Life on Southpointe Drive, and check out some of my other fun projects!
I’m sure you might like my Simple Chandelier Makeover and my Tips & Tricks to Paint a Room Quickly.
It’s been so much fun hanging out with you all here at The Crafting Nook! Come by and see me and let’s stay in touch…find me on Pinterest & Instagram!
Alternatives and Substitutions
To make it even more eye-catching, you can paint the frame and upholstery in contrasting colors. For example, use a vibrant color like teal or mustard on the upholstery and a crisp white or black on the frame.
Instead of sanding, use a dry brush technique to add a distressed look to the painted fabric. Lightly dip the brush in a contrasting paint color and swipe across the upholstery to give it a worn, vintage feel.
Frequently Asked Questions
Nope! If done correctly, the paint should remain flexible and durable. Just make sure to use a good quality chalk paint.
Absolutely! The fabric will have a different texture, but it stays comfortable to sit on.
Chalk paint works best on natural fabrics like cotton or linen. If your chair is a synthetic blend, do a small patch test first to make sure the paint adheres well.
Painted fabric can be spot cleaned with a damp cloth. Avoid using harsh chemicals or scrubbing too hard. For routine maintenance, a soft brush or vacuum can help keep it dust-free.
More Furniture Projects To Try
If you liked this tutorial on How to Paint an Upholstered Chair, you might definitely love these other furniture project ideas too:
✂️ Tutorial
How to Paint an Upholstered Chair (an easy way)
Supplies
- An Old Upholstered Chair – or even better one you have sitting around the house}
- Chalk Paint – I used Annie Sloan Old White for the chair and Annie Sloan French Linen for the upholstery
- Annie Sloan Clear Wax
- Paint Brush – I used a 2inch brush
- Wax Brush
- Fine grit sandpaper or Sanding Sponge
Instructions
Step 1: Prep the Chair
- Start by thoroughly cleaning the chair. Remove any dust, dirt, or grime from the frame and crannies and wipe any dust from the surface of the fabric. This will help the paint adhere better. If the fabric has any stains, try to spot clean them as much as possible.
Step 2: Paint the Chair Frame
- All I did on the chair itself was take off the cushion and give the whole upholstered chair 2 coats of Annie Sloan Old White chalk paint and made sure to get every nook and cranny.
- You might need to bring out the painter’s tape for this part. I did end up dripping a few drops on the upholstery but I didn’t sweat it since I was going to paint the upholstery anyway.
- Let it dry for a few hours.
- The beauty of chalk paint is that you don’t really have to have a great painting technique. With chalk paint you’re going to see brush strokes, and that is ok. I think it adds to the character especially with older pieces.
Step 3: Apply Clear Wax
- After letting the chair dry (another great thing about chalk paint is it dries really fast) I gave the whole chair one coat of Annie Sloan clear wax to give it a more durable finish.
Step 4: Painting the Upholstery
- Then I took the cushion and started painting the upholstery. I was super nervous, but kept thinking the chair was only $15!
- I did take the cushion off the chair to paint it on the top side but I had horrible lighting in my garage, so for the back side I just flipped it over and painted it in the house so I could get a better photo for you all!
- So, when you try this make sure you take off the cushion and paint all sides. You might have to let dry some parts to move on to the next ones but like I said, this paint dries really fast.
- After the first coat I was a little worried since it was such a light coat and the design on the cushion was bleeding through…a lot, but after the second coat I was good to go..it was like magic!
- I let it dry for several hours.
Step 5: Distress for a Vintage Look (Optional)
- The chair was already starting to really come to life and I was already happy with the way it was turning out. But in order to give it even more of a vintage look I decided that after the chair was painted and fully dried I would distress it a bit with a sanding sponge.
- I have used many different techniques to distress or age furniture, but sandpaper is usually my go-to. The key is to pick areas where you feel the piece would naturally get worn over time. Edges are always a safe bet. Make sure not to be too rough with it, lightly go over the edges to give it a natural distressed look.
Step 6: Styling Your New Chair
- So after the painting and distressing, it was time for a little styling!
- When I was walking through Ikea on a mission to find something else I came across a couple of pillows that I thought would be perfect. I snagged them up along with a couple of pillow inserts and got to prettying (is that even a word?!) it up!
- Nothing says vintage farmhouse like a pretty French ticking pillow cover! I mix my pillows up often so not sure how long these two will stay here, but I really am loving them together in the space.
- Enjoy!
Share and PIN ME!!!
Til’ next time…


FREE WORKBOOK
Keeping your Sweet Home Organized
Learn how to create intentional habits and simple routines to Keep Your Home Organized. Plus freebies, printables, exclusive content, and tips.
Disclaimer: By clicking on the “Yes” button above you are giving me your consent to collect and use your information according to the law and My Policy Privacy. Zero Spam I promise!
I love, love, love this. What a timely find for myself, because I have to wingback chairs I want to paint white, but was not sure wat to do, thanks to you, I now know exactly what to do. Thank you, thank you, thank you
This is fantastic!
Great project! I’ve always wanted to try this but wasn’t sure how it would turn out. Love the idea of using chalk paint though. I have an old chair that actually got paint on the upholstery (errant kid with a paintbrush lol) that I’ve had packed up for awhile- I might give this a try!
I had so much fun guest posting for you today, Cami! Thank you for the opportunity! Hope your readers enjoy!