DIY Large Hoop Christmas Ornaments
This post may contain affiliate links. Please read our Disclosure Policy.
Make a cute Large Hoop Christmas Ornaments with yarn, greenery, and simple hoops. A beautiful DIY project perfect for your holiday decorating.
There’s something about the Christmas season that makes me want to craft all the soft, fluffy, cozy things. Maybe it’s the lights, maybe it’s the cold… or maybe it’s just my excuse to sit with some yarn and greenery while sipping a warm drink.

And the best part? You only need a few supplies, and the process is kind of therapeutic — lots of wrapping, fluff, and pretty finishing touches. If you’ve got kiddos or grandkids around, this is also a fun one to do together!
Table of Contents
How to Make These Large Hoop Ornaments
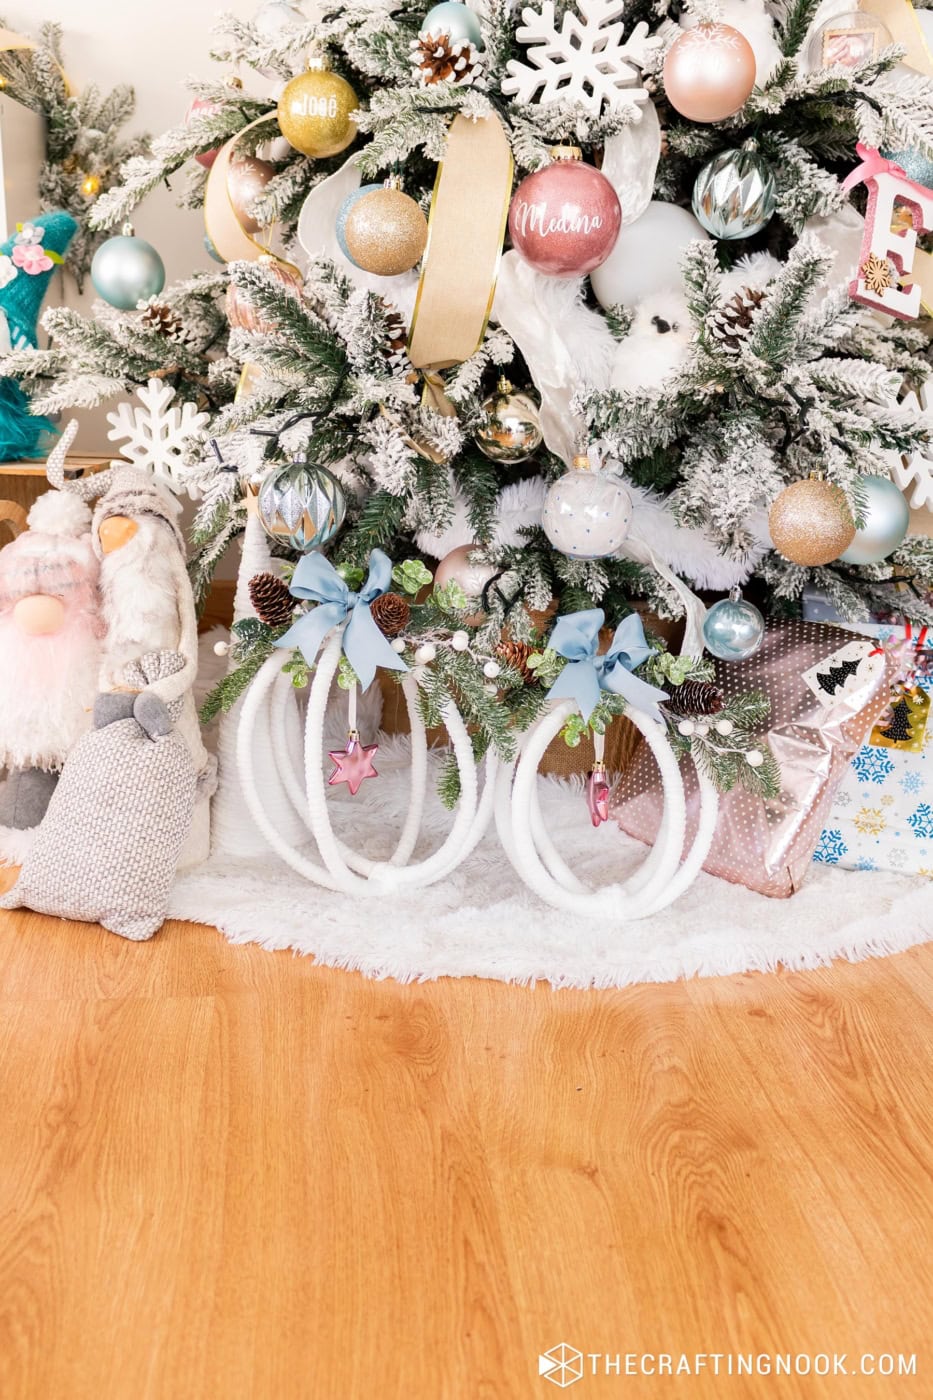
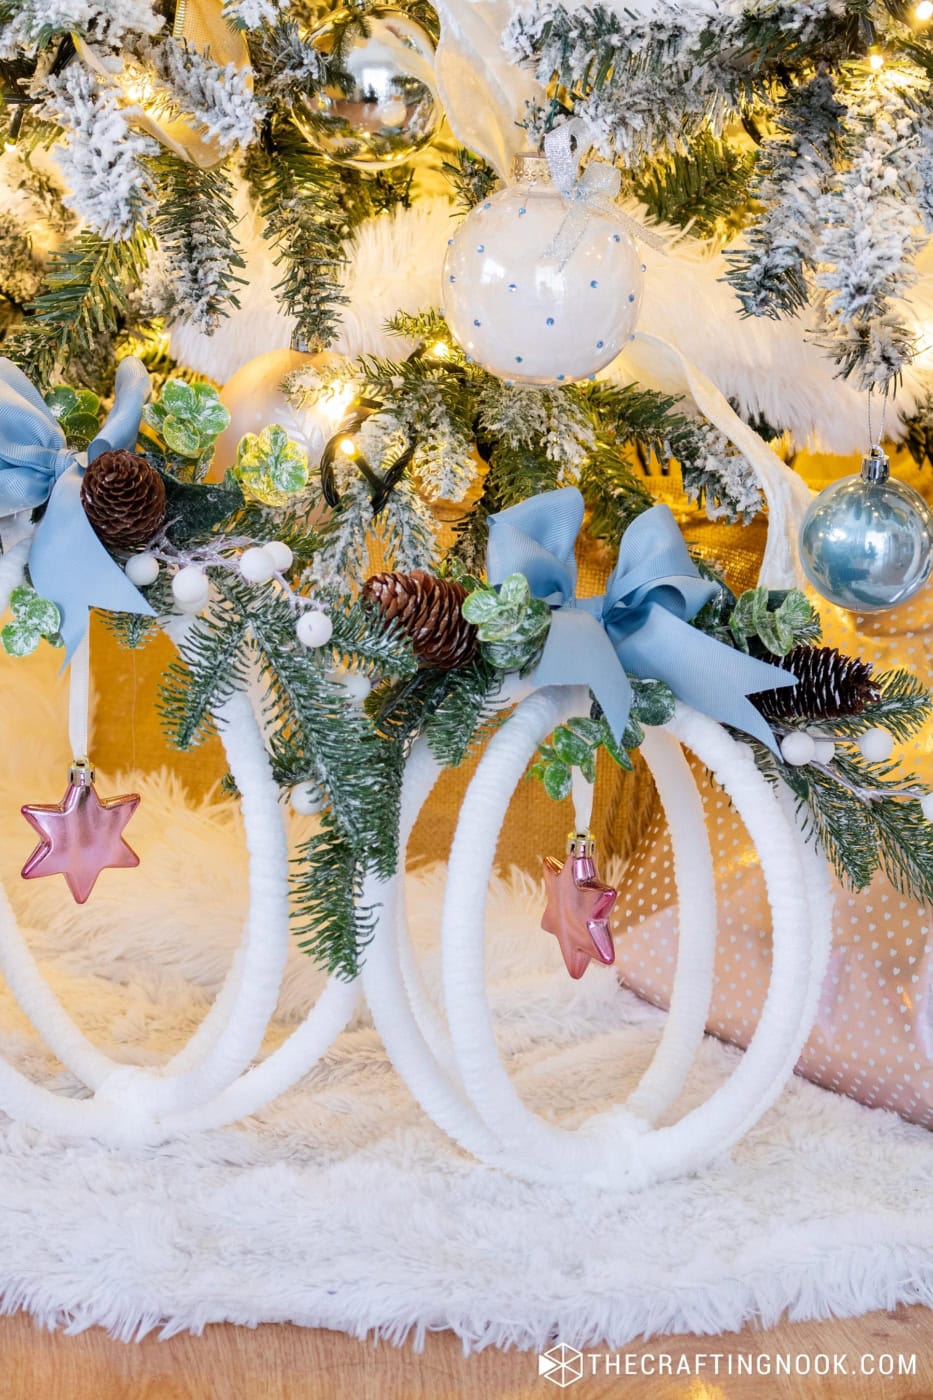
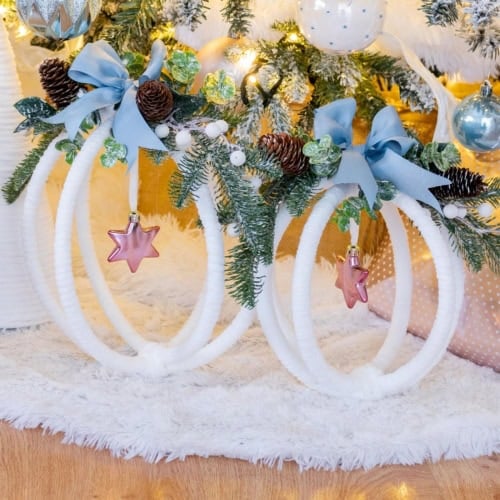
These large hoop ornaments have become one of my new favorites. They’re simple, fluffy, and really pretty when you set them under the tree or around your living room.
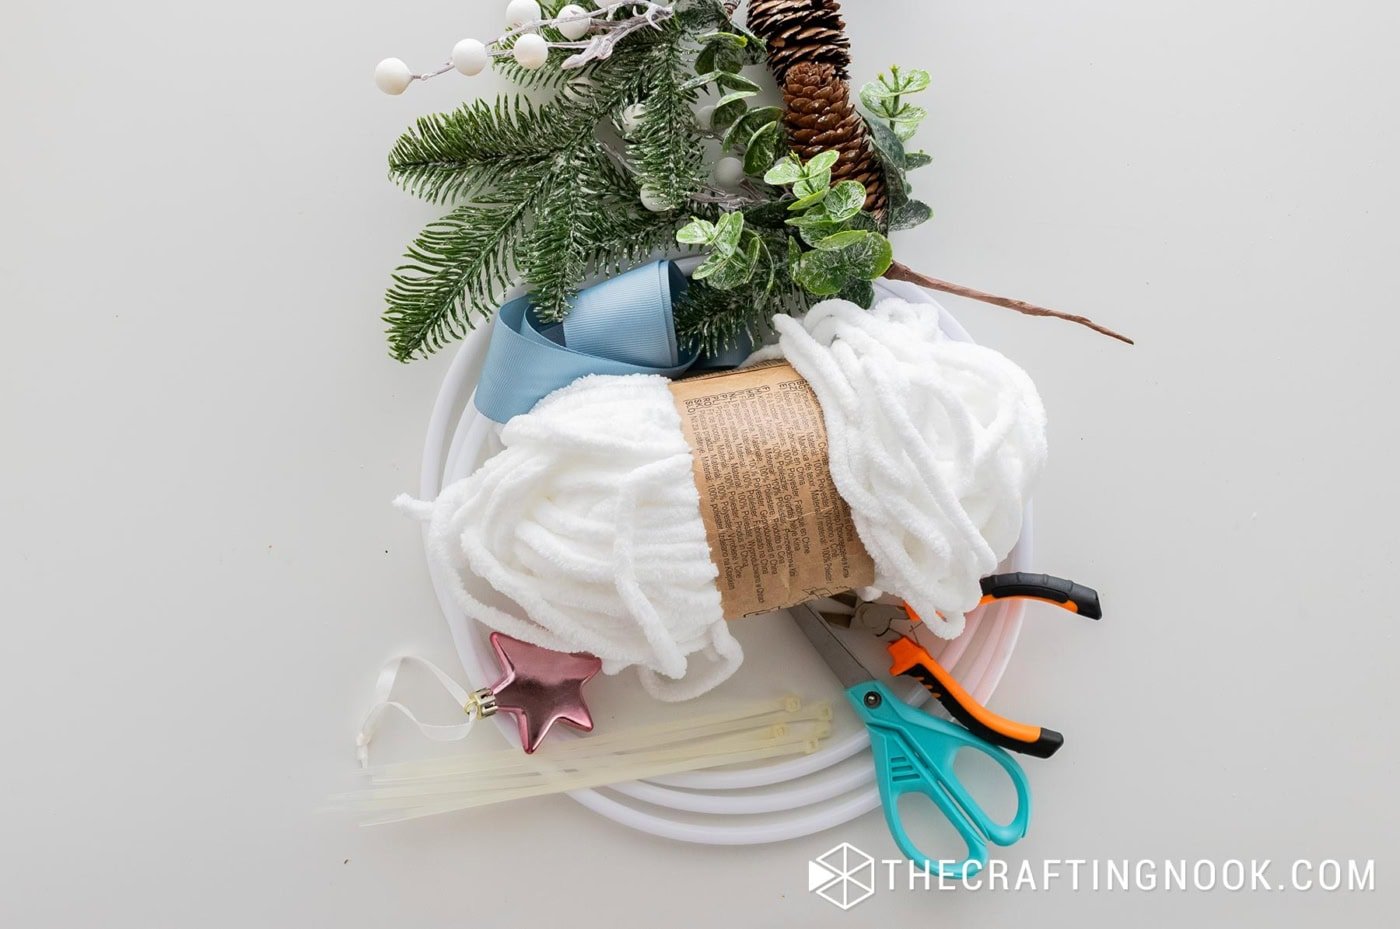
Supplies
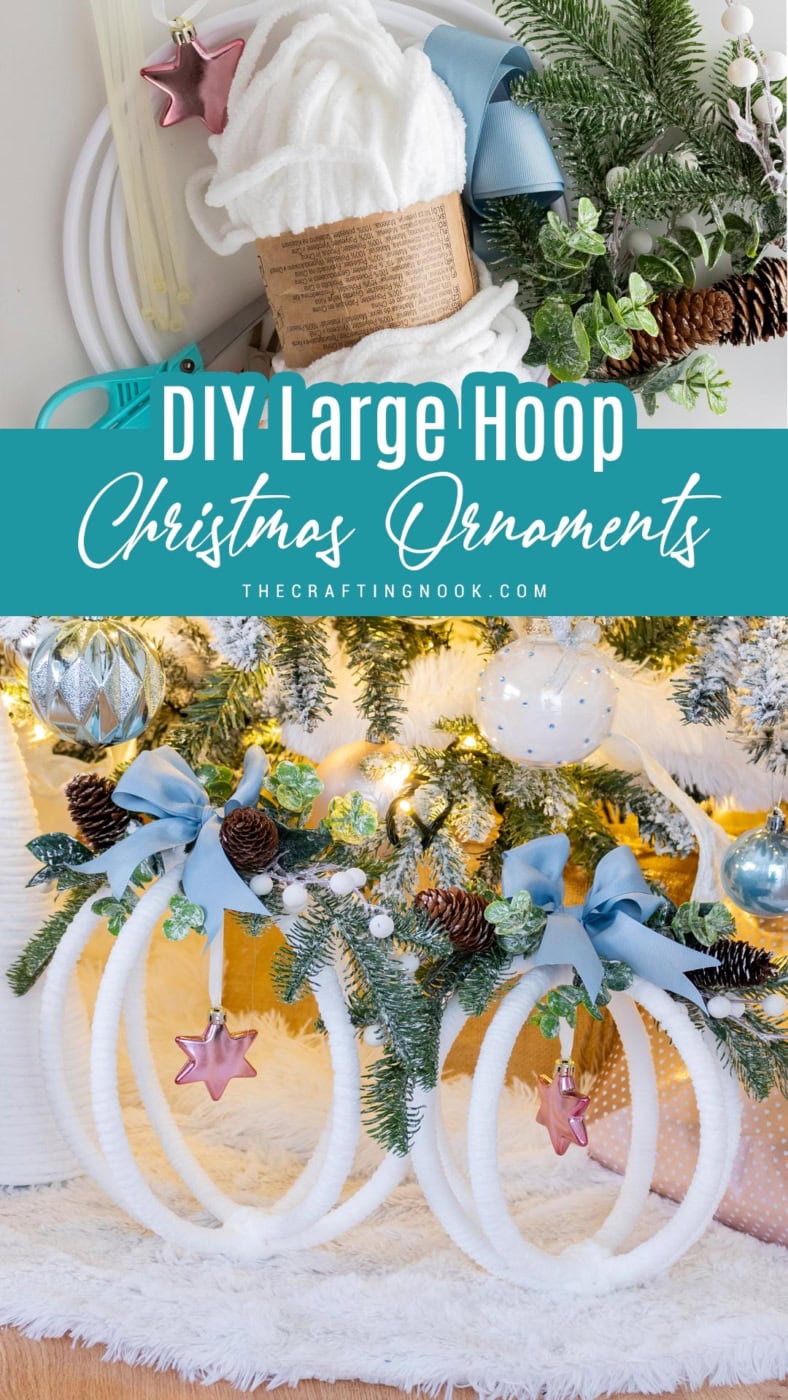
- 3 hoops (plastic or metal — whatever you find is totally fine)
- Thick chenille yarn (5 mm works great, but if you find 1 cm thickness, even better!)
- Zip ties
- Faux greenery springs (pine, eucalyptus, berries, anything wintery)
- Ribbon for the bow
- Lightweight ornament (to hang in the center)
Tools
- Scissors
- Hot glue (optional)
- Wire cuter
Instructions:
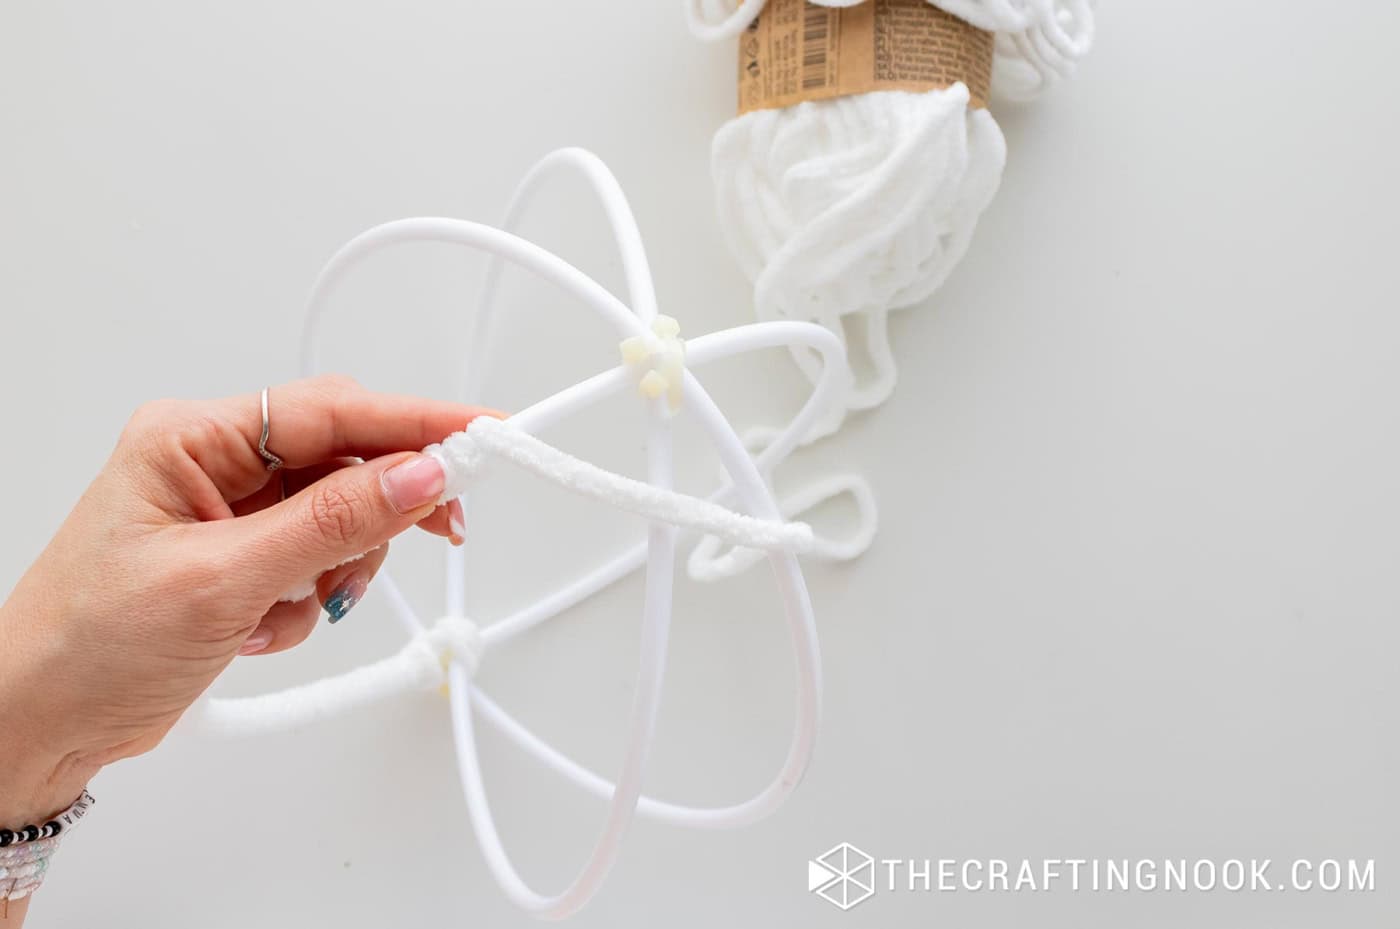
1. Build the hoop structure
Take the three hoops and nest them into each other to form a spherical shape. Think of it like a globe — three rings crossing at different angles.
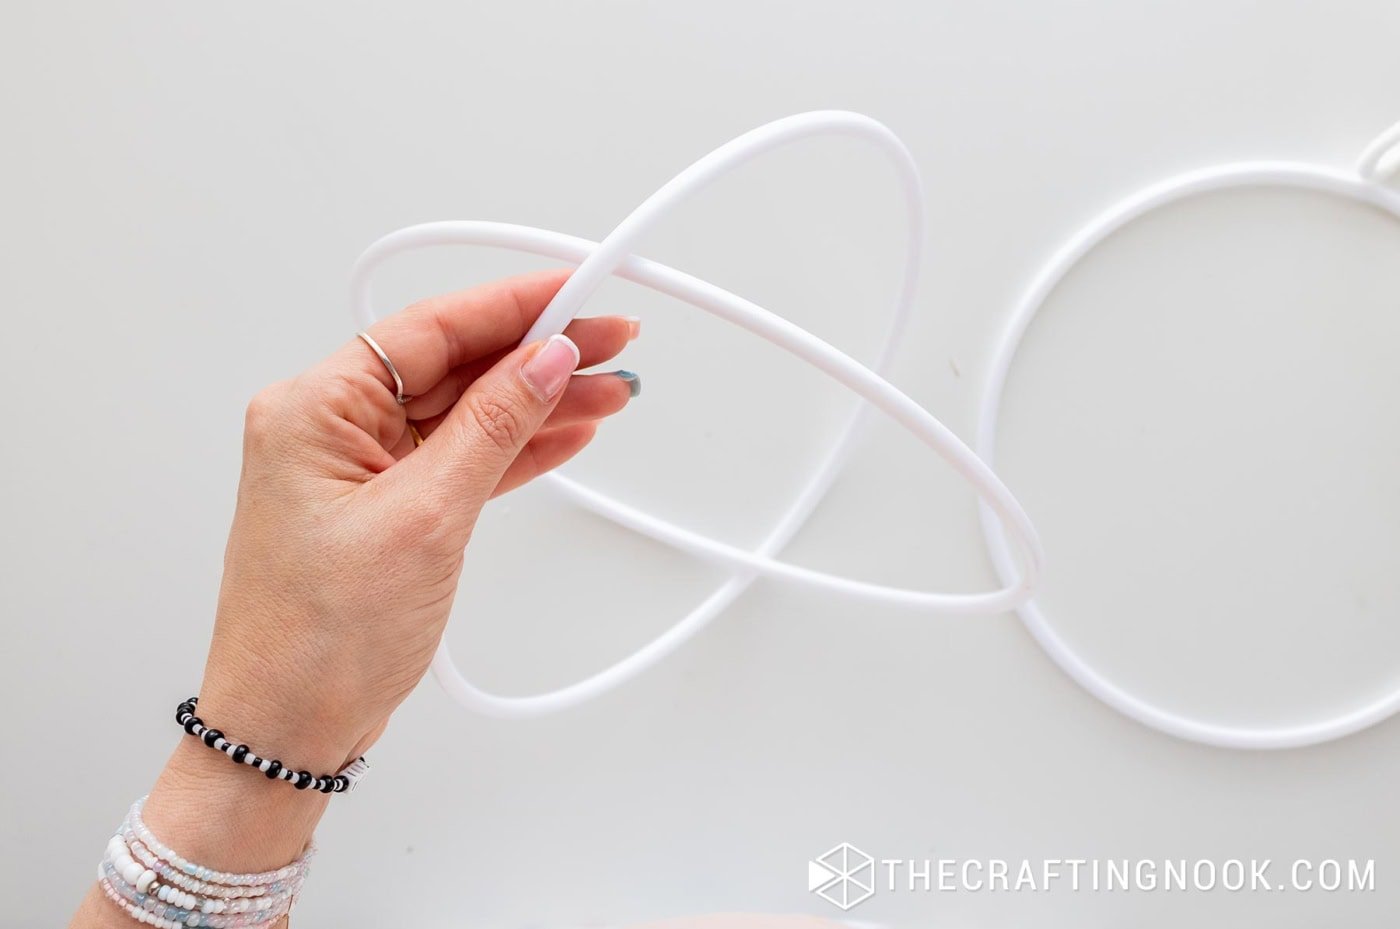
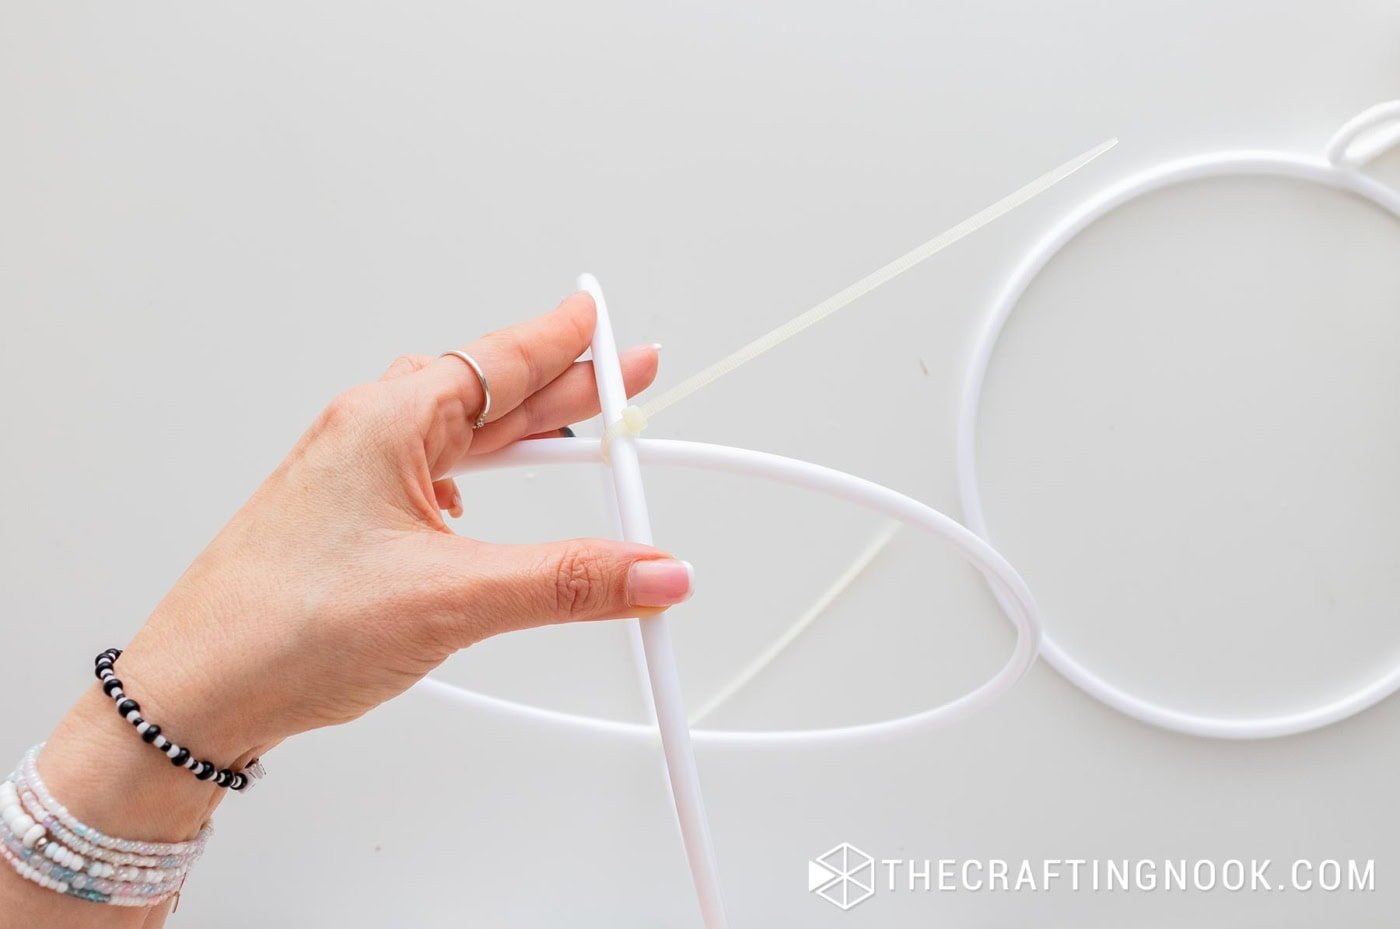
To keep everything evenly spaced, add three zip ties at the top and three at the bottom, one between each pair of hoops. This keeps the structure stable and helps you avoid lopsided ornaments later.
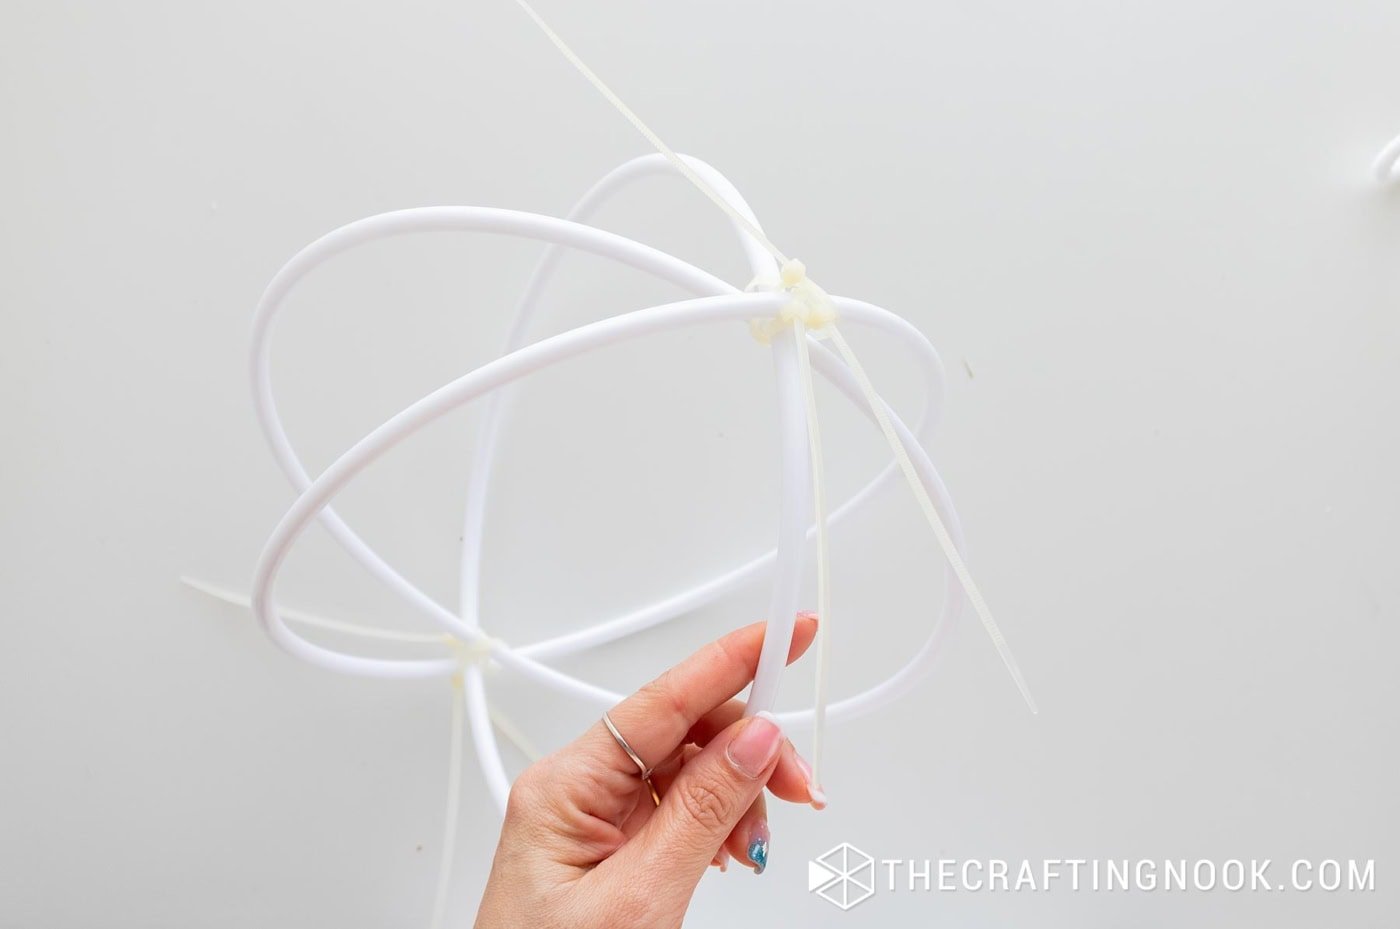
Pull the zip ties tight. You can trim the ends later once the yarn covers everything.
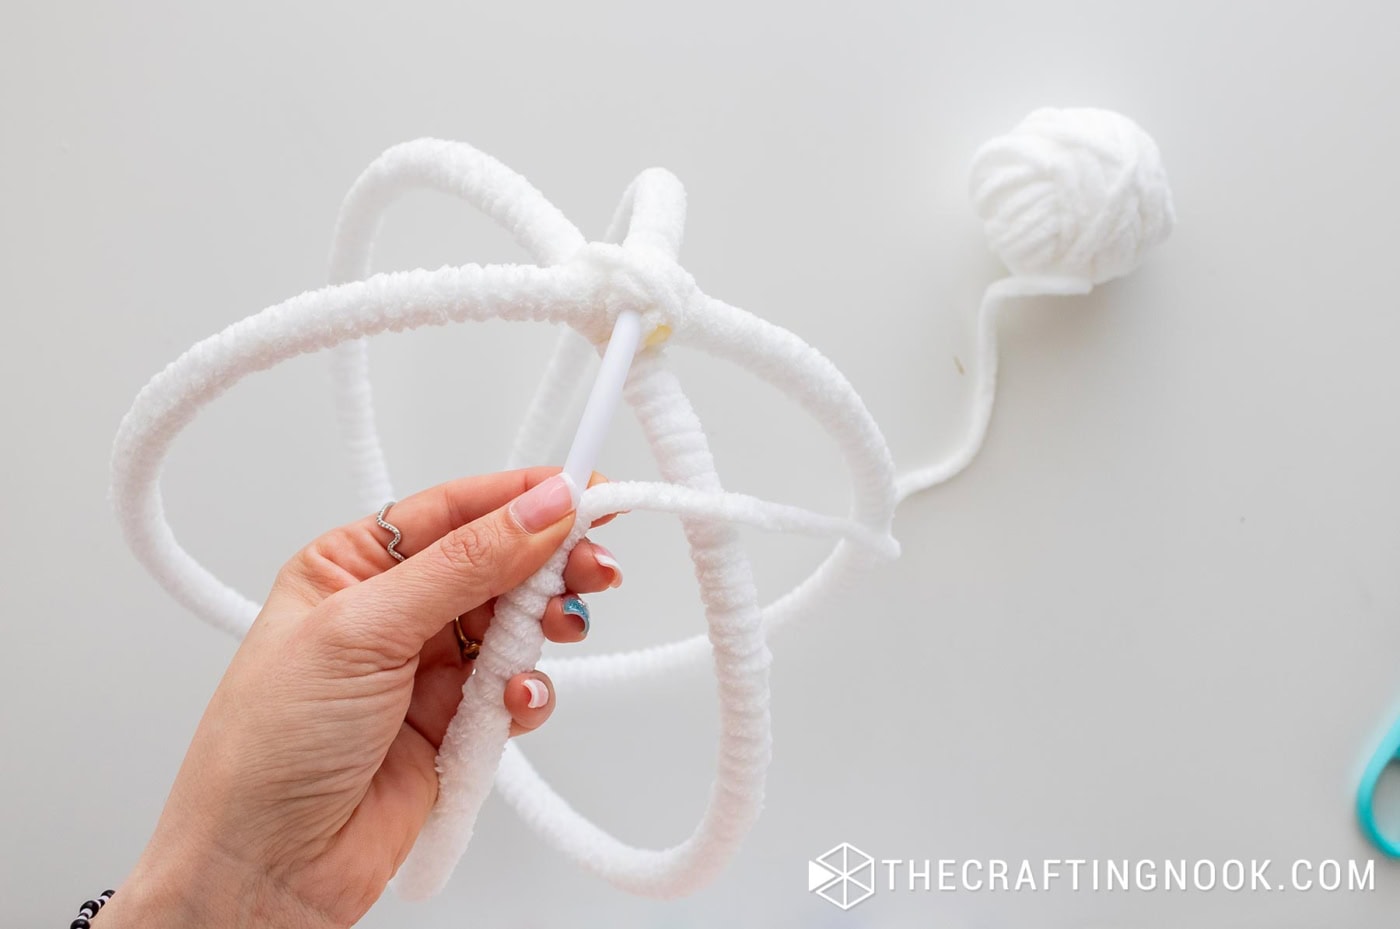
2. Wrap the hoops with yarn
Tie your yarn onto one hoop and start wrapping. The key here is: slow and steady, and keep your wraps close together.


Chenille yarn hides everything beautifully, including those trimmed zip ties. When you reach one of the hoop intersections, wrap a few extra times around the joint to cover it completely.
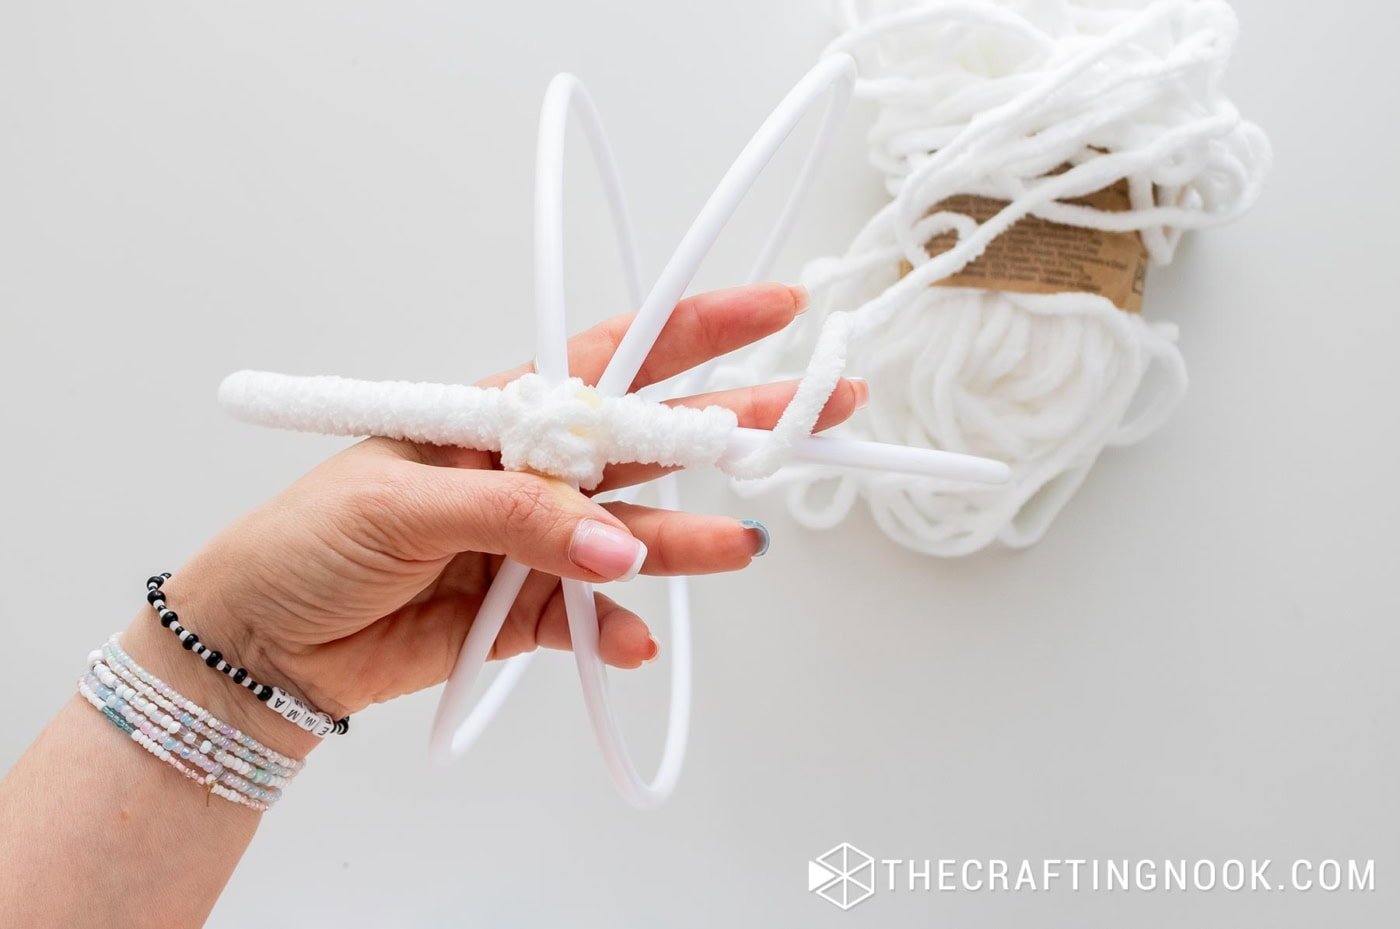
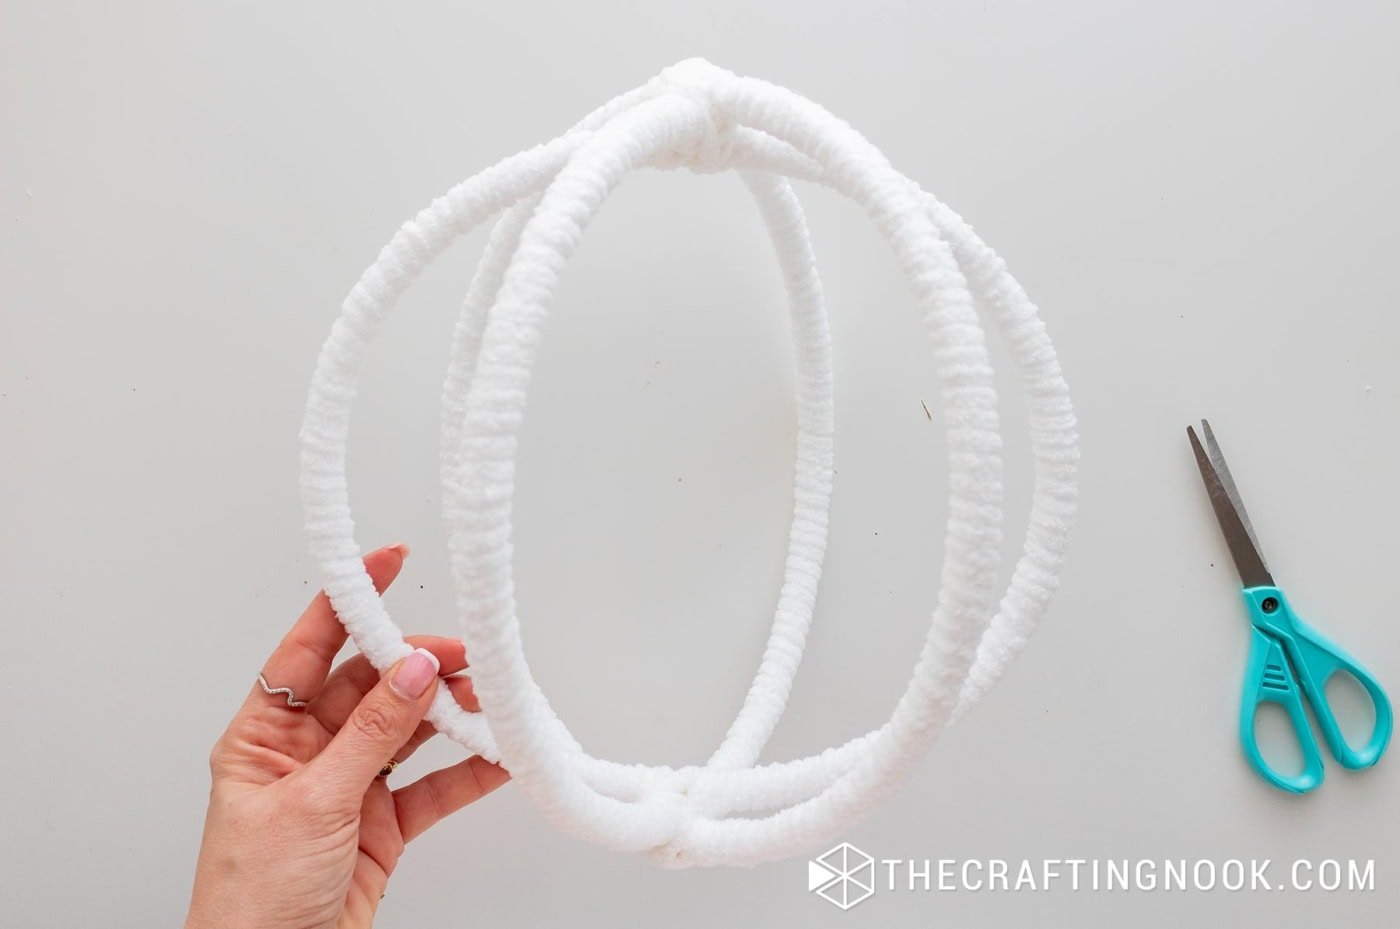
Keep going until all three hoops are fluffy, soft, and fully covered.
3. Add greenery
Choose your “front” side and gather your winter greens — pine, eucalyptus, berries, pinecones, whatever fits your holiday theme.
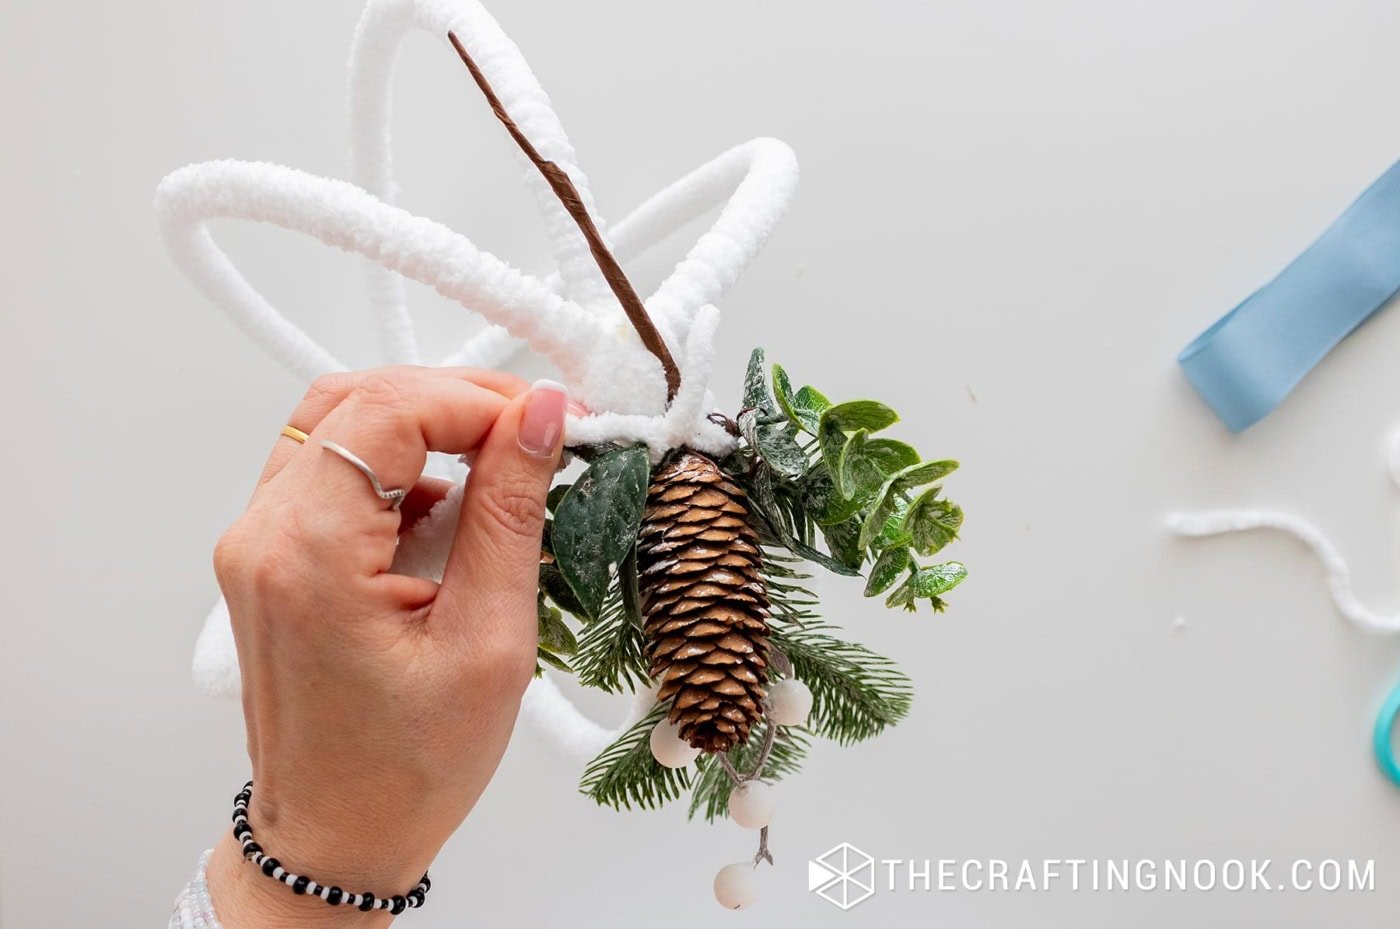
I added mine by tying the stems directly with the same chenille yarn, which blends so well that you don’t even see it. If you need extra hold, feel free to add a tiny dab of hot glue under the wraps.
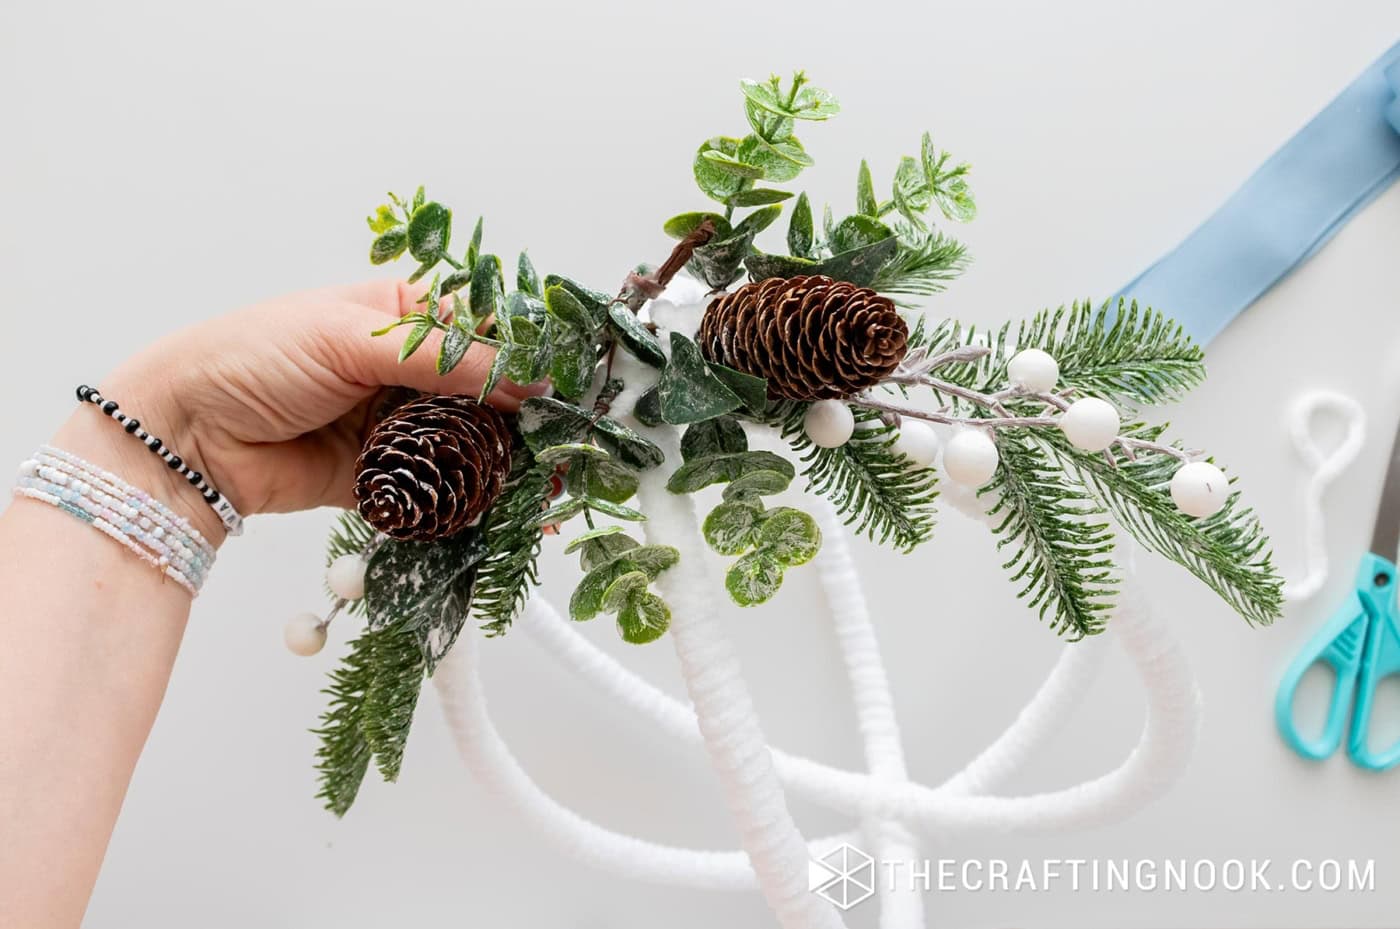
Play around with the arrangement until you like how full it looks.
4. Add your bow
Make a pretty ribbon bow (or use a ready-made one).
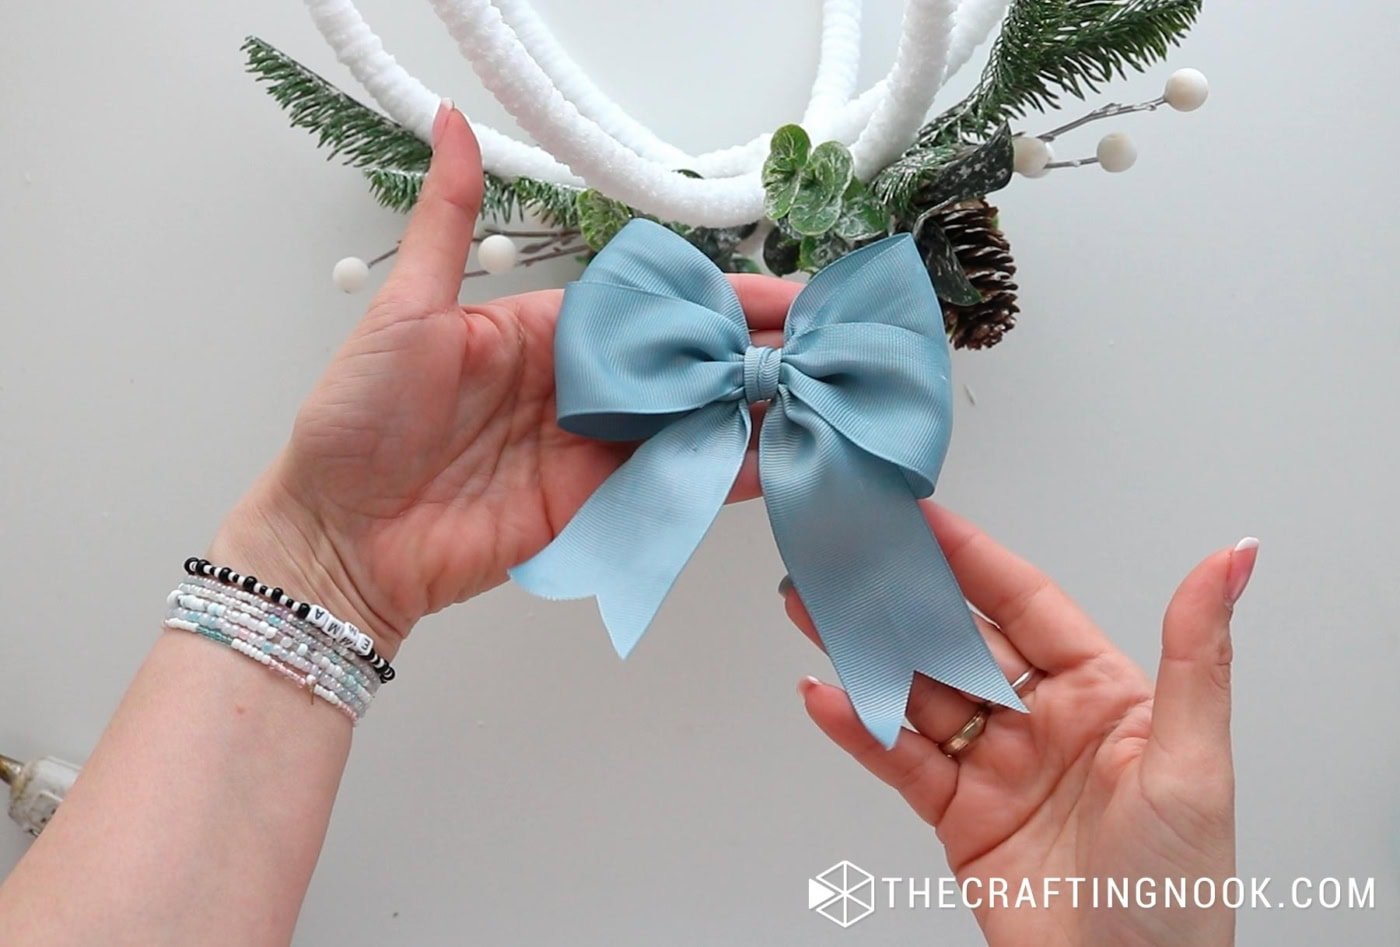
Attach it right in the center of the greenery cluster. It instantly brings everything together and adds that soft holiday charm.

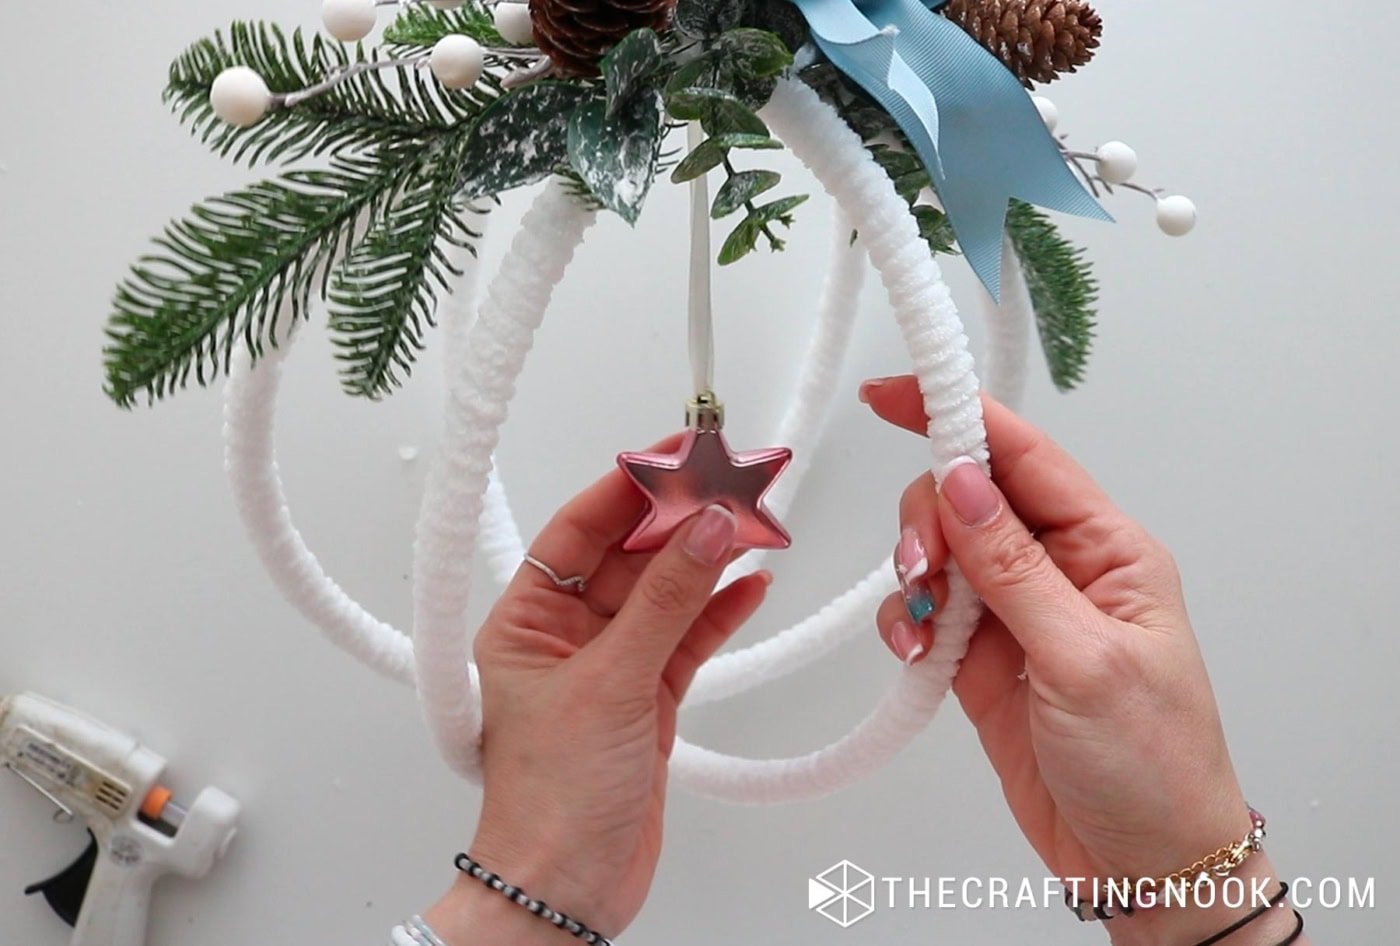
5. Hang the center ornament
Take your small ornament and tie it to the top inside of the hoop using the yarn.
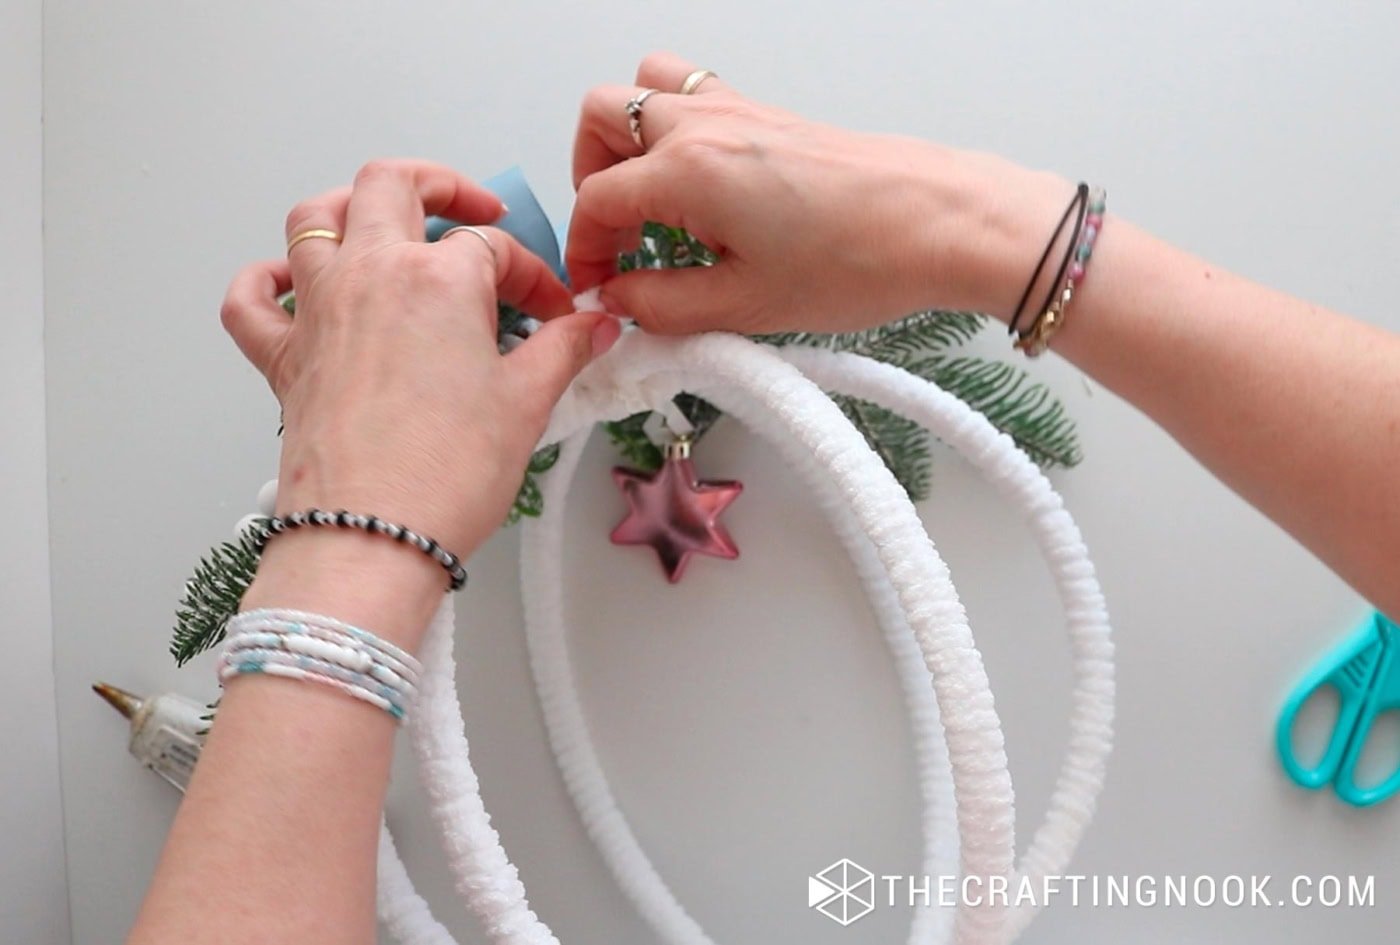
Make sure it hangs right in the middle — this gives the whole ornament such a magical, floating look.
6. Add some Final touches
Straighten the hoops, lift little branches, tuck things where they look best, and fluff the yarn-wrapped structure.

Once it looks cute, you’re done!
Crafting Tips
Here are a few things that make the process easier or help the final ornament look even better:
- The thicker the yarn, the faster the wrapping. If you can find 1 cm chenille yarn, it covers the hoops super quickly.
- Metal hoops are sturdier, but plastic hoops are easier to bend if you need slight adjustments.
- Try wrapping the hoops in two colors (white + light gray, blush + cream) for subtle texture.
- If your greenery has thick stems, remove some of the wire or break it into smaller clusters, it layers much more neatly.
- Don’t over-glue. Small, strategic dots are enough and stay invisible under the yarn.
- Make a set of different sizes. A group of these looks adorable under the tree or along a fireplace.

Alternatives & Substitutions
Use velvet yarn instead of chenille yarn, even sweater yarn, or even fleece strips.
Instead of greenery, try felt leaves, mini snowflakes, pom-poms, or fabric flowers.
Instead of a normal hanging ornament inside, consider adding fairy lights, a small wooden star, or even leaving it empty for a minimalist look.
FAQ
They’re pretty big, so they’re mainly meant for floor or shelf décor, but if you have a large tree, you absolutely can.
Not really. Metal stays firm, and plastic holds well once everything is tied together and wrapped tightly.
About 45-60 minutes to wrap and decorate — faster if you use thicker yarn.
You can, but you’ll have to cut the yarn off. If you love the final result, you probably won’t want to!
More Christmas Projects To Try
Like this DIY Rhinestone Christmas Ornaments tutorial? You might definitely love these other Christmas project ideas too:


✂️ Tutorial
DIY Large Hoop Christmas Ornaments
Tools
- scissors
- Hot glue (optional)
- Wire cutter.
Supplies
- 3 hoops plastic or metal — whatever you find is totally fine
- Thick chenille yarn 5 mm works great, but if you find 1 cm thickness, even better!
- Zip ties
- Faux greenery pine, eucalyptus, berries, anything wintery
- Ribbon for the bow
- Lightweight ornament to hang in the center
Instructions
Build the hoop structure
- Take the three hoops and nest them into each other to form a spherical shape. Think of it like a globe — three rings crossing at different angles.
- To keep everything evenly spaced, add three zip ties at the top and three at the bottom, one between each pair of hoops. This keeps the structure stable and helps you avoid lopsided ornaments later.
- Pull the zip ties tight. You can trim the ends later once the yarn covers everything.
Wrap the hoops with yarn
- Tie your yarn onto one hoop and start wrapping. The key here is: slow and steady, and keep your wraps close together.
- Chenille yarn hides everything beautifully, including those trimmed zip ties. When you reach one of the hoop intersections, wrap a few extra times around the joint to cover it completely.
- One full hoop segment completely wrapped in yarn while the rest of the frame is still uncovered.
- Keep going until all three hoops are fluffy, soft, and fully covered.
- The full spherical frame completed, with all three hoops wrapped in soft white chenille yarn.
Add greenery
- Choose your “front” side and gather your winter greens — pine, eucalyptus, berries, pinecones, whatever fits your holiday theme.
- I added mine by tying the stems directly with the same chenille yarn, which blends so well that you don’t even see it. If you need extra hold, feel free to add a tiny dab of hot glue under the wraps.
- Play around with the arrangement until you like how full it looks.
Add your bow
- Make a pretty ribbon bow (or use a ready-made one).
- Attach it right in the center of the greenery cluster. It instantly brings everything together and adds that soft holiday charm.
Hang the center ornament
- Take your small ornament and tie it to the top inside of the hoop using the yarn.
- Make sure it hangs right in the middle — this gives the whole ornament such a magical, floating look.
Add some Final touches
- Straighten the hoops, lift little branches, tuck things where they look best, and fluff the yarn-wrapped structure.
- Once it looks cute, you’re done!
Notes
- The thicker the yarn, the faster the wrapping. If you can find 1 cm chenille yarn, it covers the hoops super quickly.
- Metal hoops are sturdier, but plastic hoops are easier to bend if you need slight adjustments.
- Try wrapping the hoops in two colors (white + light gray, blush + cream) for subtle texture.
- If your greenery has thick stems, remove some of the wire or break it into smaller clusters, it layers much more neatly.
- Don’t over-glue. Small, strategic dots are enough and stay invisible under the yarn.
- Make a set of different sizes. A group of these looks adorable under the tree or along a fireplace.
Share and PIN me!!!
Til’ next time…


FREE WORKBOOK
Keeping your Sweet Home Organized
Learn how to create intentional habits and simple routines to Keep Your Home Organized. Plus freebies, printables, exclusive content, and tips.
Disclaimer: By clicking on the “Yes” button above you are giving me your consent to collect and use your information according to the law and My Policy Privacy. Zero Spam I promise!