

Personalized DIY Glitter Christmas Ornaments

This post may contain affiliate links. Please read our Disclosure Policy.
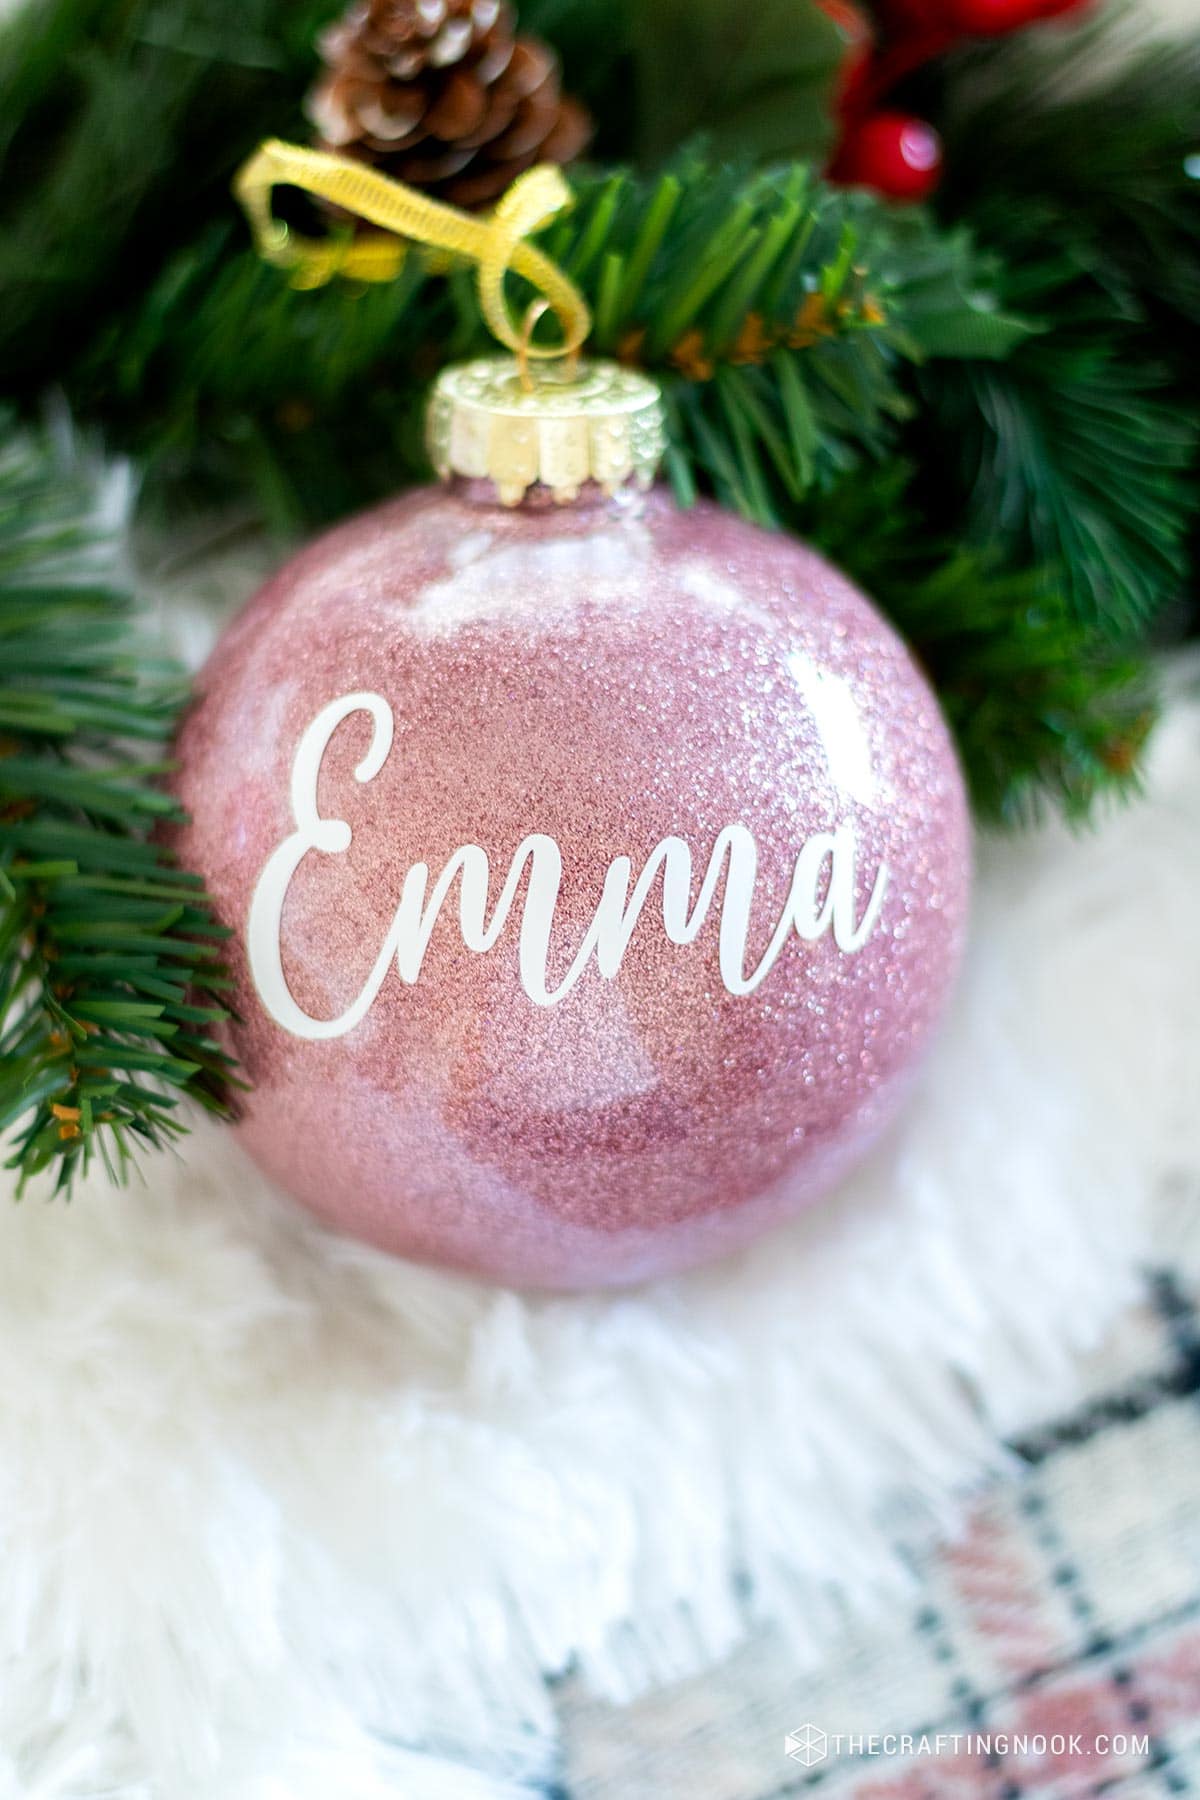
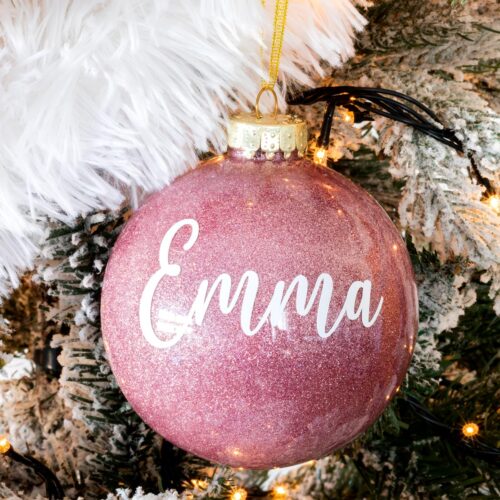
I had wanted to make personalized glitter Christmas ornaments for the longest time, and when I finally made them for our pink, white, and gold Christmas tree, I couldn’t have been happier with how they turned out! I made one for each family member, with their names in white vinyl, and they looked so pretty hanging among the snowy branches.
I used extra-fine glitter inside clear ornaments and added our names with vinyl. It took a little experimenting to get the glitter coating right, but once I figured it out, making the rest was pretty simple. I’ll show you what worked, what didn’t, and how I made them.

Table of Contents
Why You’ll Love These DIY Glitter Christmas Ornaments
Besides being pretty, there are a few things I particularly like about making these ornaments.
- You can make a whole set at once. Once you figure out the drying time for your adhesive, it’s easy to work on several ornaments together.
- They’re personal. You can add the names of your family members, kids, grandkids, or anyone you want to include on your tree.
- You can match your Christmas colors. Pink and gold were my first choice, but I’ve also made them in black and gold, and they turned out just as beautiful.
- The glitter stays inside. That means you get all the sparkle without glitter constantly falling off the outside.
- They’re lovely handmade gifts. You can personalize them with names, initials, or even a special year.
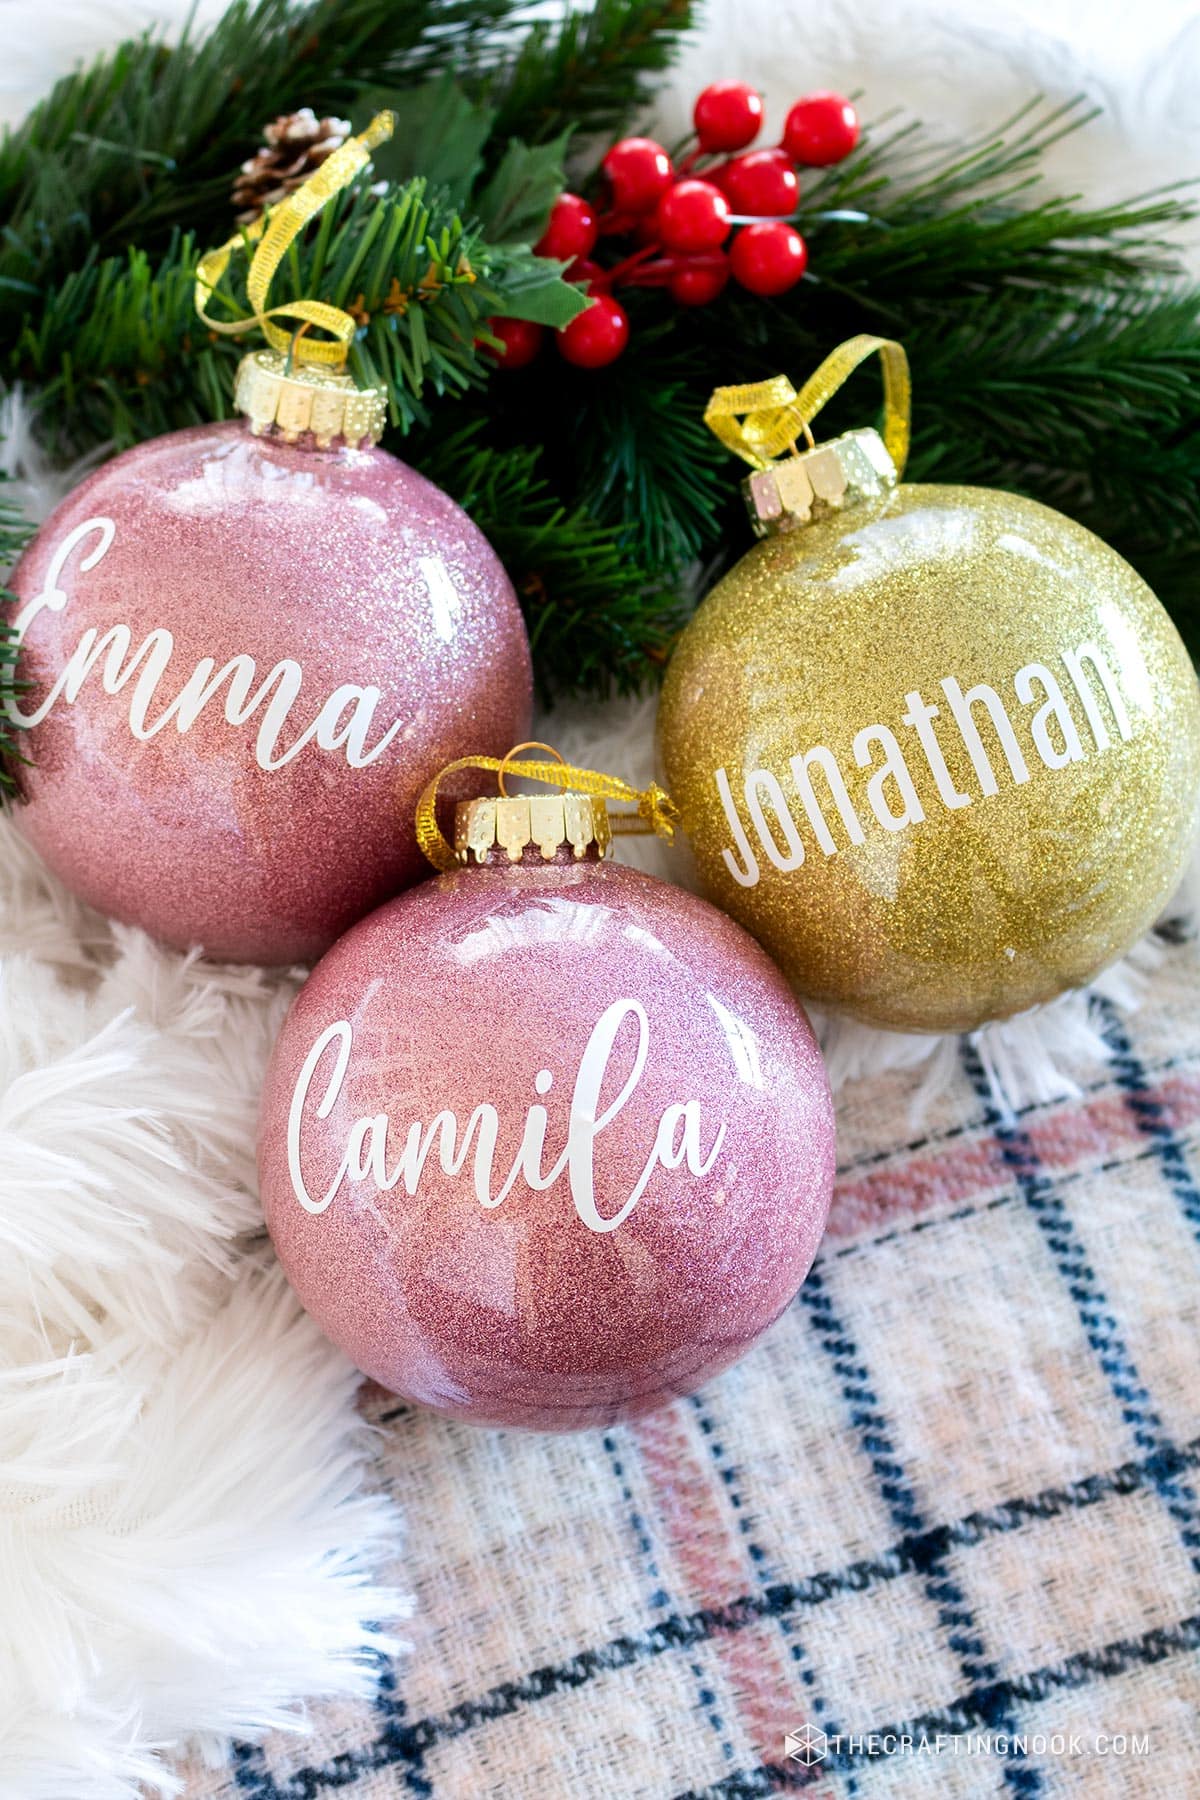
How to Make Personalized Glitter Christmas Ornaments
I’ll walk you through how I made these ornaments, including the little things I learned along the way.
The technique is fairly simple, but I recommend testing your adhesive on one ornament before making the entire set. That one step would have saved me a few ruined ornaments!
Supplies:
- Clear plastic ornaments – You can use clear glass ornaments too.
- Glitter (in your favorite festive colors) _ I used extra fine glitter.
- Vinyl sheets (for the names in your favorite colors that contrast with the chosen glitter)
- Transfer tape or contact paper.
- Polyurethane varnish or Polyacrylic.
- Small funnel or paper funnel
- Ribbon or twine
- Rubbing alcohol
- Syringe
- Paper towels
- Glass or plastic cups
- Patience (the most important ingredient!)
Tools:
- Cutting Machine – Silhouette or Cricut will work
- Weeding Tool
- Squeegee or scraper
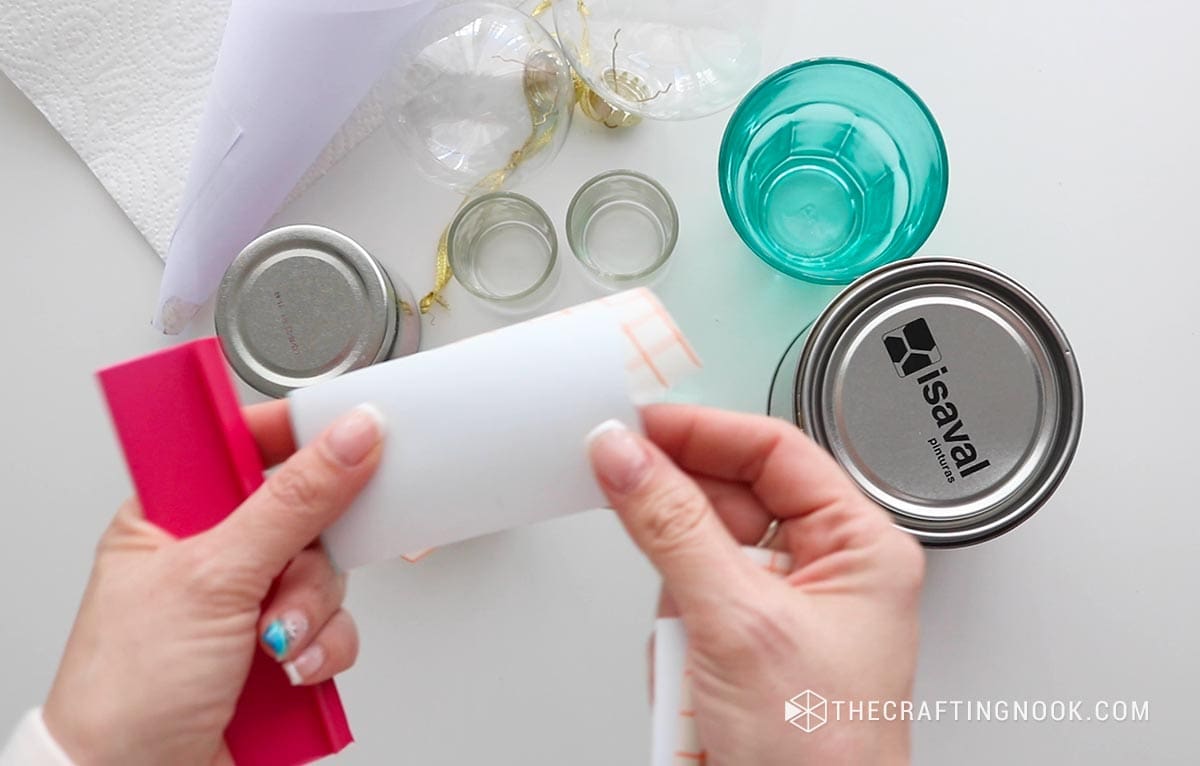
Instructions:
Before You Start: Choosing the Right Adhesive
This is probably the most important thing I learned while making these ornaments.
Before settling on polyurethane, I tested white glue, clear glue, and polyurethane varnish.
All three gave me similar-looking results at first, but the white glue was too thick and took forever to spread around the inside of the ornaments. It also took a long time to dry clear, which meant I couldn’t see the glitter properly.
The clear glue worked better, but I preferred the finished result with polyurethane.
There was one little problem, though.
I don’t live in the USA, and the polyurethane I found here was quite different from the Minwax product my friend was using in the United States.
She told me hers was ready for glitter after about 5–10 minutes of draining and settling. Mine, from the brand Isaval, needed approximately 45–60 minutes before I could add the glitter successfully.
I tried 10, 30, and 45 minutes before figuring out what worked with my particular product.
And yes, I ruined about three ornaments along the way!
When I added the glitter too soon, the excess polyurethane was still moving around inside. The glitter would slide toward the bottom and leave little cracks and uneven areas in the finish.
My recommendation: Don’t assume every polyurethane product behaves the same way. The drying and draining times depend on the formula, consistency, and conditions. Test one ornament first, follow the product’s safety instructions, and make sure it’s compatible with your ornament material.
Also, use polyurethane only in a well-ventilated area and follow the manufacturer’s instructions for safe handling. Keep children away from the varnish and other chemicals.
Step 1: Clean the Clear Ornaments
Remove the metal caps from your ornaments.
Use a little rubbing alcohol to clean the inside of each ornament. This helps remove any residue that could interfere with the coating.
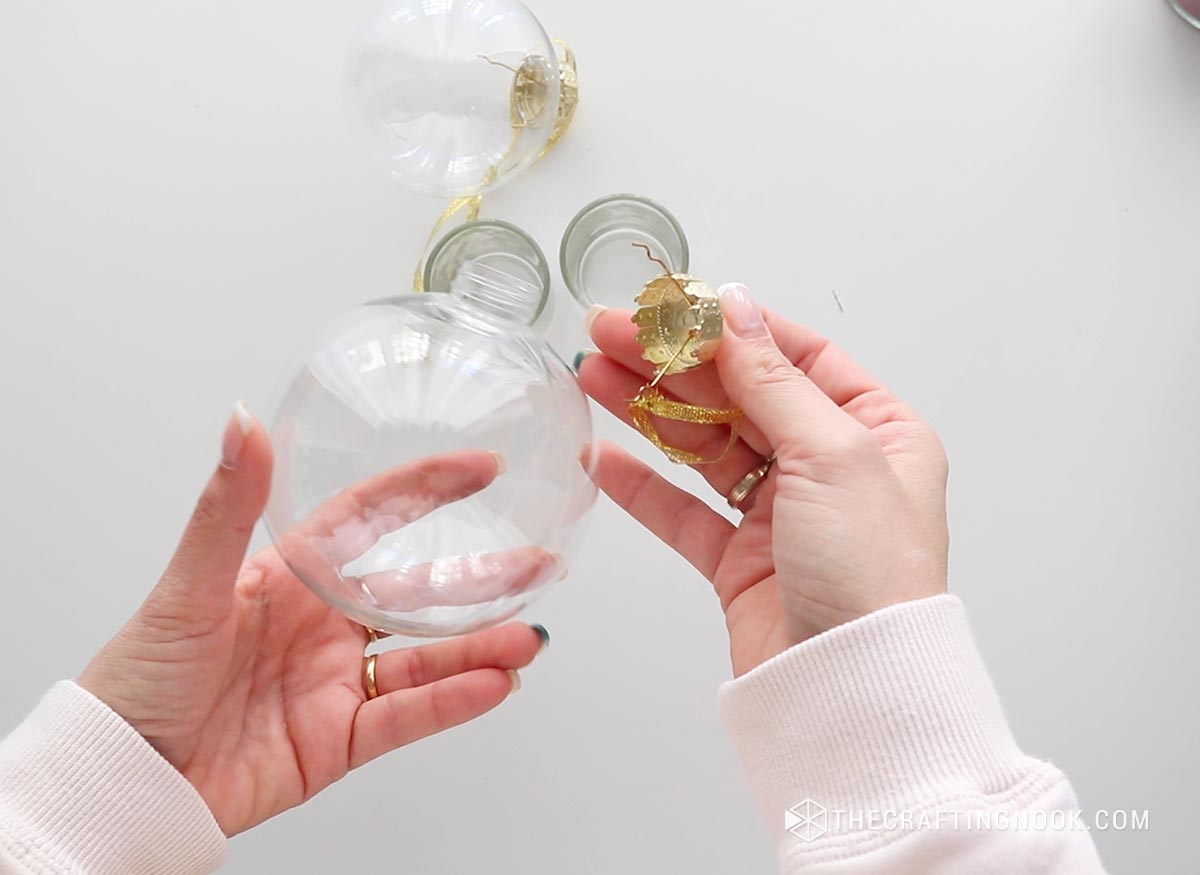
Let the alcohol evaporate completely before moving on.
Make sure the ornaments are clean and dry inside.
Step 2: Add the Polyurethane
Place an ornament on a glass or plastic cup to keep it steady while you work.
Using a syringe, carefully add some polyurethane through the ornament opening.
The amount you’ll need depends on the size of the ornament and the consistency of your polyurethane. Add enough to coat the inside without leaving a large amount sitting at the bottom.
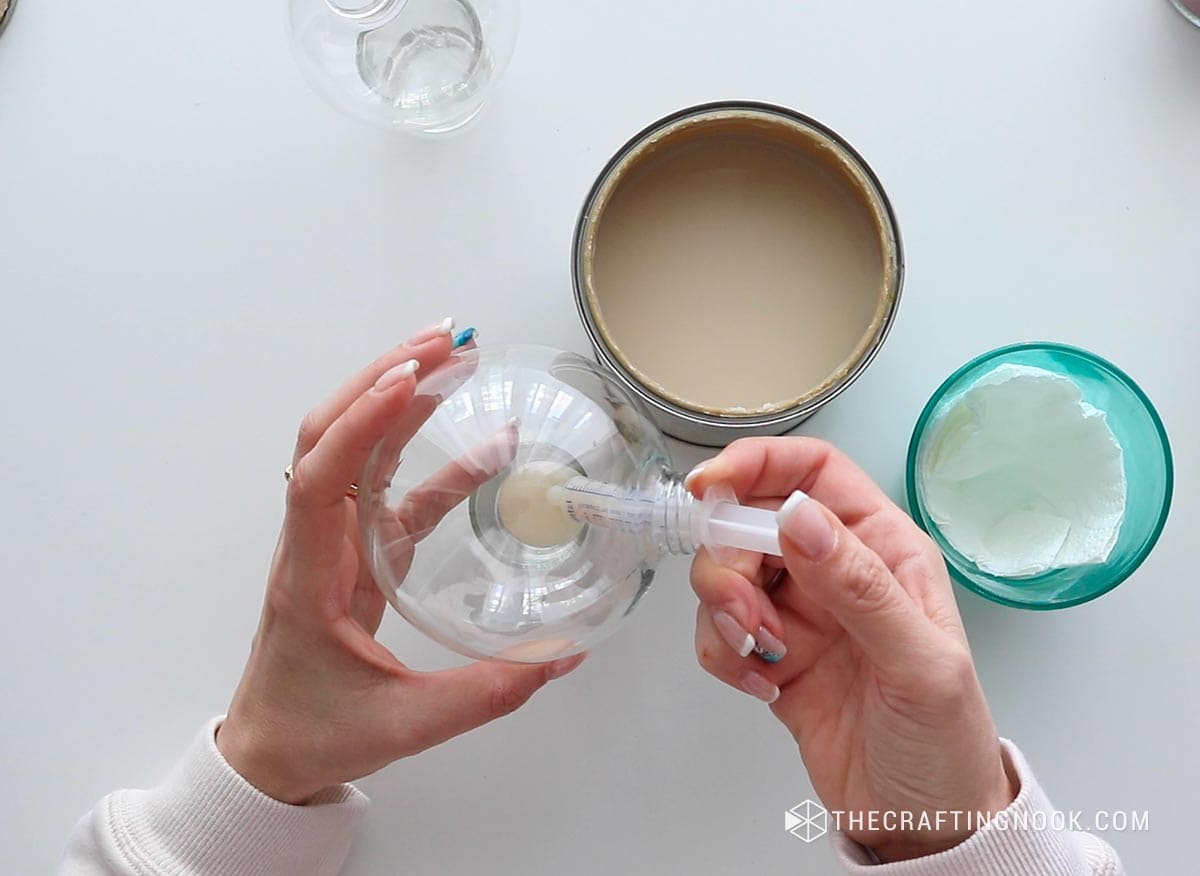
Slowly rotate the ornament, allowing the polyurethane to spread over the entire inside surface.

Keep turning it until the interior is evenly coated.
Step 3: Drain the Excess Polyurethane
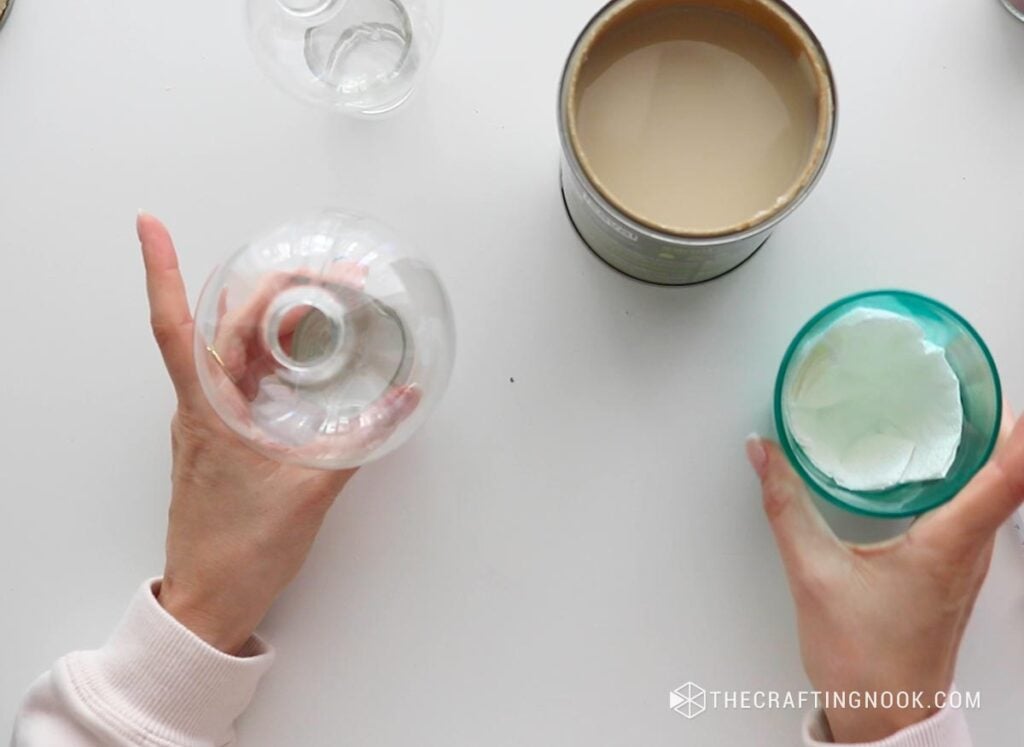
Once the inside is coated, turn the ornament upside down to let the extra polyurethane drain out.
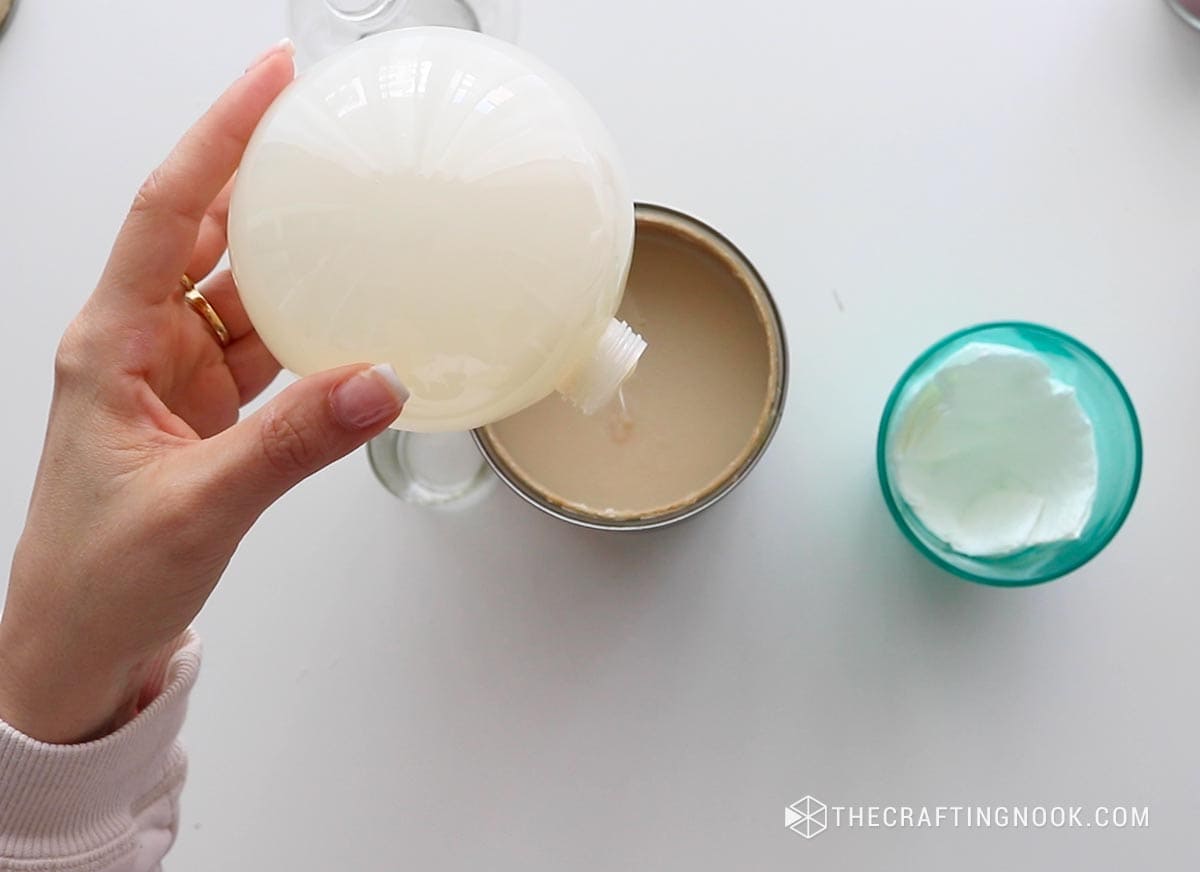
I rested mine over a container so the excess could drip out while I worked on the next ornament.
You can also use a cup with a paper towel inside to catch the drips.
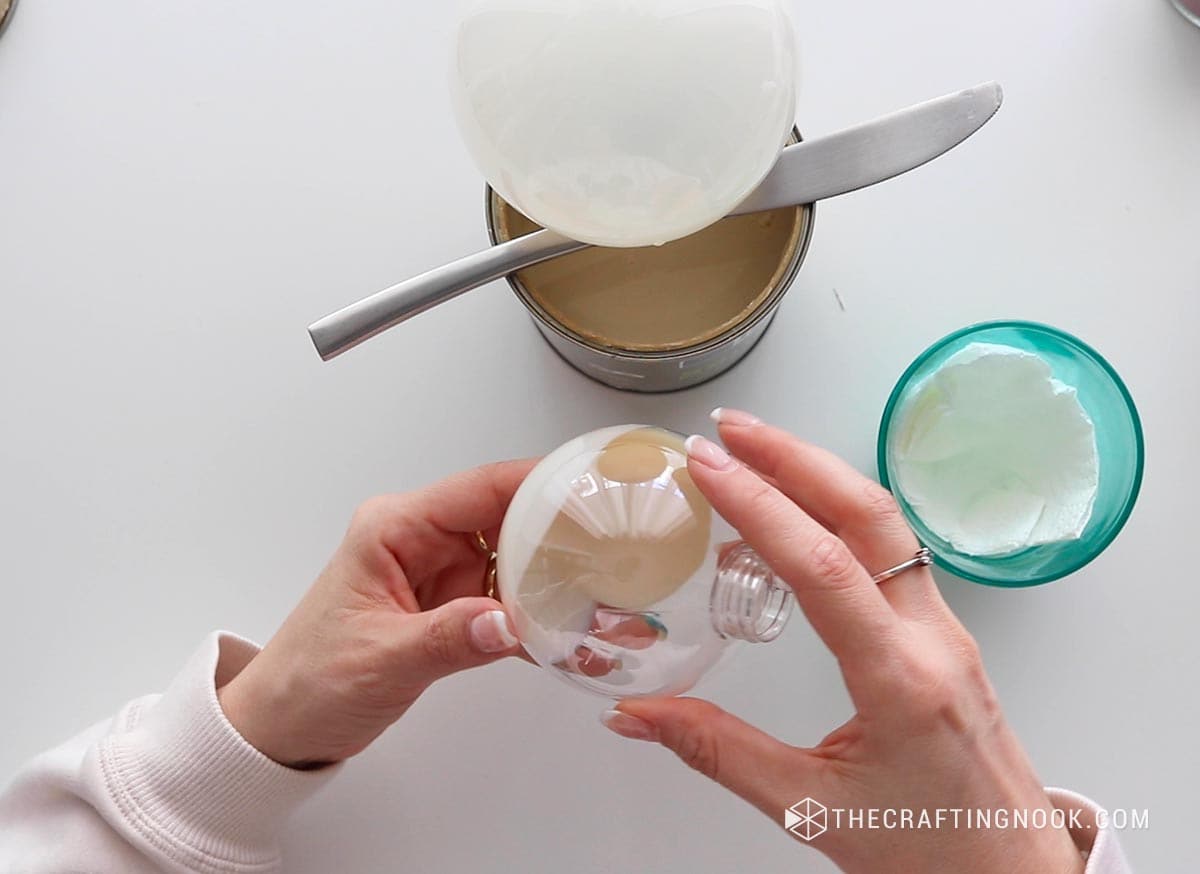
The important thing is not to leave a puddle of polyurethane sitting inside.
Too much leftover product can make the glitter slide around and create an uneven finish.
Step 4: Let the Polyurethane Set
This is where a little patience makes a big difference.
After draining the excess, let the polyurethane settle until the coating is ready to hold the glitter.
As I mentioned earlier, my polyurethane needed approximately 45–60 minutes, but yours may behave differently.
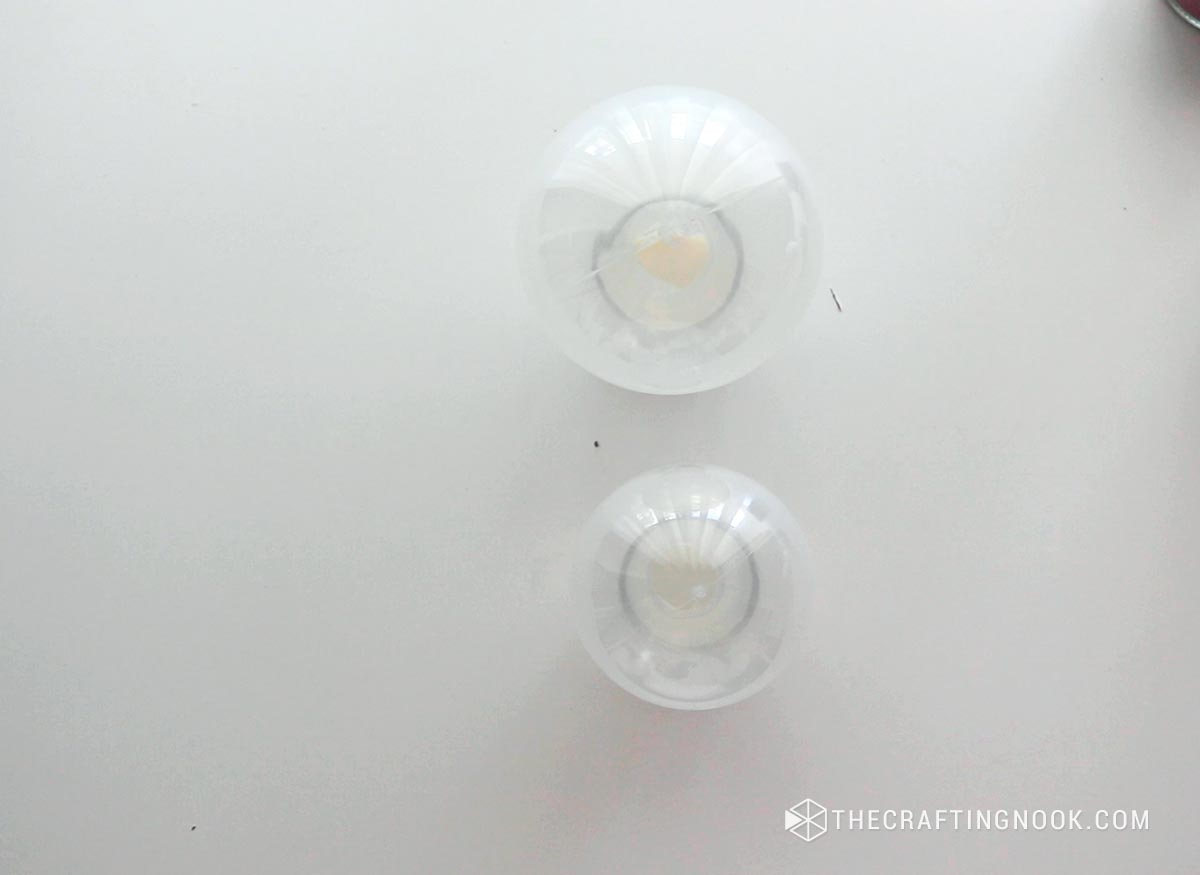
While the first ornament is sitting, you can continue coating the others.
I found it easier to work on several ornaments this way instead of completing them one at a time.
Just keep track of the order you started them so you know which one is ready for glitter first.
Step 5: Add the Glitter
Once the polyurethane is ready, use a small funnel or a funnel made from paper to pour extra-fine glitter inside the ornament.

Add a generous amount so there’s enough to coat the entire surface.
Slowly rotate and gently shake the ornament, allowing the glitter to move around and cover the inside.
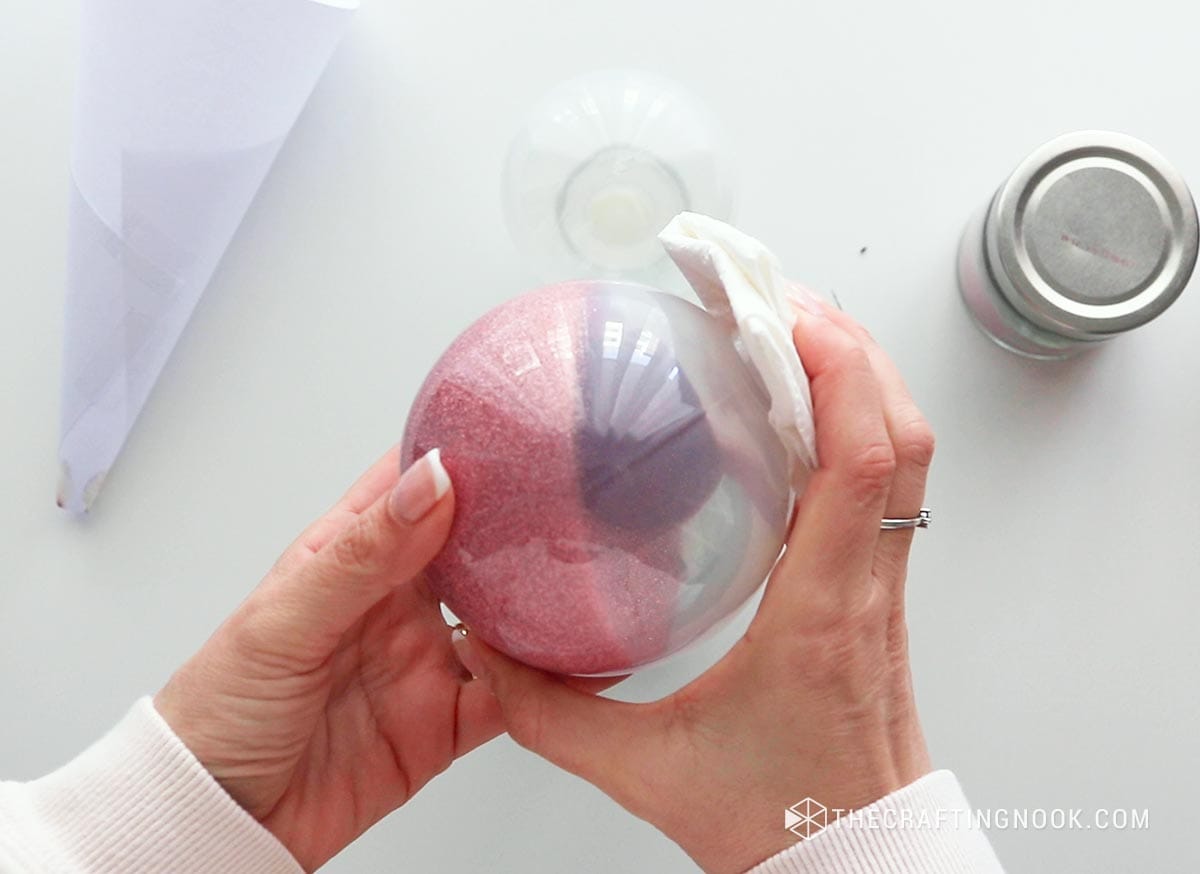
Keep going until you no longer see any transparent areas.
Then pour the excess glitter back into its container.
I made some ornaments pink and others gold to match our Christmas tree.
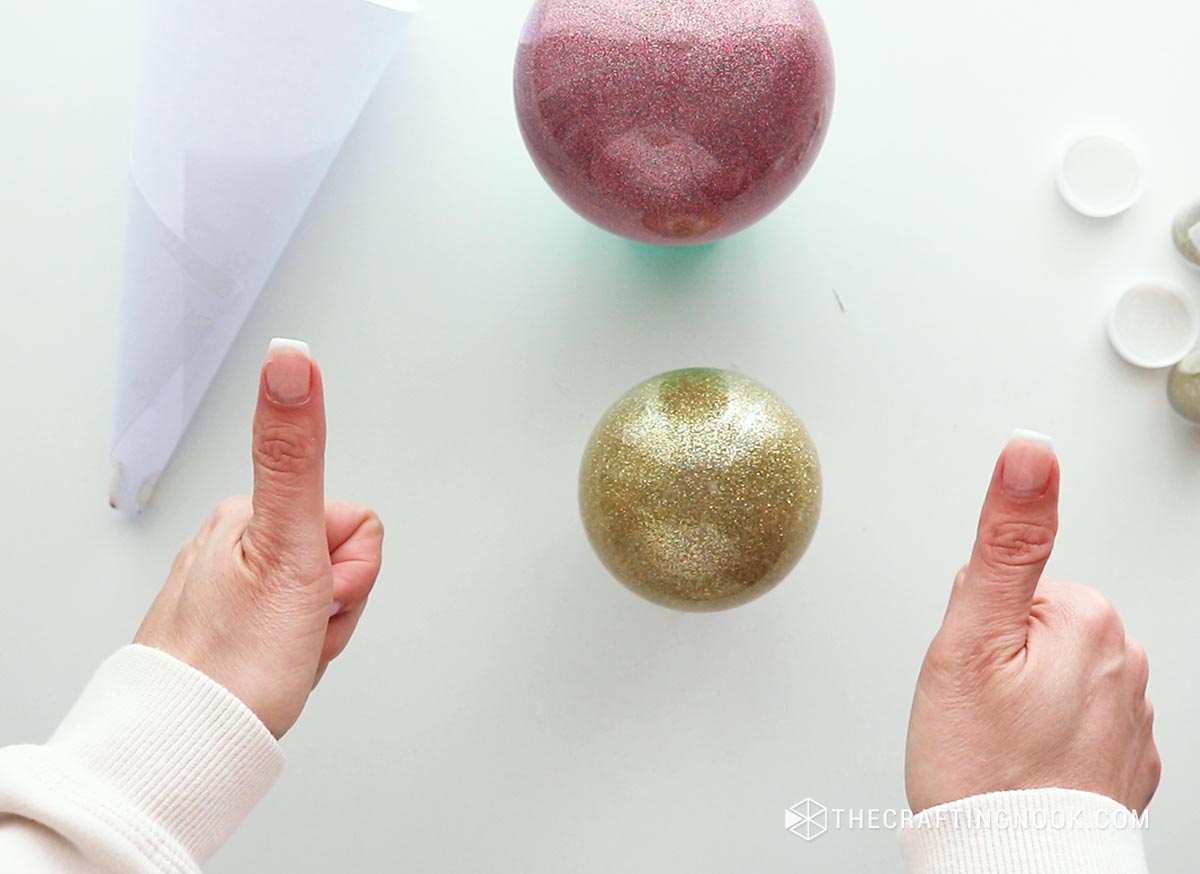
Let the ornaments dry according to the adhesive manufacturer’s instructions. Avoid handling the inside or closing the ornaments while the coating is still wet.
Step 6: Prepare Your Vinyl Names
While the ornaments are drying, you can start working on the names.
I used my Silhouette Cameo and Silhouette Studio, but you can use a Cricut or another cutting machine.
Open your design software and type the names you want to add to the ornaments.
Choose a font you like and adjust the size of each name to fit the ornament.
Keep in mind that longer names might need smaller lettering.
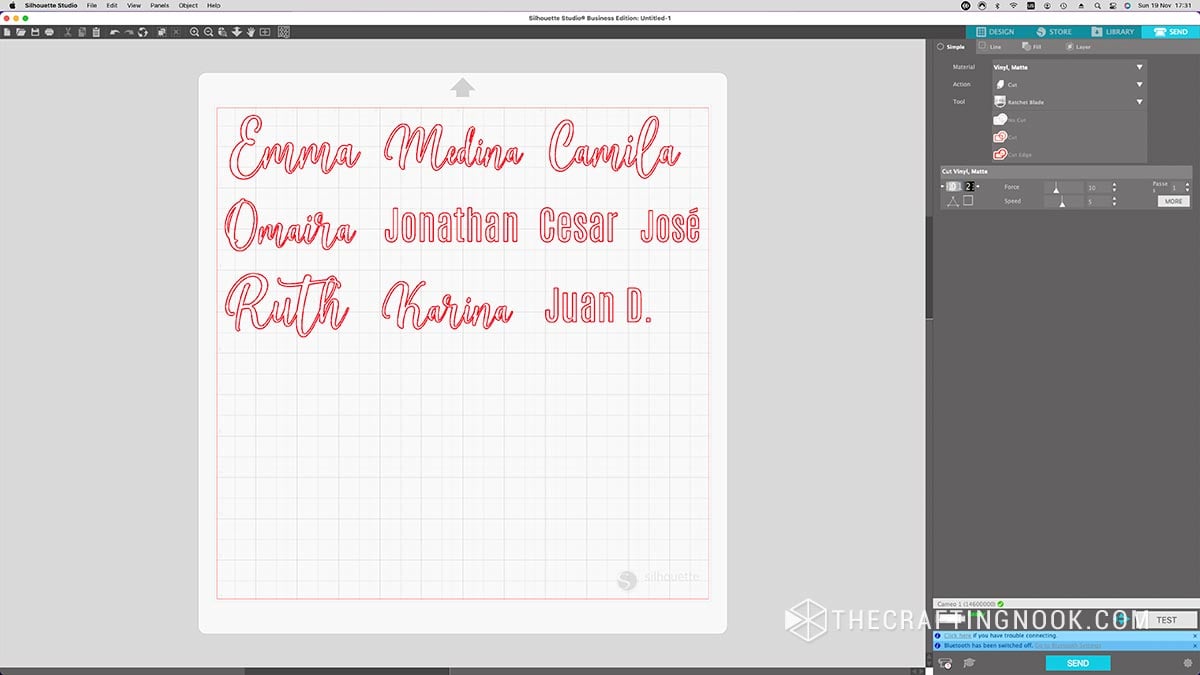
I used a script-style font because I loved how it looked with the glitter, but you can use a simpler font if you prefer.
Arrange the names so they fit on your vinyl sheet with enough space between them for cutting and weeding.
Step 7: Prepare and Cut the Vinyl
I chose white vinyl because it contrasted beautifully with both the pink and gold glitter.
Place the vinyl on your cutting mat, making sure it’s smooth and properly attached.
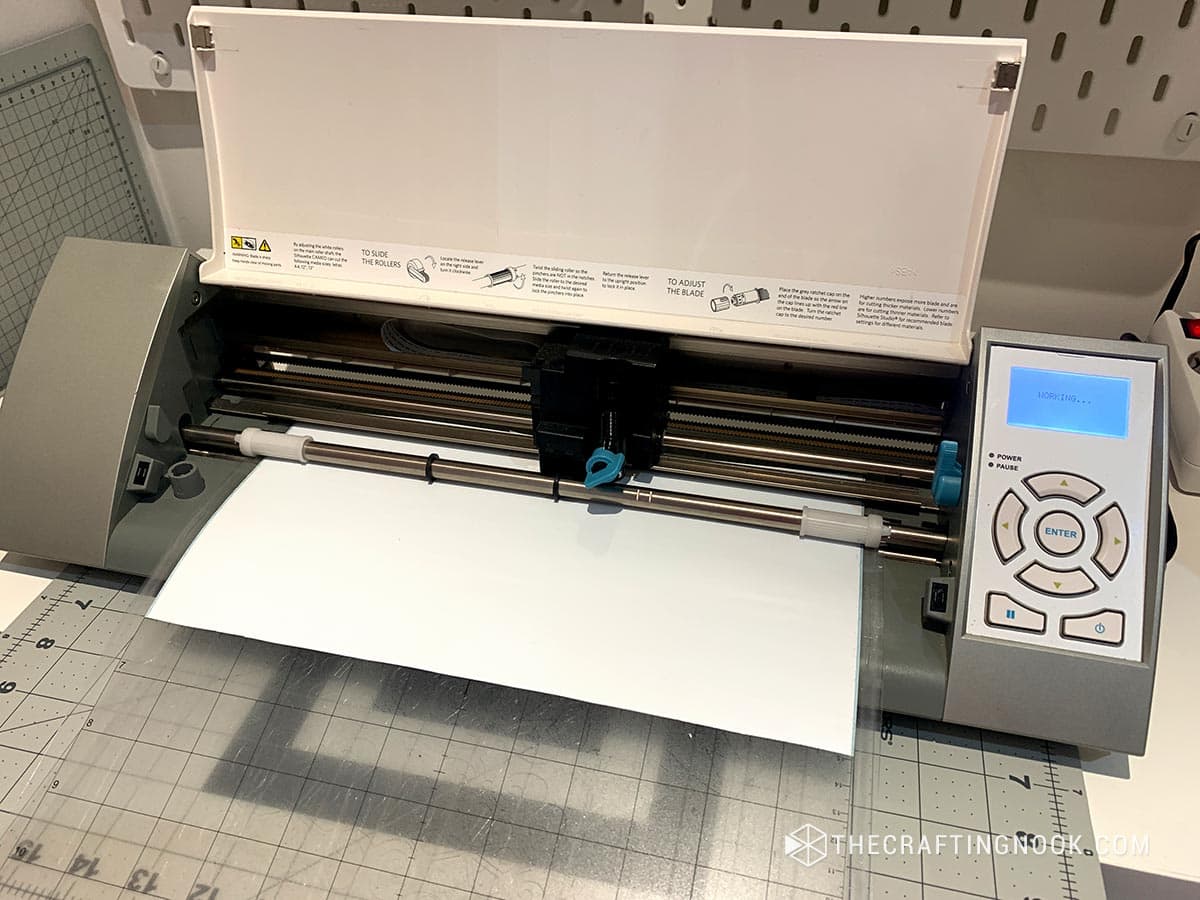
Select the appropriate vinyl settings in your cutting machine’s software, then load the mat and send the design to cut.
Once the machine finishes, remove the vinyl from the mat.
Step 8: Weed the Names
Carefully remove the excess vinyl around each name.
Use your weeding tool to remove the small pieces inside letters, such as the centers of an A, O, or E.
Take your time with delicate script letters.
Once you’ve finished weeding, cut the names apart so each one is ready to apply to its ornament.
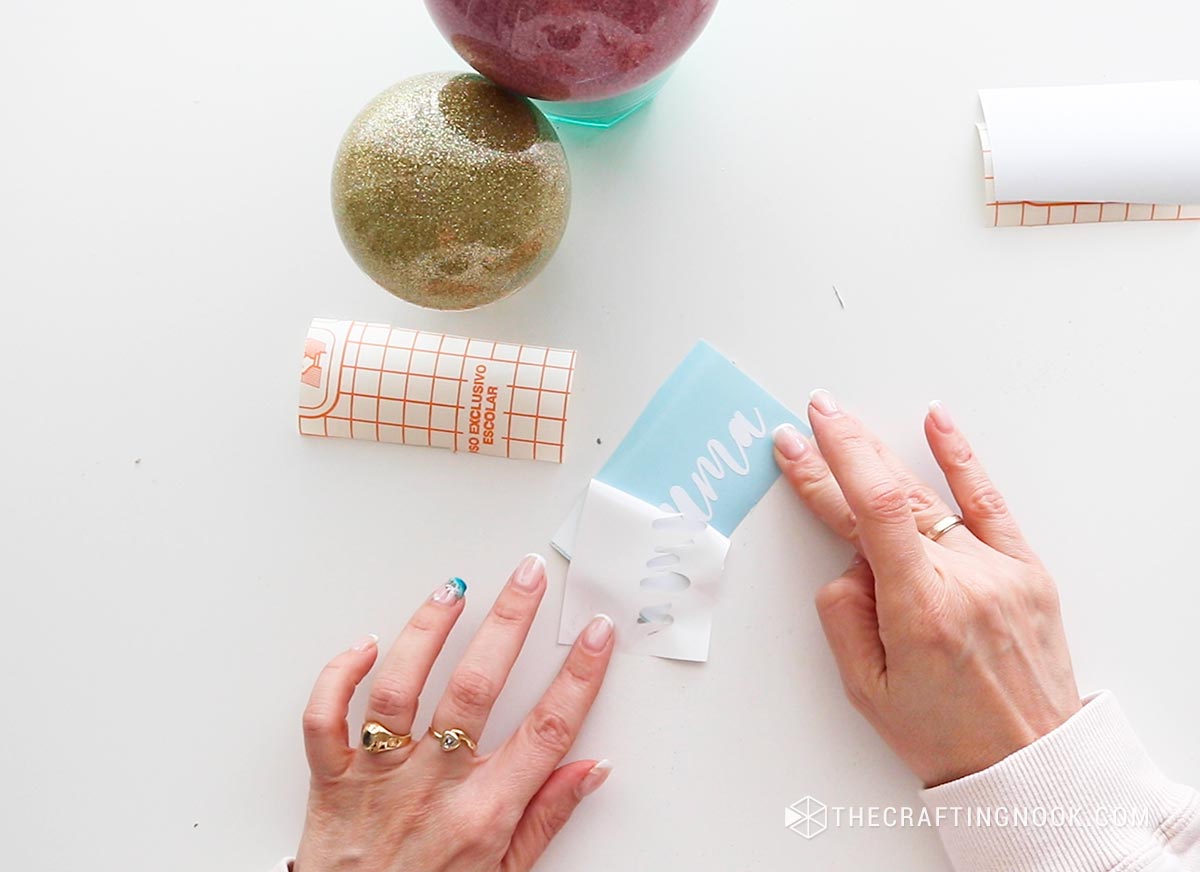
Step 9: Apply the Transfer Tape
Cut a piece of transfer tape slightly larger than the name.
I actually used inexpensive contact paper for mine, and it worked well with the vinyl I had.
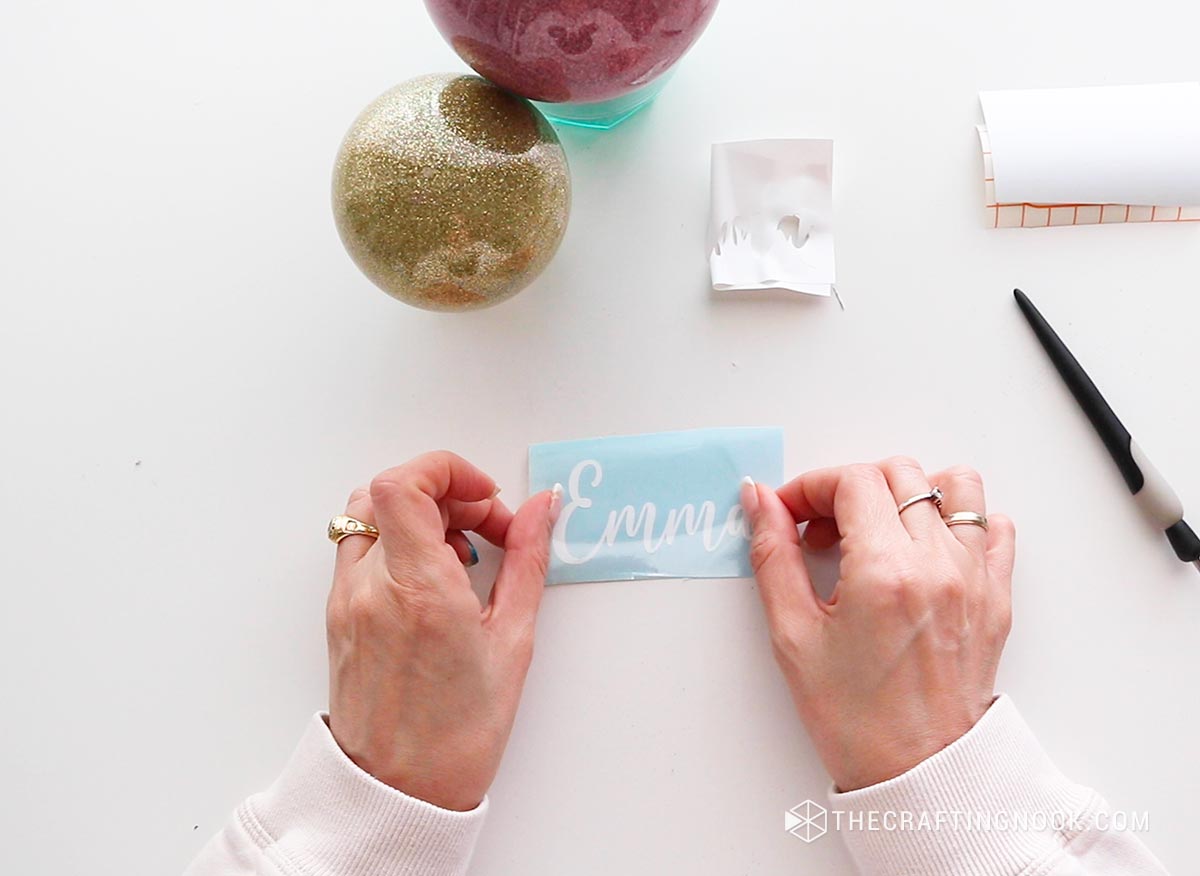
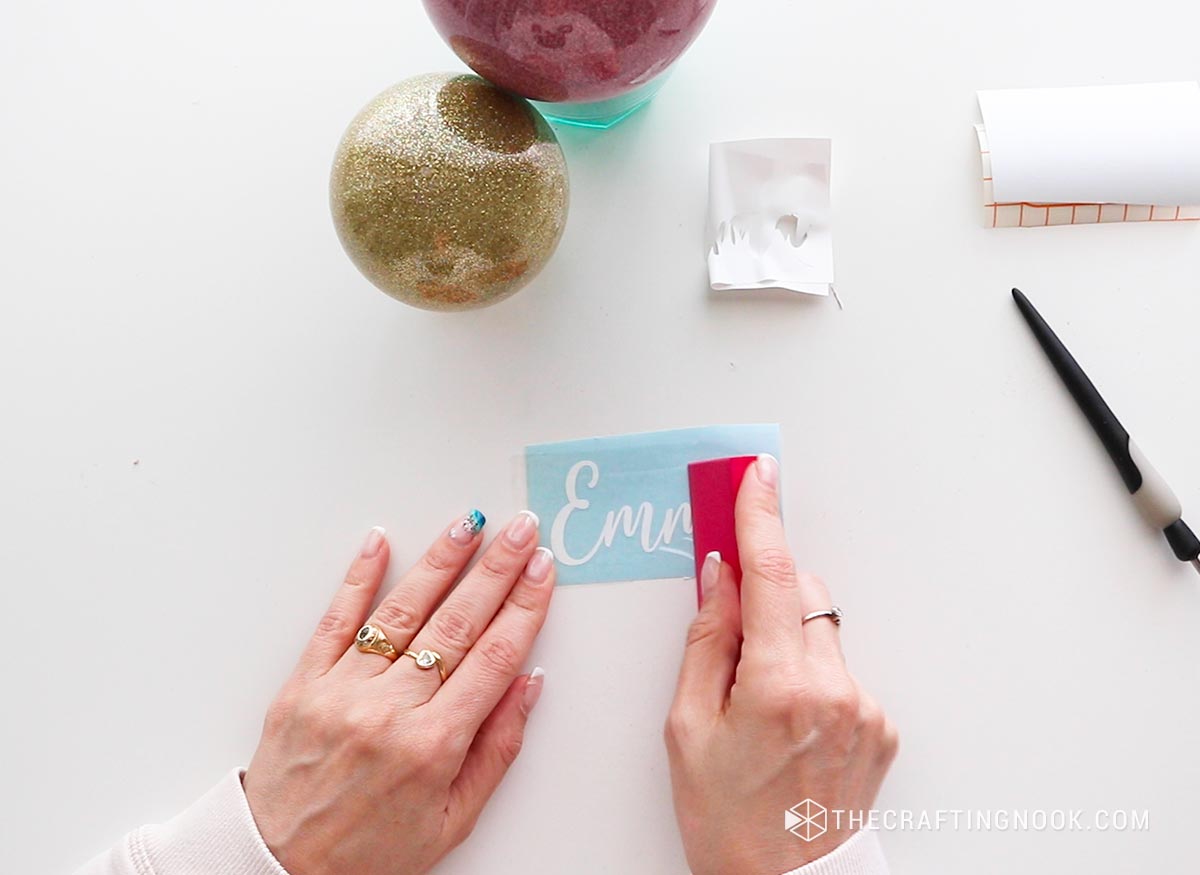
Place the transfer tape over the name and rub it gently with your scraper to help the letters stick to it.
Slowly lift the transfer tape, making sure the entire name comes away from its backing.
If any part stays behind, lay the tape back down and rub over that area again.
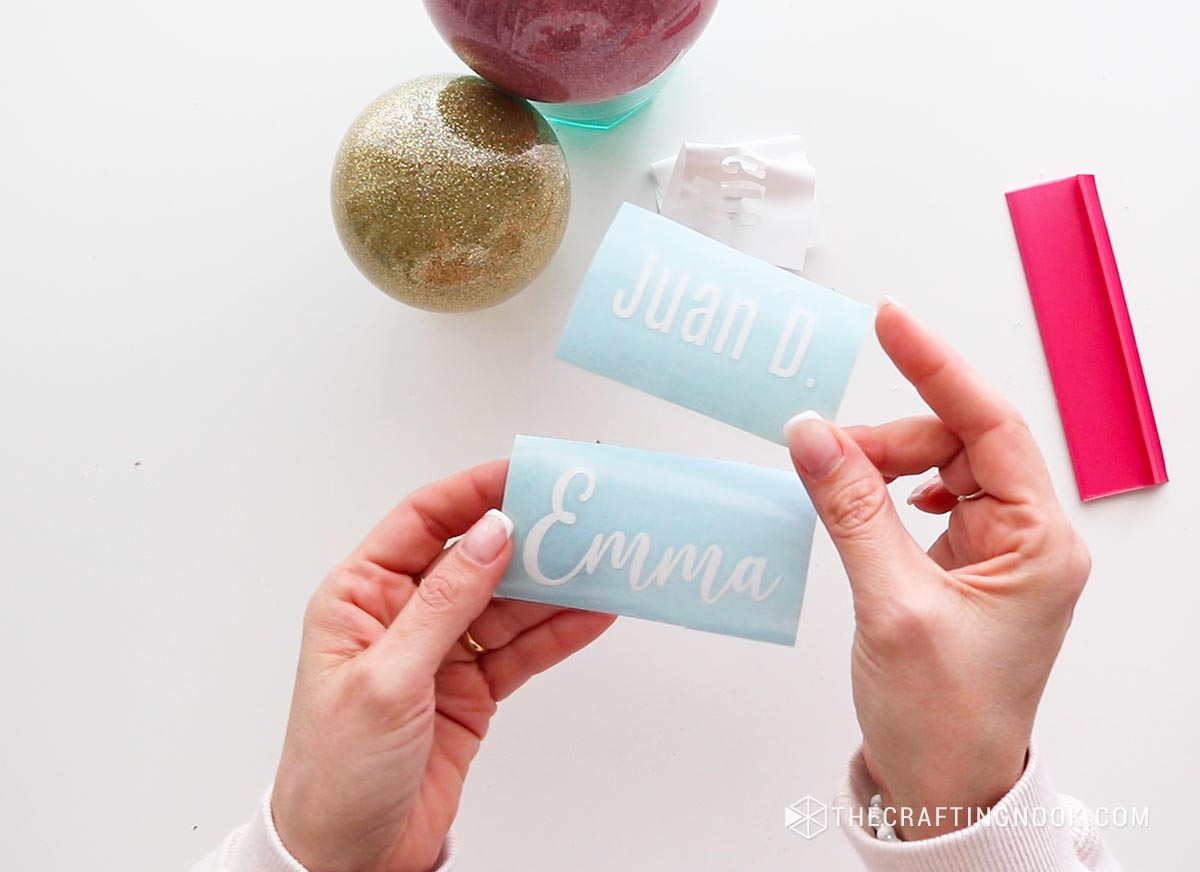
Step 10: Apply the Vinyl Names to the Ornaments
Before applying the names, make sure the outside of the ornaments is completely clean and dry.
Position the name where you want it on the ornament.

Here’s something I found helpful: start pressing the vinyl down from the center of the name and work toward the sides.

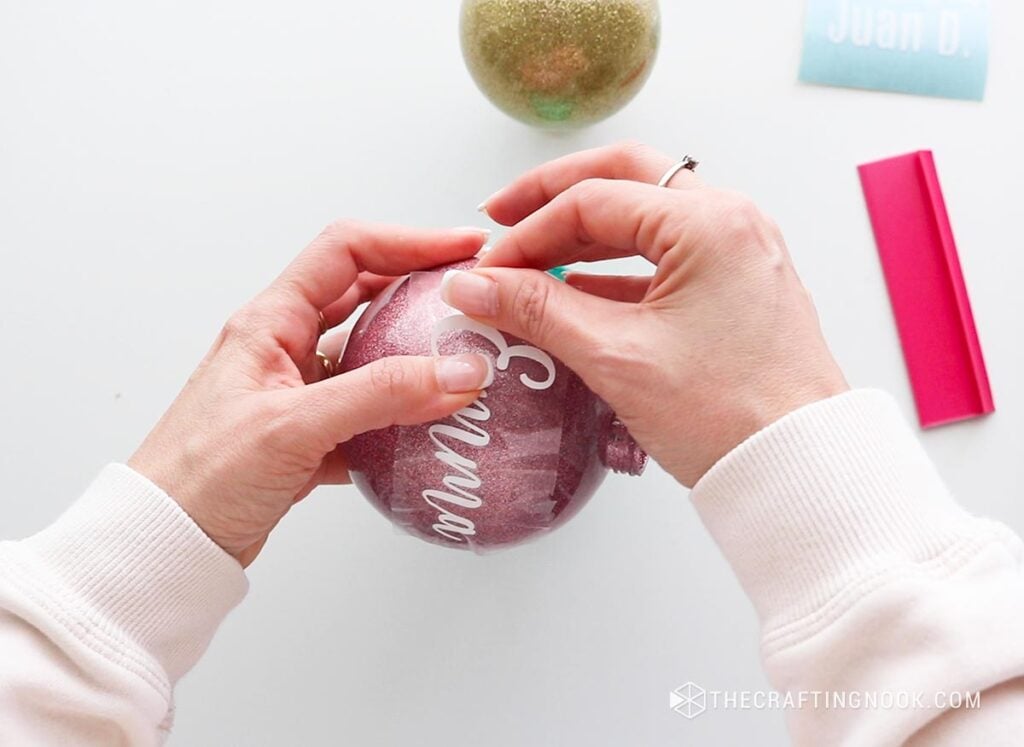
Because ornaments are curved, trying to stick the entire name down at once can cause wrinkles or distort the letters.
I prefer securing the middle first, then smoothing the vinyl toward the right and left.
Press gently as you go, making sure the letters follow the curve of the ornament. Once it’s all in contact with the ornament, press down with the scraper.
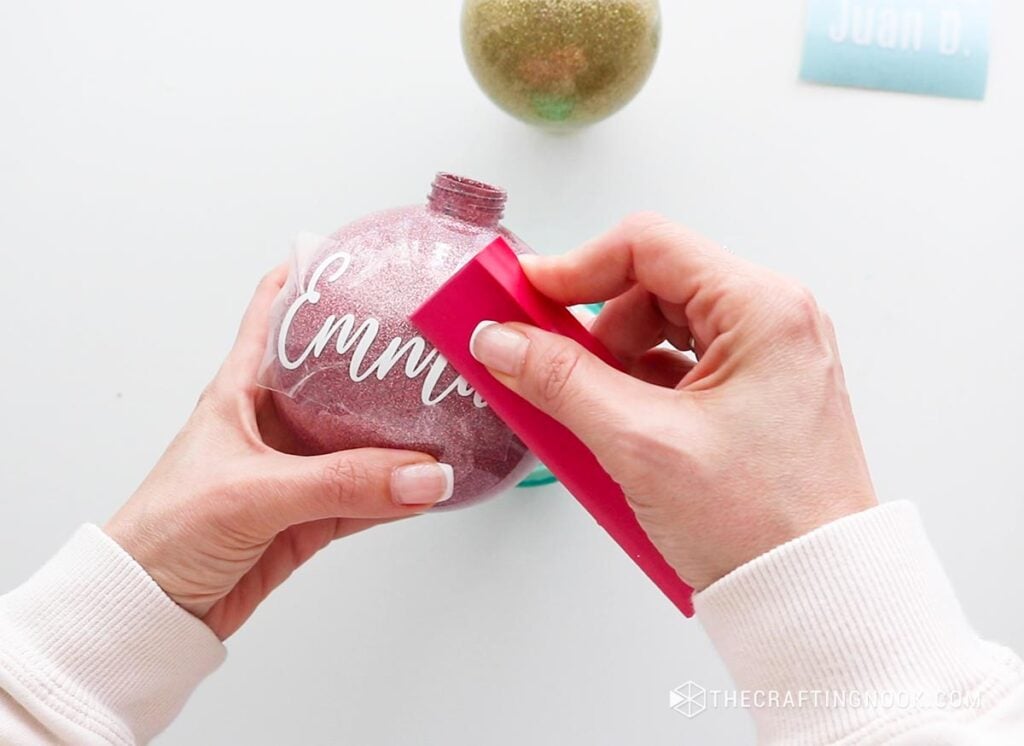
Once the name is attached, slowly peel away the transfer tape, keeping it close to the surface.
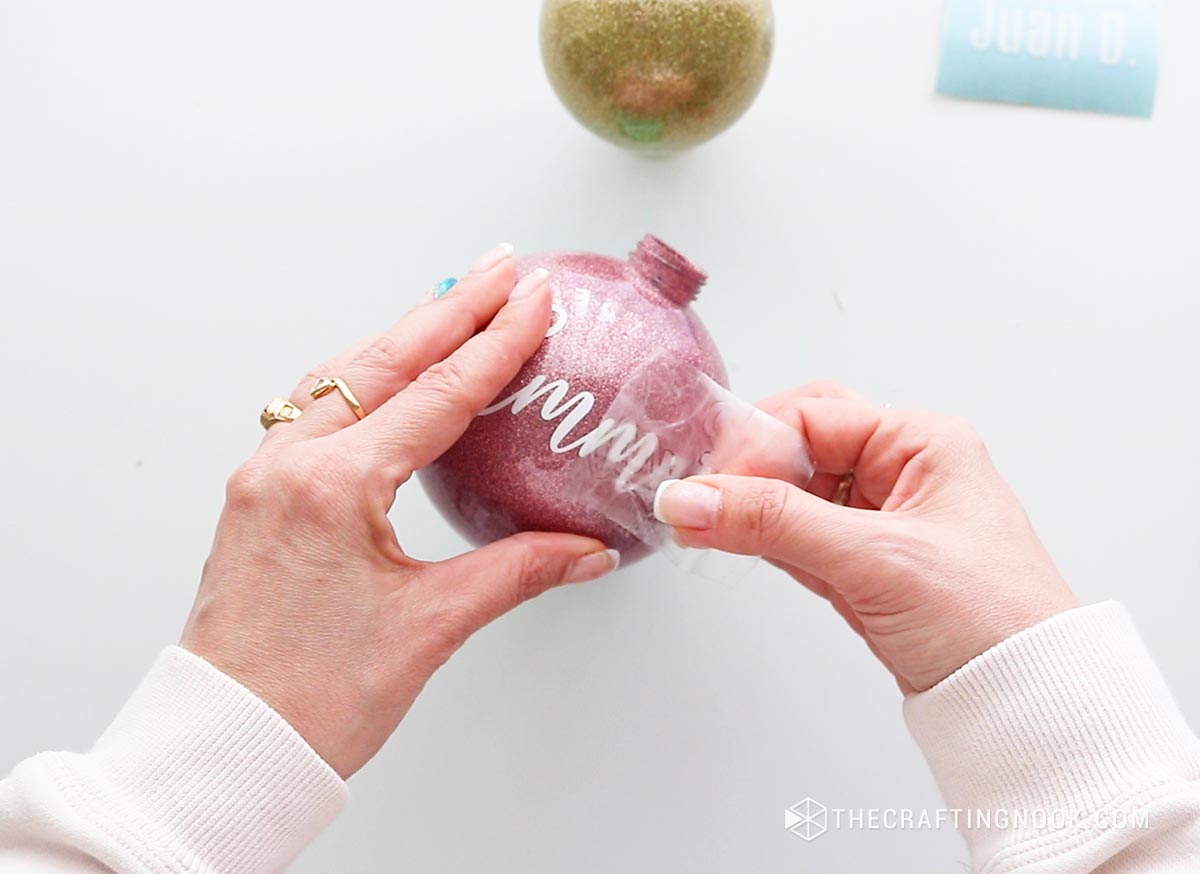
If any letters start lifting with the tape, press them down again before continuing.
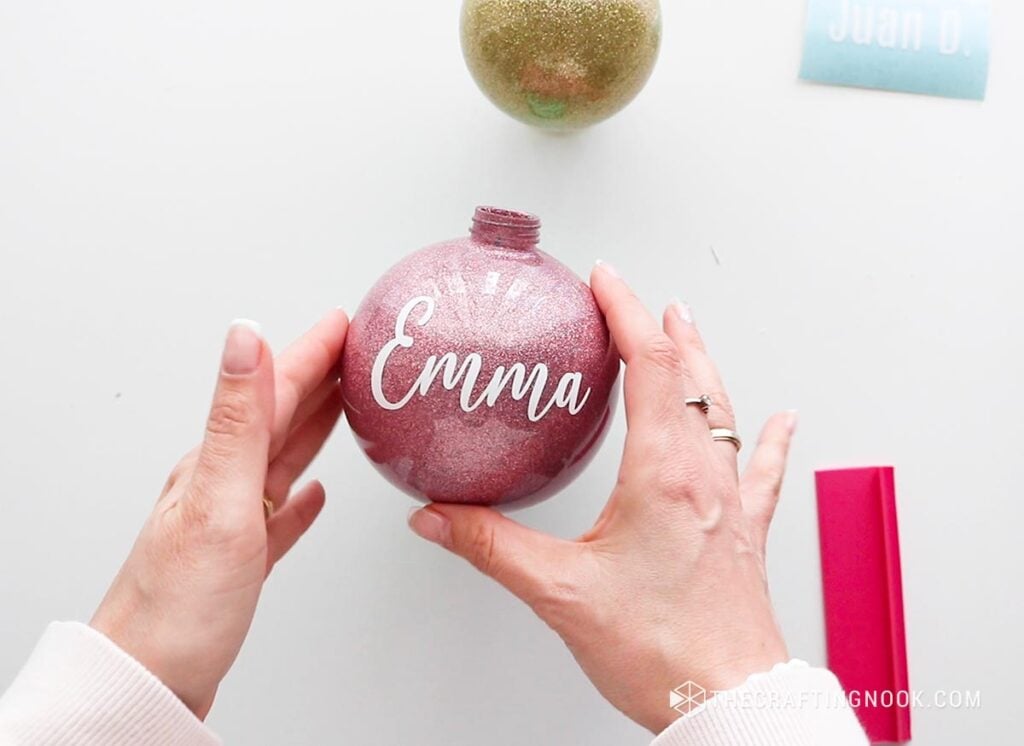
Give the edges one final gentle press to make sure everything is secure.
Step 11: Finish the Ornaments
Allow the glitter coating to dry completely before replacing the ornament caps.
I recommend giving the ornaments plenty of time rather than rushing this part. The exact curing time depends on the polyurethane you’re using.
Once they’re completely dry, carefully put the metal caps back on.
Add your ribbon or twine for hanging.
And that’s it! Your personalized glitter Christmas ornaments are ready for the tree.
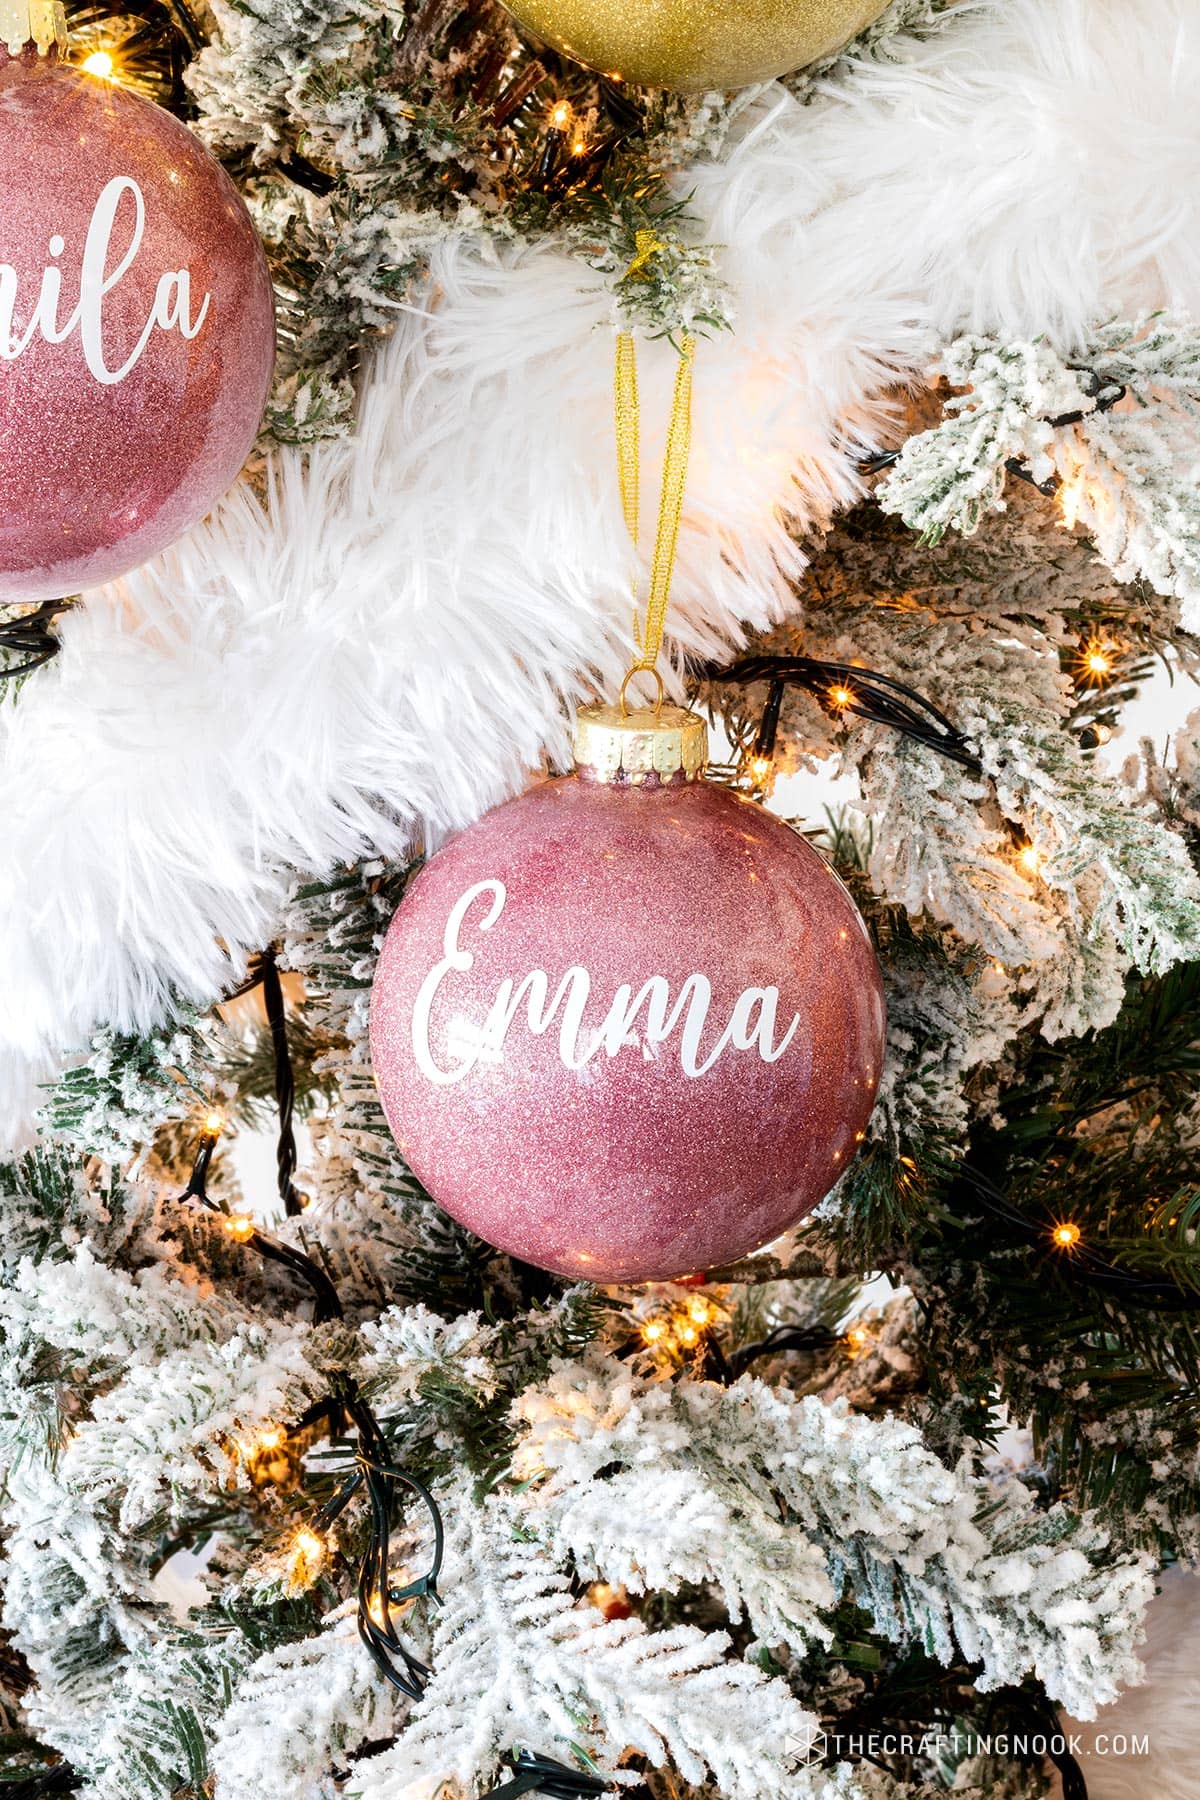
I loved seeing all our names hanging together among the snowy branches and warm Christmas lights.
Crafting Tips
After testing different products and making more than one set of these ornaments, here are the things I would pay the most attention to.
- Test your adhesive before making the whole set. Different products behave differently, and figuring out the correct draining and settling time first can save you a lot of trouble.
- Don’t leave too much polyurethane inside. Let the excess drain properly so the coating doesn’t pool at the bottom.
- Use extra-fine glitter. It’s my preference for getting that smooth, sparkly finish inside the ornaments.
- Work on several ornaments in stages. While one is draining or settling, you can prepare the next one.
- Give the glitter coating enough time to dry. Don’t rush to put the caps back on while the interior is still wet.
- Choose vinyl that contrasts with your glitter. My white lettering showed up beautifully against both pink and gold, but darker or lighter vinyl may work better with other glitter colors.
- Take your time applying vinyl to the curved surface. Starting from the middle and working toward the edges makes the process easier.
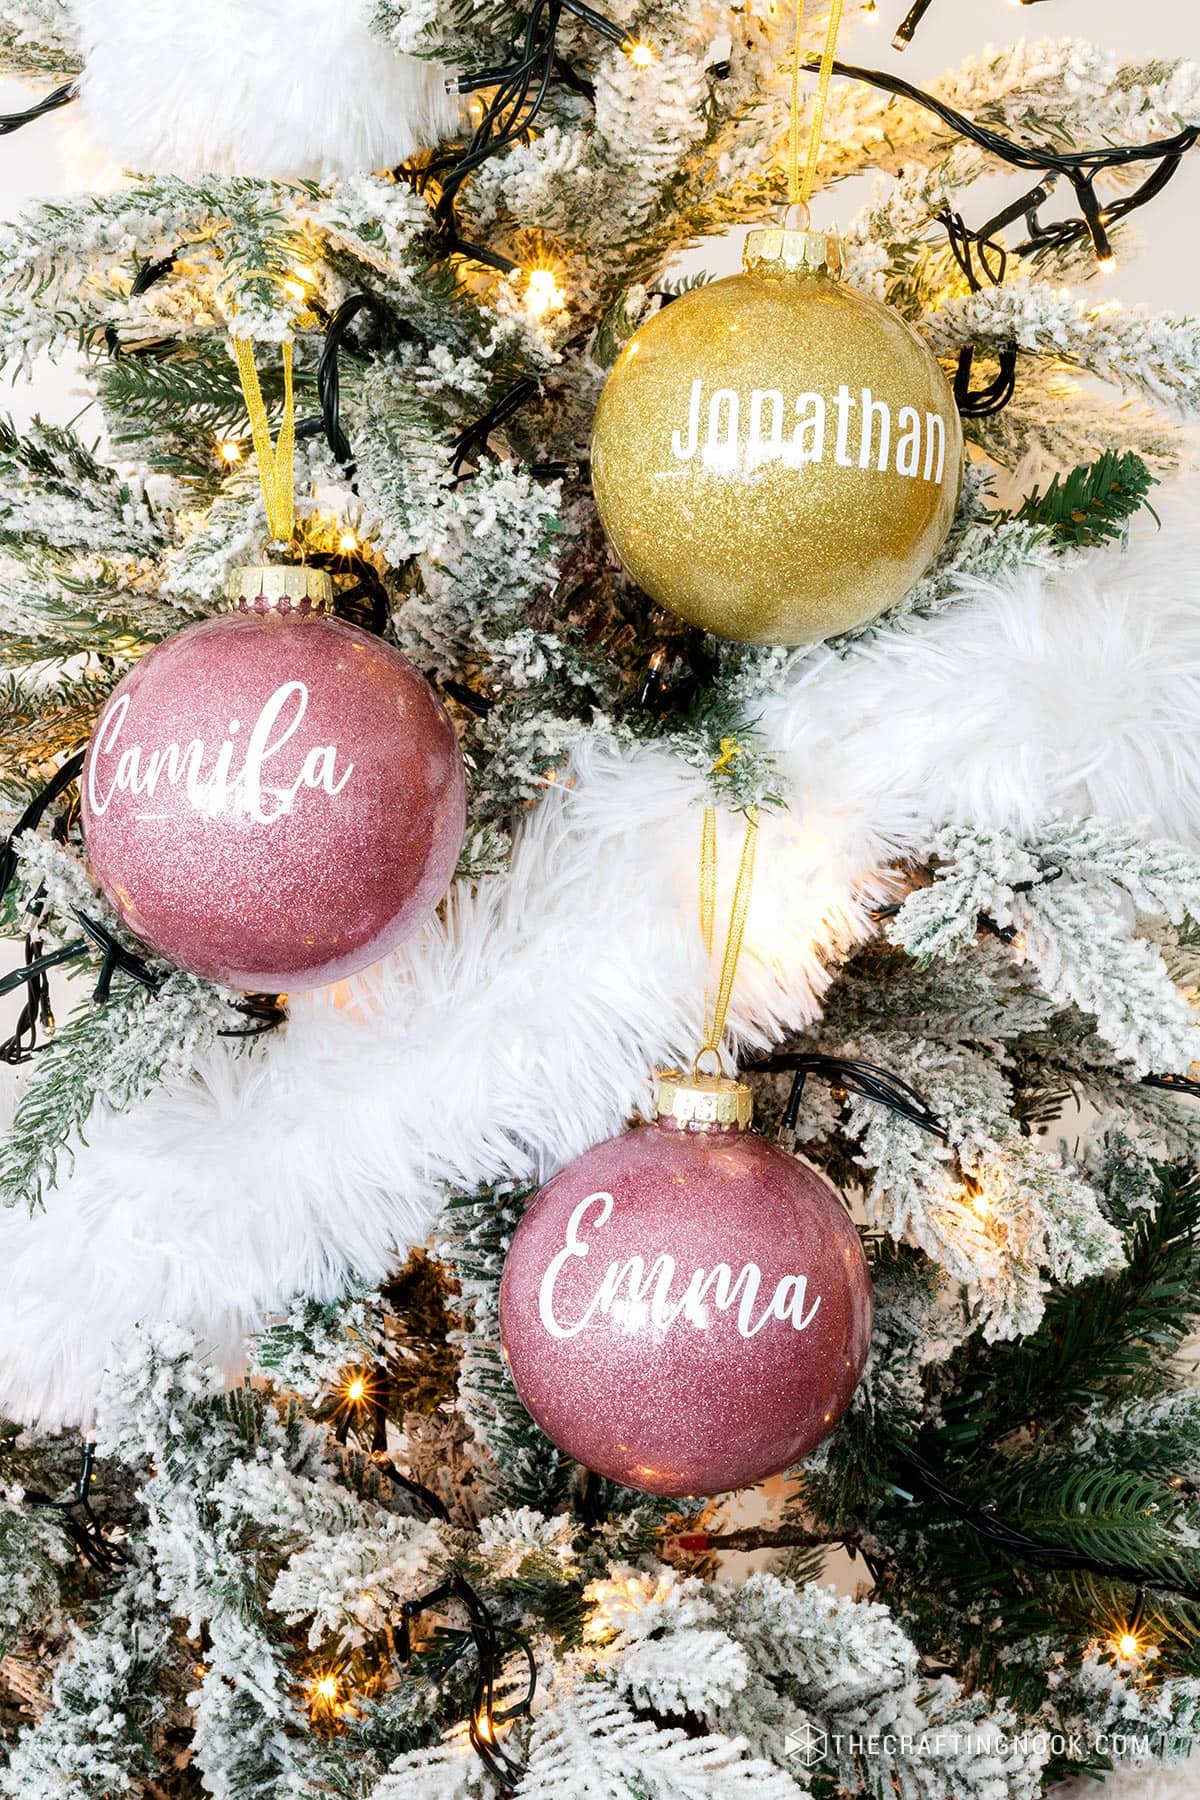
Glitter Ornament Color Ideas
The fun thing about these ornaments is that you can make them work with almost any Christmas decorating theme.
Here are a few combinations I particularly like:
- Pink, white, and gold: My original combination, with white vinyl lettering.
- Black, white, and gold: The combination I used when I made my second set.
- Red and gold: A pretty choice for a more traditional Christmas tree.
- Silver and blue: A lovely combination for winter-inspired Christmas decorations.
You can also mix different glitter colors throughout a set while keeping all the vinyl names the same color. That’s what I did with my original ornaments, and I really liked how they looked together.
My Black and Gold Glitter Christmas Ornaments
A few years after making these pink and gold ornaments, I decided to make them again for our black, white, and gold Christmas theme.
I already had some gold ornaments, so I made a few new black glitter ones and personalized them with our names using the same technique.
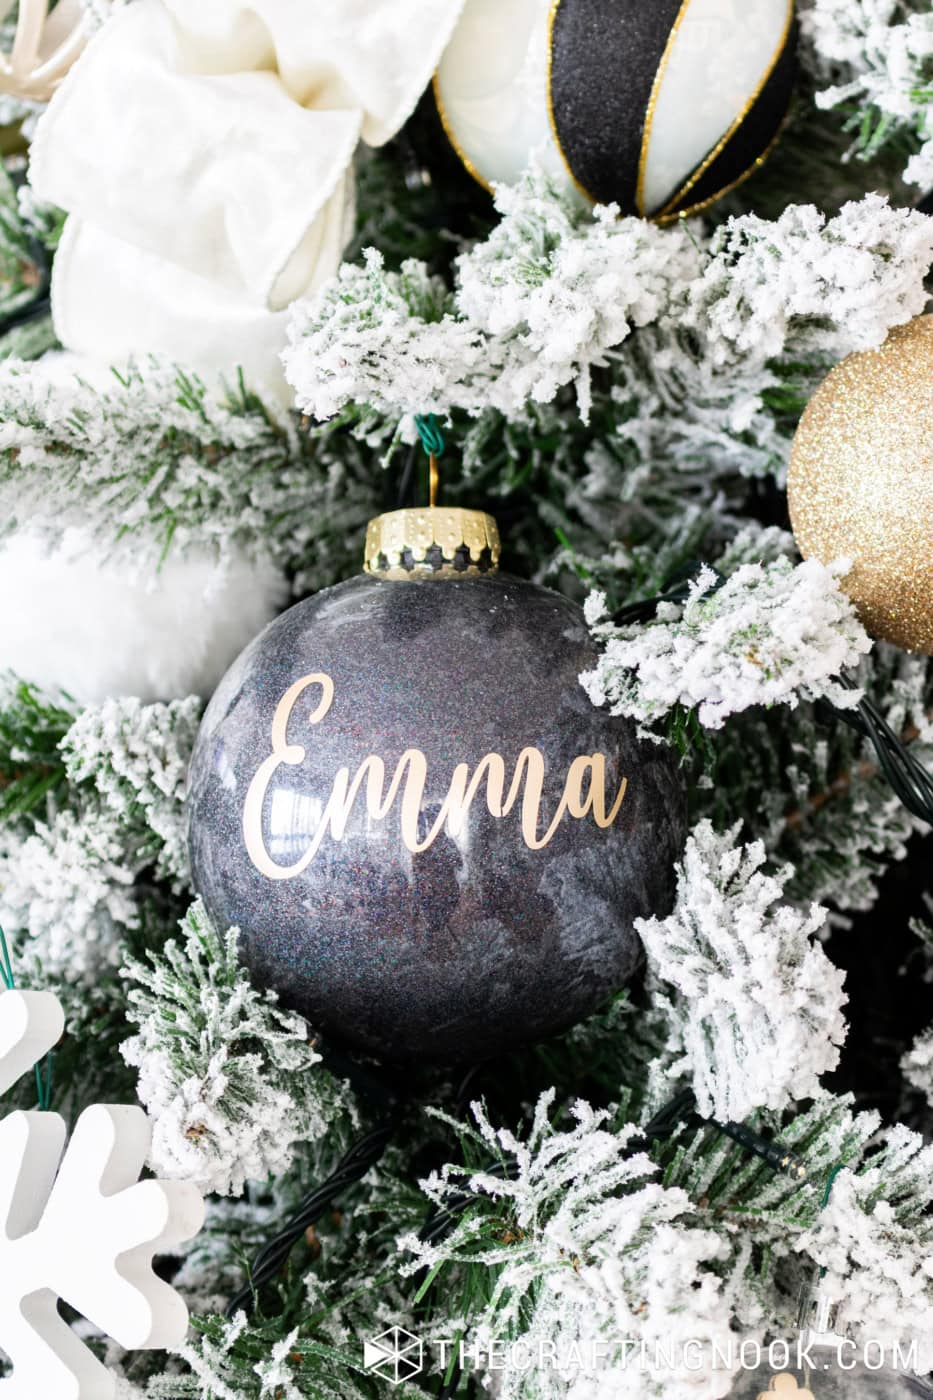
I love how changing the glitter colors gives these ornaments a completely different look without changing the process at all. The black ones looked especially pretty next to the gold, and they fit beautifully with the rest of our Christmas decorations.
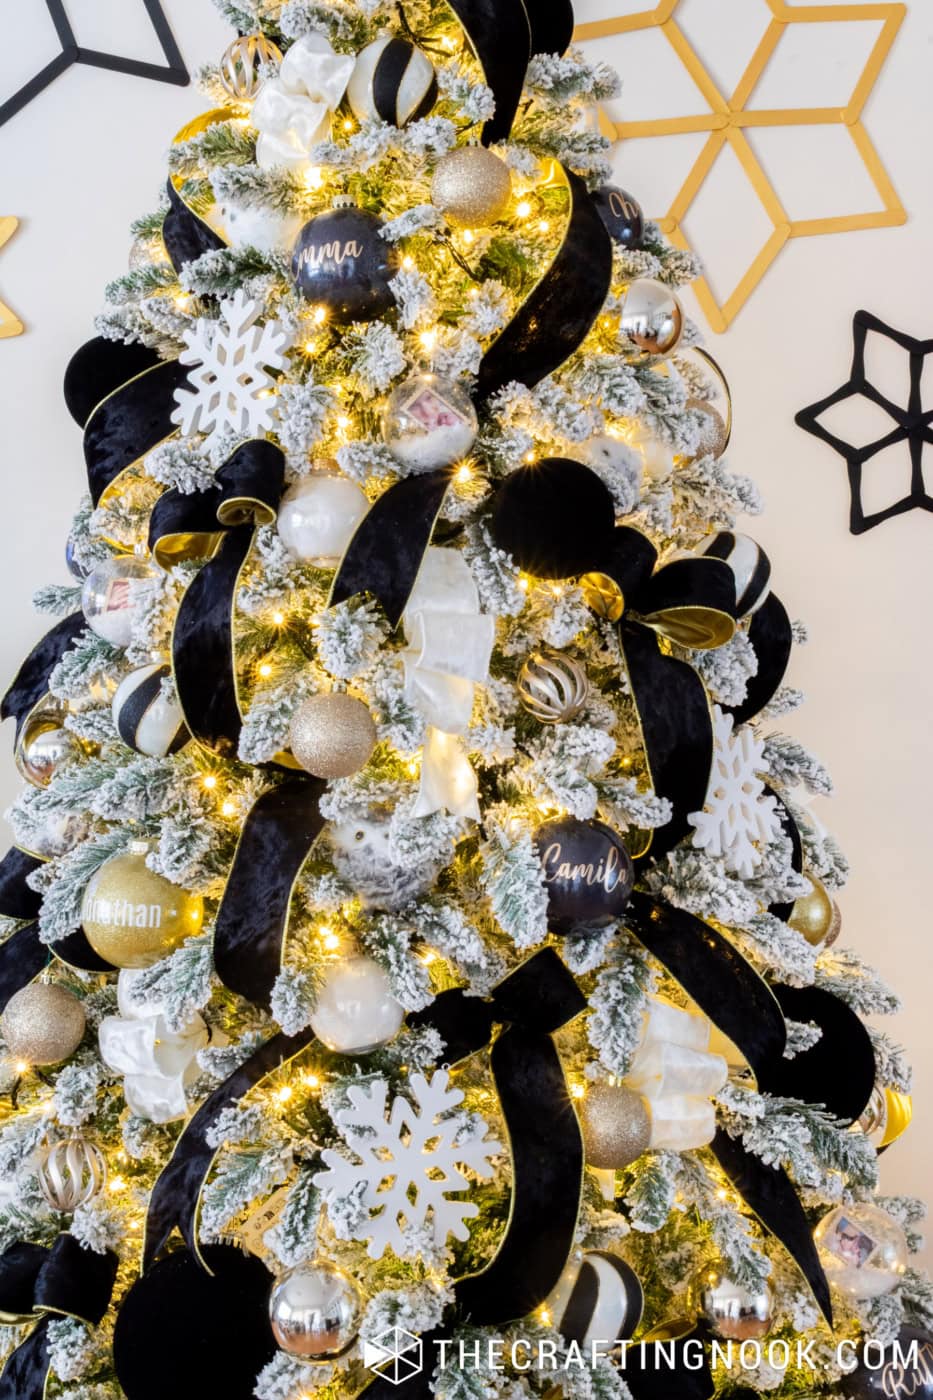
I also recorded the process of making the black ornaments and personalizing the whole set, so you can see how I work when I’m making several ornaments at once.
You can use this same tutorial with practically any glitter color that matches your Christmas decorations. Just choose a vinyl color with enough contrast so the names stand out.
A Little Story Behind These Personalized Ornaments
My bestie from Living and Crafting had been making glitter ornaments for years, and every time I saw hers, I wanted to try making my own.
One of the things I love doing with our Christmas tree is adding little touches that represent our family. That year, my parents and brother were far away, while my mother-in-law was spending Christmas with us.
So I decided to make an ornament with each person’s name. That way, even the ones who weren’t physically with us would have a little place on our tree.
I chose pink and gold glitter to match our Christmas decorations and used white vinyl for the names. The combination turned out just as I had imagined.
I also learned quite a bit while making them, especially about getting the glitter to stick evenly inside the ornaments. I shared what worked, what didn’t, and what I would recommend “before you start” section at the beginning of the tutorial.


Frequently Asked Questions
Yes, you can use clear glass ornaments, but they are more fragile, so you’ll need to handle them carefully. Make sure the adhesive you choose is suitable for glass.
You can experiment with other types, but I prefer extra-fine glitter because it gives the ornaments a smoother, more even finish. Larger glitter particles may not cover the interior in quite the same way.
A cutting machine makes it much easier to create custom vinyl names, especially if you’re making several ornaments. You could also use ready-made adhesive vinyl letters if you don’t have a machine.
That depends on the adhesive you’re using. My polyurethane needed quite a bit of time just to reach the right consistency before I added the glitter. The finished coating also needs time to dry and cure, so always check the manufacturer’s instructions and avoid sealing the ornaments too soon.
Absolutely! I think personalized ornaments make such thoughtful handmade gifts, especially when you add someone’s name or a meaningful year. You could even make a matching set for a whole family.
More Christmas Projects to Try
If you like this DIY Glitter Christmas Ornaments tutorial, you might also love these other Christmas Project ideas too:


Family Rustic DIY Monogram Christmas Ornaments
These ornaments will always have a special meaning to me. What started as a project inspired by a friend’s beautiful glitter ornaments became a way to have our whole family represented on our Christmas tree, even when we couldn’t all be together.
And I love that I was able to make them again years later in completely different colors.
If you make your own personalized glitter Christmas ornaments, I’d love to hear what colors you choose! Leave me a comment below with a rating star, and tag me on Instagram so I can see your creations.
And if you found this tutorial helpful, don’t forget to save it for your next Christmas crafting day!
✂️ Tutorial
Personalized DIY Glitter Christmas Ornaments

Tools
- Cutting Machine – Silhouette or Circuit will work
- Weeding tool
- Squeegee or scrapper
Supplies
- Clear plastic ornaments
- Glitter in your favorite festive colors
- Vinyl sheets for the names in your favorite colors that contrast with the chosen glitter
- Transfer tape or contact paper.
- Polyurethane varnish
- Funnel or paper funnel
- Ribbon or twine
- Rubbing alcohol
- Syringe
- Paper towels
- Plastic or glass cups
- Patience the most important ingredient!
Video

Instructions
- Clean the ornaments.Remove the caps and clean the inside with rubbing alcohol. Let dry completely.
- Coat with polyurethane. Use a syringe to add polyurethane inside each ornament. Slowly rotate until the entire interior is evenly coated.
- Drain the excess. Place the ornaments upside down over cups to let the extra polyurethane drip out.
- Let the coating set. Allow the polyurethane to settle before adding glitter. Timing varies by product. Mine needed 45–60 minutes, but some products may need much less.
- Add the glitter. Pour extra-fine glitter inside using a funnel. Gently swirl and shake until fully covered, then pour out the excess. Let the coating dry thoroughly.
- Prepare the vinyl names. Design and size your names in Cricut Design Space or Silhouette Studio. Cut them from permanent adhesive vinyl.
- Weed and transfer. Remove the excess vinyl, then apply transfer tape over each name. Rub gently and lift the lettering from its backing.
- Apply the names. Position each name on a clean, dry ornament. Press from the center outward to follow the curved surface, then carefully remove the transfer tape.
- Finish the ornaments. Once the glitter coating is completely dry, replace the caps, add ribbon or twine, and hang them on your Christmas tree!
Notes
- Test your polyurethane on one ornament first. Different brands have different draining, drying, and curing times.
- Extra-fine glitter gives a smoother, more even finish.
- Choose a vinyl color that contrasts with your glitter so the names are easy to read.
- Work on several ornaments in stages to save time.
- Follow the varnish manufacturer’s safety and drying instructions, especially when working with plastic ornaments.
Share and PIN ME!!!
Til’ next time…


FREE WORKBOOK
Keeping your Sweet Home Organized
Learn how to create intentional habits and simple routines to Keep Your Home Organized. Plus freebies, printables, exclusive content, and tips.
Disclaimer: By clicking on the “Yes” button above you are giving me your consent to collect and use your information according to the law and My Policy Privacy. Zero Spam I promise!