DIY Duvet Cover Twin Size for Kids
This post may contain affiliate links. Please read our Disclosure Policy.
Make a cozy DIY duvet cover for a twin-size bed with this fun tutorial! Easy steps, fabric tips, and lots of love for your little one!
This duvet cover project was a big challenge to take on, mostly because of the dimensions. Sewing a duvet cover is definitely not the same as sewing a pillowcase. However, I love how it turned out and so did my daughter!
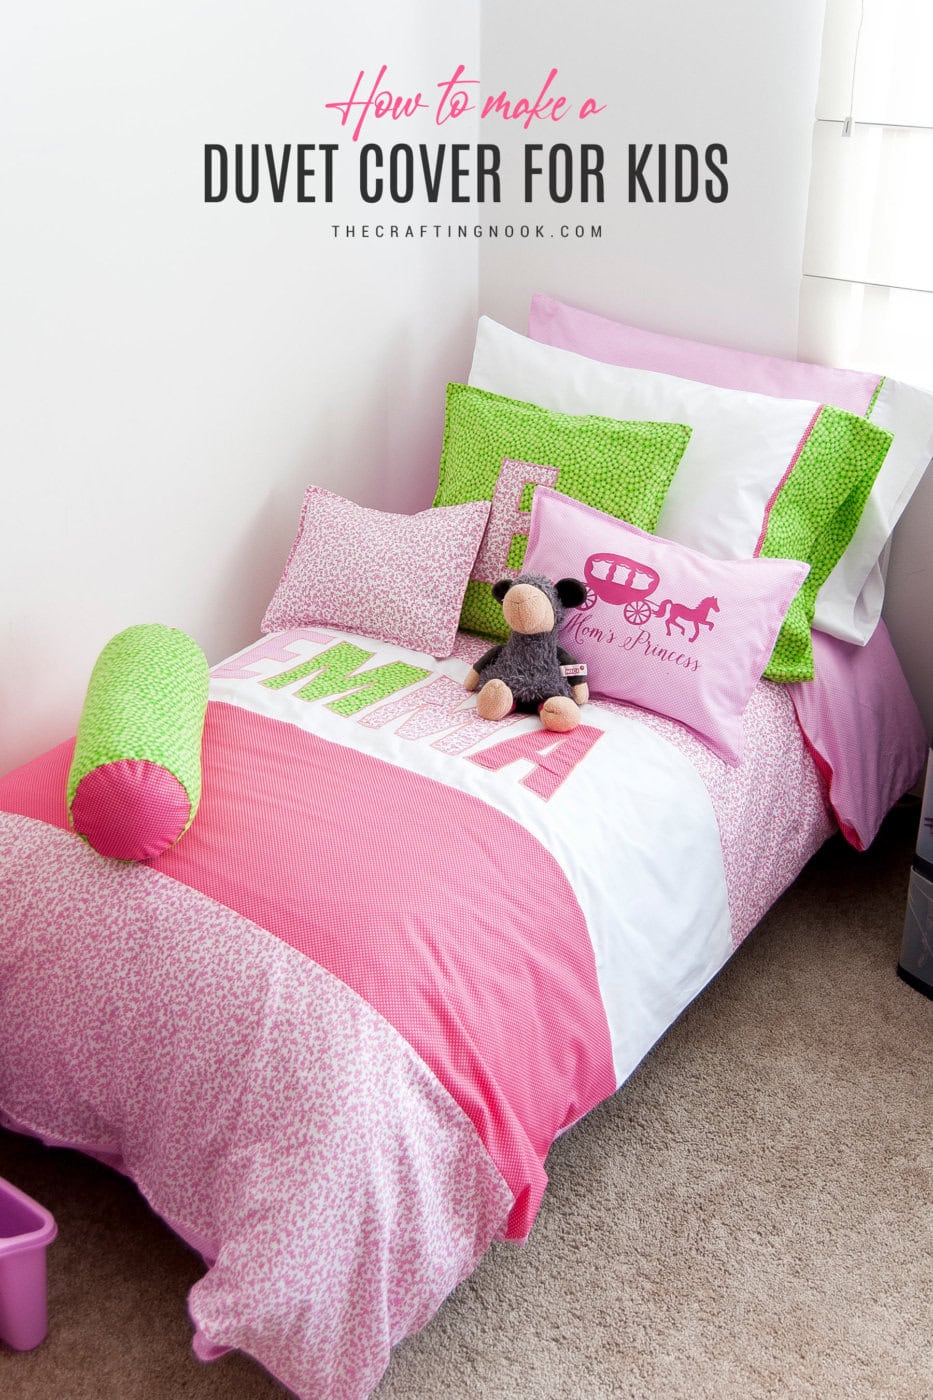
Table of Contents
Let’s Make Duvet Cover Sets for Kids
What can be more inspiring than our children? I do anything for my little girl and to see her smile. Sometimes I think she’s an unusual child, or maybe I just haven’t had enough experience with kids but the things that make her happy at the age of 4 don’t seem the usual ones.
She’s happier with cute dresses than with toys and she cares about her bedroom and loves having a lovely bedding set especially if pink is involved. She loves having things that are only and especially for her so anything with her name on it makes her feel over the moon. LOL.
I take a huge pleasure in making things for my daughter because she cherishes them so much, She actually cares about who gives her anything and she never forgets.
When she watches me making something that she knows is for her, she always tells me, Mommy I love what you are making for me! And God knows how proud I feel every time I see her happy when I make something for her!
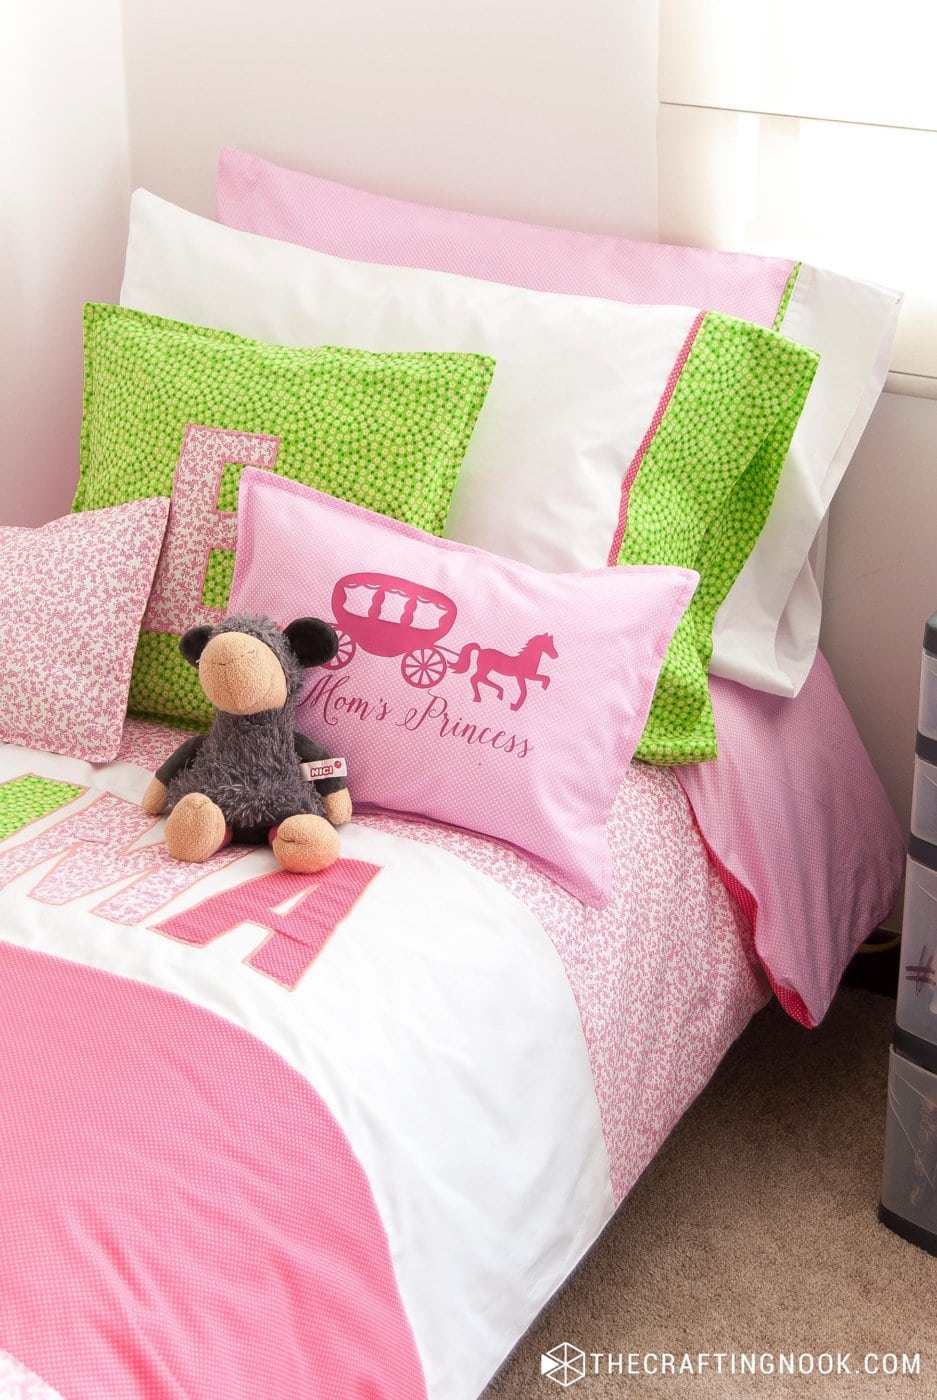
This diy duvet cover set was one of my Christmas gifts for her. I put together everything that she loves such as putting her name on it, different shades of pink, and lots of matching pillows. I had to hide to make it so it would be a surprise.
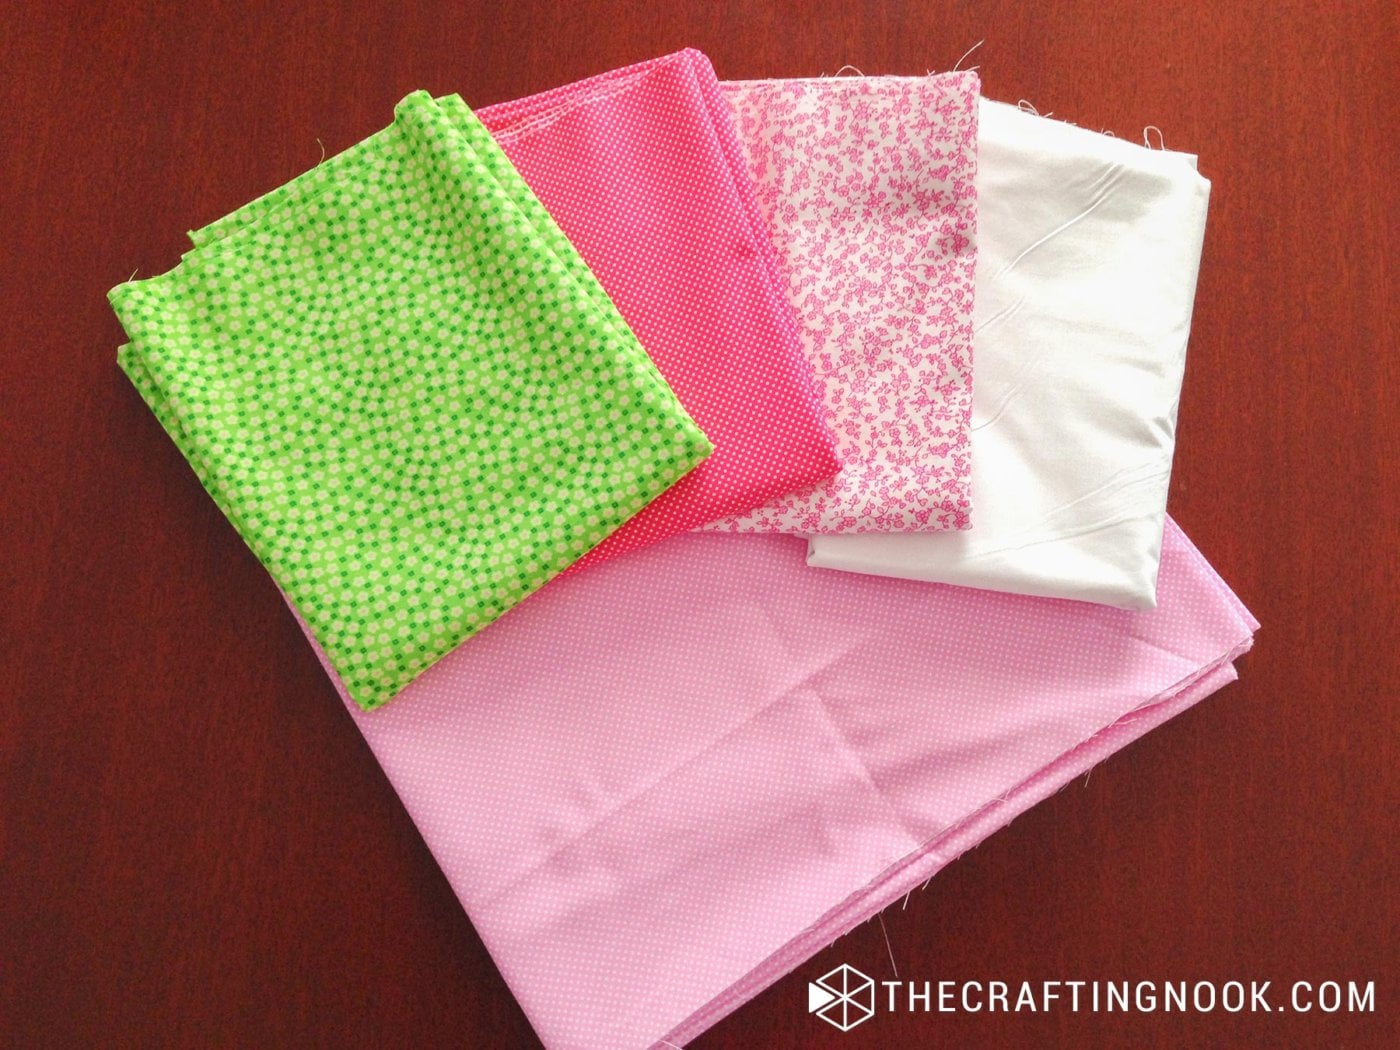
Tips for choosing fabric for your pillowcases
I used regular quilting cotton fabric and sheet fabric for durability and softness. Knit fabric, flannel, sateen, or satin would be great too.
To make this project fast and easy, I finished my seam allowances with a simple zig-zag stitch on my sewing machine.
So let’s get started sewing this cute duvet cover!
How to make a Duver Cover
This might not be the usual kind of tutorial you would find on my blog. I usually share quick and easy projects but this one took me about 3 or 4 days to finish because I had to use the time I had when she was not around.
Supplies:
- 2 yards of white sheet fabric {the name might change between countries}
- 3 yards of a patterned cotton fabric for the bottom layer of the duvet cover
- 1.5 yards each of 3 different but coordinated patterned fabrics.
- Color matching thread
- 6 Buttons
- Lace ribbon {4 strips of 20 cm or 8 Inches}.
- Fabric Marker
Tools:
- Sewing Machine
- Sharp Fabric Scissors
- Pins
- Measurement tape
- Ruler
Instructions:
I’ll do my best to explain each step the best I can and be as organized as I can.
Prep work
This cover was made for a twin-sized duvet. You might need to adjust the amount of fabric you need according to the size of duvet cover you will be making.
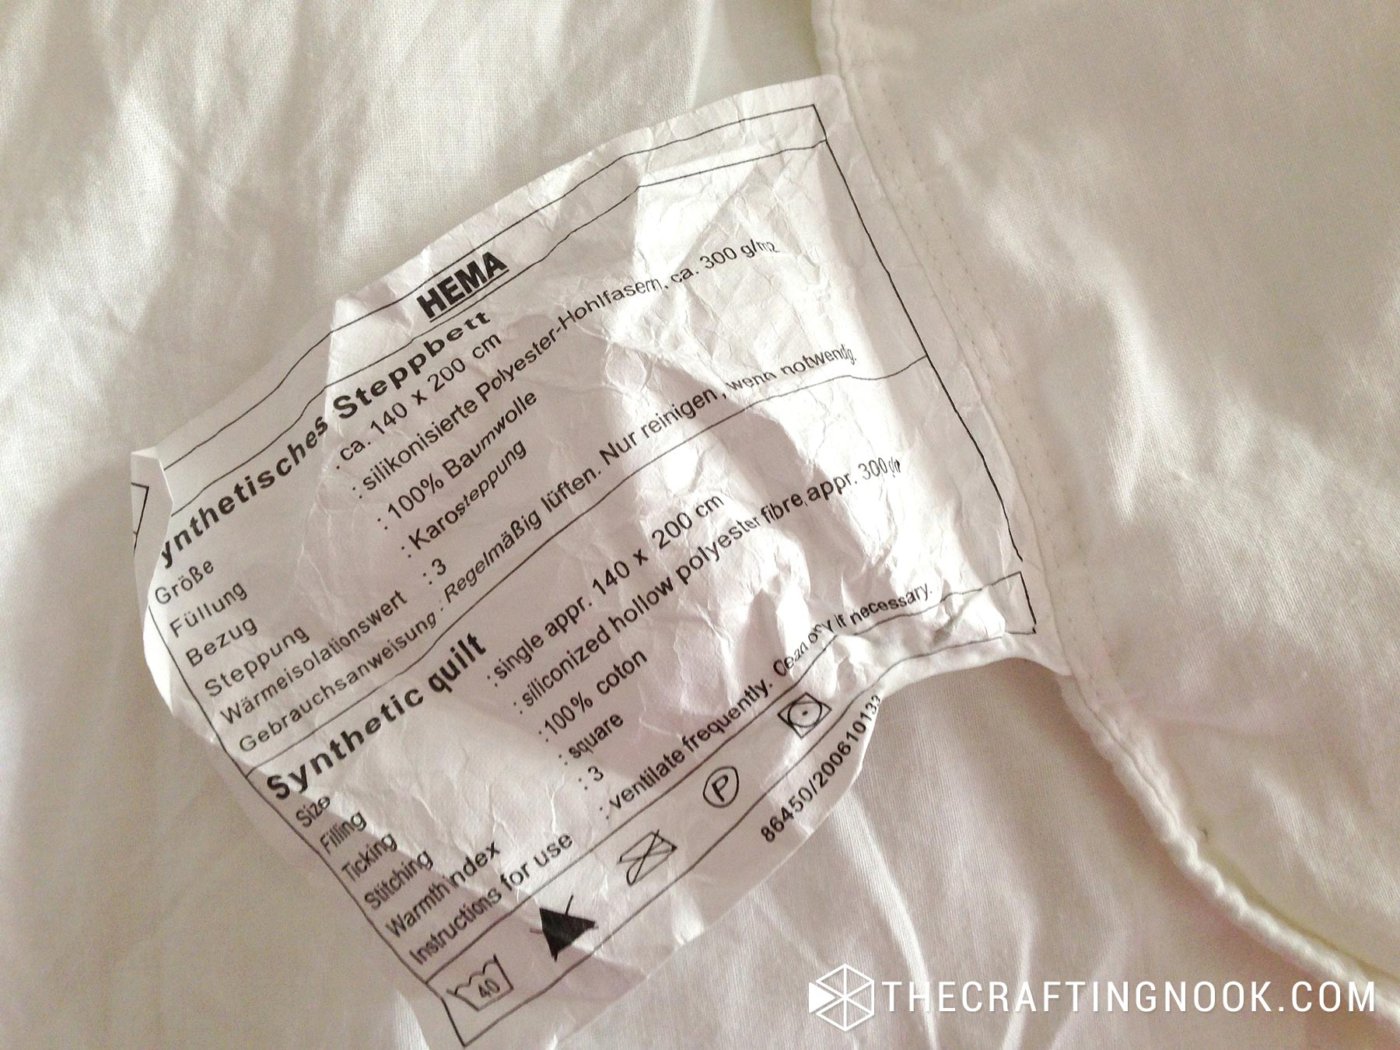
The first thing is to check the duvet’s exact measures in the duvet’s tag. Mine says 140 cm X 200 cm (55×80-inch). I added 2 cm and 5 cm (1 inch and 2 inches) just to be sure it would fit in fine on the new cover.
* Here where I live most places have 150 -180 cm wide fabric {59 – 70 Inches}. If where you live fabrics are not as wide you can follow Corey’s technique to make the fabric wider.
Now I’m going to start with the pieces you need for the diy duvet cover and then I’ll show how made my girl’s name on one of the cover sections.
Twin Size Duvet Cover Pattern
NOTE: Before I start, I wanted to make sure you understand that duvet measurements in different countries are different, In my case this duvet us smaller than most. So these measurements I’m providing are not definite and you should make your pieces according to your own Duvet measurements and calculations.
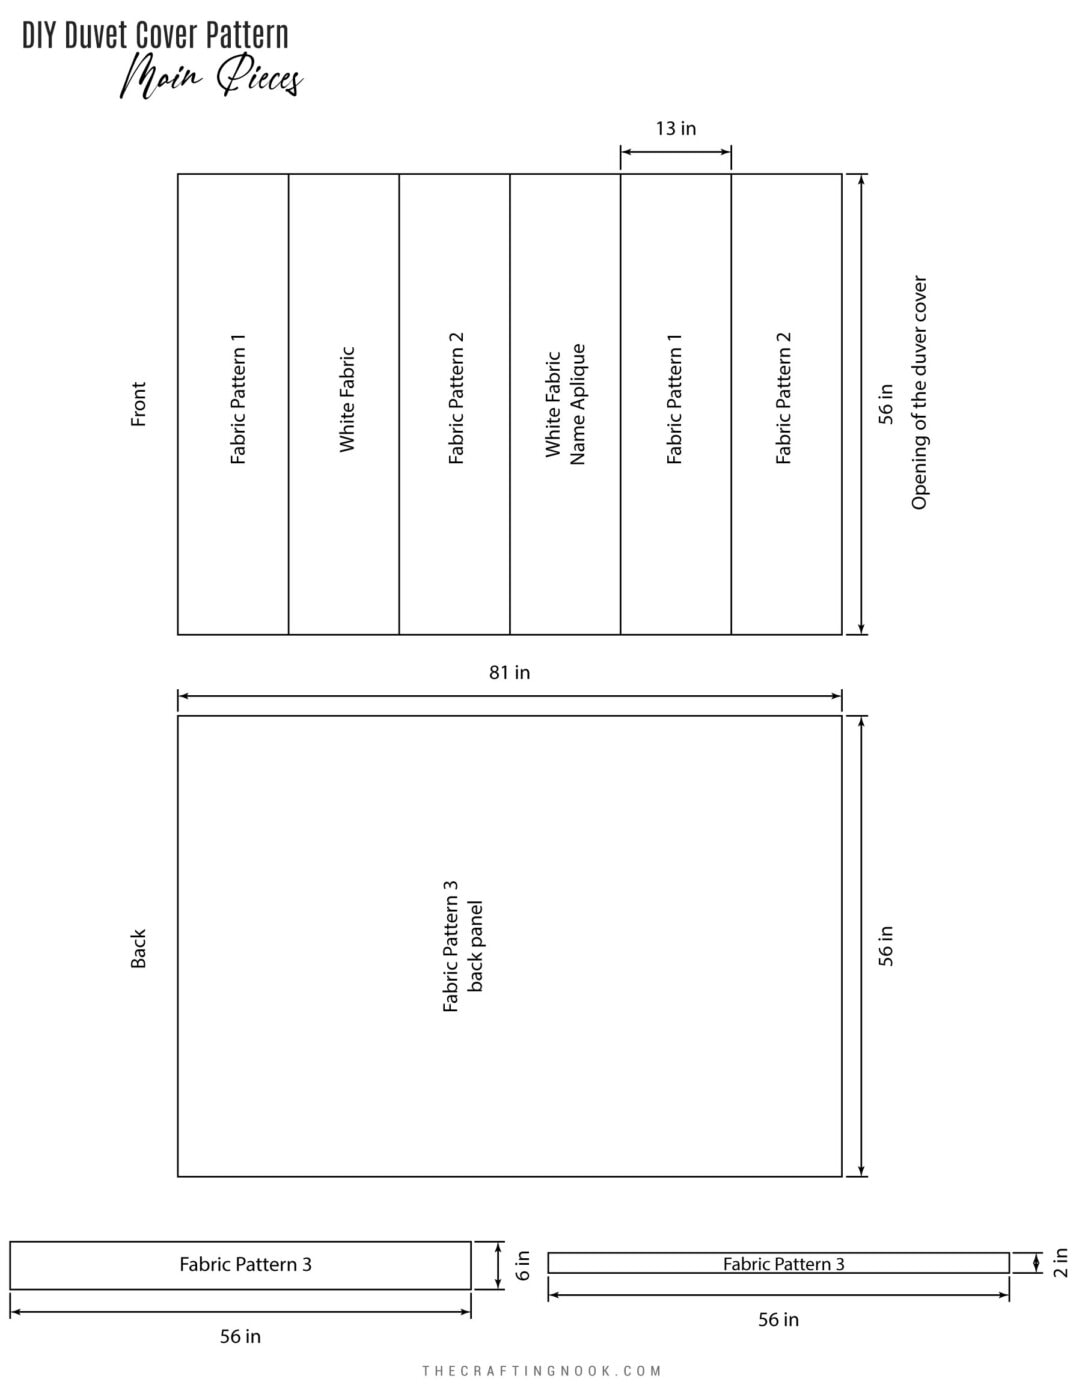
The basics are: For the back is the duvet size + 1 inch + seam allowance, for the front is the same as the back + 1 inch but divided by 6 + seam allowance.
For the top layer of the duvet cover you need:
- 2 pieces white fabric 33 cm X 142 cm {13 X 56 Inches} + seam allowance
- 2 pieces of patterned fabric 1, 33 cm X 142 cm {13 X 56 Inches} + seam allowance
- 2 pieces of patterned fabric 2, 33 cm X 142 cm {13 X 56 Inches} + seam allowance
For the Back of the duvet cover you need:
- 1 piece of patterned fabric 3, 142 cm X 205 cm {56 X 81 Inches} + seam allowance
Additional pieces:
- 1 piece of patterned fabric 3, 142 cm X 15 cm {56 X 6 Inches}
- 1 piece of patterned fabric 3, 142 cm X 5 cm {56 X 2 Inches}
- Fabric scraps for letters.
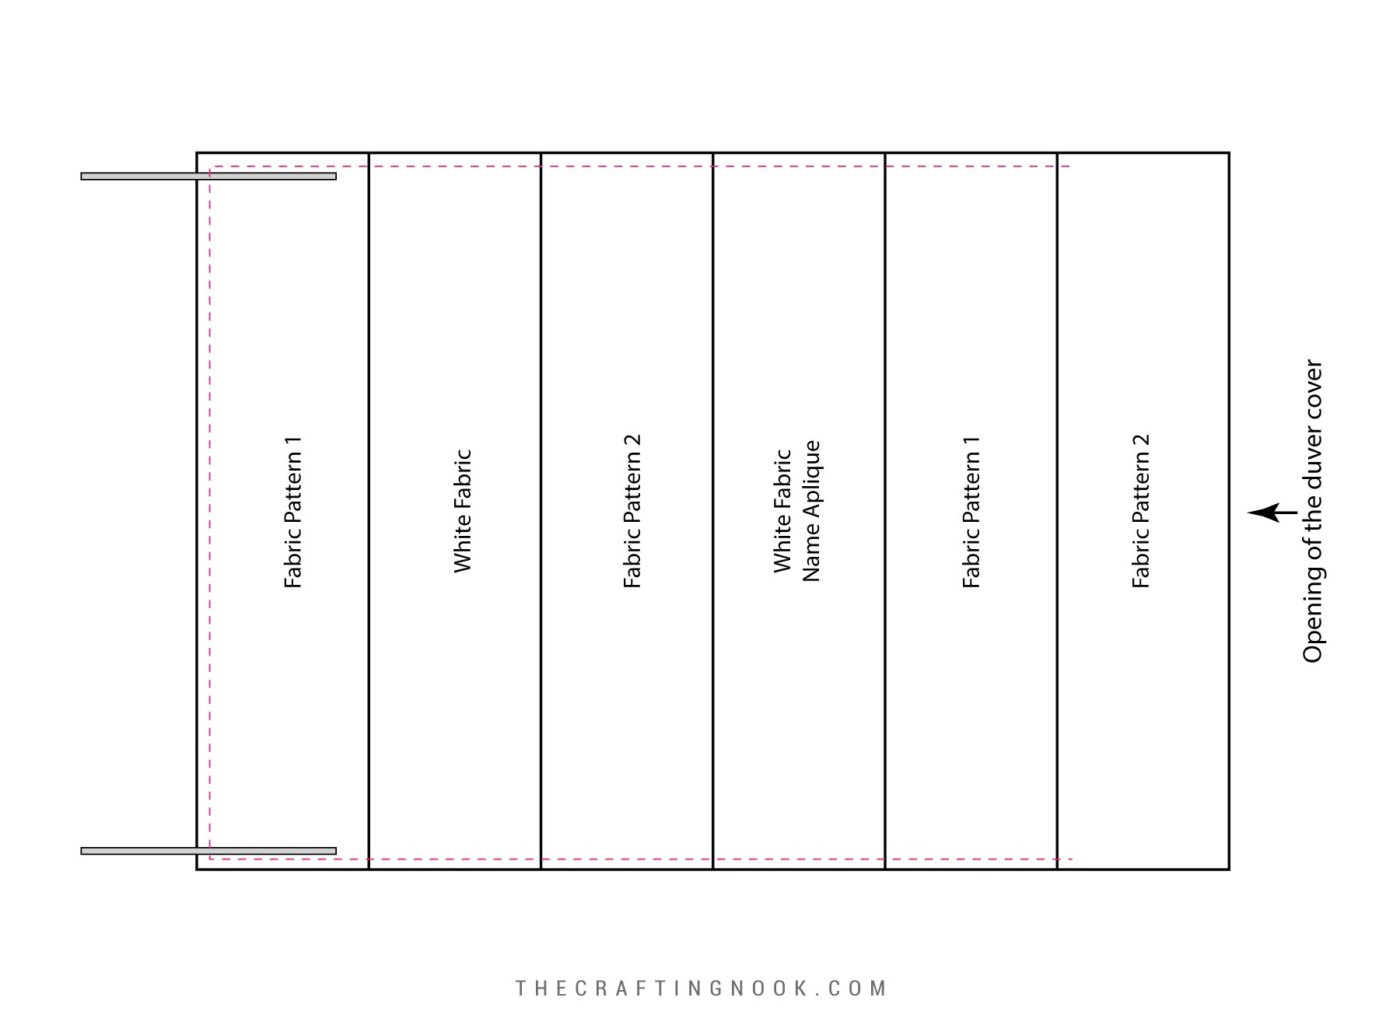
The order in which I made to top layer:
Pattern 1 – White – Pattern 2 – White – pattern 1 – Pattern 2.
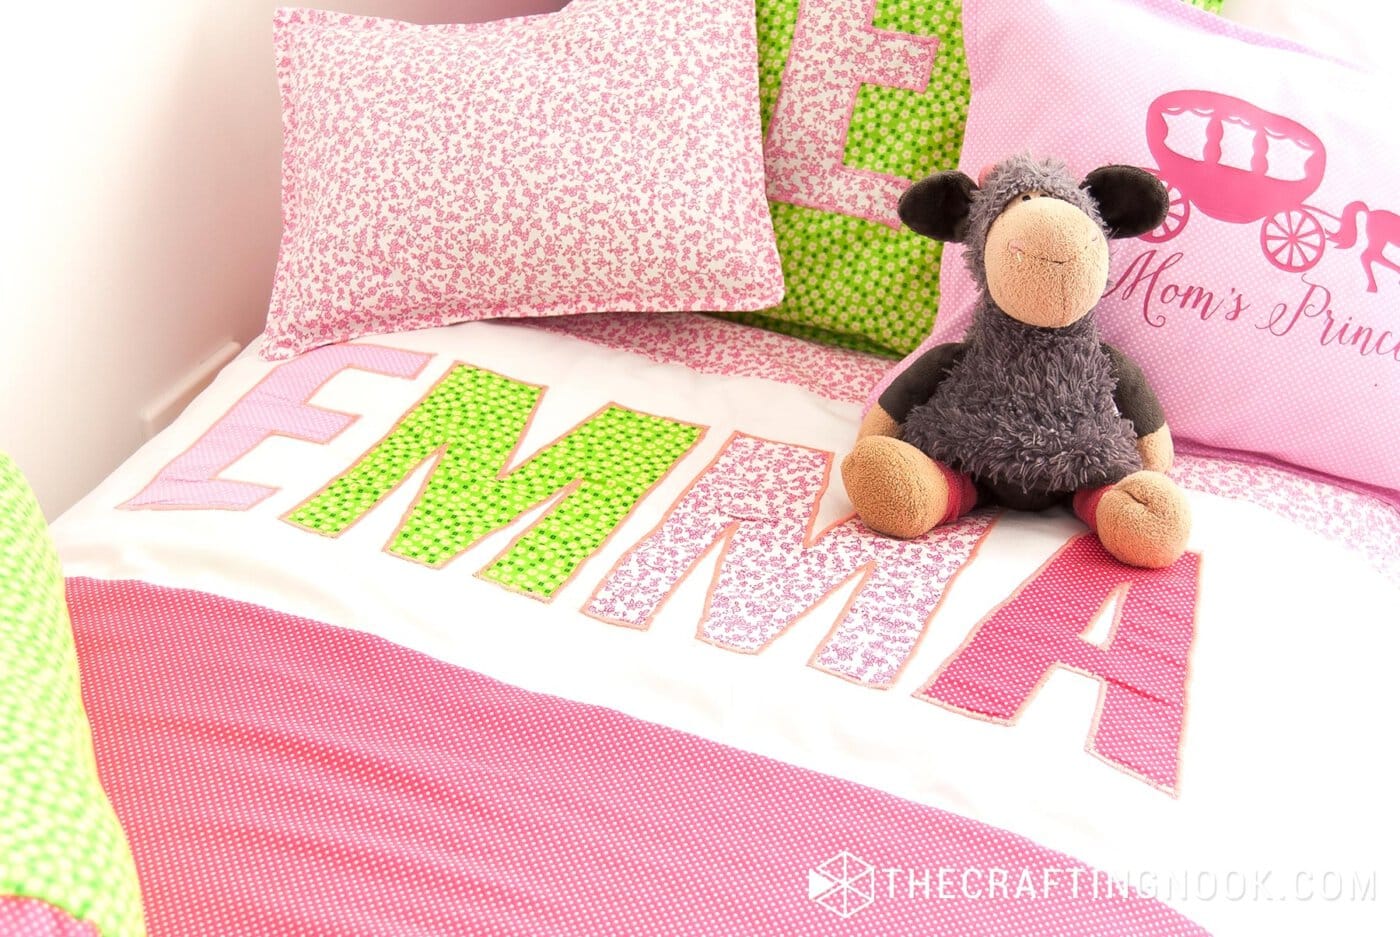
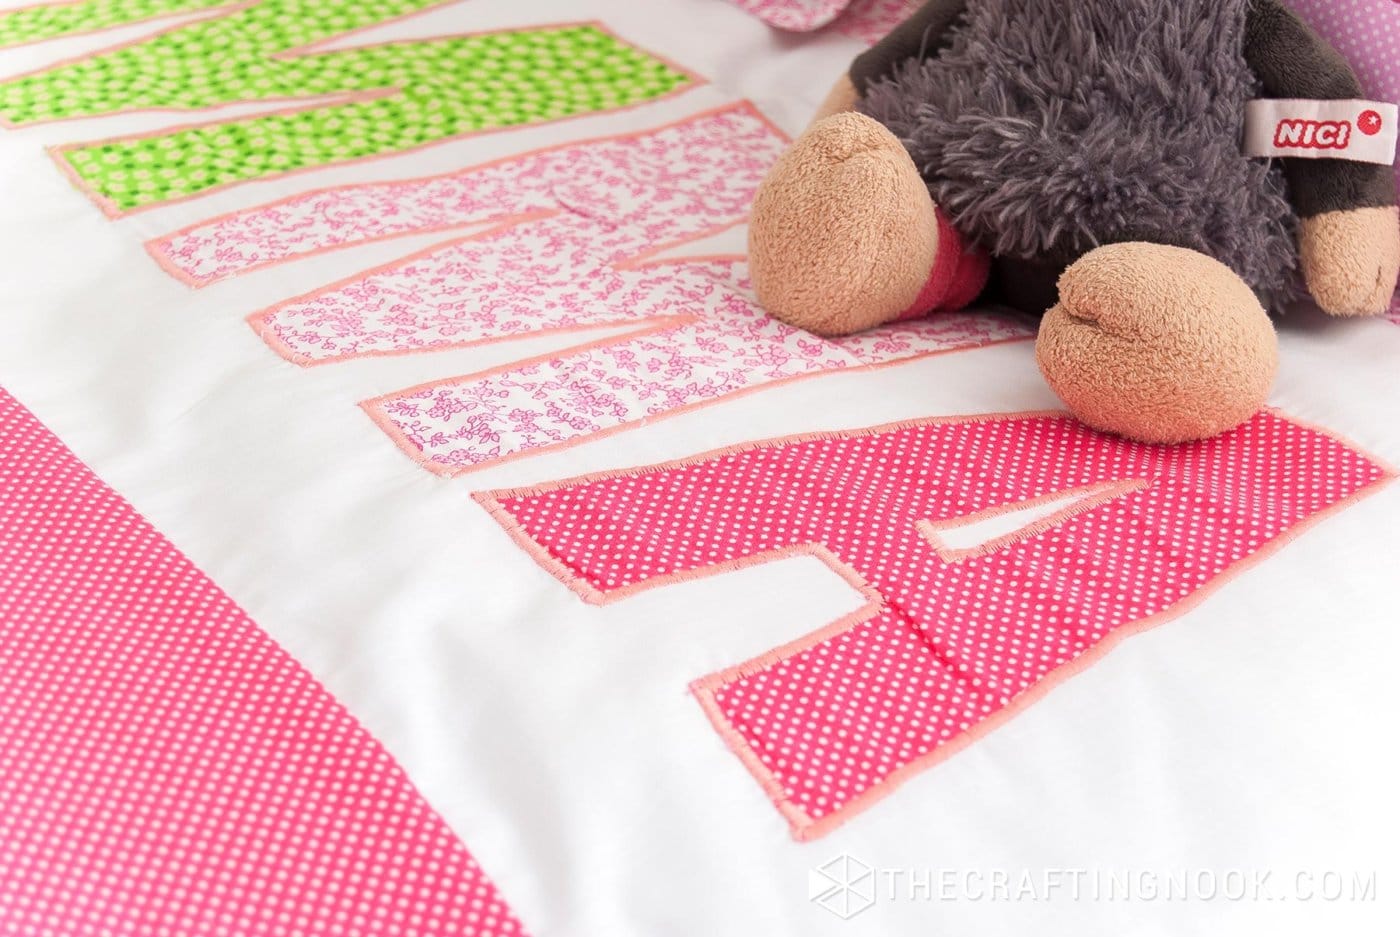
The Applique Letters
We are using one of the white rectangles to create the name. Due to the piece size, the name shouldn’t be larger than 60 cm X 20 cm (24 X 8 Inches). But’s actually up to you; you can play with these measurements.
1. Print the name you want to place on the duvet cover in the actual size. Use any font that is bulky and bold so it’s easier to cut and sew.
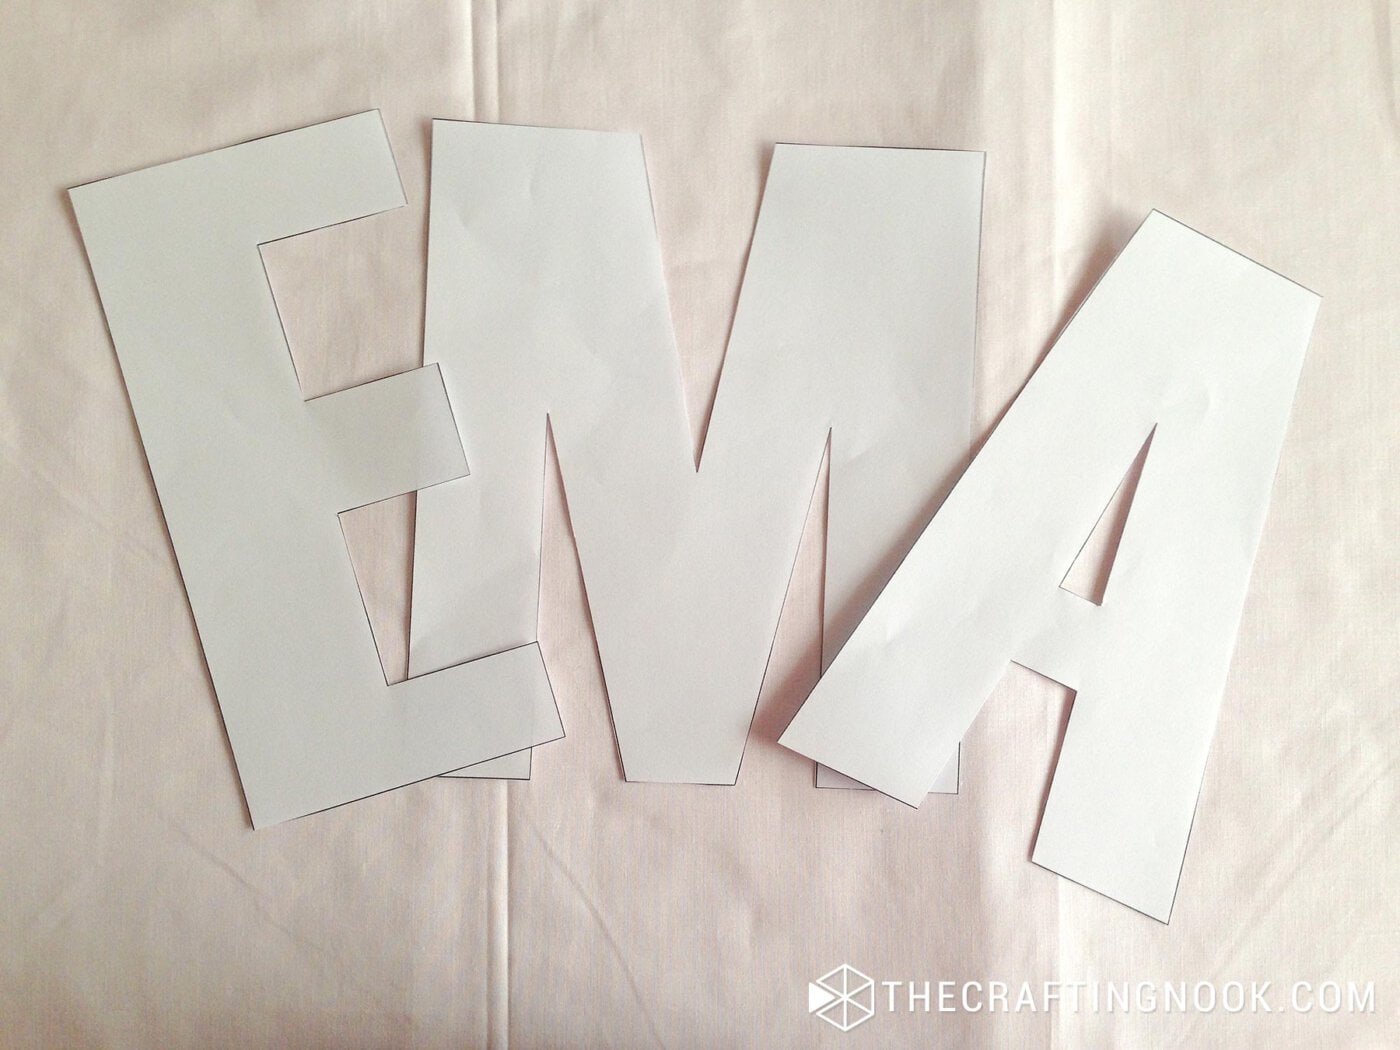
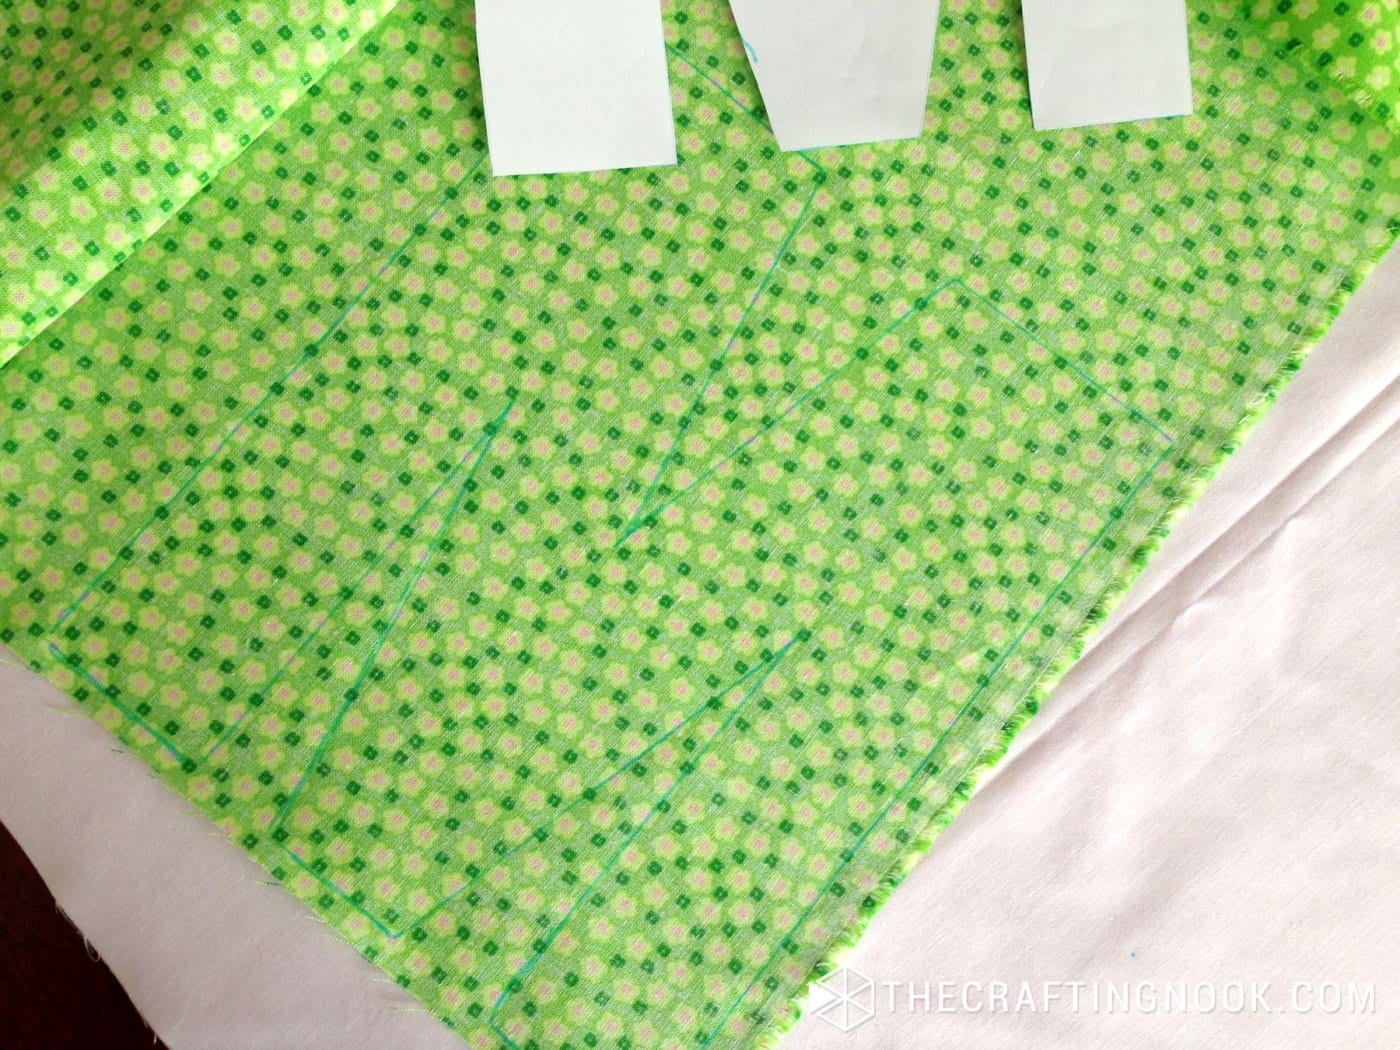
2. Cut the printed letters and then use them as patterns to trace them onto the fabric pieces and cut them in different fabrics. You can if you want, make all letters in one fabric.
Ideally, the best way to work with fabric appliques is to use interfacing to make it easier to stitch the letters to the white fabric panel. I didn’t have it at the moment so here I’ll show you how I did it without interfacing.
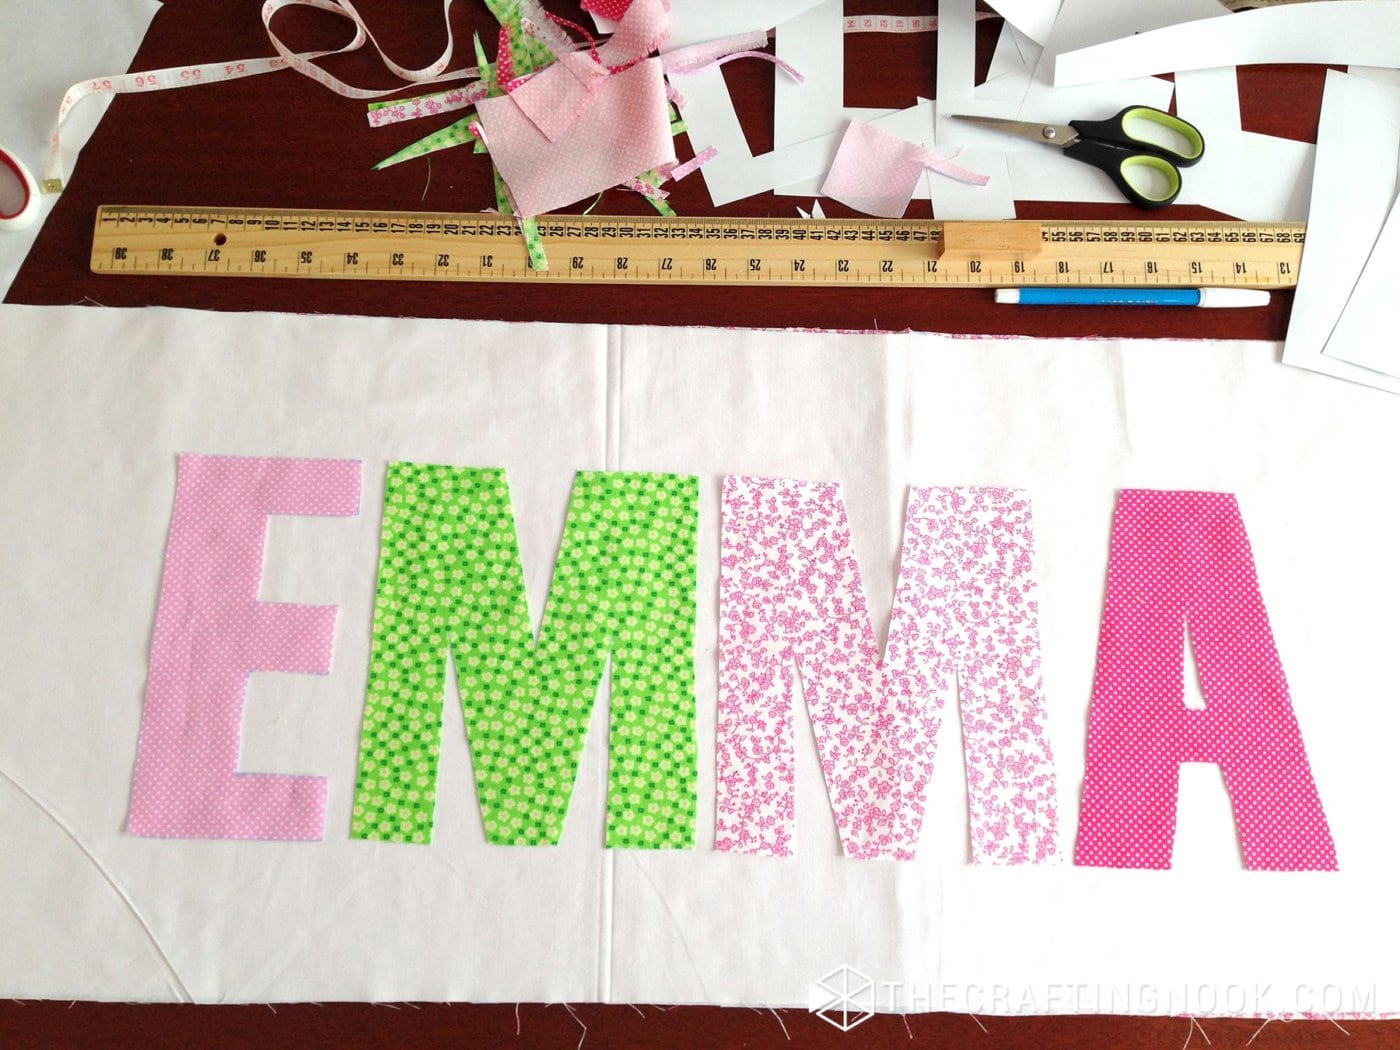
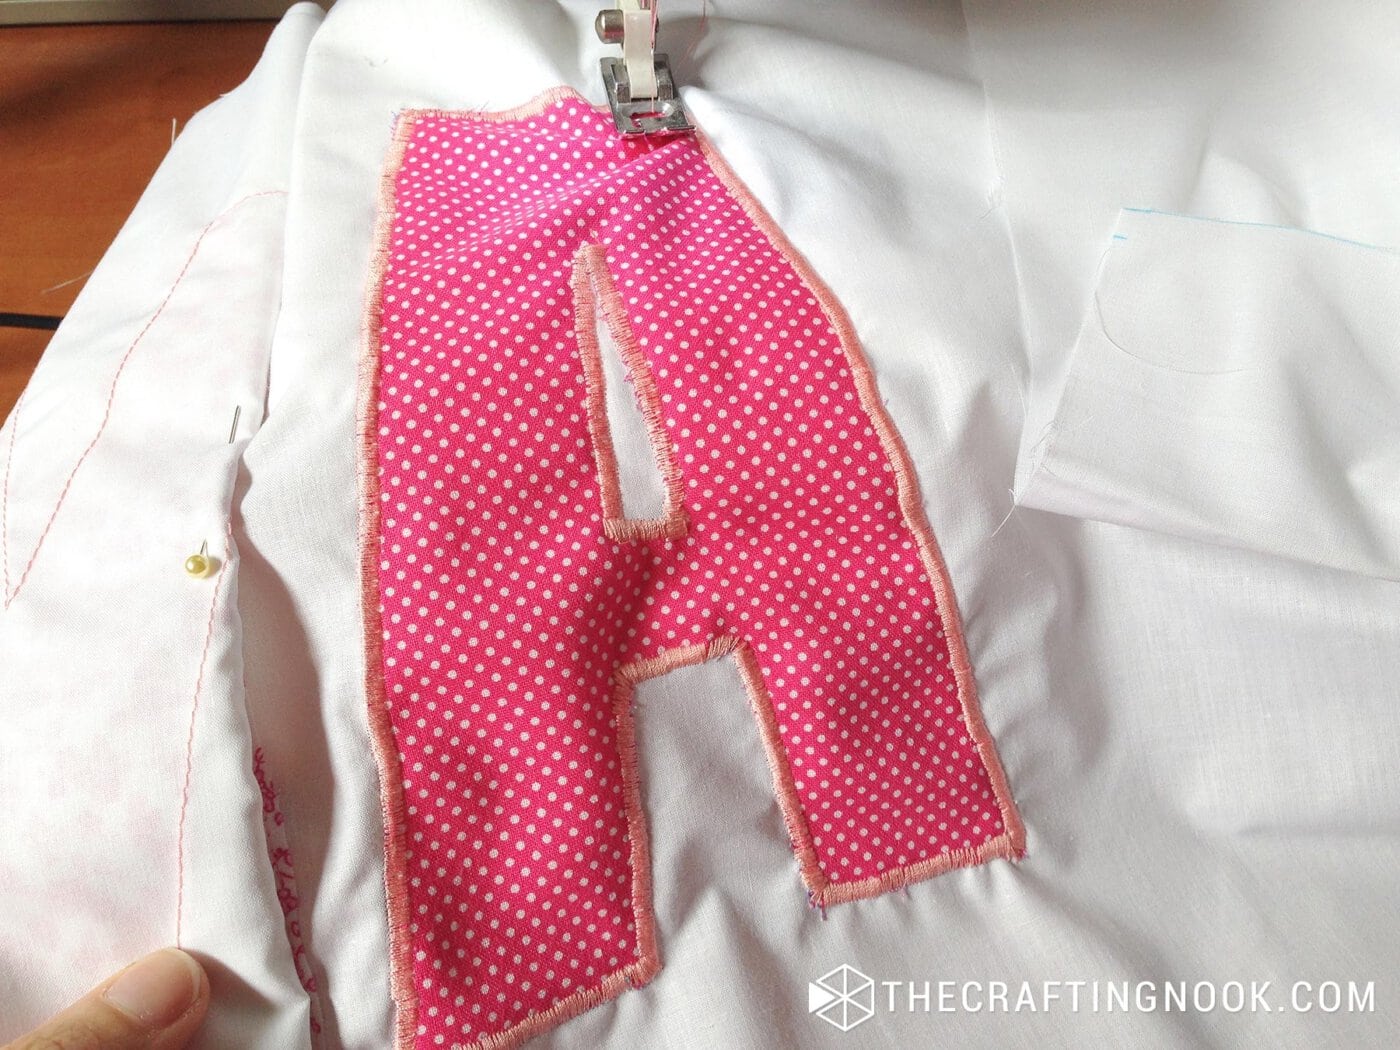
3. Place each letter in the white fabric panel. Once you are satisfied with the letters’ placement, pin them in place. Make sure they are well pinned so they won’t move.
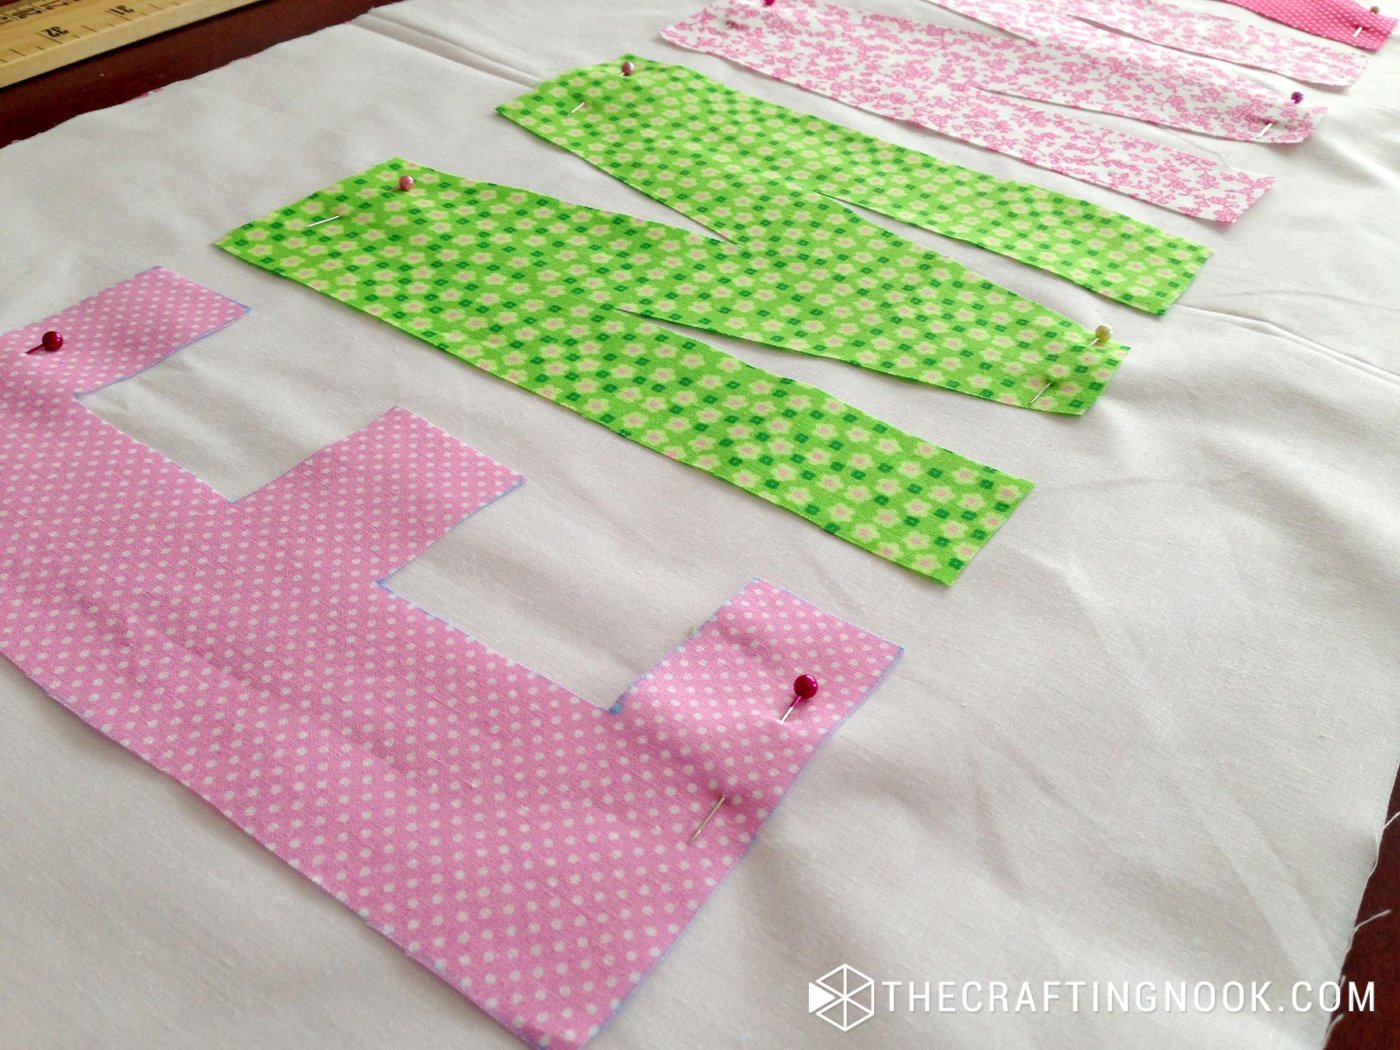
4. To make sure the letters don’t move around while zig-zaging, stitch them first with a straight seam really close to the letter edges.
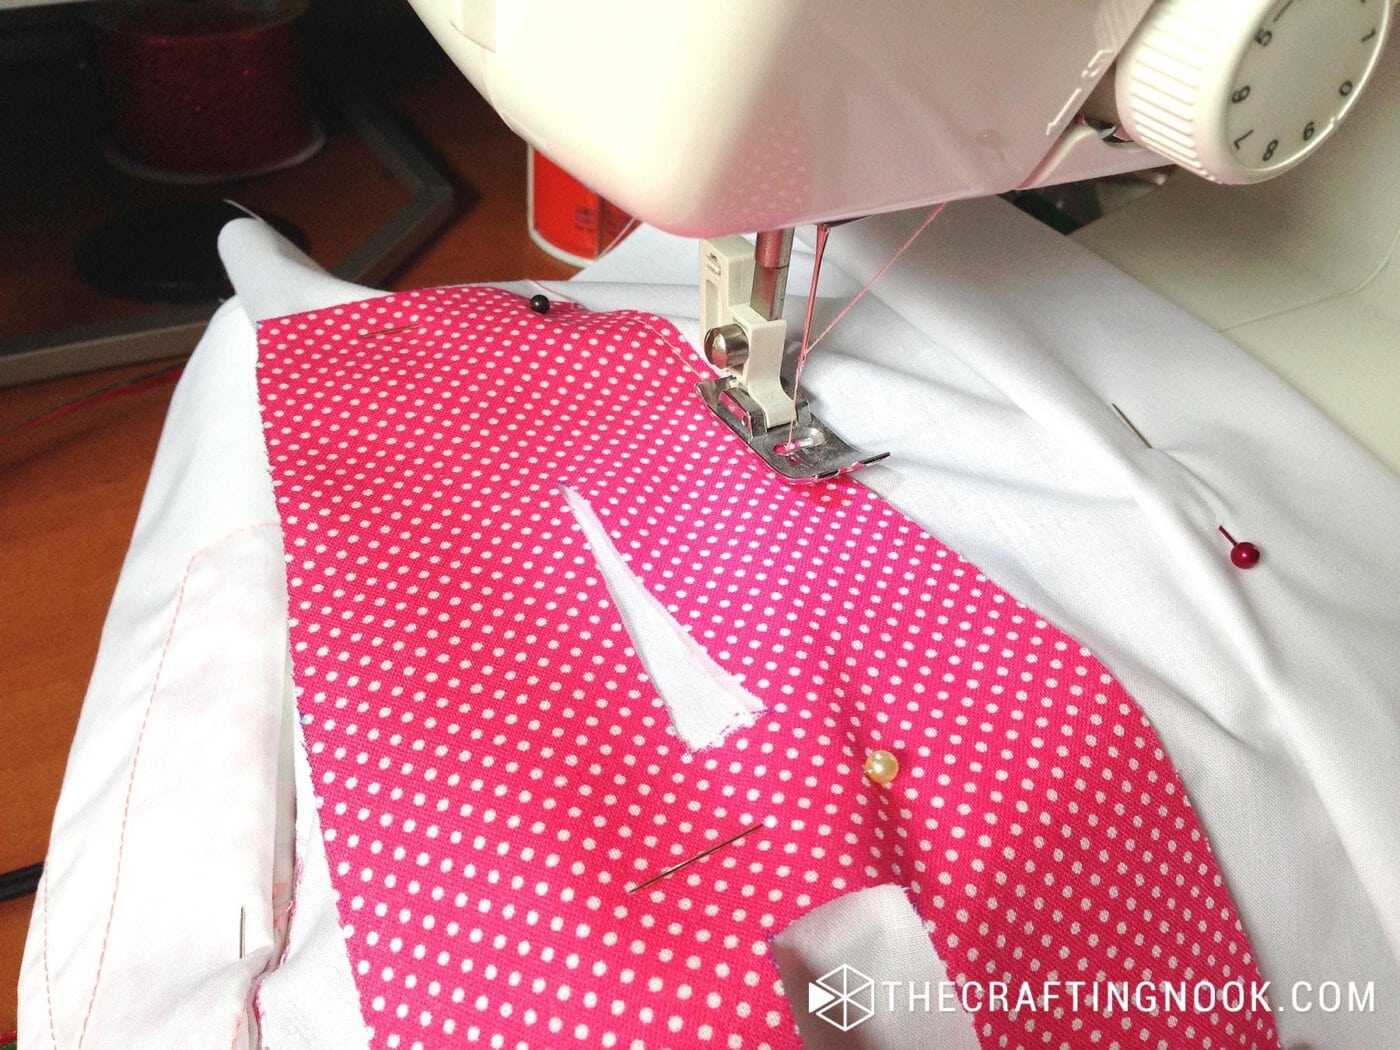
5. Then using the tighter zigzag stitch the sewing machine allows, zigzag all around the edges.
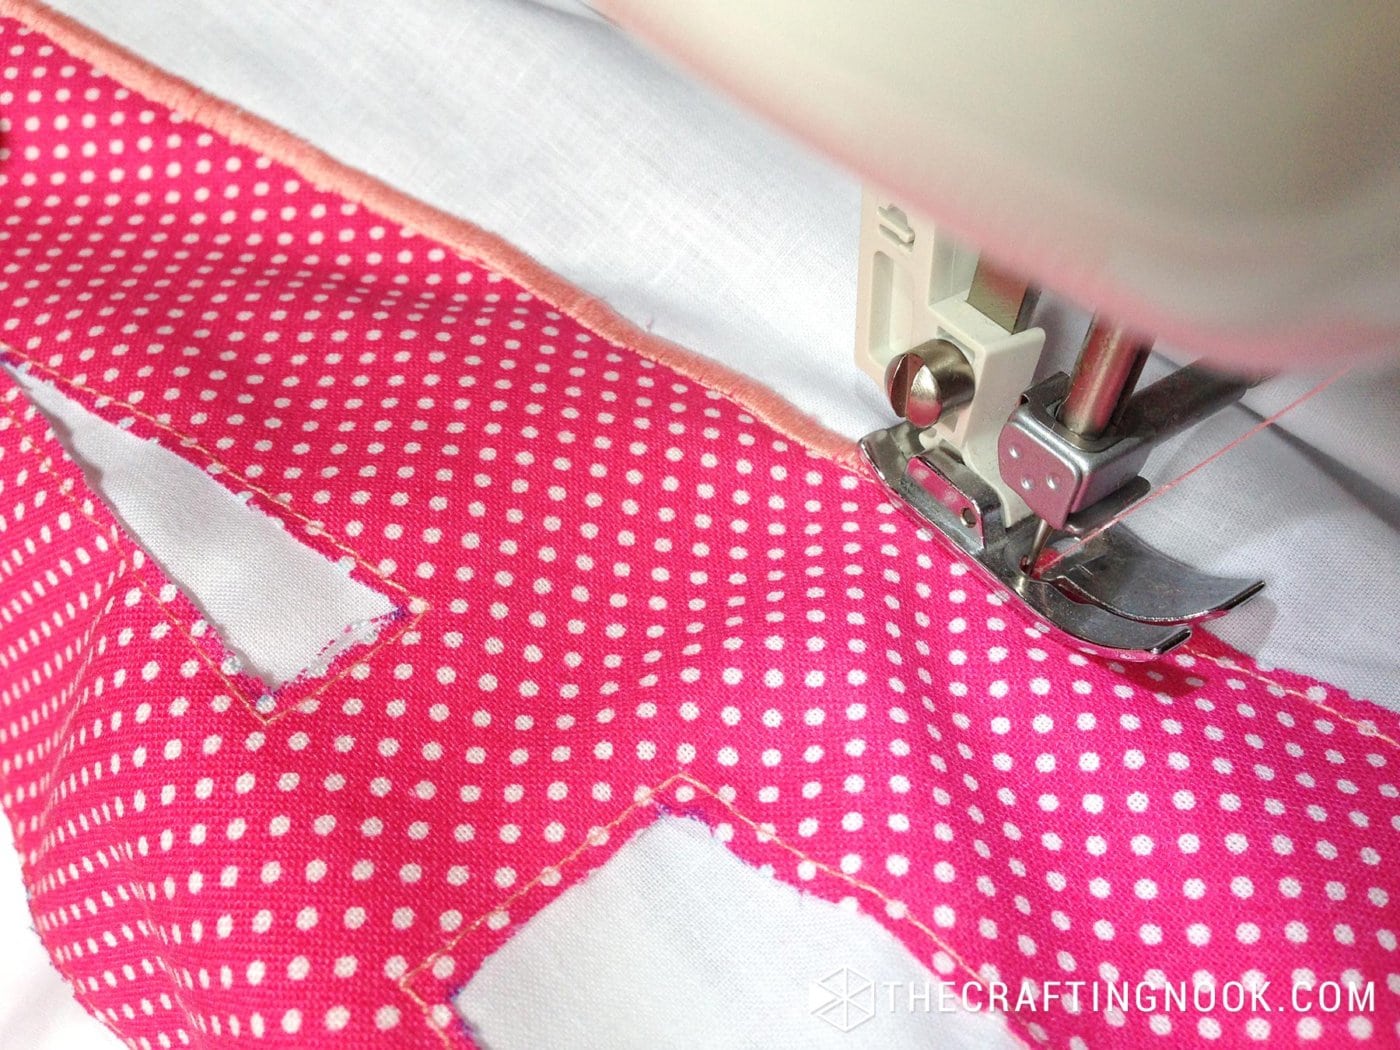
6. When all the letters are done stitching, iron the whole piece so the fabric fits into place. Usually it gets wrinkled because of the zigzag.
Assembling the Duvet Cover
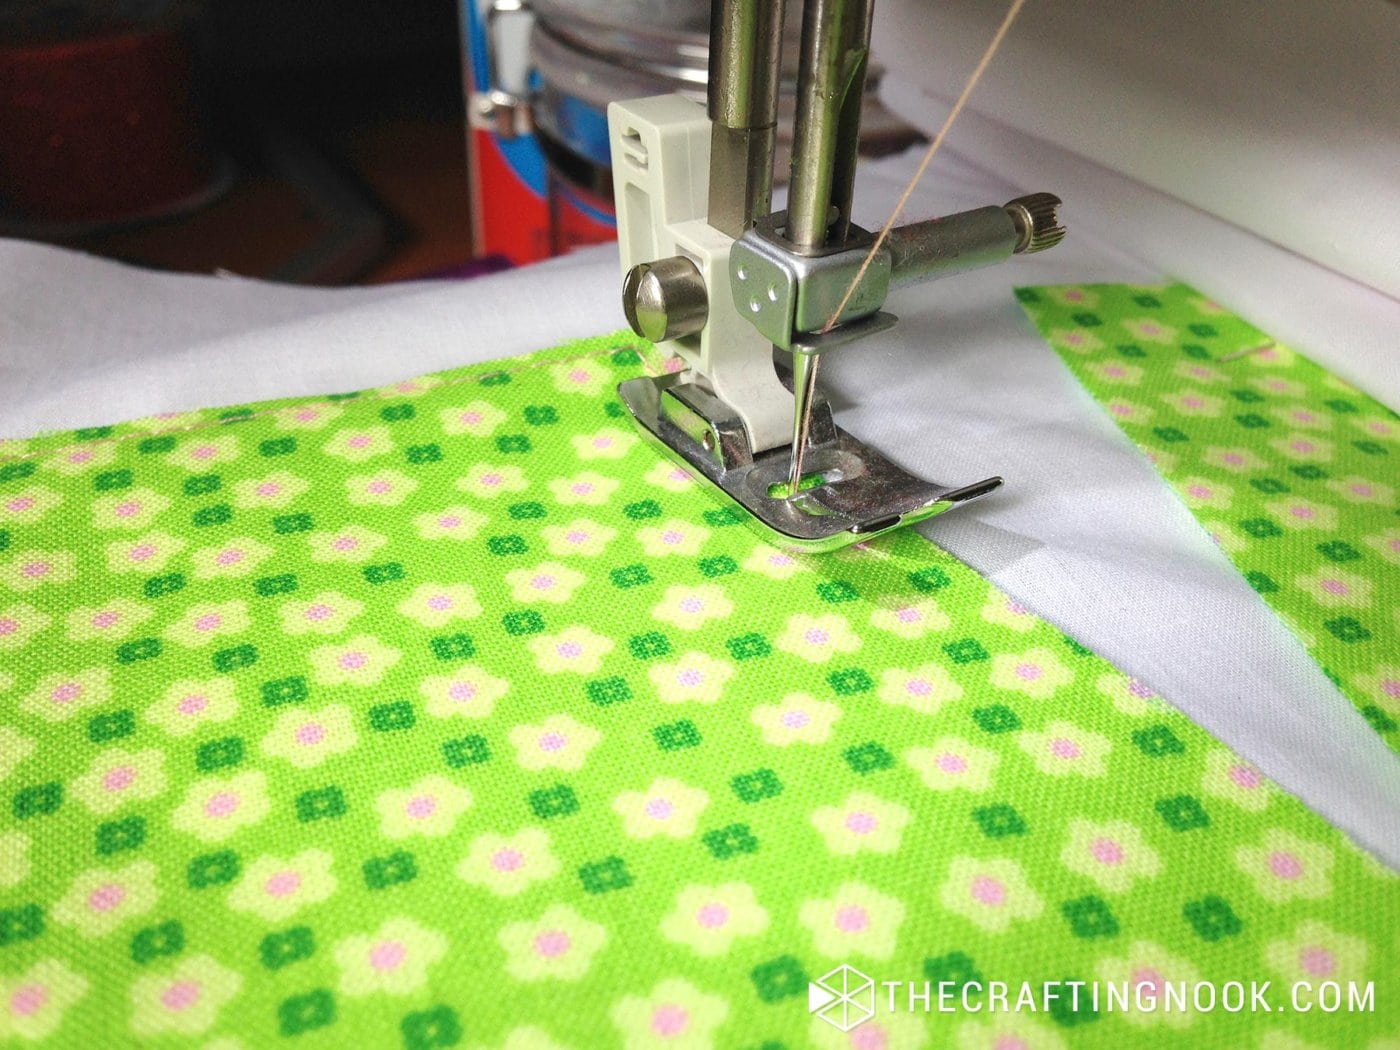
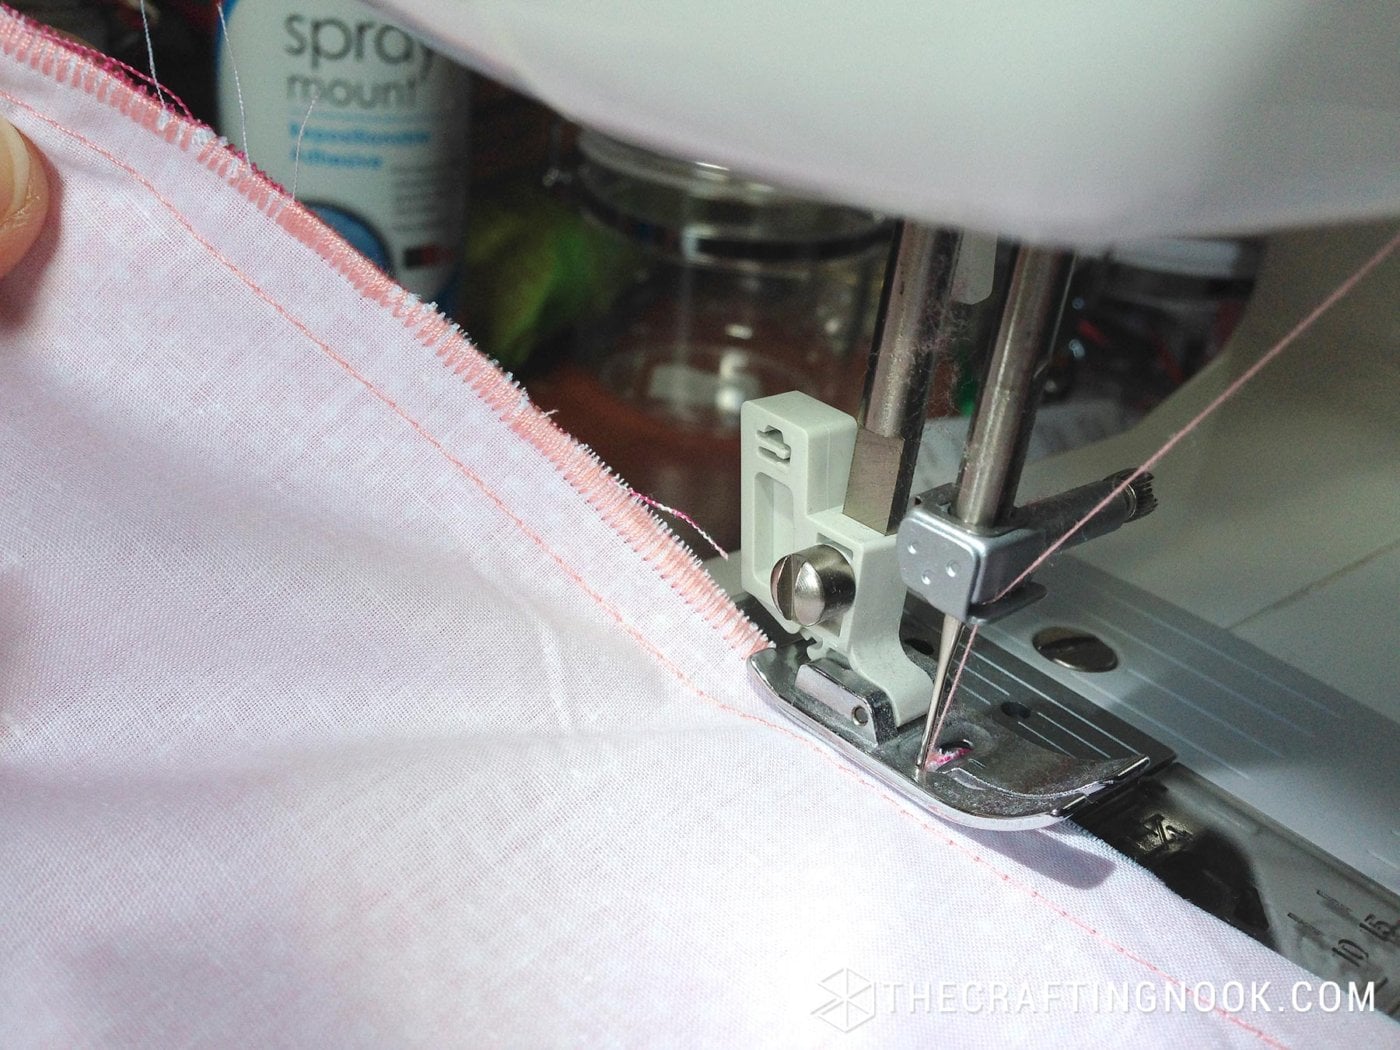
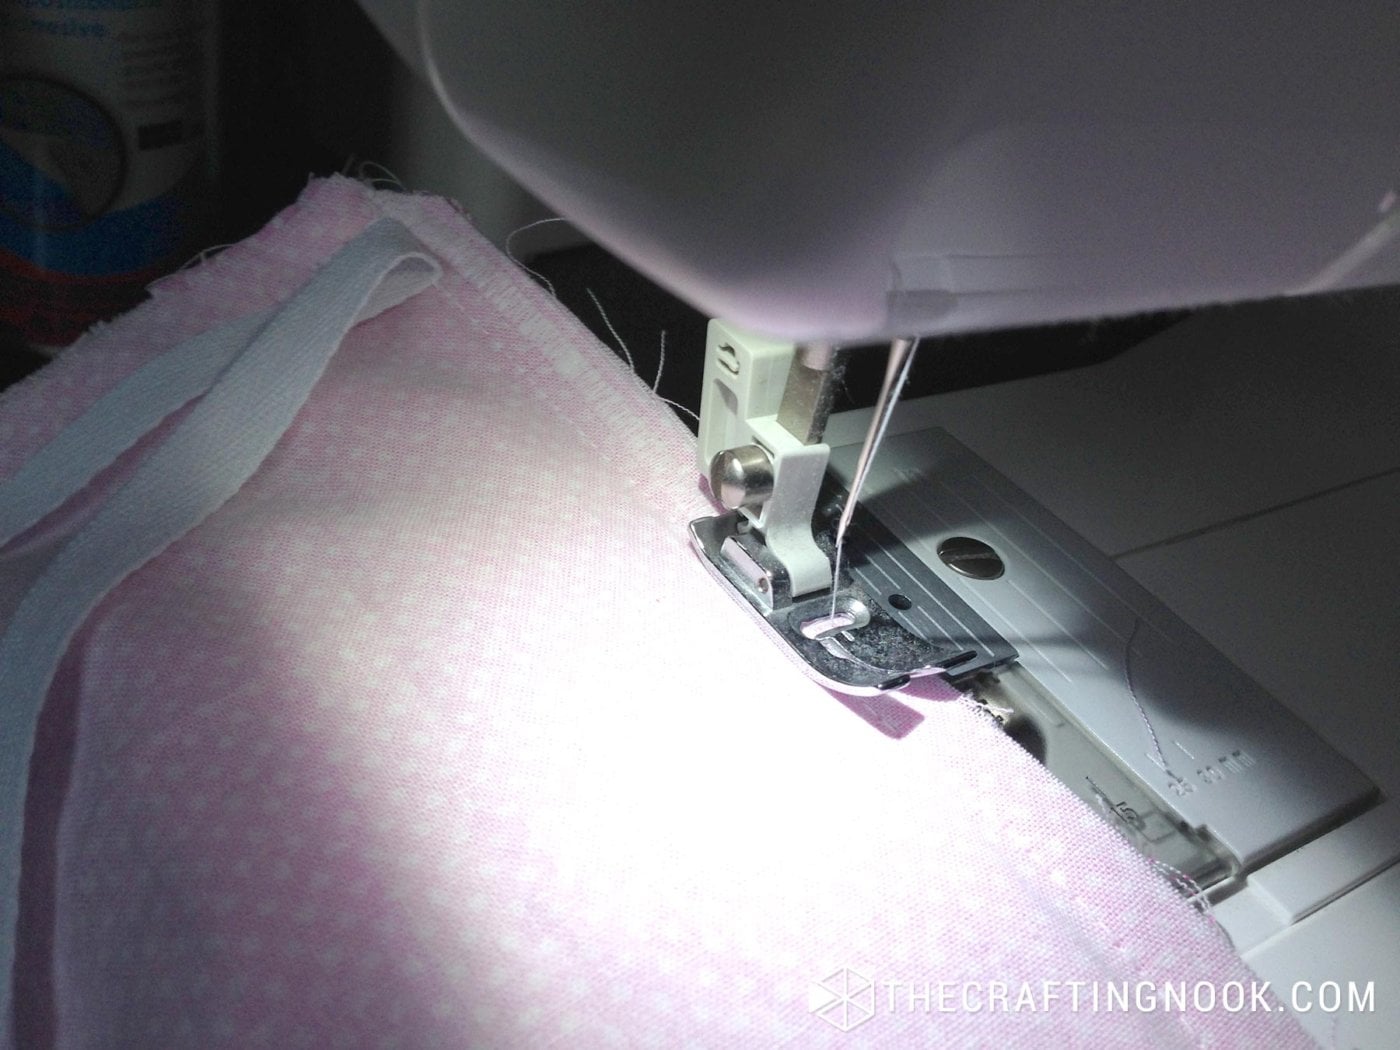
7. Take the pieces pattern 1 and plain white. With the right sides together stitch with a 1 cm seam and then serge the edges so that it won’t come fray apart in the wash.
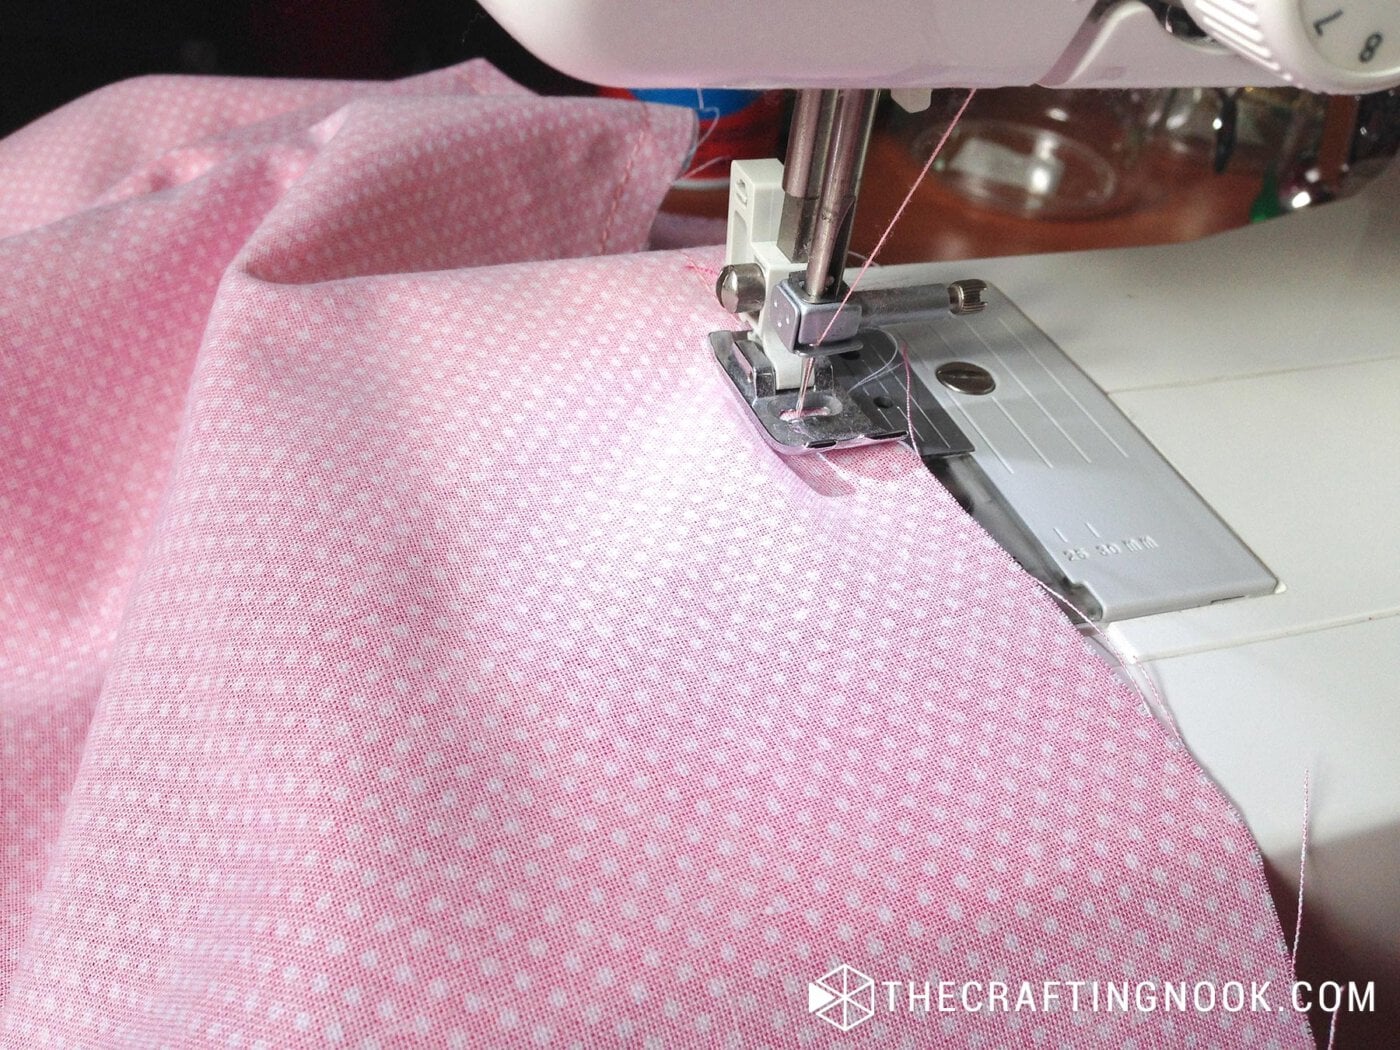
If you don’t have a serger like me, simply run it through the machine again with the zig-zag stitch making sure that it catches the fabric on the outer edges.
8. Then do the same but add the pattern fabric 2 with the right sides together, stitch and then zig-zag edges. Then the white fabric with the name on it, and then fabric pattern 1, and the last panel would be fabric pattern 2.
9. Iron the whole front panel of the cover so it will be easy to manage. This is more or less what you would have so far – the other half is there I promise, just didn’t have enough space.
10. Now lay your top layer onto the back layer right sides together and pin all the way around on 3 sides (top, right, and left), not pinning on the side with the hem and pocket.
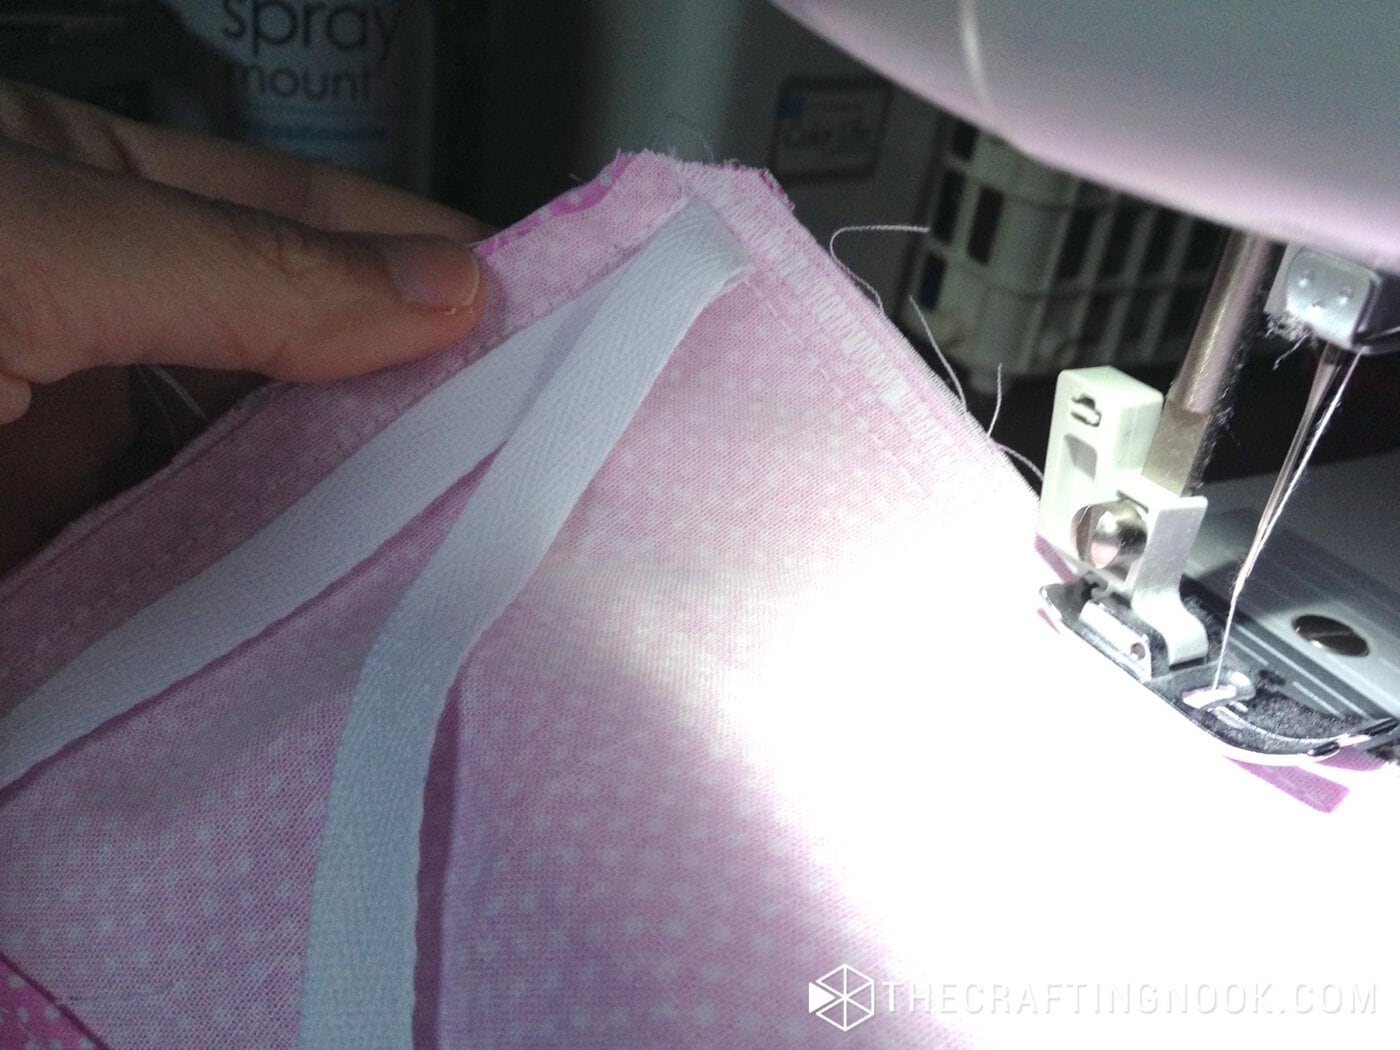
11. On each top corner pin in place one strip of lace ribbon. Make sure the middle of the ribbon is right over where the stitch will go through.
12. Stitch all around the edges of the cover except for the last panel where the opening of the duvet cover will be.
Also, make sure to stitch back and forth on top of the ribbon to secure it. These strips secure the cover onto the duvet so it won’t move around inside.
I wanted to create kind of a pocket in the inside of the cover, so the duvet wouldn’t show through the opening. This is where the additional pieces come in and it’s a bit tricky.
13. Take your rectangle of 142 cm X 15 cm (56 X 6 Inches). Make a hem on one of the largest edges.
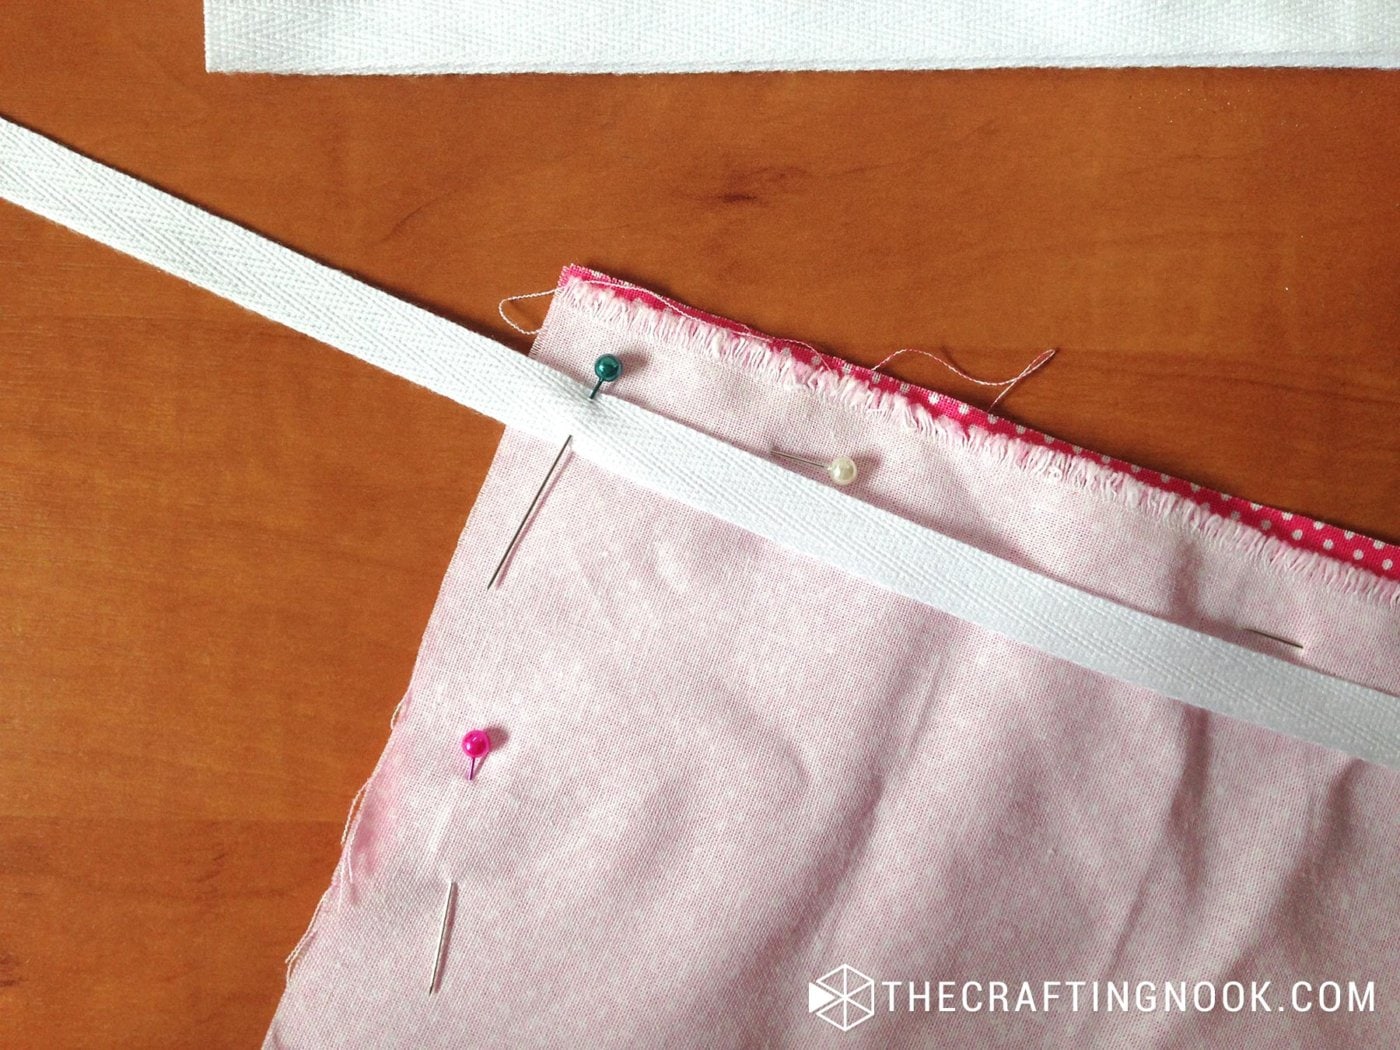
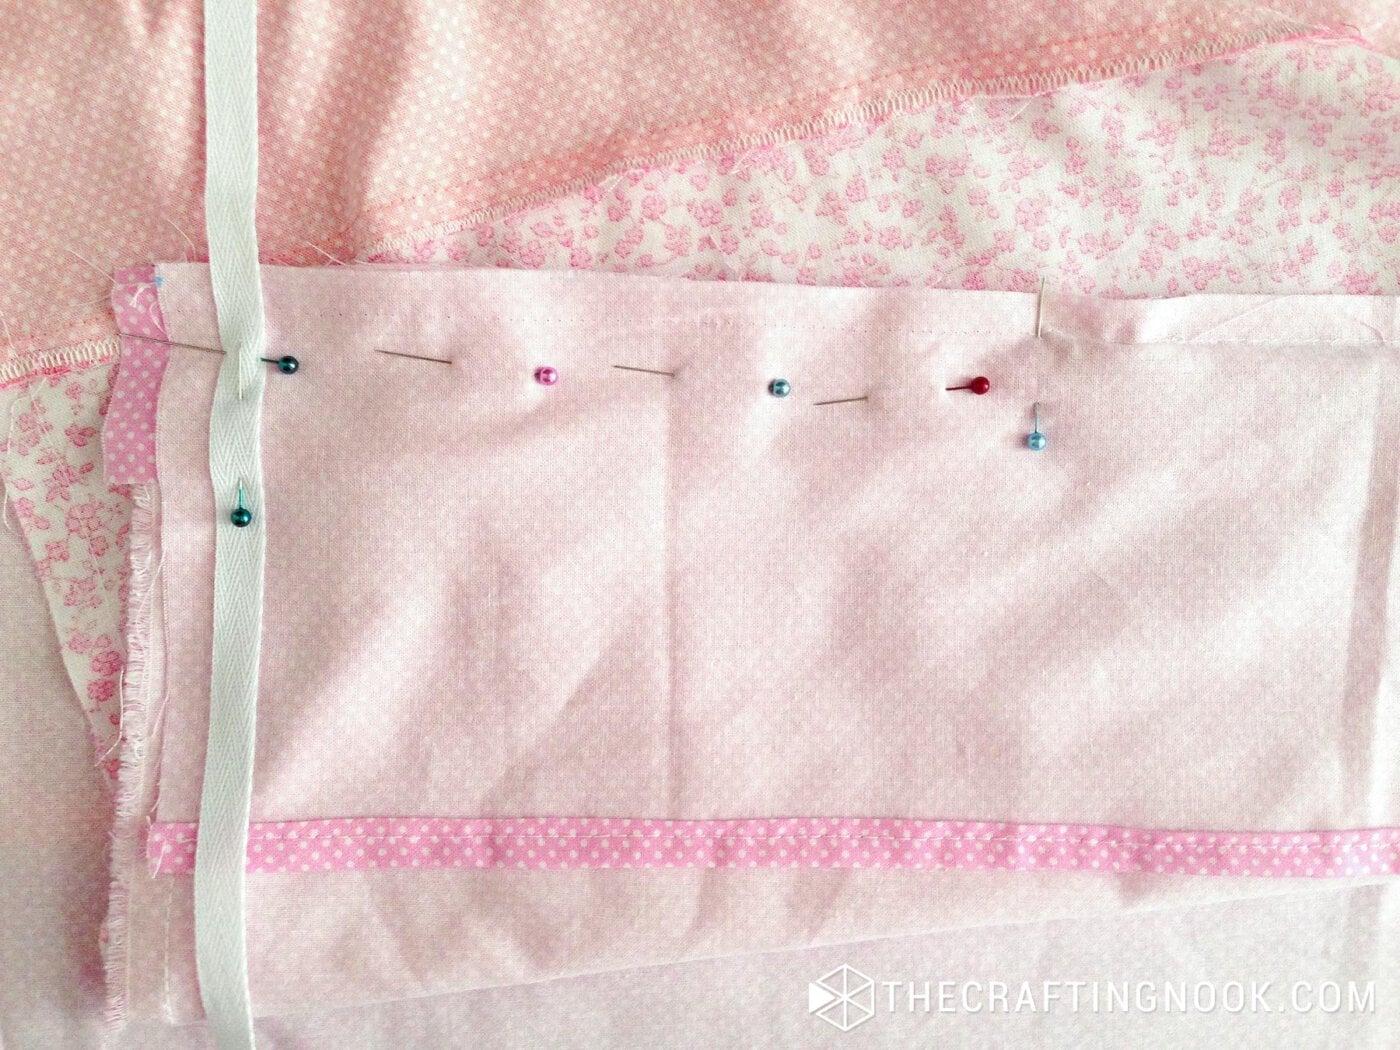
14. Place the front panel the bottom edge and this piece with the right sides together and pin them in place.
15. Stitch them together leaving 20 cm (8 inches) from each end with a 1 cm seam allowance.
You should get something like this:
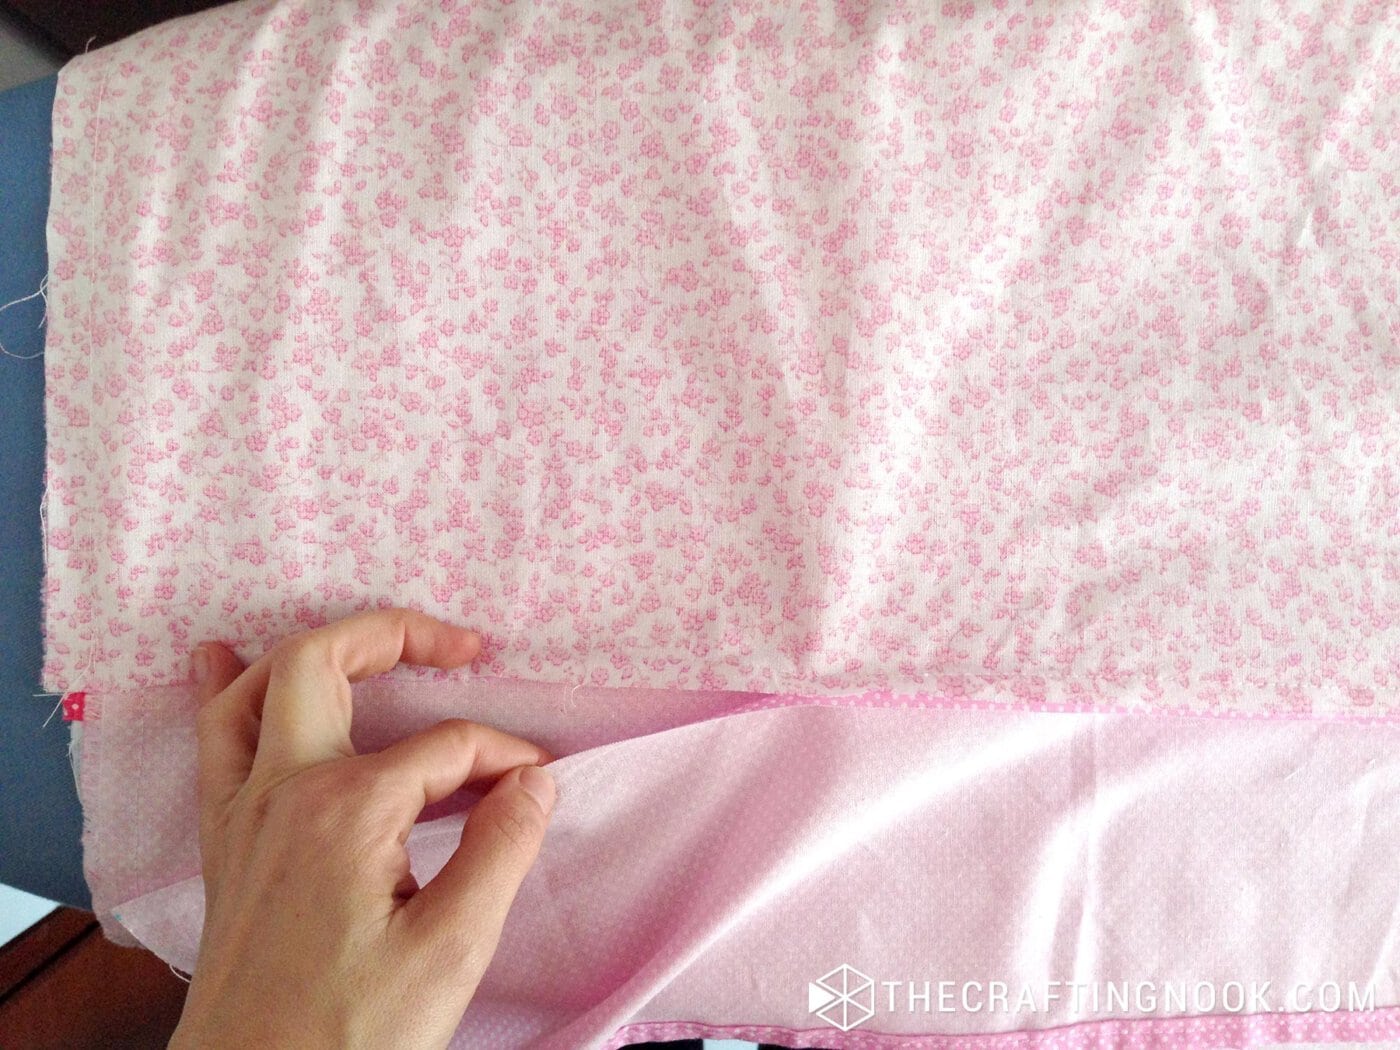
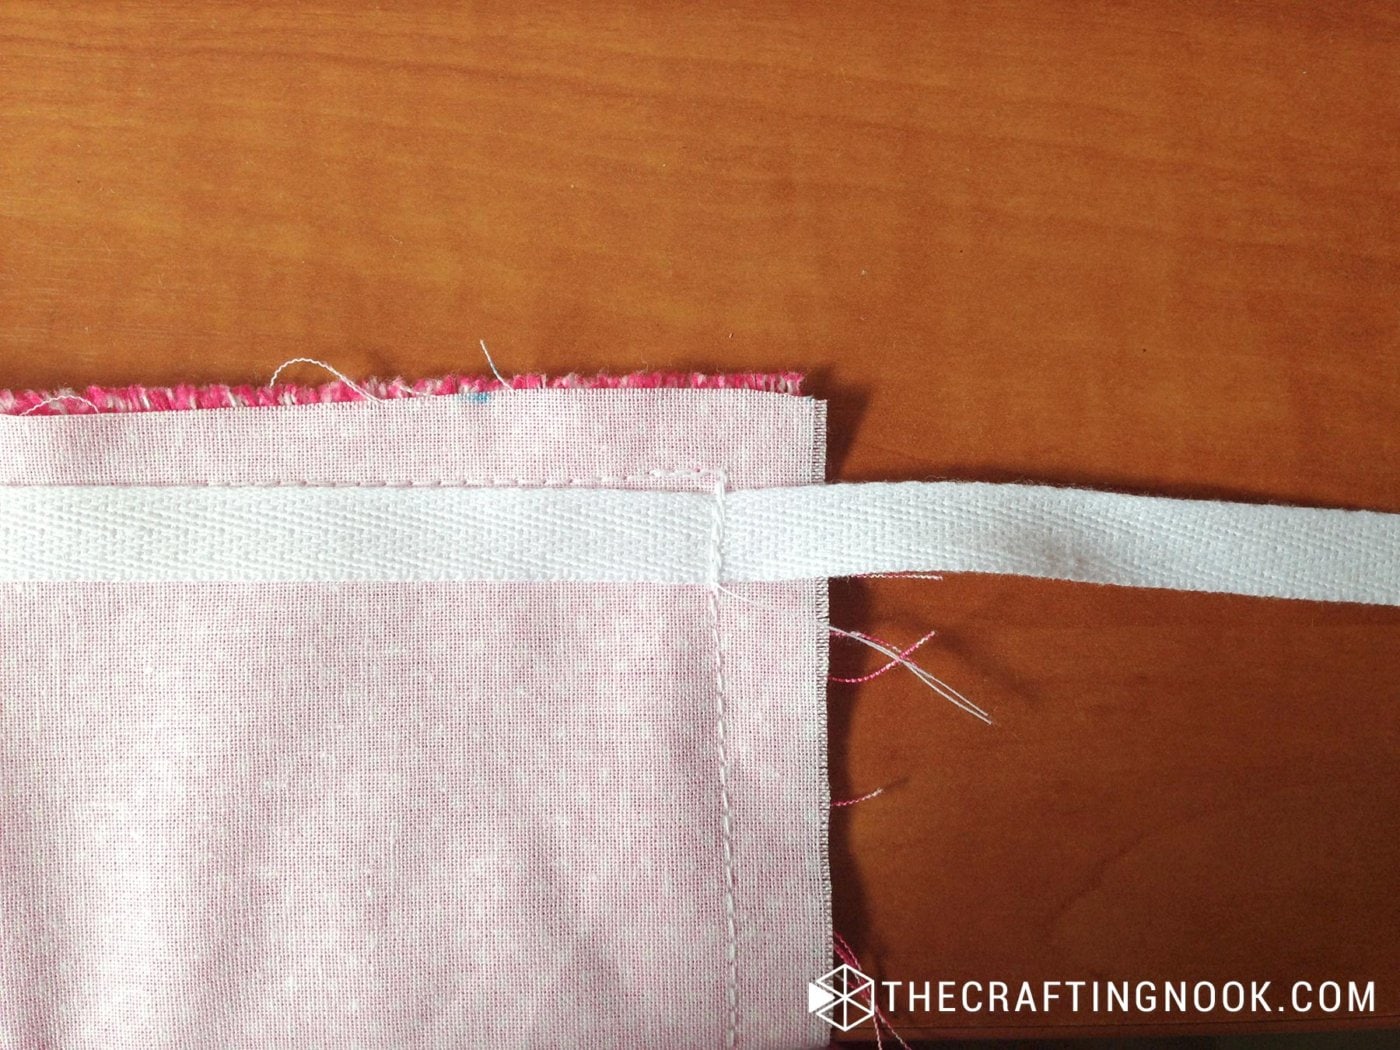
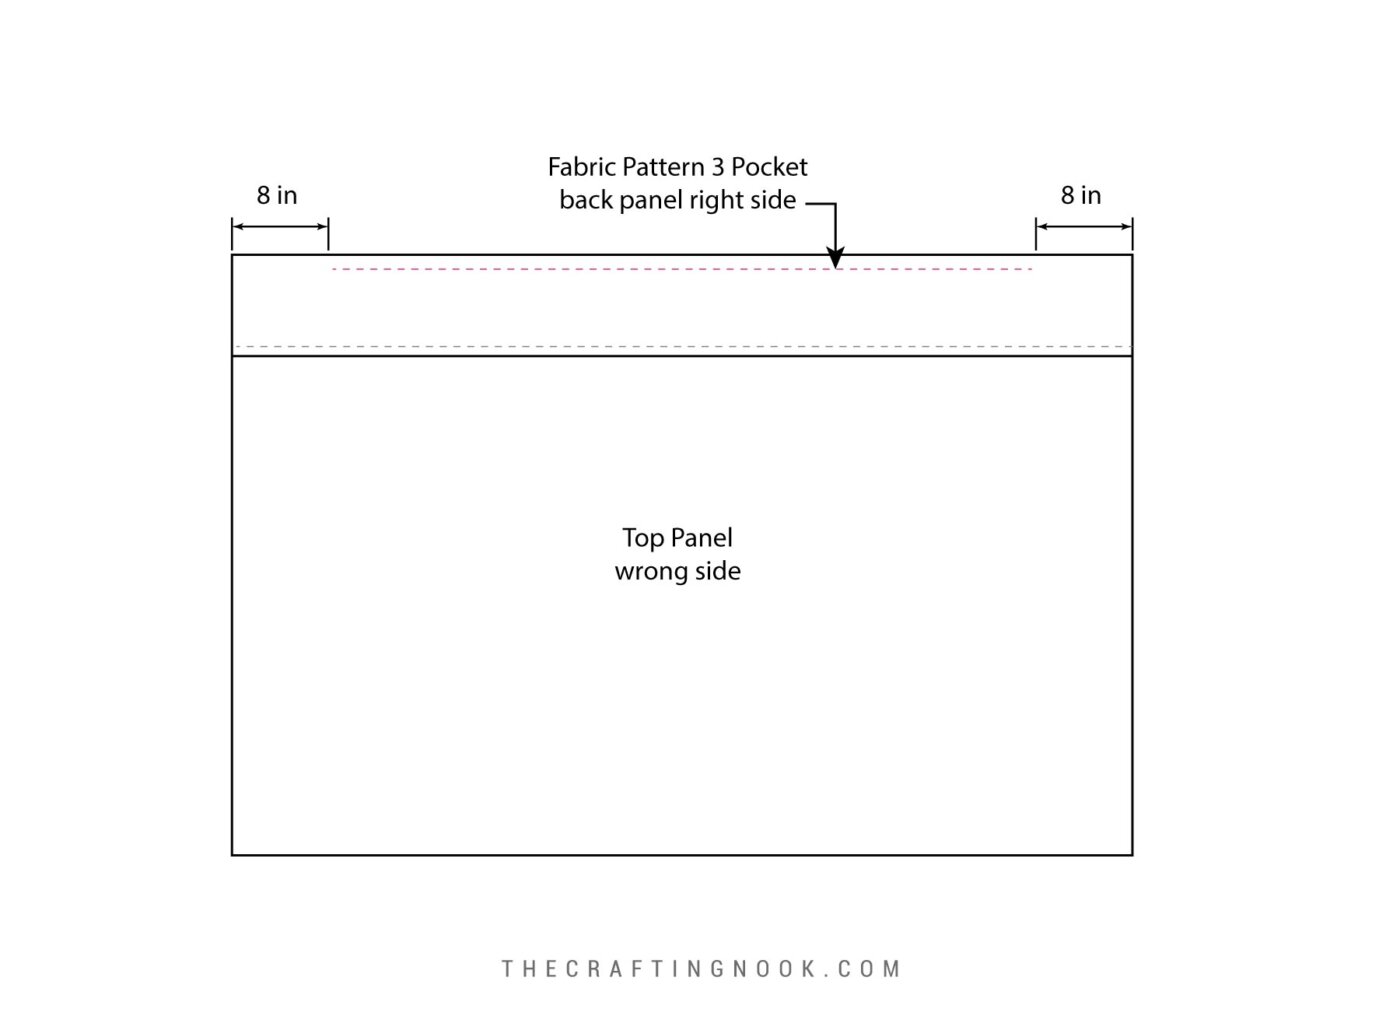
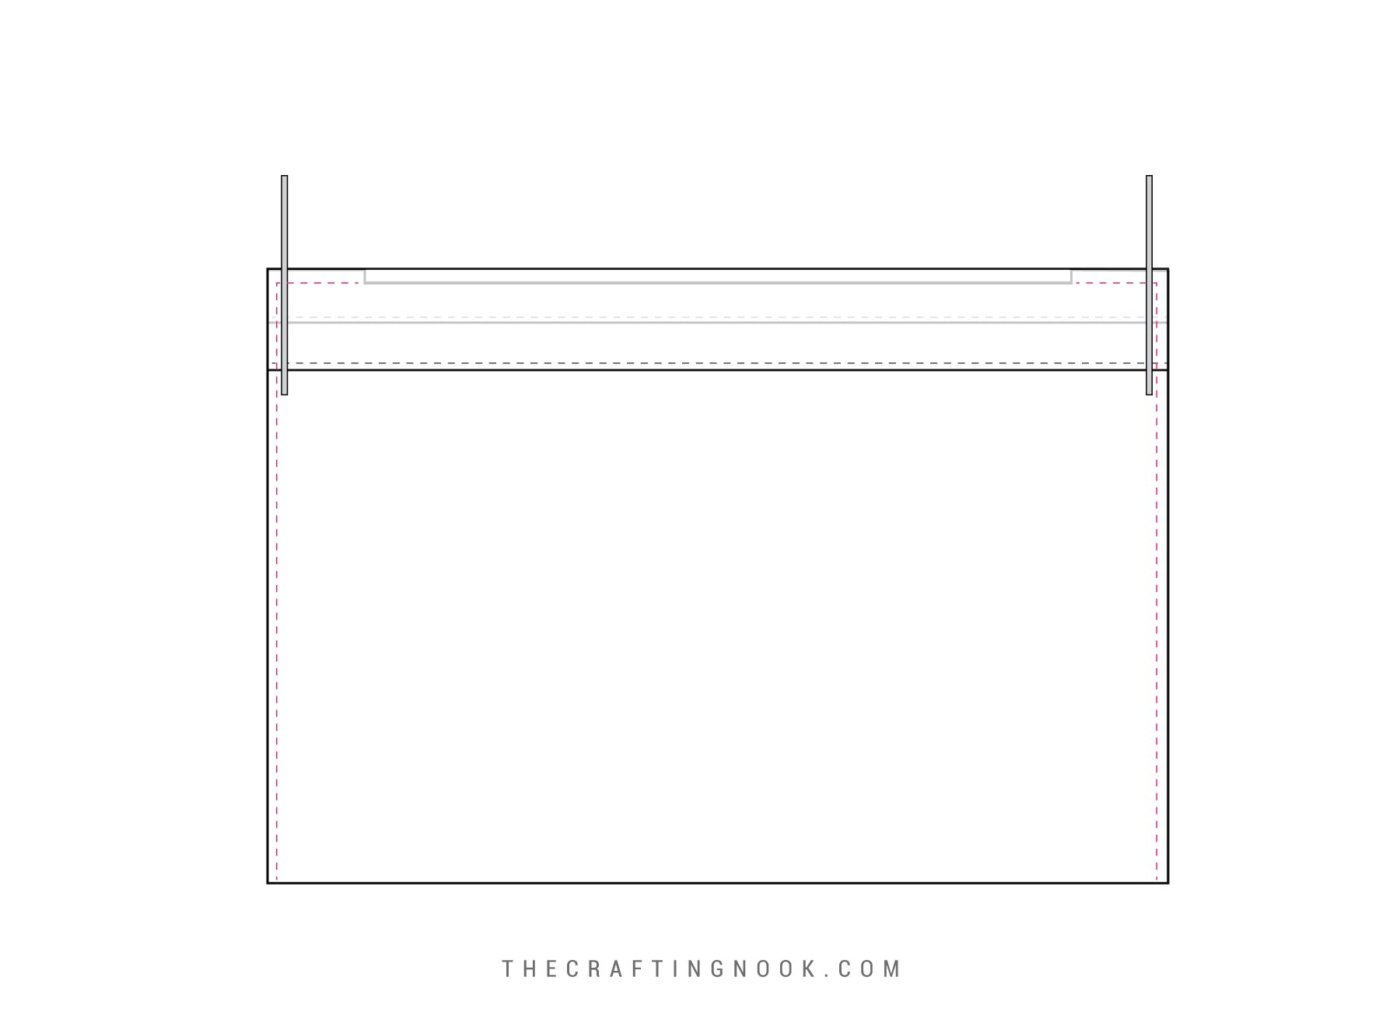
16. Take your back layer piece and your strip of 142 cm X 5 cm (56 X 2 Inches). With right sides together lengthwise, stitch along the edge also leaving 20 cm (8 inches) from each end with 1 cm seam allowance.
17. Turn it back with the wrong sides together. Press.
18. Fold the opposite edge inwards (like a hem), press, and pin in place.
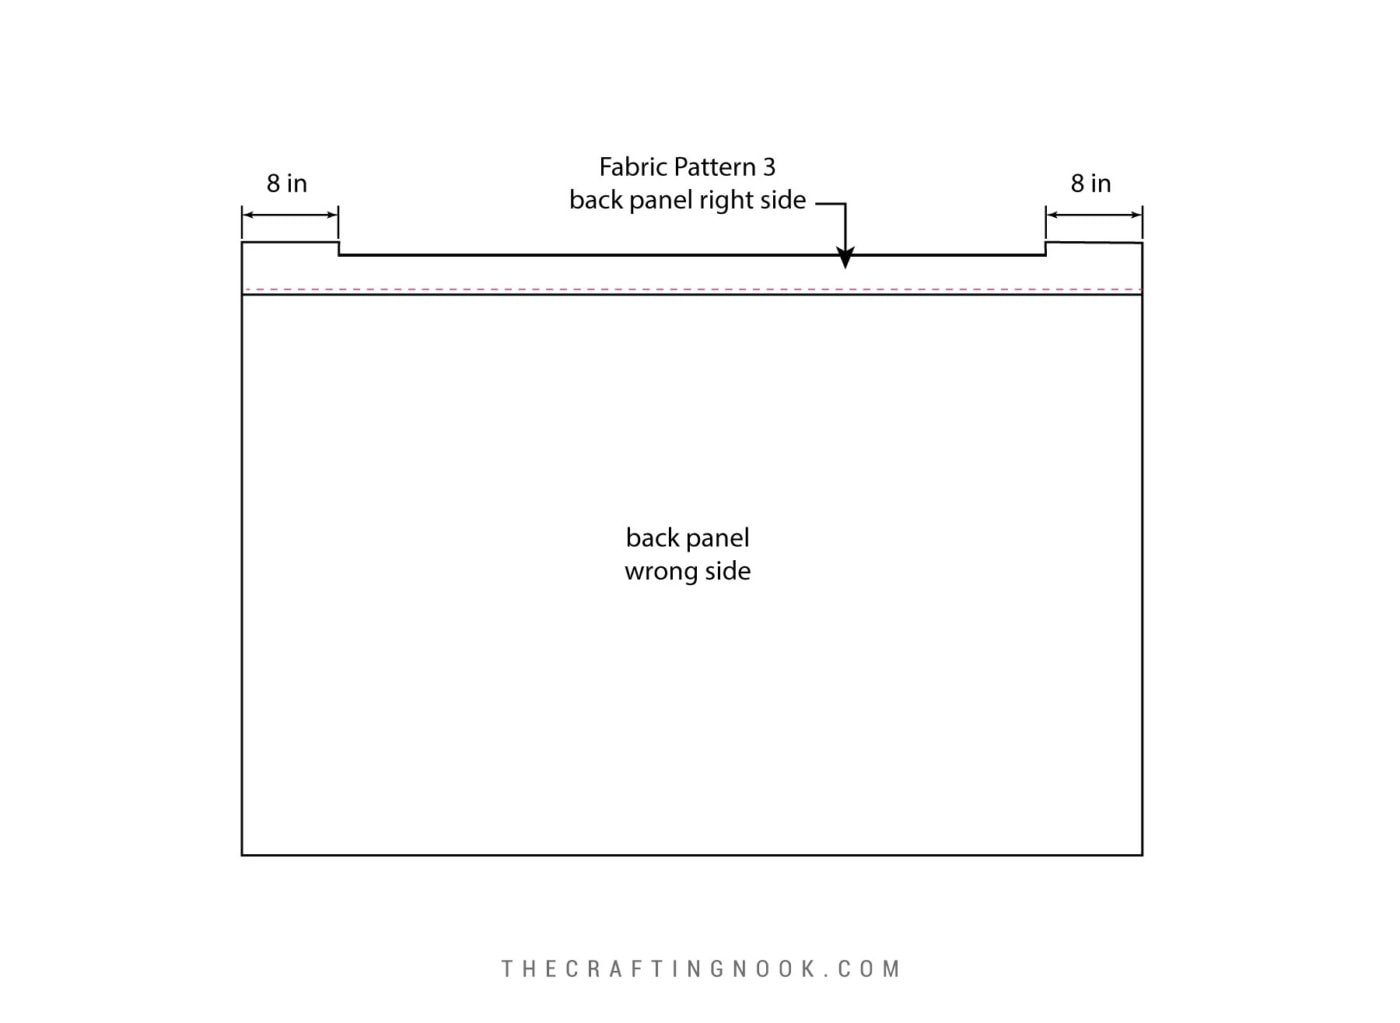
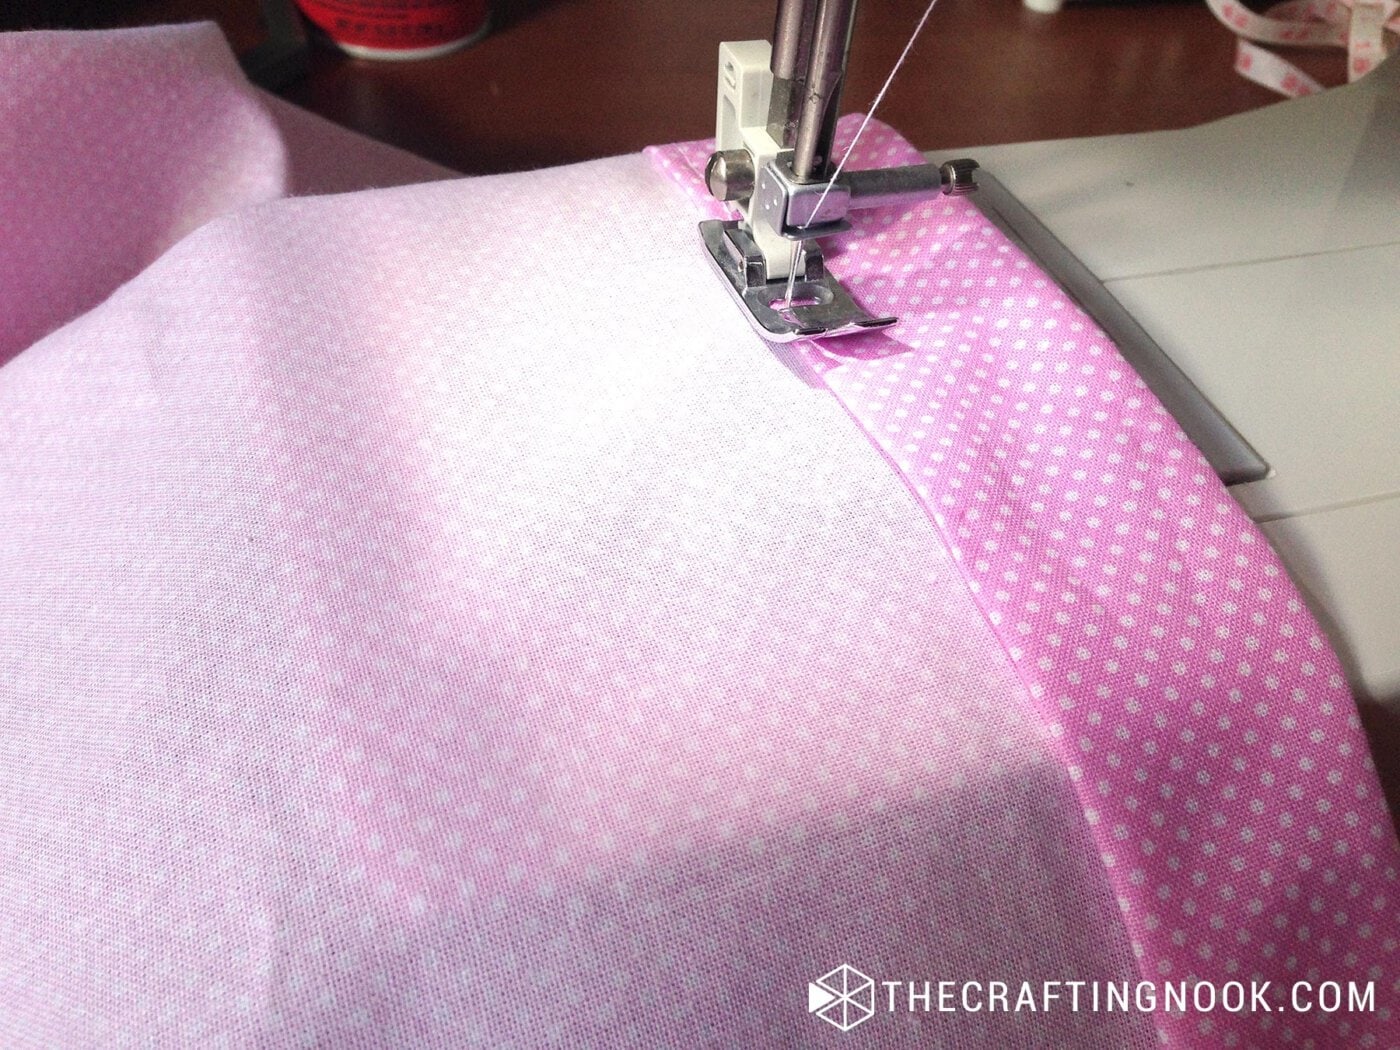
19. Stitch along the edge from end to end.
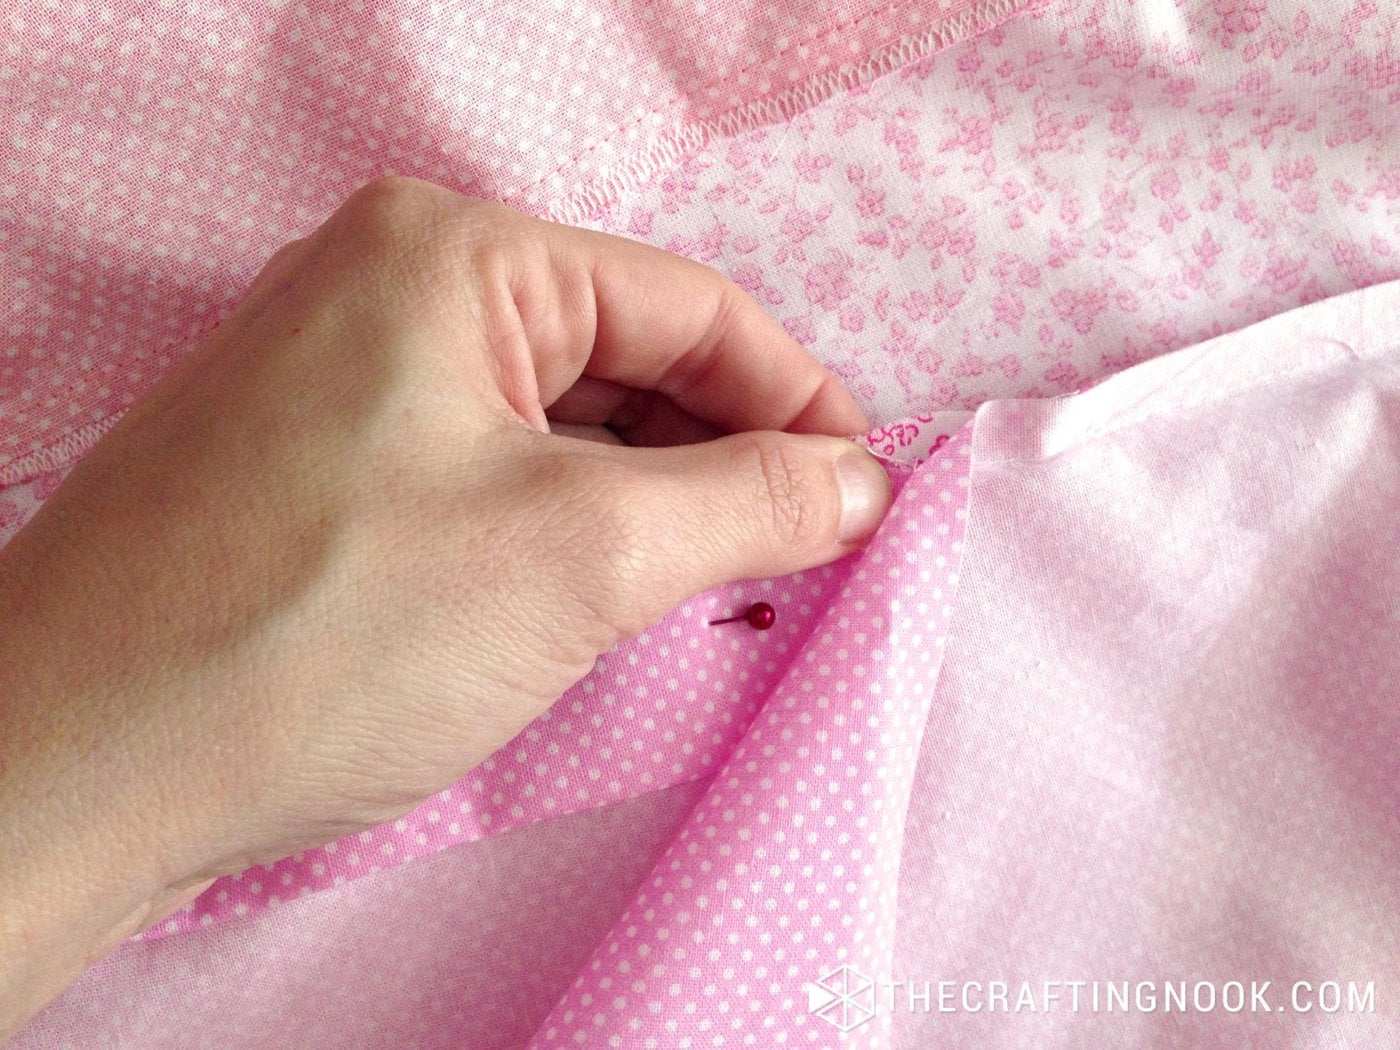
20. Having front and back layers right side together, hold the part where you didn’t stitch on the back layer and twist the fabric a little where the seam starts and pin together.
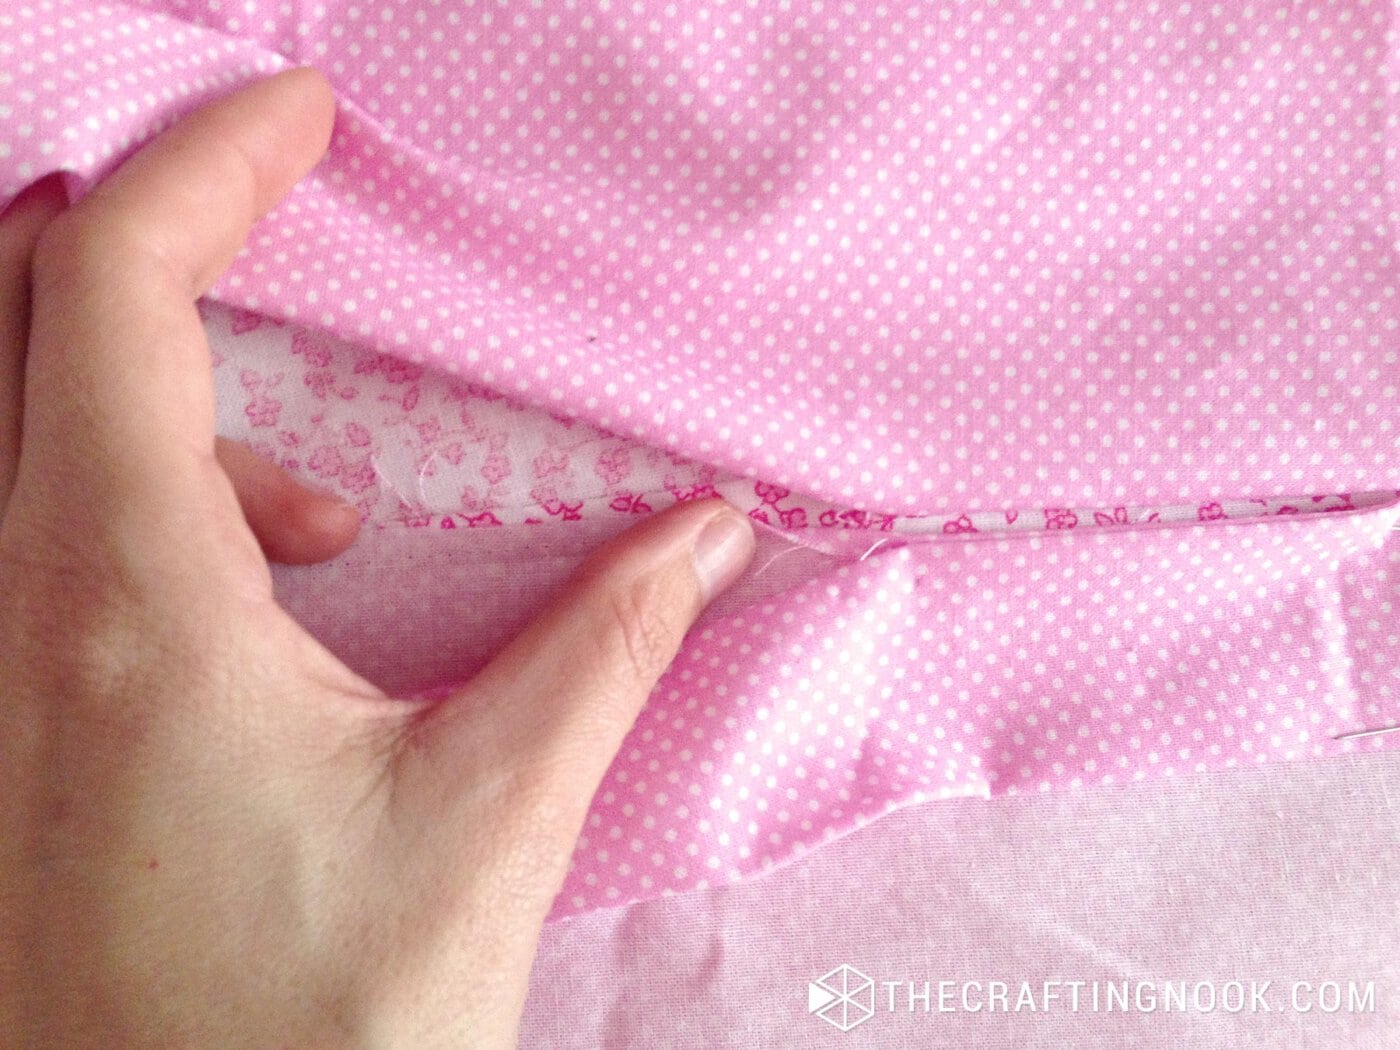
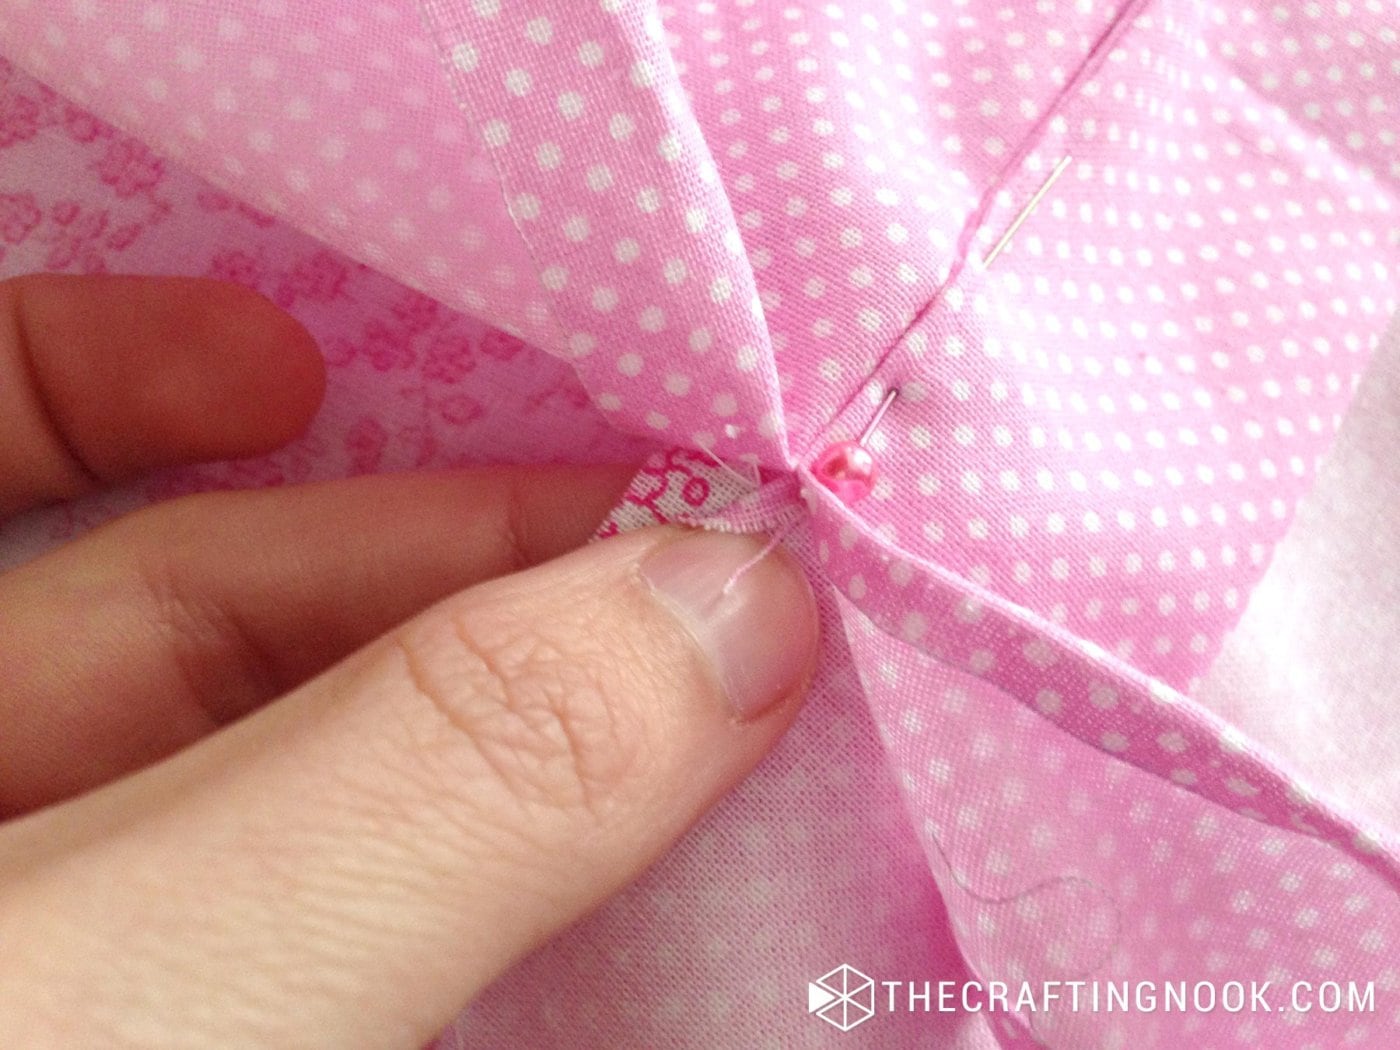
21. Lift the pocket piece and get the top layer edge joining the bottom ones.
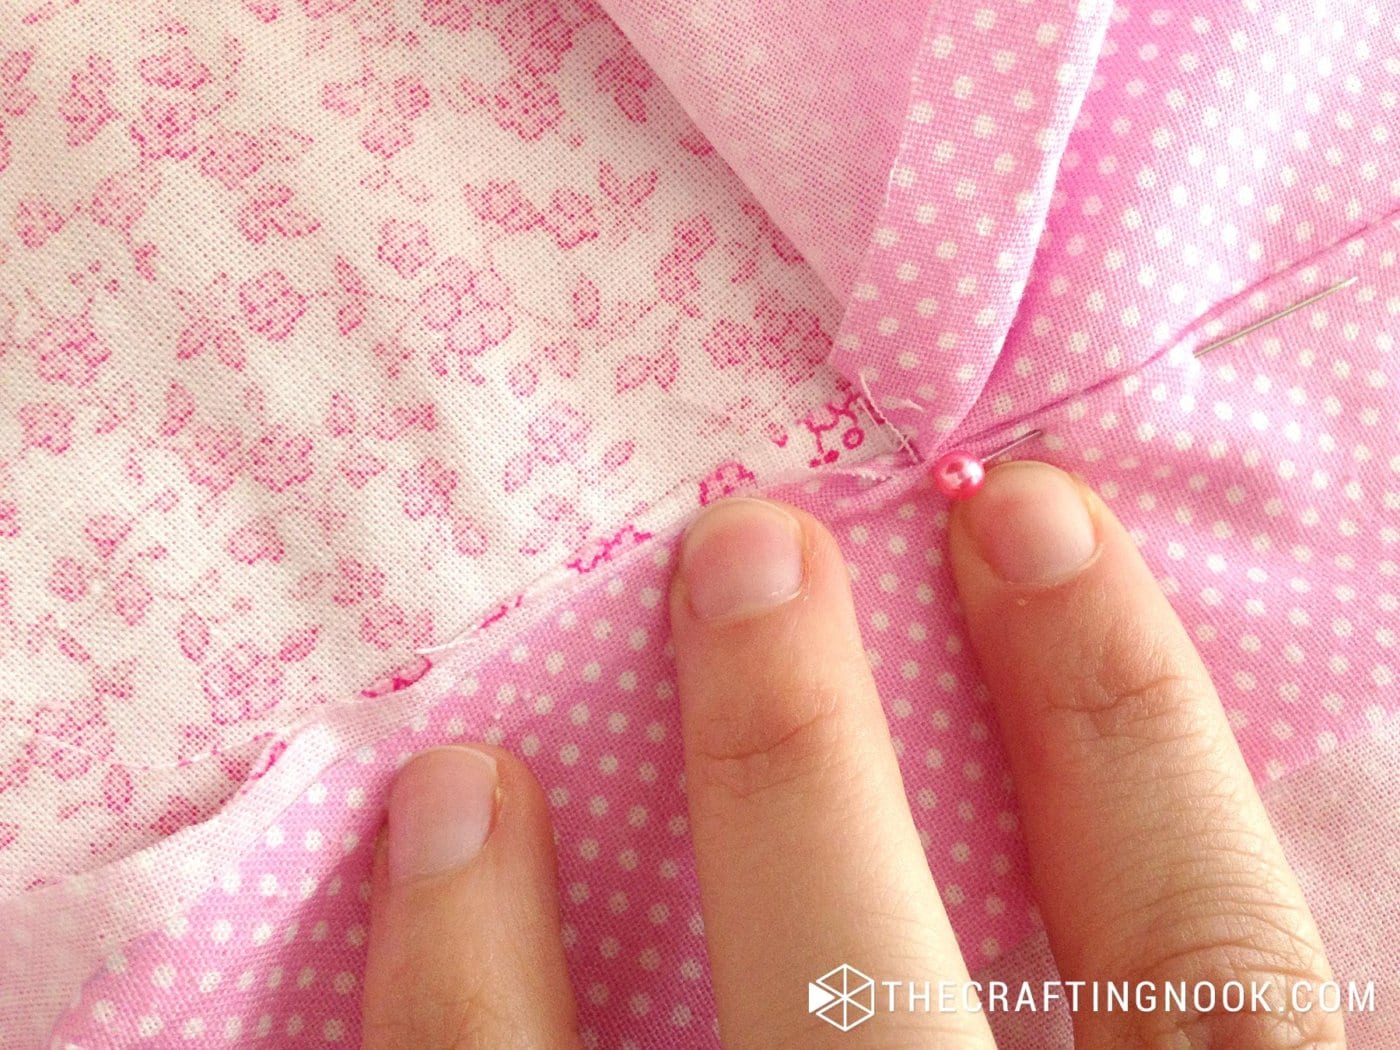
22. Finally lay the pocket piece on top of everything. You should have a 4 layer edge to stitch.
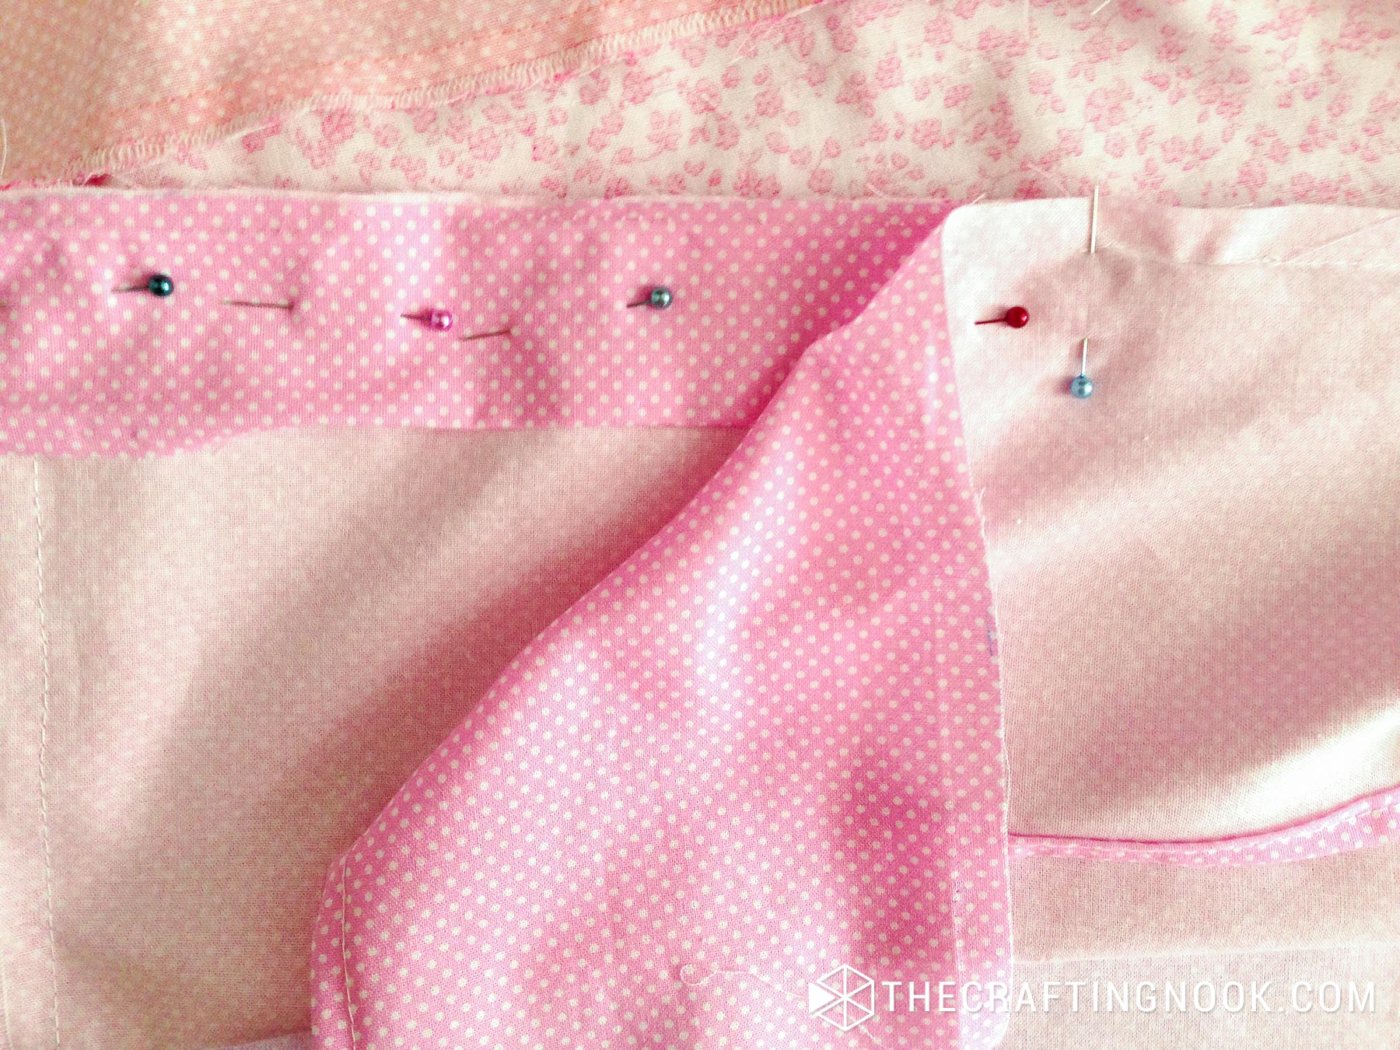
23. Pin right where the cover opening starts (20 cm /8 In.) so you don’t stitch more than you should. Also, pin in place the 4 layers to make sure you don’t miss any.

24. Pin the other 2 lace strips on each corner.
25. Stitch along from the limit pin until you meet the rest of the duvet cover seam.
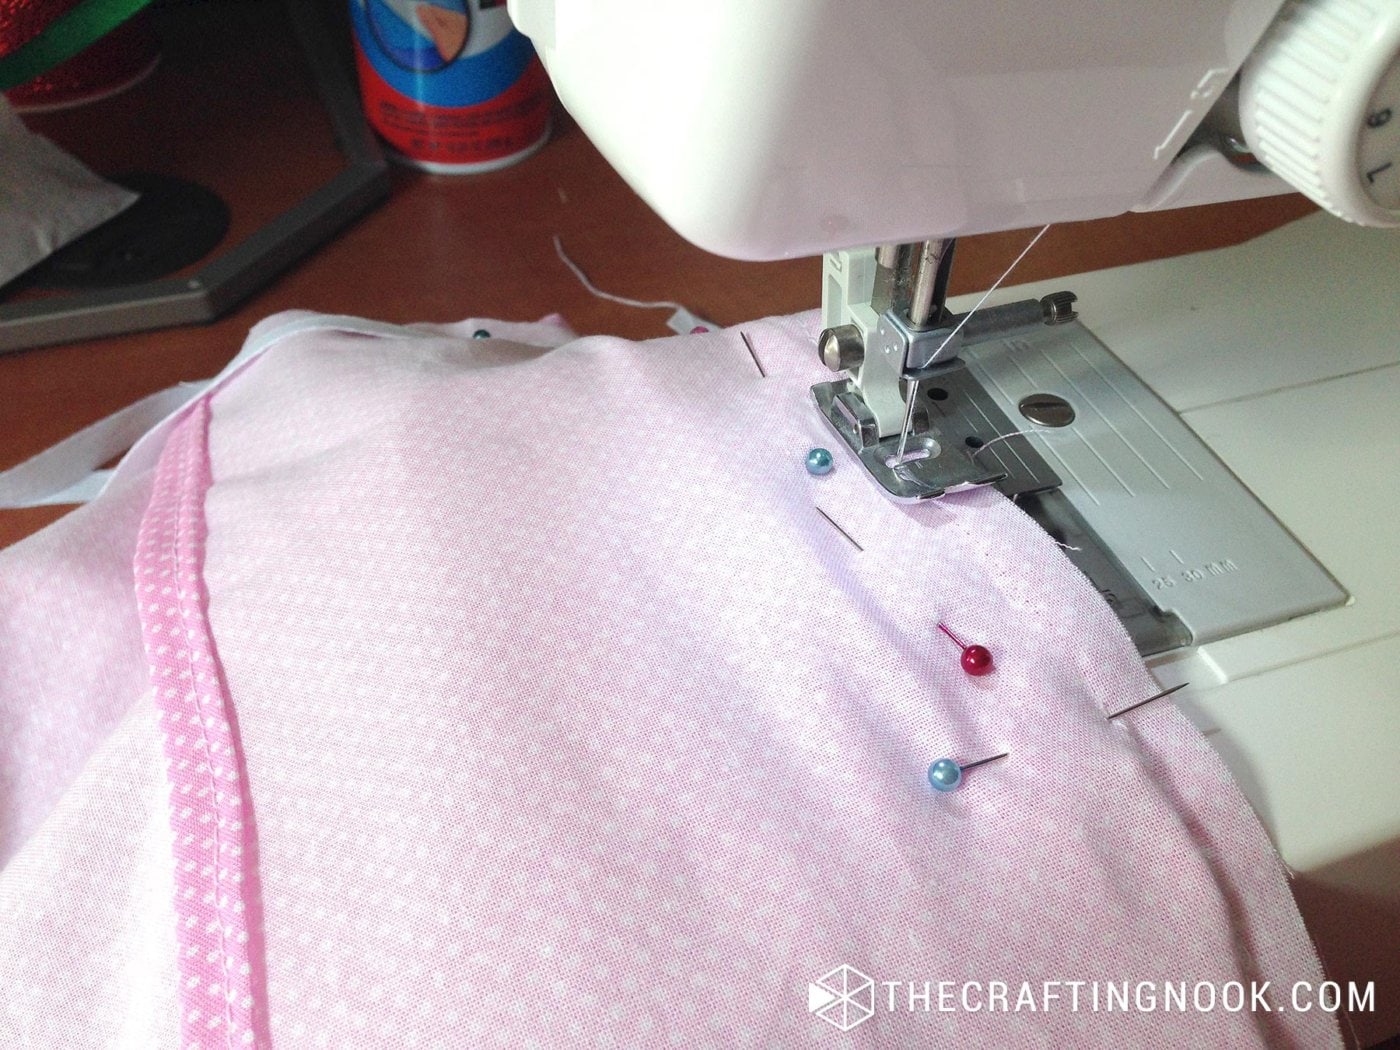
When you lift the pocket piece you should see something like this:
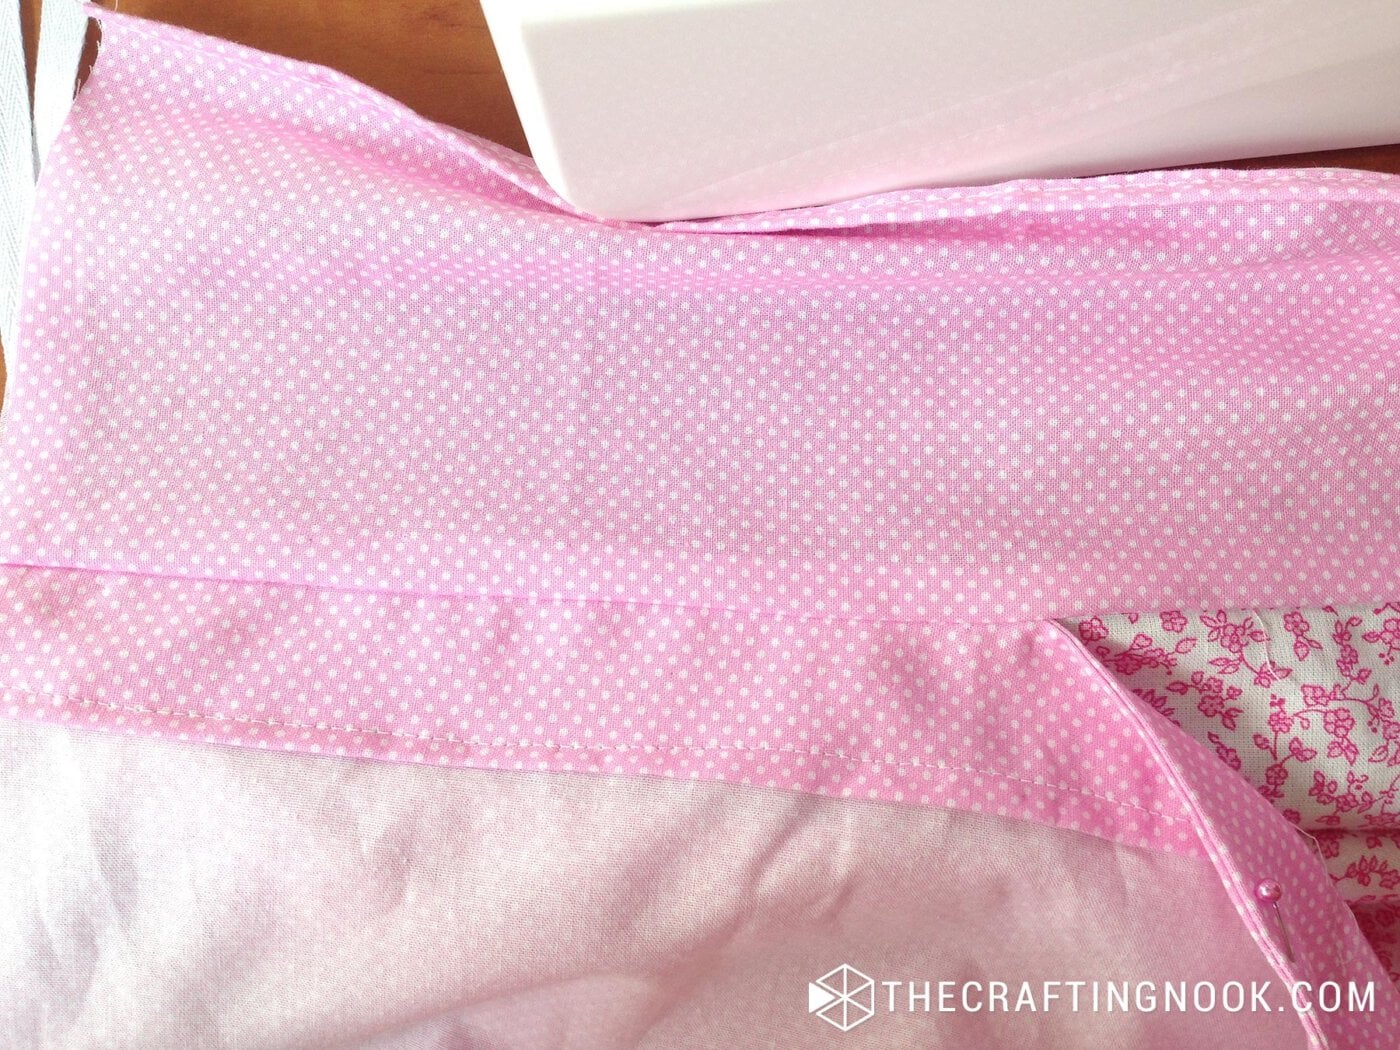
26. Serge or zigzag all the edges. Then cut all the frayed remains so the zigzag is clean.
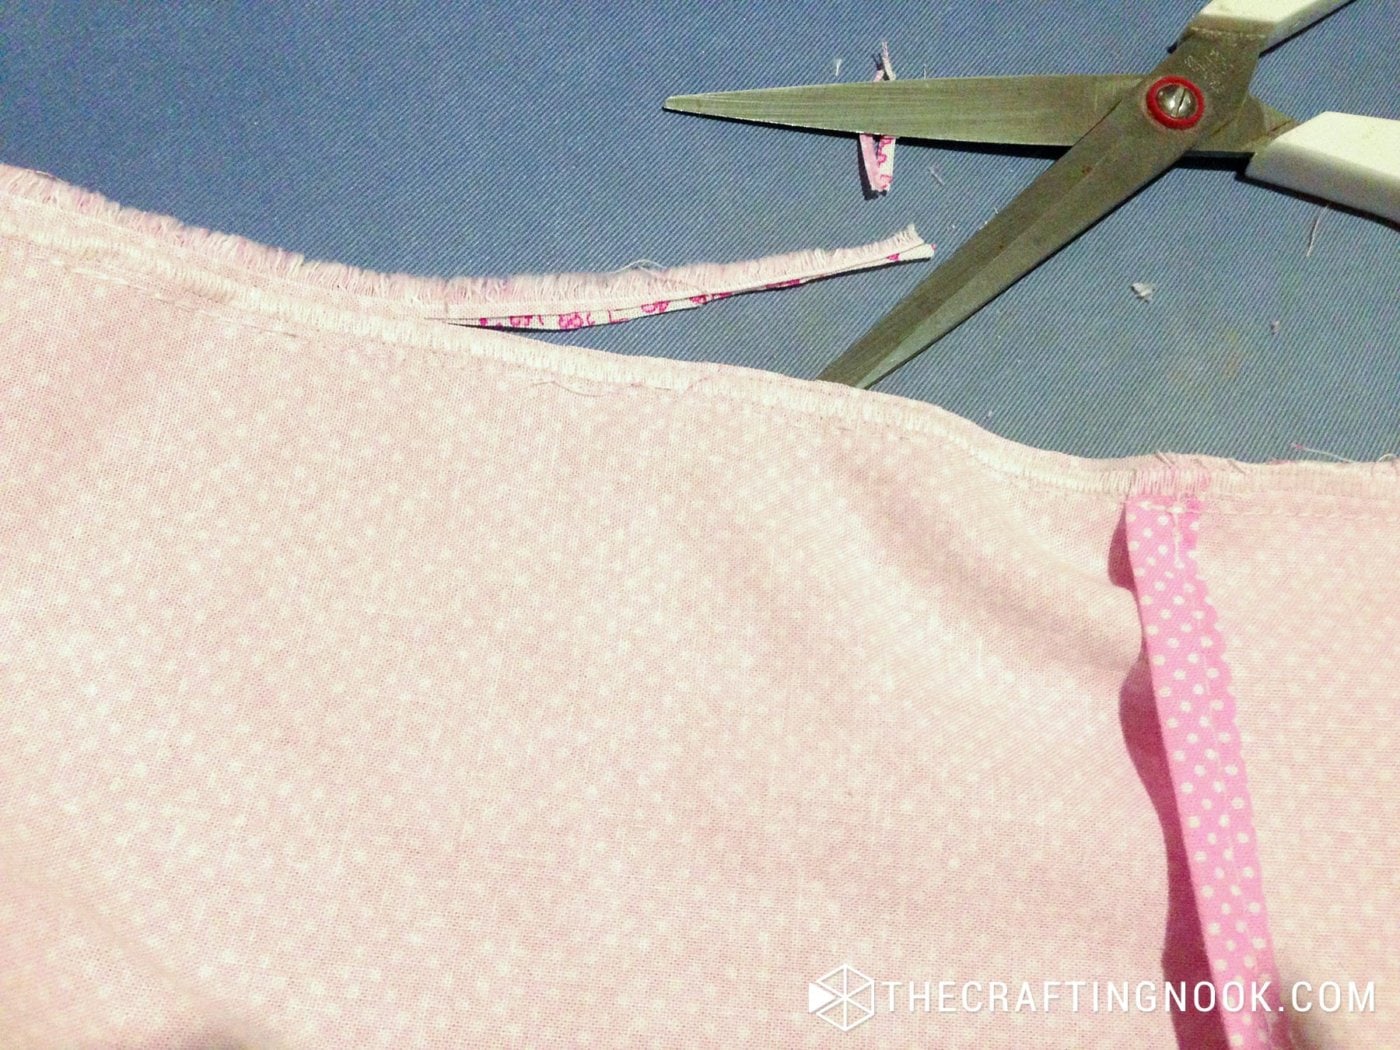
27. Make a cut on each corner so it’s easier to manage the corners when turning inside out.
Now it is time to turn that sucker inside out!!!
Adding the Closing buttons.
28. I used medium size buttons and placed them 20cm (8 Inches) apart.
29. I Made the buttonholes using the attachment that came with my sewing machine and followed its instructions.
I also didn’t want the buttons to be visible, so I sew them on the inside pocket fabric and the buttonholes on the bottom layer.
*TIP: Try making the buttonholes on another piece of fabric first so you are sure the size and style are fine before doing it in the actual cover.
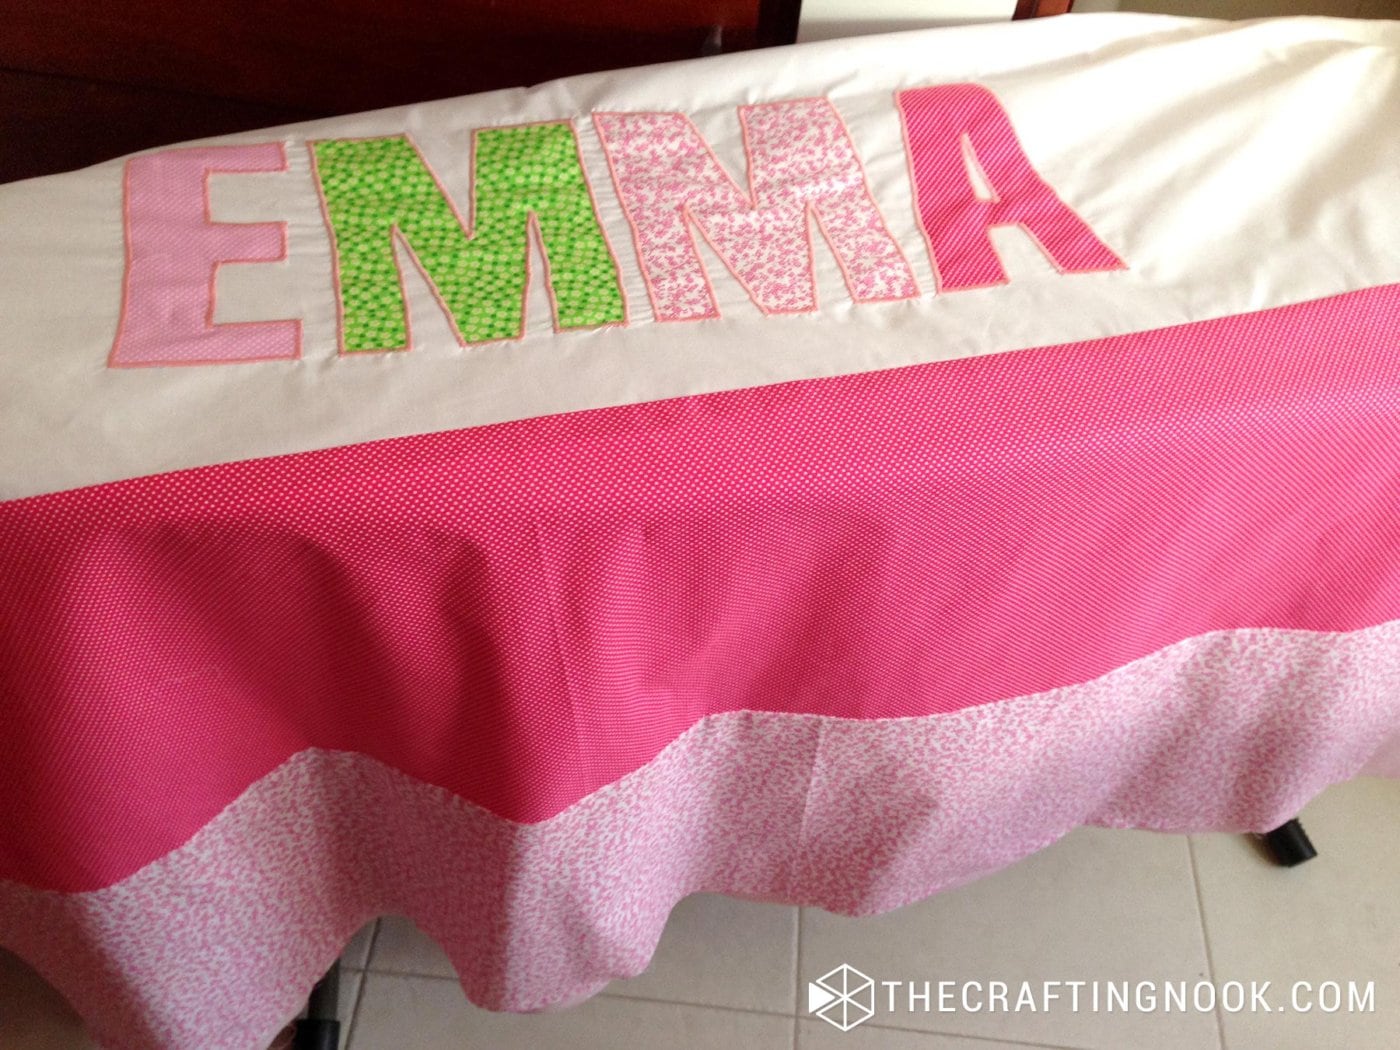
The duvet cover is ready.

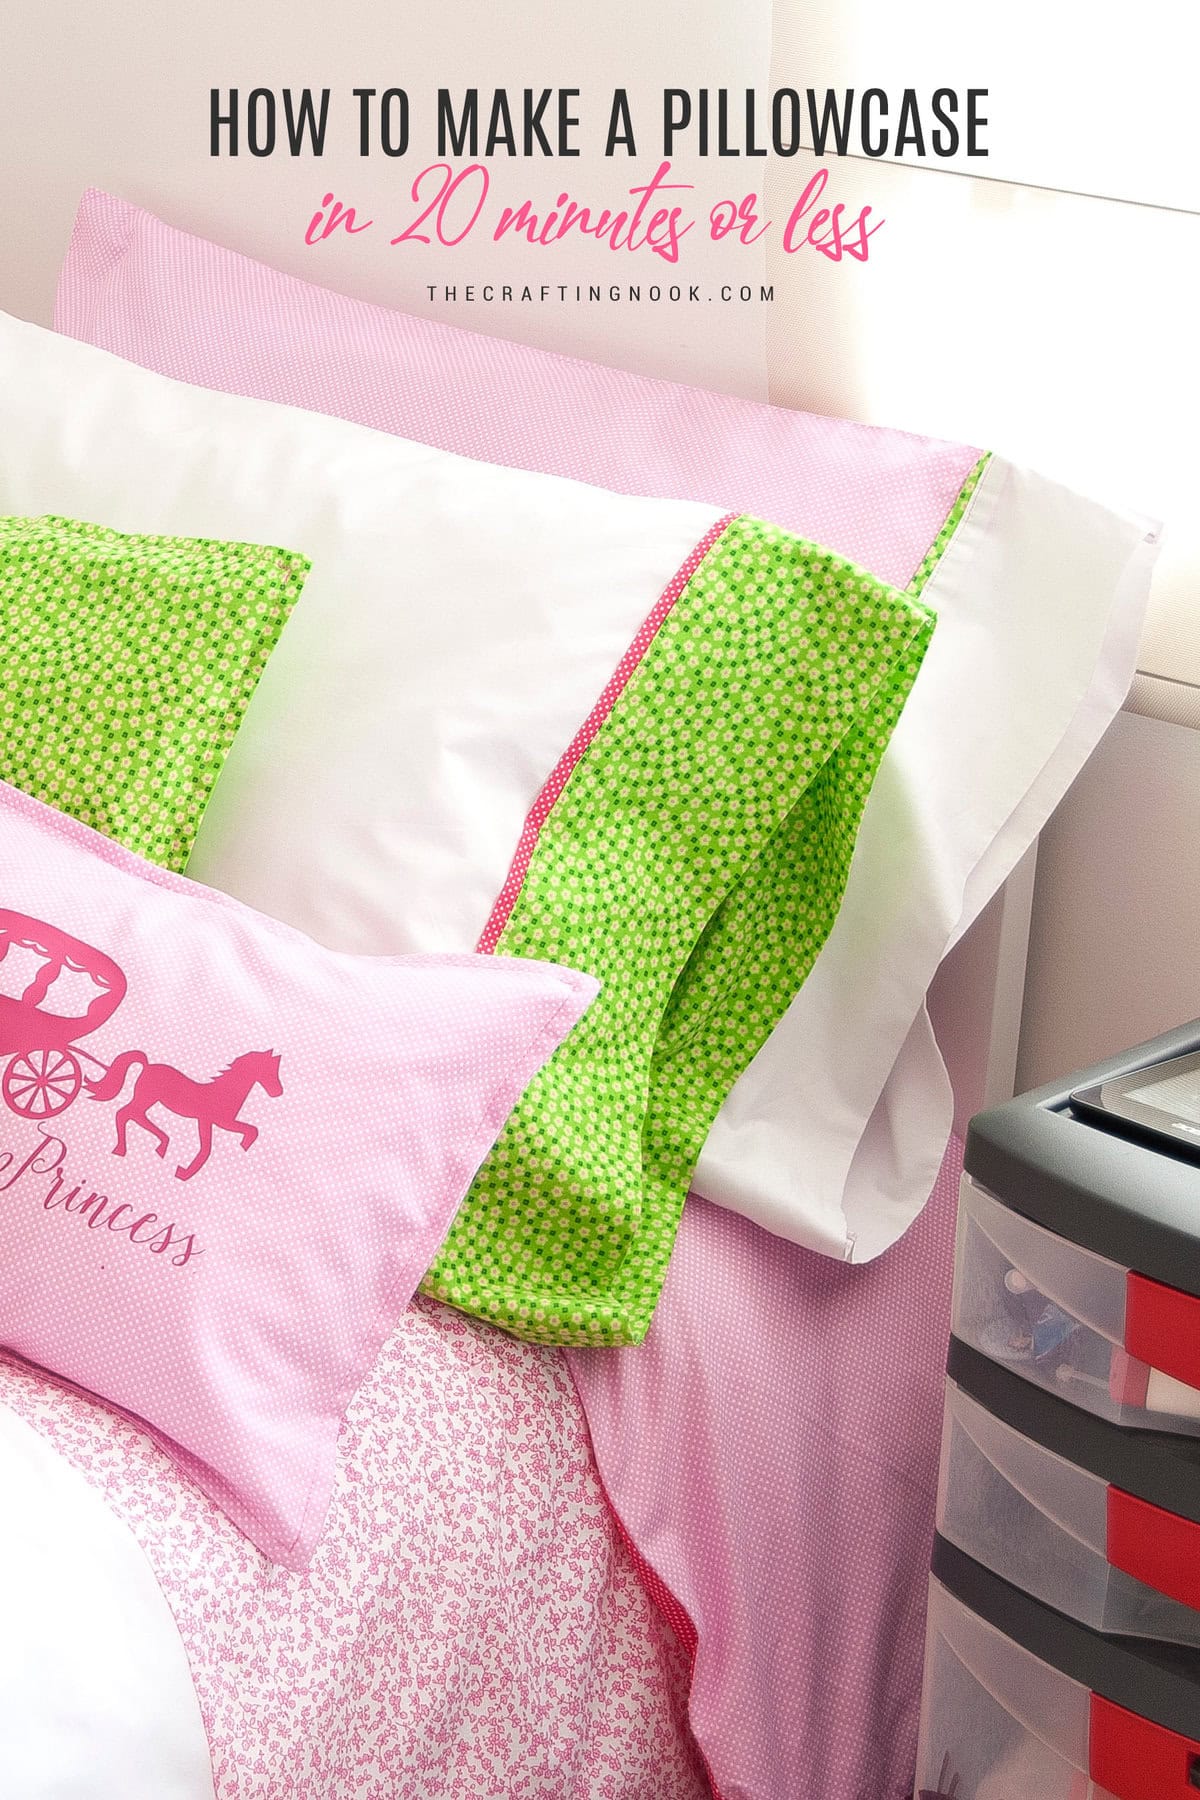
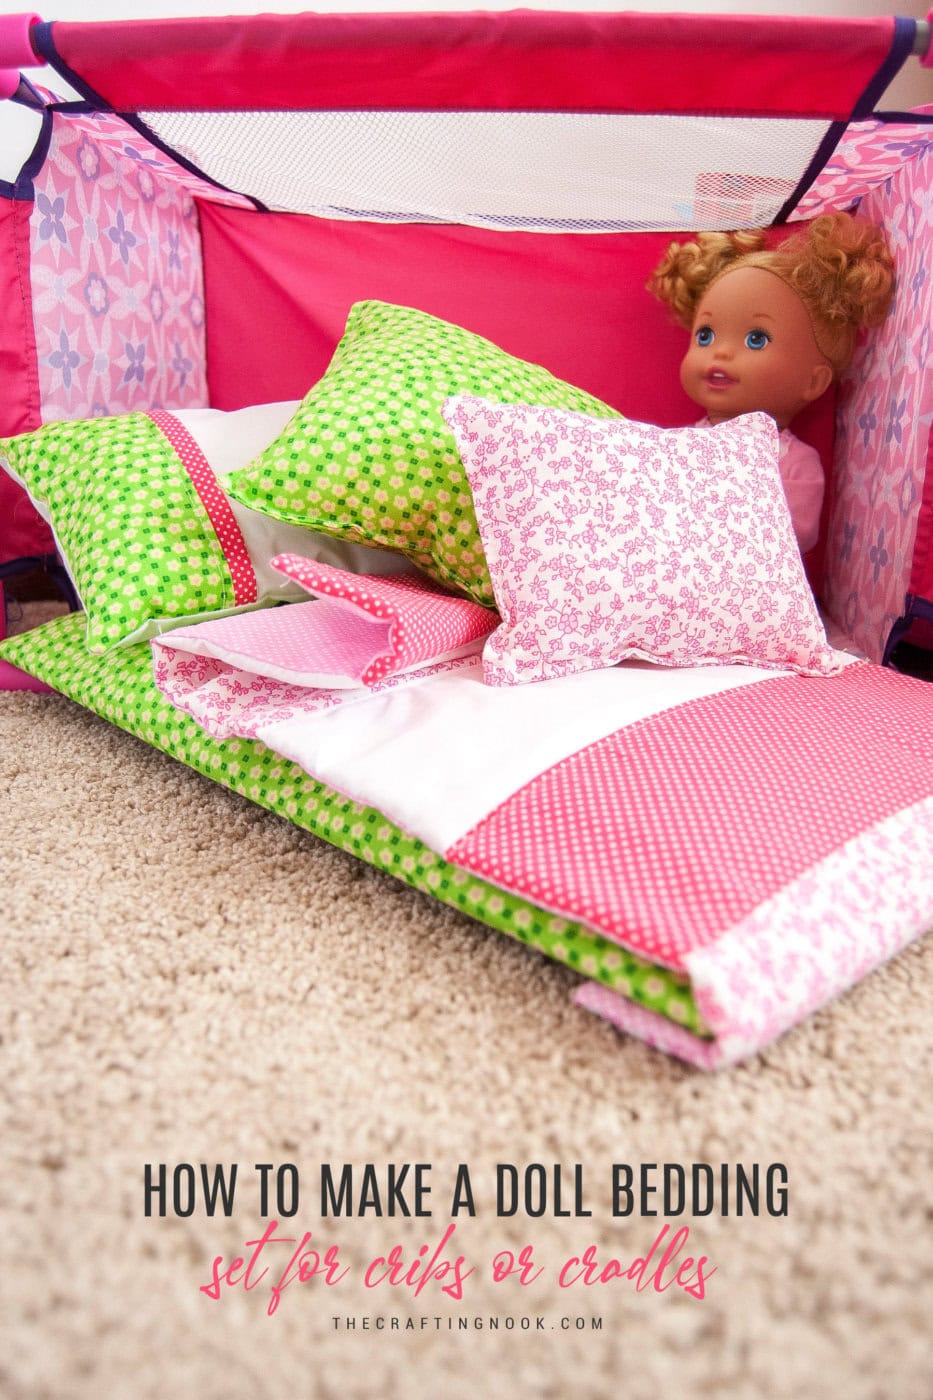
I also made some pillowcases and throw pillow covers that you can check out here. I made 2 main standard-size pillowcases because she had 2 main pillows and then a bunch of throw pillows.
Crafting Tips
- Although this tutorial has used girly colors, you can definitely choose different fabrics stles and colors to match boys and even adults.
- You can alternatively use old bed sheets, curtains, or large fabric scraps to create an eco-friendly duvet cover. Mixing and matching different patterns can give a unique, eclectic look.
- Add more than just a name. Try including meaningful shapes or characters, such as hearts, stars, or the child’s favorite animal, for a fun, personalized touch.
- Customize the duvet cover to match your child’s favorite themes, like dinosaurs, princesses, space, or animals. You can mix and match fabrics that feature their favorite characters or motifs.
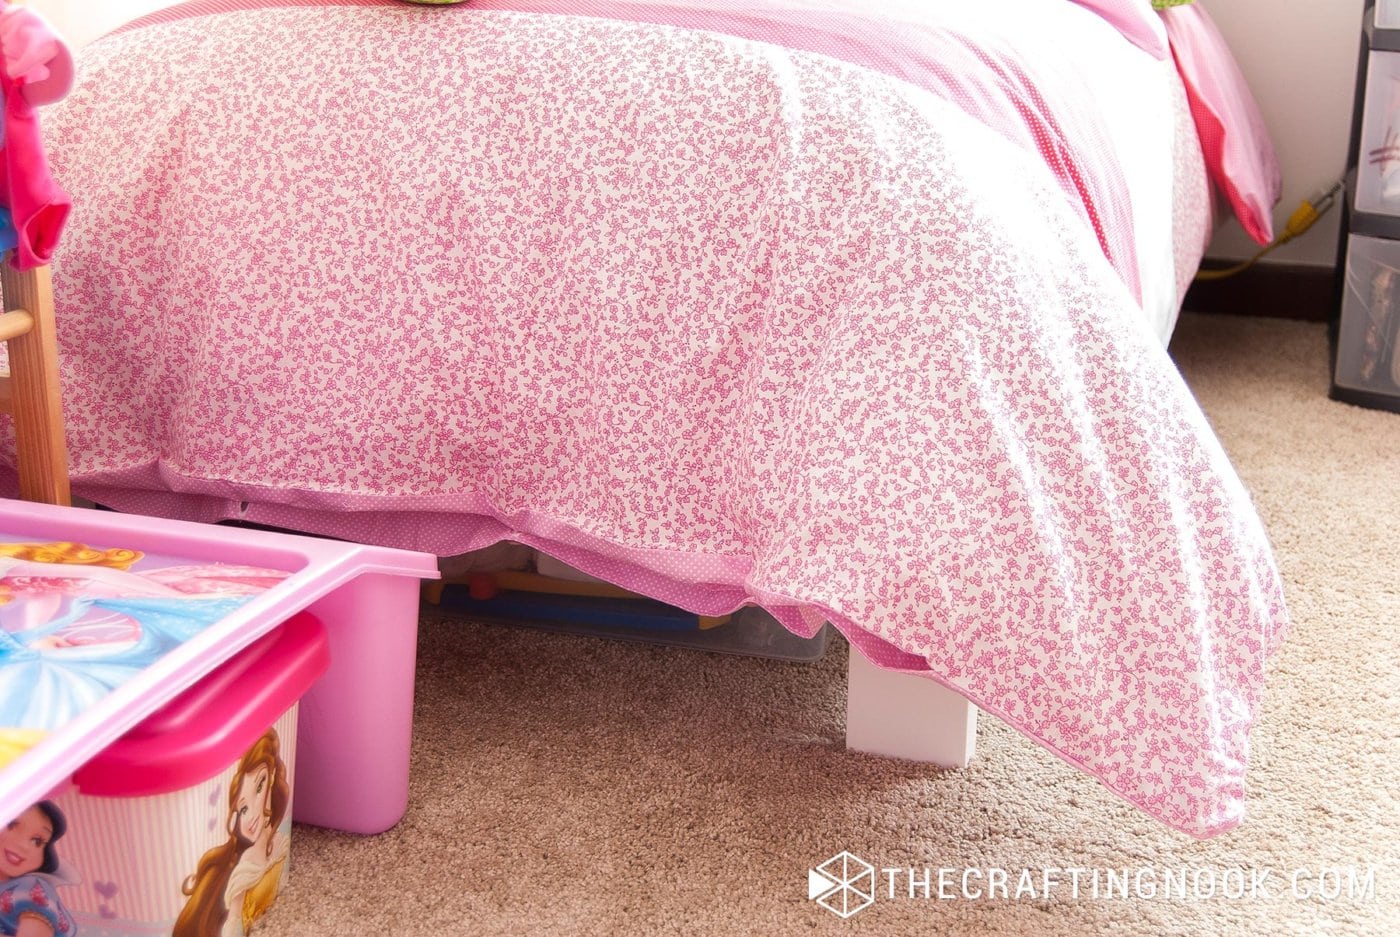
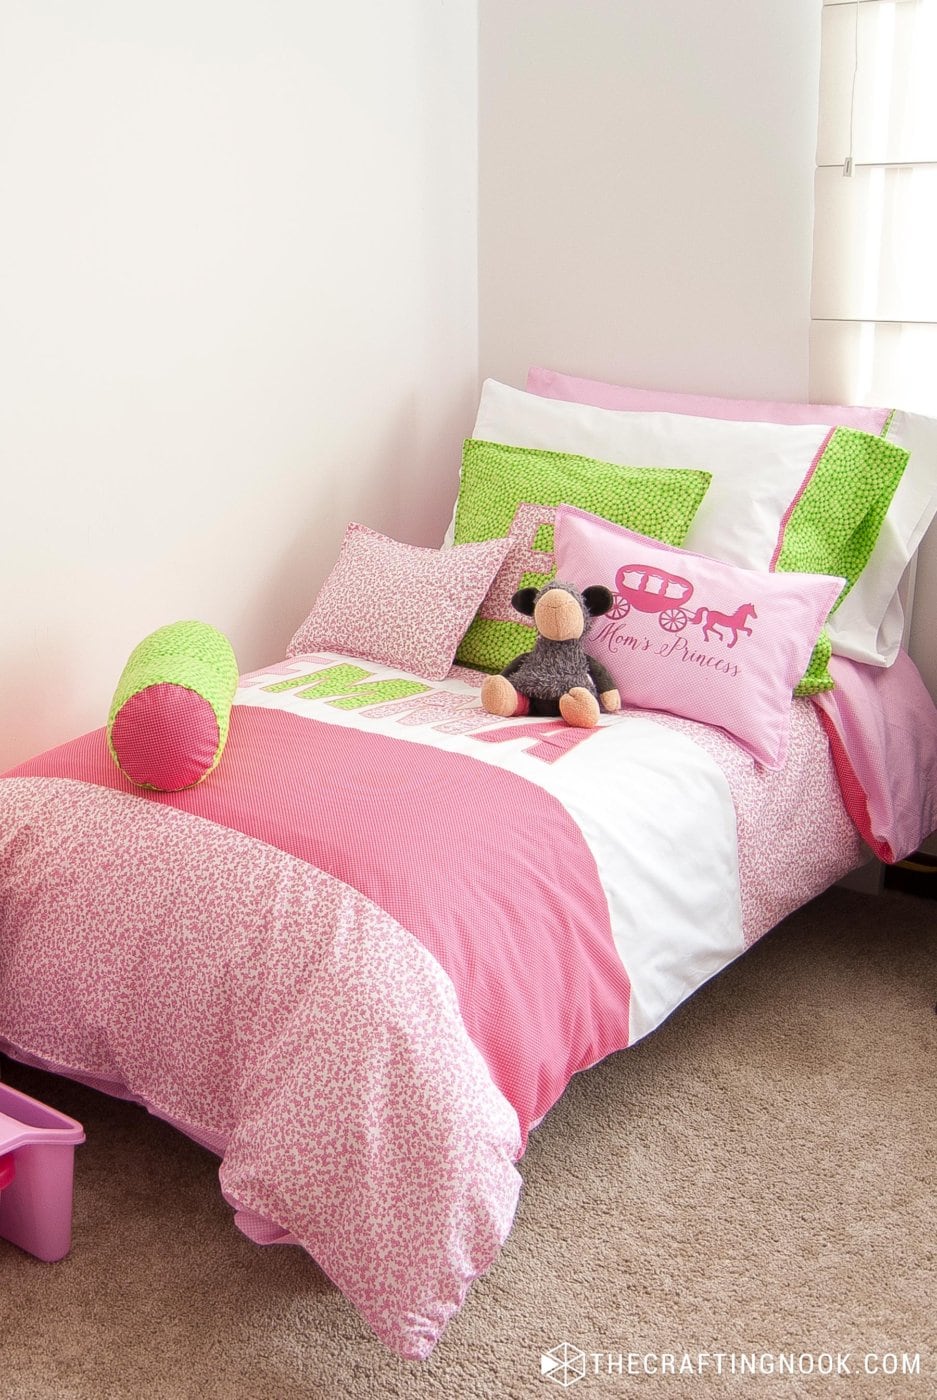
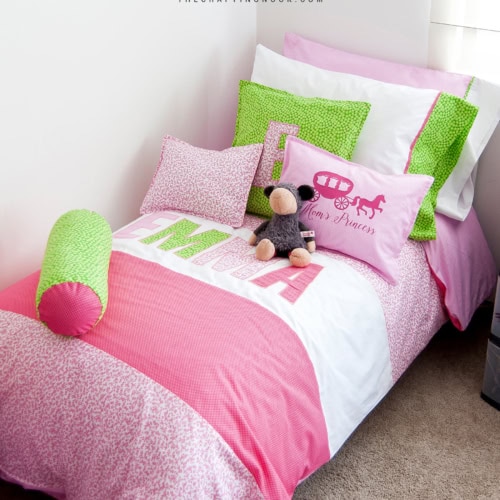
So this is it!
This is the final result of my girl’s duvet cover. Hope I made sense throughout the tutorial. I’m not a pro sewist and I also don’t know most technical words in this area. But I hope you can follow if you are interested in making one of these!
Alternatives and Substitutions
For a more glamorous touch for the letters, opt for glitter or metallic fabrics. These fabrics can make the letters stand out and add a sparkly element to the decor.
For children with sensitive skin or allergies, use organic cotton fabric. It’s free of harsh chemicals and pesticides, making it a healthier option.
Instead of buttons, use a zipper to close the duvet cover. It’s quicker and easier for kids to use and gives a more streamlined look. Skip the pocket part and just install the zipper.
For a rustic or bohemian vibe, sew fabric ties instead of buttons or a zipper. This also adds a soft, playful element to the design.
Additional Accessories you could make
- Matching Pillowcases: Create matching or complementary pillowcases to complete the set. Use leftover fabric scraps to tie the look together.
- Coordinating Bed Skirt: Make a simple bed skirt from the same fabric or a coordinating fabric to give the whole bed a cohesive look.
- Fabric Headboard Cover: Use extra fabric to create a matching cover for a headboard, or even make a soft, padded headboard to match the duvet cover.
- Bed Canopy or Curtain: If you have extra fabric, create a matching canopy or curtains to coordinate with the duvet cover. This creates a cohesive, magical bedroom theme.
Frequently Asked Questions
The best fabric depends on your needs. Cotton is a popular choice because it’s durable, breathable, and easy to wash. For a softer, cozier feel, consider using flannel or minky fabric. If you want something lightweight for warmer climates, a cotton blend or linen could work well. You can also use organic cotton for an eco-friendly option.
First, measure your duvet insert’s dimensions (length and width). Add seam allowances to each side—usually about 1 inch. For a snug fit, keep the additional fabric to a minimum; if you prefer a looser fit, add a few extra inches to each side.
If you don’t have a serger, you can use a zigzag stitch on your sewing machine to finish the edges and prevent fraying. Another option is to use pinking shears to trim the edges, which also helps minimize fraying.
You can sew fabric ties or ribbon into the inside corners of the duvet cover and corresponding loops on the corners of the duvet insert. Tying these together helps keep the duvet insert in place.
Alternatives to buttons include snaps, Velcro, or a zipper. Snaps can be sewn into the opening and are easy for kids to use. Velcro is another simple option, but be aware it may wear out faster over time. A hidden zipper provides a sleek look and is secure.
Choose fabrics that share a common color palette or theme. You can mix solids, stripes, and patterns for a more dynamic look, but make sure at least one color is consistent across all the fabrics to tie the design together.
More Sewing Projects To Try
Like this diy duvet cover tutorial? You might definitely love these other sewing project ideas too:
✂️ Tutorial
DIY Duvet Cover for Kids
Tools
- Sewing Machine
- Sharp Fabric Scissors
- Pins
- Measurement tape
- Ruler
Supplies
- 2 yards of white sheet fabric {the name might change between countries}
- 3 yards of a patterned cotton fabric for the bottom layer of the duvet cover
- 1.5 yards each of 3 different but coordinated patterned fabrics.
- Color matching threads
- 6 Buttons
- Lace ribbon {4 strips of 20 cm or 8 Inches}.
- Fabric Marker
Instructions
Prep work
- This cover was made for a twin-sized duvet. You might need to adjust the amount of fabric you need according to the size of duvet cover you will be making.
- The first thing is to check the duvet’s exact measures in the duvet’s tag. Mine says 140 cm X 200 cm (55×80-inch). I added 2 cm and 5 cm (1 inch and 2 inches) just to be sure it would fit in fine on the new cover.
- Now I’m going to start with the pieces you need for the duvet cover and then I’ll show how made my girl’s name on one of the cover sections.
- For the top layer of the duvet cover you need:
- 2 pieces white fabric 33 cm X 142 cm {13 X 56 Inches} + seam allowance
- 2 pieces of patterned fabric 1, 33 cm X 142 cm {13 X 56 Inches} + seam allowance
- 2 pieces of patterned fabric 2, 33 cm X 142 cm {13 X 56 Inches} + seam allowance
- For the Back of the duvet cover you need:
- 1 piece of patterned fabric 3, 142 cm X 205 cm {56 X 81 Inches} + seam allowance
- Additional pieces:
- 1 piece of patterned fabric 3, 142 cm X 15 cm {56 X 6 Inches}
- 1 piece of patterned fabric 3, 142 cm X 5 cm {56 X 2 Inches}
- Fabric scraps for letters.
- The order in which I made to top layer:
- Pattern 1 – White – Pattern 2 – White – pattern 1 – Pattern 2.
The Applique Letteres
- We are using one of the white rectangles to create the name. Due to the piece size, the name shouldn’t be larger than 60 cm X 20 cm (24 X 8 Inches). But’s actually up to you; you can play with these measurements.
- Print the name you want to place on the duvet cover in the actual size. Use any font that is bulky and bold so it’s easier to cut and sew.
- Cut the printed letters and then use them as patterns to trace them onto the fabric pieces and cut them in different fabrics. You can if you want, make all letters in one fabric.
- Ideally, the best way to work with fabric appliques is to use interfacing to make it easier to stitch the letters to the white fabric panel. I didn’t have it at the moment so here I’ll show you how I did it without interfacing.
- Place each letter in the white fabric panel. Once you are satisfied with the letters’ placement, pin them in place. Make sure they are well pinned so they won’t move.
- To make sure the letters don’t move around while zig-zaging, stitch them first with a straight seam really close to the letter edges.
- Then using the tighter zigzag stitch the sewing machine allows, zigzag all around the edges.
- closer view of Using the tightest zigzag stitch that the sewing machine will allow, around the edges.
- When all the letters are done stitching, iron the whole piece so the fabric fits into place. Usually it gets wrinkled because of the zigzag.
Assembling the Duvet Cover
- Take the pieces pattern 1 and plain white. With the right sides together stitch with a 1 cm seam and then serge the edges so that it won’t come fray apart in the wash.
- If you don’t have a serger like me, simply run it through the machine again with the zig-zag stitch making sure that it catches the fabric on the outer edges.
- Then do the same but add the pattern fabric 2 with the right sides together, stitch and then zig-zag edges. Then the white fabric with the name on it, and then fabric pattern 1, and the last panel would be fabric pattern 2.
- Iron the whole front panel of the cover so it will be easy to manage. This is more or less what you would have so far – the other half is there I promise, just didn’t have enough space.
- Now lay your top layer onto the back layer right sides together and pin all the way around on 3 sides (top, right, and left), not pinning on the side with the hem and pocket.
- On each top corner pin in place one strip of lace ribbon. Make sure the middle of the ribbon is right over where the stitch will go through.
- Stitch all around the edges of the cover except for the last panel where the opening of the duvet cover will be.
- Also, make sure to stitch back and forth on top of the ribbon to secure it. These strips secure the cover onto the duvet so it won’t move around inside.
- I wanted to create kind of a pocket in the inside of the cover, so the duvet wouldn’t show through the opening. This is where the additional pieces come in and it’s a bit tricky.
- Take your rectangle of 142 cm X 15 cm (56 X 6 Inches). Make a hem on one of the largest edges.
- Place the front panel the bottom edge and this piece with the right sides together and pin them in place.
- Stitch them together leaving 20 cm (8 inches) from each end with a 1 cm seam allowance.
- Take your back layer piece and your strip of 142 cm X 5 cm (56 X 2 Inches). With right sides together lengthwise, stitch along the edge also leaving 20 cm (8 inches) from each end with 1 cm seam allowance.
- Turn it back with the wrong sides together. Press.
- Fold the opposite edge inwards (like a hem), press, and pin in place.
- Stitch along the edge from end to end.
- Having front and back layers right side together, hold the part where you didn’t stitch on the back layer and twist the fabric a little where the seam starts and pin together.
- Lift the pocket piece and get the top layer edge joining the bottom ones.
- Finally lay the pocket piece on top of everything. You should have a 4 layer edge to stitch.
- Pin right where the cover opening starts (20 cm /8 In.) so you don’t stitch more than you should. Also, pin in place the 4 layers to make sure you don’t miss any.
- Pin the other 2 lace strips on each corner.
- Stitch along from the limit pin until you meet the rest of the duvet cover seam.
- When you lift the pocket piece you should see something like this:
- Serge or zigzag all the edges. Then cut all the frayed remains so the zigzag is clean.
- Make a cut on each corner so it’s easier to manage the corners when turning inside out.
- Now it is time to turn that sucker inside out!!!
Adding the Closing buttons.
- I used medium size buttons and placed them 20cm (8 Inches) apart.
- I Made the buttonholes using the attachment that came with my sewing machine and followed its instructions.
- I also didn’t want the buttons to be visible, so I sew them on the inside pocket fabric and the buttonholes on the bottom layer.
- The duvet cover is ready.
Notes
Share and PIN ME!!!

Til’ next time…


FREE WORKBOOK
Keeping your Sweet Home Organized
Learn how to create intentional habits and simple routines to Keep Your Home Organized. Plus freebies, printables, exclusive content, and tips.
Disclaimer: By clicking on the “Yes” button above you are giving me your consent to collect and use your information according to the law and My Policy Privacy. Zero Spam I promise!
