DIY Geometric Painted Cork Coasters
This post may contain affiliate links. Please read our Disclosure Policy.
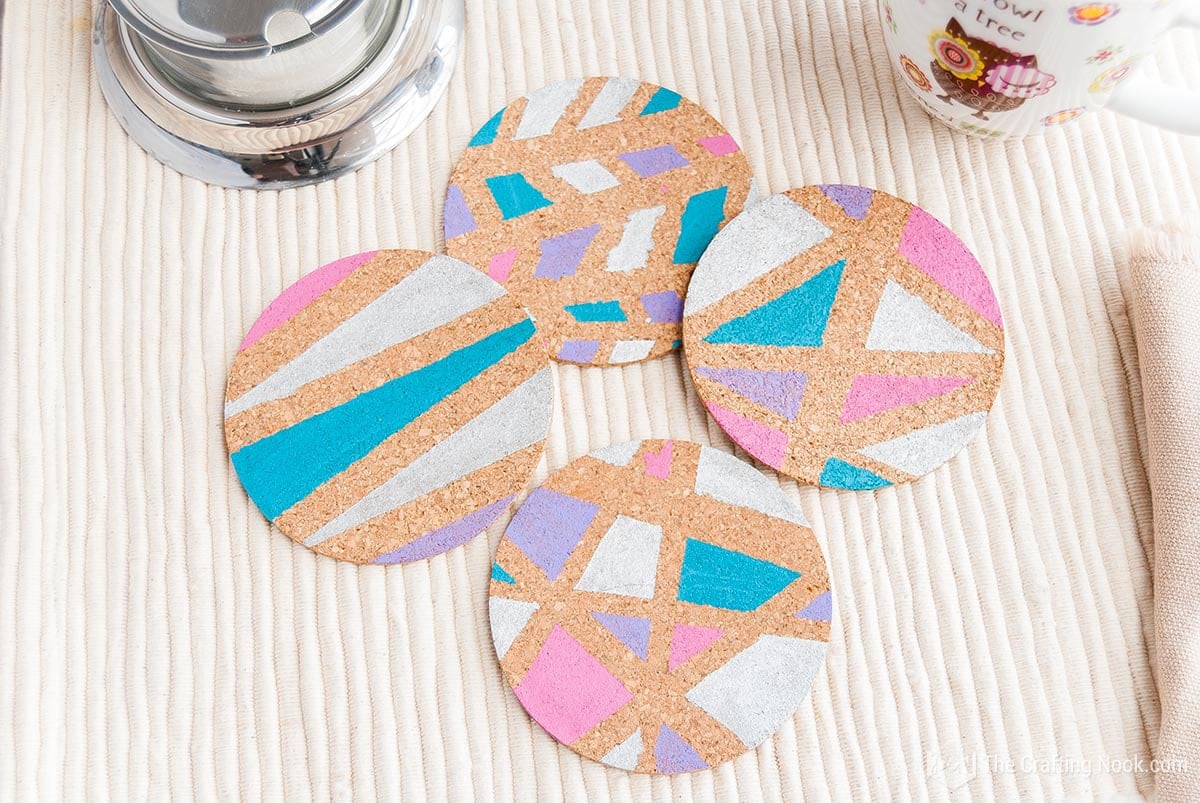
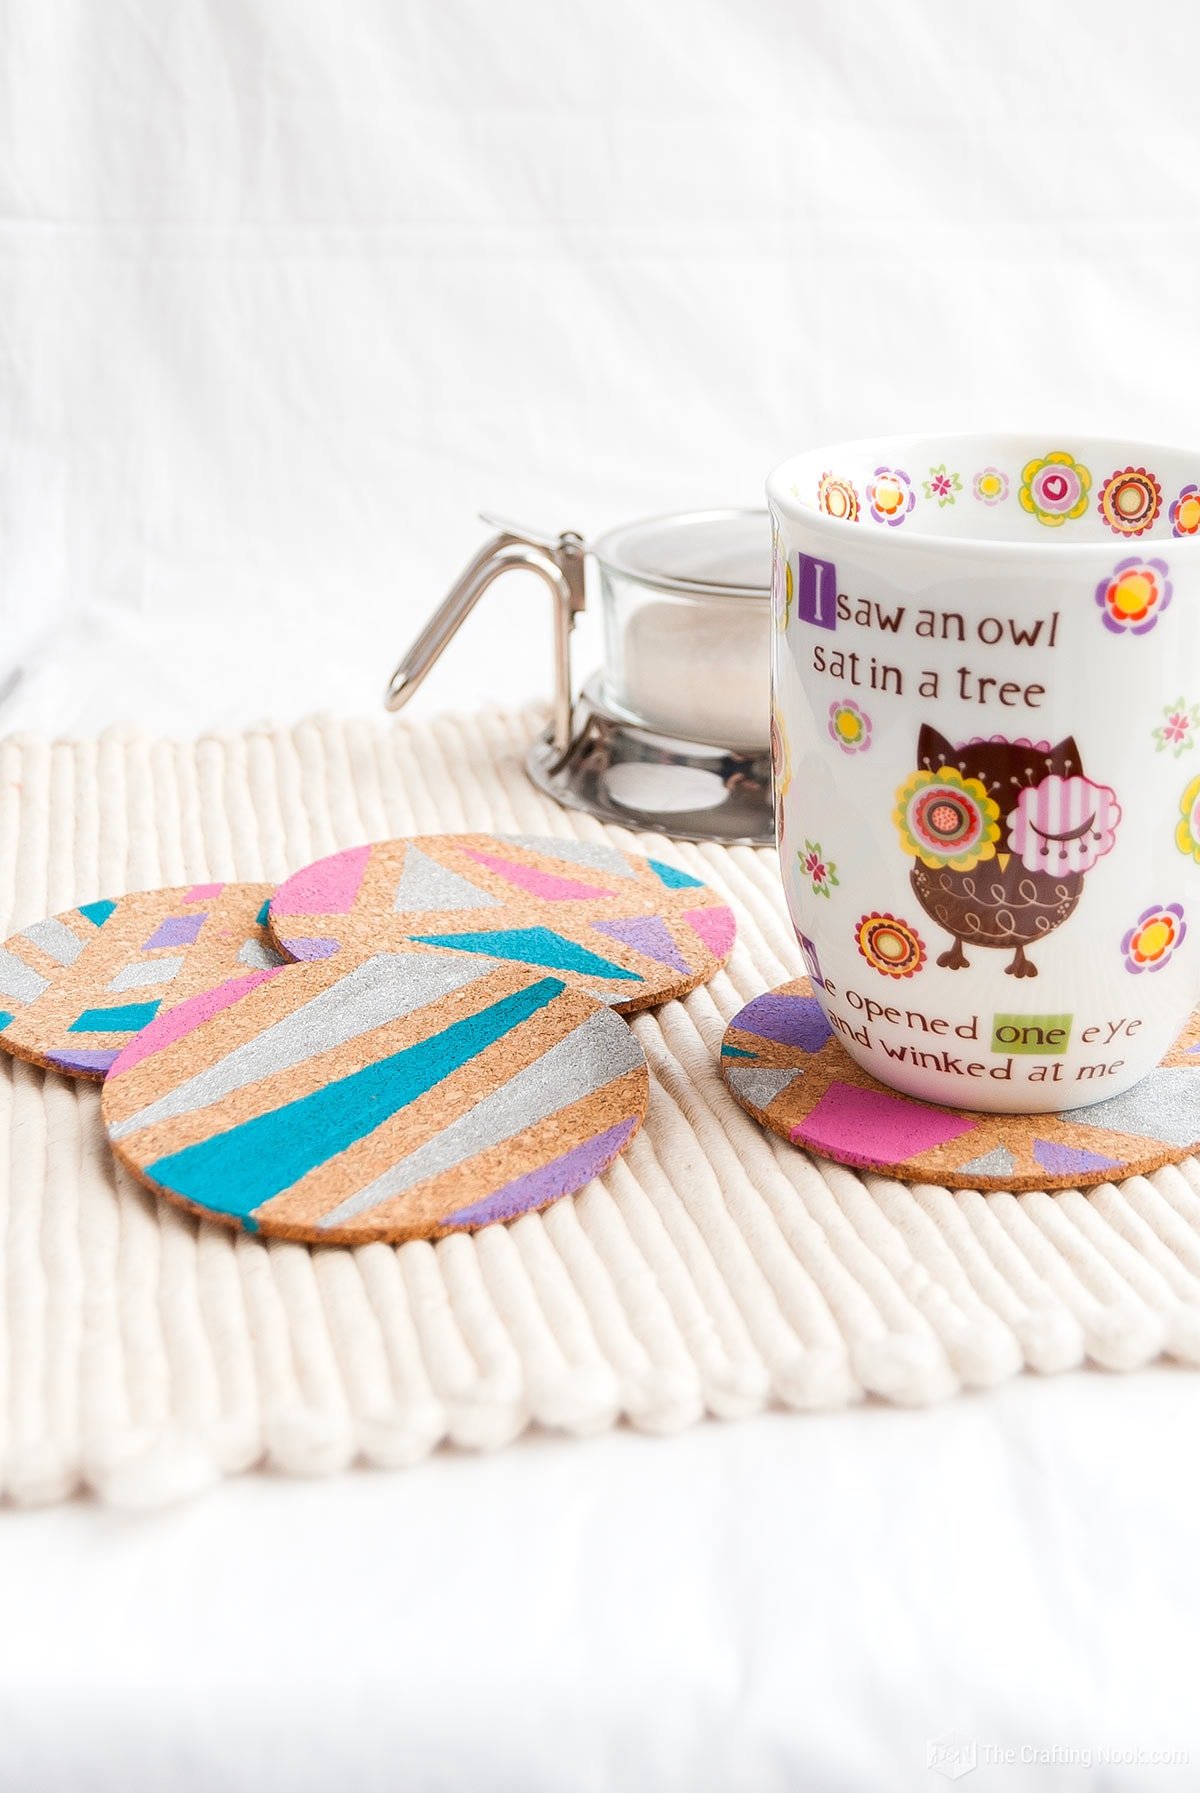
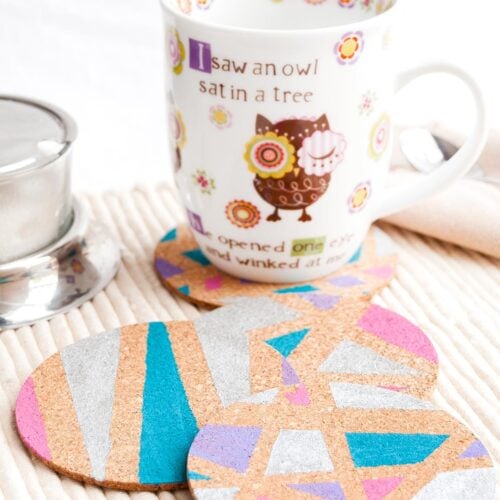
Make a set of geometric painted cork coasters using bright paints, painter’s tape, and cork from the craft store. Adding painter’s tape to the bottom of each coaster is a quick and easy way to create simple shapes and patterns. Learn how to make them here.
If you want to have some really cute and unique coasters or if you want to make a thoughtful gift, you can always go for some diy things.

These geometric pattern painted cork coasters will make a great addition to your table or a really great gift for someone special.
I love how these turned out despite the small imperfection details. We have used them at home a lot and I have even used them as props when photographing cups or beverages!
Table of Contents
DIY Painted Cork Coasters Tutorial
It’s super easy and fun to make. I really trusted and let my hand do the work. I didn’t plan the shapes I just went with the flow and even though now I would have done a few things differently, I loved the shapes that came out!
This craft was inspired by my sweet friend Lauren from the thinking closet. She always inspired me to make cute and fun things. This is another one of them.
I used my favorite colors {ahem, my new favorite colors LOL}. I got obsessed with turquoise but I still have a deep love for my pink. I added a silver color and a bit of purple to make it pop.
I LOVE the result and who knew I even end up using the colors on my Theme design haha.
How to Make these cute geometric painted cork coasters
Let’s do it!
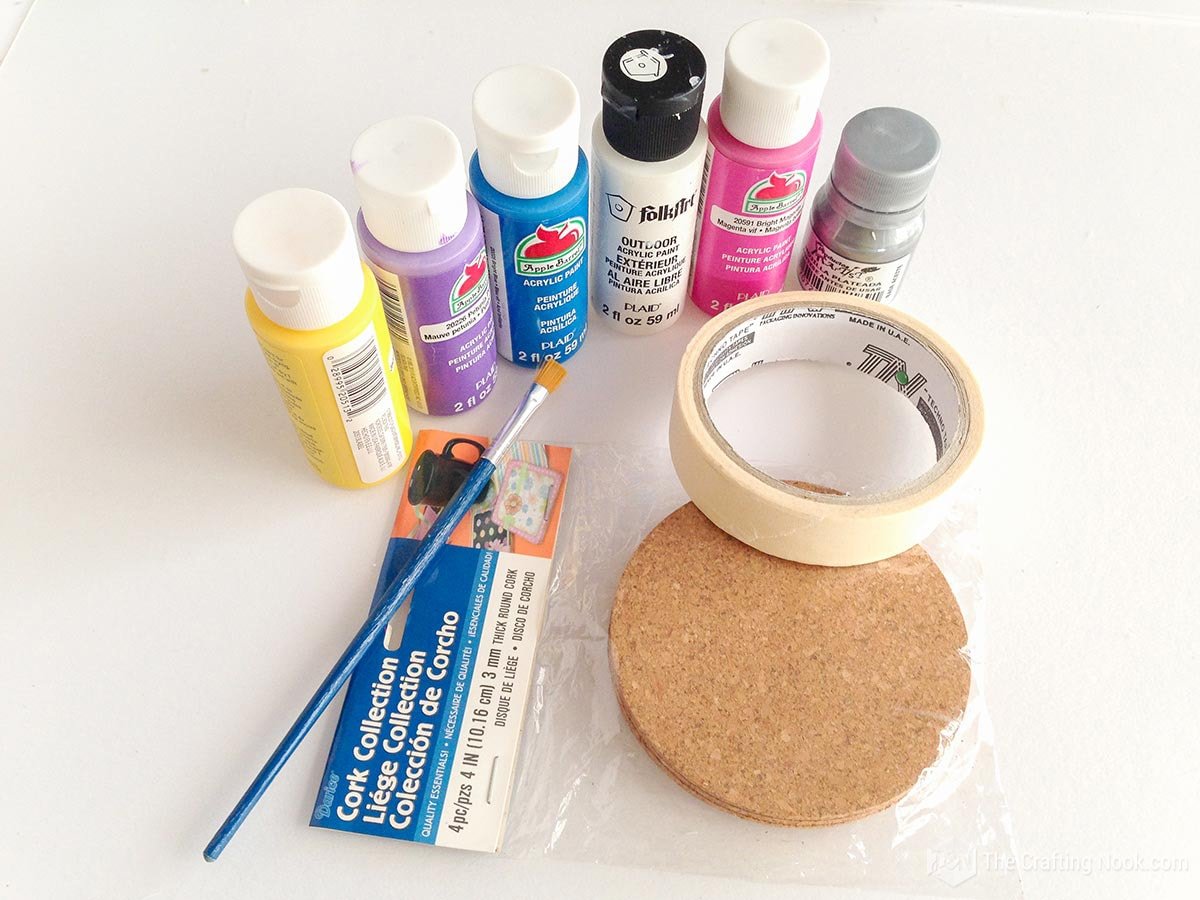
Supplies:
- Plain cork coasters – round or square coasters work
- Acrylic paint in different colors {and metallic paint if you want}
- Masking tape or painters tape
- Paint brushes
- Water-resistant clear acrylic paint sealer spray or shellac finish & sealer
Tools:
- Scissors.
Instructions:
Firstly make sure to clean your coasters. Free them from grease and dust.
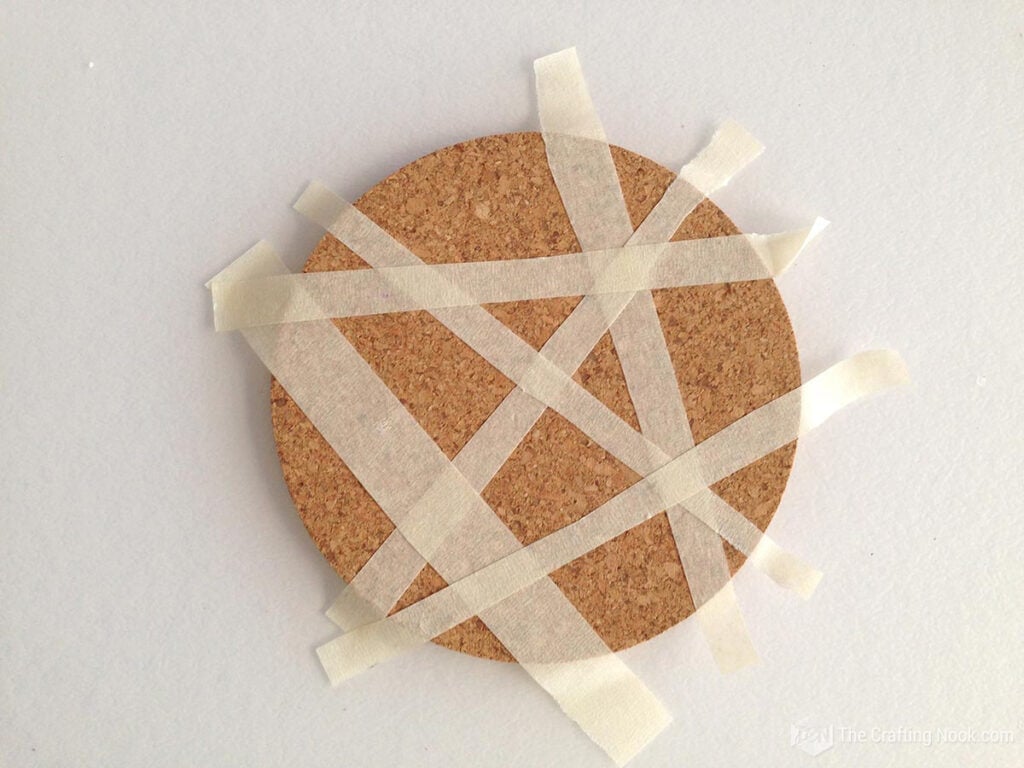
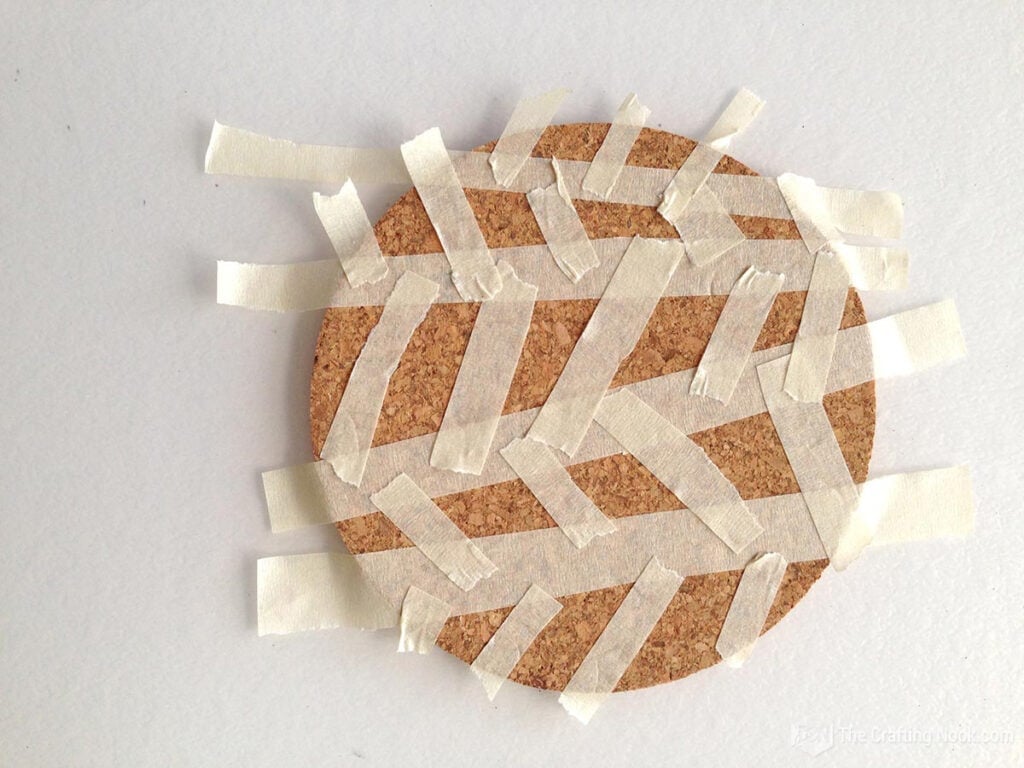
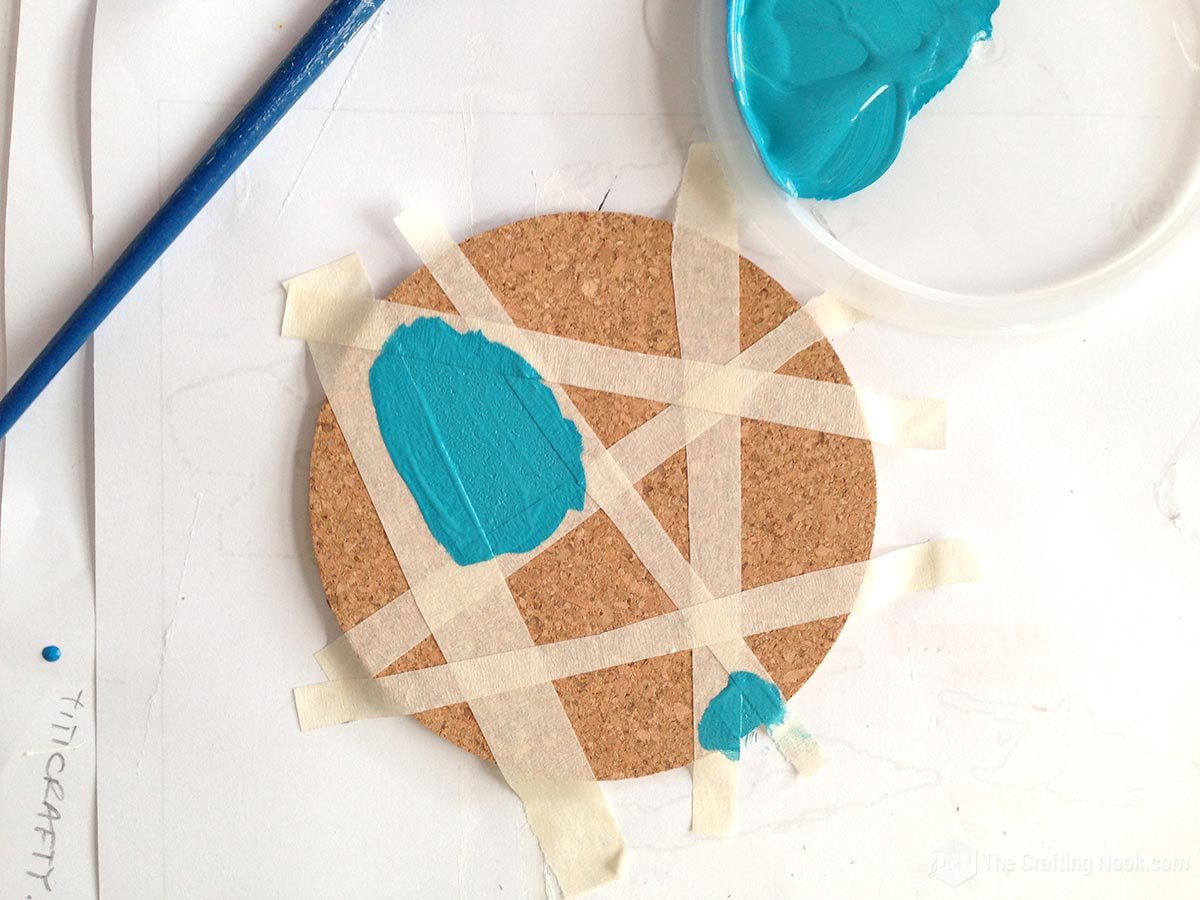
With the masking tape, make random shapes. Cut the masking tape in different widths so it’s all uneven. I made them like this:
Next, start painting. I didn’t have turquoise color, so I made it. The picture makes it look more bluish, but believe me, it’s turquoise LOL.

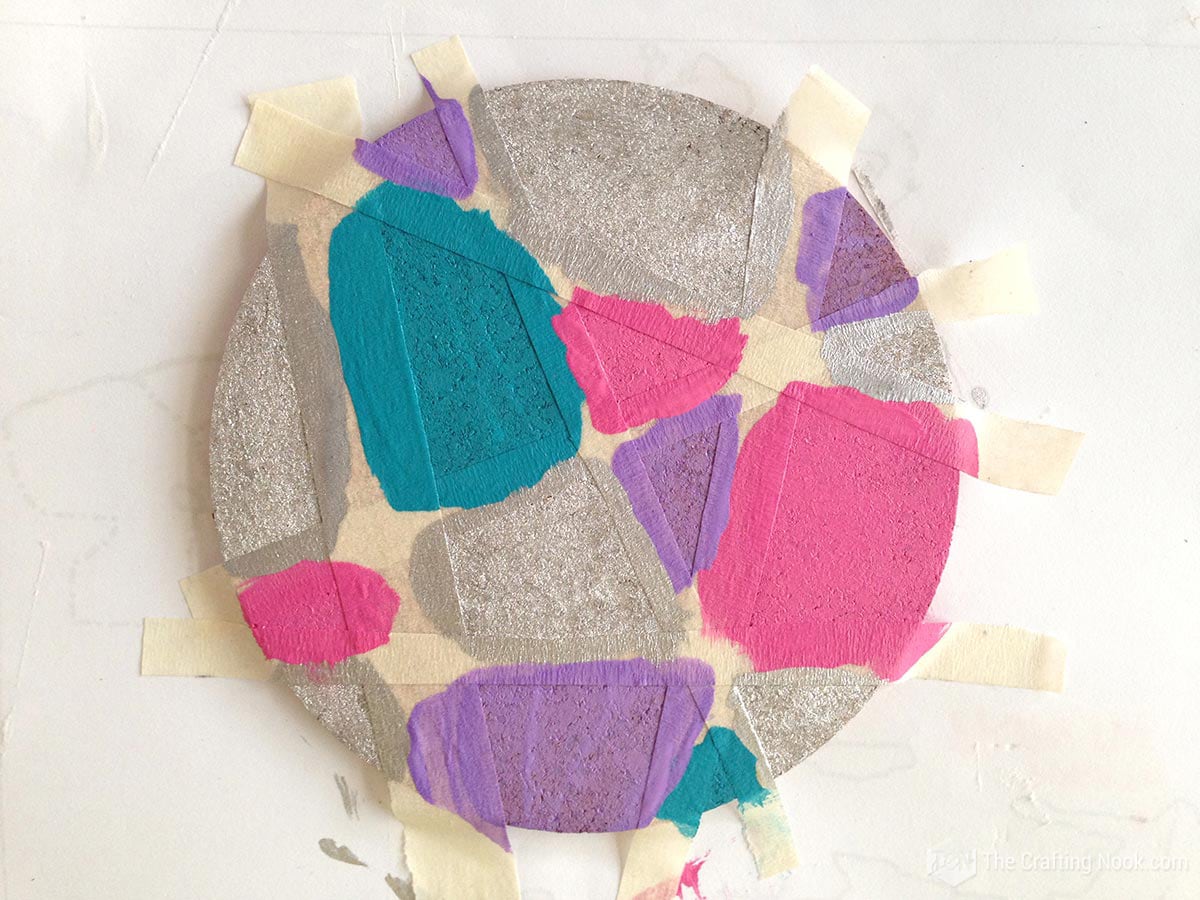
I painted different spots with different sizes with each color getting this:
Now, Let it dry for a couple of hours – although these paints dry really fast, it’s even better to wait 24 hours just to be safe.
Then seal it. Spray or apply the waterproof craft sealant before removing the tape. Remember that the cork is absorbent and you wanted to leave some of that absorbent surface exposed to help soak up any liquid on a sweating glass.
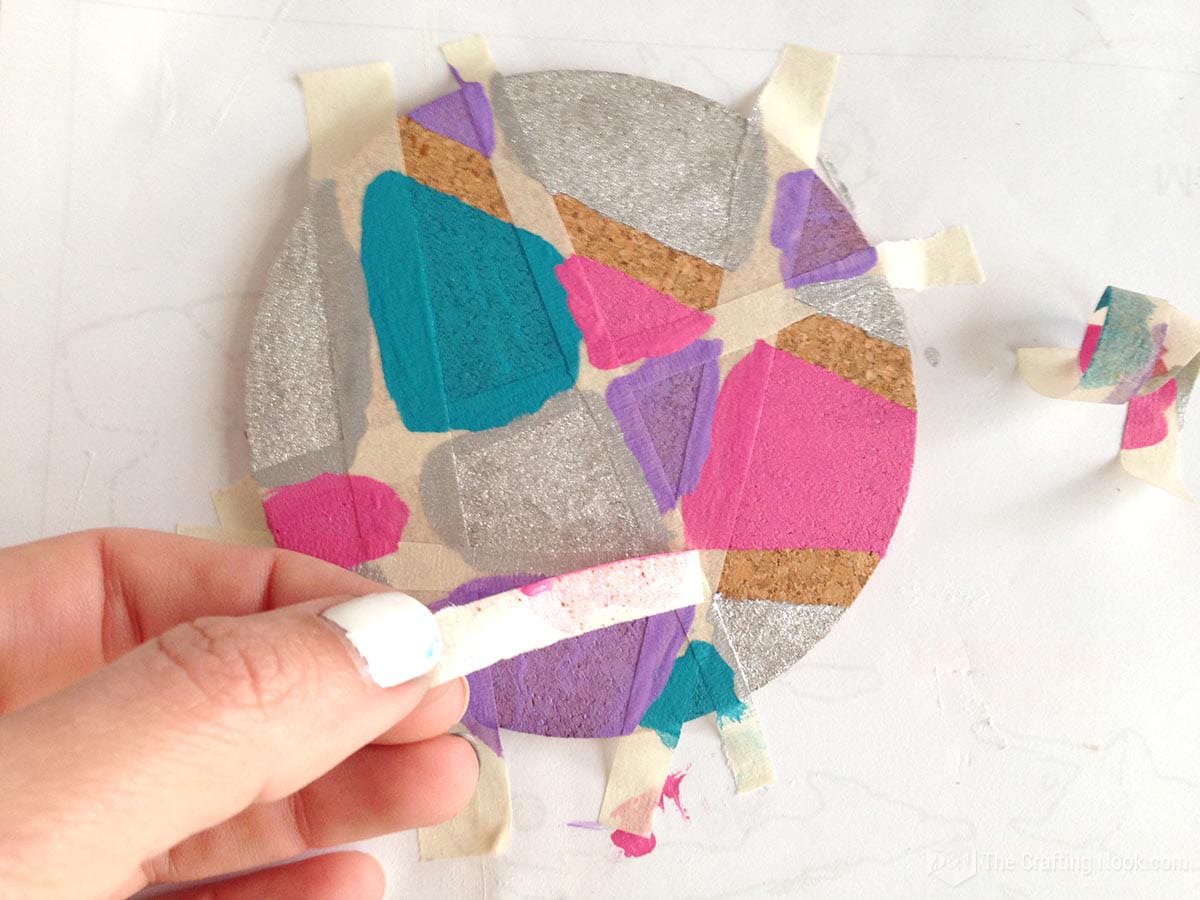
Here comes the fun part. When dry, peel off the masking tape to reveal the result!
Always, always read the instructions on your can for specifics. I have found that these sealants take time to cure completely, so it’s recommended to wait at least 2 weeks to put hot drinks on the coasters to avoid the tacky sensation.
Lastly, repeat the process with all your coasters just change the pattern and create amazing designs.
That’s it!
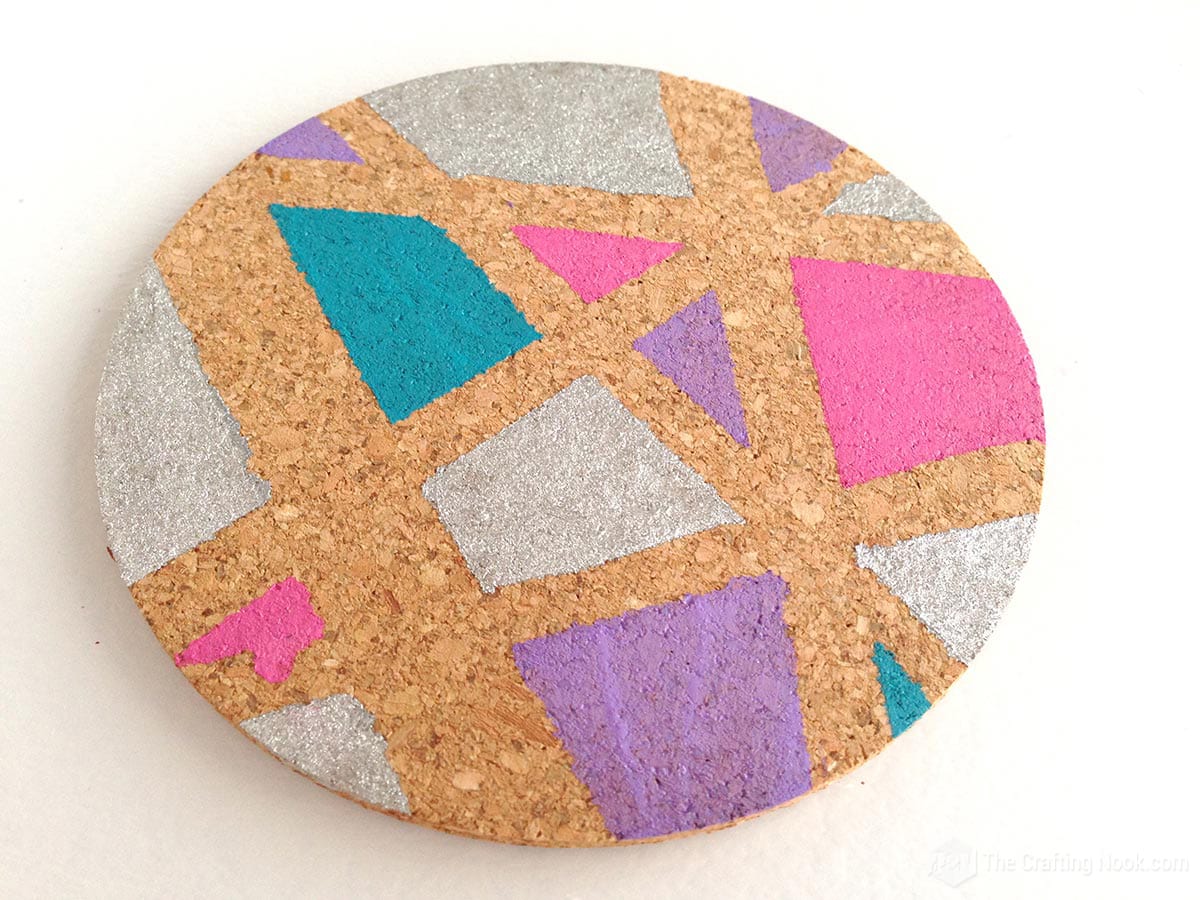
I made all 4 of these in less than an hour and I couldn’t be happier.

Tadaaaaa!!!! LOVE it. I might do new ones but with thinner lines of masking tape so there are more painted areas. But I still love the result.
I’m planning on making some more and trying different shapes!
We can always use different materials too, like wood, and plastic. Anything can be useful with a little imagination!

Crafting Tips
– Embrace your inner doodler and let the pen lead the way. Grab a fine-tip marker or a gel pen and start doodling anything that comes to mind – squiggles, flowers, unicorns, or even aliens. It’s a guaranteed way to add whimsy to your coasters.
– Instead of a brush, you can also try using a sponge to apply your paint. This will give your coasters a fun, textured look and make them stand out.
– It’s easy to focus on the top of your coasters, but don’t forget about the sides! A pop of color or a fun pattern on the edges can really make your coasters stand out.
– Consider adding a personal message or a fun design that represents you or the person you’re giving the coasters to. It’ll make them extra special and unique!

Frequently Asked Questions
Preferably opt for thick, absorbent coasters made of natural cork. They’re perfect for soaking up those vibrant acrylic colors and ensuring a smooth painting experience.
It’s highly recommended! Acrylic paint can be prone to scratching or fading over time, so applying a clear sealant like varnish or polyurethane will protect your masterpiece and keep it looking fresh. I recommend applying the waterproof craft sealant before removing the tape
You have plenty of options! Soft-bristle brushes work well for smooth strokes, while stiffer bristles can add texture. Also, foam brushes work wonderfully. Experiment with different sizes and shapes to achieve the desired effect.
Patience is key! Acrylic paint typically dries within a couple of hours, but to be safe, give it a full 24 hours to ensure it’s completely dry before applying any sealant. Good things come to those who wait!
You can wipe them clean with a damp cloth, but avoid soaking them in water or putting them in the dishwasher.
More Easy Projects to Try
If you like this fun geometric painted cork coasters tutorial you might also love these other Easy craft projects too:
✂️ Tutorial
DIY Geometric Painted Cork Coasters
Tools
- scissors
Supplies
- Plain cork coasters – round or square coasters work
- Acrylic paint in different colors {and metallic paint if you want}
- Masking tape or painters tape
- Paint brushes
- Water-resistant clear acrylic paint sealer spray or shellac finish & sealer
Instructions
- Firstly make sure to clean your coasters. Free them from grease and dust.
- With the masking tape, make random shapes. Cut the masking tape in different widths so it’s all uneven. I made them like this:
- Next, start painting. I didn’t have turquoise color, so I made it. The picture makes it look more bluish, but believe me, it’s turquoise LOL.
- I painted different spots with different sizes with each color getting this:
- Now, Let it dry for a couple of hours – although these paints dry really fast, it’s even better to wait 24 hours just to be safe.
- Then seal it. Spray or apply the waterproof craft sealant before removing the tape. Remember that the cork is absorbent and you wanted to leave some of that absorbent surface exposed to help soak up any liquid on a sweating glass.
- Here comes the fun part. When dry, peel off the masking tape to reveal the result!
- Lastly, repeat the process with all your coasters just change the pattern and create amazing designs.
- That’s it! Enjoy!
Notes
How about you?… Inspired to make some geometric painted cork coasters? Hope you are!
Share and PIN ME!

Til’ next time…


FREE WORKBOOK
Keeping your Sweet Home Organized
Learn how to create intentional habits and simple routines to Keep Your Home Organized. Plus freebies, printables, exclusive content, and tips.
Disclaimer: By clicking on the “Yes” button above you are giving me your consent to collect and use your information according to the law and My Policy Privacy. Zero Spam I promise!
My kids (5 and 9) and i made these today. I let them place the tape and pick the colors and paint them as gift for aunts and uncles. They could hardly wait to take the tape off and see how they looked. Thanks for the inspiration.
Aaaawe Thank you so much for sharing your experience with me. It made my day, seriously! I’m super happy that you liked my coasters idea and that you made some with your kids. It’s a great project to make with them! If you took any pictures of yours would you send them to me?, I would love to see!!!
Hugs and happy crafting!
This is an amazing idea! Thanks for sharing. Visiting Pin Junkie Pin Party.
These turned out so cute! I made some similar to this with gold and black and they have lasted for ever.
Oooh I need to check yours out!!!! Gold and black go so well!!! Thank you for stopping by!!!
Hugs
Super creative and gorgeous, Cami ♡. Love your crafts..
Thank you so so much Naznin. So glad you like these!
Thank you so much for your sweet and lovely visit!
Hugs and XOXO
What a fun idea and they turned out so cute!
Thank you a lot Kallee!!!
XOXO
Finally a crafty DIY project that even I could do! I’m the world’s uncraftiest person :)
Awwww that’s so awsome to know!!! I’m sure you will make some gorgeous ones Victoria, sometimes we are craftier than we think. If you make some of these I would love to see!!!
XOXO
This is such an adorable and easy-to-recreate DIY! I can’t wait to give this a try during our Wine & Crafts Girlfriends night next week!
Awesomeeee!!!! I would love to see how they turn out! I’m sure they will rock!!!
XOXO
Those are adorable! And look super simple with the tape masking.
They are super easy indeed. with the masking tape you just don’t need to worry about edges or going to the other color with the brush! …And possibilities are endless!!!
Thanks for visiting!
XOXO
What a sweet and simple craft! I have some of these in my stash, I may have to let my daughter loose on this one…
Thank you so much Jamie! Always happy to inspire!!!!
XOXO
These are darling! I need to give my coasters a makeover. Something bright and cheerful! Thanks for sharing!
Thank you!!! Yayy glad that you like these! I love how easy and full of option these are!
XOXO
Love the look of your coasters and what an easy project to do. Such a great project to do with your kids or grandkids.
Your coffee cup really caught my eye. It’s adorable……….absolutely LuV It!
THANK you so much!!! It’s is fun to make with kiddos! Fun and easy project. haha that cup is my favorite!!! I got one broken and I went to buy another one exactly the same. Hope they don’t stop making it!!!!
XOXO
What a fun idea! I can see doing this type of design on so many things.
Thank you so much Dru!!! Actually me too… I can see a lovely T-shirt haha!
XOXO
These coasters are SO cute!
Lol! I have the same dull brown coasters and always wondered how I can spruce them up. My friend’s daughter doodles on them to make them more fun, but, I like your idea much better!
Agree those coasters are so boring when plain! hope you make yours soon. I would love to see them!!!
XOXO