DIY Felt Ornaments for Christmas
This post may contain affiliate links. Please read our Disclosure Policy.
I’m sharing how I make these cute DIY felt ornaments—super easy, soft, and fun to stitch. Just a few supplies and some cozy holiday time.
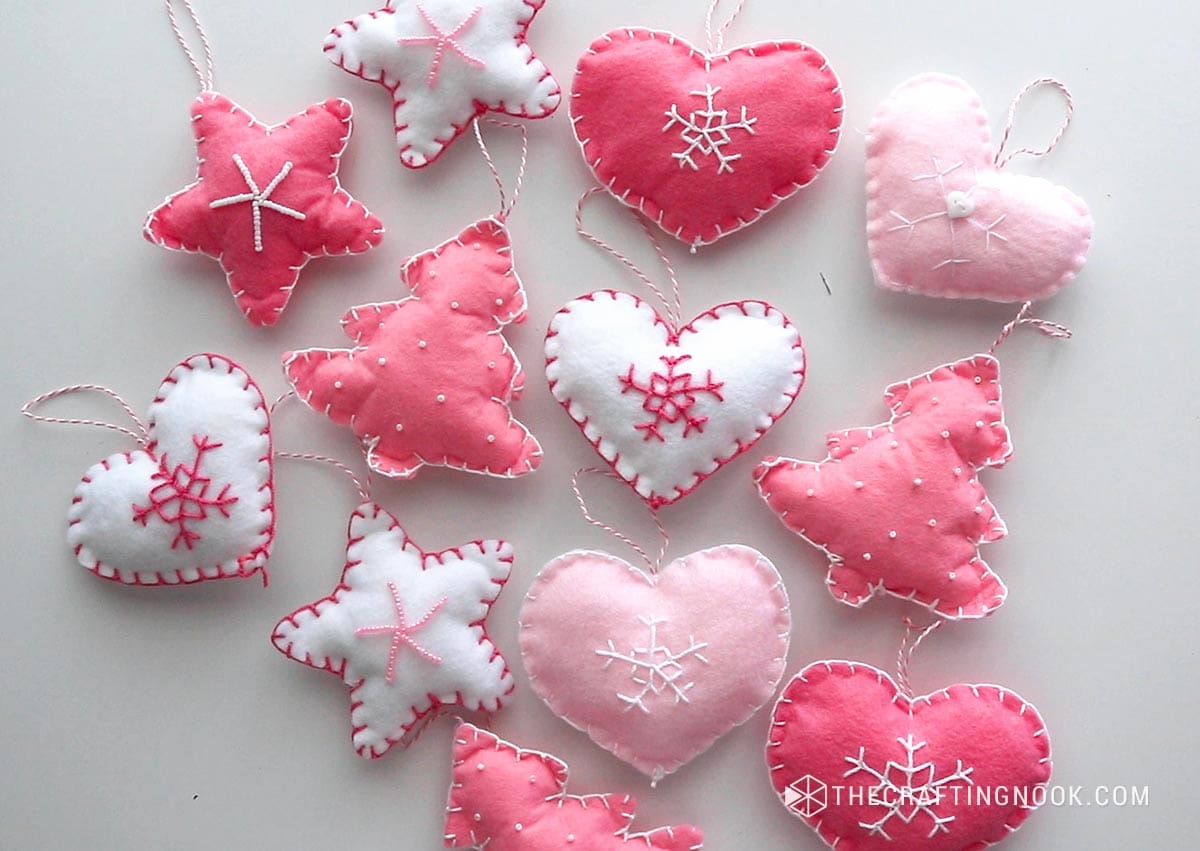
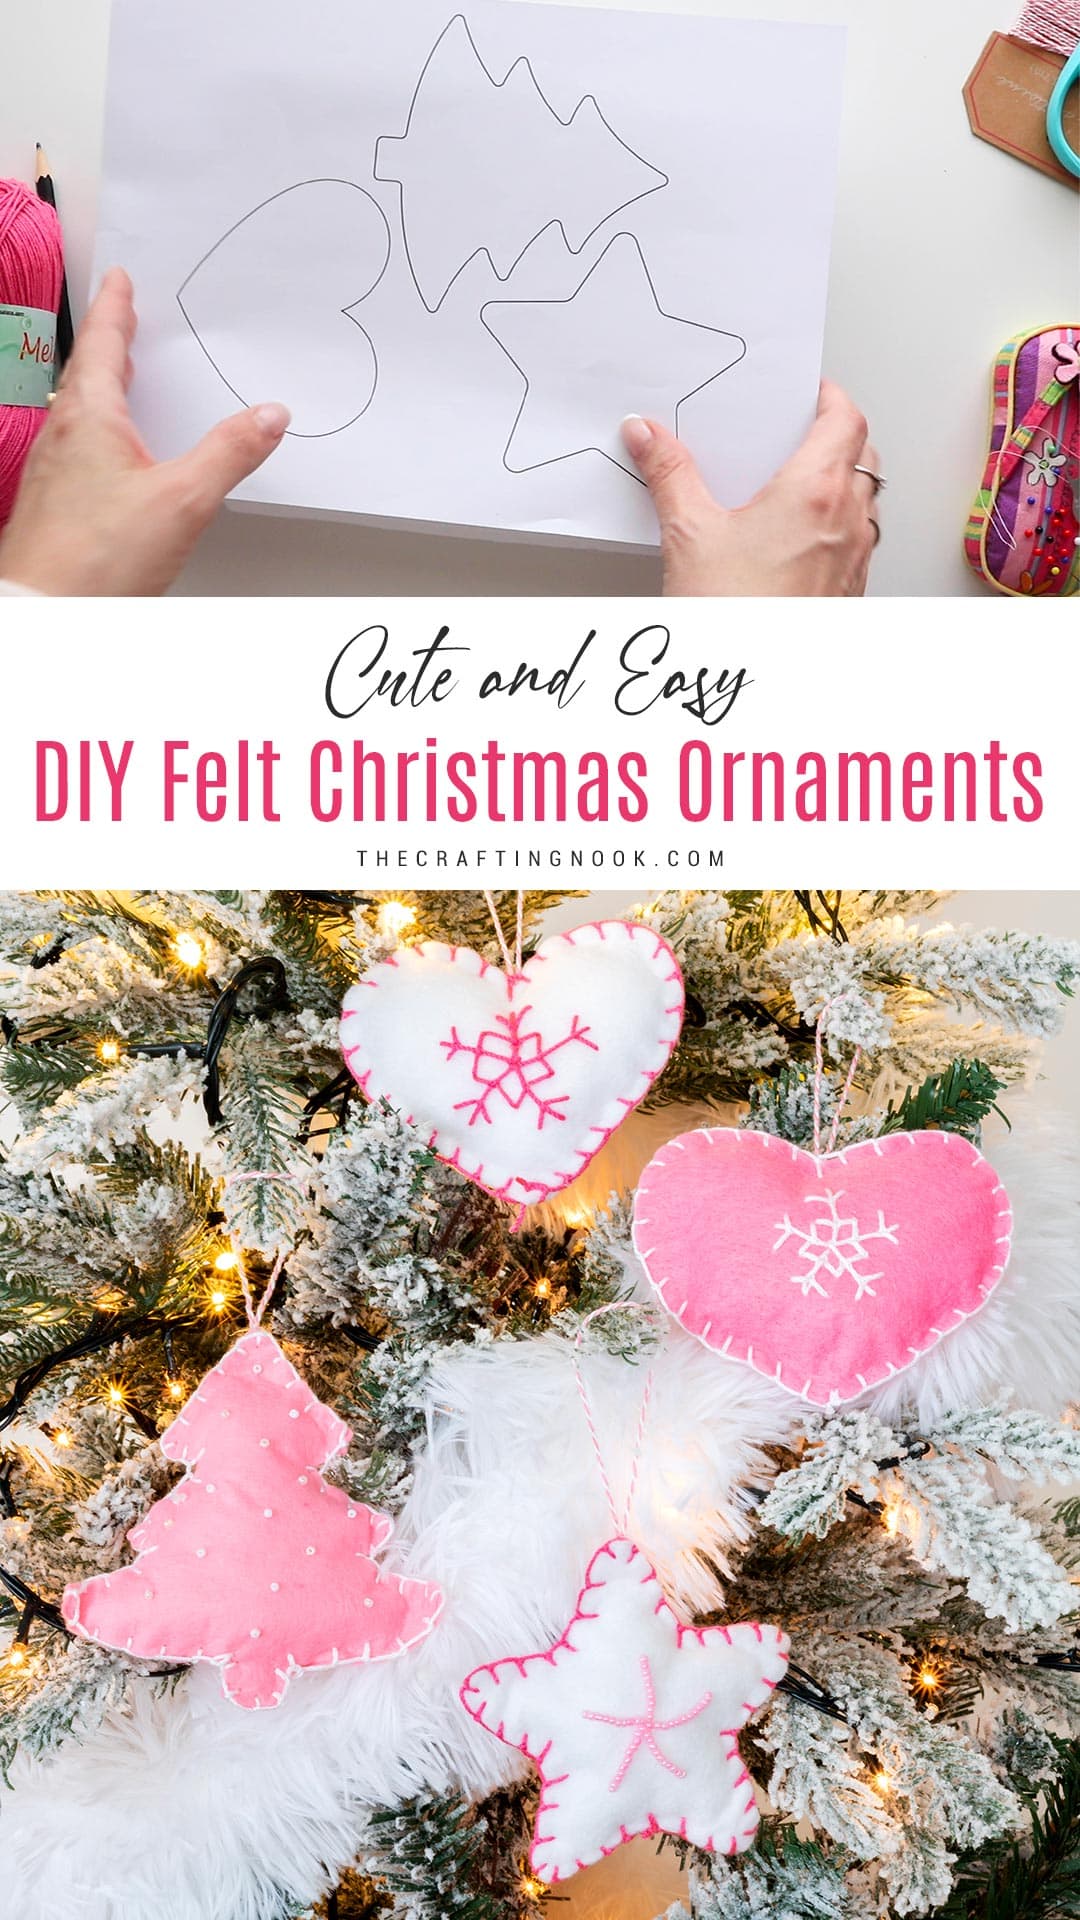
It’s time to decorate for the holidays with homemade charm. I’m really excited to show you how to make cozy Felt Christmas Ornaments. We will be making cute hearts, stars, and trees with beads and embroidery.

Table of Contents
DIY Felt Christmas Ornaments Tutorial
Felt is a special material that makes me feel very creative and inspired. Since I was a little kid, I loved working with felt. It’s soft and can be used for lots of different things. This made me really interested in crafting, and I’ve loved it ever since. I remember clearly sitting at a table with lots of colorful felt, using my imagination to make fun decorations with my hands.
As the years have passed, I have grown to love working with felt even more. The things you can do with it are endless, just use your imagination. It’s not just a thing; it’s a place for dreams, a space where you can be as creative as you want. Whenever I hold felt in my hands or use bright colors in my artwork, it makes me think of happy times making ornaments for our family tree.

Felt is a great material for my creative projects. It’s easy to work with and can be used for so many different things. I rely on it a lot. I like to make pretty things and decorate my home with them. It lets me be creative and tells stories with my imagination.
This shows how amazing crafting is and the happiness it creates. As I go on with my journey, I realize that I don’t just remember feeling fond of felt from my childhood, but I really love it. It makes me feel inspired and creative every time I touch it.
Are you ready to add some holiday magic to your decorations? Today, we’re going to learn how to make festive decorations ourselves. We will make adorable Christmas decorations out of felt in heart, star, and tree shapes. We will decorate them with beads and stitching.
These cute felt Christmas tree ornaments are perfect to make with kids and spend some great time together and also make special handmade gifts for loved ones because they are adorable and they are suited for all sewing skill levels.
How to Make Felt Christmas Ornaments
In this sewing project tutorial, I’ll show you how to make the heart felt ornament and these same instructions can be used to make any othe,r like stars, trees or anything you like.
Get your crafting materials and let’s make some cute stuff to match the cozy feeling that will make you feel happy and cozy in your home.
Supplies:
- Felt sheets in festive colors – scraps work too. I used White felt and pink felt.
- Pencil or fabric marker
- Cotton stuffing or polyfill
- Ribbon or twine for hanging
- Embroidery thread – think festive colors.
- Cotton stuffing for that plush finish.
- A dash of creativity and a pinch of holiday spirit!
- Festive Christmas Shapes – If you like mine, you can snag the template here.
Tools:
- An embroidery needle
- A pair of scissors.
- Pins
- Threader

Instructions:
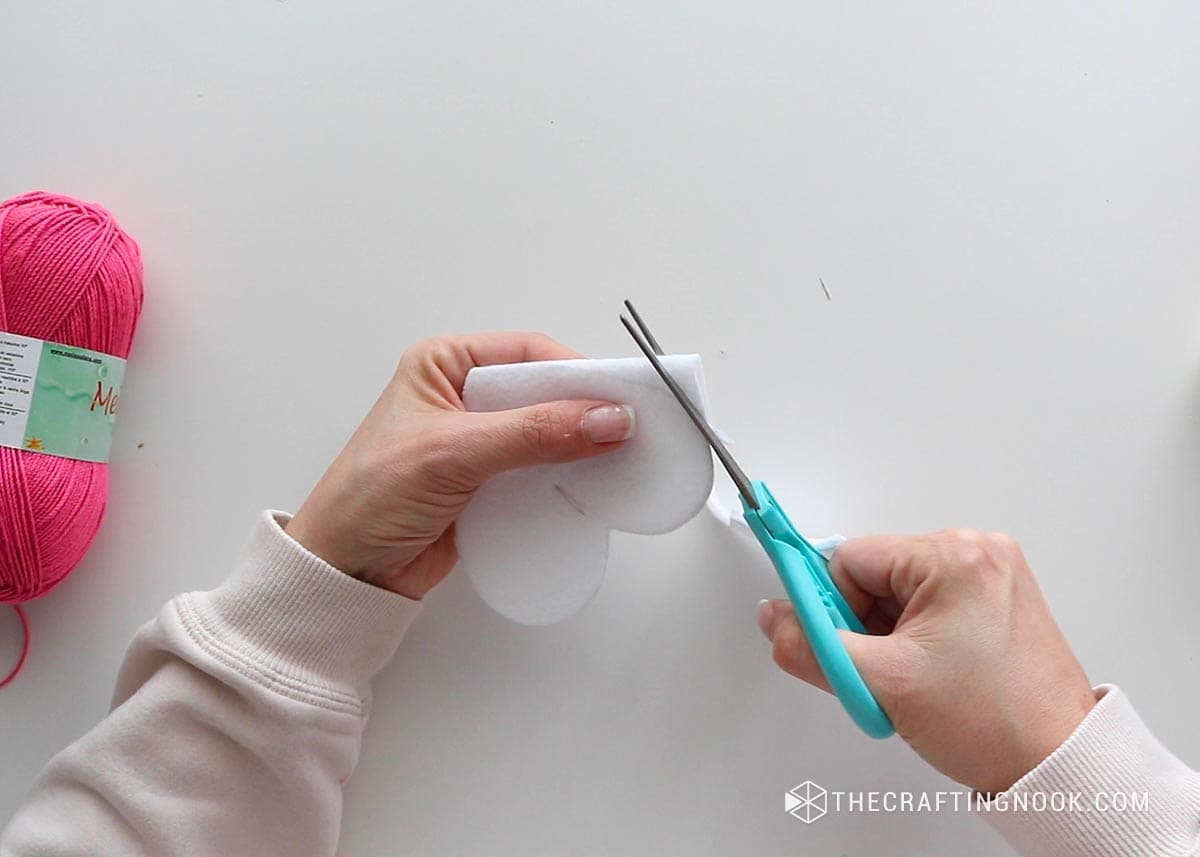
Step 1: Cutting the shapes
Begin by cutting out on paper the shapes you want to create ornaments for.

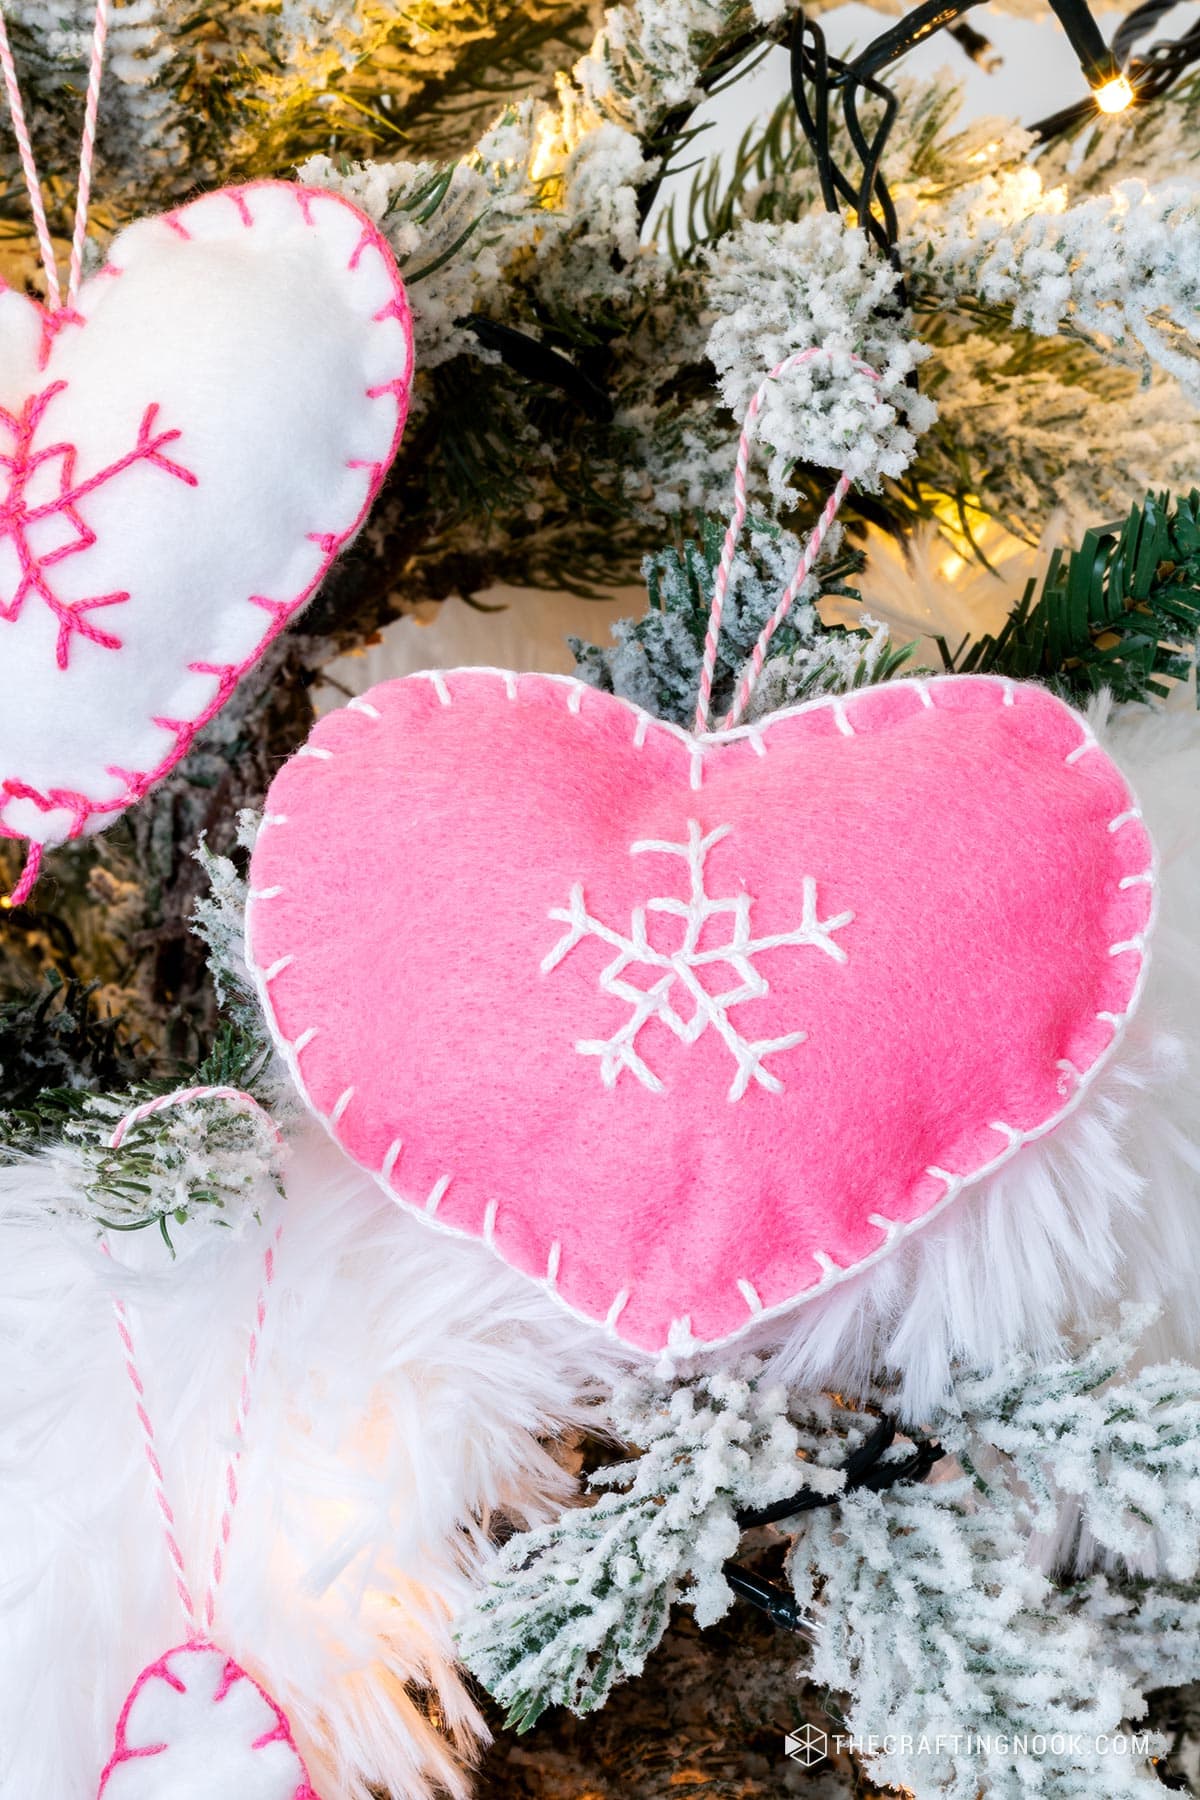
Then trace the shapes onto the folded felt so you get two heart shapes (or your chosen ones) from your chosen felt. This year’s theme is white, pink and gold so I chose white and pink felt.
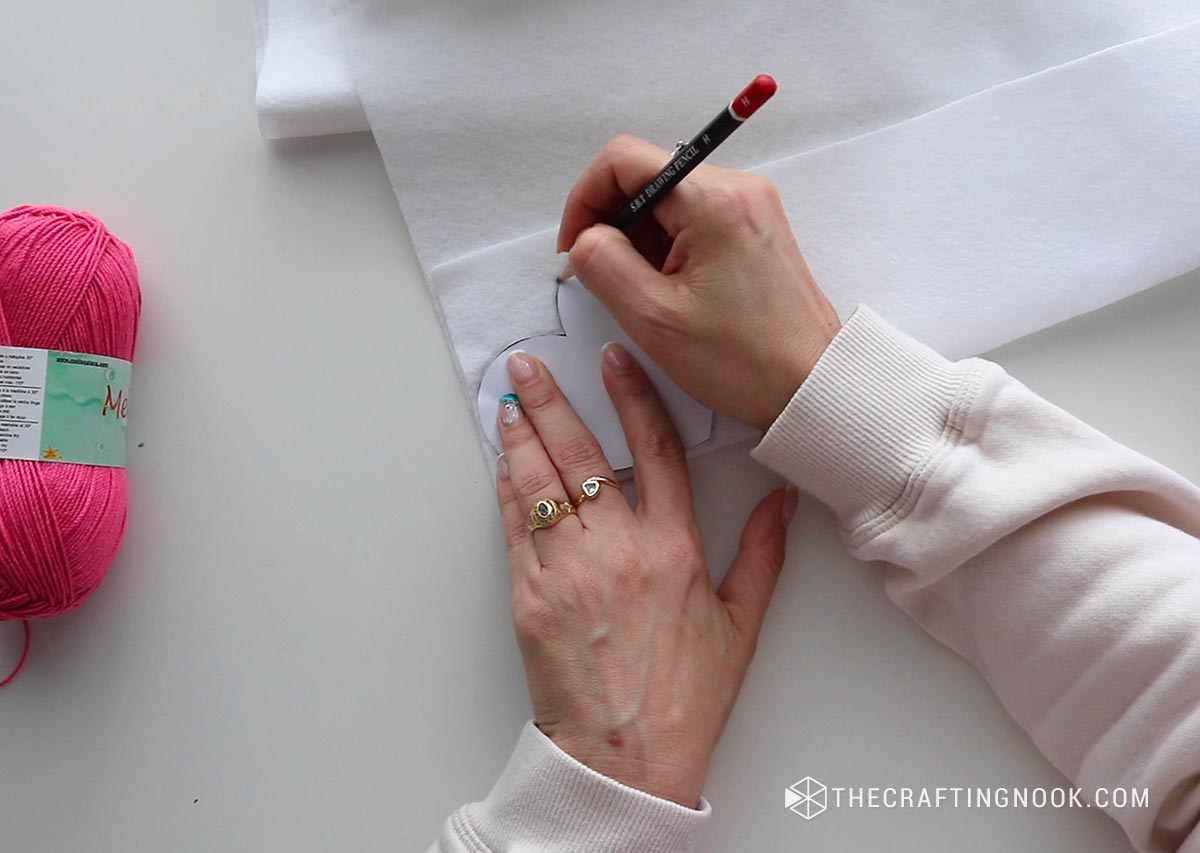
You can use the free templates I’m sharing right here!
Make sure they’re identical for a perfect pairing.
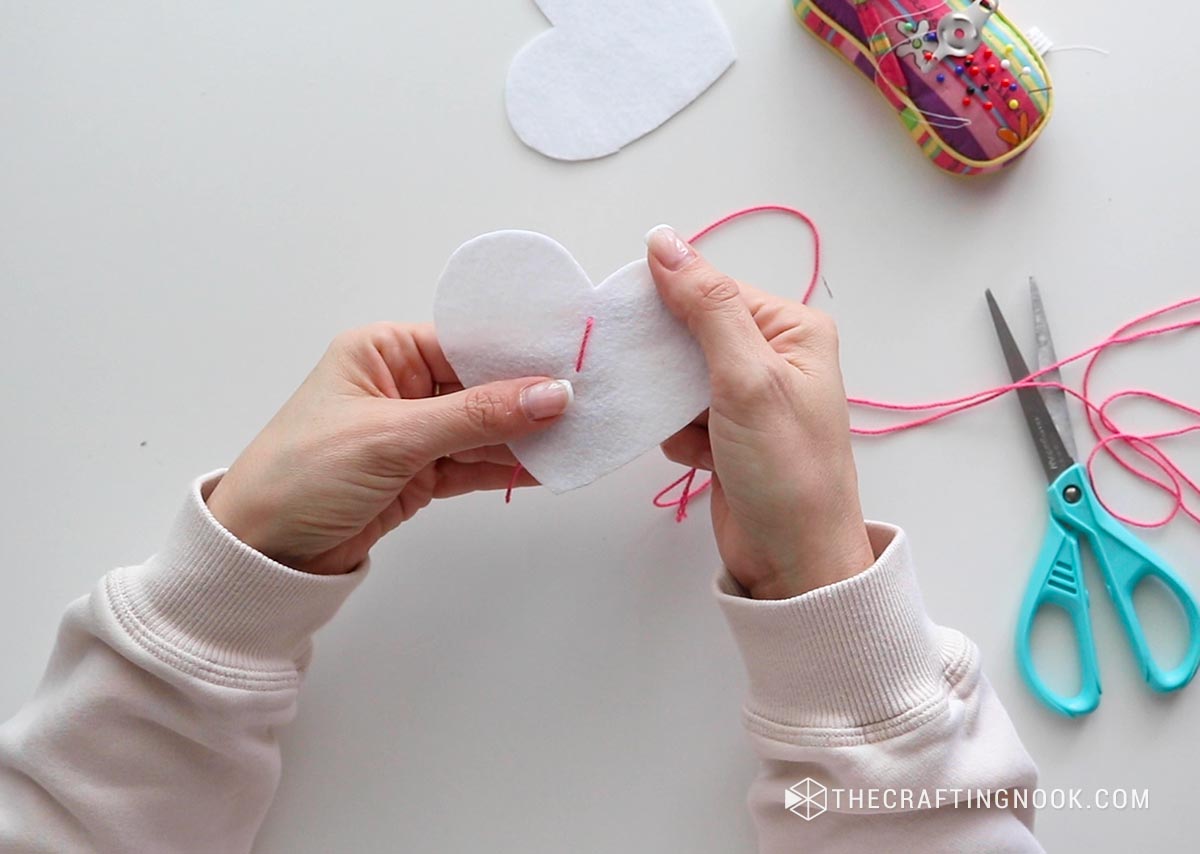
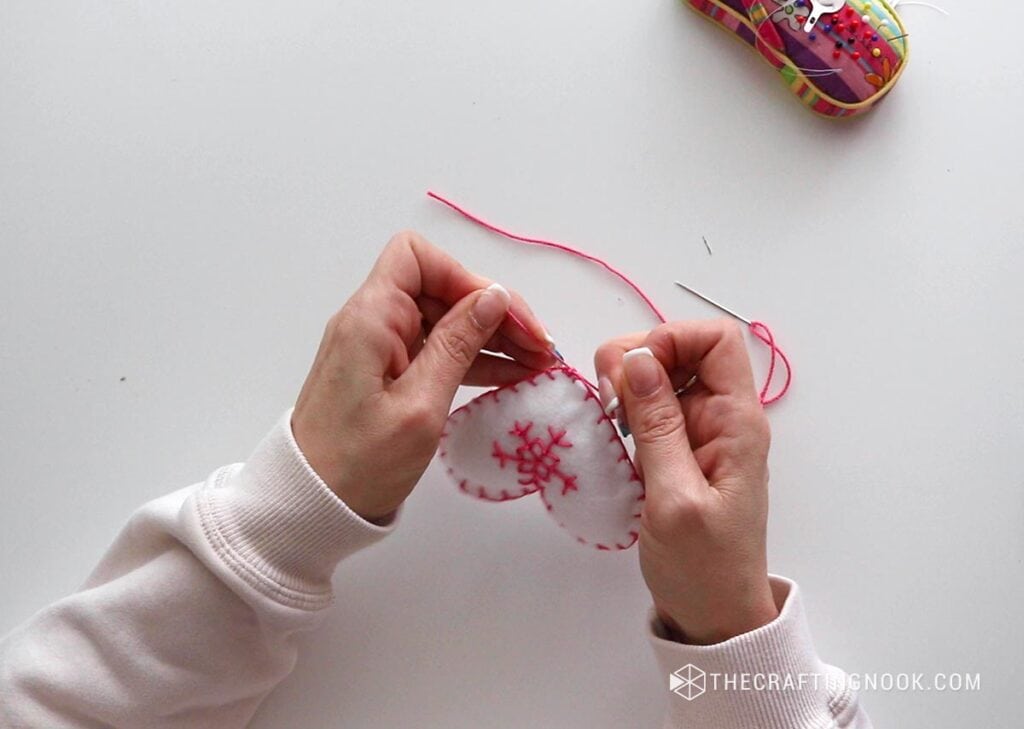
Step 2: Embroider the and Snowflakes
Lay one heart flat, which will serve as the canvas for our snowflake embroidery.
Thread your needle with the chosen embroidery thread. In this case, let’s go with a dark pink for that cute contrast touch.
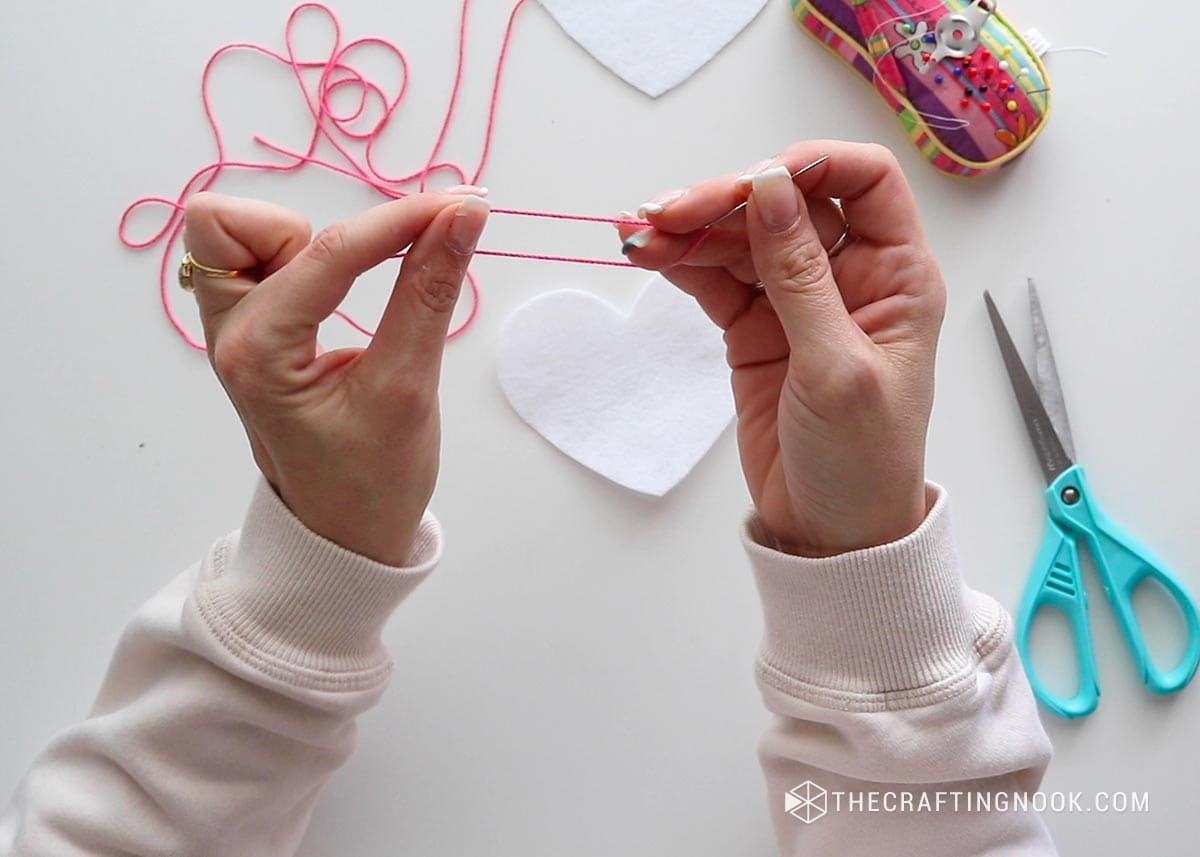
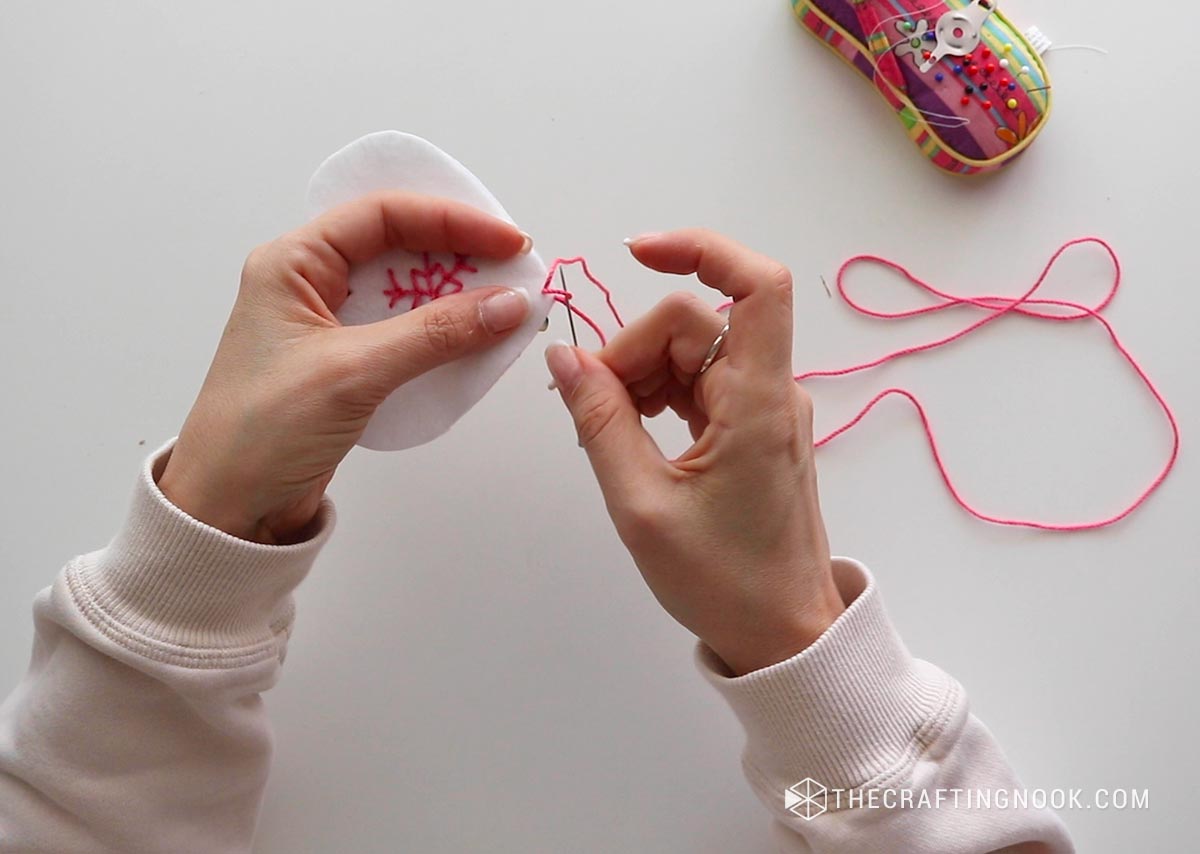
Start at the center of the heart and create a small cross. This will serve as the base for your snowflake. Or you can start from the center and build the snowflake outwards like I did.
Leave a couple of inches of thread on the back for the finishing.

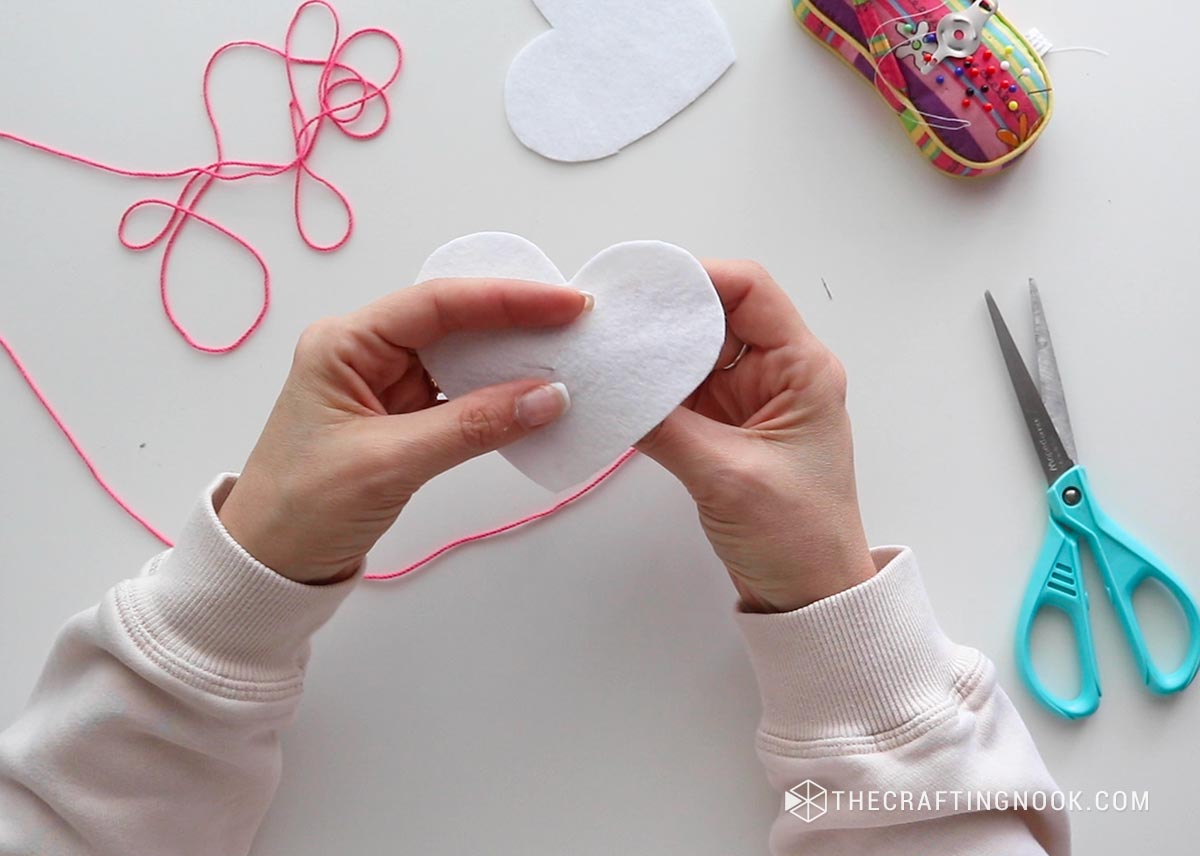
Extend lines outward from the center cross, resembling the arms of a snowflake. Keep them delicate and evenly spaced.
To make your snowflake intricate, add small stitches along each arm. These can be V-shaped stitches or simple straight stitches, depending on your preferred design. I did them as V shape.
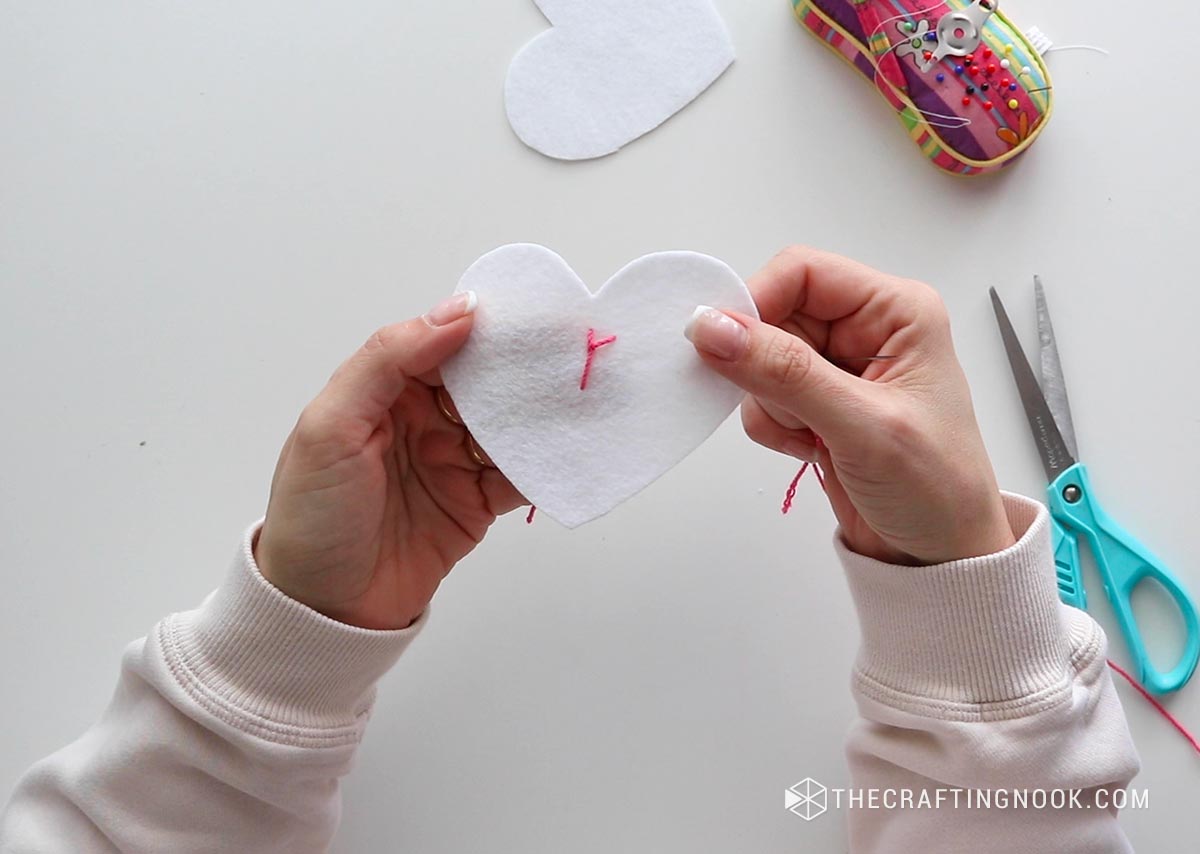
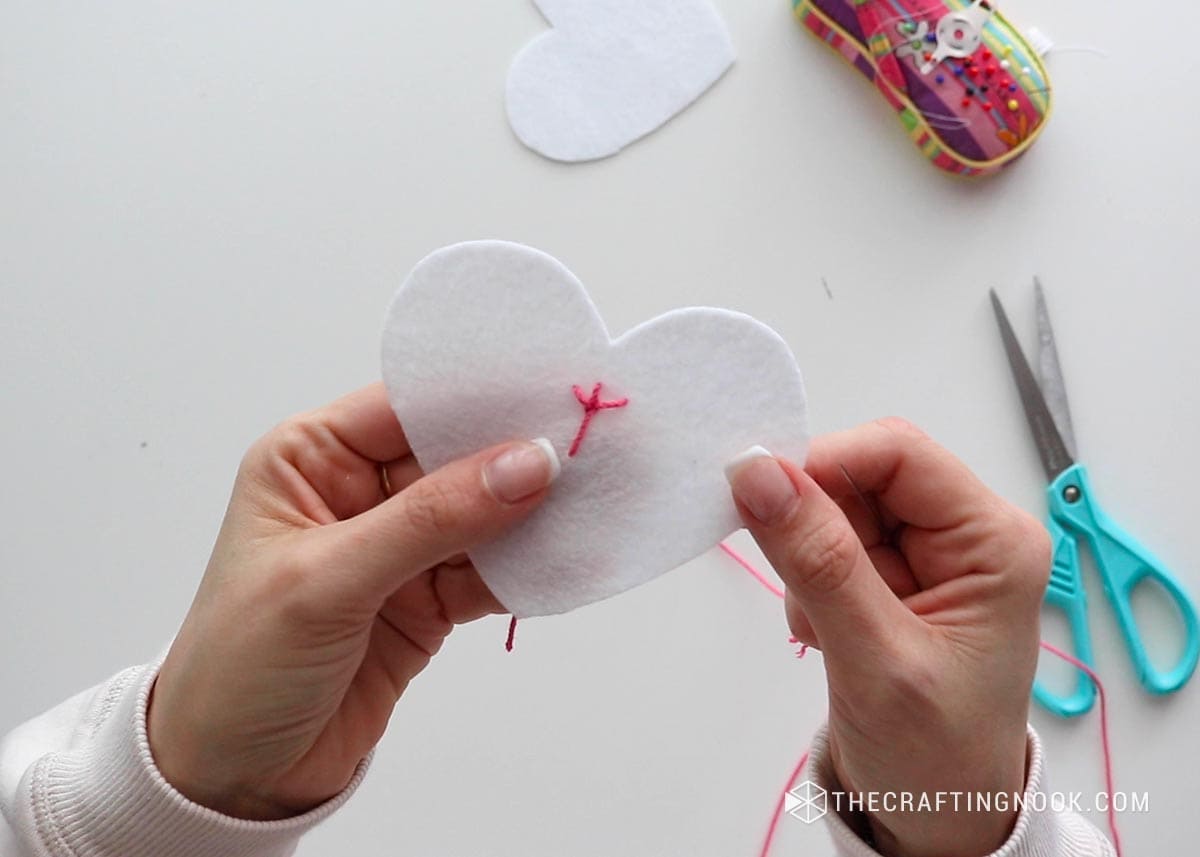
Repeat this process with all the points. I did a 5-point snowflake.
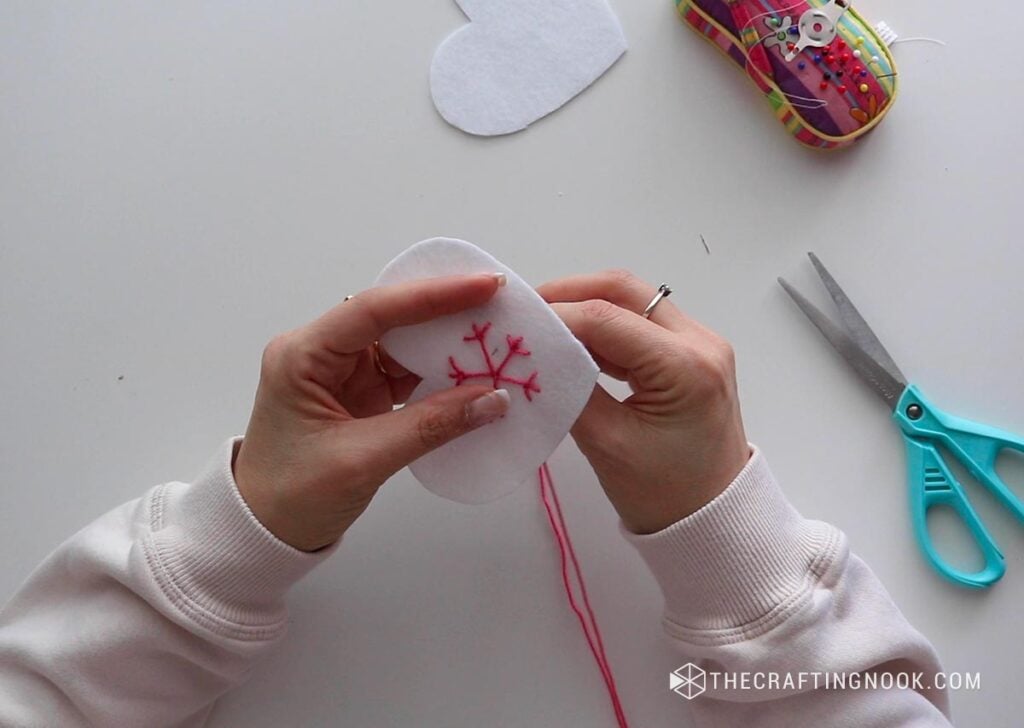
Close to the center, I stitched some extra reversed V shapes to give the snowflake an even more intricate look but you can skip this step if you like.
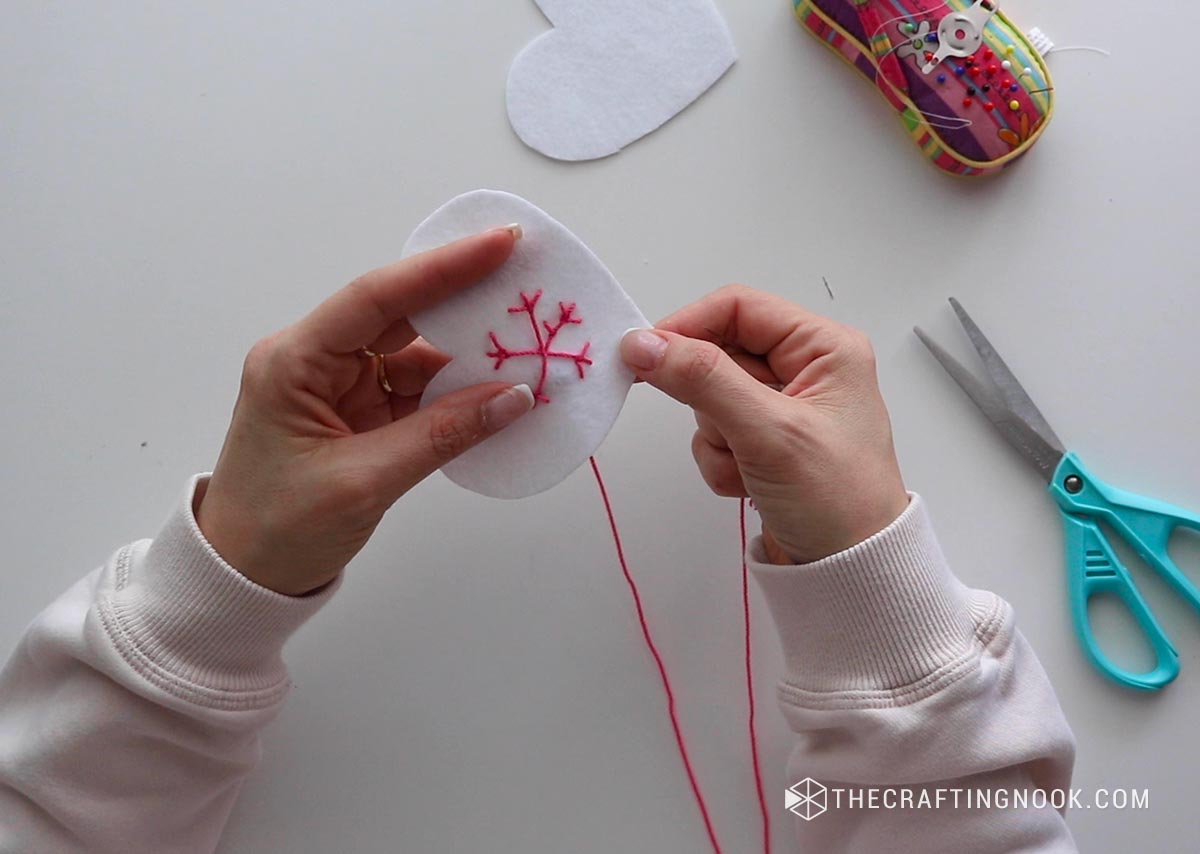
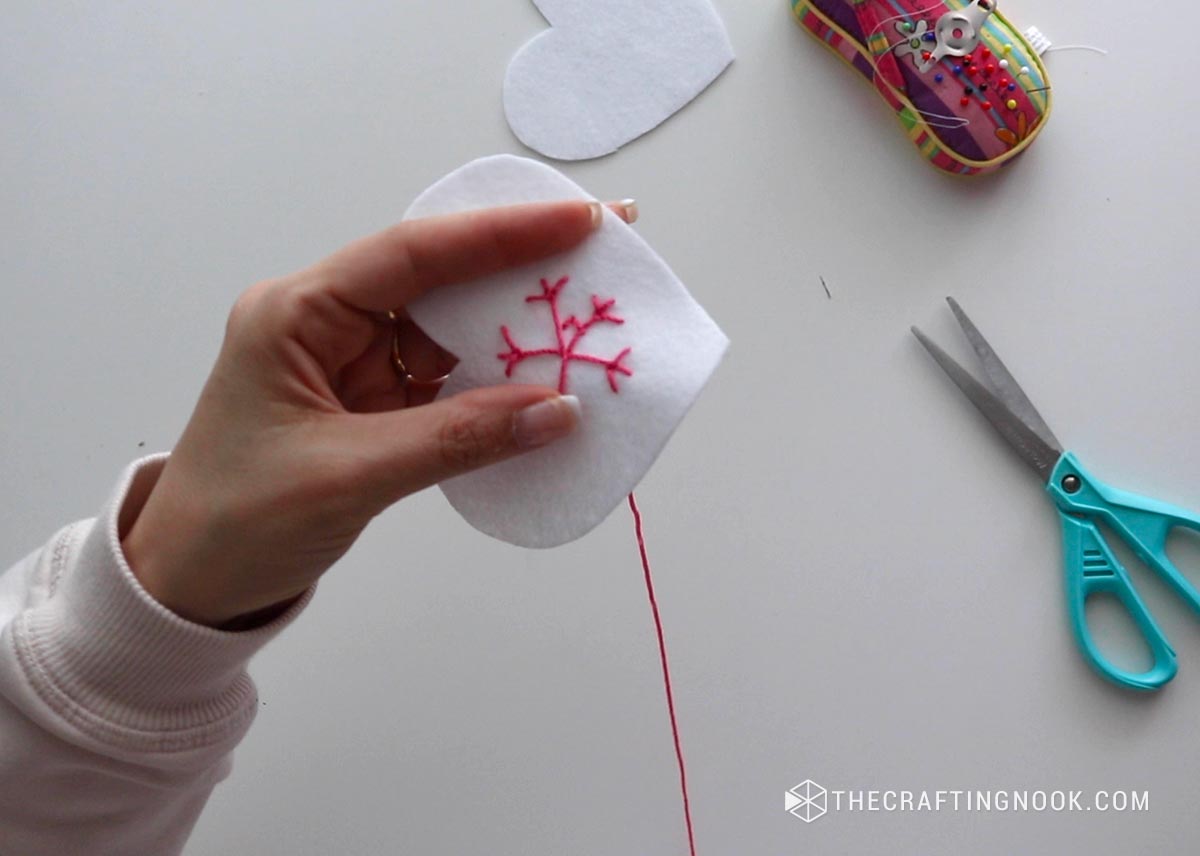
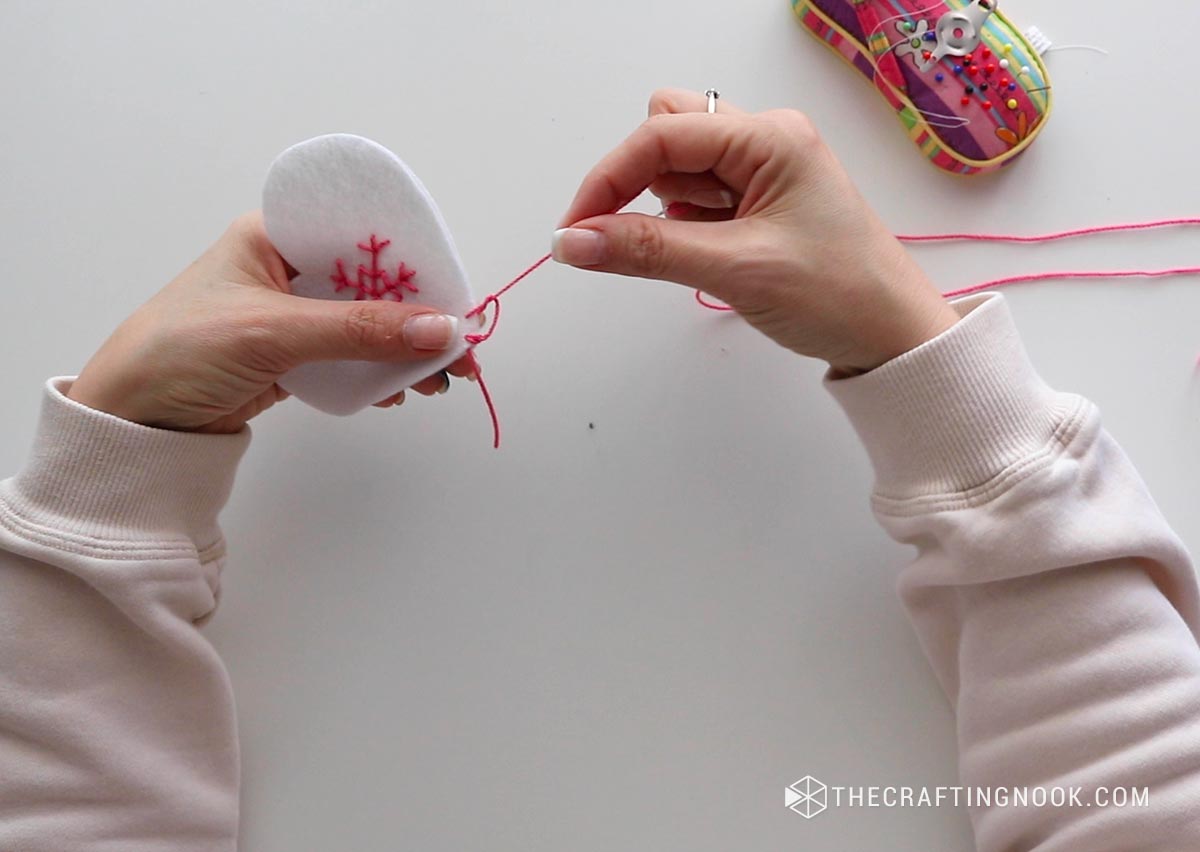
Once your snowflake is complete, tie a knot at the back of the felt to secure the thread.
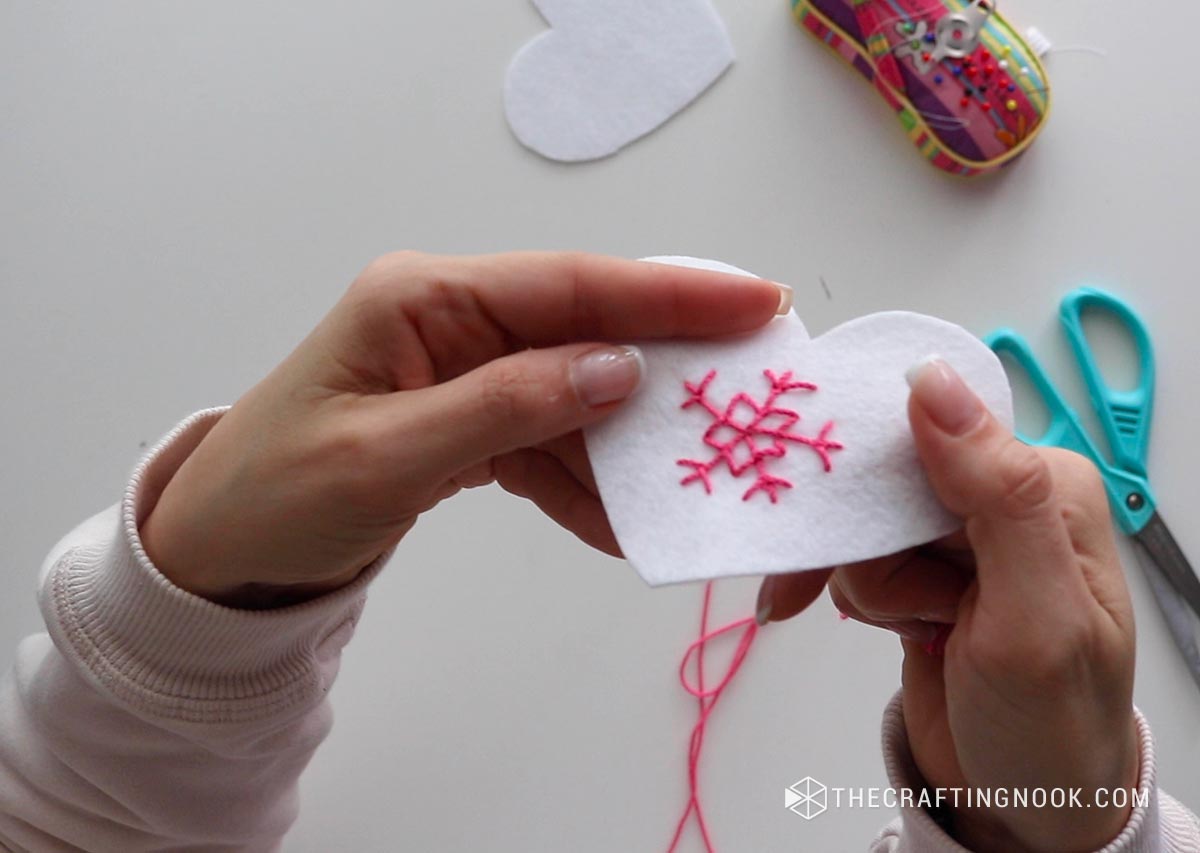
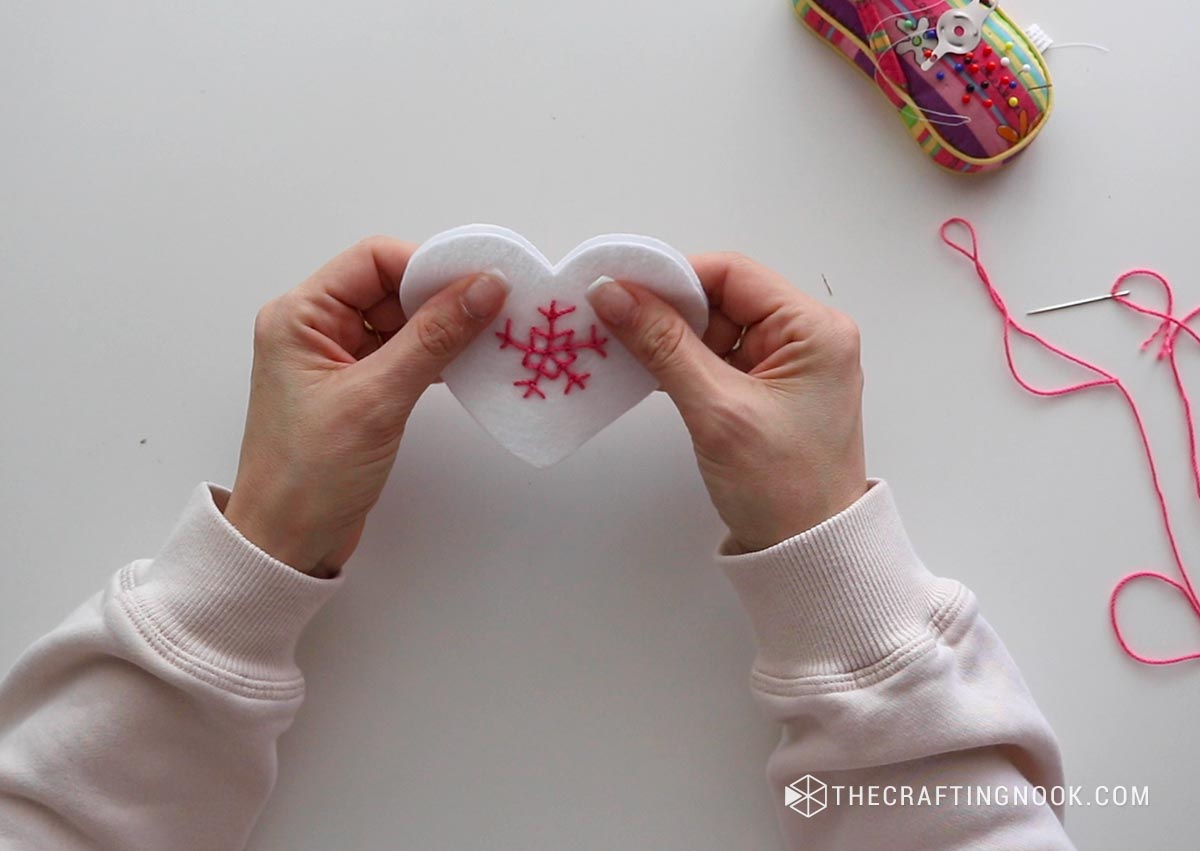
Step 3: Assembling the Ornament
Place the second heart below the embroidered one, creating a charming sandwich.
Start by threading your needle with a suitable length of embroidery thread. A standard rule of thumb is about 18-24 inches, but adjust based on your comfort.
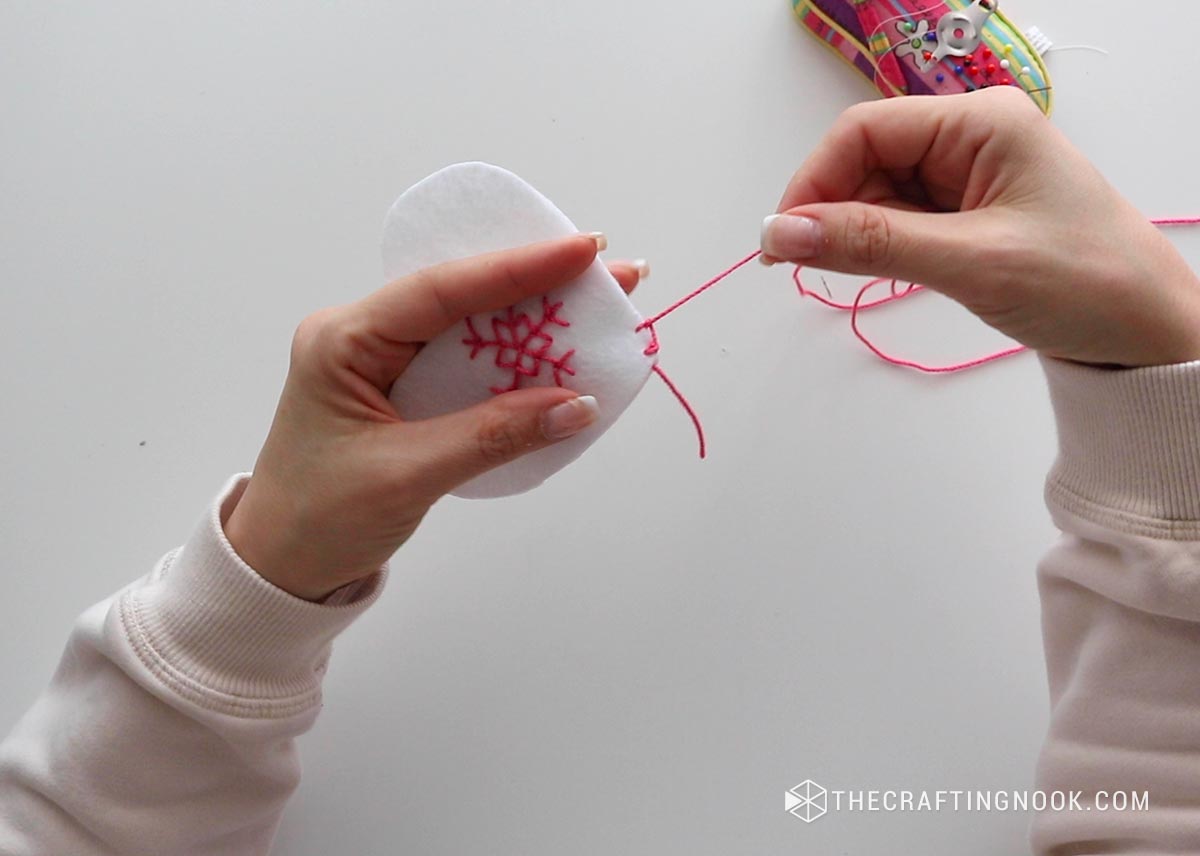
Place your heart pieces in front of you, and decide where you want to start your stitch. I decided to start by the bottom tip.
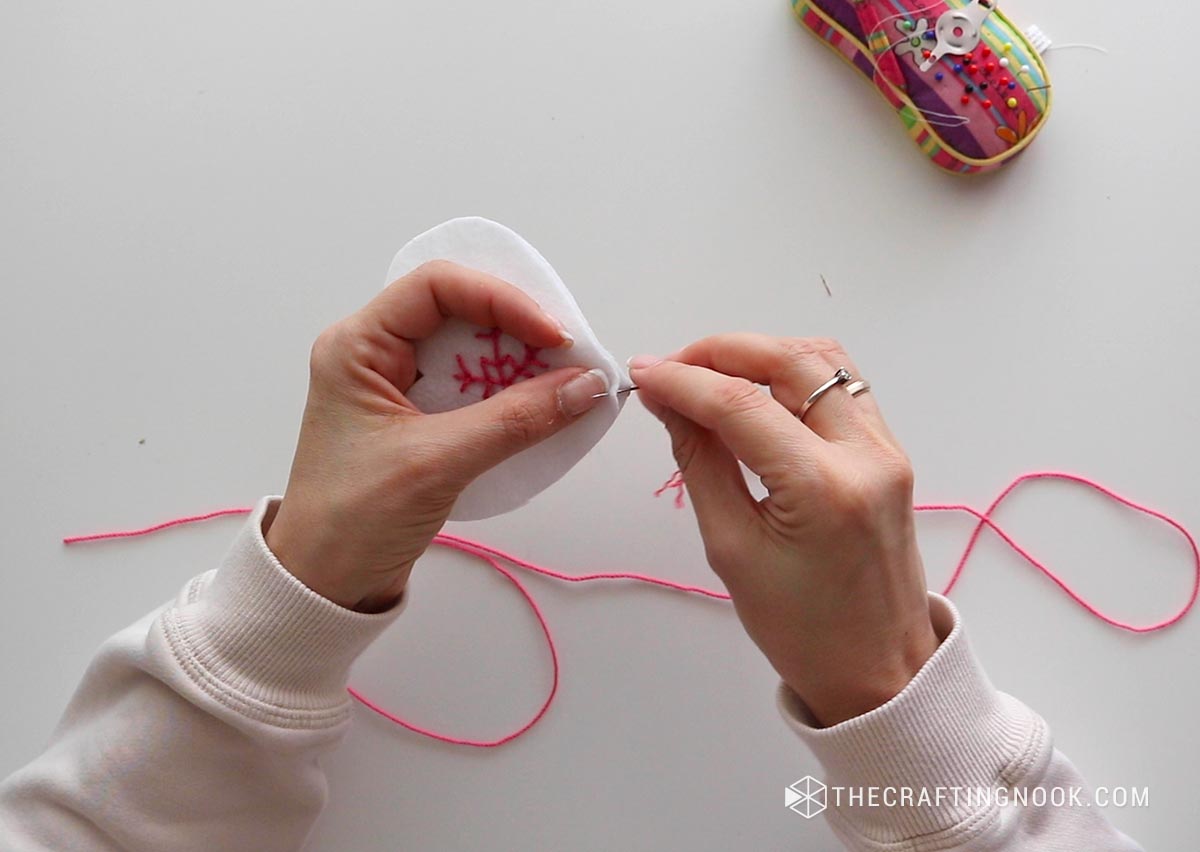
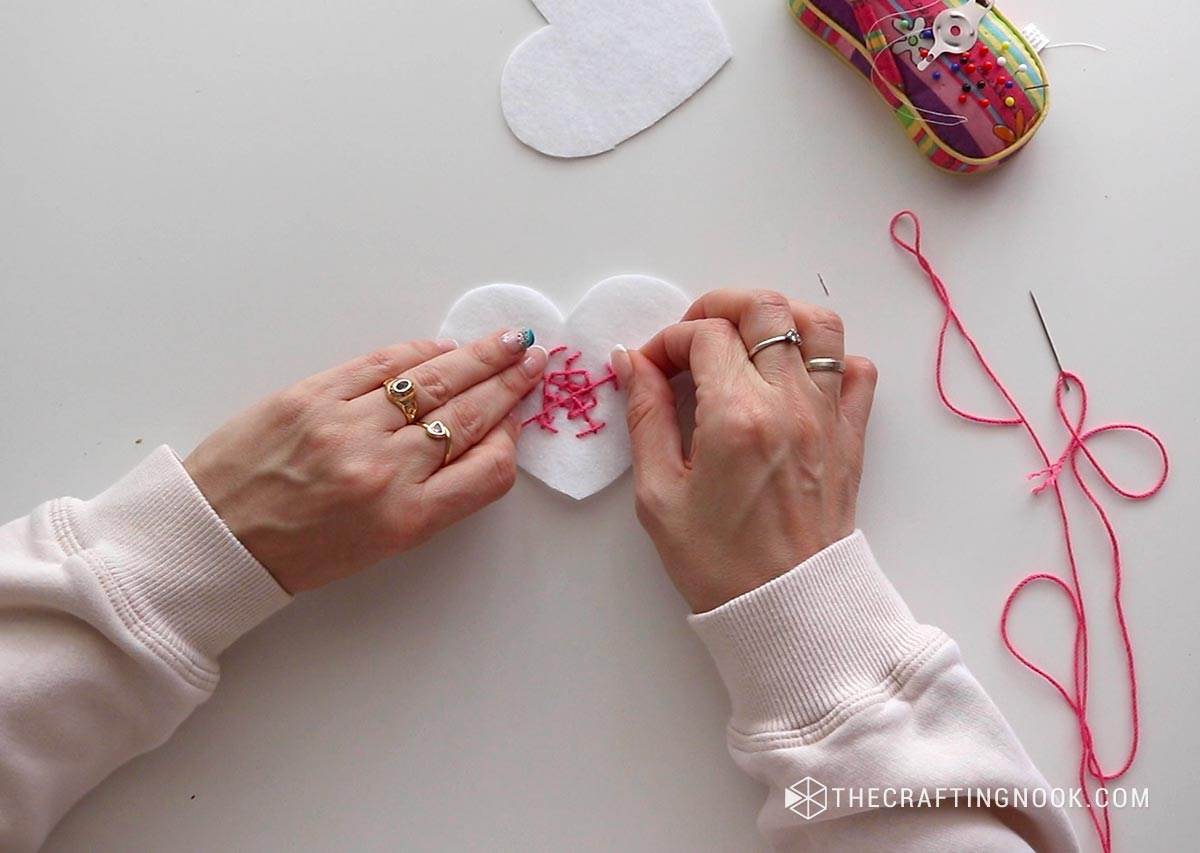
Insert the needle from the backside of the felt to the front at your chosen starting point. Pull the thread until there’s a couple of inches tail on the backside.
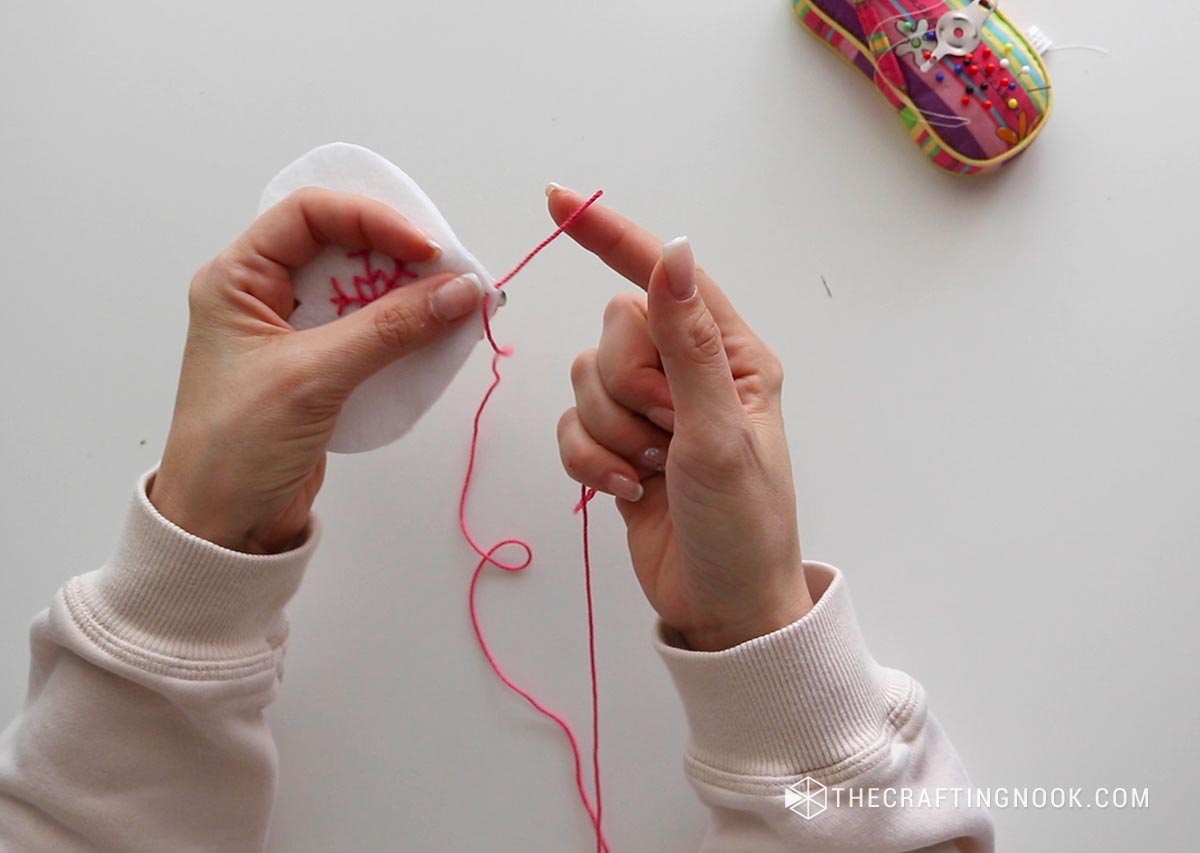
Loop the thread over the felt edge and insert the needle back through from back to front and insert the needle through the loop and pull creating a neat stitch.

Now, position the needle on the back of the felt heart, pointing towards the direction you want to go. This is crucial for creating neat, even stitches.
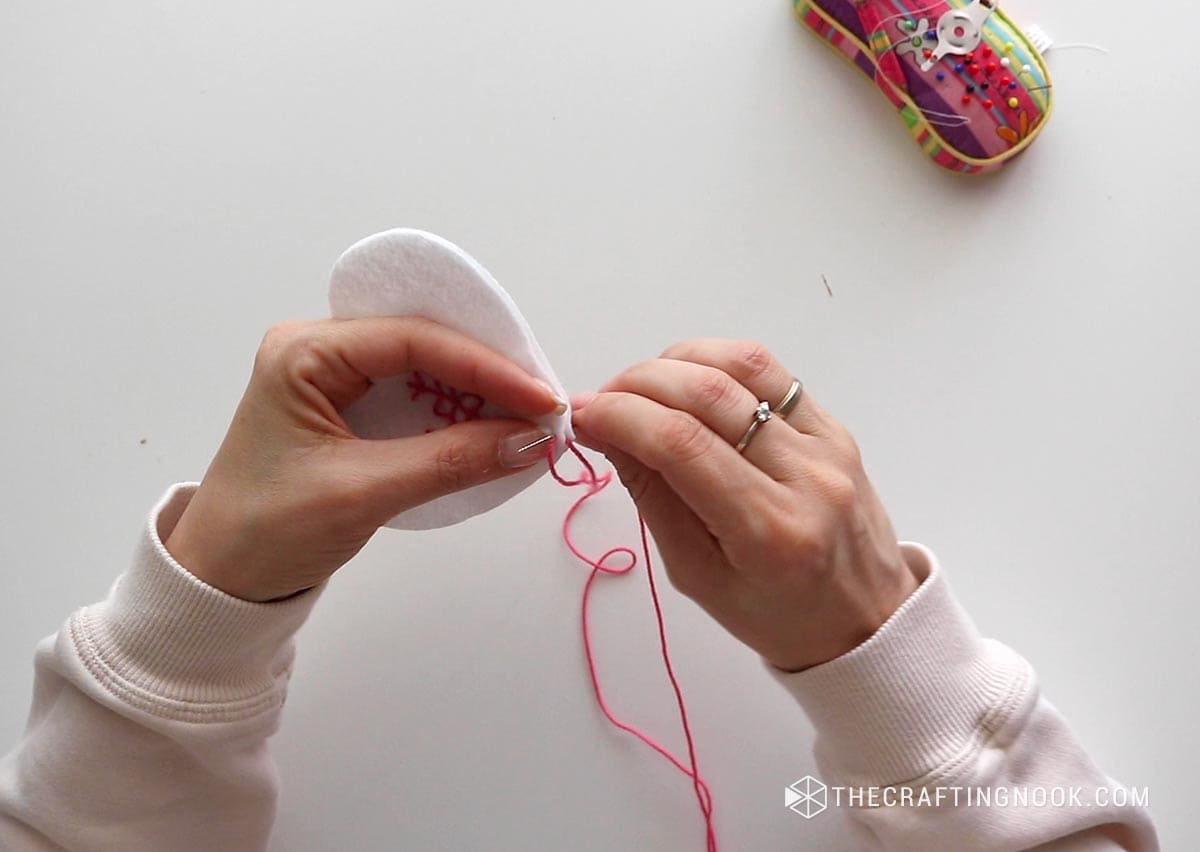
Insert the needle back into the felt, creating a small loop along the edge. Ensure the needle goes through the loop before pulling the thread tight.
Congratulations, you’ve just made your first blanket stitch!
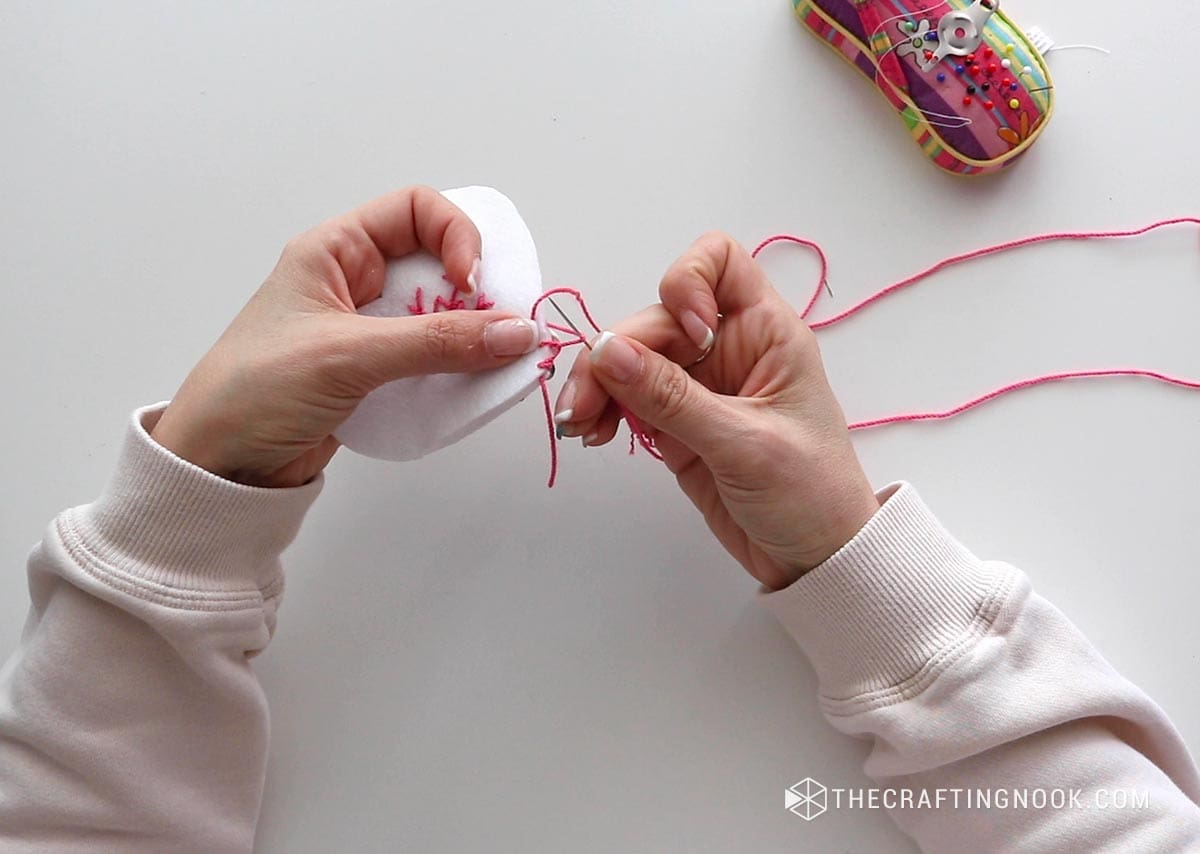

As you continue, keep a consistent space between stitches for a nice look. The key is to always insert the needle from the same side maintaining uniformity.
Continue this pattern, making sure to space your stitches evenly.
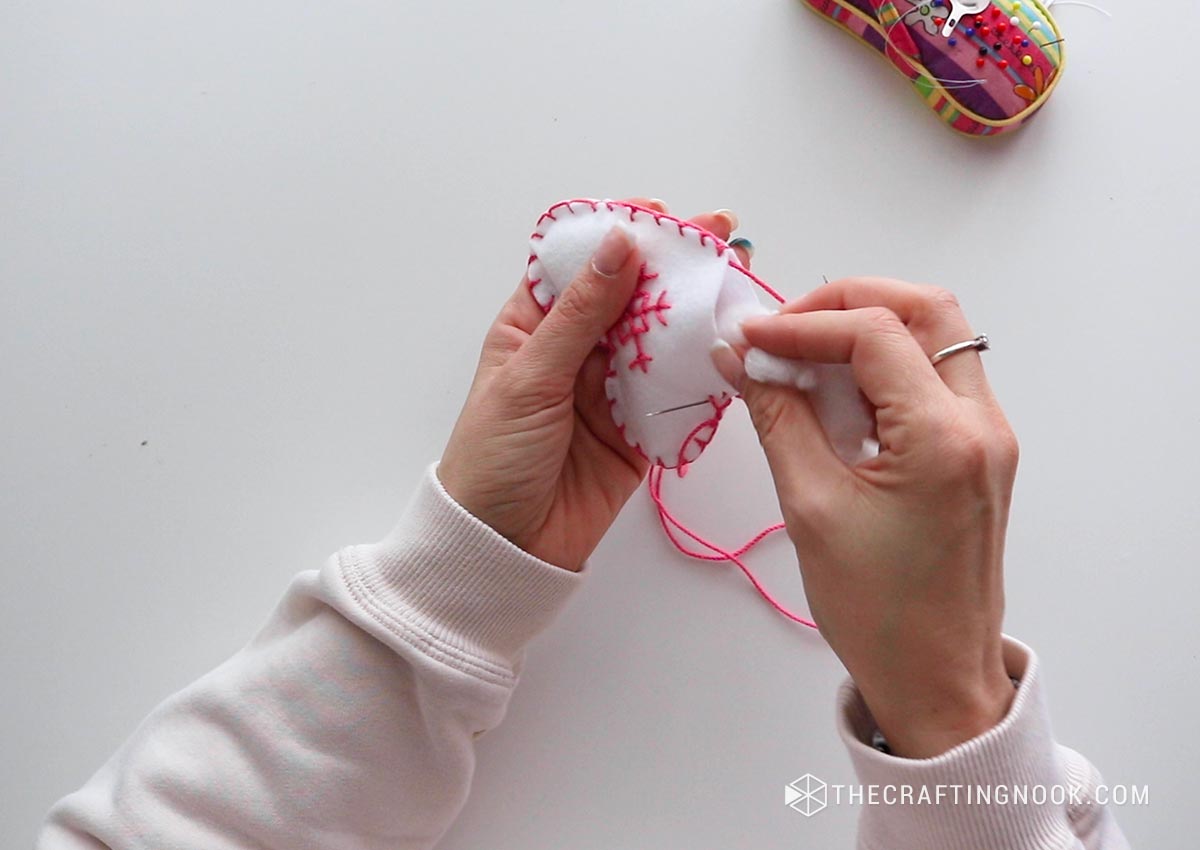
When you’re ready to reach the end of your felt heart, leave a couple of inches to stuff it. I like to leave the needle inserted through the last stitch to avoid the stitches to undo.
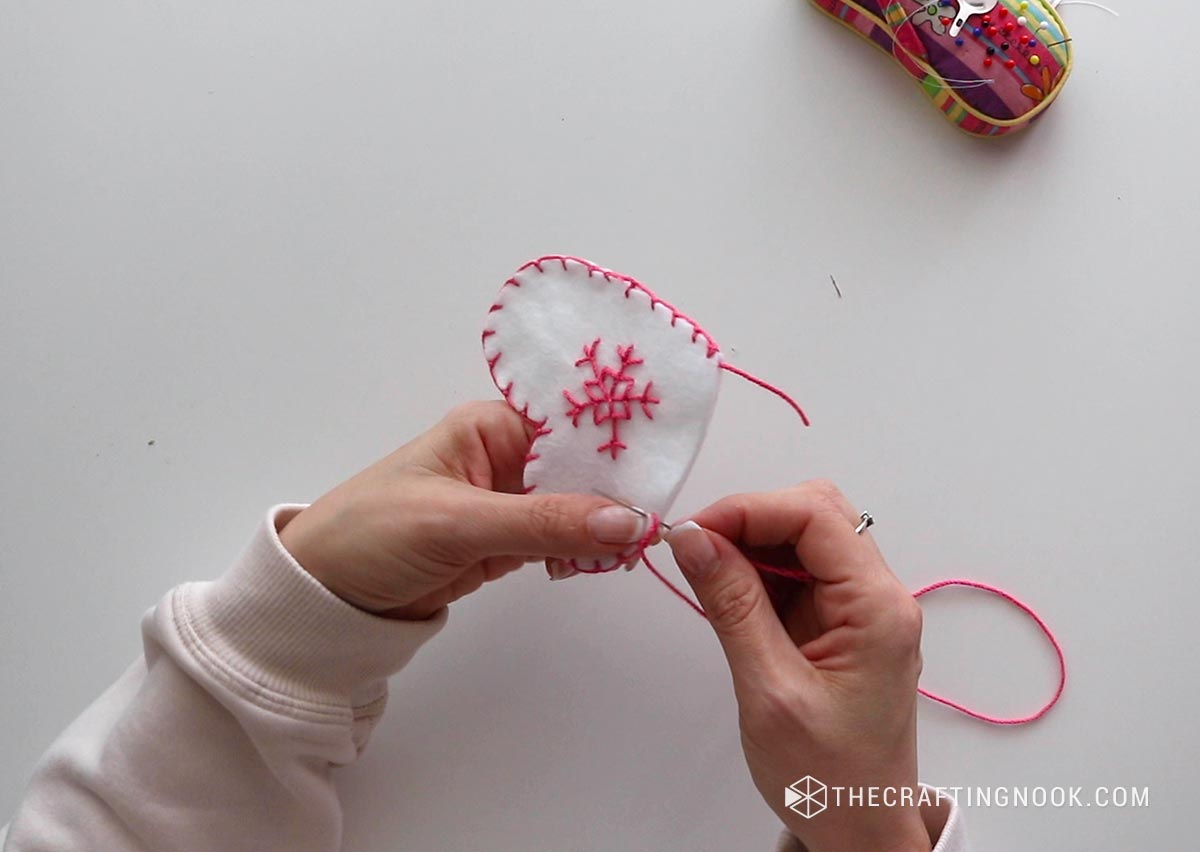
Step 4: Stuffing the ornament
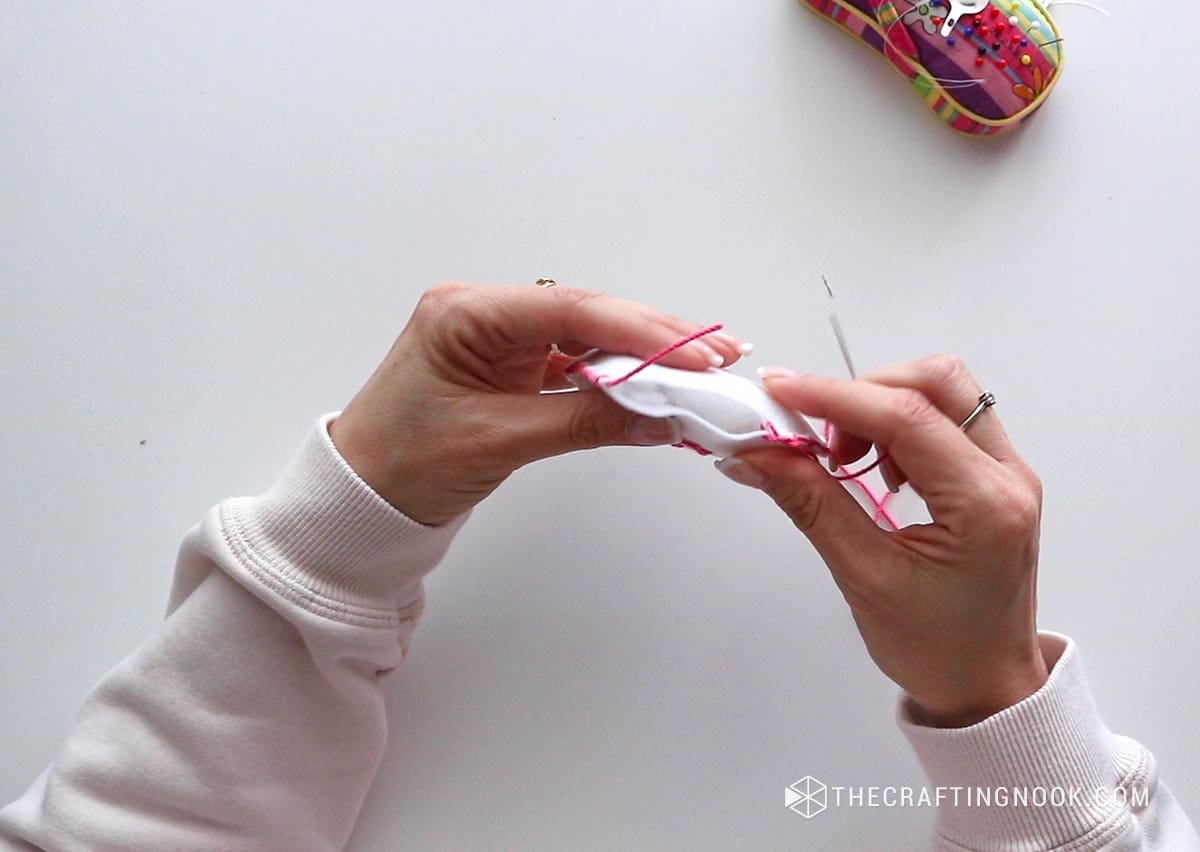
Stuff your heart or chosen shape with cotton or polypill until you are satisfied.
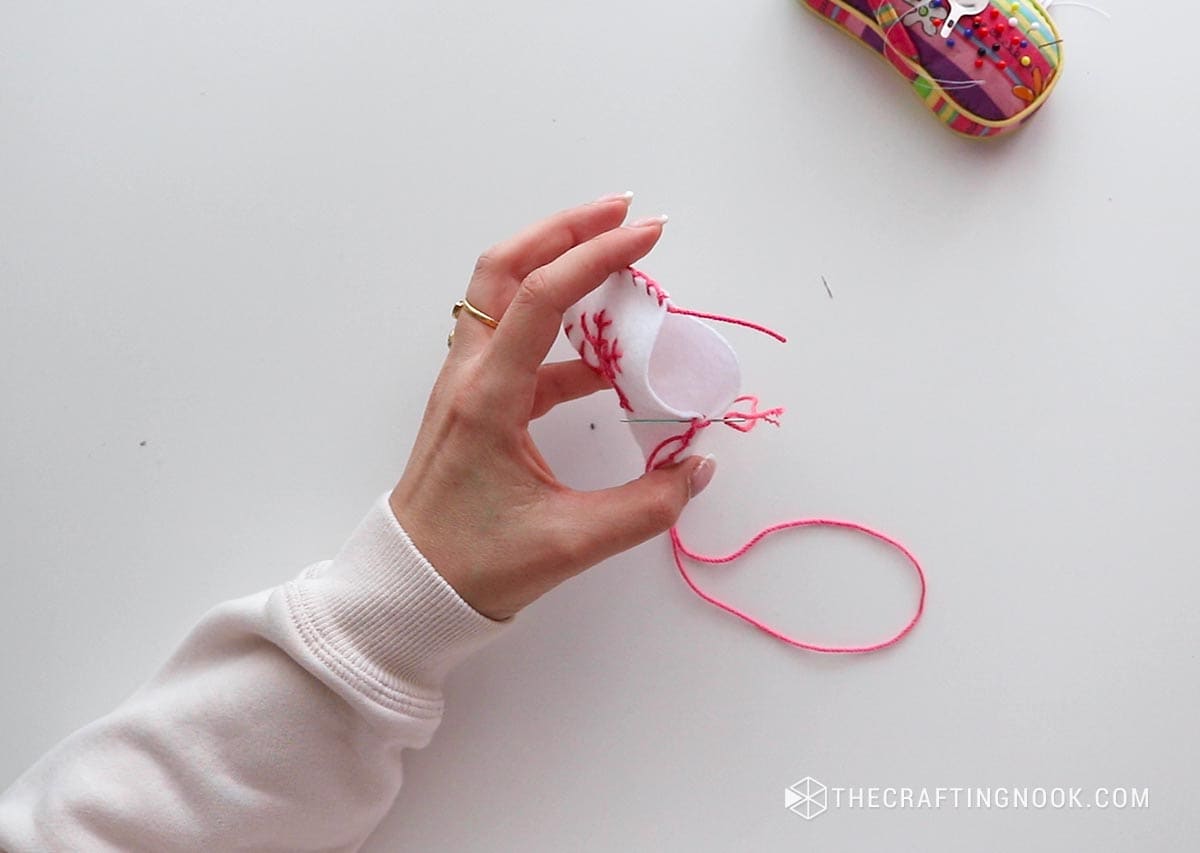
Step 5: Closing the ornaments
To close it, take your needle back, align your edges well and pull the thread to make sure the last stitch is tight and resume stitching the same way you have been doing it.
When you meet the first stitch, create a loop similar to the first stitch. Insert the needle through the loop and pull tight to secure the last stitch.

Then I cut the thread leaving a couple of inches and make a tight knot with the tail from the start with the finish one and cut as close as possible from the knot.

Step 6: Keep making more
Make as many as you want and as different shapes as you like.
Step 7: Put the hanger
Cut a strip of thread, yarn, or twine.
Put both ends together and tie a knot right at the end.
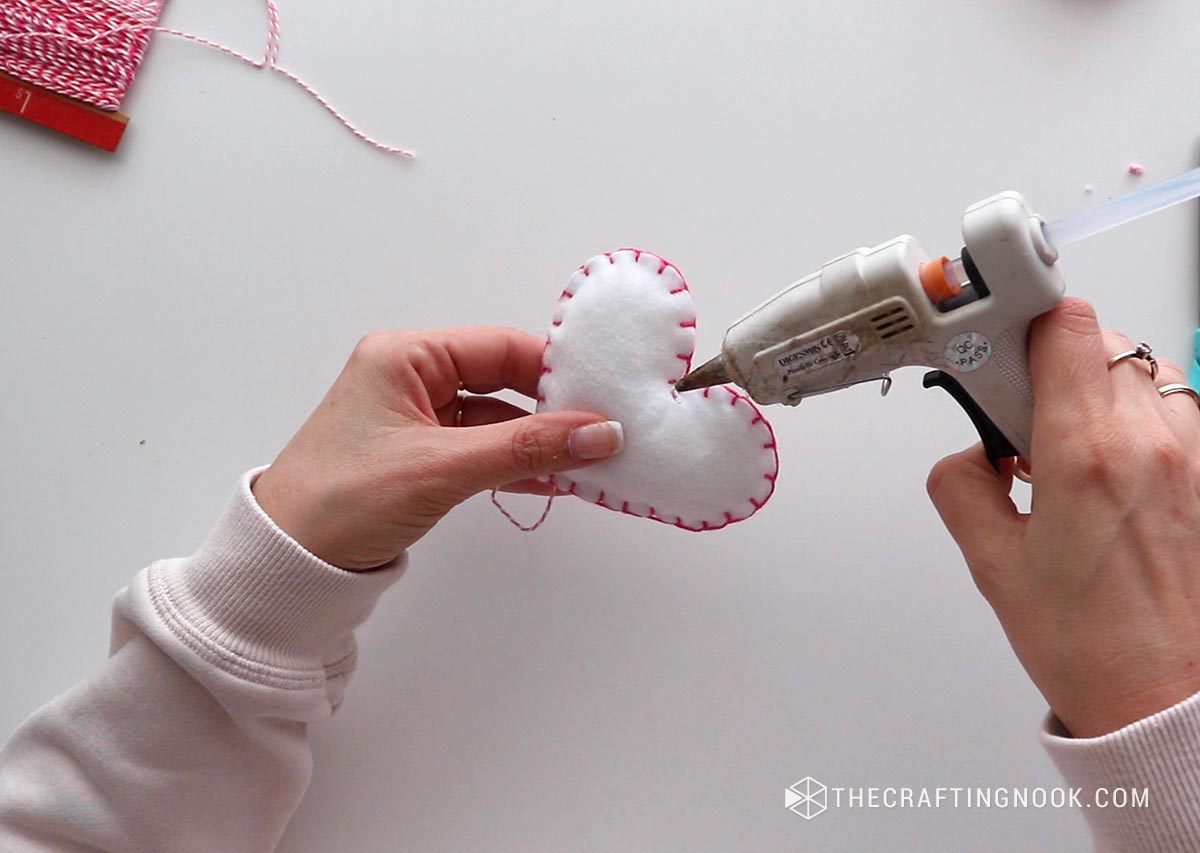
Apply a dab of hot glue or stitch the hanger to the back of the ornament.
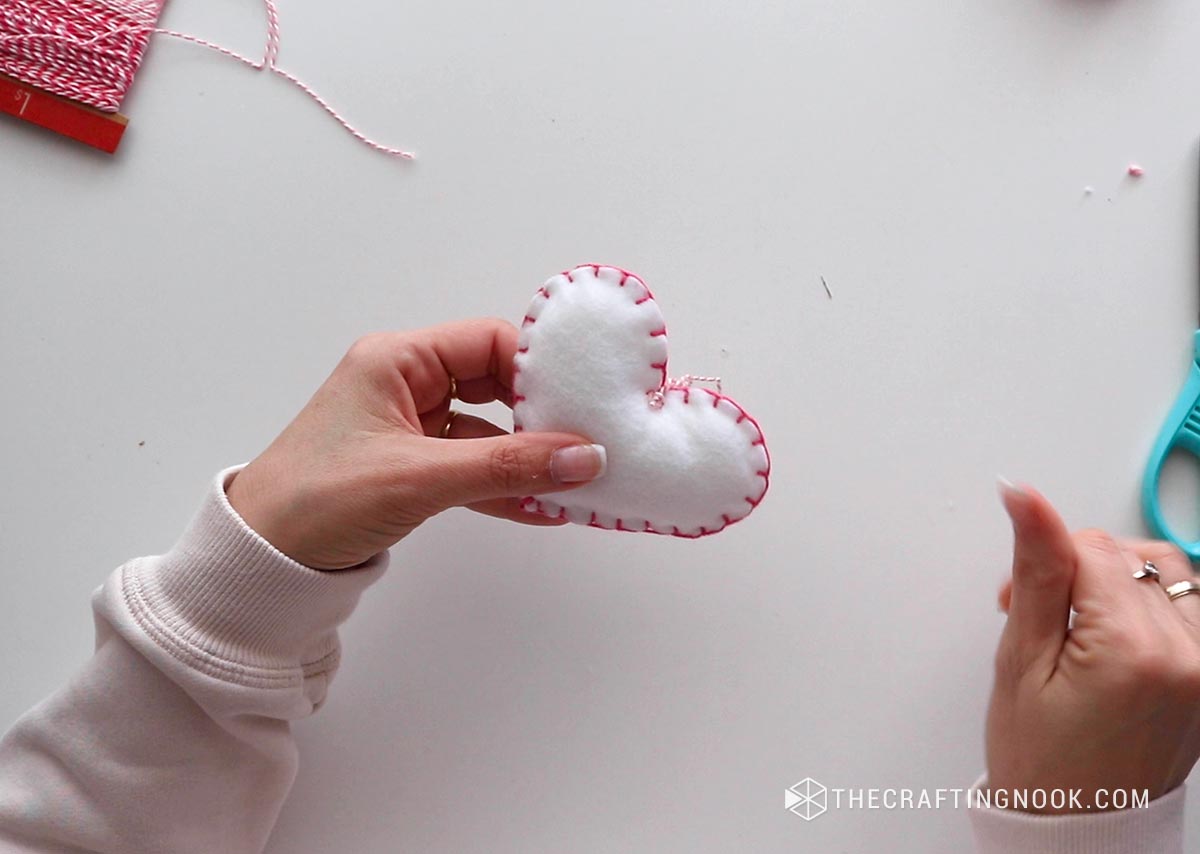
Step 8: Hang them on your Tree
It’s time to show off your new ornaments. Hang them on your Christmas tree and enjoy the magic!

Crafting Tips:
- Use different techniques in each ornament. For example, on the stars, I used bead threads from the center to each tip. Super simple, nothing fancy. Play with different bead sizes for a textured and visually interesting look. On the h Christmas trees I used beads as the tiny ornaments,
- Heart, star, and tree shapes are classics. They bring a warm and festive vibe to your tree. But feel free to let your creativity run wild, and make gnome ornaments, reindeer, mitten.
- Before cutting your felt, give it a gentle press with a warm iron. This not only smoothens out any wrinkles but also makes the felt more manageable, ensuring precise cuts for your perfect ornaments.
- When attaching small felt pieces, use a glue gun on a low setting for a quick and secure hold. This is especially handy for those tiny details that can be tricky to stitch in place.
- To achieve a plush finish without the lumps, pull apart your cotton stuffing and distribute it evenly. This prevents clumps and ensures your ornaments feel as delightful as they look.


Frequently Asked Questions
To prevent fraying, consider using sharp scissors and make swift, clean cuts. Additionally, you can apply a thin layer of clear nail polish or fabric glue along the edges. This seals the fibers and keeps your felt looking crisp.
Achieving professional-looking stitches is all about practice and patience. Keep your stitches even and consistent, and don’t rush the process. Using a hoop to keep the fabric taut can also enhance the neatness of your stitches.
Pull apart your cotton stuffing before filling your ornaments. Distribute it evenly, and add small amounts at a time to achieve a smooth, uniform result.
Consider embroidering initials, adding small charms, or incorporating meaningful colors. Your creations will not only be festive but also uniquely yours.
For felt, use a sharp embroidery needle with a small eye. This type of needle glides through the fabric smoothly without causing unnecessary damage.
Store your felt ornaments in a cool, dry place. Place a layer of tissue paper between them to prevent any color transfer. A sealed container or a zip-top bag works well to keep dust at bay.
More Christmas Projects to Try
If you like this DIY Felt Ornaments tutorial, you might also love these other Christmas Crafts ideas too:


✂️ Tutorial

DIY Felt Ornaments for Christmas
Tools
- An embroidery needle
- A pair of scissors.
- Pins
- Threader
Supplies
- Felt sheets in festive colors
- Pencil or fabric marker
- Cotton stuffing or polyfill
- Ribbon or twine for hanging
- Embroidery thread – think festive colors.
- Cotton stuffing for that plush finish.
- A dash of creativity and a pinch of holiday spirit!
Instructions
STEP 1: CUTTING THE SHAPES
- Begin by cutting out on paper the shapes you want to create ornaments for.
- Then trace the shapes onto the folded felt so you get two heart shapes (or your chosen ones) from your chosen felt. This year’s theme is white, pink and gold so I chose white and pink felt.
- You can use the free templates I’m sharing right here!
- Make sure they’re identical for a perfect pairing.
STEP 2: EMBROIDER THE AND SNOWFLAKES
- Lay one heart flat, which will serve as the canvas for our snowflake embroidery.
- Thread your needle with the chosen embroidery thread. In this case, let’s go with a dark pink for that cute contrast touch.
- Start at the center of the heart and create a small cross. This will serve as the base for your snowflake. Or you can start from the center and build the snowflake outwards like I did.
- Leave a couple of inches of thread on the back for the finishing.
- Extend lines outward from the center cross, resembling the arms of a snowflake. Keep them delicate and evenly spaced.
- To make your snowflake intricate, add small stitches along each arm. These can be V-shaped stitches or simple straight stitches, depending on your preferred design. I did them as V shape.
- Repeat this process with all the points. I did a 5-point snowflake.
- Close to the center, I stitched some extra reversed V shapes to give the snowflake an even more intricate look but you can skip this step if you like.
- Once your snowflake is complete, tie a knot at the back of the felt to secure the thread.
STEP 3: ASSEMBLING THE ORNAMENT
- Place the second heart below the embroidered one, creating a charming sandwich.
- Start by threading your needle with a suitable length of embroidery thread. A standard rule of thumb is about 18-24 inches, but adjust based on your comfort.
- Place your heart pieces in front of you, and decide where you want to start your stitch. I decided to start by the bottom tip.
- Insert the needle from the backside of the felt to the front at your chosen starting point. Pull the thread until there’s a couple of inches tail on the backside.
- Loop the thread over the felt edge and insert the needle back through from back to front and insert the needle through the loop and pull creating a neat stitch.
- Now, position the needle on the back of the felt heart, pointing towards the direction you want to go. This is crucial for creating neat, even stitches.
- Insert the needle back into the felt, creating a small loop along the edge. Ensure the needle goes through the loop before pulling the thread tight.
- Congratulations, you’ve just made your first blanket stitch!
- As you continue, keep a consistent space between stitches for a nice look. The key is to always insert the needle from the same side maintaining uniformity.
- Continue this pattern, making sure to space your stitches evenly.
- When you’re ready to reach the end of your felt heart, leave a couple of inches to stuff it. I like to leave the needle inserted through the last stitch to avoid the stitches to undo.
STEP 4: STUFFING THE ORNAMENT
- Stuff your heart or chosen shape with cotton or polypill until you are satisfied.
STEP 5: CLOSING THE ORNAMENTS
- To close it, take your needle back, align your edges well and pull the thread to make sure the last stitch is tight and resume stitching the same way you have been doing it.
- When you meet the first stitch, create a loop similar to the first stitch. Insert the needle through the loop and pull tight to secure the last stitch.
- Then I cut the thread leaving a couple of inches and make a tight knot with the tail from the start with the finish one and cut as close as possible from the knot.
STEP 6: KEEP MAKING MORE
- Make as many as you want and as different shapes as you like.
STEP 7: PUT THE HANGER
- Cut a strip of thread, yarn, or twine.
- Put both ends together and tie a knot right at the end.
- Apply a dab of hot glue or stitch the hanger to the back of the ornament.
STEP 8: HANG THEM ON YOUR TREE
- It’s time to show off your new ornaments. Hang them on your Christmas tree and enjoy the magic!
Share and PIN ME!!!
Til’ next time…


FREE WORKBOOK
Keeping your Sweet Home Organized
Learn how to create intentional habits and simple routines to Keep Your Home Organized. Plus freebies, printables, exclusive content, and tips.
Disclaimer: By clicking on the “Yes” button above you are giving me your consent to collect and use your information according to the law and My Policy Privacy. Zero Spam I promise!