DIY Stuffed Animals: Free Stuffed Dog Sewing Pattern
This post may contain affiliate links. Please read our Disclosure Policy.
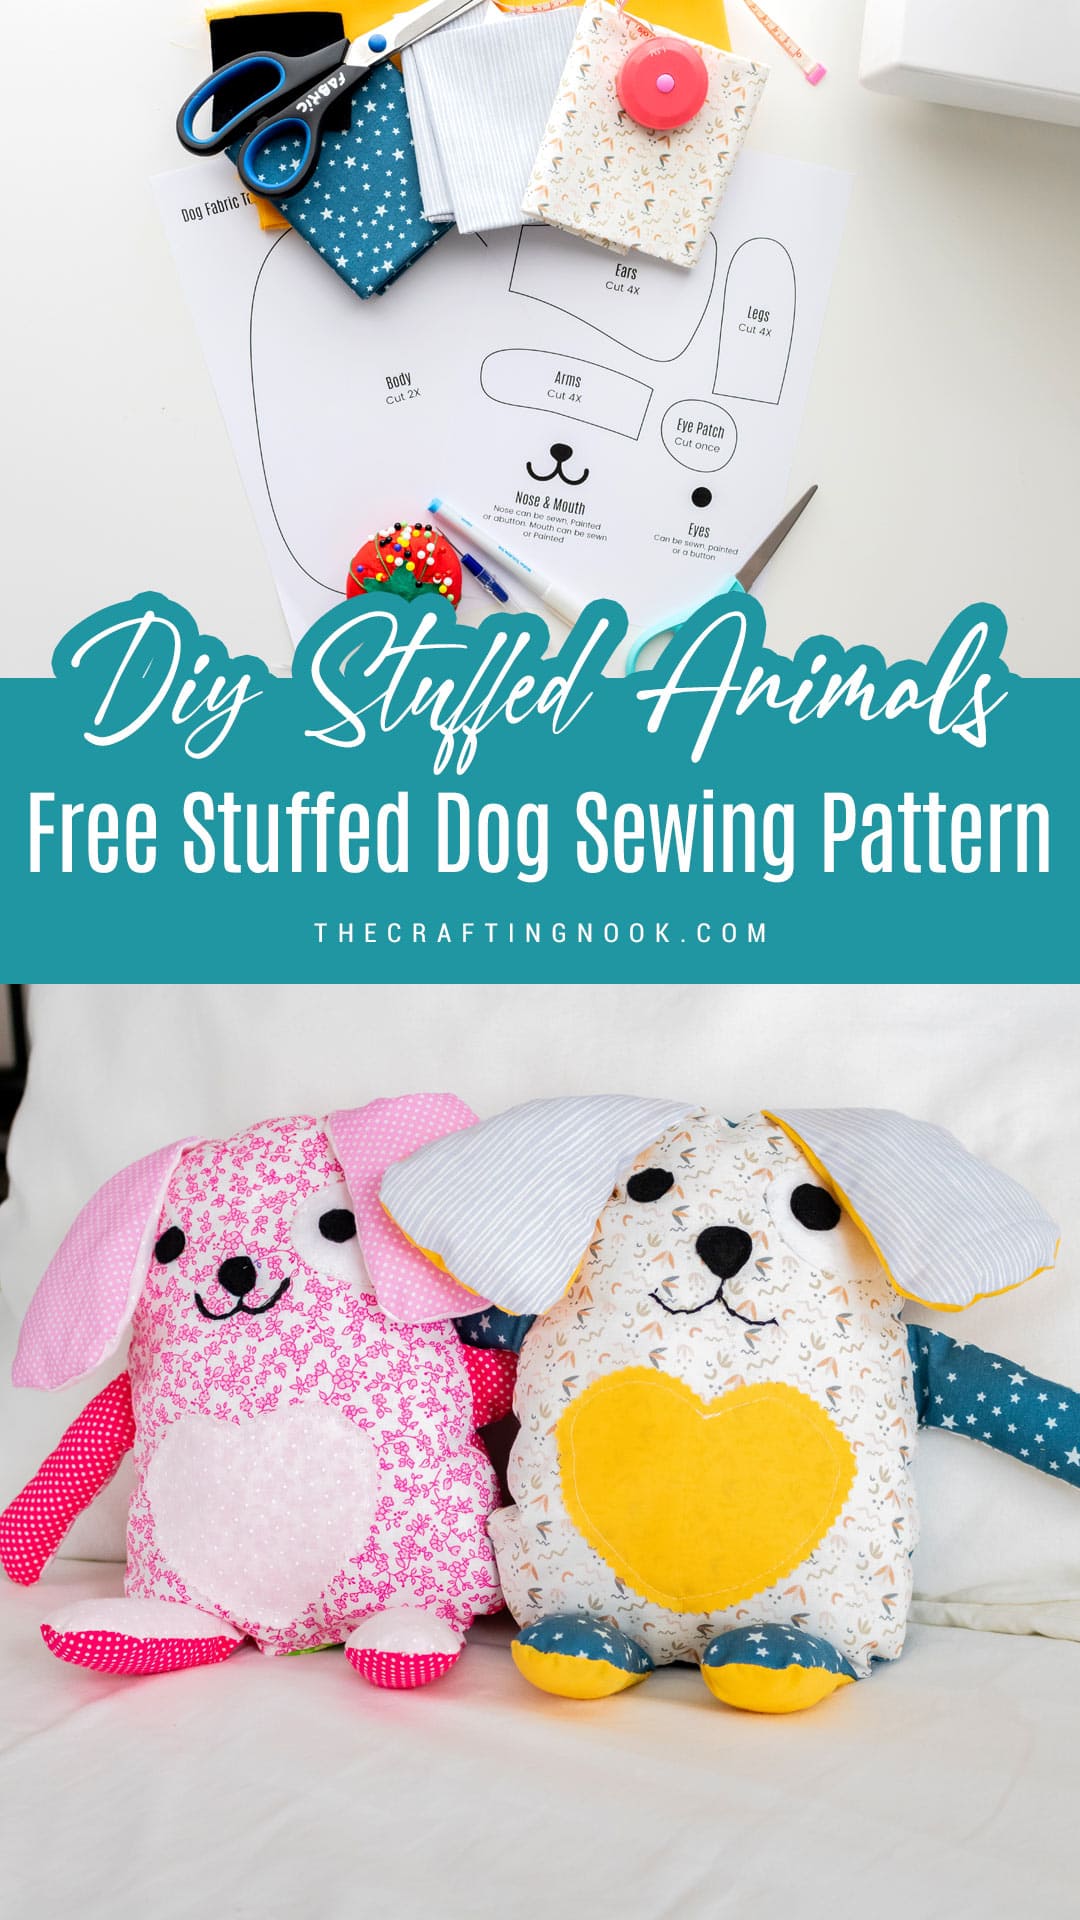
This free stuffed dog sewing pattern includes a printable PDF you can download and use at home. It’s beginner-friendly, easy to customize, and perfect for handmade gifts or kids’ toys.
There’s something special about making a handmade gift, especially when it’s for someone who has completely stolen your heart! You can always tell when something is made with love.
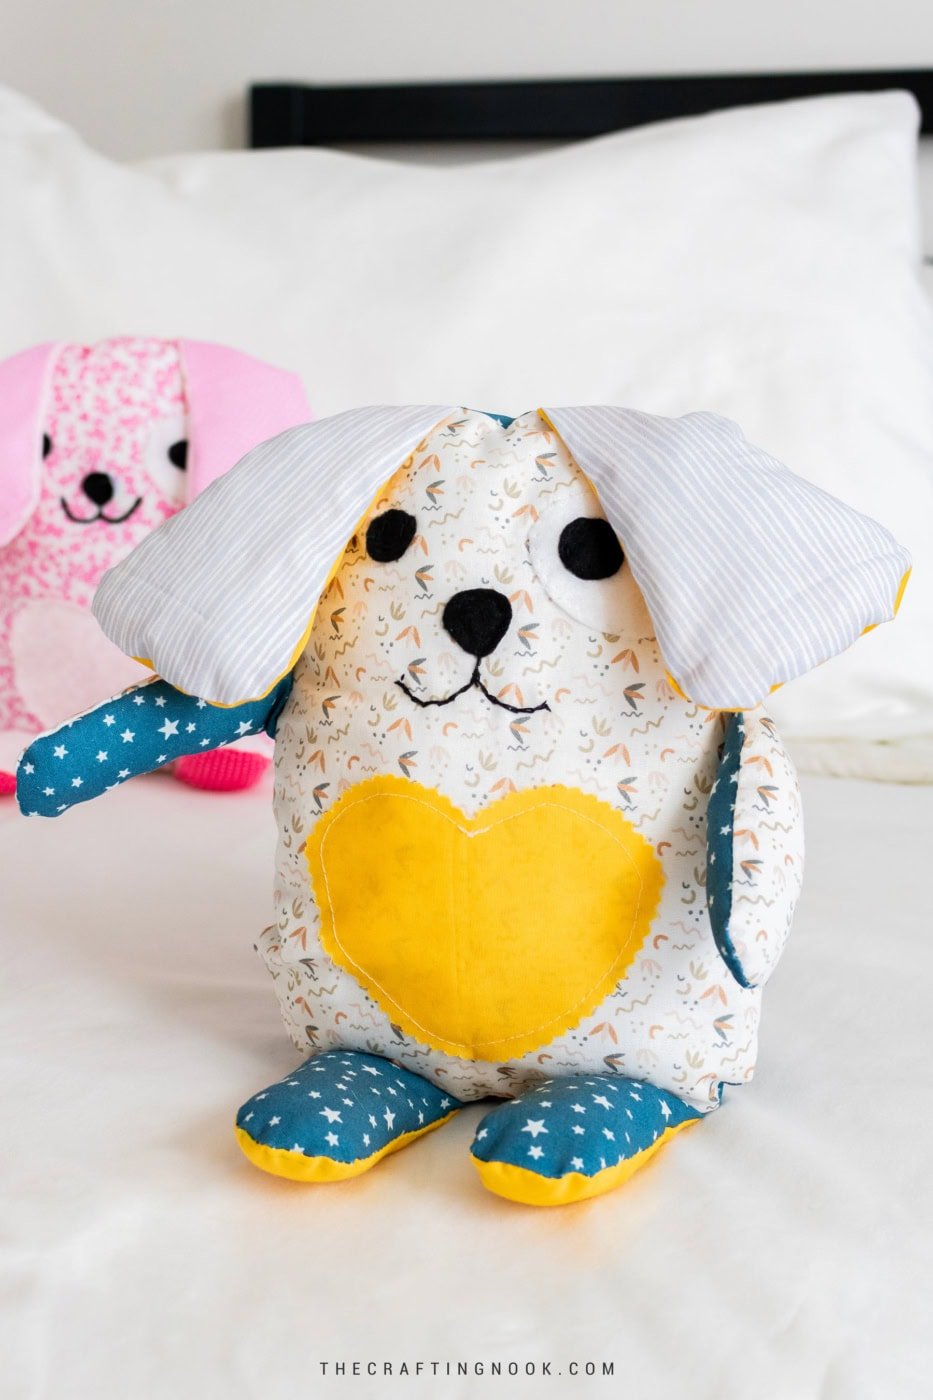
Table of Contents
How To Make This Fabric Stuffed Dog
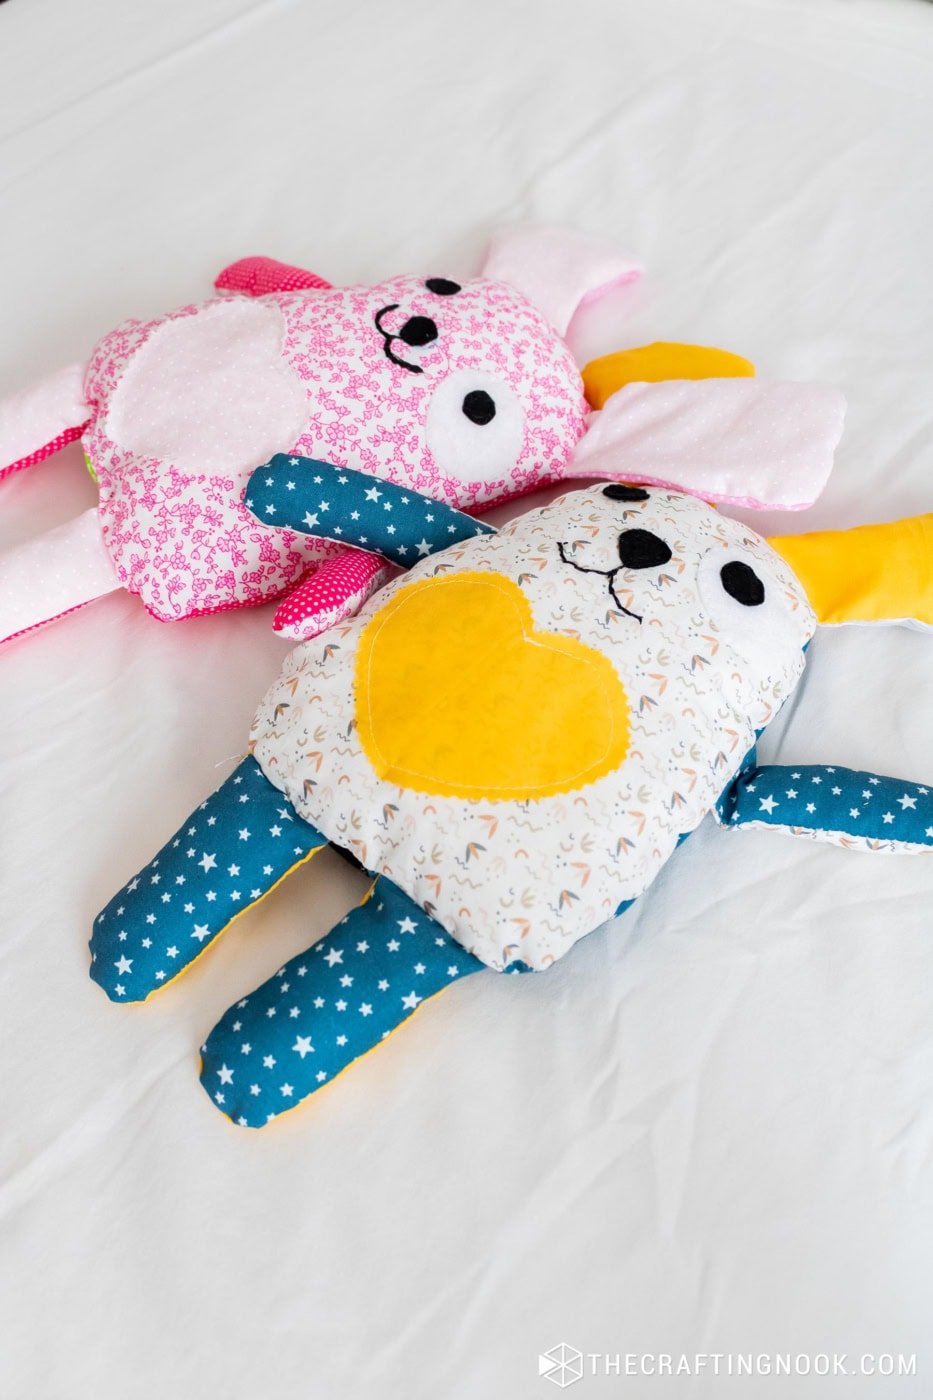
I originally made this stuffed puppy dog as a gift for my nephew, but my daughter quickly claimed one for herself too. That’s one of my favorite things about this project. It’s easy to personalize with different fabrics, which makes it great for kids of all ages.
To make things simple, I’ve included a free stuffed dog sewing pattern with a printable PDF you can use at home. The steps are beginner-friendly, and the pattern is easy to follow, even if you’re newer to sewing.
Grab your favorite fabrics, and let’s get started.
Project snapshot
- Type of project: Sewing
- Skill Level: Beginner (basic sewing skills)
- Time Required: About 2 hours
- Pattern Included: Yes – free printable PDF
- Method/Technique: Sewing Machine or hand sewing
- Customization level: Fully customizable
- Budget range: Low
- Best for: Kids’ rooms / Gift-giving
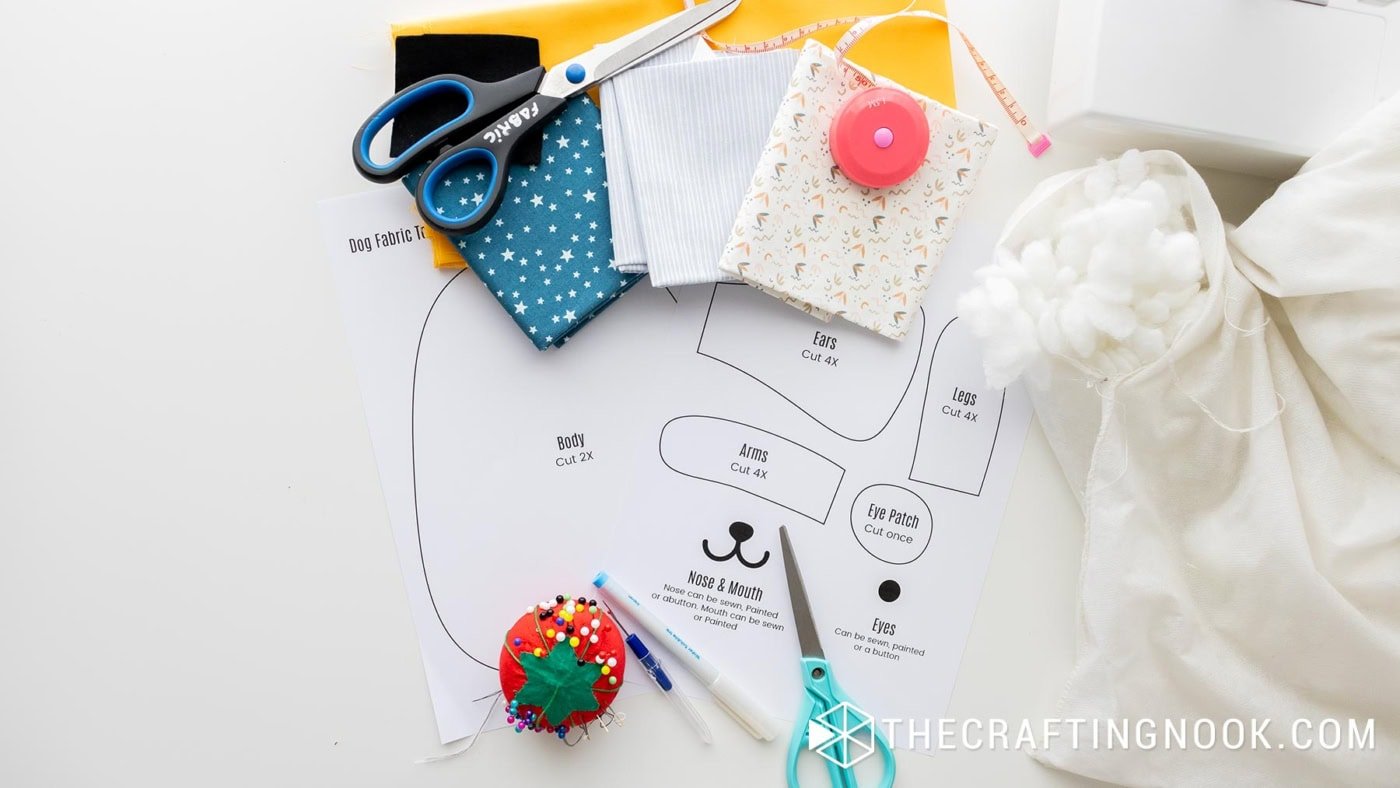
Supplies:
- Free Stuffed Dog Sewing Pattern
- 4 Coordinated fabrics (fat quarters are more than enough)
- Black felt (for the nose and eyes)
- White felt (for the eye patch)
- Stuffing (Polyfill)
- Measuring tape
- Fabric erasable marker or chalk
Tools:
- Seam ripper
- Needle and thread (I used only black and white)
- Pins
- Sewing machine
- Fabric sharp scissors and paper scissors
- Pinking shears *Optional
Instructions:
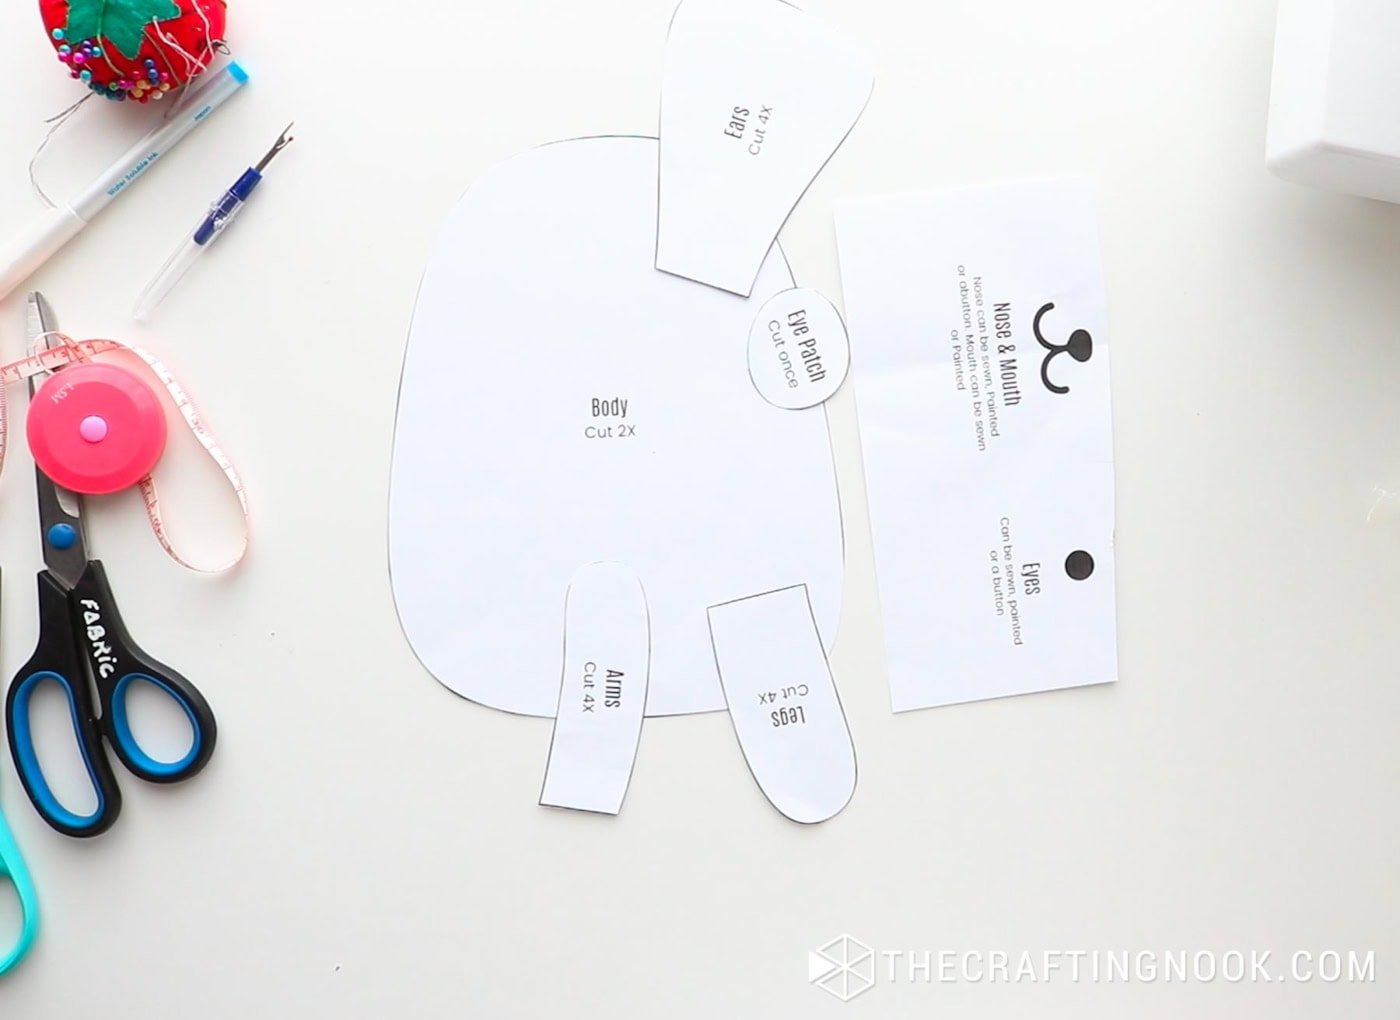
Step 1: Download and Prepare the Pattern
First, download the free sewing pattern and print it at 100% scale (do not scale to fit).
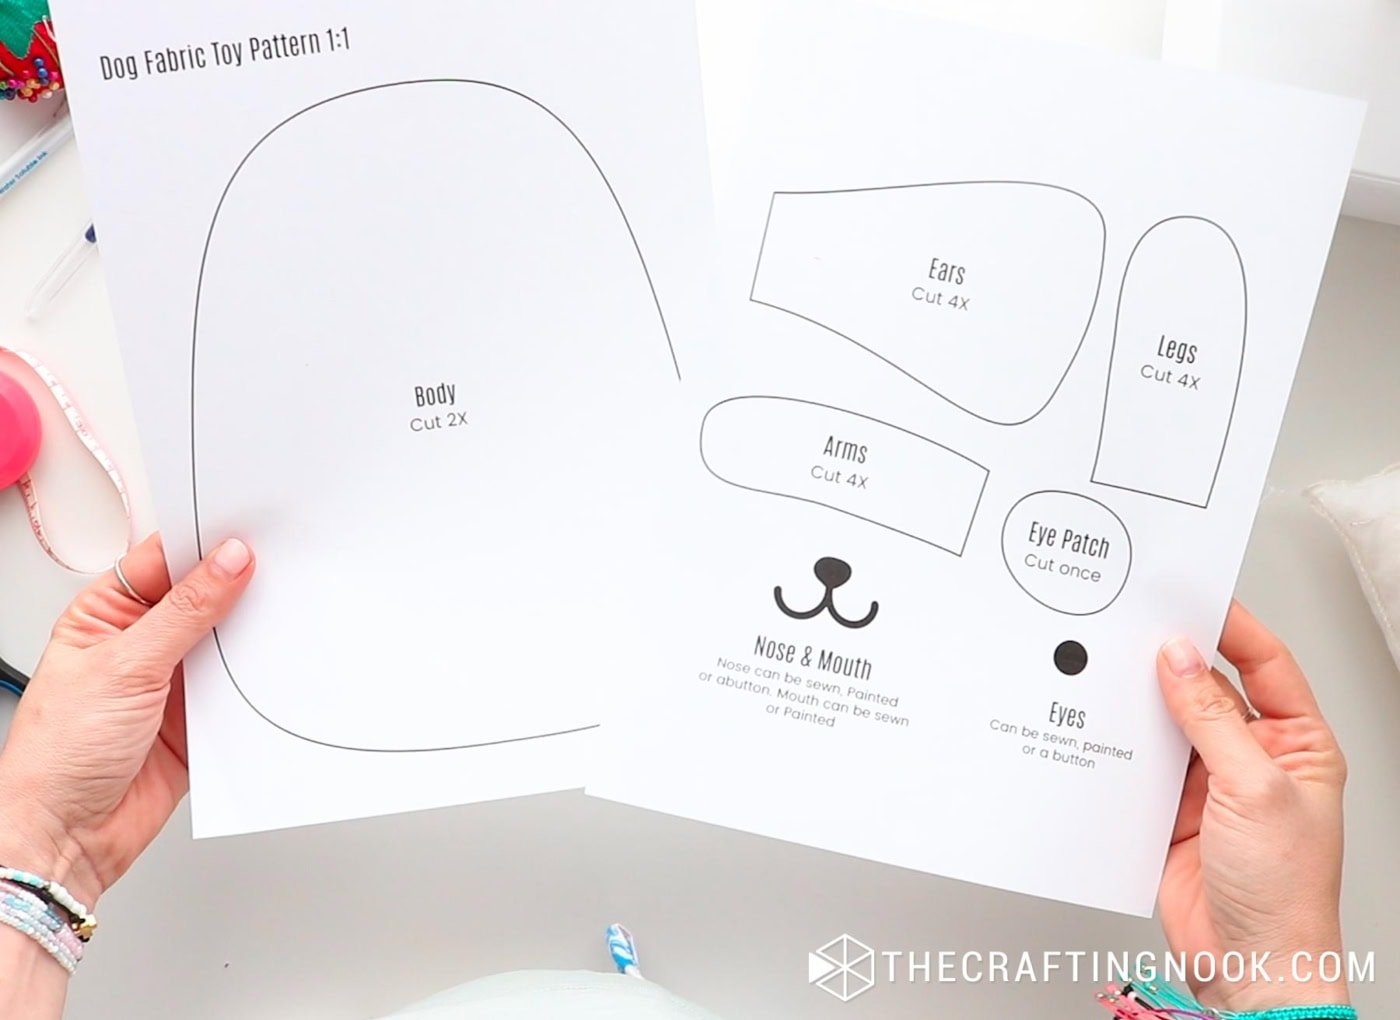
Cut out all paper pattern pieces using paper scissors.
Step 2: Cut the Fabric Pieces
Choose your fabrics. You’ll need 4 coordinating fabrics (or 2 for a simpler look).
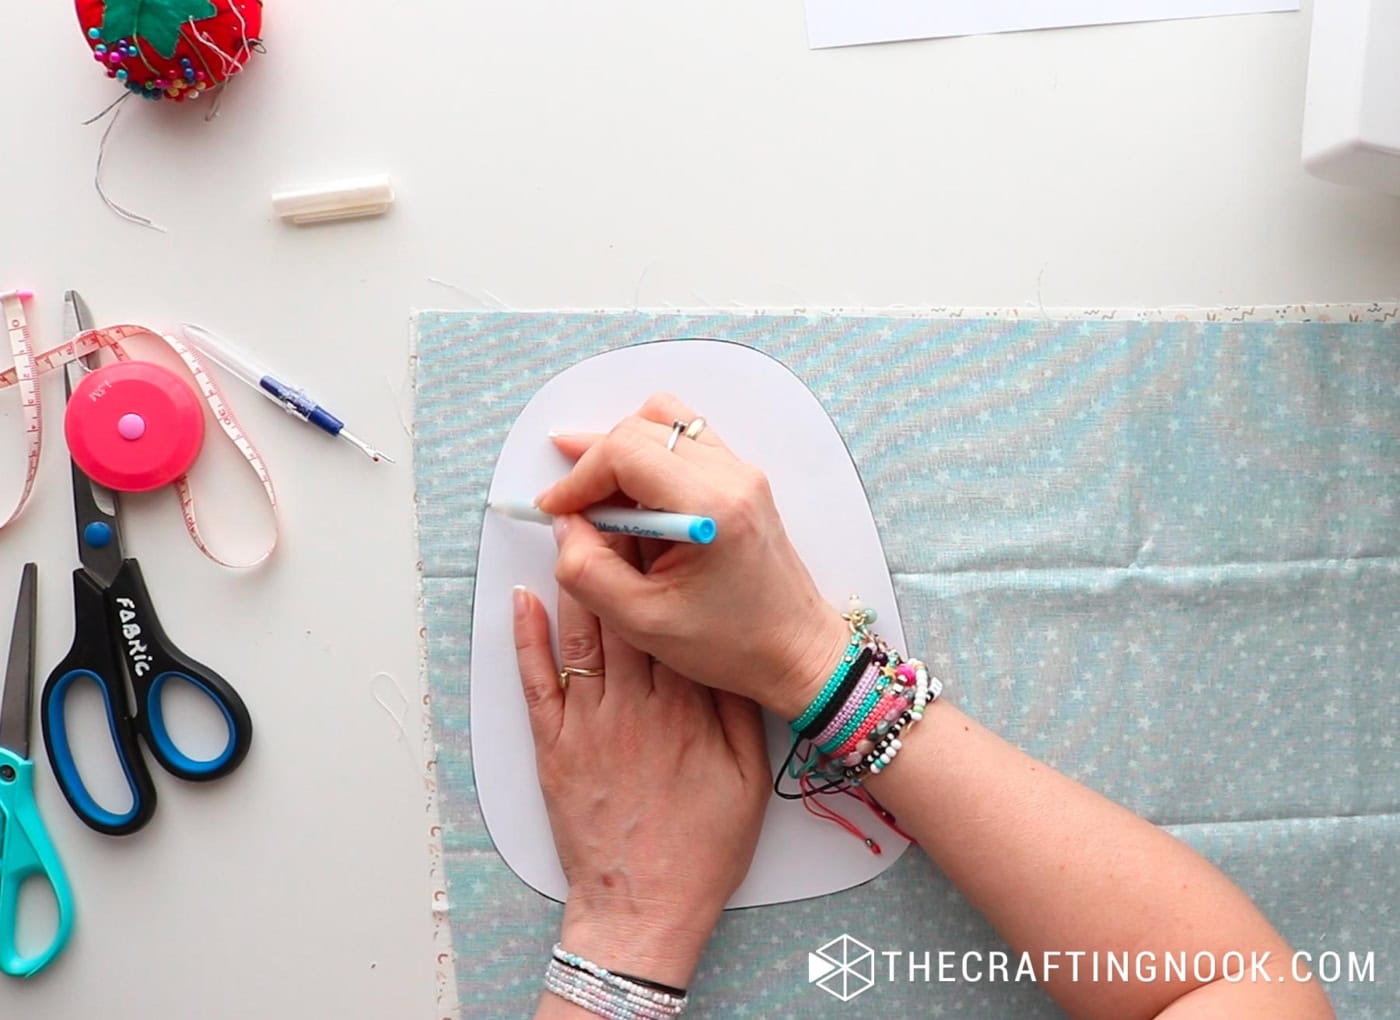
Trace the pattern pieces onto the fabric and cut using fabric scissors.
You should have:
- Body (front and back) – I used different fabrics for each.
- Arms, legs, and ears (front and back) –I used different fabrics for each.
- A heart for the tummy piece (or other embellishments if you like!) cut with pinking shears.
- White felt eye patch
- Don’t forget to cut 2 small felt circles for the eyes, a rounded triangle for the nose, and the tail from the black felt.
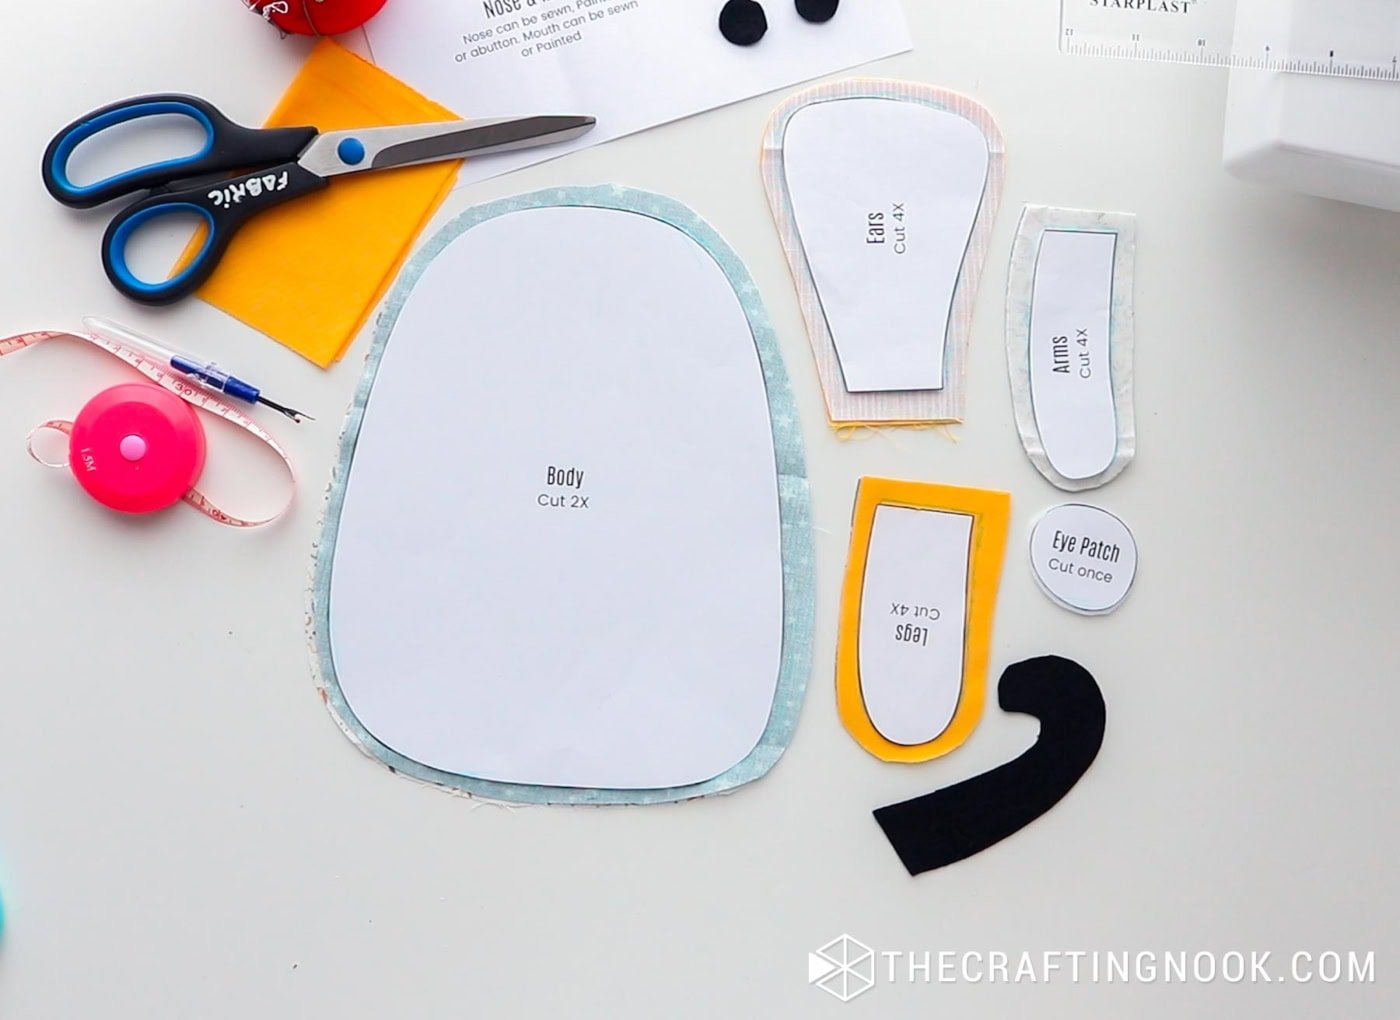
Before sewing, lay out all pieces to make sure all the pieces go together and nothing is missing.
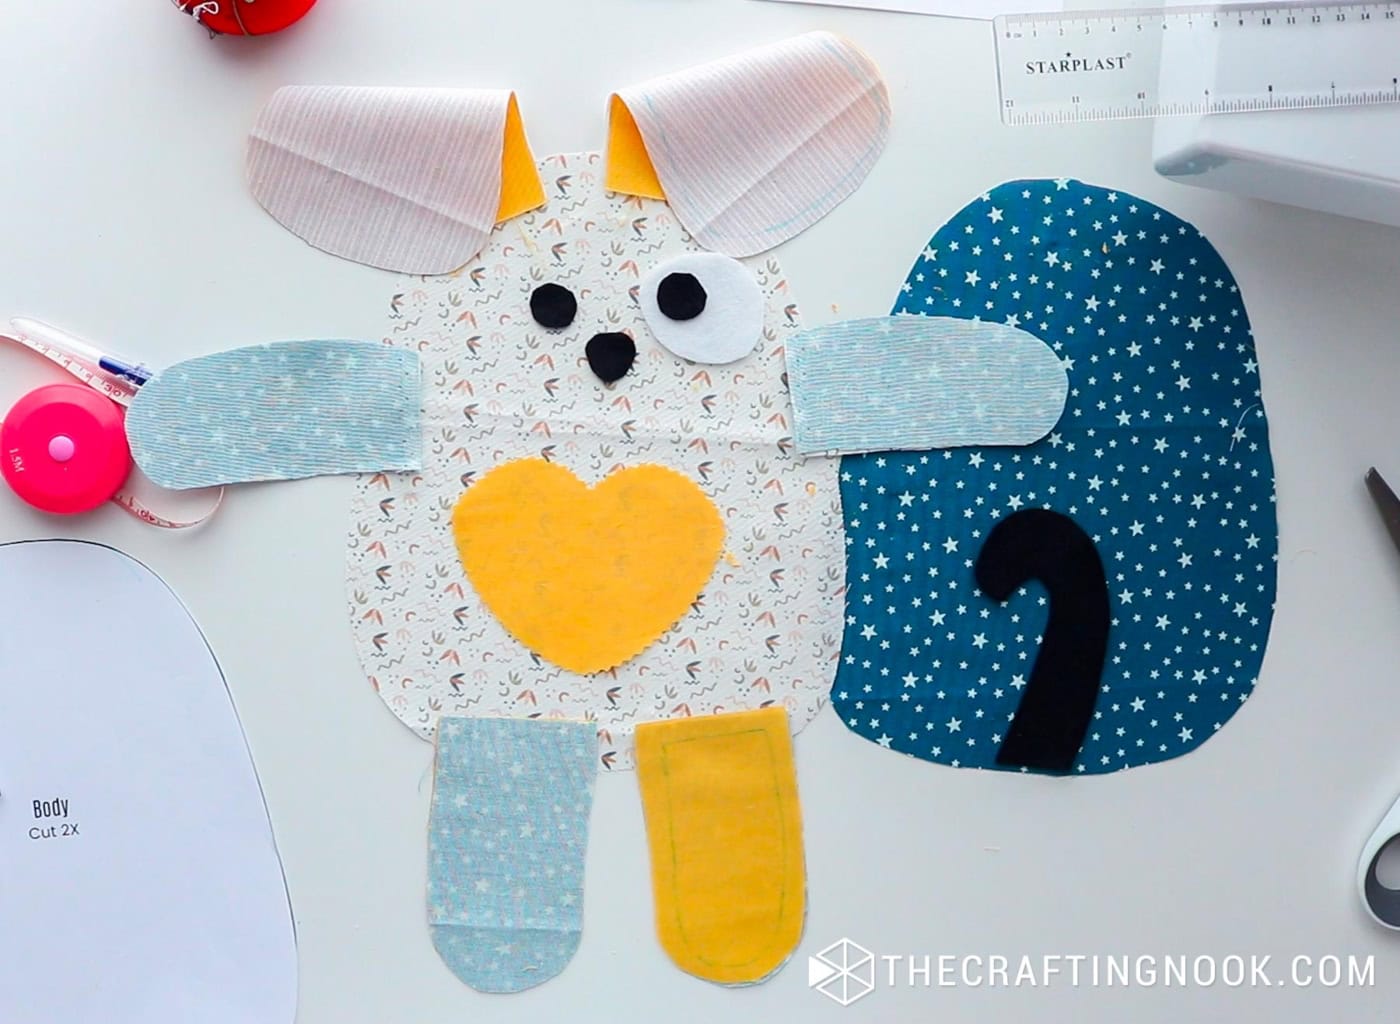
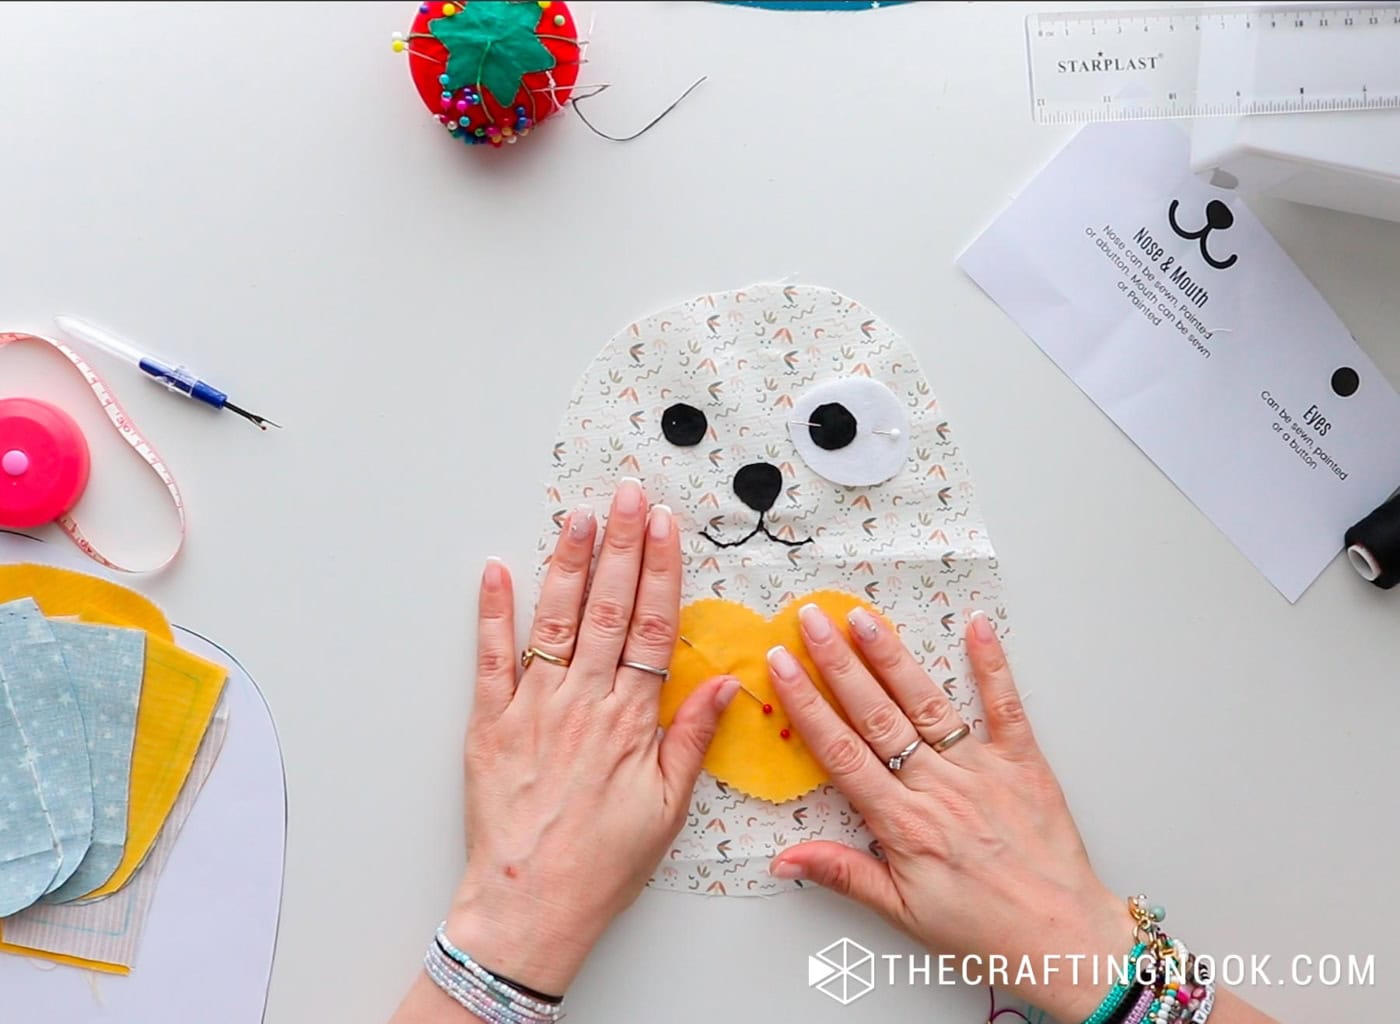
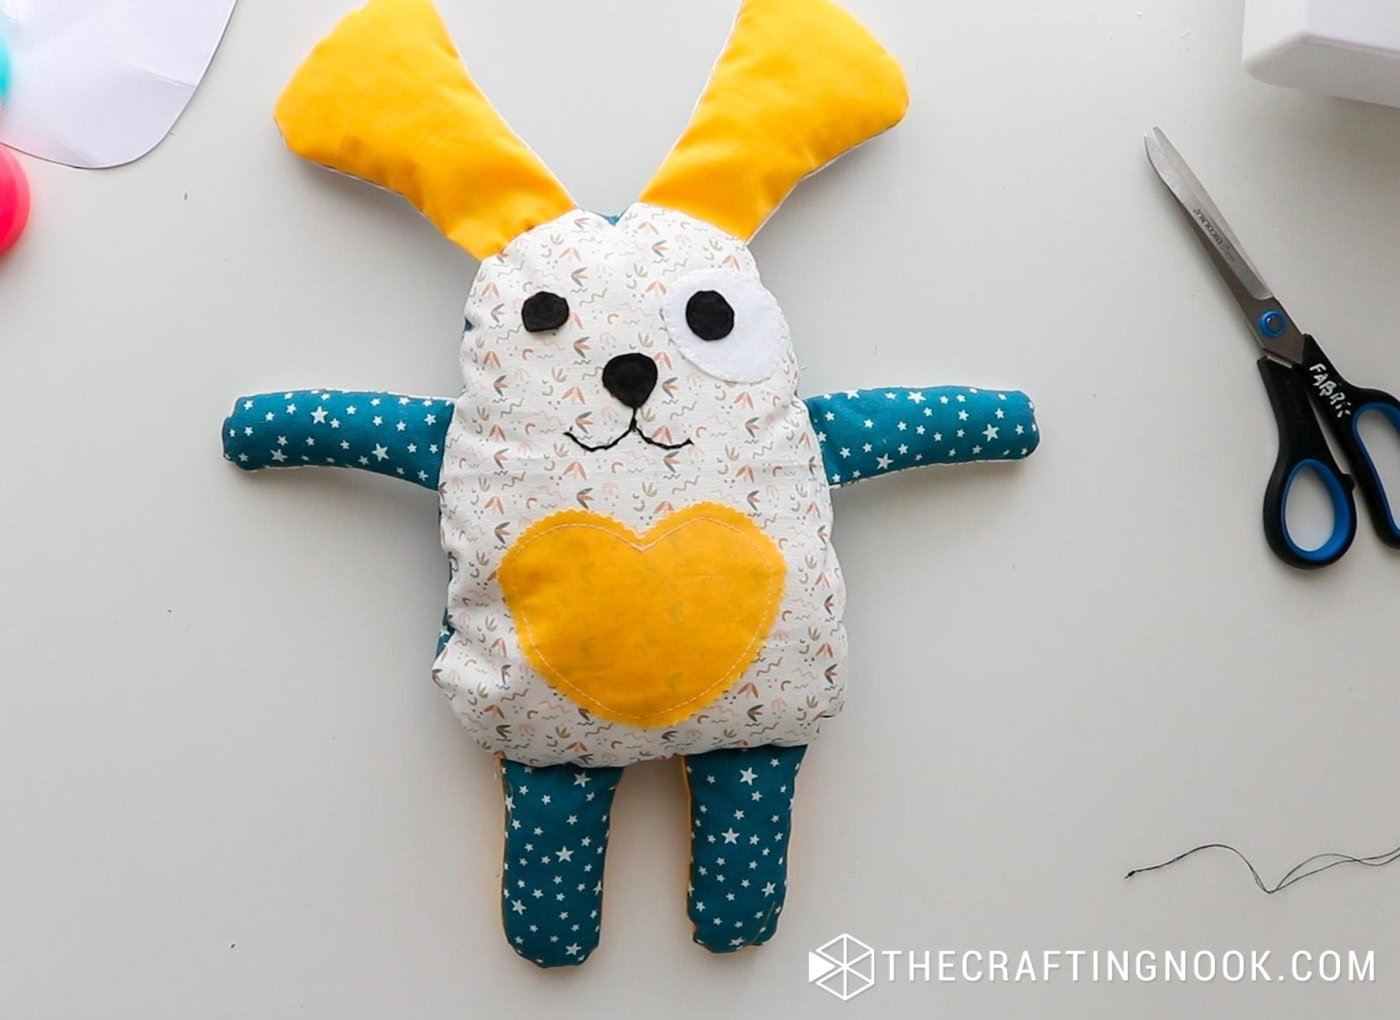
Step 3: Add Facial Features, Tummy, and Tail
Start by working on the front body piece.
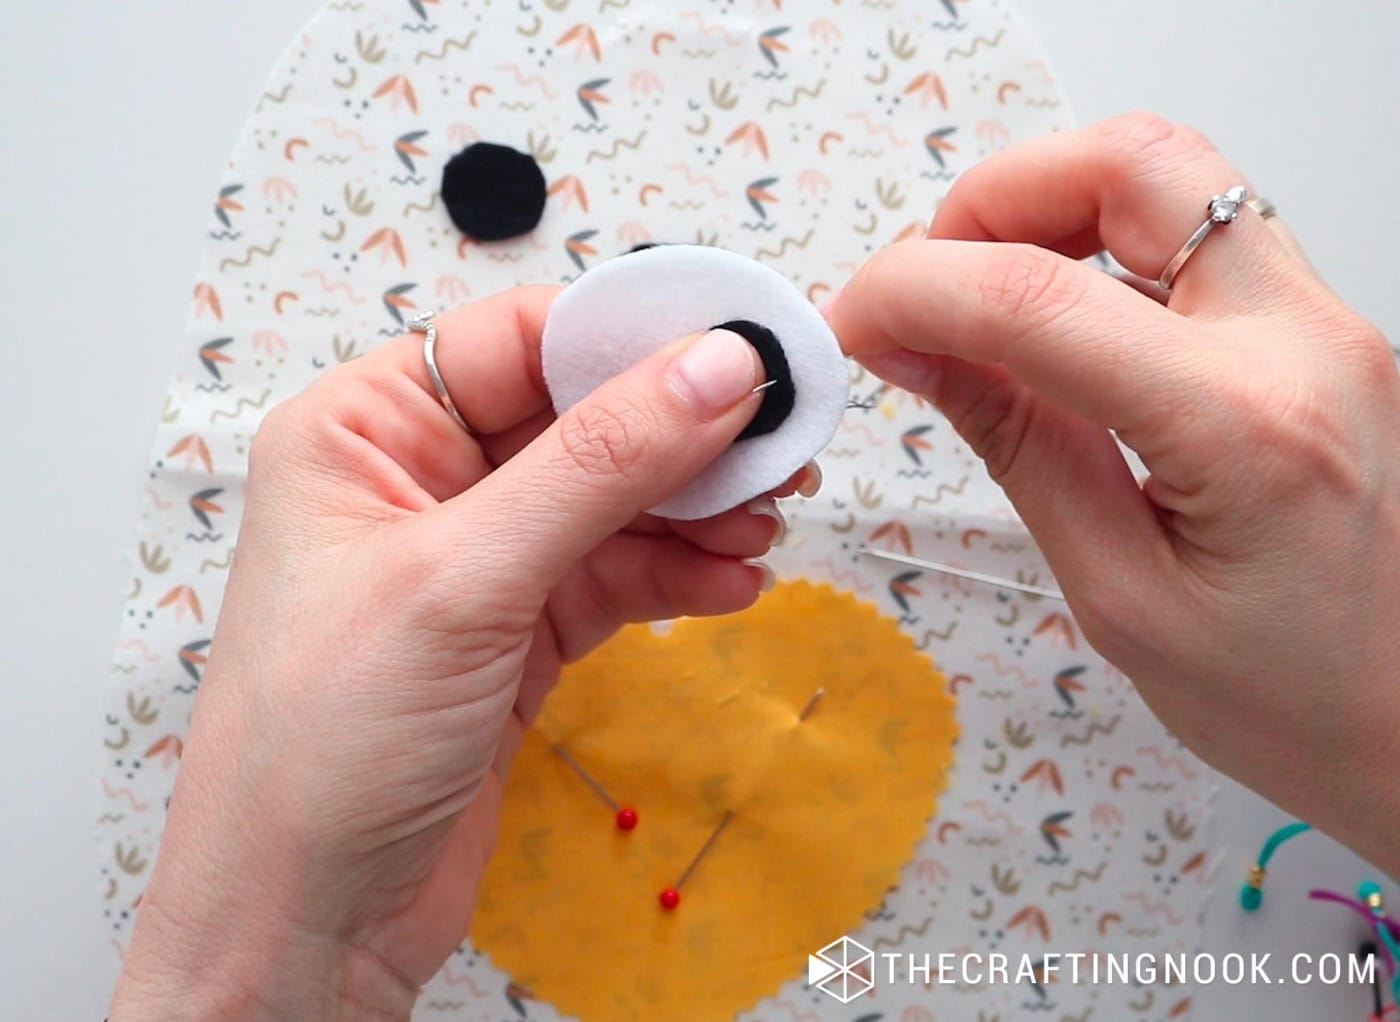
Place all facial elements first to check positioning.
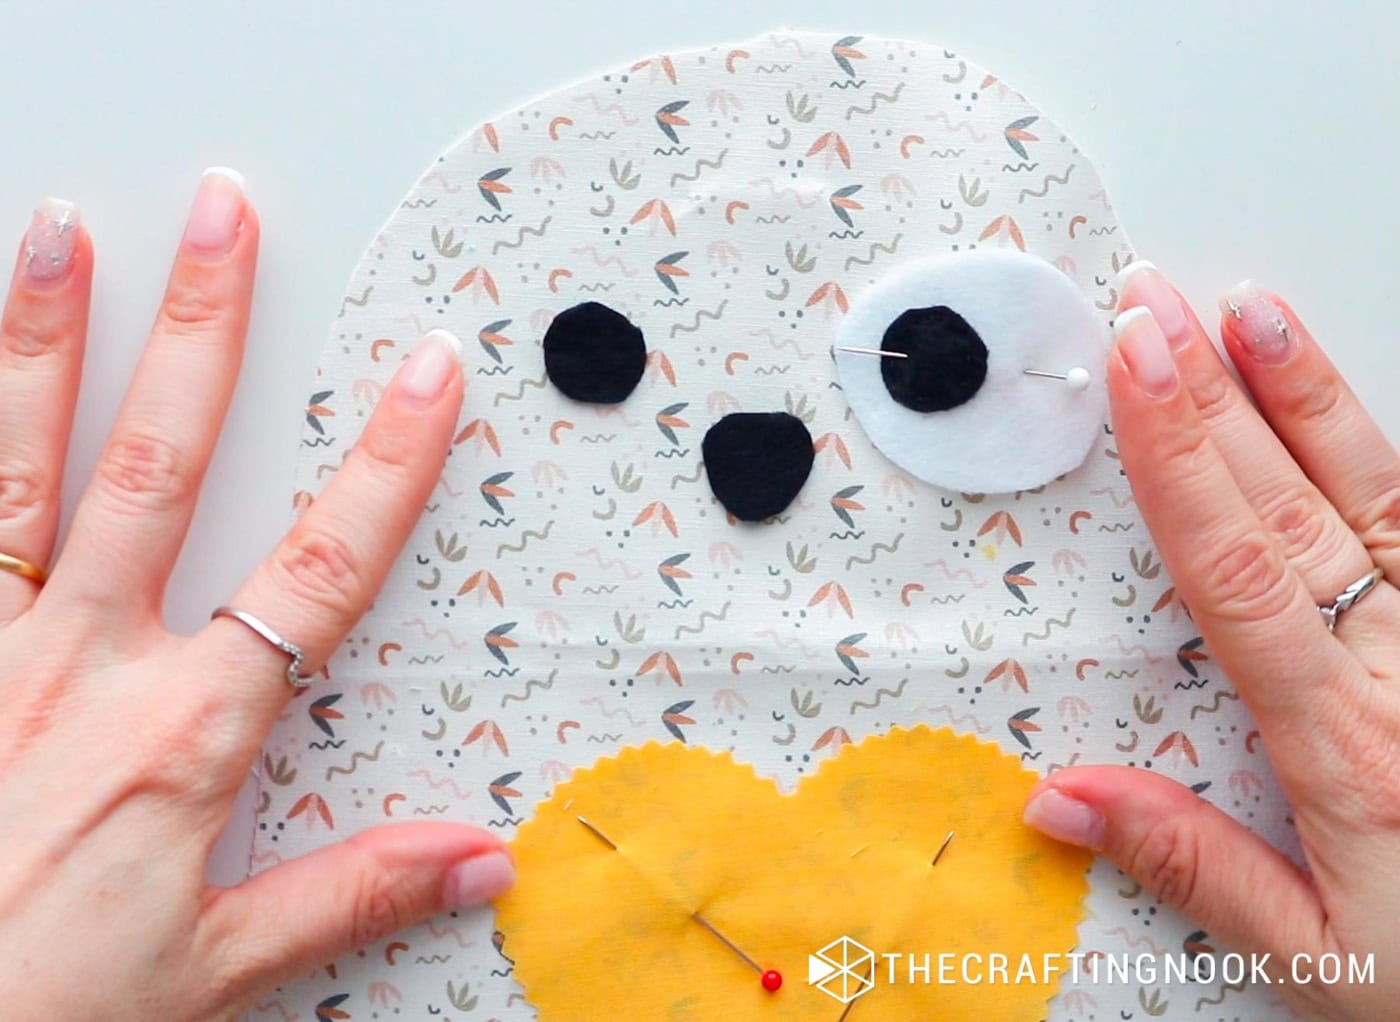
- Stitch the black felt eye onto the white eye patch
- Sew the eye patch onto the body piece
- Sew the felt eyes and nose in place using black thread

Add the mouth using an embroidery chain stitch
- Thread your needle and knot the end.
- Bring the needle up from the back of the fabric to the front at your starting point.
- Insert the needle back into the same hole and bring it out a short distance along the mouth line, leaving a small loop on the surface.
- Pass the needle through the loop before pulling it tight to form your first chain link.
- Repeat this process along the mouth line, creating a series of connected loops.
- Finish by securing the last stitch with a small knot on the back of the fabric.
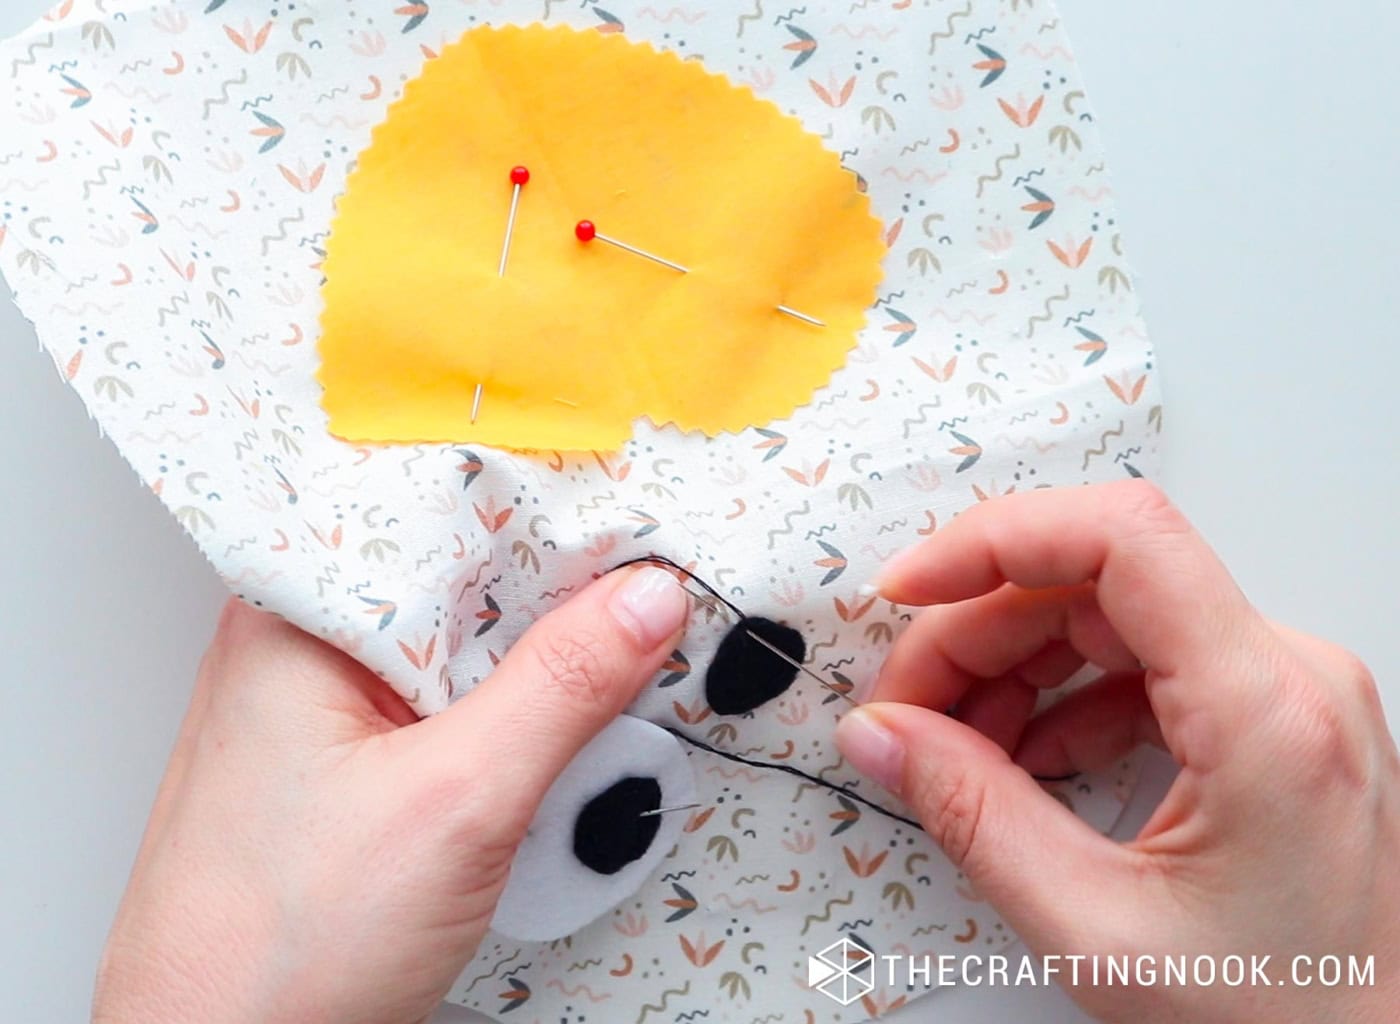
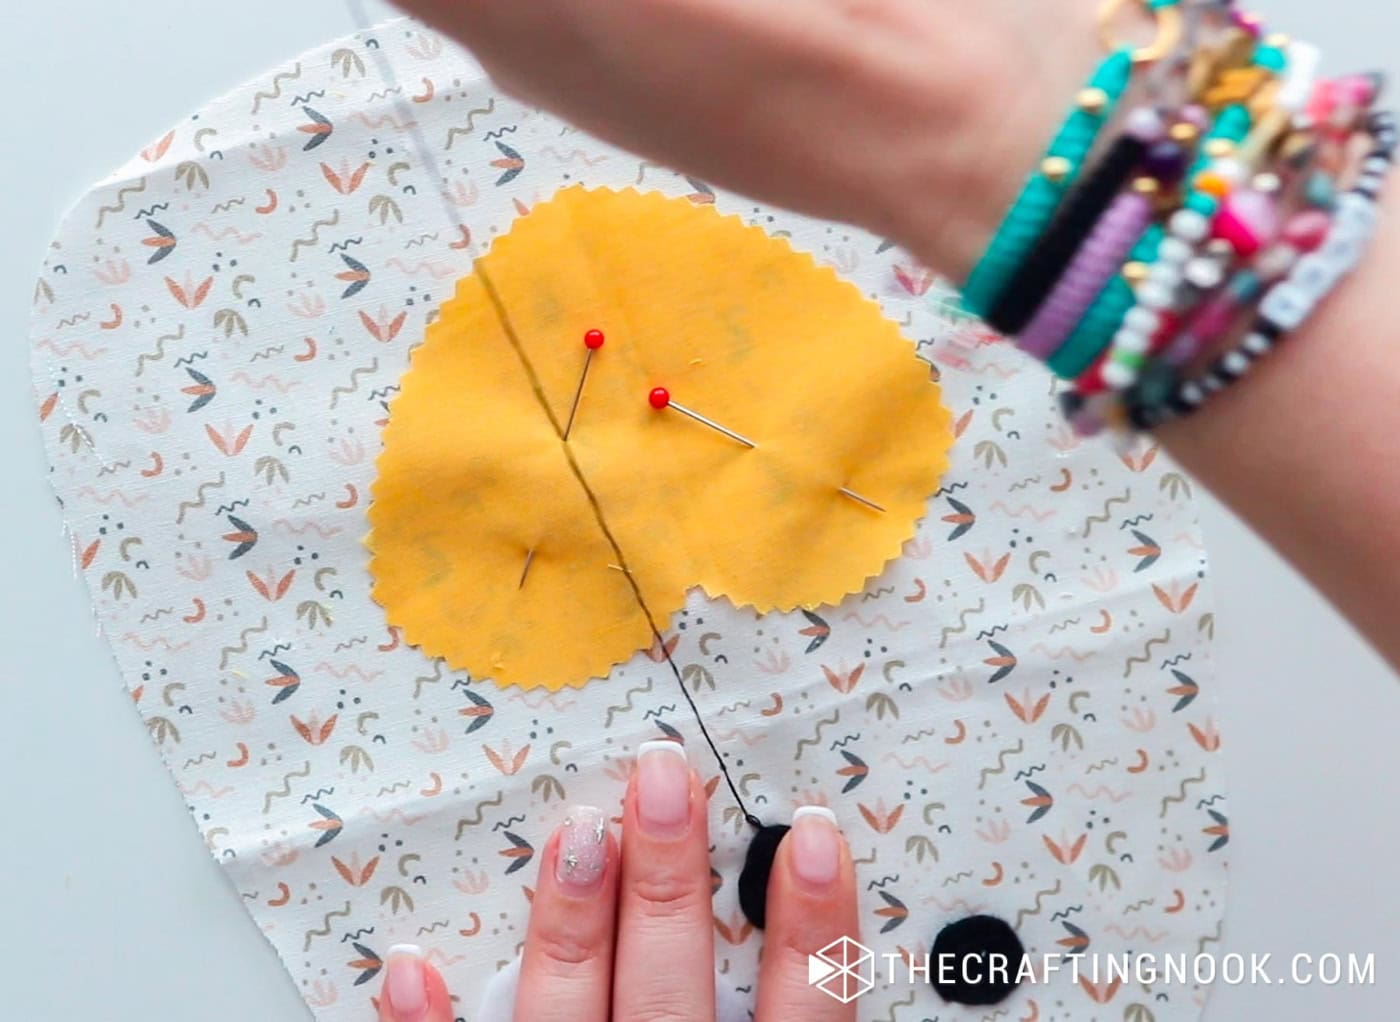
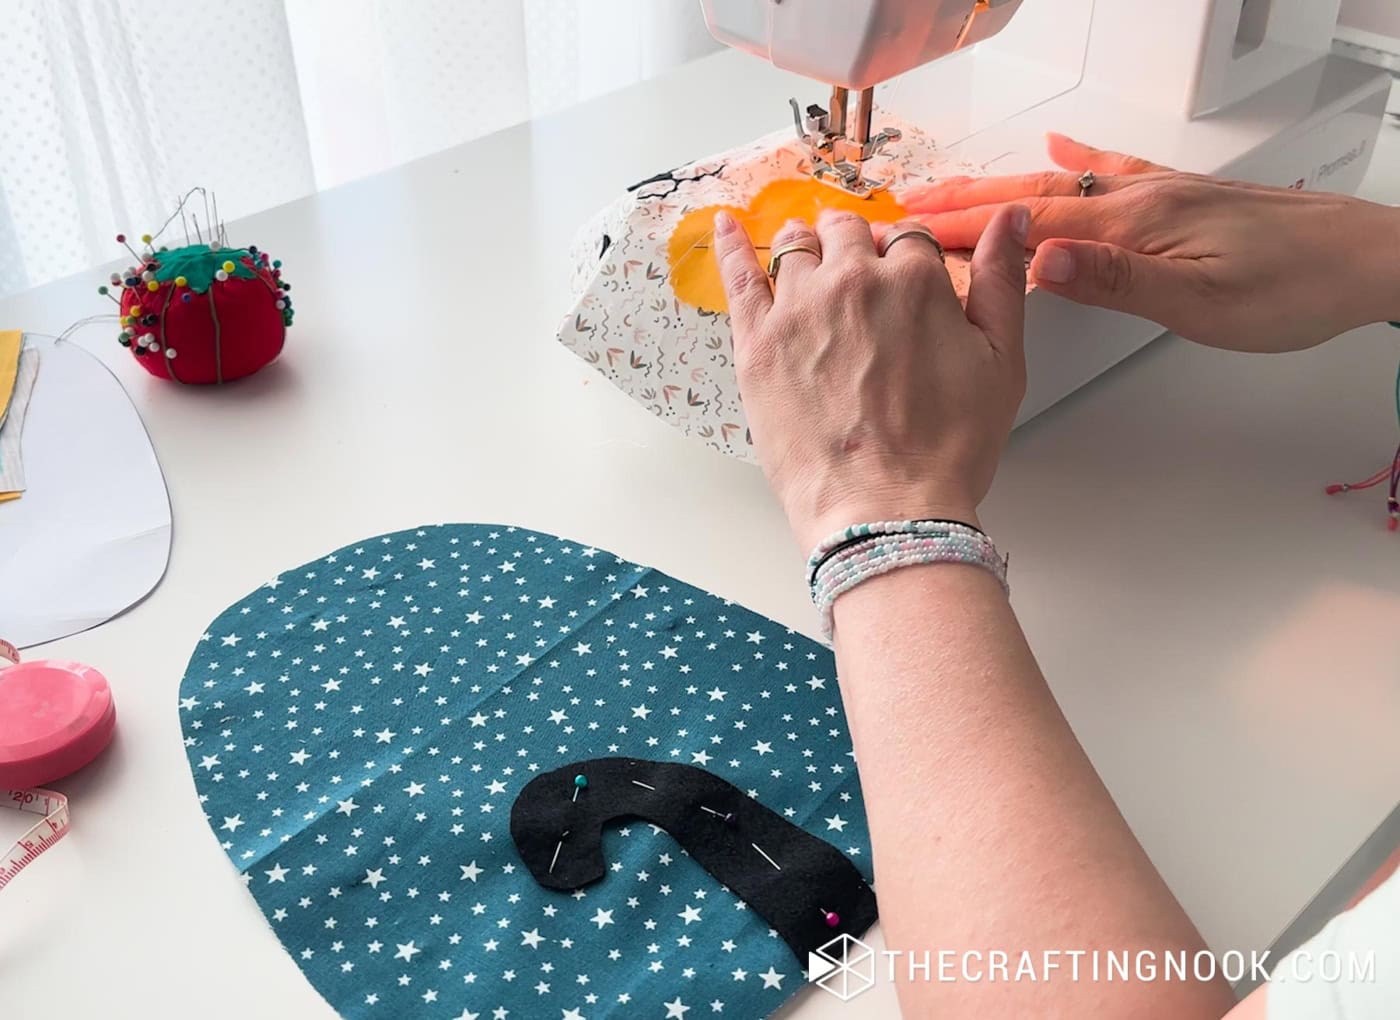
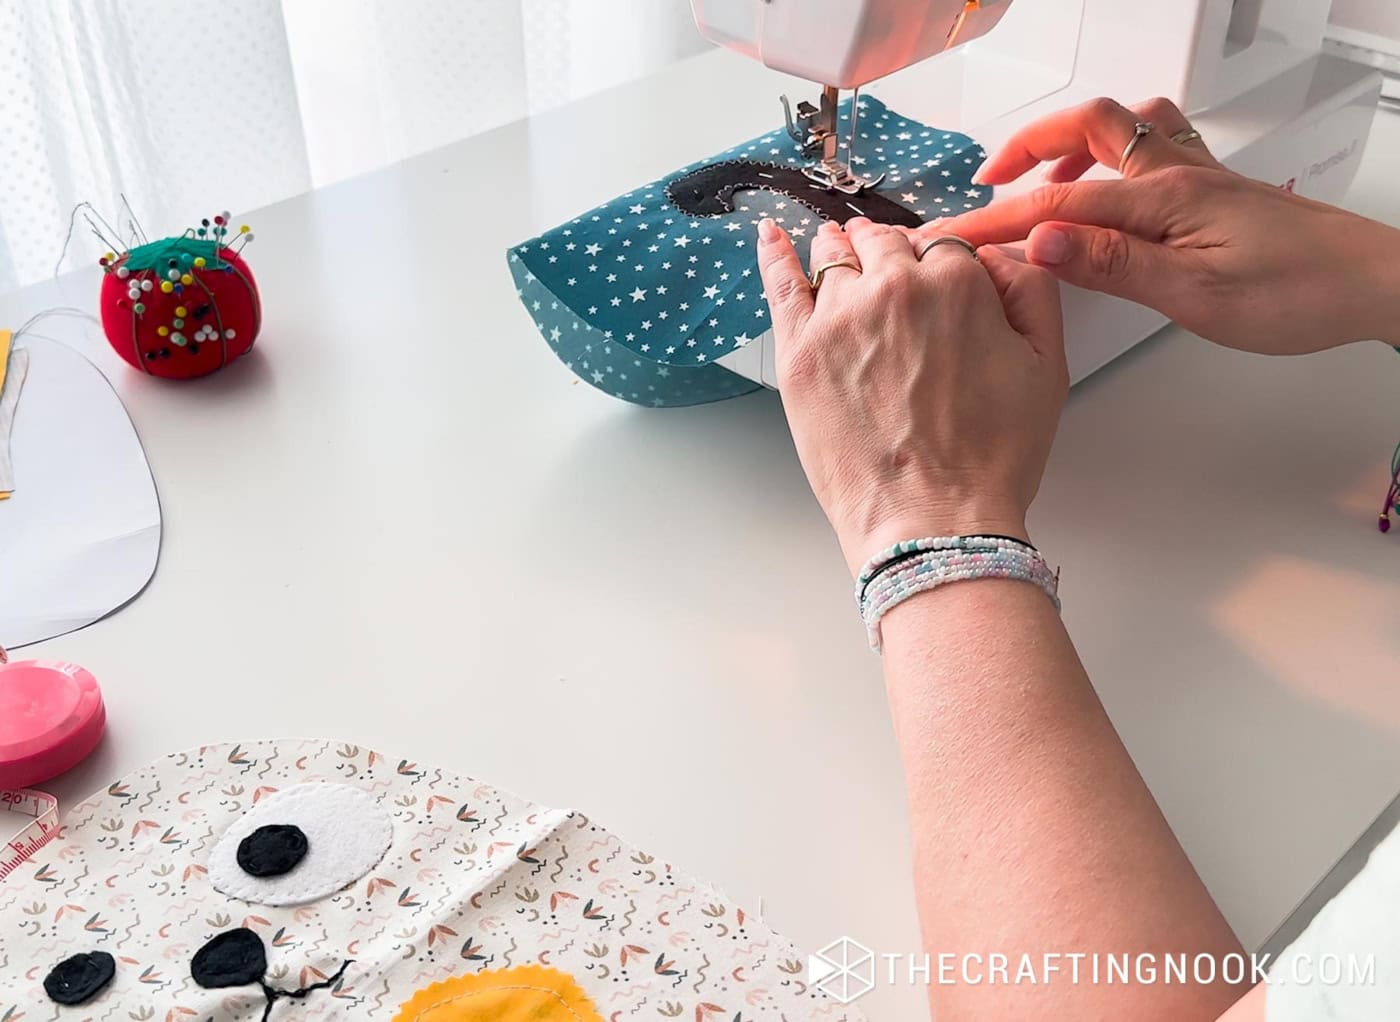
Attach the heart to the tummy area and sew the tail onto the back body piece using a zig-zag or straight stitch.
(All facial details can be sewn by machine or by hand.)
Do the same for the tail on the back of the body fabric. I used zig-zag with white thread for this but you can do straight stitch with your sewing machine or by hand.
Step 4: Sew the Arms, Legs, and Ears
Place each pair of pieces right sides together.
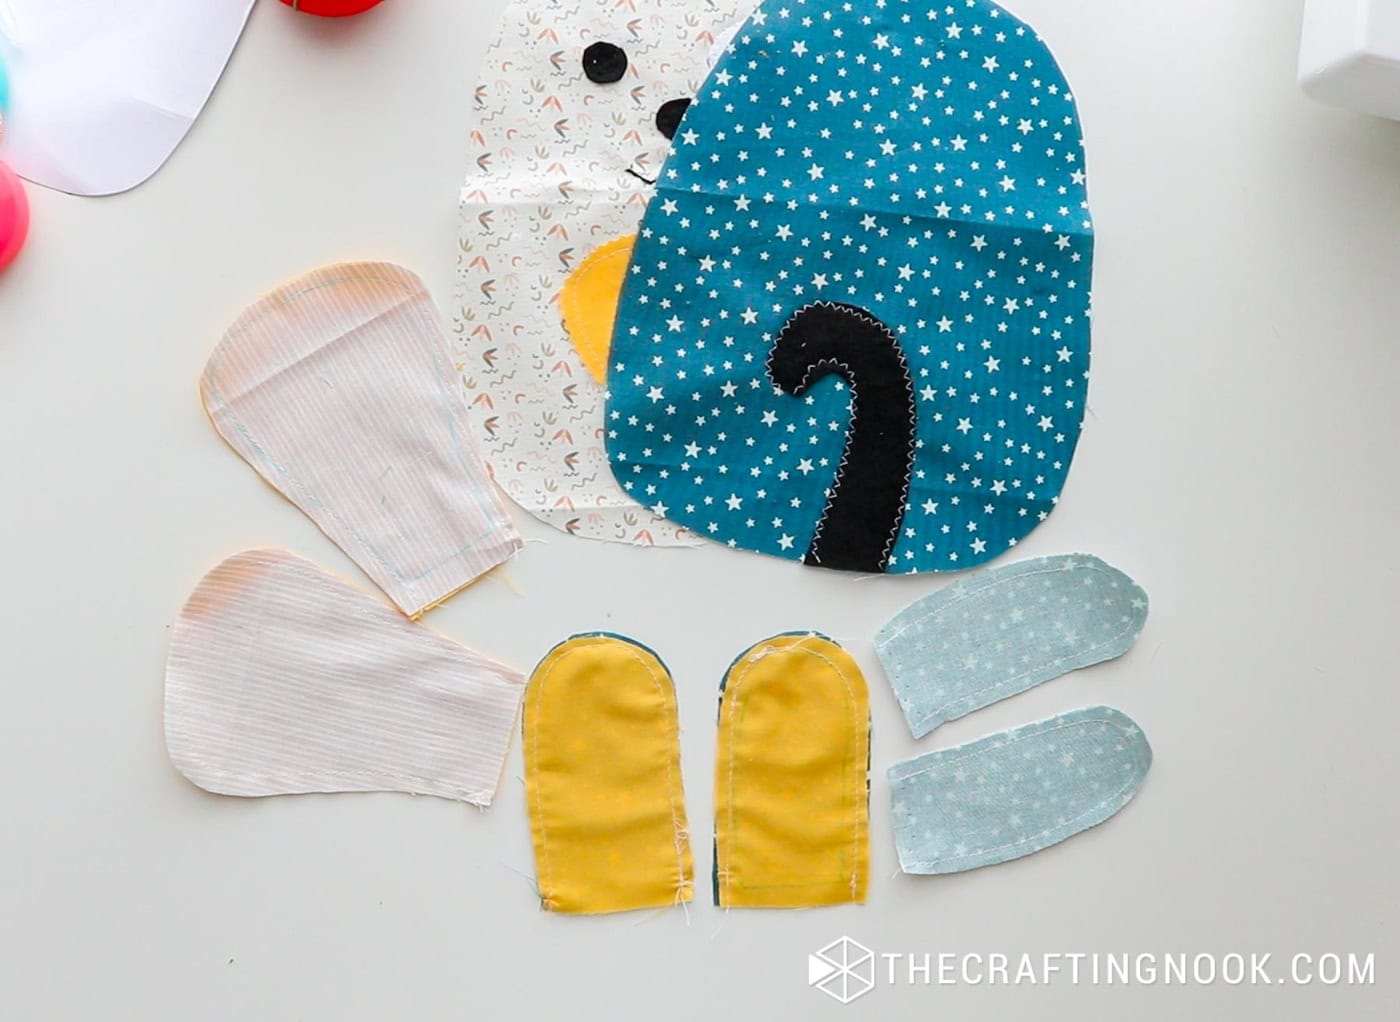
Sew around the edges, leaving the top open, using a ⅓-inch seam allowance.
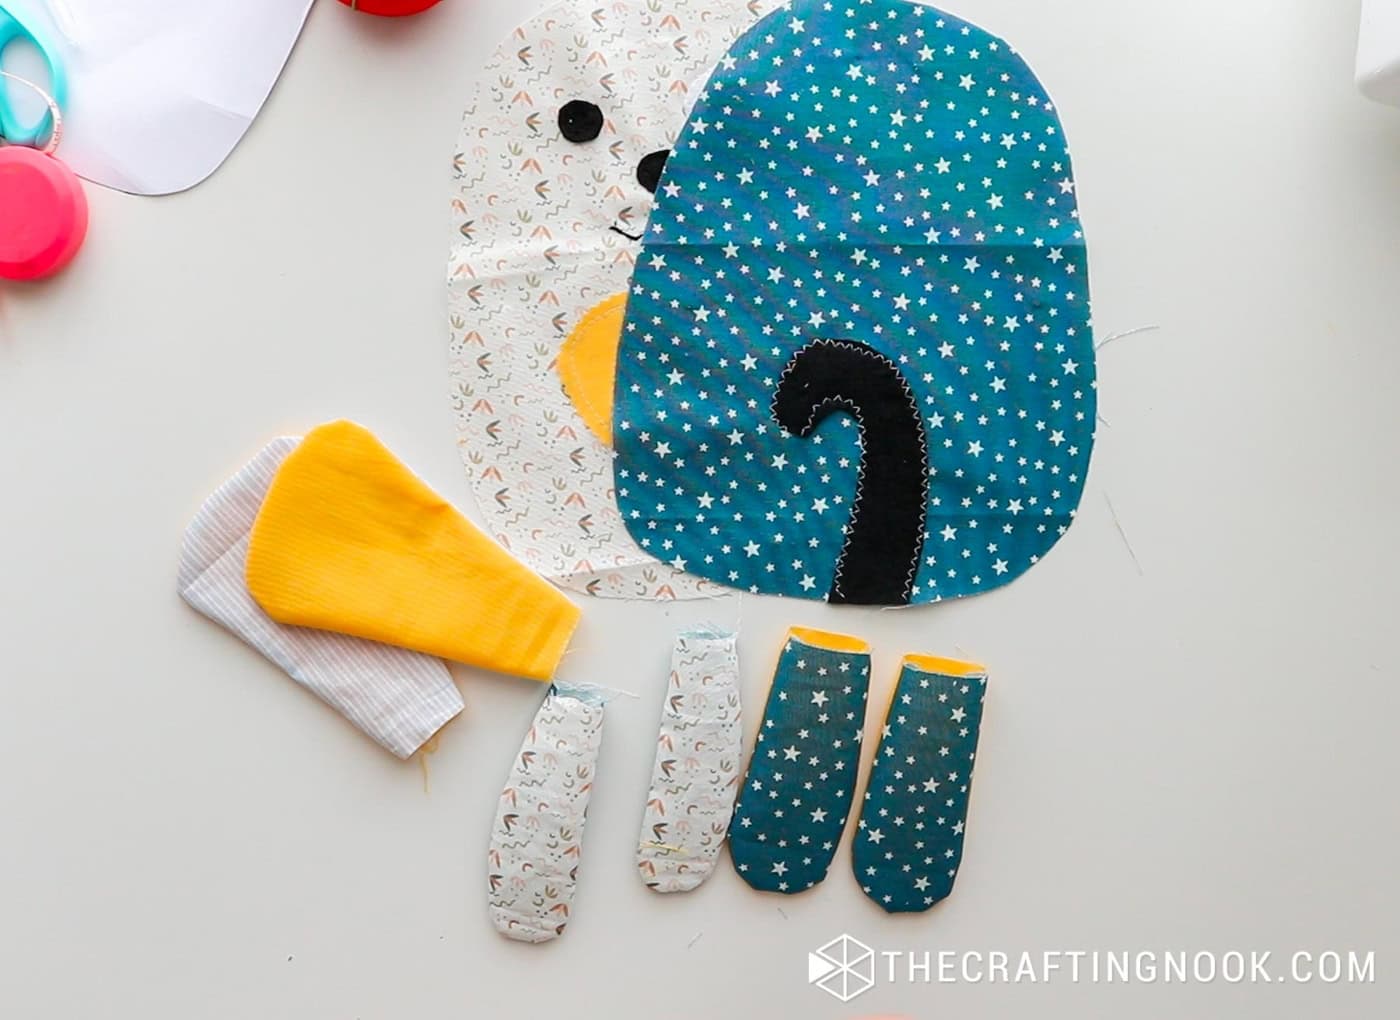
Turn each piece right side out using your fingers, a pencil, or a turning tool.
Step 5: Stuff the Arms, Legs, and Ears
Lightly stuff each piece with polyfill.

- Arms and legs: stuff more firmly
- Ears: stuff lightly so they stay floppy
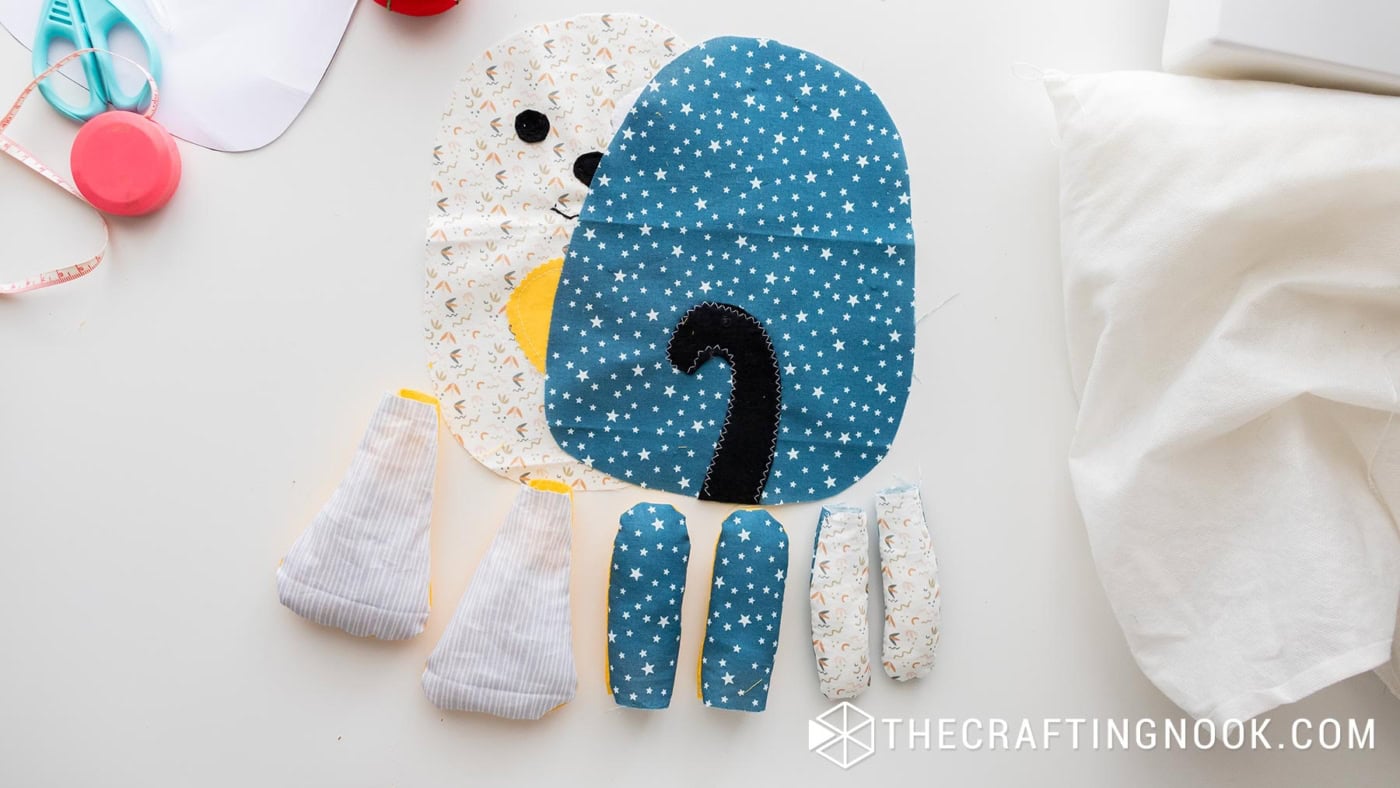
Set pieces aside.
Step 6: Assemble and Sew the Body
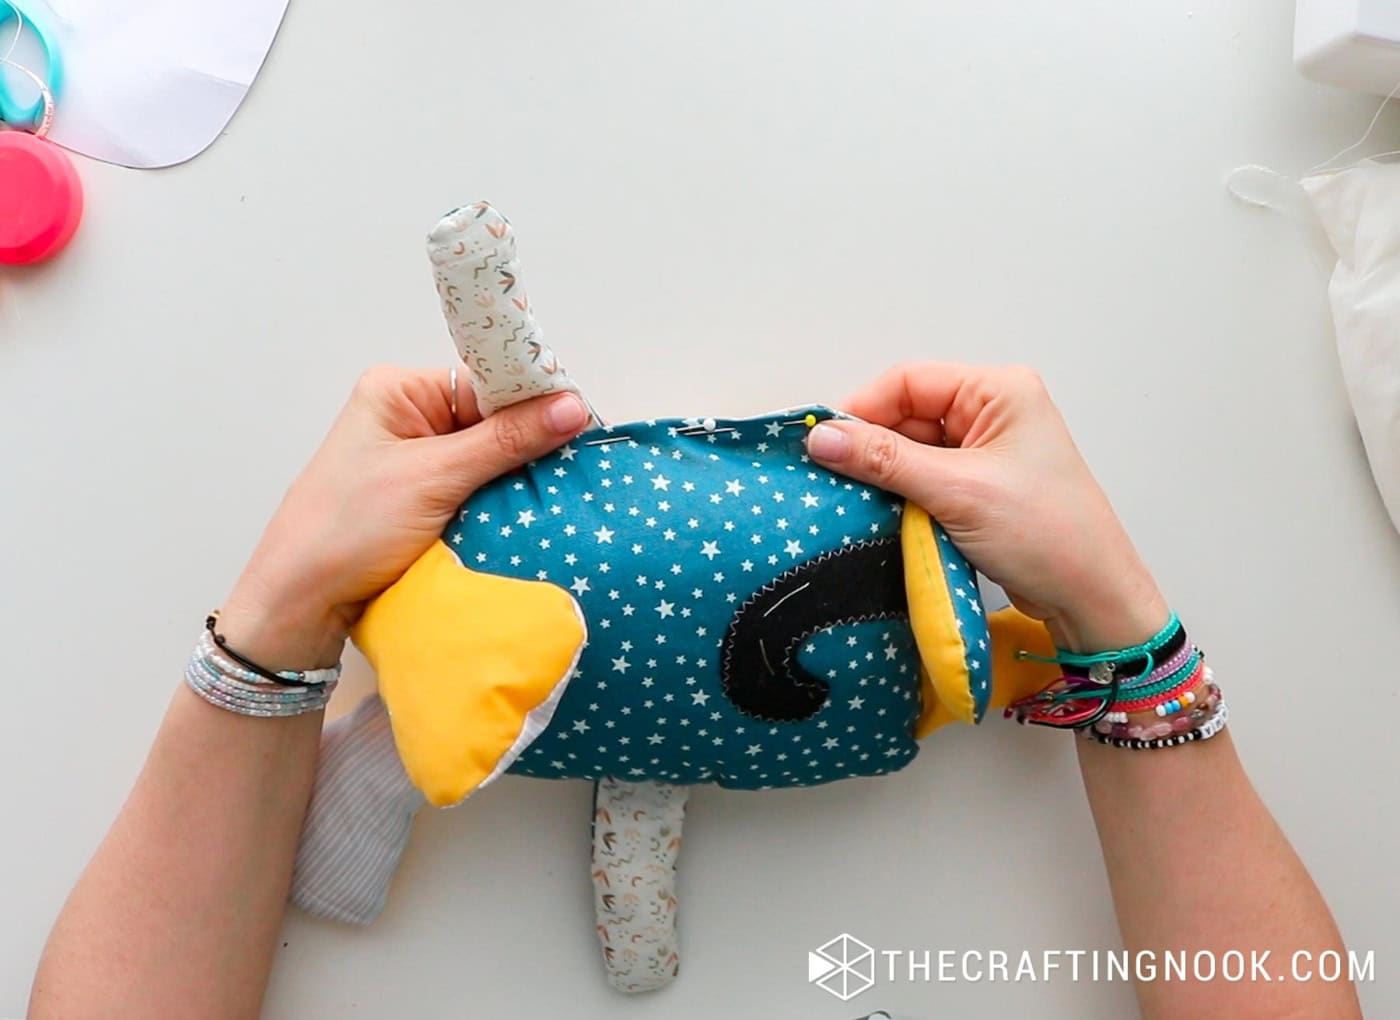
Place the front and back body pieces right sides together.
Position the arms, legs, and ears between the body layers, aligning raw edges.
Pin each piece in place, keeping them slightly away from the stitching line.
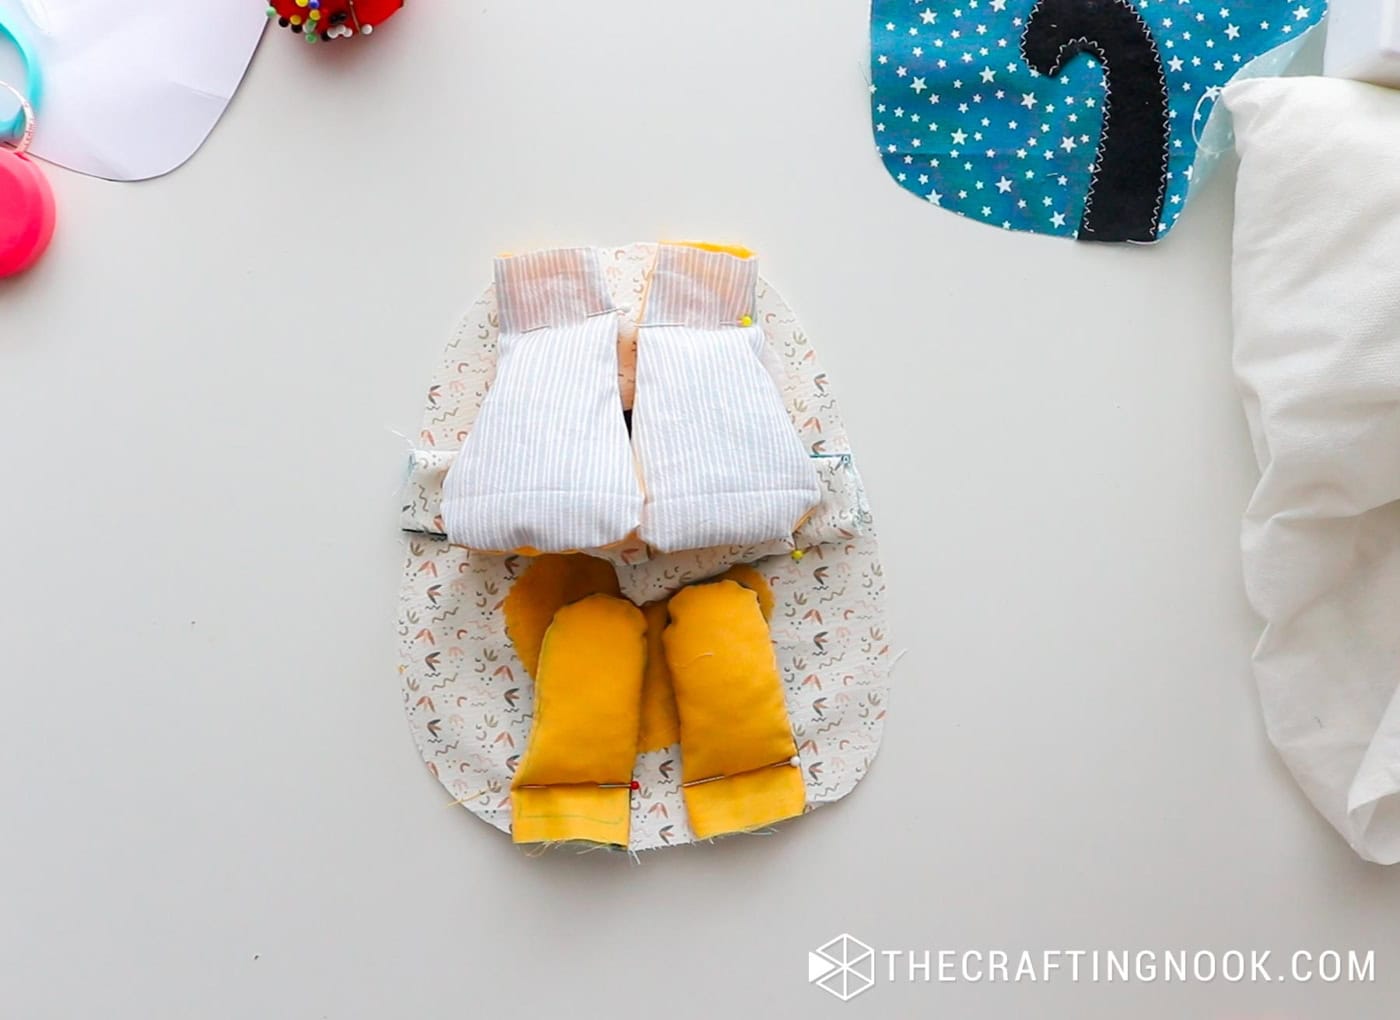
Pin the body pieces together and sew around the edges, leaving a small opening on one side for turning and stuffing.
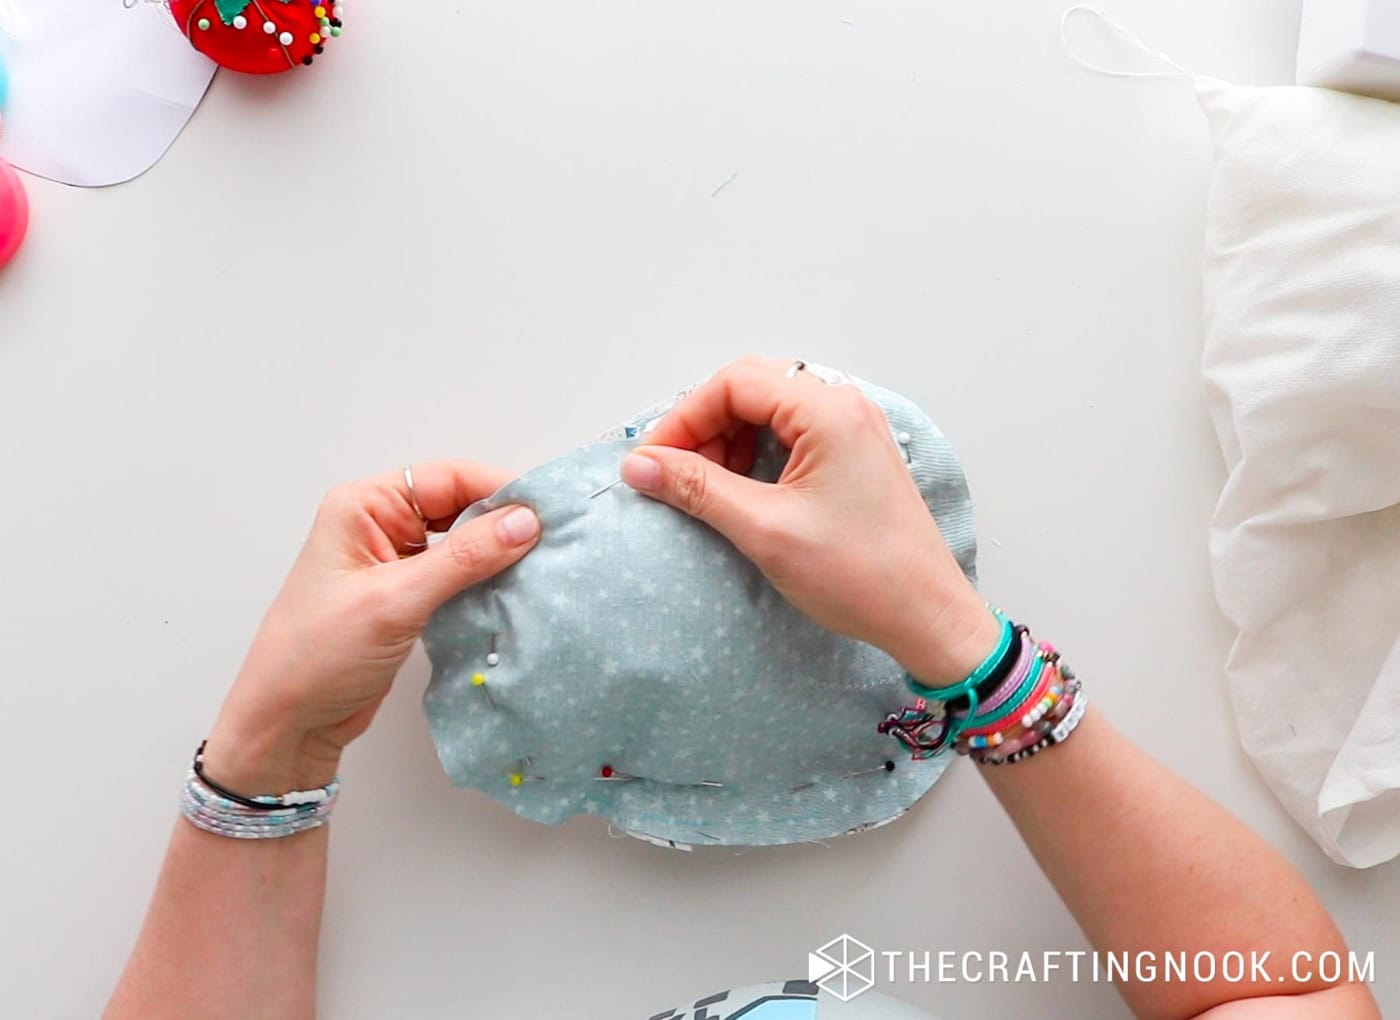
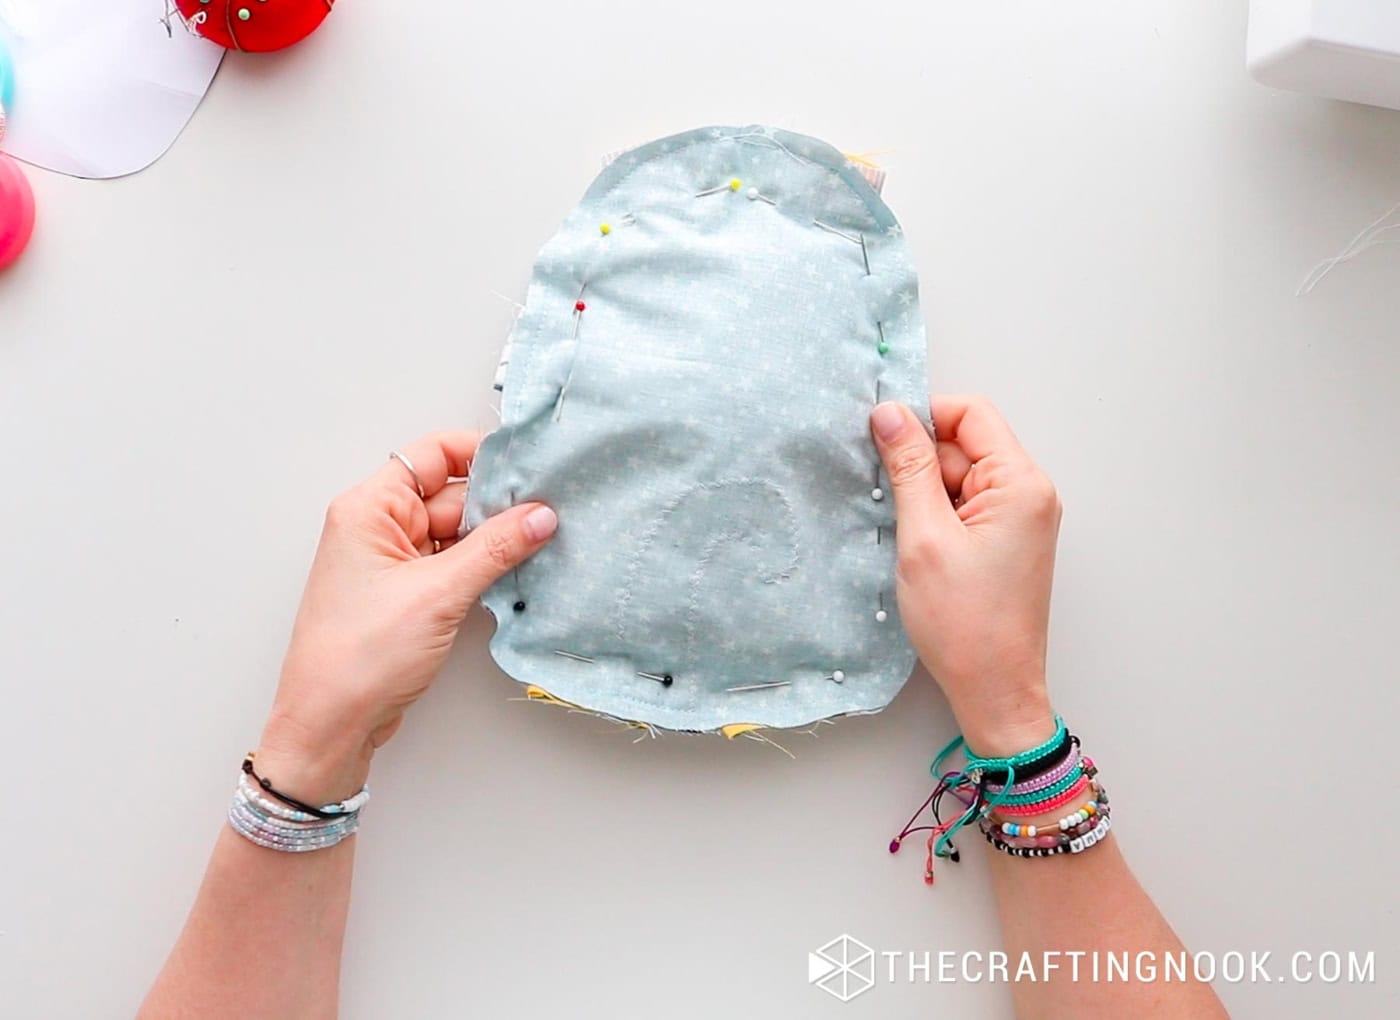
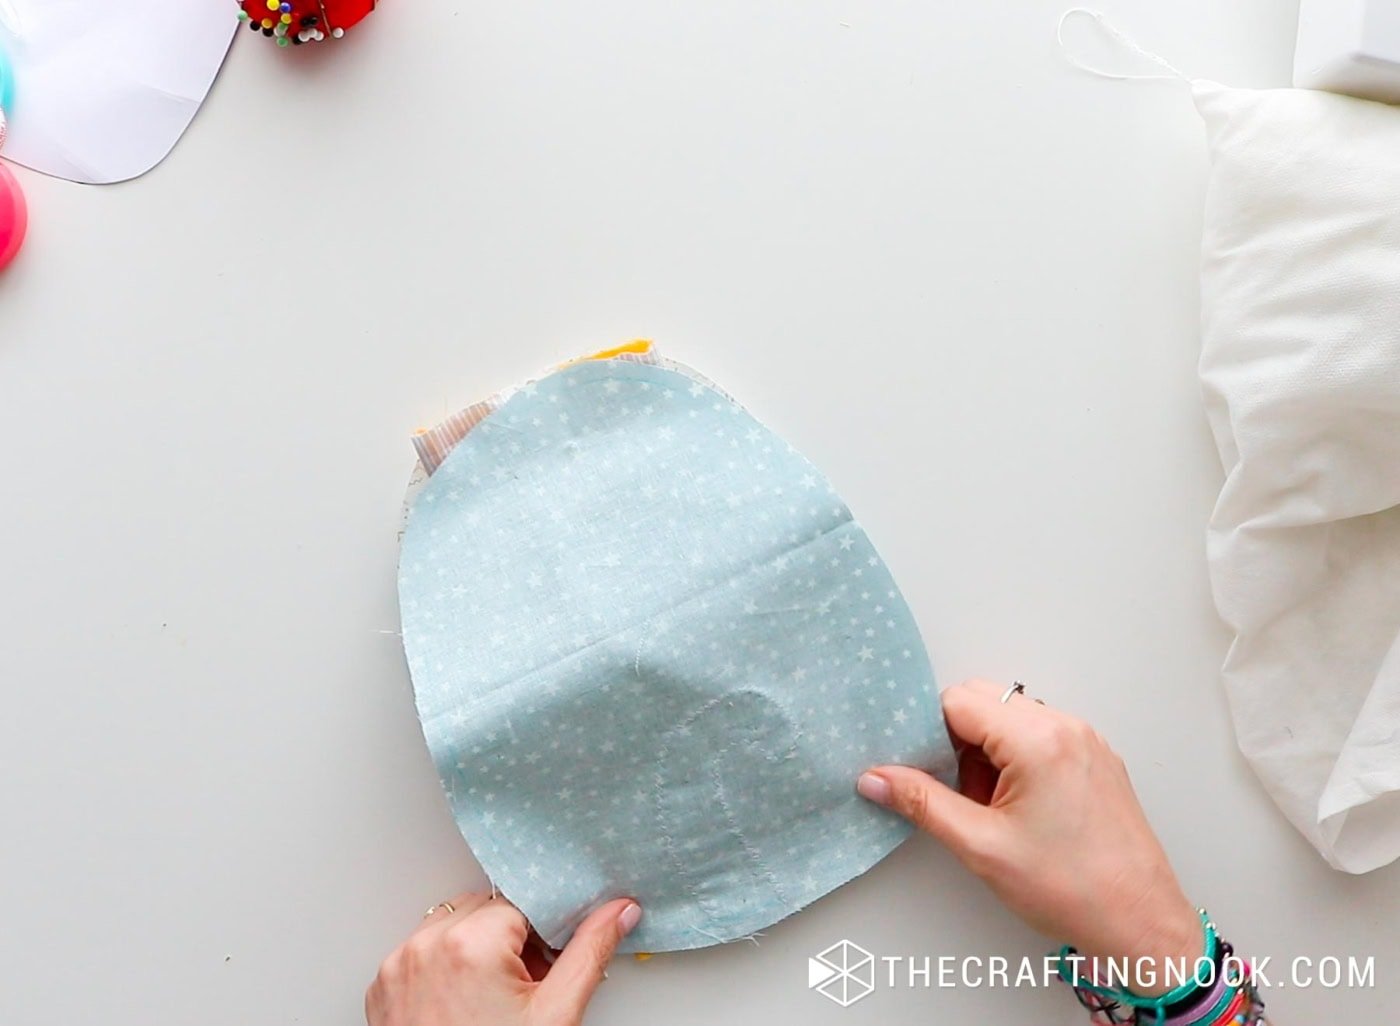
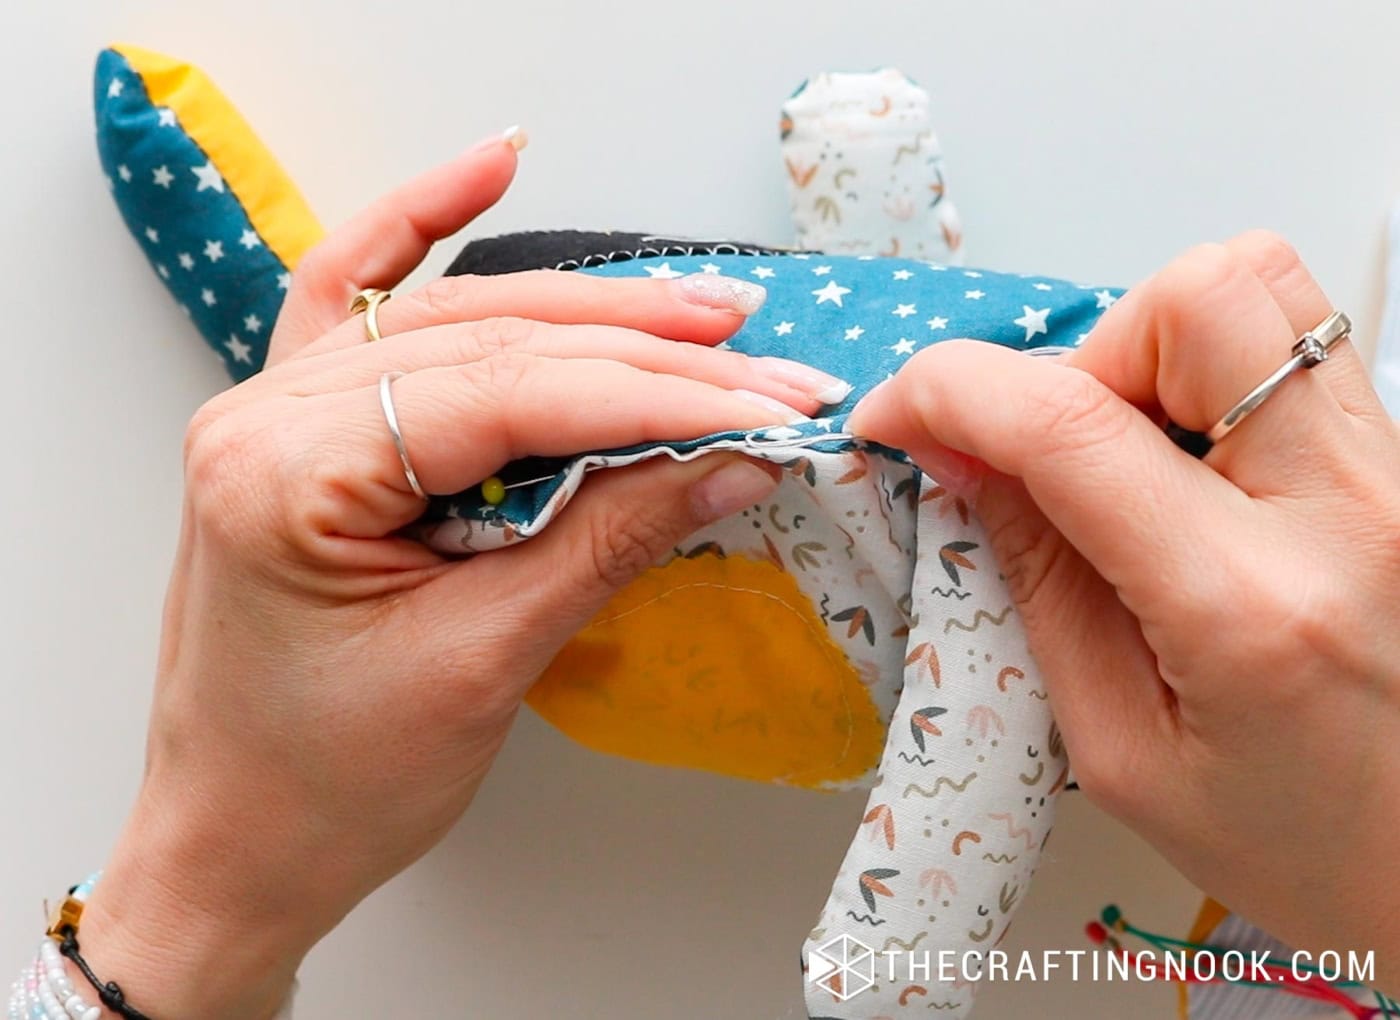
Step 7: Turn and Stuff the Body
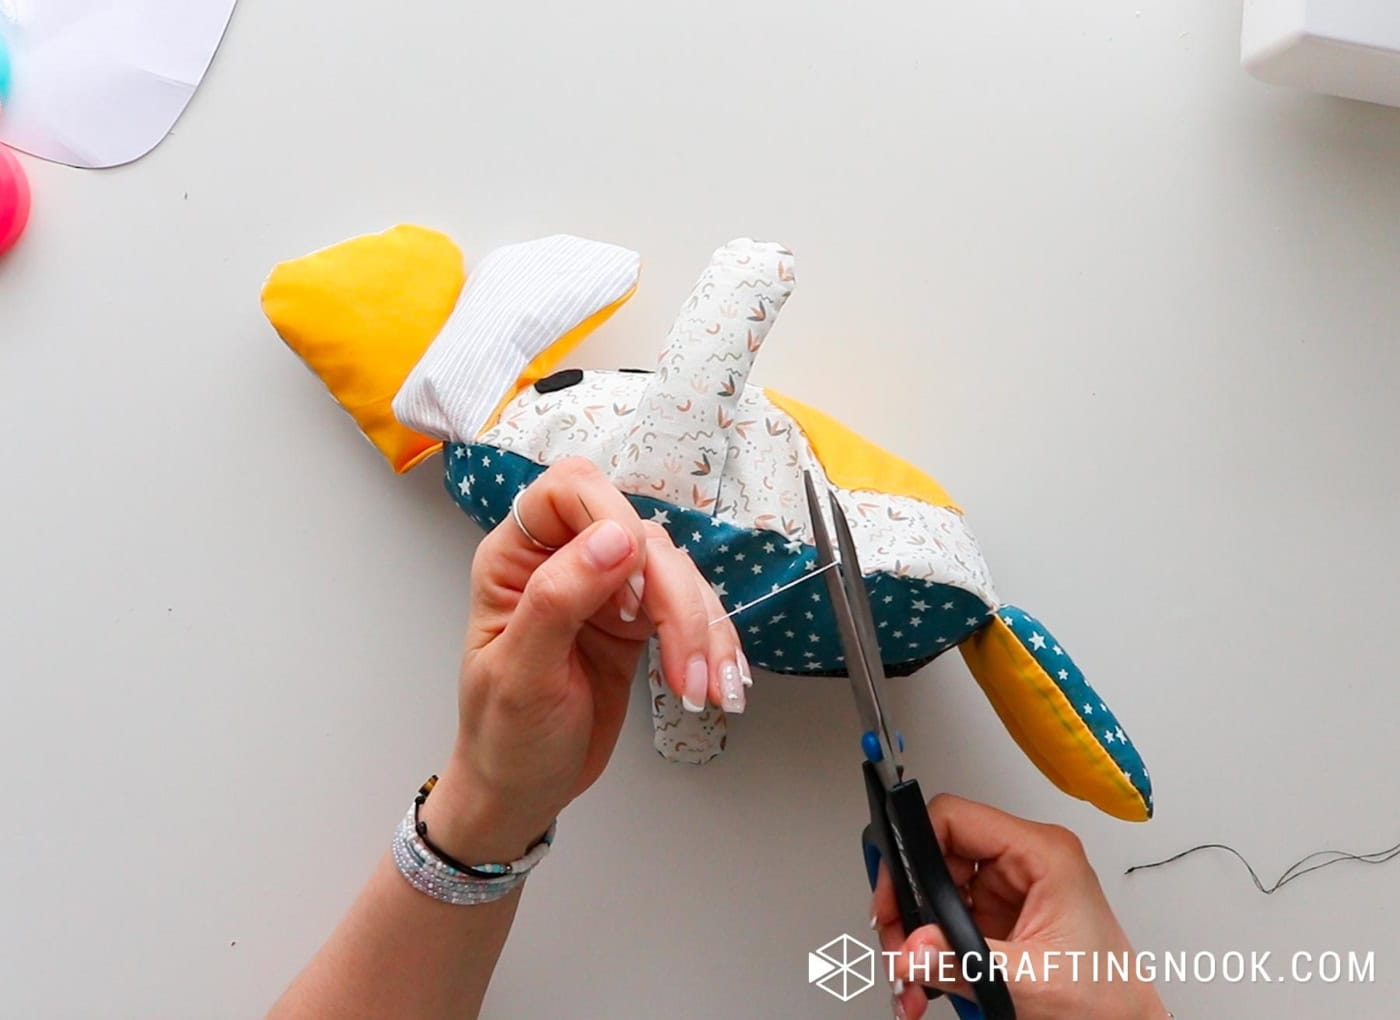
Once the body is sewn, remove pins and trim loose threads.
Turn the body right side out through the opening.
Stuff with polyfill until soft and squishy, but not overfilled.
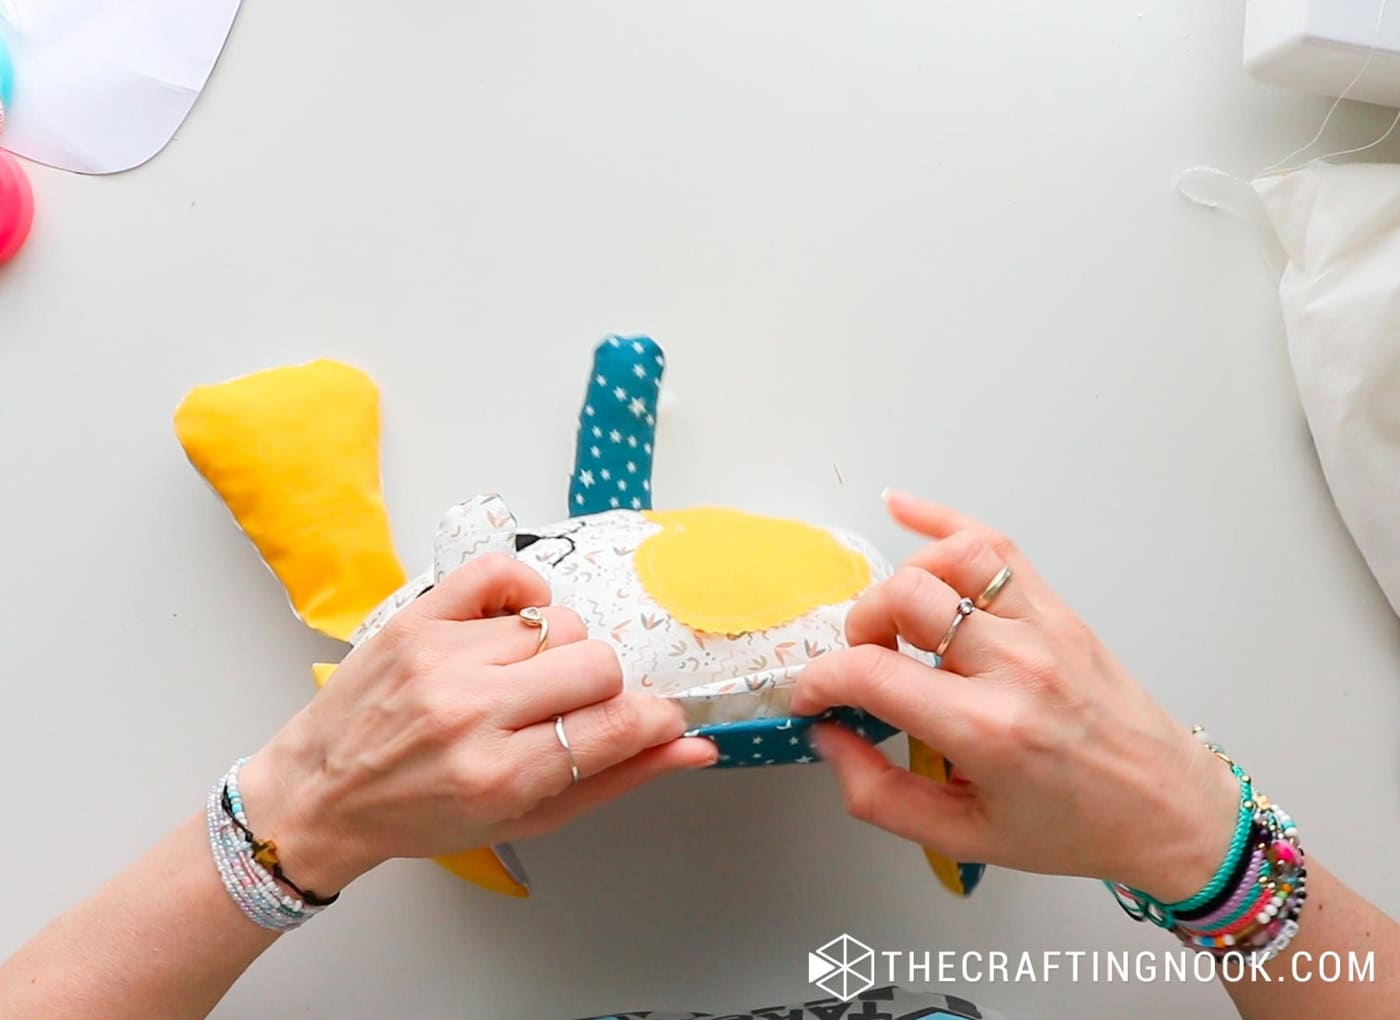
Step 8: Close the Opening
After stuffing, fold the raw edges inward and pin closed.
Use an invisible (ladder) stitch to close the opening by hand.
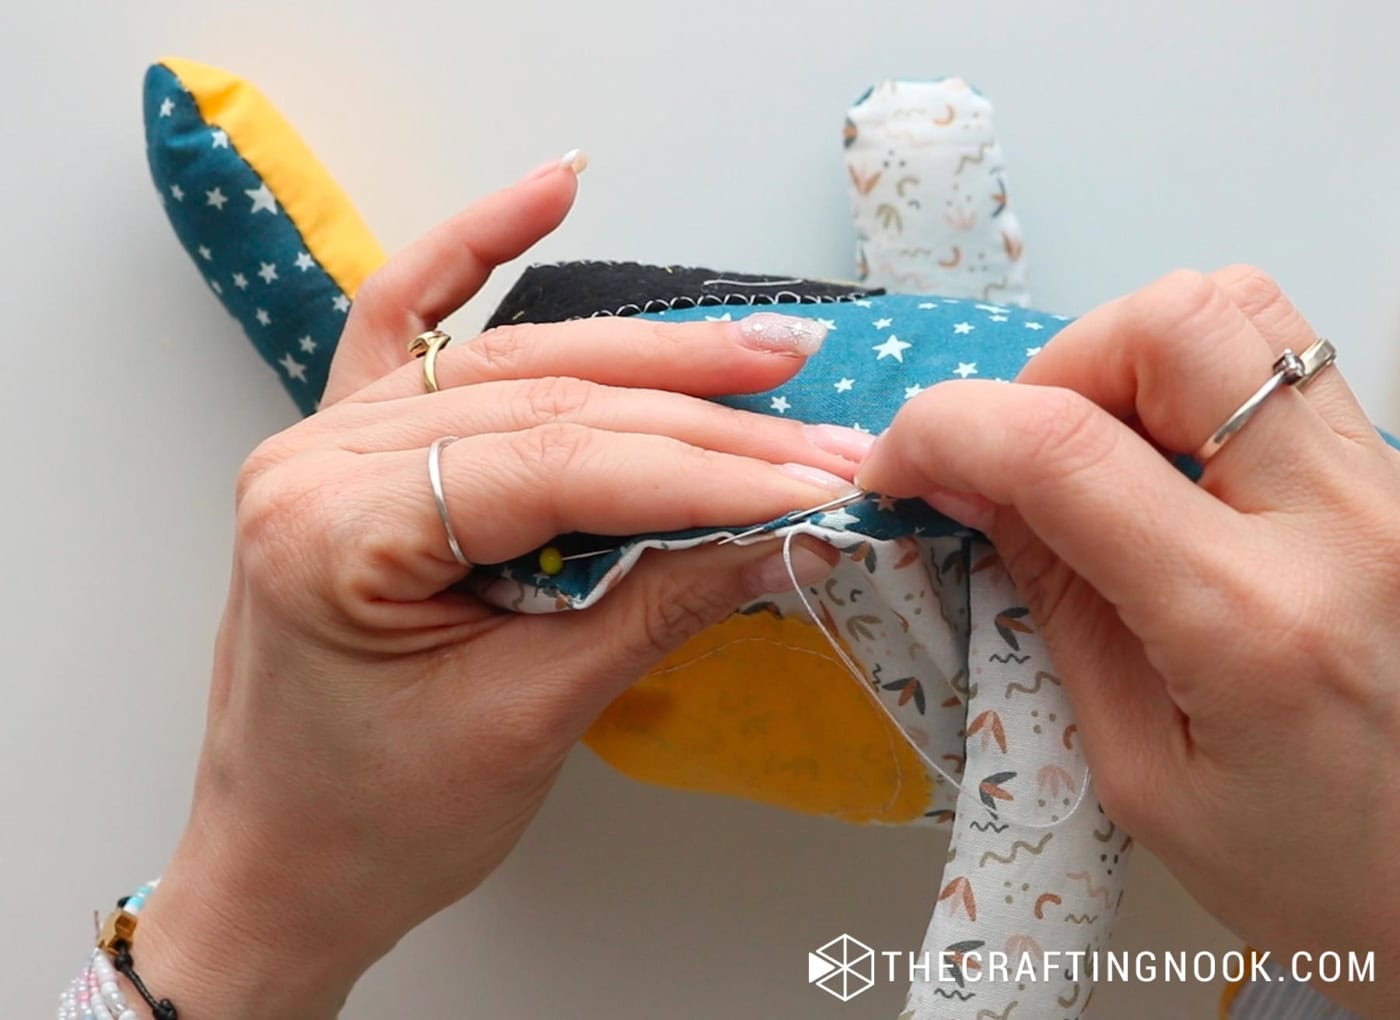
- Insert the needle into the fold of one side and pull it through, hiding the knot inside the seam.
- Insert the needle directly across into the opposite fold, making a small horizontal stitch.
- Repeat, alternating sides and pulling the thread gently after each stitch to create a “ladder” effect.
Pull the thread gently to hide the stitches, knot, and tuck the thread inside the seam.
Step 9: Add Optional Finishing Touches
Personalize your stuffed dog with extra details like:

- Fabric markers
- A bow or collar
- Buttons or embroidery
Quick Safety & Use Notes
If you’re making this stuffed dog for babies or very young children, avoid buttons or loosely attached embellishments. Embroidered or securely stitched facial features are the safest option to prevent choking hazards.
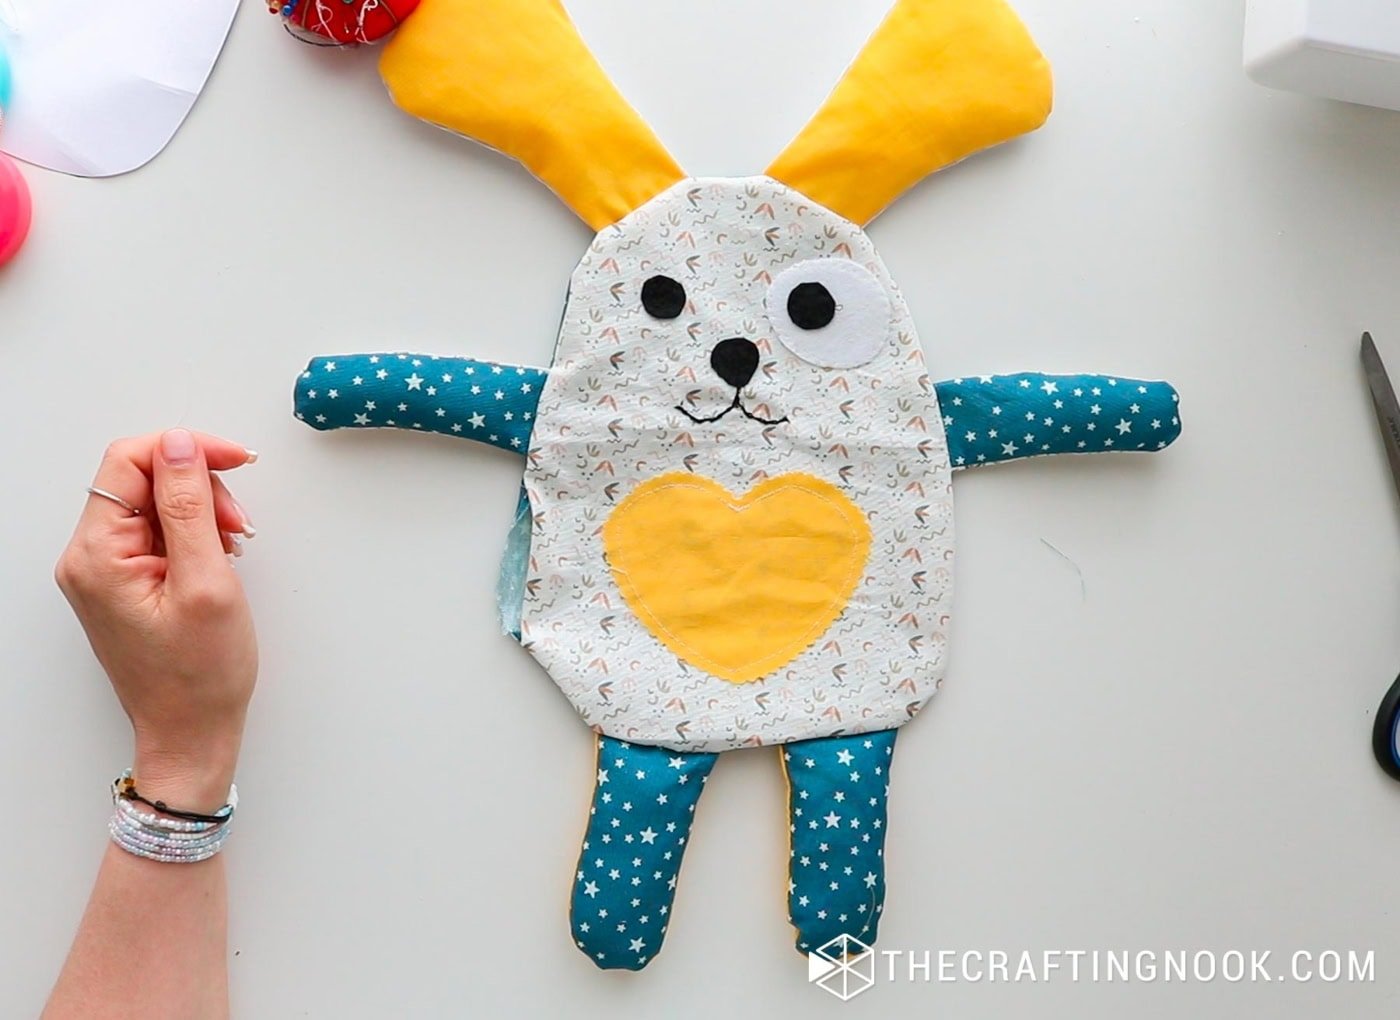
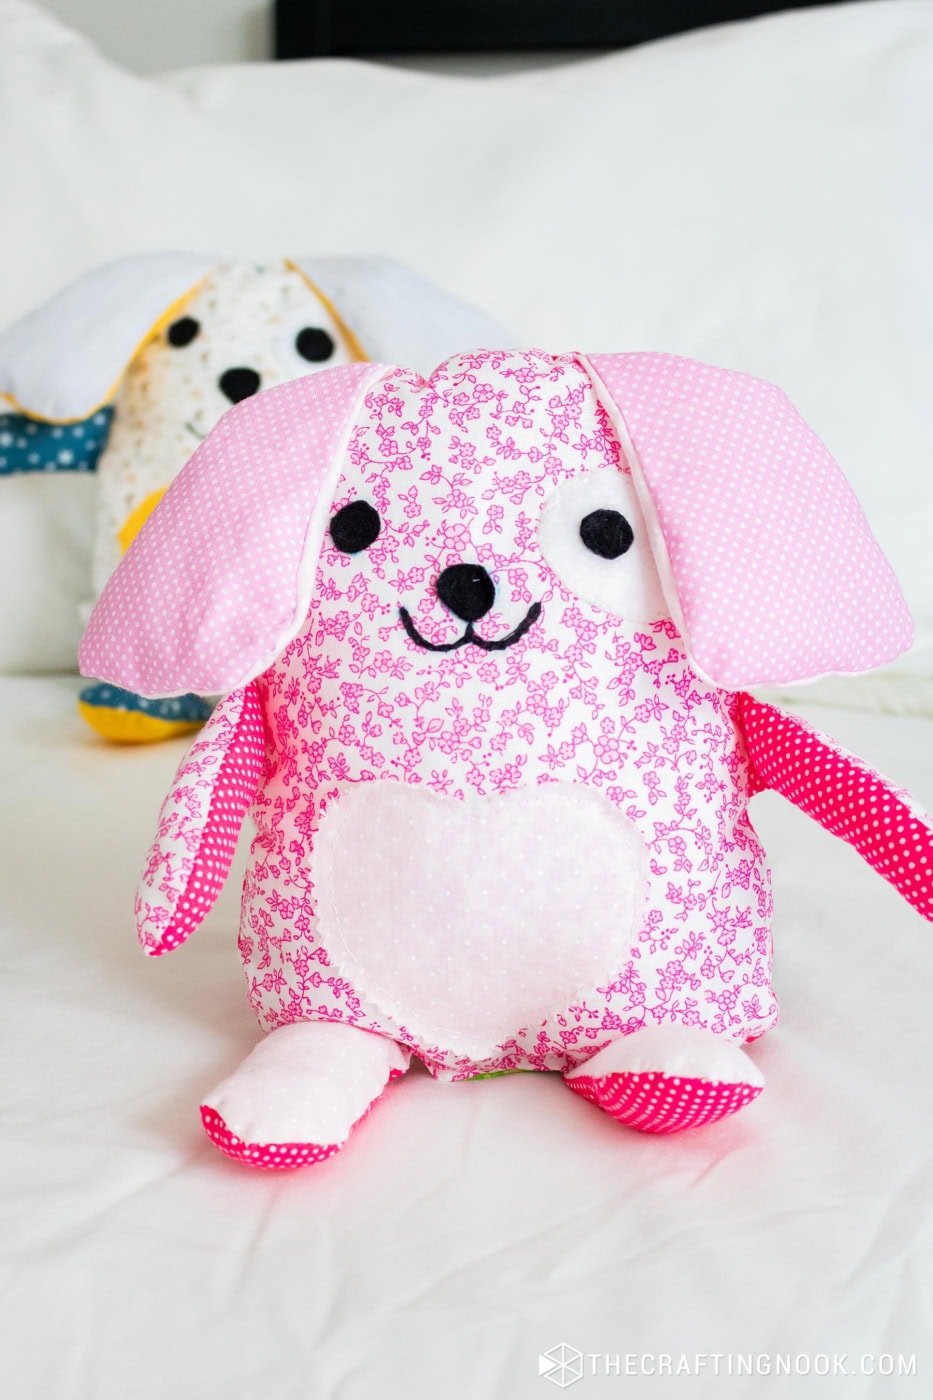
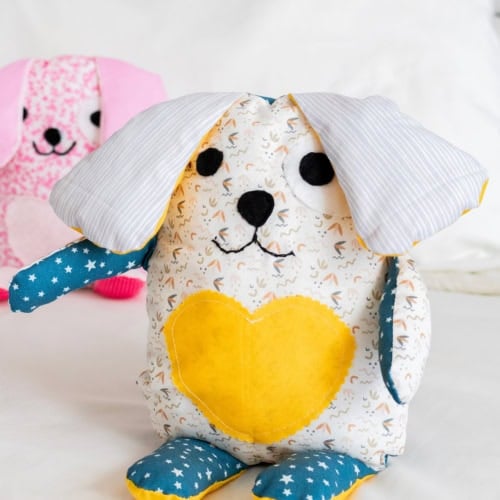
Your stuffed dog is finished.
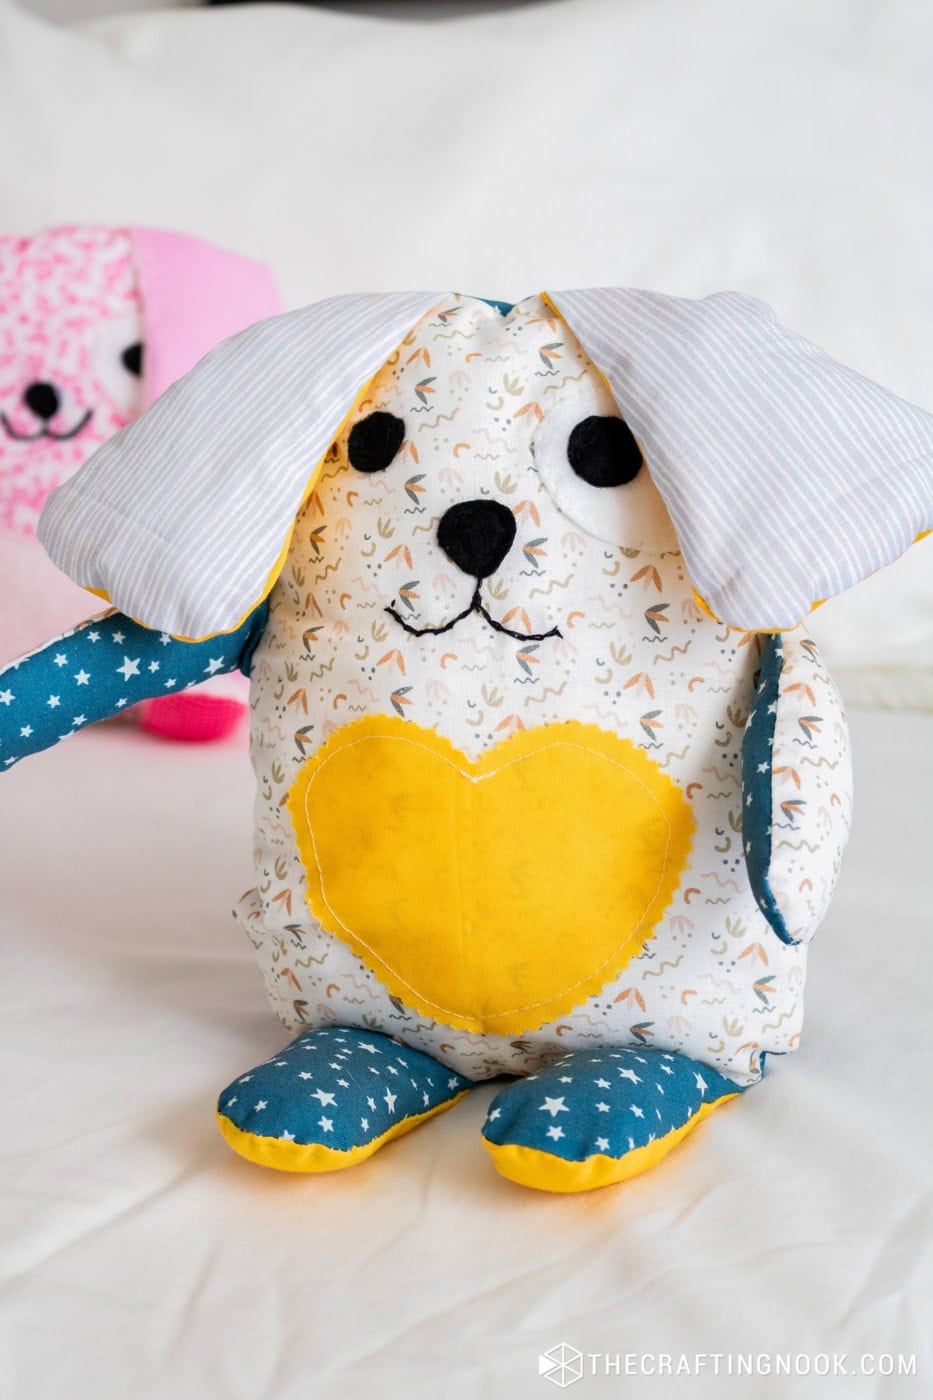
Don’t you just love those floppy ears?
Changing the fabric colors and patterns gives each stuffed dog a completely different look.
Crafting Tips
- Cut all fabric pieces in advance and organize them by body parts (arms, legs, body). This speeds up assembly and helps avoid missing pieces.
- If you’re newer to sewing, stick to straight stitches for construction and use decorative stitching only for small details like the mouth or eyes.
- Use an erasable fabric marker or tailor’s chalk to trace pattern pieces for cleaner cuts and more accurate sewing.
- A chopstick, pencil, or turning tool works great for stuffing arms, legs, and small corners evenly.
- You don’t have to buy new polyfill if you don’t want to. Clean stuffing from an old throw pillow works just as well and is a great way to reuse materials you already have at home.
- When stuffing, avoid overfilling. A softer finish helps the arms and ears stay floppy and gives the dog a more cuddly look.
I’ll be making more easy stuffed animal patterns soon, so stay tuned!

Alternatives and Substitutions
For a quicker finish, you can use fabric glue instead of stitching felt details like the eyes or nose. Allow it to dry fully before assembling and stuffing.
Personalize the stuffed dog by adding a name, initials, or a small design to the tummy or back using embroidery or heat transfer vinyl.
Mix fabric textures for extra interest. Minky, fleece, or flannel work especially well for ears or the tummy accent.
Add a small squeaker or rattle inside the body before closing the seam to make the stuffed dog more interactive. If using for young children, make sure it’s securely enclosed.
Frequently Asked Questions
Yes. The stuffed dog sewing pattern is completely free and includes a printable PDF you can download and use at home.
Yes. The pattern and steps are designed with beginners in mind. Basic sewing skills are enough, and the project can be sewn by machine or by hand.
The finished stuffed dog measures approximately [add exact height here] once completed. Size may vary slightly depending on seam allowance and stuffing firmness.
Yes. The entire project can be hand-sewn if you don’t have a sewing machine. It will take a bit longer, but the construction remains the same.
Cotton fabric works well for beginners, but you can also use flannel, fleece, or minky for a softer, cuddly finish. Mixing textures is a great way to add personality.
You may sell finished items made from this pattern on a small, handmade scale. Please do not redistribute, resell, or claim the pattern itself as your own.
More Sewing Projects To Try
Like this free stuffed dog sewing pattern project? You might definitely love these other sewing project ideas too:

✂️ Tutorial
DIY Stuffed Animals: Free Stuffed Dog Sewing Pattern
Tools
- Seam ripper
- Needle and thread (I used only black and white)
- Pins
- Sewing Machine
- Fabric sharp scissors and paper scissors
- Pinking shears *Optional
Supplies
- Free Stuffed Dog Sewing Pattern
- 4 Coordinated fabrics fat quarters are more than enough
- Black felt for the nose and eyes
- White felt for the eye patch
- Stuffing Polyfill
- Measuring tape
- Fabric erasable marker or chalk
Instructions
Step 1: Download and Prepare the Pattern
- First, download the free sewing pattern and print it at 100% scale (do not scale to fit).
- Cut out all paper pattern pieces using paper scissors.
Step 2: Cut the Fabric Pieces
- Choose your fabrics. You’ll need 4 coordinating fabrics (or 2 for a simpler look).
- Trace the pattern pieces onto the fabric and cut using fabric scissors.
- You should have:
- Body (front and back) – I used different fabrics for each.
- Arms, legs, and ears (front and back) –I used different fabrics for each.
- A heart for the tummy piece (or other embellishments if you like!) cut with pinking shears.
- White felt eye patch
- Don’t forget to cut 2 small felt circles for the eyes, a rounded triangle for the nose, and the tail from the black felt.
- Before sewing, lay out all pieces to make sure all the pieces go together and nothing is missing.
Step 3: Add Facial Features, Tummy, and Tail
- Start by working on the front body piece.
- Place all facial elements first to check positioning.
- Stitch the black felt eye onto the white eye patch
- Sew the eye patch onto the body piece
- Sew the felt eyes and nose in place using black thread
- Add the mouth using an embroidery chain stitch
- Thread your needle and knot the end.
- Bring the needle up from the back of the fabric to the front at your starting point.
- Insert the needle back into the same hole and bring it out a short distance along the mouth line, leaving a small loop on the surface.
- Pass the needle through the loop before pulling it tight to form your first chain link.
- Repeat this process along the mouth line, creating a series of connected loops.
- Finish by securing the last stitch with a small knot on the back of the fabric.
- Attach the heart to the tummy area and sew the tail onto the back body piece using a zig-zag or straight stitch.
- (All facial details can be sewn by machine or by hand.)
- Do the same for the tail on the back of the body fabric. I used zig-zag with white thread for this but you can do straight stitch with your sewing machine or by hand.
Step 4: Sew the Arms, Legs, and Ears
- Place each pair of pieces right sides together.
- Sew around the edges, leaving the top open, using a ⅓-inch seam allowance.
- Turn each piece right side out using your fingers, a pencil, or a turning tool.
Step 5: Stuff the Arms, Legs, and Ears
- Lightly stuff each piece with polyfill.
- Arms and legs: stuff more firmly
- Ears: stuff lightly so they stay floppy
- Set pieces aside.
Step 6: Assemble and Sew the Body
- Place the front and back body pieces right sides together.
- Position the arms, legs, and ears between the body layers, aligning raw edges.
- Pin each piece in place, keeping them slightly away from the stitching line.
- Pin the body pieces together and sew around the edges, leaving a small opening on one side for turning and stuffing.
Step 7: Turn and Stuff the Body
- Once the body is sewn, remove pins and trim loose threads.
- Turn the body right side out through the opening.
- Stuff with polyfill until soft and squishy, but not overfilled.
Step 8: Close the Opening
- After stuffing, fold the raw edges inward and pin closed.
- Use an invisible (ladder) stitch to close the opening by hand.
- Insert the needle into the fold of one side and pull it through, hiding the knot inside the seam.
- Insert the needle directly across into the opposite fold, making a small horizontal stitch.
- Repeat, alternating sides and pulling the thread gently after each stitch to create a “ladder” effect.
- Pull the thread gently to hide the stitches, knot, and tuck the thread inside the seam.
Step 9: Add Optional Finishing Touches
- Personalize your stuffed dog with extra details like:
- Fabric markers
- A bow or collar
- Buttons or embroidery
- Your Cute Stuffed dog is ready!
Video

Share and PIN ME!!!
Til’ next time…


FREE WORKBOOK
Keeping your Sweet Home Organized
Learn how to create intentional habits and simple routines to Keep Your Home Organized. Plus freebies, printables, exclusive content, and tips.
Disclaimer: By clicking on the “Yes” button above you are giving me your consent to collect and use your information according to the law and My Policy Privacy. Zero Spam I promise!