Ombre Felt DIY Valentine Heart Wreath
This post may contain affiliate links. Please read our Disclosure Policy.
This Ombre Felt Valentine Heart Wreath is a fun project, easy to make, and the perfect DIY to get creative alone or at a family gathering. Just a few supplies and lots and lots of love!
It’s always fun and joyful to have something to celebrate, don’t you think? In my opinion LOVE, FRIENDSHIP, FAMILY is always worth celebrating. Even though we actually celebrate those things every day, it’s fun to have a day to celebrate it big.

Table of Contents
Pretty Valentine Heart Shaped Wreath Tutorial
I love Valentine’s Day. It’s the perfect excuse to show extra love to our loved ones and bring some extra color to our homes after Christmas, and to make cute valentine’s Day crafts, isn’t it right?
I love wreaths! Just like last year I made a wreath, this year I made an Ombre Ruffled Valentines Heart Wreath to give a warm and lovely welcome to my family and friends.
I have to confess, this year I got behind on Valentine’s day. A lot has been going on and well life happens. Still, there is still plenty of time for you to make some cute Valentine’s day decorations and crafts if you are behind too.
This DIY wreath is really easy to make and super fun. Especially because you don’t need to be perfect about anything. You can have it done in about 2 to 3 hours (less if you have extra hands involved) and for less than $10. Cool right?
This is also a perfect DIY project for crafty morning and getting your kids if they are old enough to handle carefully scissors. If this is the case, I recommend replacing the hot glue with another type of glue or just staying in charge of the gluing.
How to Make a Felt Valentine Heart shaped Wreath
Supplies:
- A large piece of cardboard – I used 15” x 20”
- Approximately 1/2 yard of felt per color shade all shades of pinks (it will depend on the size of the heart you want to make)
- X & O wood or foam letters.
- White glue or Mod Podge
- Gold glitter
- A strip of red ribbon.
Tools:
- Cutter or scissors.
- Hot glue gun and glue sticks
Instructions:
Before we begin, be sure to follow us on Pinterest, Facebook, Instagram, and YouTube, and also sign up for our email list (at the end of this post), so you’ll never miss a post!
The first thing you need to do is decide the size of your heart and draw it. Yup, you heard me right. Let’s use our hands here. As I said earlier, no need for perfection.
Step 1: Creating the wreath form.
1. Place your cardboard on a table and draw with a pencil, a large heart first to create your heart wreath form.
2. Correct things as you think needed. I did a lot of trajectory corrections until I was happy. You don’t need to be perfect here.
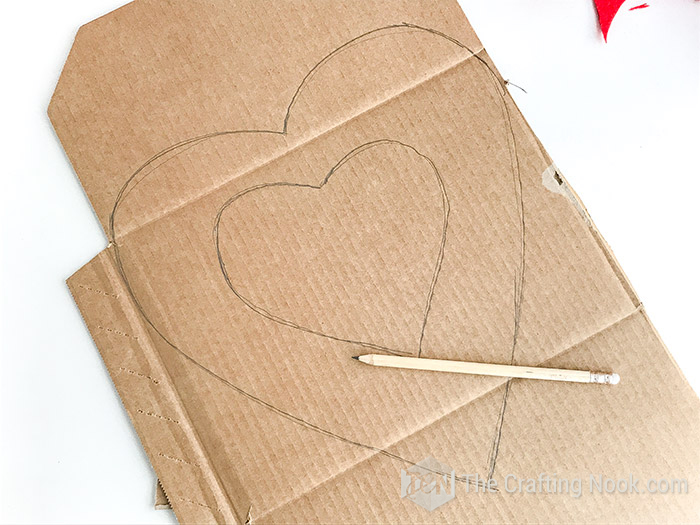
3. Then draw another heart inside making sure you have at least 2 Inches between both heart edges, 3 inches would be best because that’s the thickness of your heart.
4. Using a cutter or scissors (a cutter is a lot easier) cut your hearts until you get your heart frame.
5. Set aside.

6. Then I divided the heart’s height into 5 since I’m using 5 shades. I drew a line across the heart evenly to fill the spaces with the felt circles.
Step 2: Prepping the ruffles
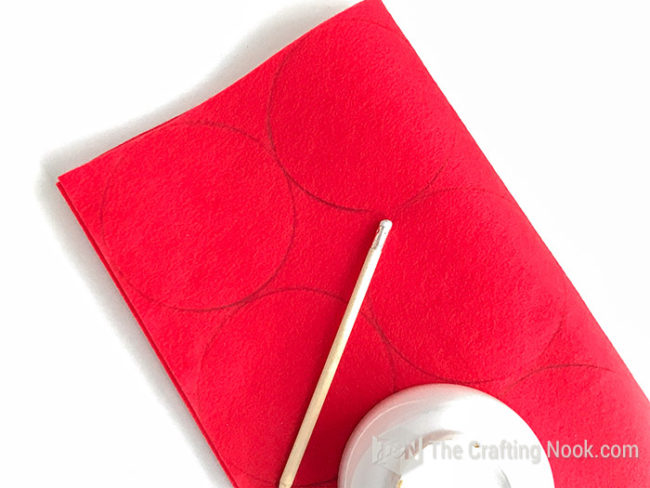
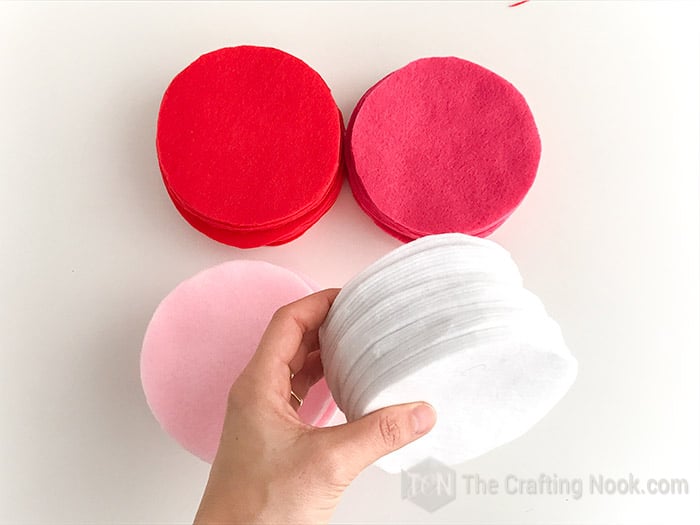
7. For this project, I need tons of felt circles. Since I love making my life easier, I folded each felt piece twice to cut in bulk. I got a four-layer fell piece now. Of course, make sure that you can fit as many circles as you can when folded.

8. I started with the red felt and then move to each shade.
9. Using a large coffee cup as my circle pattern, I traced as many circles as I possibly could.
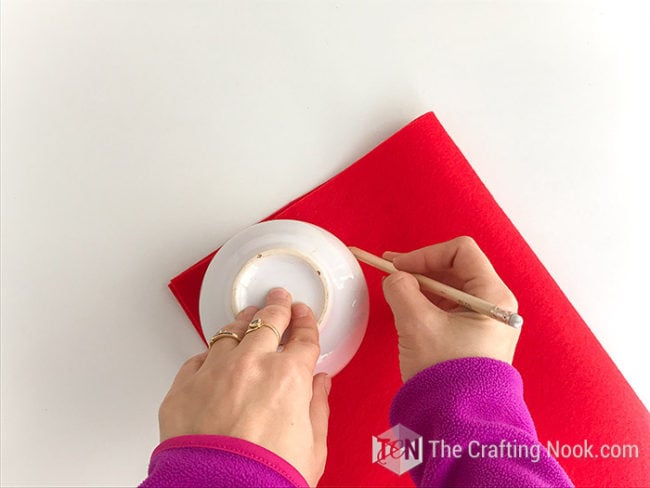
10. I made about 30 circles of 4 Inches each but didn’t use all of them since not every part of the heart requires the same amount. It’s always better to have more than necessary just in case.
11. Then I started cutting. The good thing is that I got 8 circles with four layers each. Over 30 circles easy peasy.

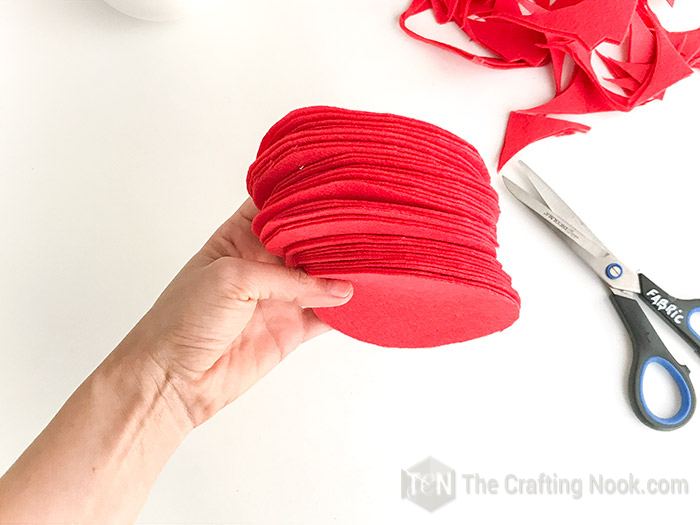
12. Cut all of your felt shades. Set aside.
Step 3: Assembling the Heart Wreath
13. Your first row would be the darkest color (or lighter if you want to).
14. Take one circle, and fold them in half twice to form rosettes.


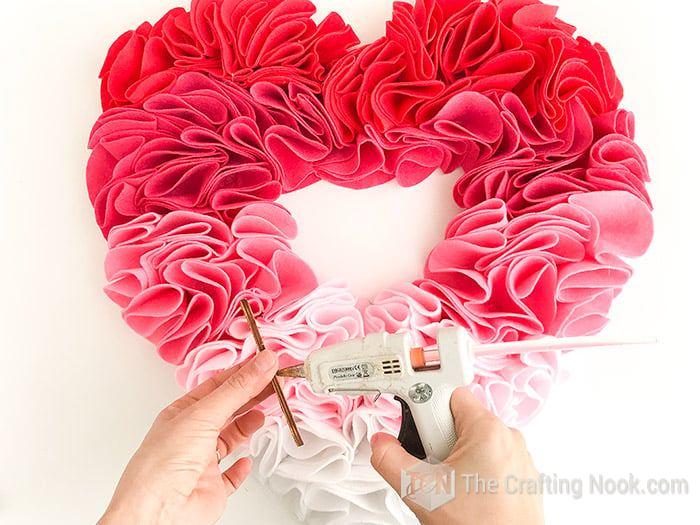
15. Apply some hot glue to the bottom corner of the rosette.
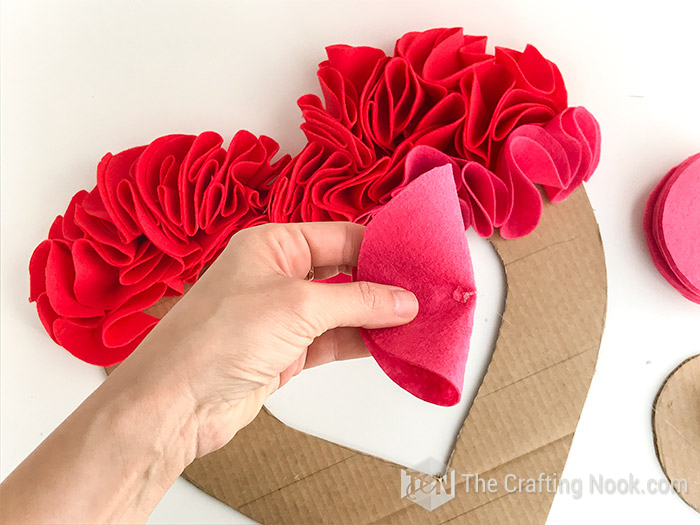
16. Then apply some hot glue to the cardboard. To start do this close to the edges and work your way down.

17. Attach the felt rosettes to the heart, making sure to group the rosettes tightly enough that no cardboard is showing through the rosettes.
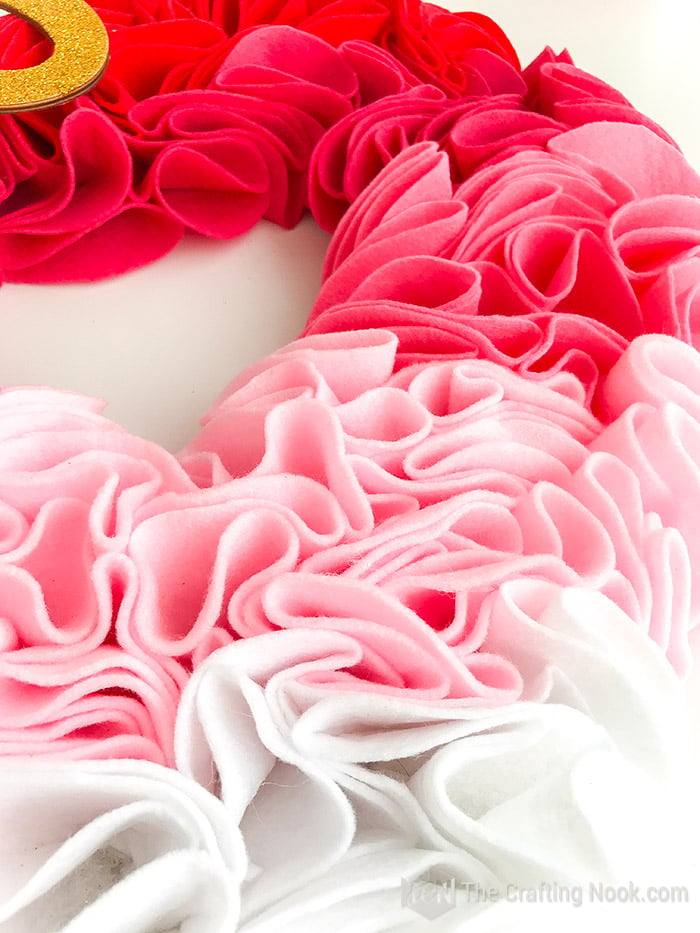
18. After you’ve added a few, fluff and open your ruffles as you go along and adjust the rosettes as you like.
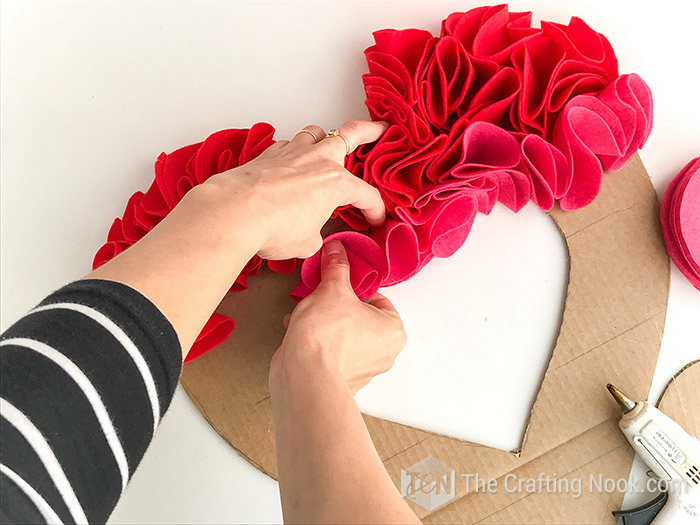
19. Continue gluing, and attaching the rosettes until you’ve worked your way along each shade space.
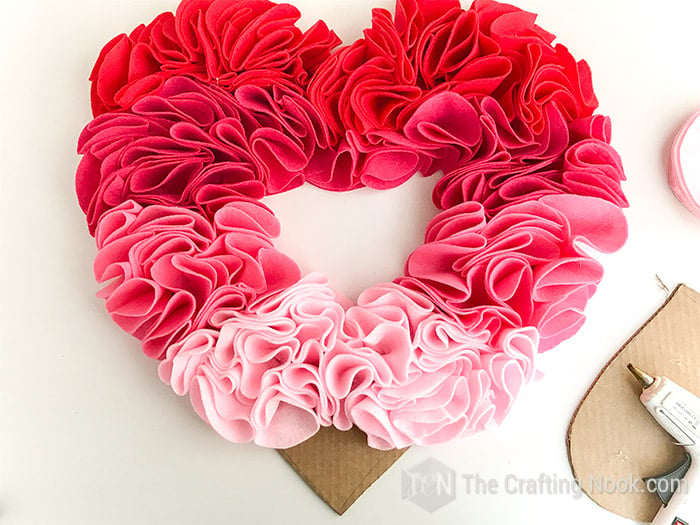
20. Then move on to the lighter shade and repeat the process until you finish covering the whole heart.

21. If you have circles that are slightly misshapen place them toward the outside or inside edges, where they can’t be seen when the wreath is hanging.


Step 4: Making XOXO Glittered Wood Word

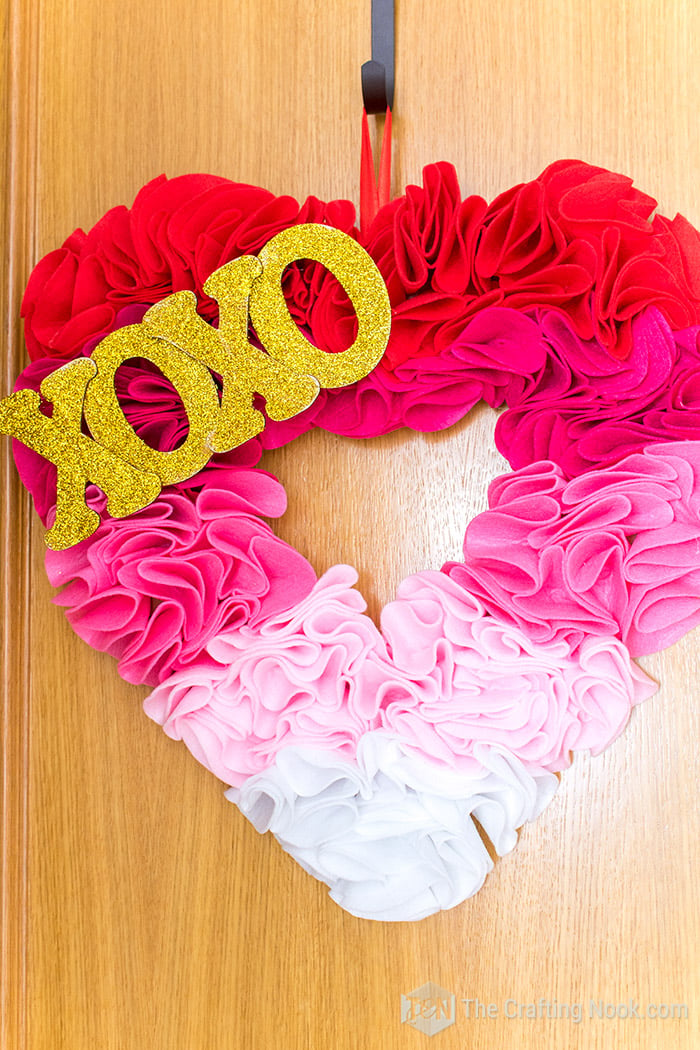
The final touch is the gold glittered XOXO word.

22. Simply brush some glue all over each letter.
23. Apply abundant glitter on top and let it sit for a few minutes, while you glue and glitter the other letters.

24. Then just lift the letters, tap them a few times to lose any free glitter, and let it dry completely for a few minutes.


25. When dry, you can either glue the letter together first by slightly overlapping each letter or gluing them directly to the wreath. I tried both, but working the word first ends up being easier, like in the video.

26. Place the XOXO where you think you like it best and add some extra glue where you think might secure it a bit better.

Step 5: Hanging our Valentine’s Heart Wreath.
27. After you’ve finished adding the felt rosettes and the XOXO, cut approximately a 10-inch length of ribbon, fold it in half, and attach it to the back of the wreath with hot glue to form a hanger.

28. Optionally you can create a pretty bow as most DIY valentine’s day wreaths have but I preferred to keep it simpler and let the felt be the main focus.

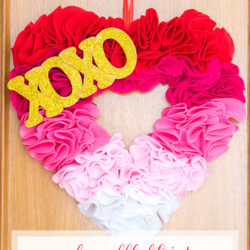
I so crazy love how organic the wreath looks when it’s finished. Then ruffly and fluffy felt rosettes when grouped together like this look so pretty.

While this Valentine’s Heart Wreath idea is rather a longer project than I’m used to making, I think it was completely worth the time I spent.
I just took my door hanger and hung my beautiful Valentines Heart Wreath on my front door!
This is my finished Felt Ruffled Valentine Heart Wreath.
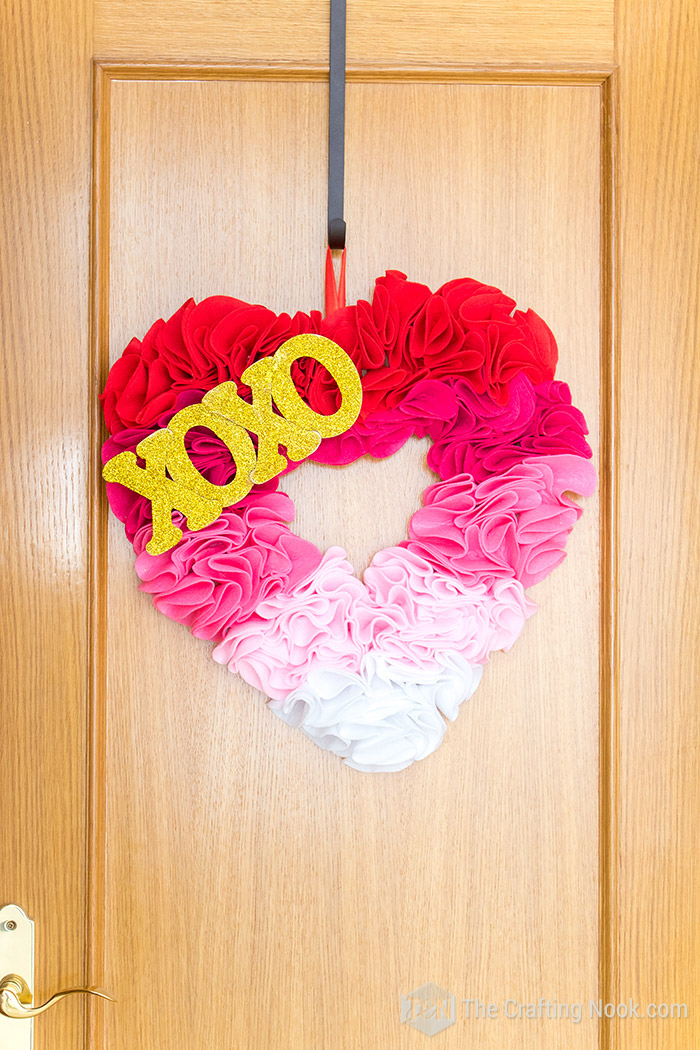
The only thing I don’t like at all is the color of our front door. Since it’s a rented apartment I can’t paint it either so, I’ll just have to love my wreath with all my heart, right?
A few Alternatives to make this Valentine’s Day Wreath
Wreath form. If you already have a heart shape wire wreath form or foam wreath form, you don’t need to make one with cardboard as I show in this tutorial. I recommend wrapping the wreath form with a cheap ribbon or fabric scraps that are long like a ribbon to protect it and be able to reuse it later.
I don’t recommend wreath forms like grapevine wreaths or an embroidery hoop because the shape is not ideal for this type of wreath.
Fabric. If you rather not using felt, you can always use scrap fabric, tulle, pom-poms, burlap, but of course, the result might be significantly different.
Wooden Letters. If you are not into this XOXO thing, you can always replace it with the word LOVE, or skip the letter altogether and maybe use a lovely wood sign. Imagination is the limit and I’m sure you can find lots of other alternatives and inspiration in the dollar store, craft stores, and even in the craft section of your favorite store.

Frequently Asked Questions
The time may vary, but on average, it takes about 1-2 hours. It’s a perfect project for a cozy evening or a fun family crafting session.
Absolutely! Feel free to choose colors that resonate with your personal style or complement your home decor. It’s all about expressing your creativity.
Absolutely! This DIY project is designed with simplicity in mind. The step-by-step guide and easy-to-find materials make it perfect for beginners looking to add a handmade touch to their home.
I definitely don’t recommend it. humidity and dust can damage both the felt and the cardboard.
Gently dust it with a soft brush or use a hairdryer on a low, cool setting. Avoid using water to prevent damage to the felt.
Heck Yeah!! It’s a fantastic family-friendly project. Let your kids pick their favorite colors and enjoy creating beautiful memories together. If they are too young to handle scissors and cuters, you do the cutting and they can do the gluing with your supervision.
More Valentine’s Day Projects to Try
If you like this DIY Felt Valentine Wreath tutorial, you might also love these other Valentine’s Day project ideas too:


✂️ Tutorial
Ombre Felt DIY Valentine Heart Wreath
Tools
- Cutter or Scissors
- Hot glue gun and glue sticks
Supplies
- A large piece of cardboard – I used 15” x 20”
- Approximately 1/2 yard of felt per color shade all shades of pinks it will depend on the size of the heart you want to make
- X & O wood or foam letters.
- White glue
- Gold glitter
- A strip of red ribbon.
Instructions
- The first thing you need to do is decide the size of your heart and draw it. Yup, you heard me right. Let’s use our hands here. As I said earlier, no need for perfection.
STEP 1: CREATING THE WREATH FORM.
- Place your cardboard on a table and draw with a pencil, a large heart first to create your heart wreath form.
- Correct things as you think needed. I did a lot of trajectory corrections until I was happy. You don’t need to be perfect here.
- Then draw another heart inside making sure you have at least 2 Inches between both heart edges, 3 inches would be best because that’s the thickness of your heart.
- Using a cutter or scissors (a cutter is a lot easier) cut your hearts until you get your heart frame.
- Set aside.
- The heart shape wreath form cut out from the cardboard
- Then I divided the heart’s height into 5 since I’m using 5 shades. I drew a line across the heart evenly to fill the spaces with the felt circles.
STEP 2: PREPPING THE RUFFLES
- For this project, I need tons of felt circles. Since I love making my life easier, I folded each felt piece twice to cut in bulk. I got a four-layer fell piece now. Of course, make sure that you can fit as many circles as you can when folded.
- I started with the red felt and then move to each shade.
- Using a large coffee cup as my circle pattern, I traced as many circles as I possibly could.
- I made about 30 circles of 4 Inches each but didn’t use all of them since not every part of the heart requires the same amount. It’s always better to have more than necessary just in case.
- Then I started cutting. The good thing is that I got 8 circles with four layers each. Over 30 circles easy peasy.
- Cut all of your felt shades. Set aside.
- STEP 3: ASSEMBLING THE HEART WREATH
- Your first row would be the darkest color (or lighter if you want to).
- Take one circle, and fold them in half twice to form rosettes.
- Apply some hot glue to the bottom corner of the rosette.
- Then apply some hot glue to the cardboard. To start do this close to the edges and work your way down.
- Attach the felt rosettes to the heart, making sure to group the rosettes tightly enough that no cardboard is showing through the rosettes.
- After you’ve added a few, fluff and open your ruffles as you go along and adjust the rosettes as you like.
- Continue gluing, and attaching the rosettes until you’ve worked your way along each shade space.
- Then move on to the lighter shade and repeat the process until you finish covering the whole heart.
- If you have circles that are slightly misshapen place them toward the outside or inside edges, where they can’t be seen when the wreath is hanging.
STEP 4: MAKING XOXO GLITTERED WOOD WORD
- The final touch is the gold glittered XOXO word.
- Simply brush some glue all over each letter.
- Apply abundant glitter on top and let it sit for a few minutes, while you glue and glitter the other letters.
- Then just lift the letters, tap them a few times to lose any free glitter, and let it dry completely for a few minutes.
- When dry, you can either glue the letter together first by slightly overlapping each letter or gluing them directly to the wreath. I tried both, but working the word first ends up being easier, like in the video.
- Place the XOXO where you think you like it best and add some extra glue where you think might secure it a bit better.
STEP 5: HANGING OUR VALENTINE’S HEART WREATH.
- After you’ve finished adding the felt rosettes and the XOXO, cut approximately a 10-inch length of ribbon, fold it in half, and attach it to the back of the wreath with hot glue to form a hanger.
- Optionally you can create a pretty bow as most DIY valentine’s day wreaths have but I preferred to keep it simpler and let the felt be the main focus.
- You are finihsed
If you want to see another pretty Valentine’s Day Heart Wreath idea, check out my friend Kari from Living and crafting for another gorgeous one!

Don’t forget to pin and share it with friends!

Til’ next time…


FREE WORKBOOK
Keeping your Sweet Home Organized
Learn how to create intentional habits and simple routines to Keep Your Home Organized. Plus freebies, printables, exclusive content, and tips.
Disclaimer: By clicking on the “Yes” button above you are giving me your consent to collect and use your information according to the law and My Policy Privacy. Zero Spam I promise!