

DIY Twine Ball Christmas Ornaments (Easy Tutorial)

This post may contain affiliate links. Please read our Disclosure Policy.
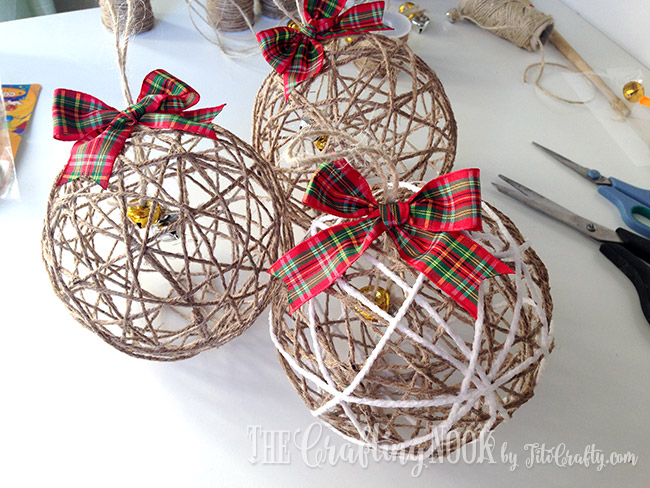
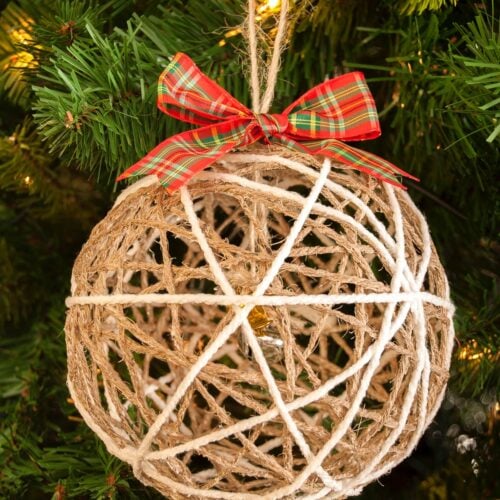
These DIY twine ball Christmas ornaments are such a fun way to add a little rustic charm to your Christmas tree! They’re made with jute twine, glue, and balloons, then finished with pretty ribbon bows and tiny jingle bells. I made eight of them for my tree, and I love how the natural twine looks mixed with the white yarn and plaid ribbons.
If you enjoy making your own Christmas decorations, these are simple enough to make a whole bunch in one afternoon. You’ll just need to leave them drying overnight before adding the finishing touches.

Christmas has always been my favorite time of year. Fall has barely started, and I’m already thinking about decorating the tree, hanging lights, and making handmade ornaments. LOL!
These twine ball ornaments were inspired by my dear friend Lauren from The Thinking Closet. I fell in love with her glitter twine ball ornaments years ago, and I finally decided to make my own version.
I went with natural jute twine, added white yarn to a few, and finished them with tiny bells and plaid bows. I made eight for my tree, and I love how they turned out!

Table of Contents
Why You’ll Love These Twine Christmas Ornaments
Besides being really pretty, there are a few things I particularly love about this project:
- Simple, inexpensive supplies. You probably already have most of what you need in your craft room.
- Easy to customize. Make them with natural jute, white yarn, cotton twine, or a mixture of different strings.
- Lightweight decorations. Once the glue dries and you remove the balloon, you’re left with a hollow twine ball that’s light enough to hang on your Christmas tree.
- Fun to make in batches. I made eight, and once you get the hang of wrapping the first balloon, the rest go much faster.
- A lovely handmade look. The little bells and ribbons make them extra cute without taking away from the natural texture of the twine.
The only part that requires patience is waiting for the glue to dry. But I promise, removing the balloons the next day is so satisfying!
How to Make Twine Ball Christmas Ornaments
The idea is pretty simple. You soak twine in diluted glue, wrap it around a small balloon, and let it dry until the twine becomes stiff enough to hold its shape. Then you pop the balloon, remove it, and decorate your ornament.
I’ll show you exactly how I made mine, including the little tricks that helped me along the way.
The printable how-to card is further down, but I recommend reading through the photo tutorial first, especially if you’ve never made ornaments using balloons.
Key Supplies:
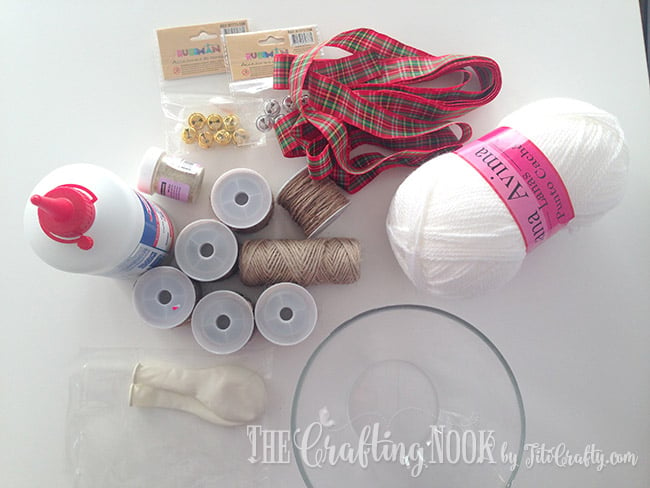
- Natural jute twine: I used approximately 10 meters (11 yards) for each ornament. You’ll need quite a bit if you’re making several. LOL!
- White yarn (optional): About 3 meters (3.2 yards) per ornament if you want to add a contrasting layer.
- White glue or Mod Podge: I used white wood glue because that’s what I already had at home.
- Water: To dilute the glue so the twine is easier to soak and wrap.
- Small balloons: These will determine the size of your ornaments.
- Small Christmas bells: I used a mixture of gold and silver.
- Plaid Ribbon: For making the cute little bows.
- Glitter (optional): If you’d like your ornaments to have a little sparkle.
Tools:
- Hot Glue Gun and glue sticks
- Small glass bowl
- Scissors
- Needle or pin
- Clothespins or ornament hooks for drying
- Plastic bags or plastic wrap to protect your work area
I used natural jute twine because I wanted that rustic look, but you can absolutely use white cotton twine or other types of absorbent string.
One thing to remember is that the material needs to absorb enough glue to hold its shape once it dries. Not every type of string will behave the same way.
Instructions:
Step 1. Prepare the Balloons and Glue Mixture
Start by blowing up your balloons to the size you want your finished ornaments.
Here’s a little trick I used: I first inflated the balloons a bit larger than I needed, then slowly released some air until they looked more round than pear-shaped.
That gave me a nicer ball shape to work with.
Next, prepare the glue mixture.
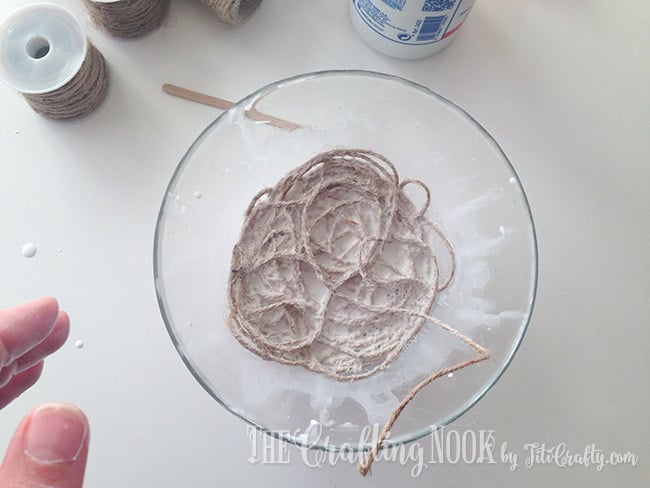
In a small glass bowl, mix 2 parts glue with 1 part water. Stir until the glue becomes thinner and has a somewhat soupy consistency.
You don’t want it to be too thick because the twine needs to absorb the glue, and a thinner mixture is much easier to work with.
I used regular white wood glue, but Mod Podge is another option.
A little tip I learned from Love Grows Wild is to cover the balloon with plastic wrap before wrapping the twine. This can help prevent the balloon from sticking to the glue.
I decided to try mine without the plastic wrap, and everything worked out fine. But I thought I’d pass along the idea in case you want to try it!
Step 2. Soak the Twine in Glue
Cut approximately 10 meters (11 yards) of twine for each ornament.
Place the twine into your glue mixture and let it soak until it’s coated.
Take one end of the twine between your thumb and index finger, then gently slide your fingers along it to remove the excess glue.
You want the twine to be well coated, but not dripping everywhere.
This part gets a little messy, so I recommend protecting your work surface before starting.
Step 3. Wrap the Twine Around the Balloon
Now comes the fun part!
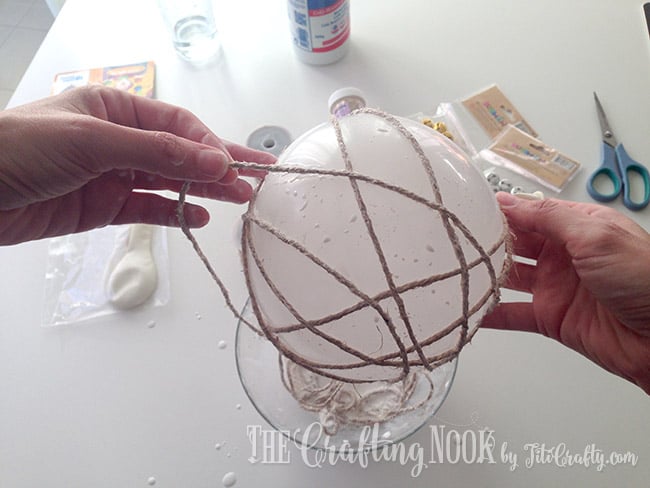
Take one end of your glue-soaked twine and place it near the knot of the balloon.
Start wrapping the twine around the balloon in different directions, making loops and crossing the strings as you go.
There’s no specific pattern to follow. In fact, I think they look prettier when the twine crosses randomly.
Note
Try to keep the twine snug against the balloon while wrapping.** If it gets too loose, the string can start slipping and unraveling.
Ask me how I know! LOL!
It happened to me a couple of times, and it was a little annoying having to adjust everything again.
Continue wrapping until you’re happy with how much of the balloon is covered.
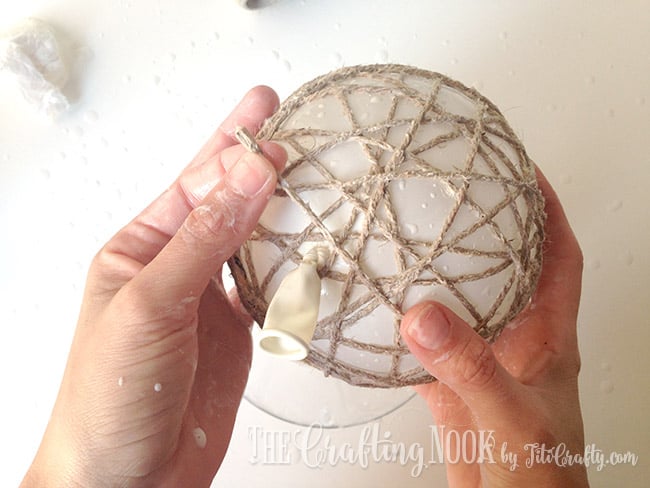
You want enough twine to create a nice structure, but leave plenty of open spaces so the ornament has that beautiful airy look.
When you’re finished, tuck the loose end underneath one of the nearby strands to secure it.
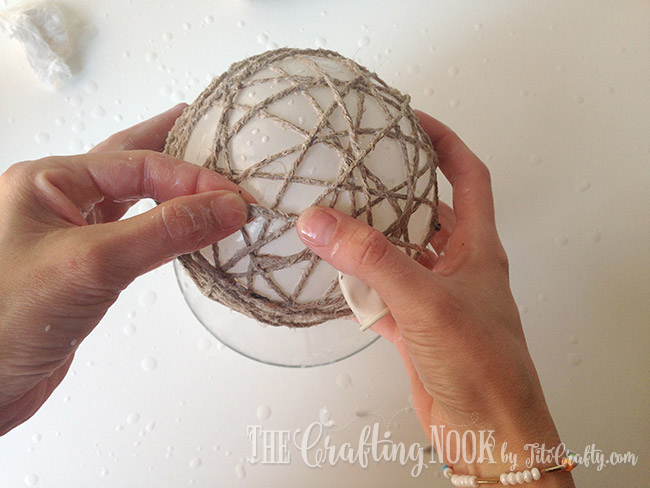
If your ornament looks too wet, gently pat some of the excess glue with a paper towel. Don’t rub or pull on the strings because they might move out of place.
Adding white yarn (optional)
For a few of my ornaments, I wanted a little contrast, so I wrapped white yarn over the jute twine.
I used approximately 3 meters (3.2 yards) of yarn for each one.
Tuck one end of the yarn underneath a strand of twine and start wrapping it randomly around the balloon, just as you did with the jute.
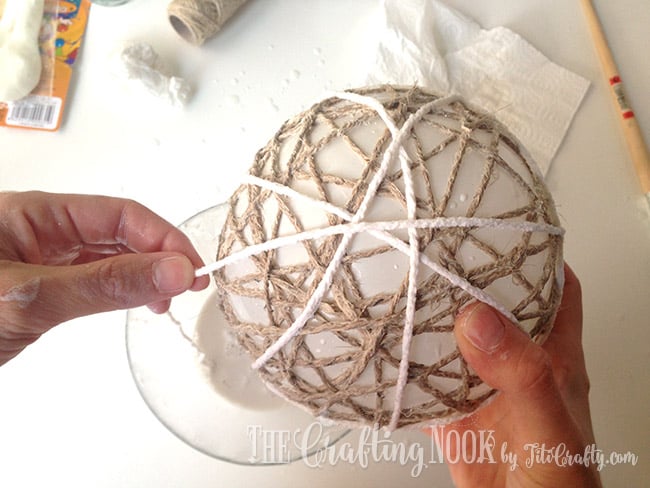
When you’re done, tuck the other end under another strand to hold everything in place.
I really love how the white yarn breaks up the natural brown color!
Step 4. Hang the Twine Balls to Dry Overnight
Once you’re happy with the wrapping, it’s time to let the glue do its job.
Hang the balloons somewhere they can dry without touching each other or any other surfaces.
I used clothespins, but you can also use ornament hooks or something similar.
Place plastic bags or plastic wrap underneath them to catch any glue drips. Trust me, cleaning dried glue off the floor is not the kind of Christmas crafting I enjoy!
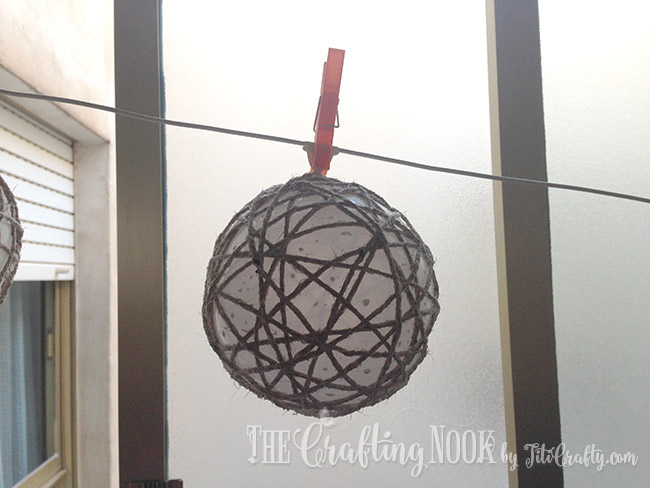
Let the ornaments dry overnight.
This step is important because the twine needs to become completely dry and stiff before you remove the balloon.
If you pop the balloon while the strings are still soft, the ornament may lose its round shape.

I left mine hanging until the next day, and they were nice and hard when I came back to finish them.
Step 5. Pop and Remove the Balloons
This might be my favorite part of the whole project!
Once your twine balls are completely dry, carefully separate the balloon from the hardened strings before popping it.
I gently slipped my finger through the open spaces between the twine and loosened the balloon wherever it seemed attached.
You can actually hear little cracking sounds as the balloon separates from the dried glue.
So much fun!
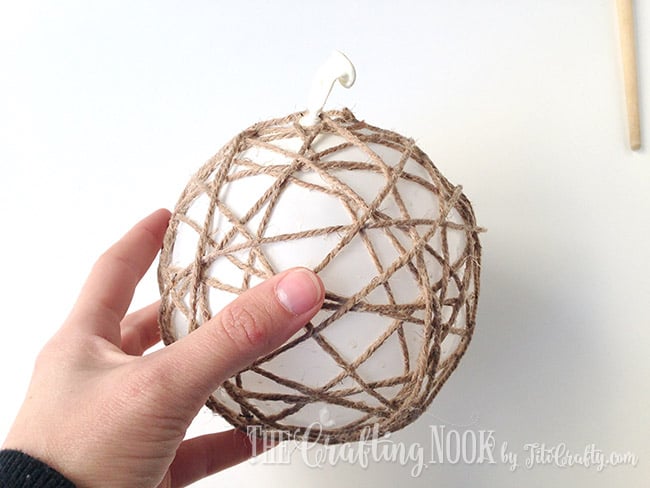
Once the balloon is loose, carefully pop it with a needle or pin.
Then pull the deflated balloon, or any remaining pieces, out through one of the larger openings in the twine ball.
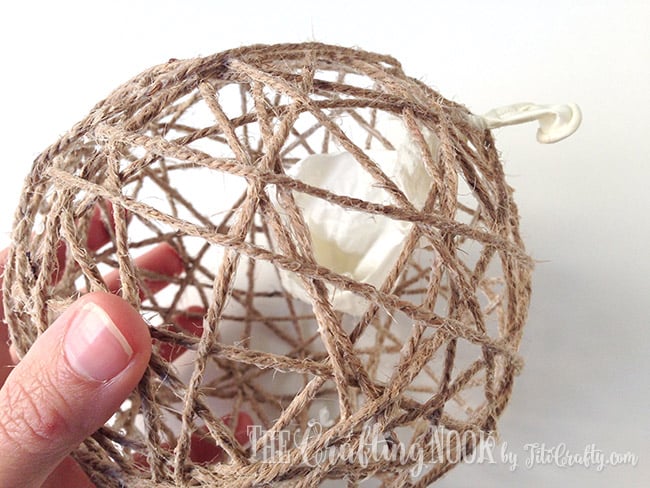
And there you have it!
A beautiful, hollow twine ball that holds its shape without anything inside.
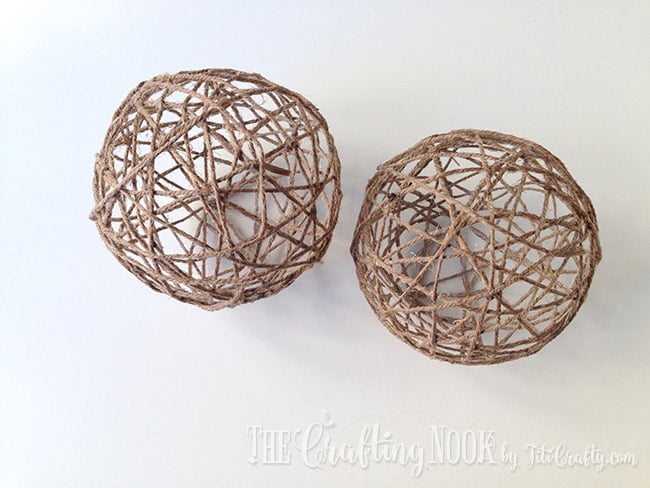

I love how they look at this stage already, but I wanted to add a few more details to make them look extra special on my tree.
Step 6. Add the Bells and Make a Hanging Loop
For the hangers, I used more twine and two small Christmas bells for each ornament.
Cut a length of twine long enough to create a hanging loop and allow the bells to dangle inside the ball.
Tie one bell to each end of the twine. I mixed gold and silver bells because I liked the little contrast.

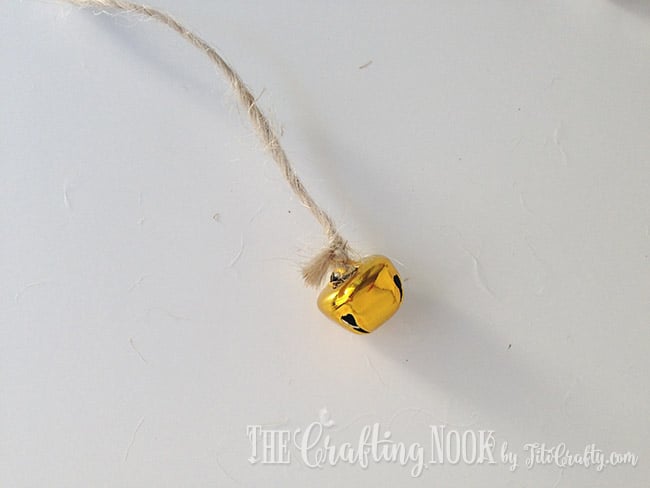
Fold the twine so one bell hangs slightly lower than the other.
This way, both bells are visible inside the ornament instead of sitting at exactly the same height.

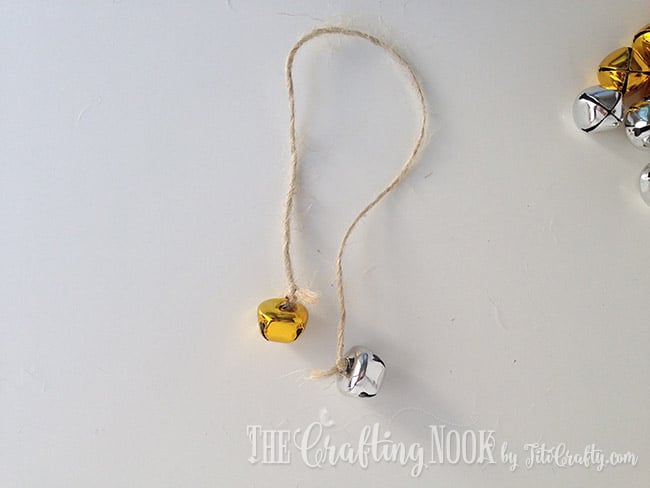
Carefully insert both bells through one of the larger openings in the twine ball.
Adjust the length until the bells hang where you want them.
Then pull the folded part of the twine through a nearby strand at the top of the ball, form a loop, and tie a knot to secure it.
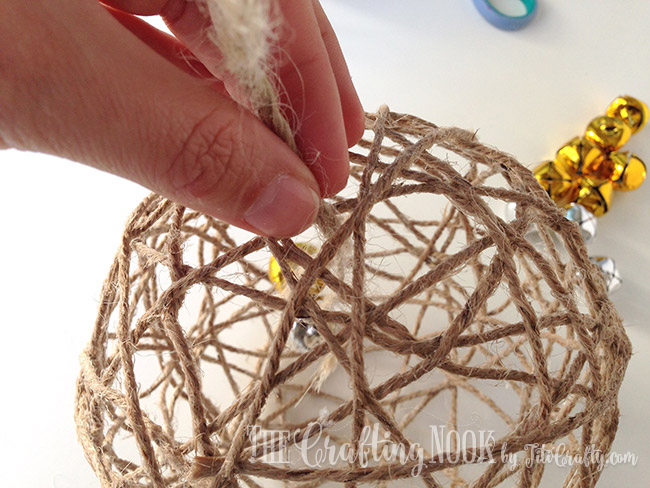
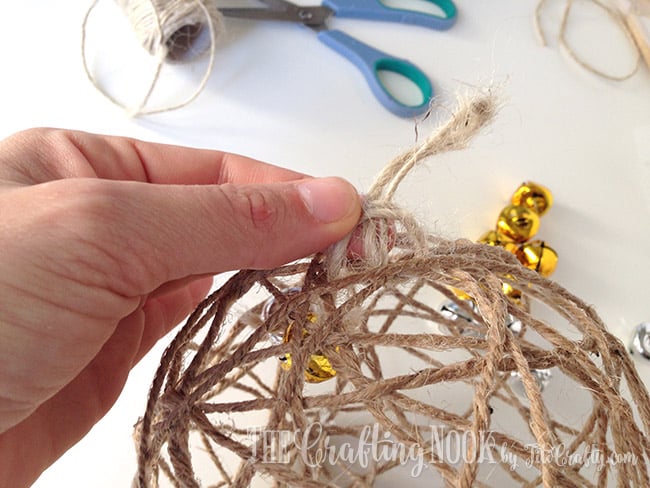
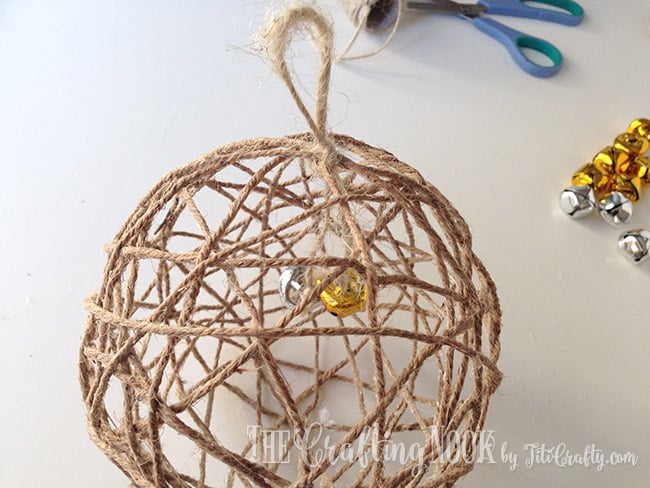
Now your ornament has its own little hanger, and the bells hang inside the ball.
Isn’t that cute?
Step 7. Finish with a Pretty Ribbon Bow
To finish the ornaments, I made small bows using plaid Christmas ribbon.
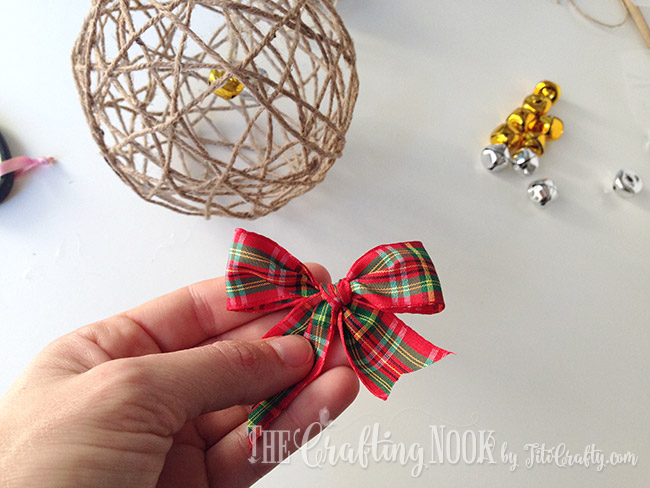
You can make them as big or small as you like. I went with smaller bows because I didn’t want to hide too much of the twine.
Using a hot glue gun, attach the bow right at the base of the hanging loop, covering the knot.
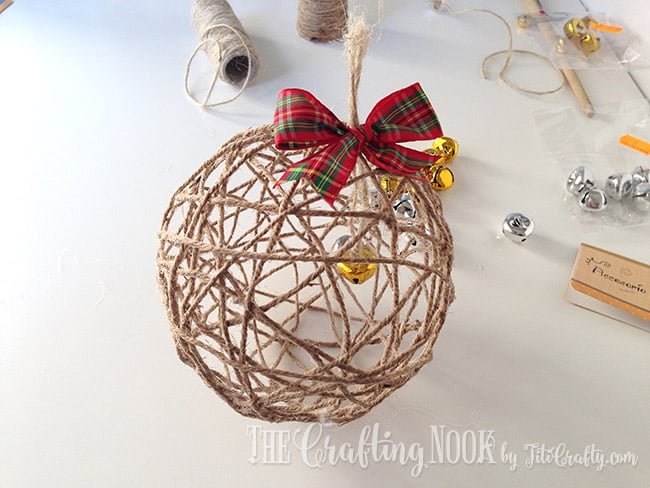
And that’s it!
If you want an even more rustic look, you can use burlap ribbon instead of plaid. I think that would be beautiful too.
Just be careful when using the hot glue gun, especially if you’re making these with children.
Step 8. Hang Your Handmade Christmas Ornaments
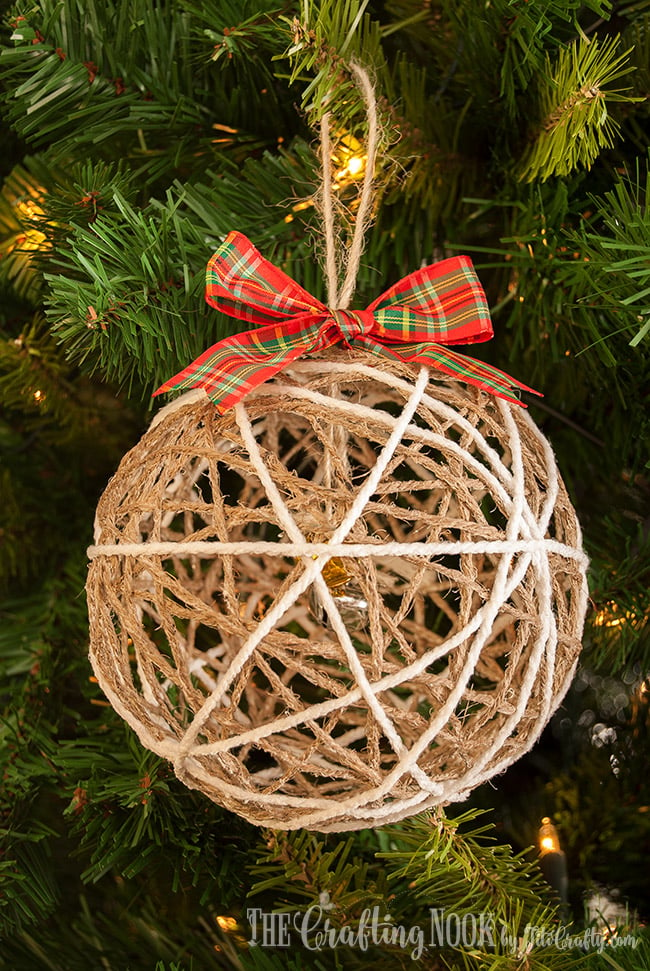
Your DIY twine ball Christmas ornaments are ready for the tree!

I absolutely love how mine turned out.
The natural jute gives them that rustic look I wanted, while the white yarn, tiny bells, and plaid bows add just enough detail to make them feel special.
You can make them in different sizes, change the ribbon colors to match your Christmas decorations, or leave them plain if you prefer something simpler.
I made eight for my tree, but honestly, I could have kept going.
Crafting Tips
After making a whole batch of these, there are a few things I’d recommend to make the process easier.
- Start with a round balloon. Inflating it a little more and then releasing some air helped me get a better shape.
- Don’t make the glue mixture too thick. The 2:1 glue-to-water ratio worked well for me and made the twine easier to handle.
- Remove excess glue before wrapping. The twine should be coated, but it doesn’t need to be dripping wet.
- Keep the twine snug. Loose strands can slide around while you’re wrapping, which makes things more difficult.
- Don’t cover the balloon completely. Leave open spaces between the strings. That’s part of what makes these ornaments so pretty.
- Give them enough drying time. I left mine overnight. Make sure they’re completely dry and stiff before popping the balloons.
- Loosen the balloon first. Gently separating it from the twine before popping helps avoid pulling on the finished ornament.
And one more thing: if you’re making several ornaments, prepare everything before you start wrapping. Having your balloons, cut twine, and glue mixture ready makes the whole process much easier.
Ornament Variations
One of the things I like about these ornaments is how easy it is to change their appearance without changing the basic technique.
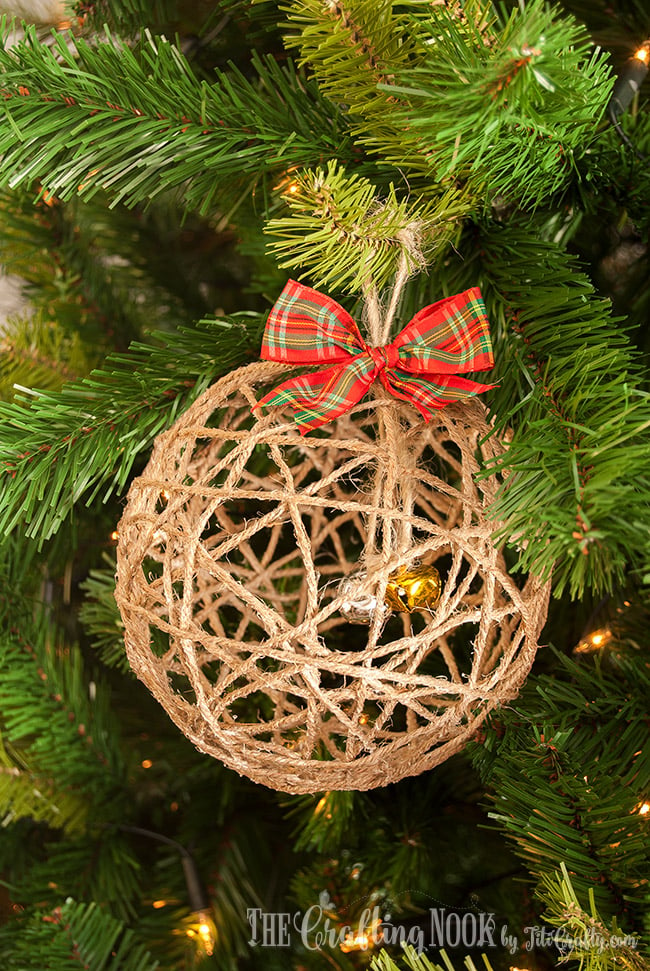
Natural jute twine: This is what I used for most of mine. I love the rustic texture and natural brown color.
Twine and white yarn: Adding a few loops of white yarn gives the ornaments a softer look and a little contrast. These were some of my favorites!
White cotton twine: If natural jute isn’t your style, you can try white cotton twine for a lighter ornament. Just make sure it absorbs the glue well.
A little glitter: For more sparkle, you can add glitter to the decoration. This is a fun option if you want something a little more festive.
You can also change the ribbon to match your tree. Plaid, burlap, or a simple ribbon in your favorite Christmas color would all look lovely.
How to Store Your Handmade Twine Ornaments
Because these ornaments are made with hardened twine, I recommend storing them carefully so they don’t get crushed between heavier Christmas decorations.
I would place them in a sturdy ornament box with a little space around each one.
Keep them somewhere dry, away from moisture, since they’re made with water-based glue and natural fibers.
If you’re planning to make several for Christmas, you can also prepare them ahead of time. Just make sure they’re completely dry before storing or decorating them.
Frequently Asked Questions
Yes! You can try yarn, cotton string, or other absorbent fibers. I used white yarn over the jute on some of my ornaments, and I loved the result. Keep in mind that different materials may absorb glue differently, so the finished stiffness can vary.
I used white wood glue diluted with water, and it worked really well for my ornaments. Mod Podge and regular white craft glue are other options. I haven’t personally tested every type of glue, so I would try one ornament first if you’re using something different.
The glue is what makes the twine harden. By soaking it in diluted glue and leaving it to dry completely around the balloon, the strands become stiff enough to keep their round shape after the balloon is removed.
Kids can definitely help with wrapping the twine around the balloons, and I think they’d enjoy the messy glue part too! Younger children will need help, especially when it’s time to pop the balloons and use the hot glue gun. Be sure to keep popped balloon pieces away from small children.
More Christmas Projects to Try
If you like this twine ball Christmas ornament tutorial, you might also love these other Christmas Project ideas too:
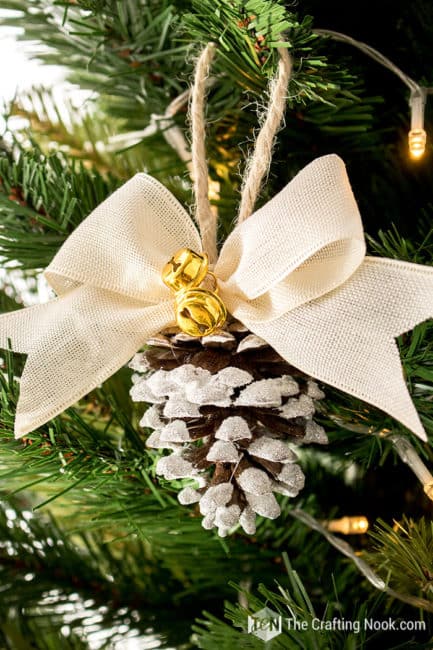


I’m so happy I finally made these ornaments after admiring Lauren’s original project for so long. I love how a few simple materials can become something so pretty for the Christmas tree.
And thank you, Lauren, for inspiring this project and always giving my creativity a little push!
I hope you enjoy making your own twine ball ornaments. Have fun experimenting with different strings, ribbons, and decorations to make them yours.
If you make some, I’d love to see them! Tag me on Instagram or leave me a comment and star rating below, and tell me how they turned out.
✂️ Tutorial
DIY Twine Ball Christmas Ornaments

Tools
- Glass bowl
- scissors
- Hot glue gun and glue sticks
- Needle or pin
- Clothespins or ornament hooks
Supplies
- Jute twine approximately 11 yards per ornament
- White yarn optional, approximately 3.2 yards per ornament
- White glue
- Water
- Small balloons
- Small Christmas bells
- Plaid ribbon
- Glitter optional
Instructions
- Inflate small balloons to your desired ornament size. Release a little air if necessary to make them rounder.
- Combine 2 parts white glue with 1 part water in a glass bowl.
- Dip approximately 11 yards of twine into the glue mixture. Slide your fingers along it to remove excess glue.
- Wrap the soaked twine snugly around each balloon in random directions, leaving open spaces. Tuck the loose end underneath a nearby strand.
- Optional, Wrap approximately 3.2 yards of white yarn over the twine, tucking both ends underneath the strands.
- Hang the wrapped balloons over a protected surface and leave them to dry overnight until completely stiff.
- Carefully loosen the balloon from the dried twine, pop it with a needle, and remove the pieces through an opening.
- Tie a bell to each end of a piece of twine. Fold it so the bells hang at different heights, insert them inside the ornament, and secure the folded end as a hanging loop.
- Make a small plaid ribbon bow and hot glue it to the base of the hanger.
- Your handmade twine ball ornaments are ready for the Christmas tree.
Notes
- Allow the twine to dry completely before removing the balloon.
- Keep the twine snug while wrapping so it doesn’t slip.
- Use a different absorbent string or ribbon color to customize the ornaments.
- Adult supervision is needed when using the needle and hot glue gun.
I hope you enjoyed this beautiful Christmas decoration tutorial and that you create many of these adding your personal touch to inspire others!
Share and PIN ME!

Til’ next time…

FREE WORKBOOK
Keeping your Sweet Home Organized
Learn how to create intentional habits and simple routines to Keep Your Home Organized. Plus freebies, printables, exclusive content, and tips.
Disclaimer: By clicking on the “Yes” button above you are giving me your consent to collect and use your information according to the law and My Policy Privacy. Zero Spam I promise!