

Elegant Black, White and Gold Christmas Tree Decor

This post may contain affiliate links. Please read our Disclosure Policy.
I’ve always loved rustic Christmas trees, but this year I felt like doing something completely different. After so many years of decorating with rustic and Nordic-inspired themes, I realized I didn’t have a single truly elegant Christmas tree in my collection. So I decided it was finally time to change that with an elegant black, white and gold Christmas tree!
So this year I went with a black, white, and gold Christmas tree, and oh my goodness, I’m completely in love with how it turned out!
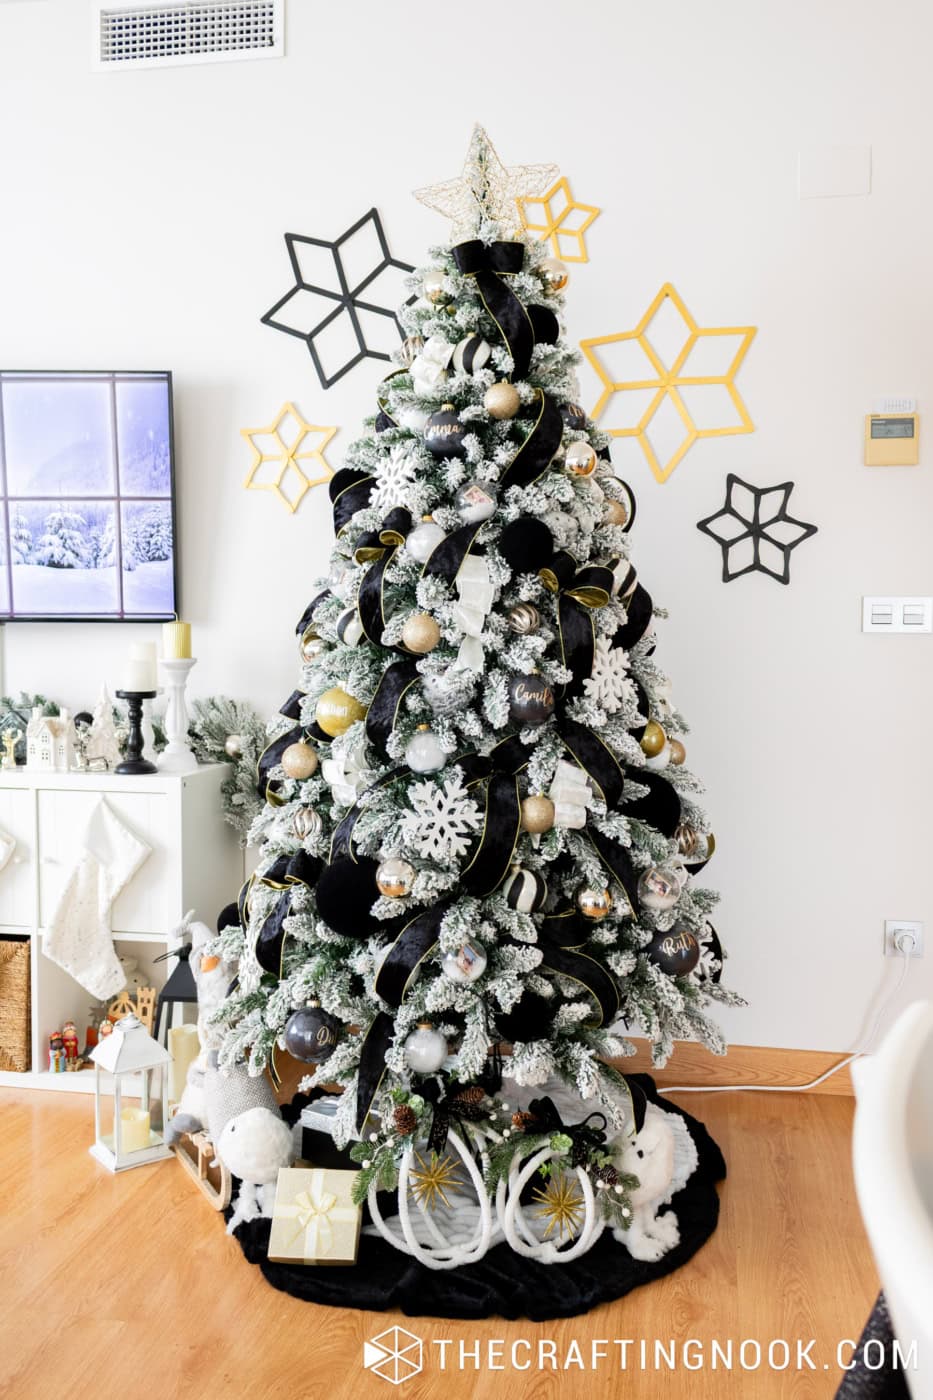
The funny thing is, I usually have such a hard time finding the right ornaments and decorations for the theme I have in mind. I know exactly what I want, but finding everything is another story. This time, though, everything came together almost effortlessly. I found the prettiest ornaments, gorgeous velvet ribbons, and even my husband got involved in choosing decorations and sharing ideas.
I was so in the groove with this tree! I enjoyed every minute of putting it together, and seeing the finished result made me love it even more.
So come along and let me show you all the little details!
Table of Contents
My First Elegant Black, White and Gold Christmas Tree
I have to admit that stepping away from my usual rustic Christmas style felt a little strange at first. I love rustic decorations, natural textures, and all those handmade touches I’ve collected over the years. They’ve been part of our Christmases for so long!
But I’ve always admired elegant Christmas trees with beautiful ribbons, rich textures, and carefully chosen ornaments. I had this picture in my head of a snowy tree filled with black velvet, soft white details, and just enough gold to make everything shine.
And this year, I finally decided to make it happen.
What surprised me the most was how easily I found everything. Usually, I’ll visit several stores and spend hours searching online for that one specific ornament or ribbon. Sometimes I end up making things myself because I simply can’t find what I want.
This time, the decorations seemed to be waiting for me!
My husband even joined the fun, helping me look for ornaments and giving his opinion on different pieces. We had such a nice time putting the whole idea together, and I think that made me enjoy this tree even more.
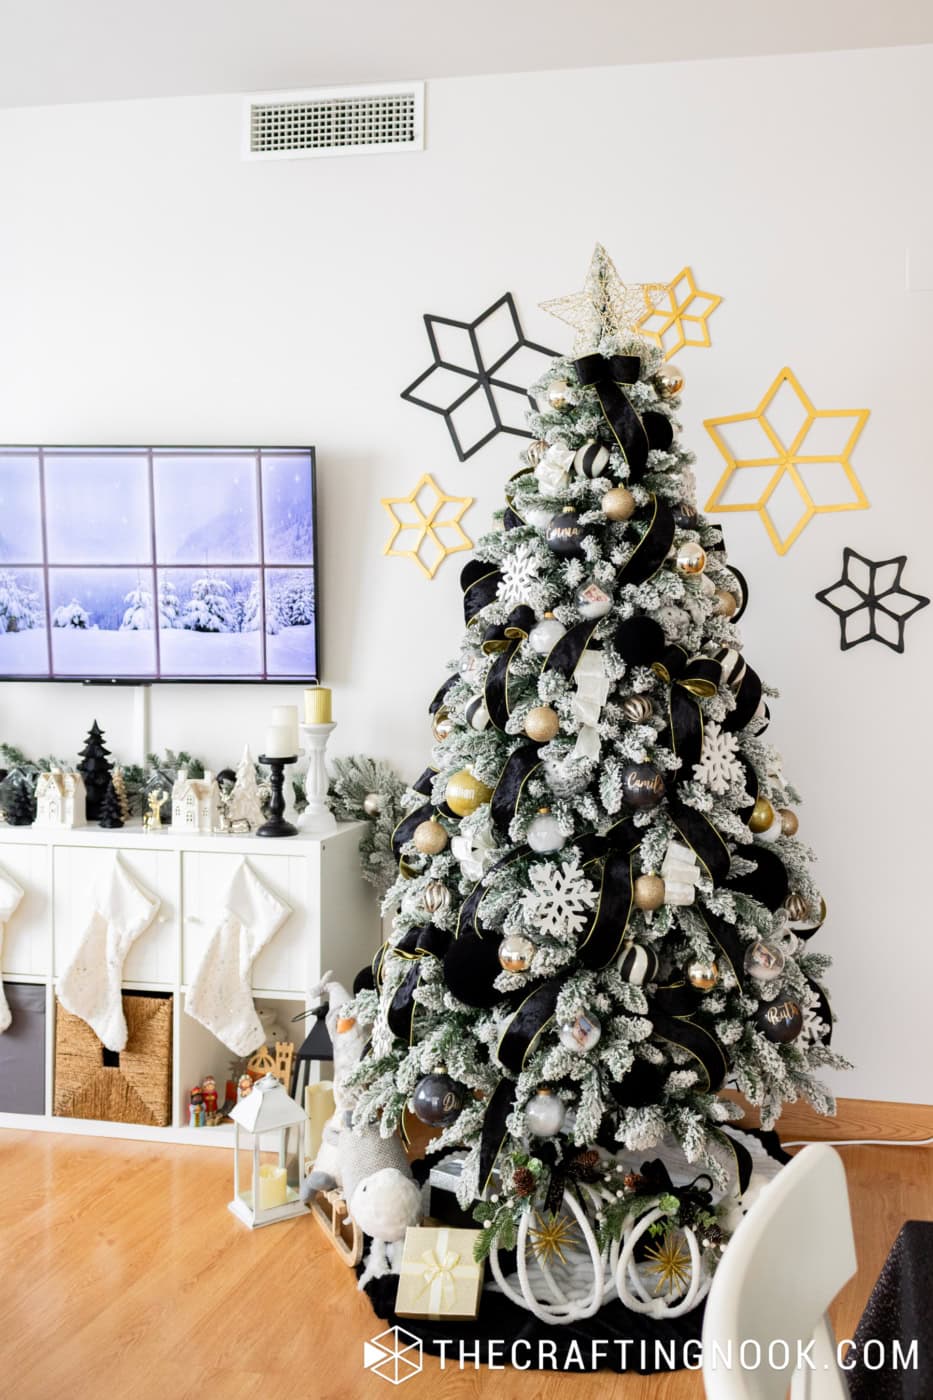
A New Flocked Christmas Tree
Before I could start decorating, there was one important thing I wanted to change: the tree itself.
My previous Christmas tree was gorgeous, and I really loved it. But it had a more Nordic look, with a different branch shape and a lighter, more open appearance.
For this particular theme, I wanted something much fuller. A fluffy, bushy Christmas tree with lots of snowy branches that could hold all those gorgeous ribbons and ornaments.
So I sold my previous tree and bought a brand-new flocked one.
And I couldn’t be happier with that decision!
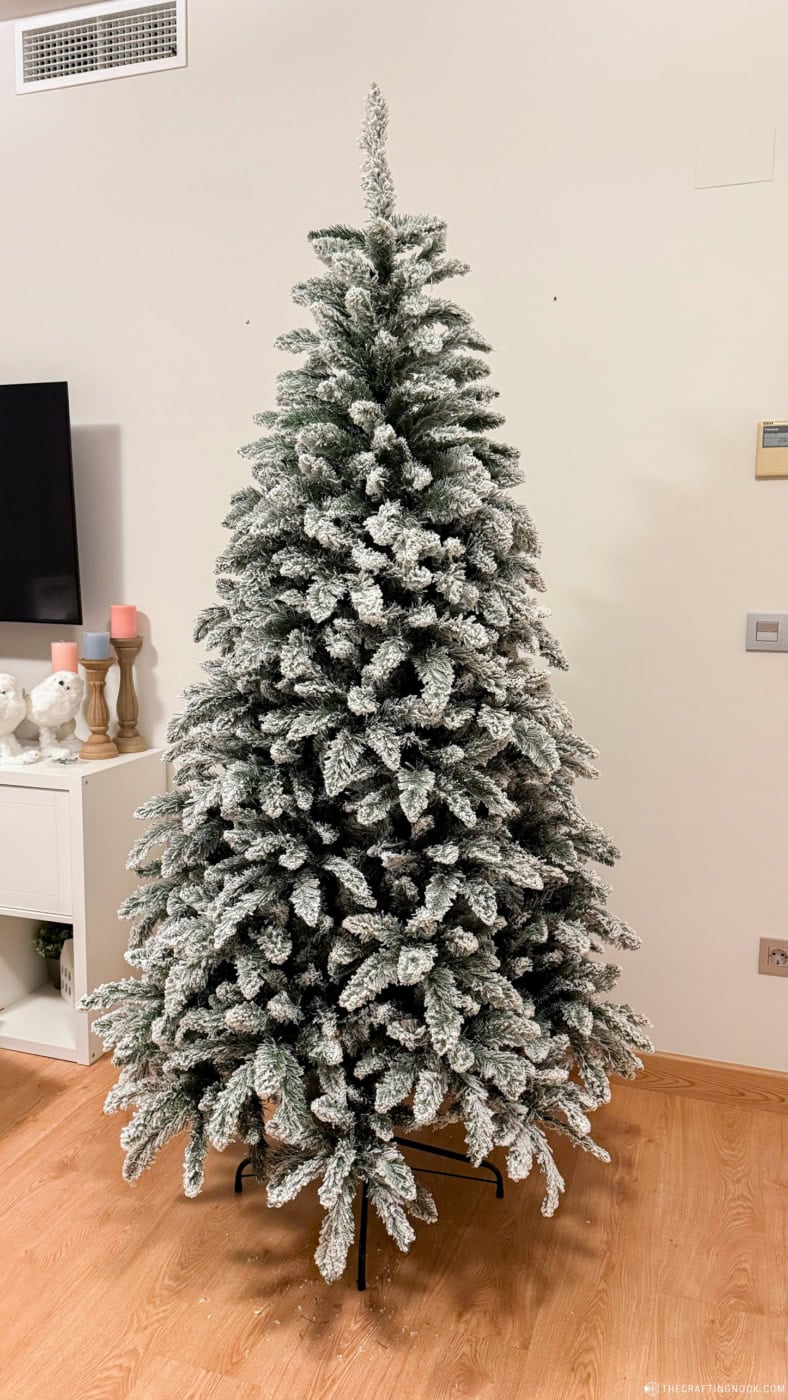
Just look at those branches!
The flocking is beautiful, and I love how full the tree looks even without a single ornament. It has that snowy appearance I love so much, but with enough volume to create the elegant look I was imagining.
The white branches also make the black decorations stand out beautifully. I knew the contrast would be pretty, but seeing everything together was even better than I expected.
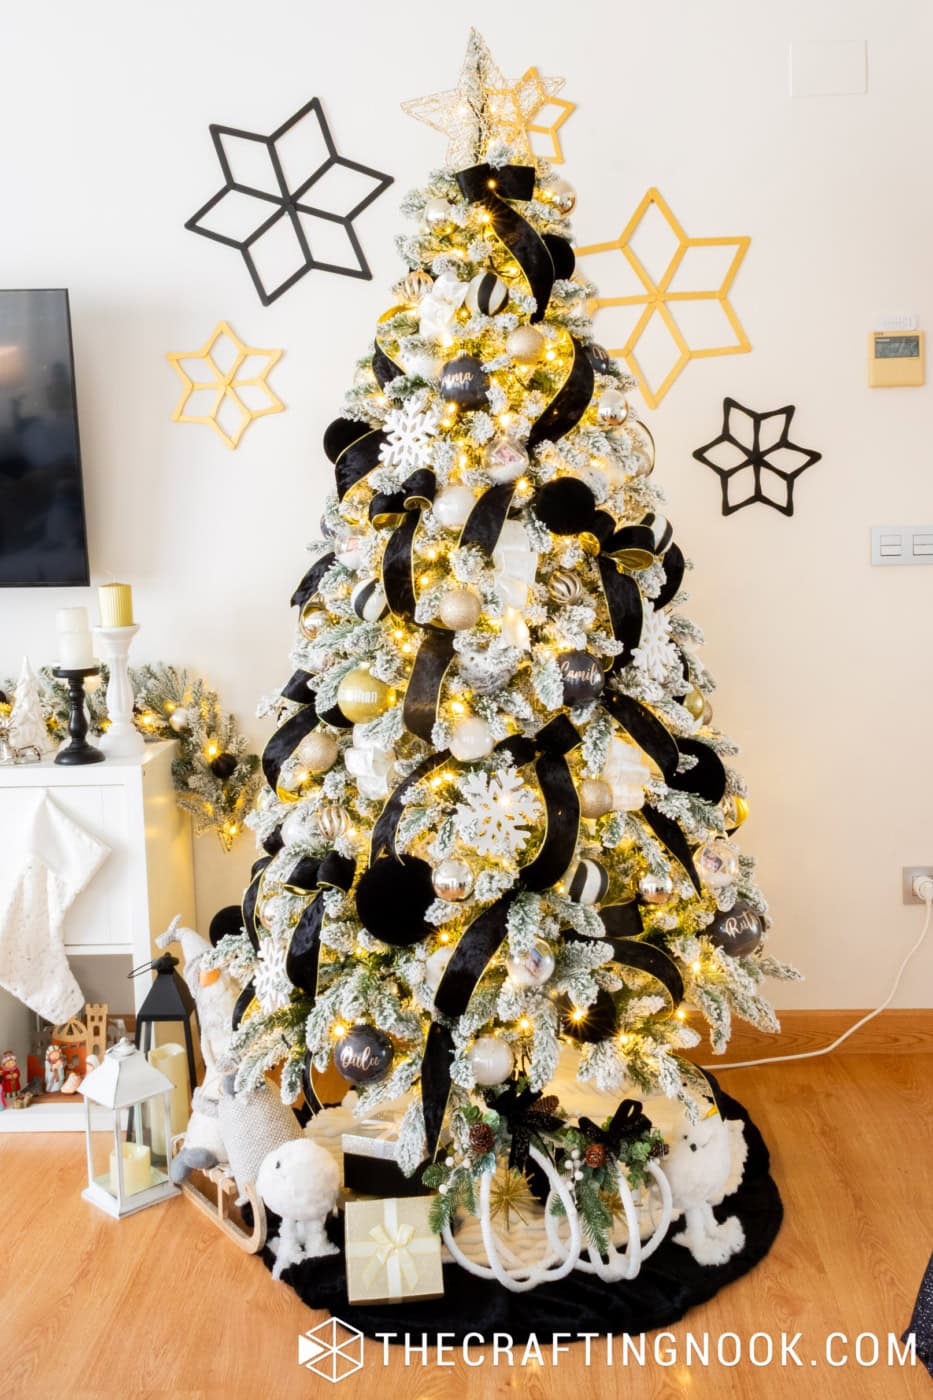
And once the warm Christmas lights were on, I was completely sold.
Decorating My Black, White and Gold Christmas Tree
I wanted this tree to have a lot of texture, so I mixed velvet ribbons, shiny and glittery ornaments, soft white details, and some of my favorite handmade Christmas decorations.
I also wanted the black to be the main accent, with white keeping everything light and gold adding warmth.
Here’s how all the decorations came together.
The Black and White Velvet Ribbons
Can we talk about these ribbons for a moment?
I think they’re one of my favorite parts of the entire tree!
I knew from the beginning that I wanted both black and white velvet ribbons. There was something about the softness and richness of velvet that seemed just right for the elegant Christmas tree I had in mind.
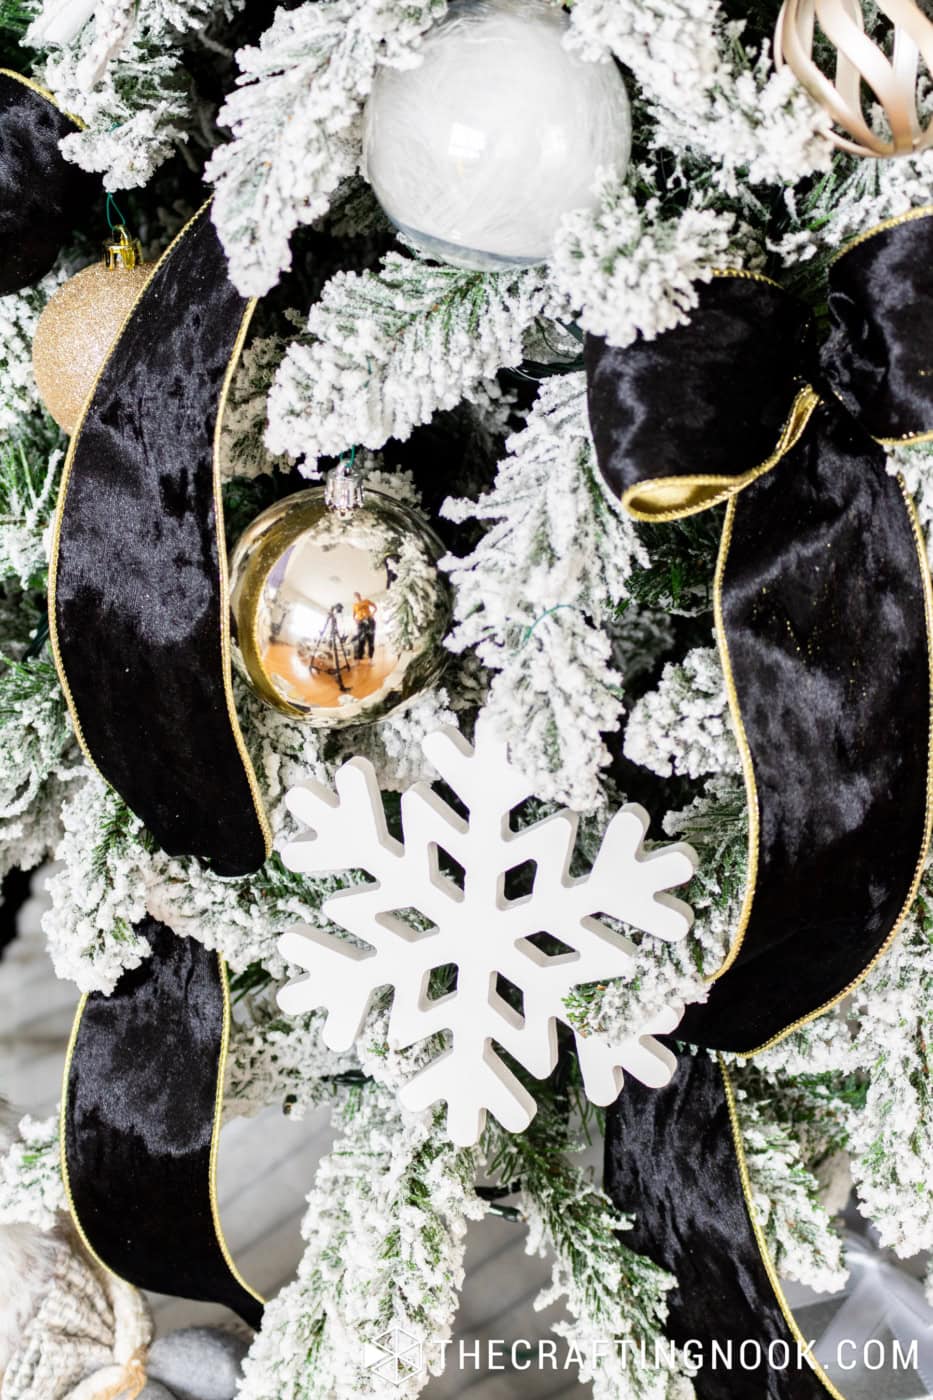
I found the black velvet ribbon with beautiful gold edges on Amazon, and it turned out even prettier than I expected.
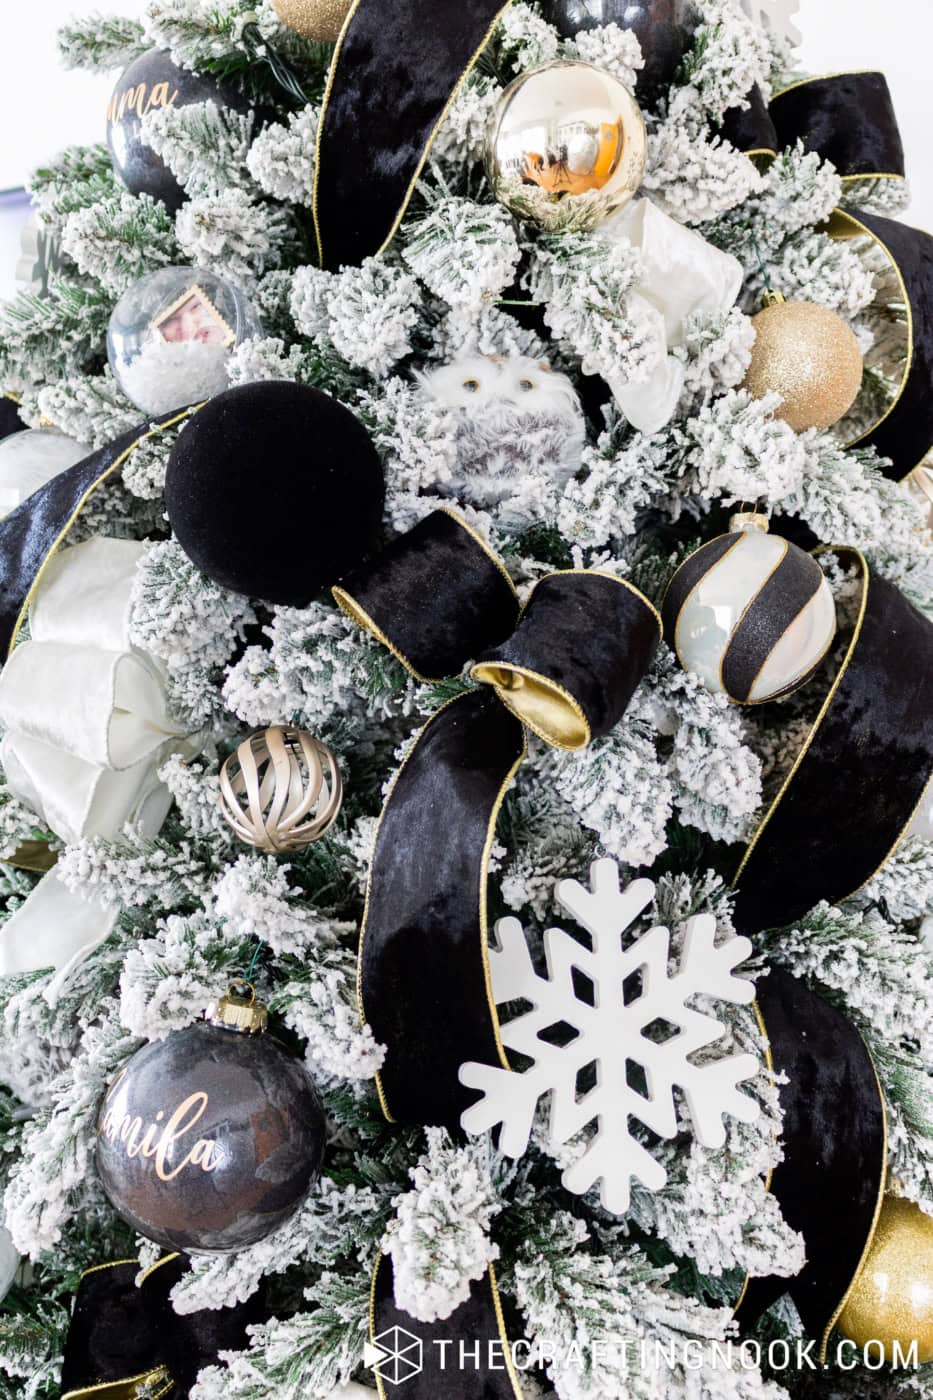
I love how the gold edging outlines every fold of the ribbon. It’s a small detail, but it makes such a difference, especially against the snowy branches.
I used the black ribbon throughout the tree, creating large flowing loops that give it movement and volume.
Then I added the white velvet ribbon for contrast. It blends softly with the flocked branches but still adds another layer of texture.
The combination of the two is just gorgeous!
One thing I love doing when decorating with ribbon is tucking sections between the branches instead of simply wrapping the ribbon all the way around the tree.
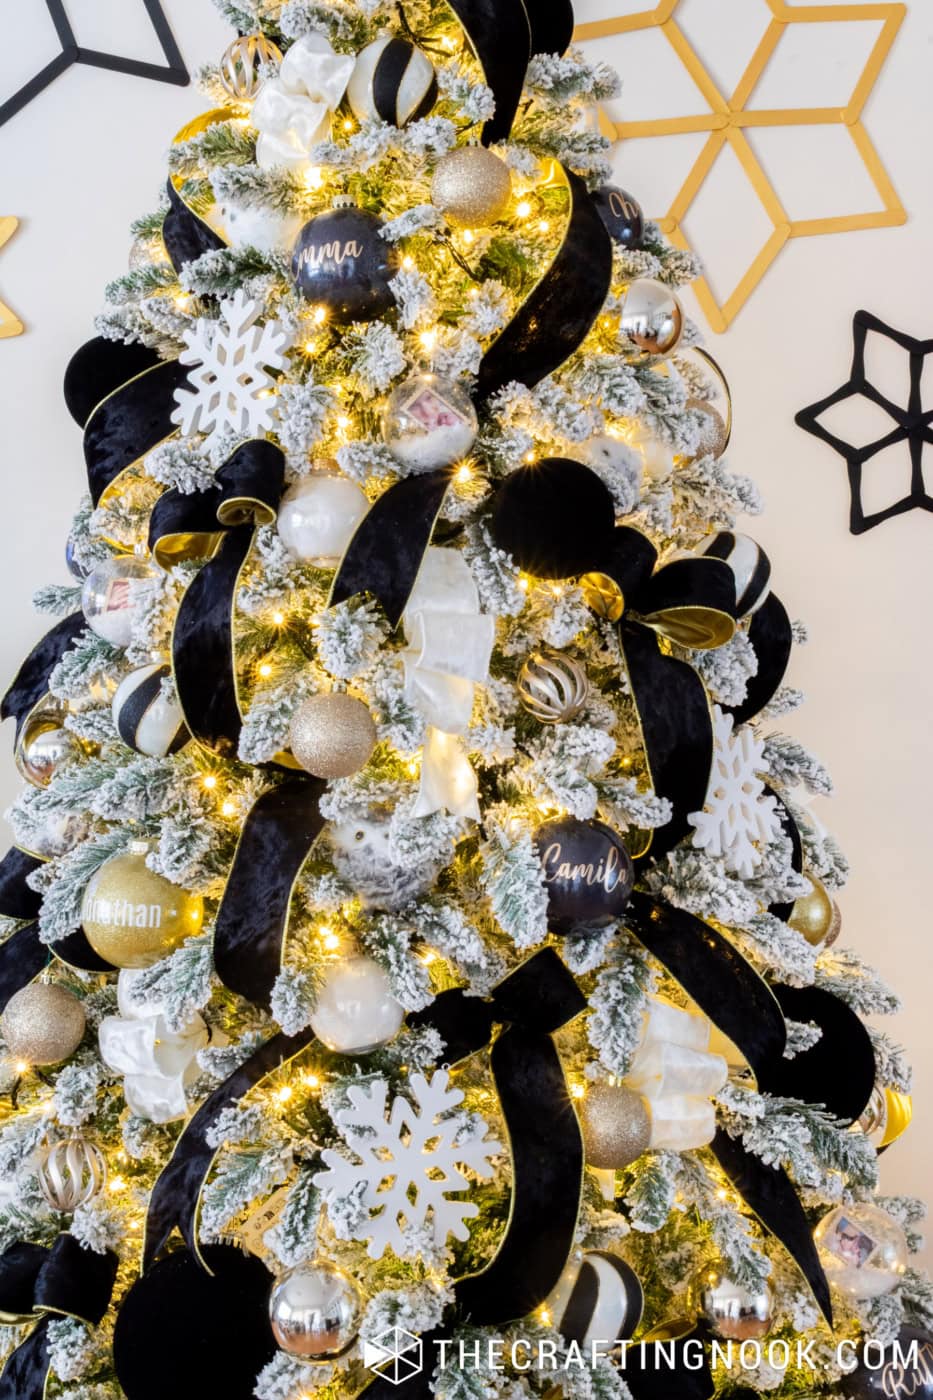
It creates those lovely loops and folds that make the ribbon look fuller and more natural. And you don’t need to cover the entire tree with ribbon to get a beautiful result.
I also love how the black velvet makes the gold ornaments pop!
Mixing Black, White and Gold Christmas Ornaments
Once the ribbons were in place, it was time for my favorite part: the ornaments!
And oh my goodness, I found so many pretty ones this year!
I wanted a mix of textures, shapes, and finishes to give the tree that elegant look I had in mind. And for once, I didn’t have to spend forever looking for the right decorations. Everything seemed to fit perfectly with my vision!
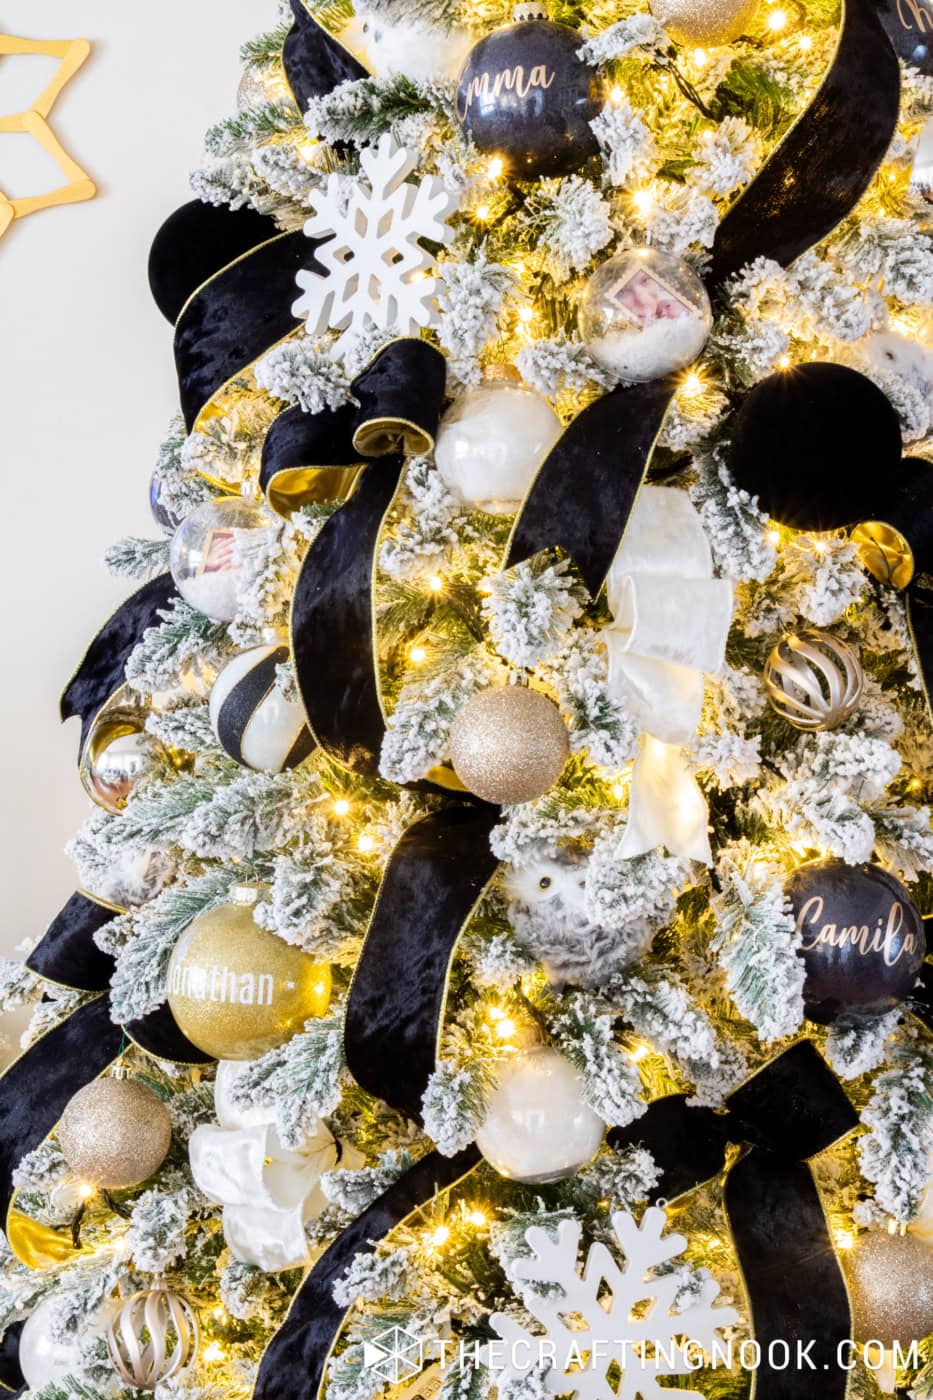
I started with the gold Christmas ornaments, choosing different shapes, sizes, and finishes. Some are shiny and reflective, others are covered in glitter, and a few have beautiful textured details. I love how they catch the warm Christmas lights and add a little sparkle throughout the tree.
Then came the black velvet ornaments, which I absolutely love! They’re so soft and pretty, and the matte finish creates a beautiful contrast against the shiny gold decorations and snowy branches. They also look gorgeous next to the black velvet ribbons.
Another favorite find was the black, white, and gold swirly ornaments. These are so pretty! I love how the three colors come together in the same ornament, with those gorgeous swirling patterns. They help connect all the decorations and break up the solid-colored ornaments.
Of course, I couldn’t resist adding some white snowflakes throughout the tree. With all that beautiful flocking, I wanted to keep the snowy feeling going, and the snowflakes were just right for that.
And then there are the little furry owls!
You know how much I love owls, and these little guys were just too cute to leave behind. Their soft, fluffy feathers blend beautifully with the flocked branches and make the tree feel even snowier.
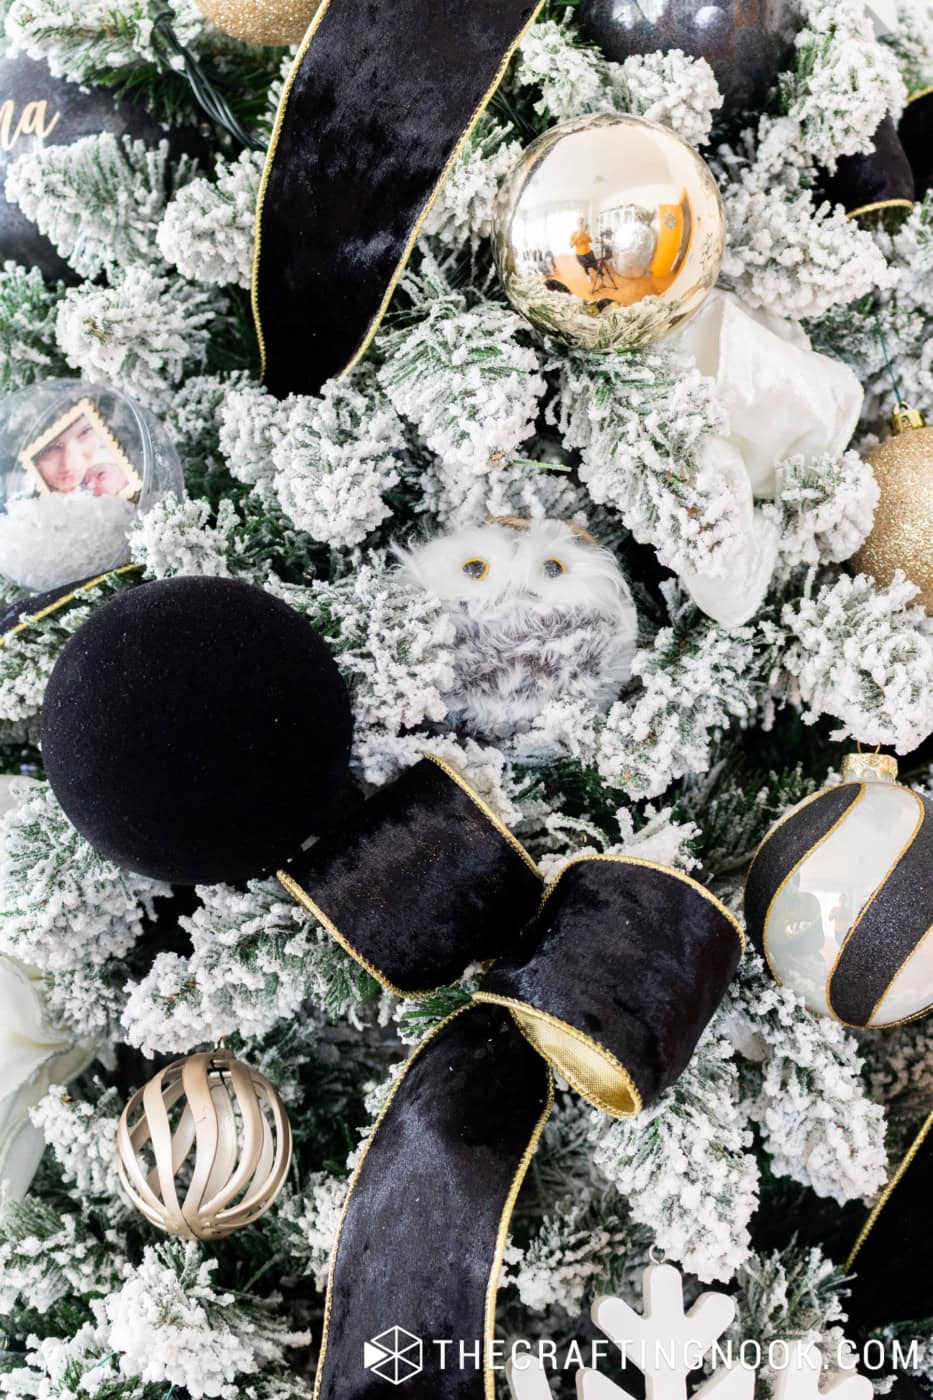
I know I was going for elegant this year, but I couldn’t resist adding a little cuteness, too! LOL!
I also mixed different ornament sizes and placed some deeper into the branches while keeping others closer to the tips. That helped give the tree more dimension and made sure the black, white, and gold details were spread throughout.
What I love most is how all these different textures work together. The velvet keeps things soft, the gold adds shine, the patterned ornaments bring the colors together, and the snowflakes and owls complement the snowy branches.
It turned out exactly how I pictured it, and I couldn’t be happier!
My Handmade Personalized Christmas Ornaments
Of course, a Christmas tree in our home wouldn’t feel complete without our personalized ornaments.
These are among my favorite decorations, and I bring them out year after year.
I made these personalized DIY glitter Christmas ornaments with our family members’ names, and I love finding ways to include them in each new color scheme.
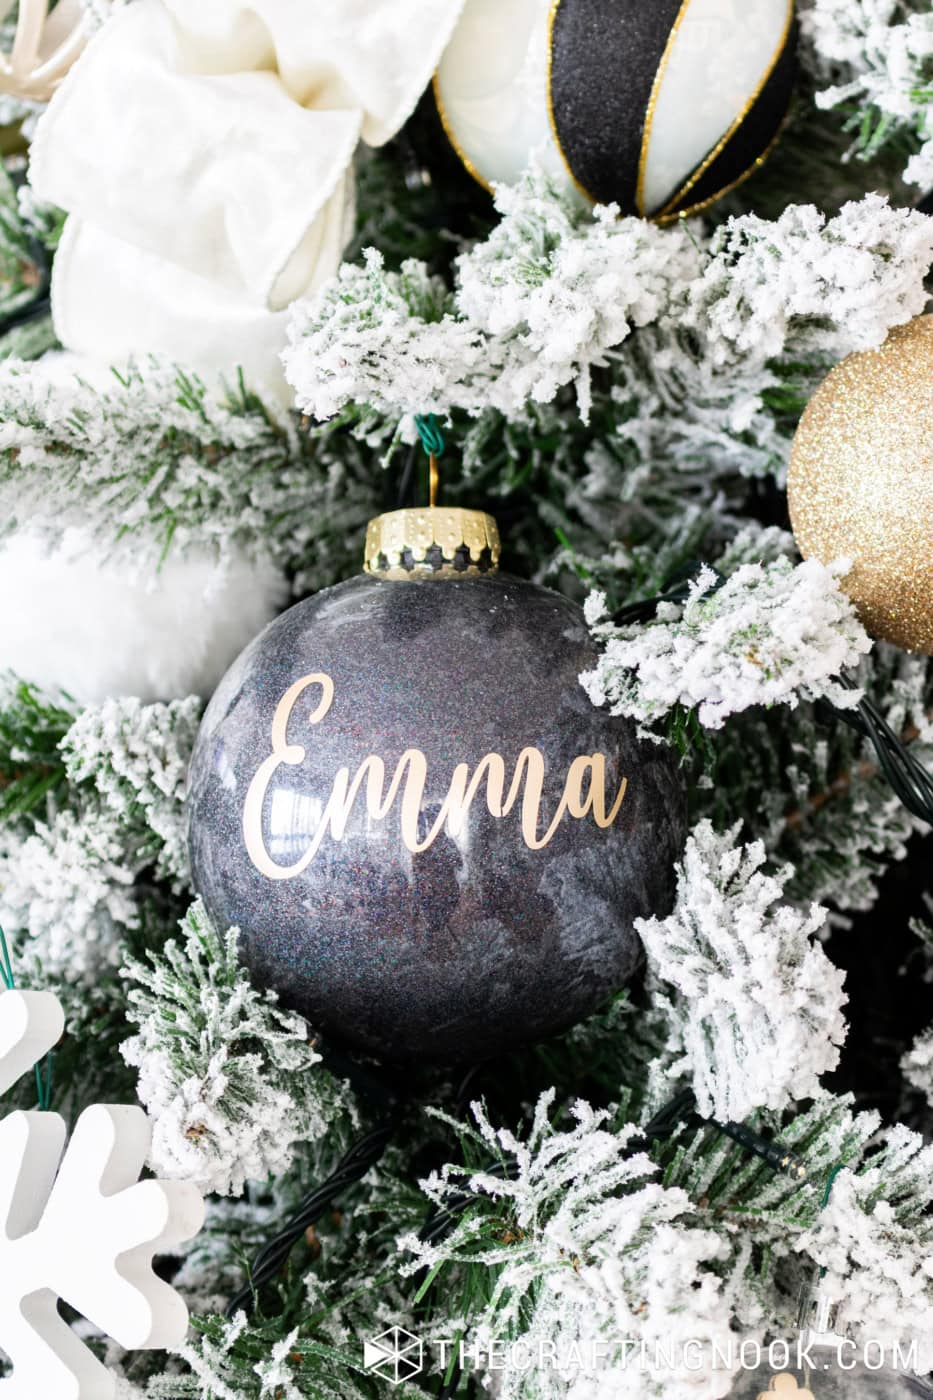
For this tree, the black and gold ornaments fit beautifully with the theme. The gold lettering looks so pretty against the dark background, and they add a little shine among the velvet and snowy branches.
I also have the gold glitter versions, which help tie everything together.
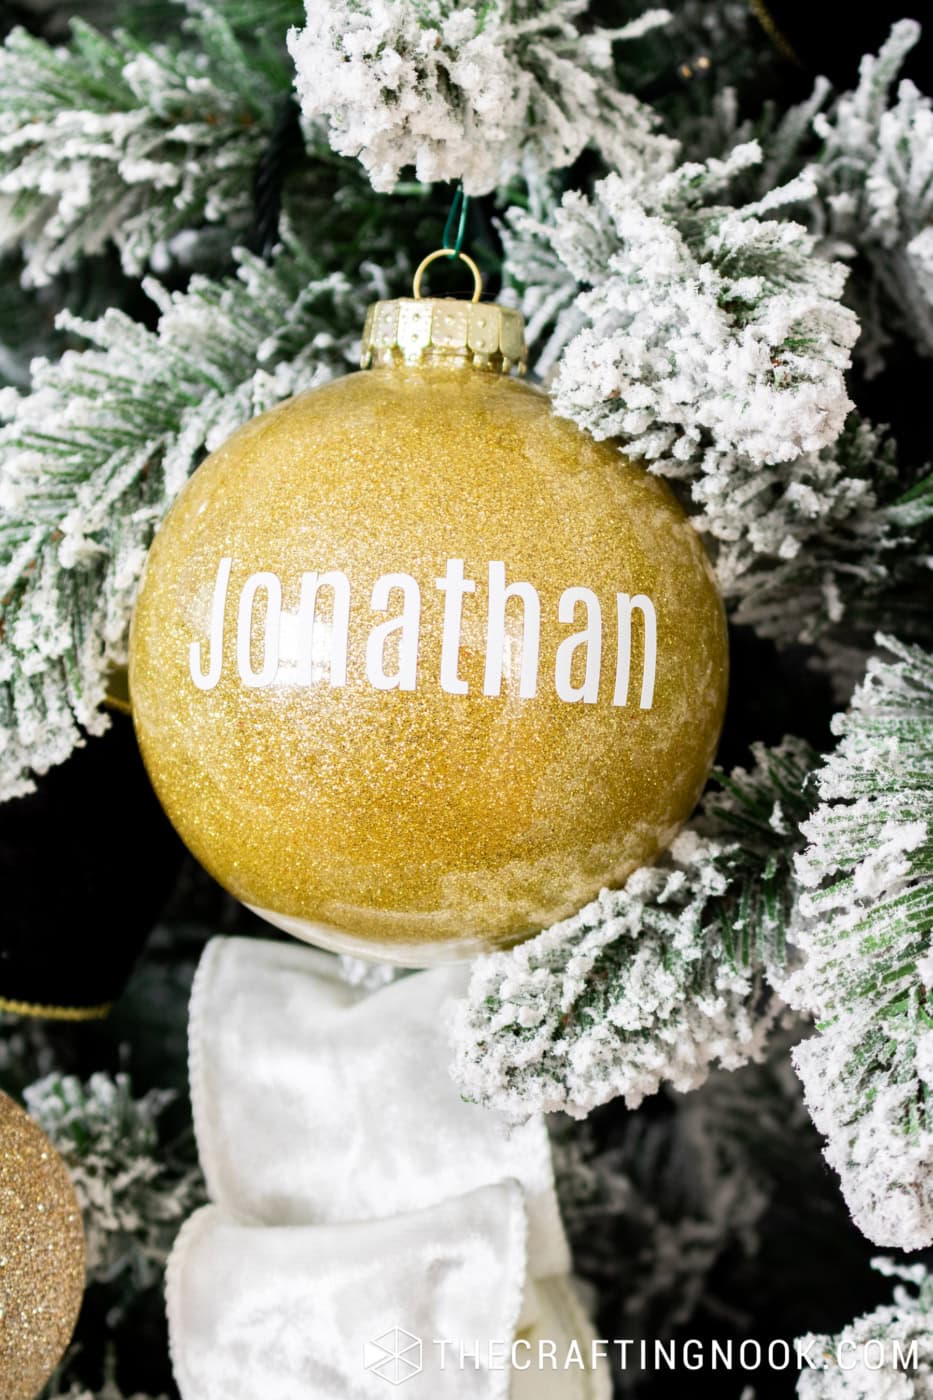
I love walking around the tree and spotting everyone’s names tucked between the branches.
It’s a little tradition that means so much to me.
And even when I completely change the colors or decorating style, these ornaments always have a place on our tree.
Our Special Memory Keepsake Snow Globe Ornaments
These are another Christmas tradition I don’t think I’ll ever get tired of.
Years ago, I made these DIY memory keepsake snow globe ornaments using clear ornaments, tiny photos, and artificial snow.
Each one holds a special moment from our lives.
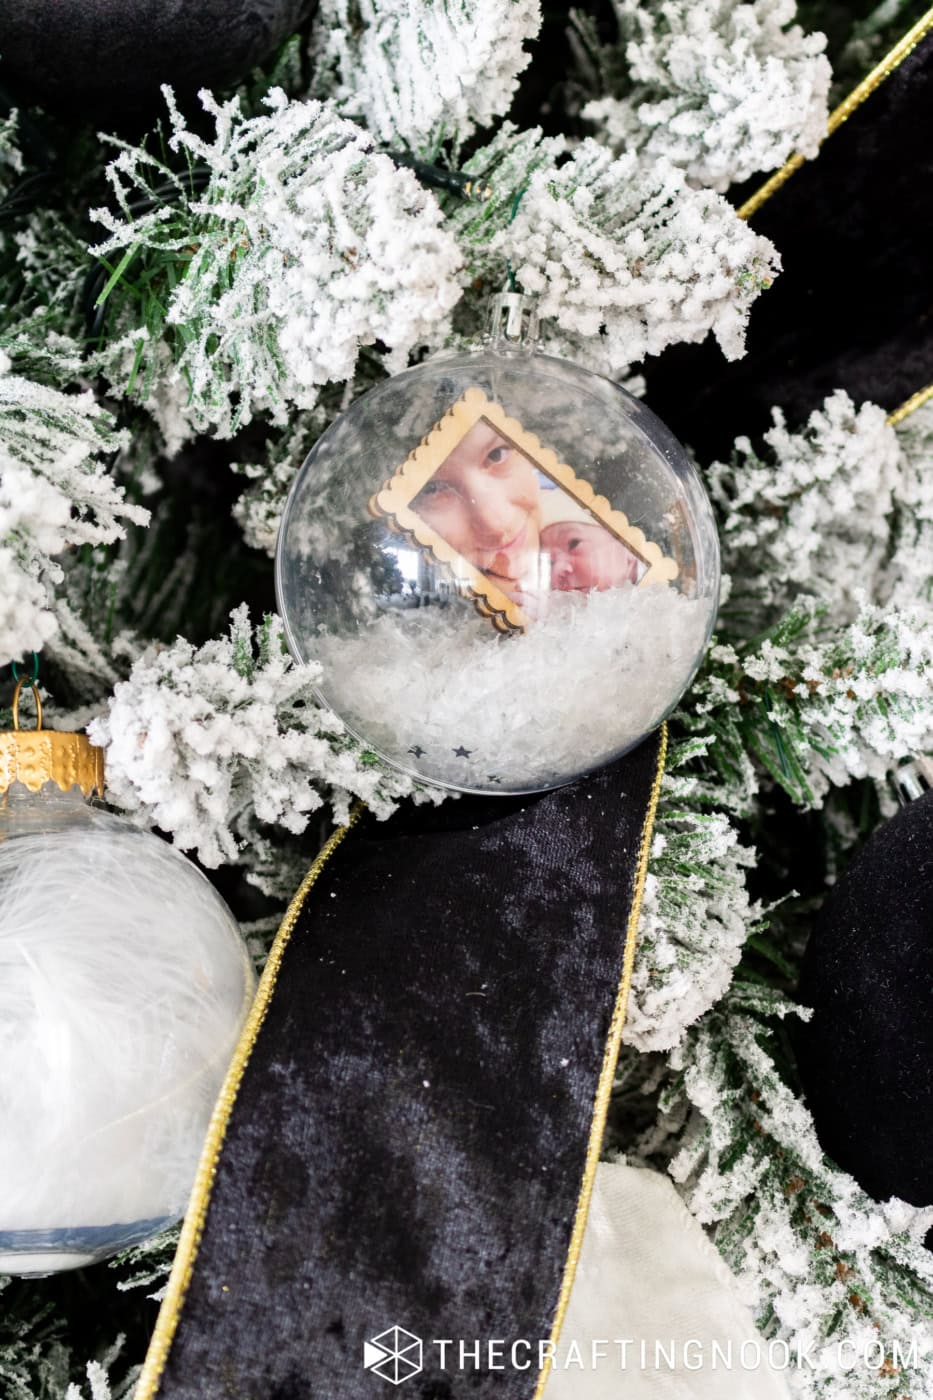
I absolutely love these ornaments because every time I hang them, I get to remember the moment captured inside.
Some decorations are beautiful just because they are pretty. These are beautiful to me because of the memories they hold.
And the best part is that they work with almost any Christmas tree theme!
The clear globes and white snow blend beautifully with the flocked branches, while the little photos add a personal detail that I wouldn’t trade for anything.
My DIY Feather-Filled Christmas Ornaments
I also brought back my handmade feather-filled ornaments!
These are so simple, but I love how delicate they look. The white feathers inside the clear ornaments give them a soft, airy appearance that works especially well with the snowy branches.
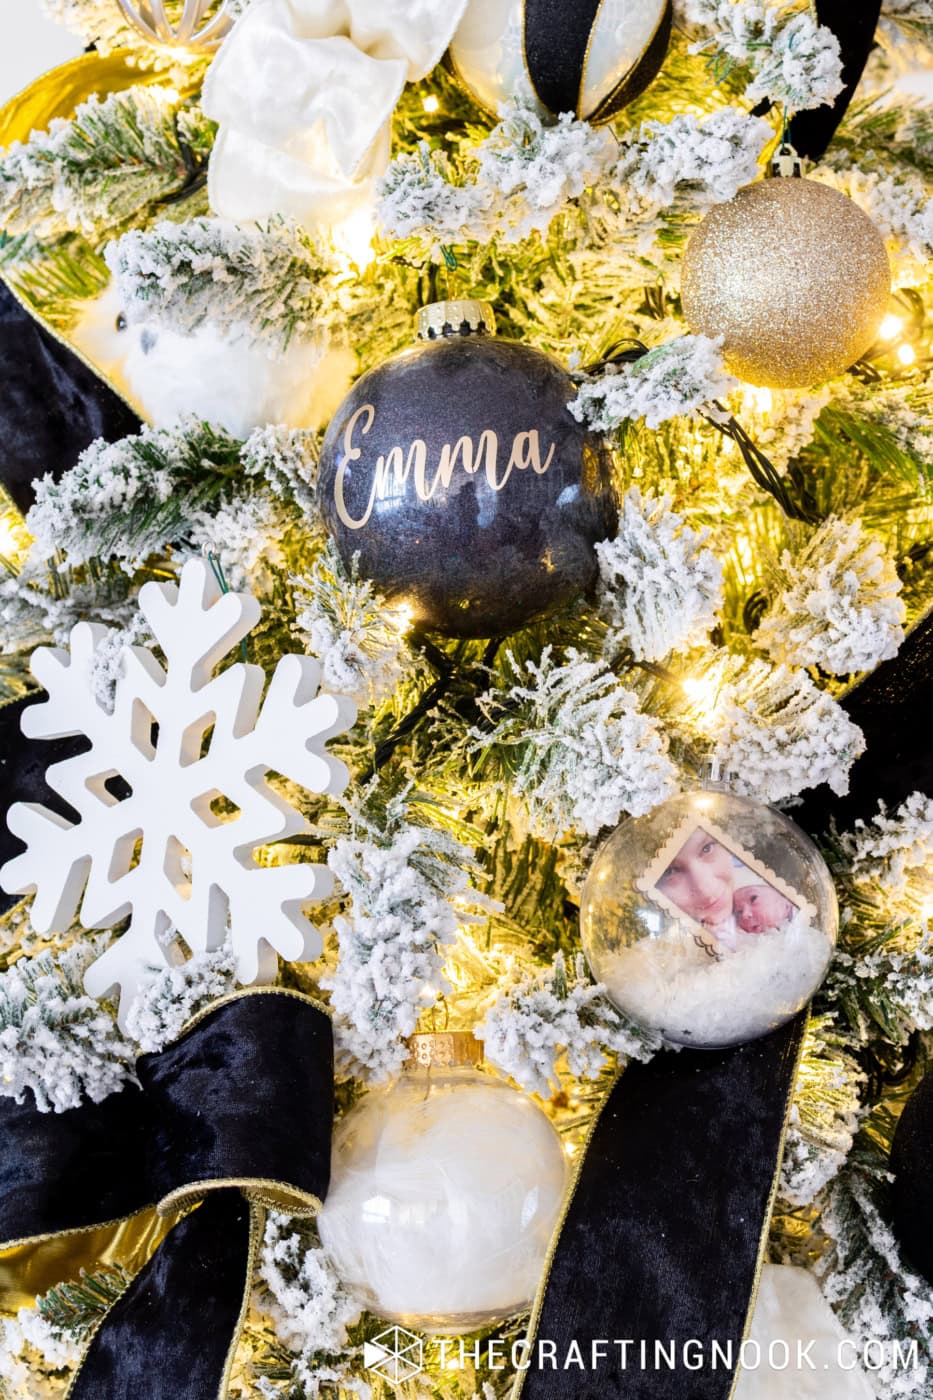
I originally made these using clear ornaments and white feathers, and they’ve been useful for several Christmas themes over the years.
You can see how I made them in my DIY Feather Christmas Ornament tutorial.
That’s something I love about handmade Christmas decorations. You can use them again and again, sometimes changing a little detail to match a new theme.
For this tree, the white feathers were already a beautiful match!
The Gold Star Tree Topper
For the top of the tree, I chose a gold star.
I wanted something that would complement the gold accents without competing with all the black velvet ribbon.
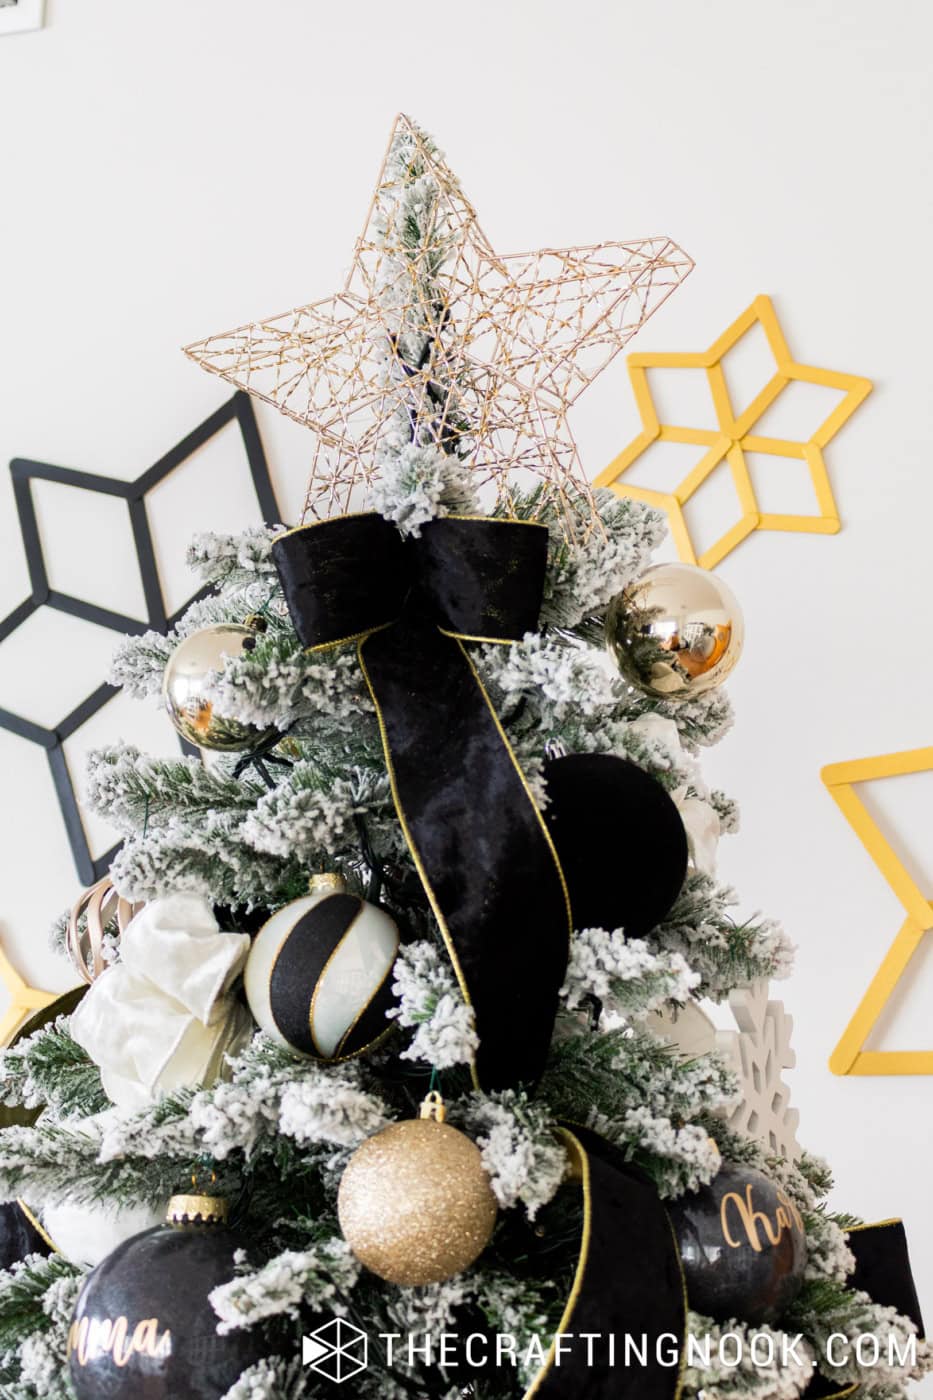
I love how delicate the open design looks against the flocked branches.
The gold also brings a little brightness to the top of the tree and connects beautifully with the other gold decorations.
Simple, pretty, and just what I had in mind!
Decorating Around the Christmas Tree
You know me. I can’t just decorate the tree and call it a day!
I love adding little details around it so the entire Christmas corner feels connected.
And this year I had a lot of fun with that, too.
Black and Gold Snowflakes on the Wall
One of the things I love most about this Christmas corner is the set of black and gold geometric snowflakes decorating the wall behind the tree.
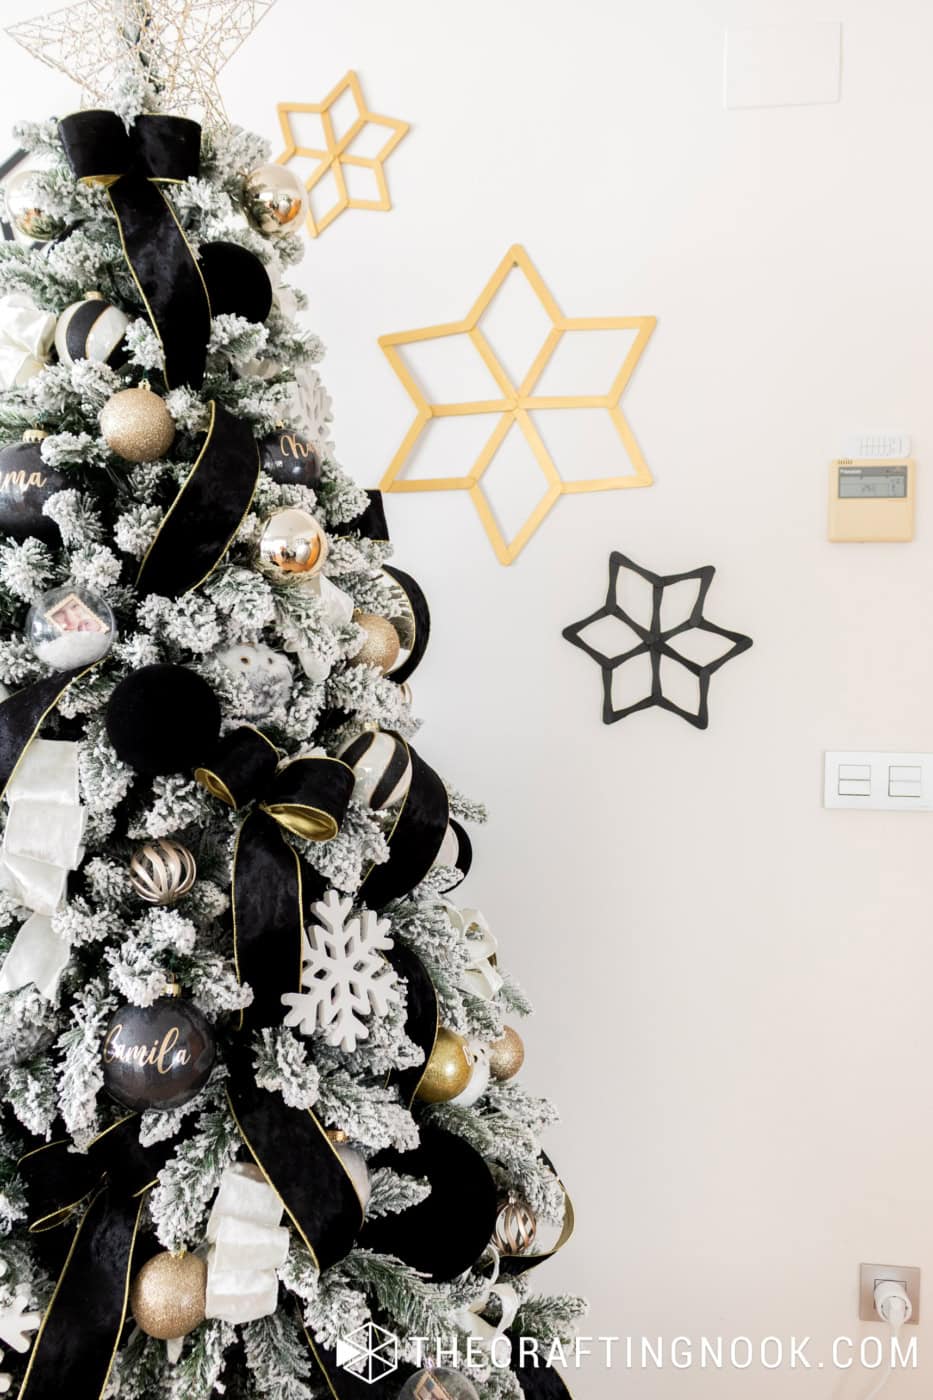
I made these with popsicle sticks, and I love their simple geometric shape.
The black and gold colors work beautifully with the tree, and they fill the wall without making everything feel too crowded.
I especially like how the black stars stand out against the white wall while the gold ones bring a little warmth.
They’re part of a separate DIY project, and I love that something made with such simple materials can look so pretty as Christmas wall decor.
The Handmade Large Hoop Christmas Ornaments
Now, let’s move down to the base of the tree because there’s something there that I absolutely love!
Those large white decorative hoops!
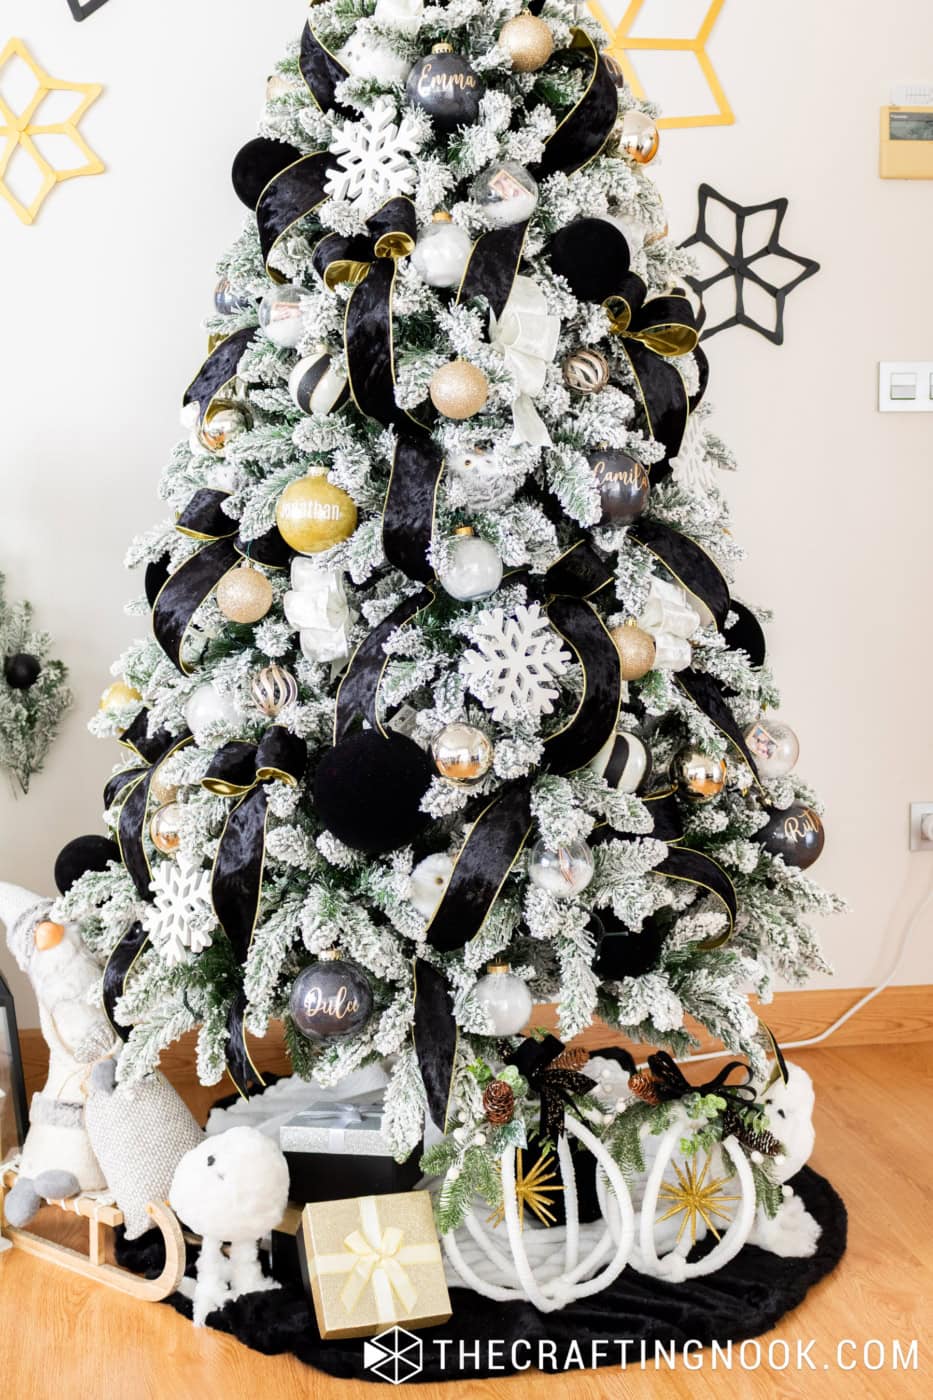
I made these DIY Large Hoop Christmas Ornaments using simple hoops wrapped in soft yarn and decorated with greenery and little ornaments.
I love the way they look sitting under the tree.
Their round shape adds something different to all the traditional Christmas decorations, and the white yarn looks so pretty with the snowy branches.
For this theme, the greenery, pinecones, black accents, and gold stars helped bring the whole look together.
And because they’re handmade, I can always change the little decorations to match a future Christmas theme.
I love projects like that!
And, of Course, Wilfurrrrd!
You didn’t think I was going to decorate the tree without a gnome, did you? LOL!
I have quite a few Christmas gnomes, and I love them all, but this little guy is particularly special to me.
Meet Wilfurrrrd!
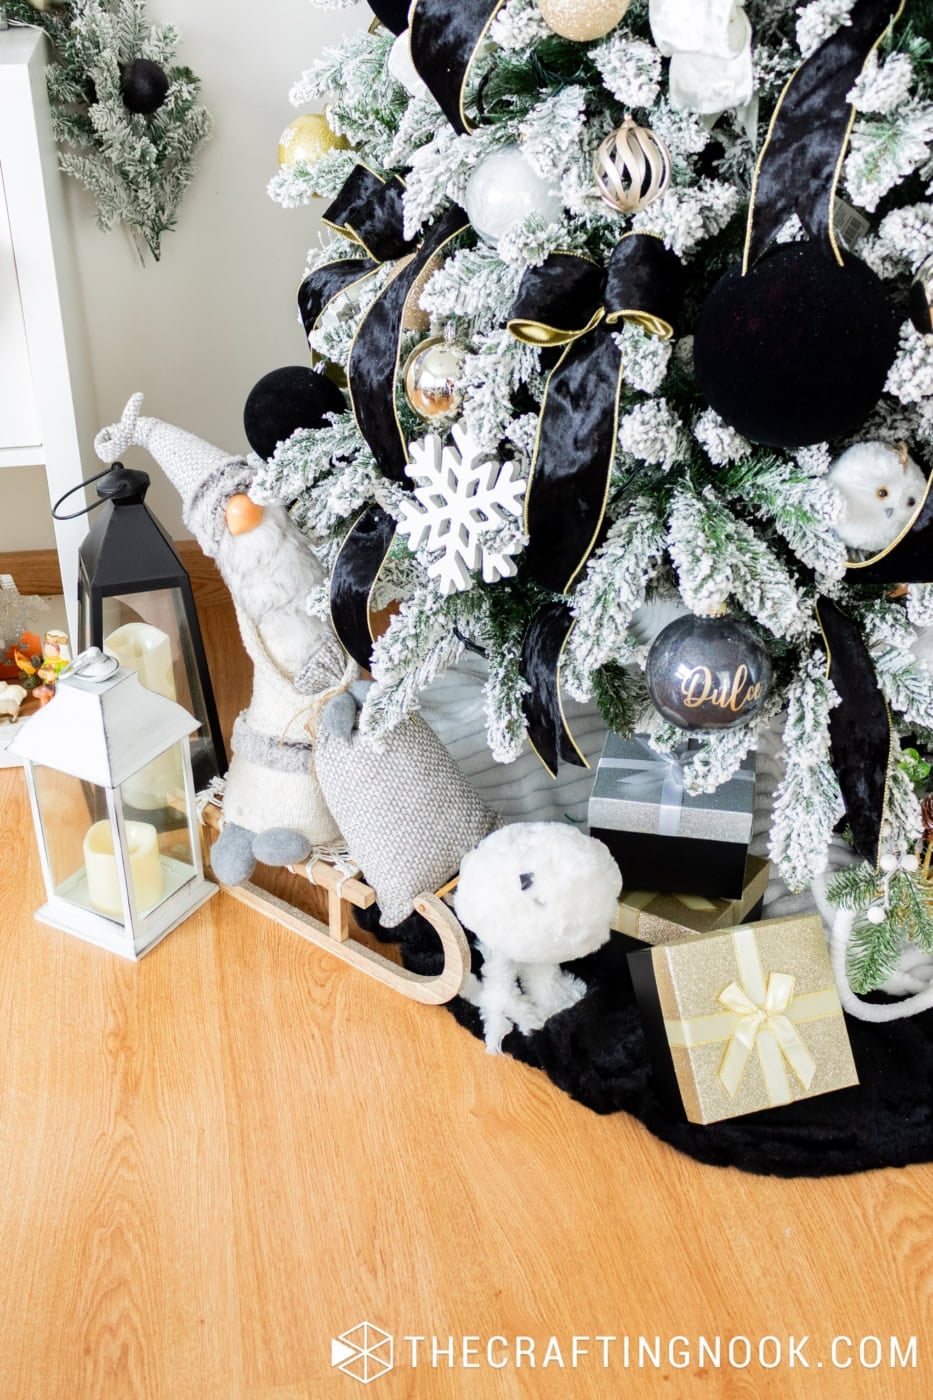
He’s my favorite gnome, and I couldn’t imagine leaving him out of our Christmas decorations.
With his long hat, fluffy beard, and cute little nose, he makes me smile every time I look at him.
I placed him beside the tree along with the other decorations, and I think he looks adorable there.
I know this tree is supposed to be elegant, but there’s always room for a little personality, right?
Especially when it’s Wilfurrrrd!
To finish the base, I added a black tree skirt, some decorative gifts, and a few other little Christmas friends.
I love how everything looks together without taking attention away from the tree.
A Few Tips for Decorating an Elegant Christmas Tree
After putting this tree together, there are a few things I think made a big difference in getting the look I wanted.
- Choose a tree that fits your vision. For me, the fuller flocked branches were important. They gave the ribbons and ornaments a beautiful snowy background.
- Mix textures, not just colors. The combination of black velvet, soft white ribbon, shiny gold ornaments, and glitter made the tree more interesting than using ornaments with all the same finish.
- Use ribbon to create movement. Tucking loops into the branches creates dimension and makes the tree feel fuller.
- Spread your accent colors throughout the tree. I wanted black to be noticeable from top to bottom, with enough white and gold to balance it.
- Keep your personal ornaments. A different decorating theme doesn’t mean you have to leave your favorite handmade decorations behind. I love mixing new pieces with the ones that have been part of our Christmases for years.
And perhaps my favorite little lesson from this tree is that sometimes decorating doesn’t have to be complicated.
For once, I found almost everything I wanted without having to spend forever searching, changing plans, or making last-minute adjustments.
I should probably enjoy that while it lasts! LOL!
My Finished Black, White and Gold Christmas Tree
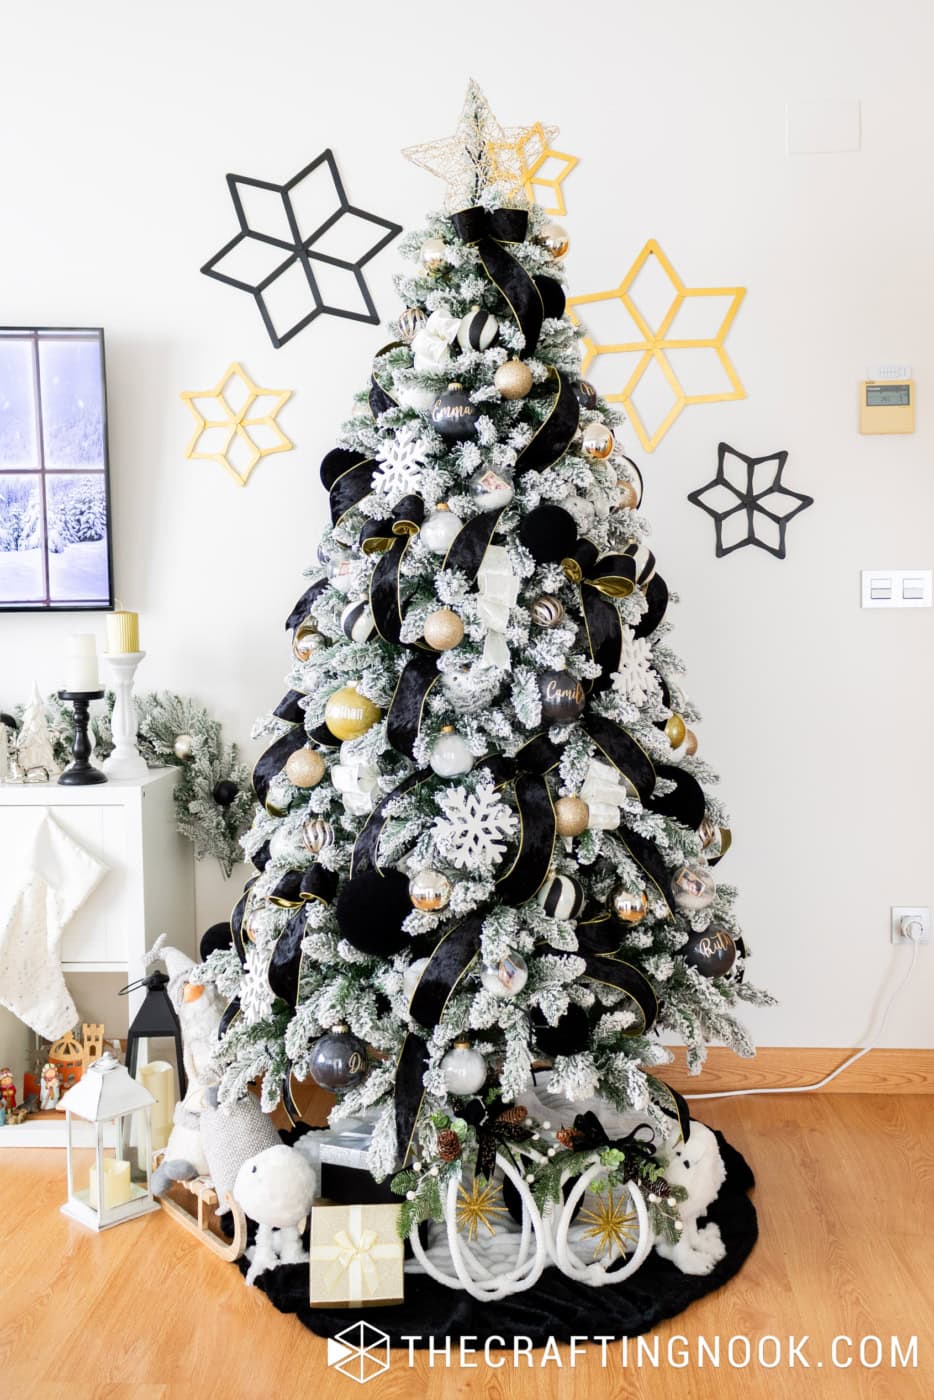
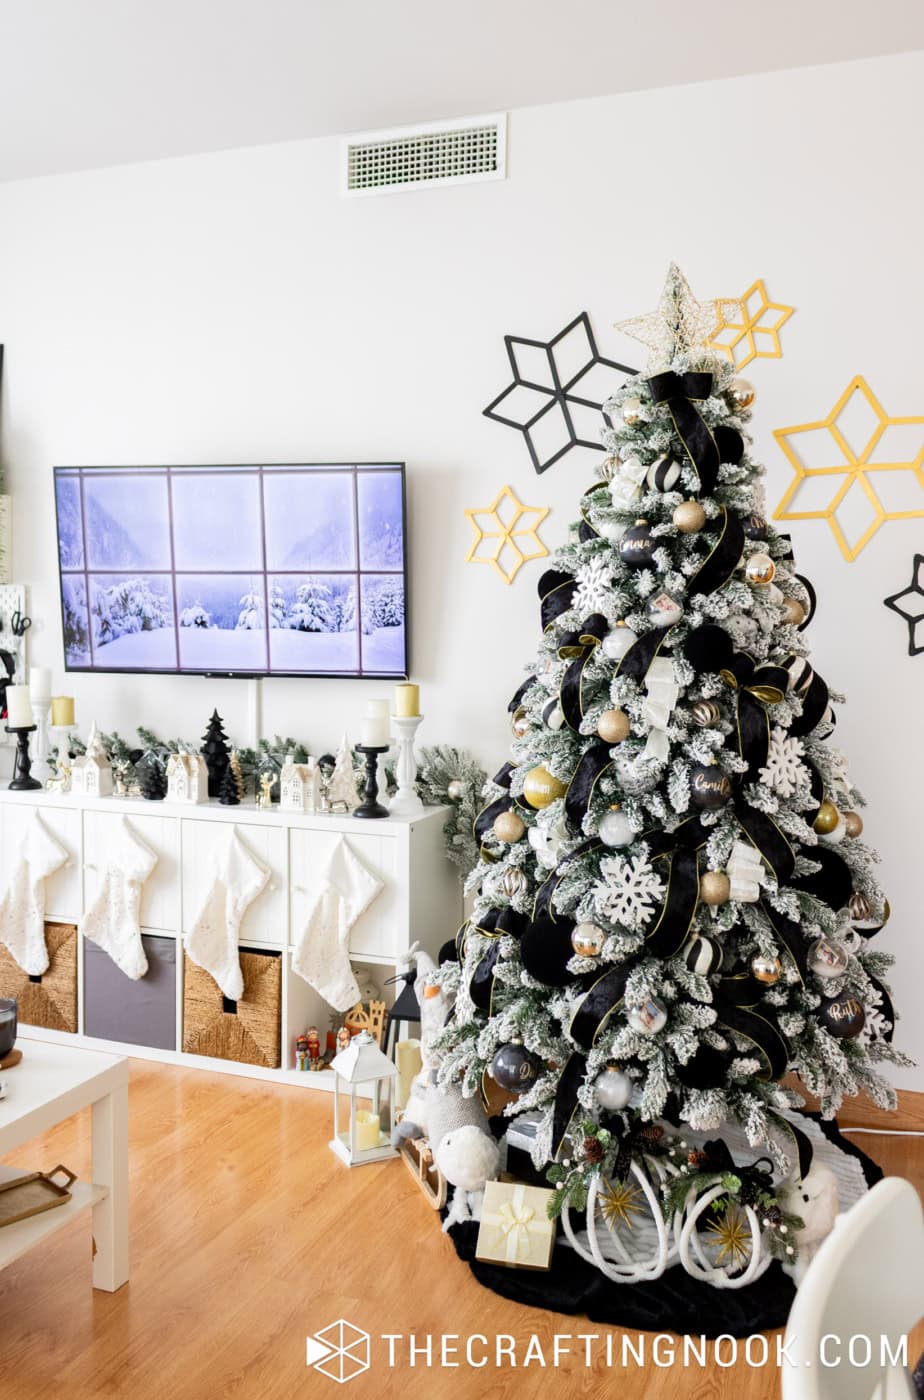
And here’s the finished tree with all its lights on!
Isn’t it pretty?
I love how the warm lights shine through the snowy branches and reflect on the gold ornaments.
And that black velvet ribbon! I just can’t get enough of it.
I have to say that this has been one of the Christmas trees I’ve enjoyed decorating the most. From choosing the new tree to shopping for ornaments with my husband and finally seeing everything come together, the whole experience was so much fun.
I had a very clear idea of what I wanted, and for once, the finished tree looks just like I imagined.
That doesn’t happen every year!
And here’s a little confession…
I loved decorating with black so much that I’m already thinking about next year’s Christmas tree. I’m imagining black and burgundy, maybe with an even more elegant look.
I know, I know. I haven’t even finished enjoying this one, and my brain is already planning the next! LOL!
We’ll see where that idea takes me.
For now, I’m just going to enjoy my beautiful black, white, and gold Christmas tree and all the little memories hanging from its branches.
I hope you enjoyed this Christmas tree tour and found a few ideas for your own holiday decorating.
I’d love to know what you think! Would you decorate a Christmas tree in black, white, and gold, or do you prefer more traditional Christmas colors?
Let me know in the comments below. I always love hearing about your Christmas decorating ideas!
If you like this Christmas Tree, please PIN it and share!!!
Til’ next time…


FREE WORKBOOK
Keeping your Sweet Home Organized
Learn how to create intentional habits and simple routines to Keep Your Home Organized. Plus freebies, printables, exclusive content, and tips.
Disclaimer: By clicking on the “Yes” button above you are giving me your consent to collect and use your information according to the law and My Policy Privacy. Zero Spam I promise!