DIY Rustic Flocked Pinecone Christmas Ornaments (Video Tutorial available)
This post may contain affiliate links. Please read our Disclosure Policy.
Learn how to make flocked pinecone Christmas ornaments with this easy DIY tutorial. These ornaments are fun to make and a beautiful addition to your holiday décor.
What is prettier than a rustic pinecone ornament? Some super cute Rustic Flocked Pinecone Christmas Ornaments of course! Come and learn how!

OK, I know what you are going to say: “Girl it’s still October! What are you doing making Christmas decorations stuff???” Well, if it depended on me, I would have started in August but I thought that would have been too much.
Besides I’m part of an awesome yearly blog hop named 31 Days of Christmas Ornaments and it’s something I look forward to every year with all my heart.
For this year I made these cute rustic Flocked Pinecone Christmas Ornaments and despite the craziness I’ve been into lately, I definitely LOVE how they turned out. How about you???
Table of Contents
Rustic Flocked Pinecone Christmas Ornaments Tutorial
This is such an easy but so cute craft to make. It’s so incredibly easy that you can even have your kids participating and having some fun playing with paint, glue, and Glitter. Oh, dear glitter!!! I missed you dearly!
You can make a bunch in less than an hour for flocking and then leave them to dry while you make super cute rustic bows. Put them together and voila! You could call it l cute DIY snow!

Doesn’t it scream perfection despite imperfection? LOL
I’m so excited about Christmas. It’s my very favorite time of the year and this year I won’t be late to start creating and inspiring you all to do the same!
How to make cute Flocked Pinecone Christmas Ornaments?
Yeah, I thought so too, let’s go!
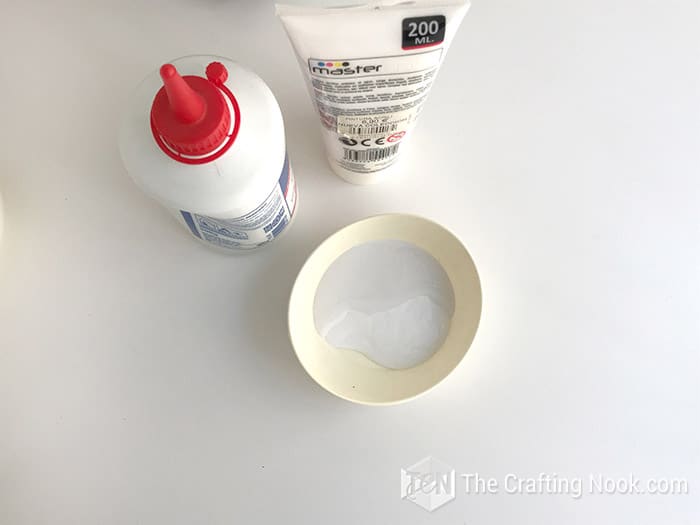
Supplies:
- Pinecones {as many as you like and try to mix small and large pinecones}
- White acrylic paint
- Jute twine
- White glue
- Burlap or linen ribbon {color of your choice}
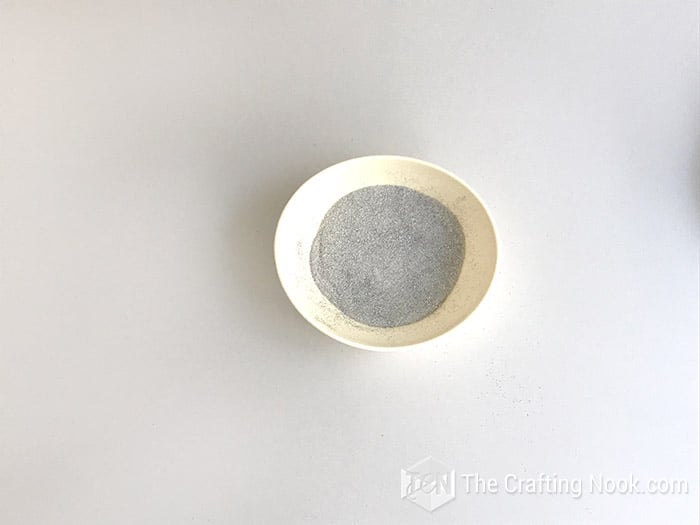
- White and silver glitter
- Jingle bells {2 per bow, or you could use red berries or any other fun decor}
- 2 bowls {big enough for the pinecones to fit}
- Paper towels
Tools:
- Needle and thread.
- Hot glue gun
- Scissors
Instructions
Before we begin, be sure to follow us on Pinterest, Facebook, Instagram, and YouTube, and also sign up for our email list (at the end of this post), so you’ll never miss a post!
Step 1: Prep Work
First, let’s make the mixtures:
In a bowl mix paint and glue, 60-40 or 50-50 will do. You don’t have to measure much just where visually seems like good proportions.
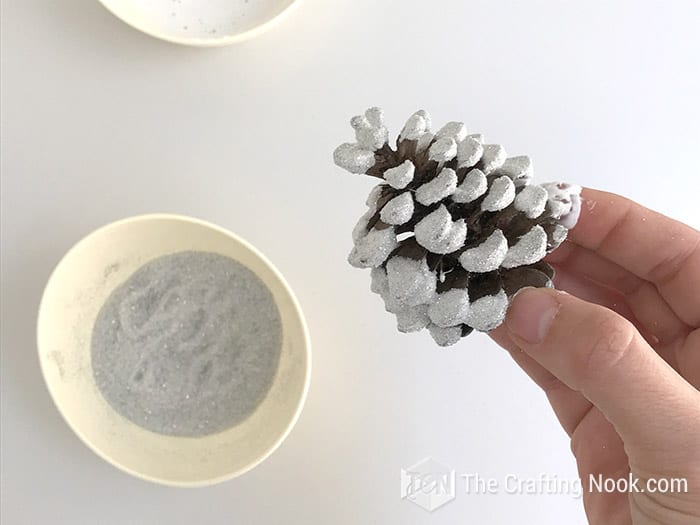
In another bowl mix the white and the silver glitter.
Step 2: FLocking the pinecones
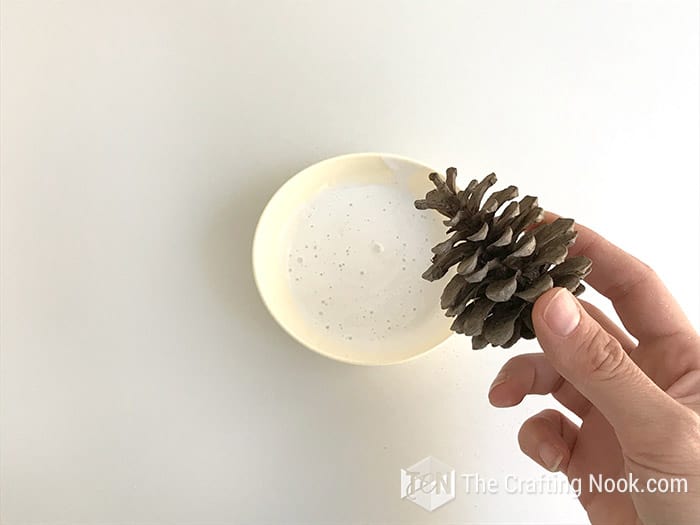
Then roll pinecones around in the paint and glue mixture making sure that the cone was evenly covered from top to bottom, leaving the inner parts paint-free.
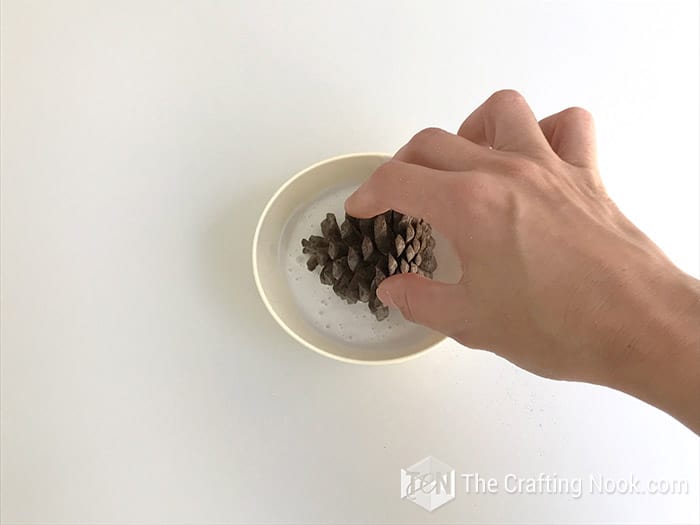

Immediately after that, roll the pinecones around in the glitter mixture. Make sure you get glitter in every place where the paint is.
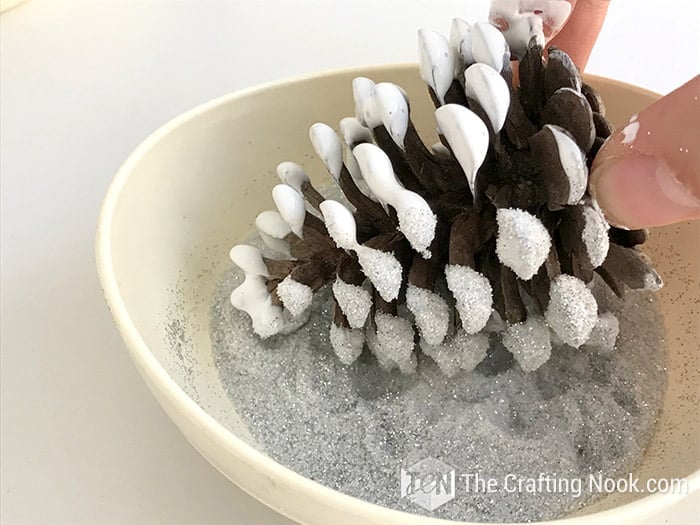
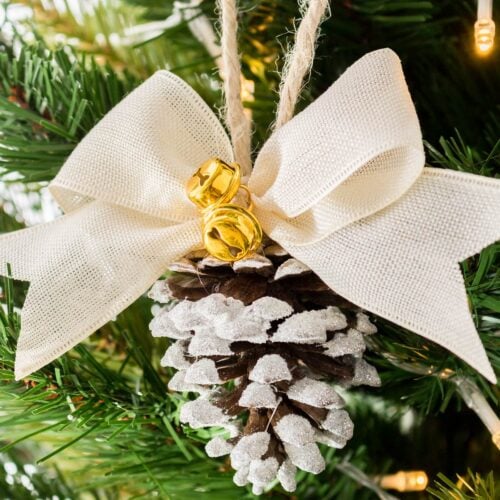
What I love the most about this technique is that the paint gives the pinecones a snow tipped look and then the mix of white and silver glitter gives a cute snowy, icy effect on the pinecone edges.
It has a much denser frosted appearance and I love how they look against the green from the tree.
Leave the pinecones on a paper towel to dry for a few hours.
Once the glue has dried completely, tap the frosty pinecones onto the paper towel to remove any loose glitter. This still won’t prevent the whole house to be covered in glitter but at least will do less mess LOL.

While the pinecones dry, let’s work on the cute bows for the perfect touch.
Step 3: Making the ribbon bows
Cut a small piece of ribbon, it will depend on the pinecone size of course. But let’s say between 10 to 15 cm (3-6 Inches), you can go up or down if your pinecones are larger or smaller.

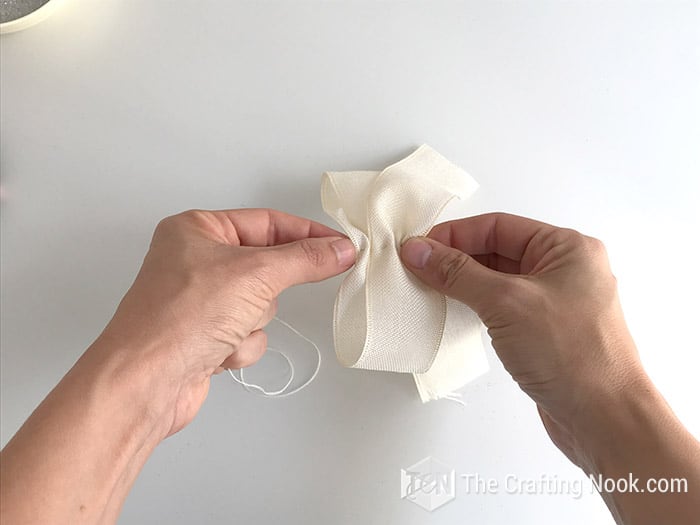
Lay it on your table and fold it in three sections as follows:
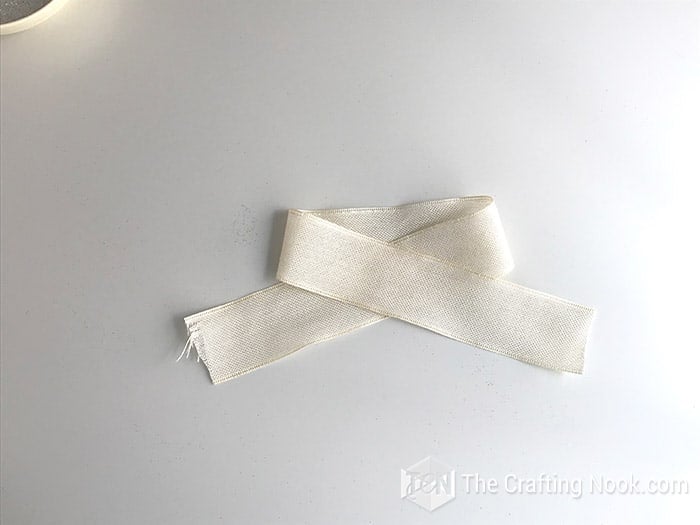
Try that where the ends overlap to stay in the middle of the backside.
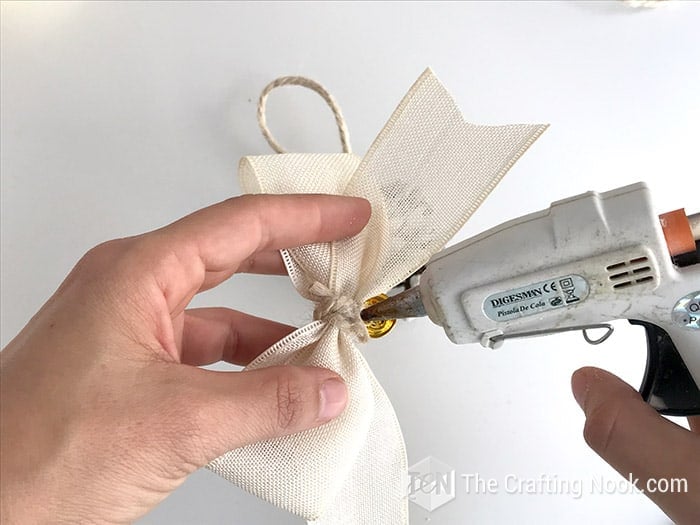
Then with a needle and thread, make some stitched right in the middle.
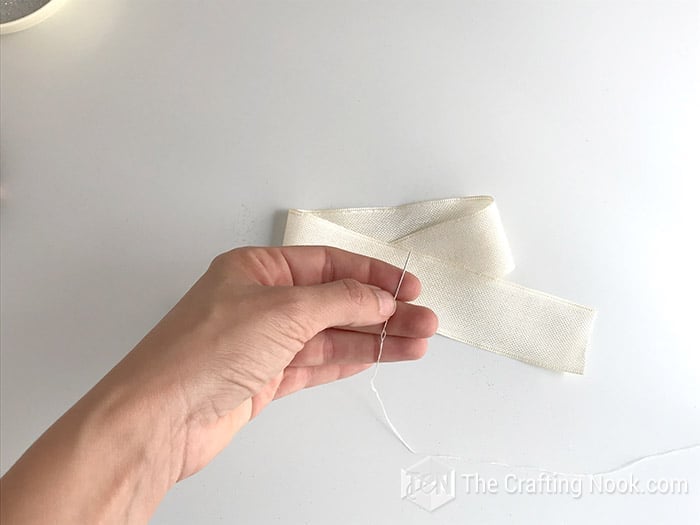

Pull your thread all the way to create a ruffle.
Wrap the thread around the center twice and then go through from top to bottom of the bow with the needle.

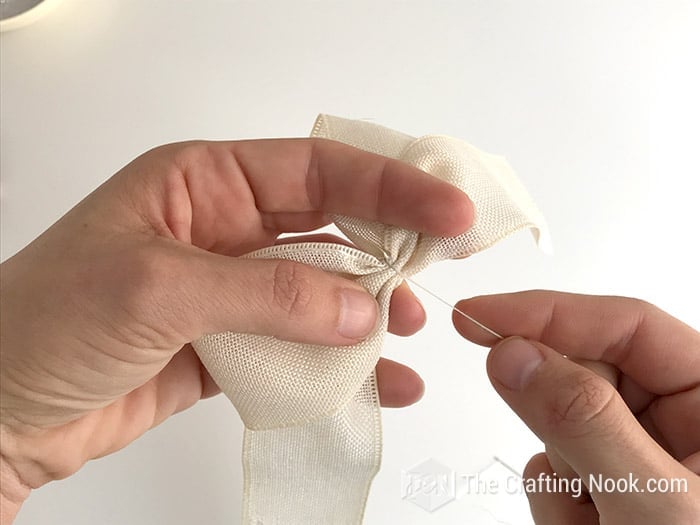
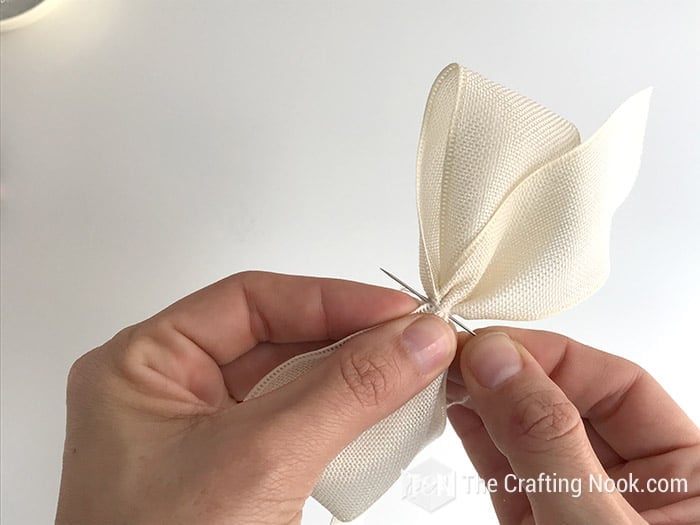
Make a knot and cut the thread.
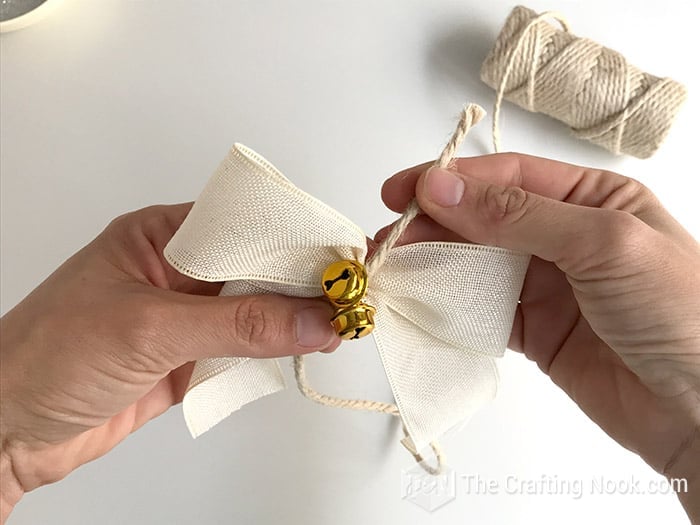
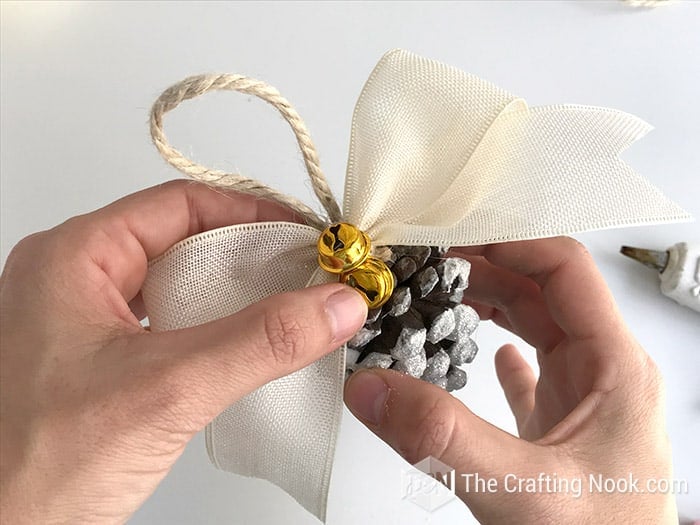
Now take your twine and insert 2 jingle bells or your faux berries if you chose to use them, for a beautiful pop of contrast.
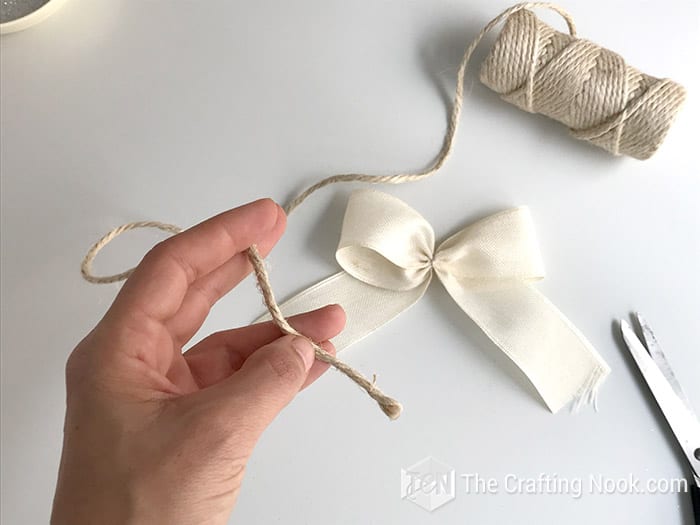
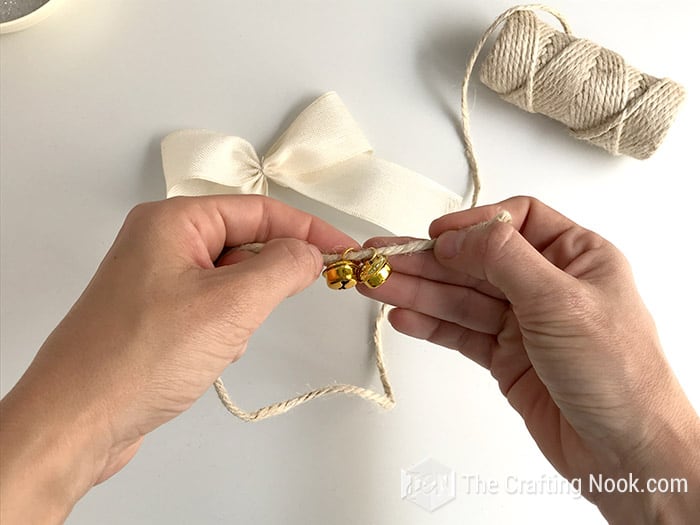
Wrap it twice around the middle of the bow making sure the bells are on the front and tie a knot at the back. Cut any excess.
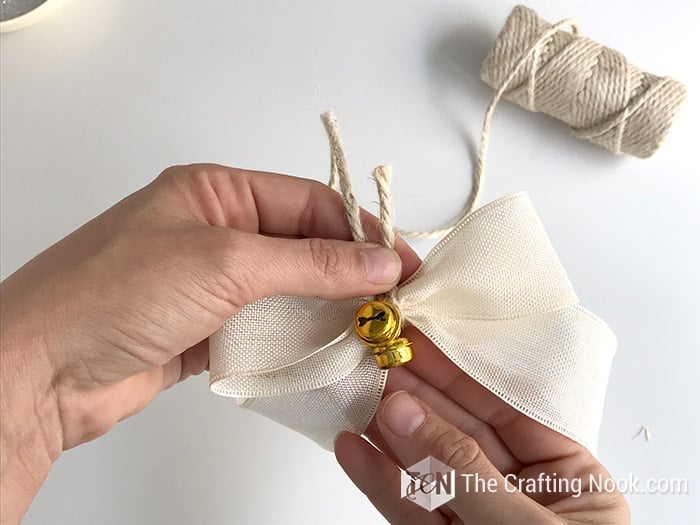

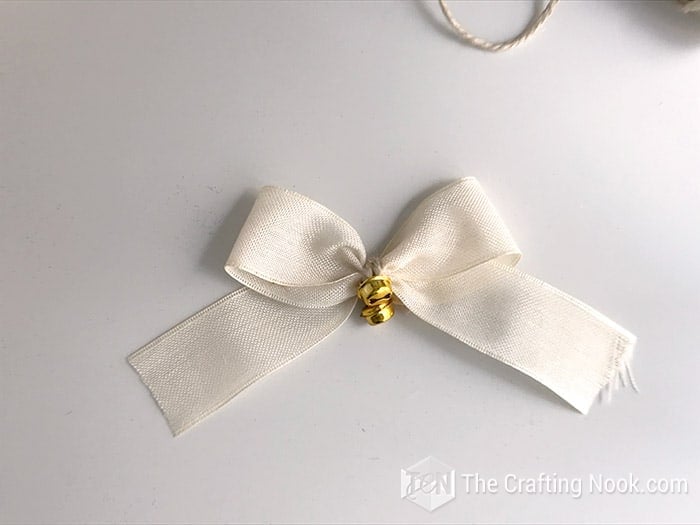
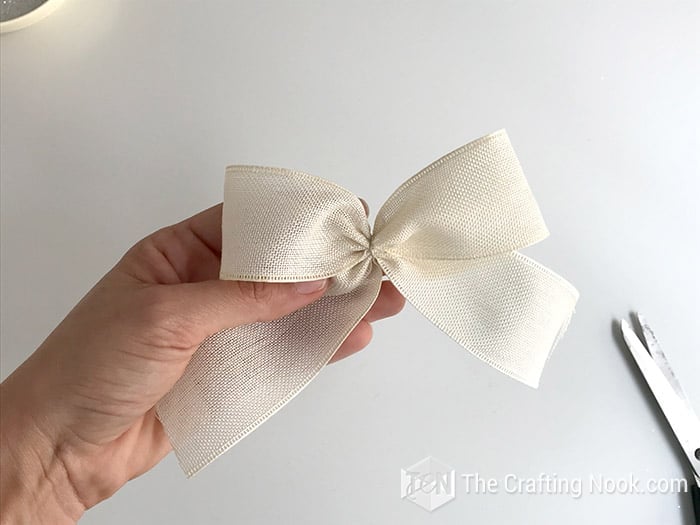
The final touch is cutting the ends to make it even prettier. Just fold each end in half lengthwise and cut diagonally towards the fold.
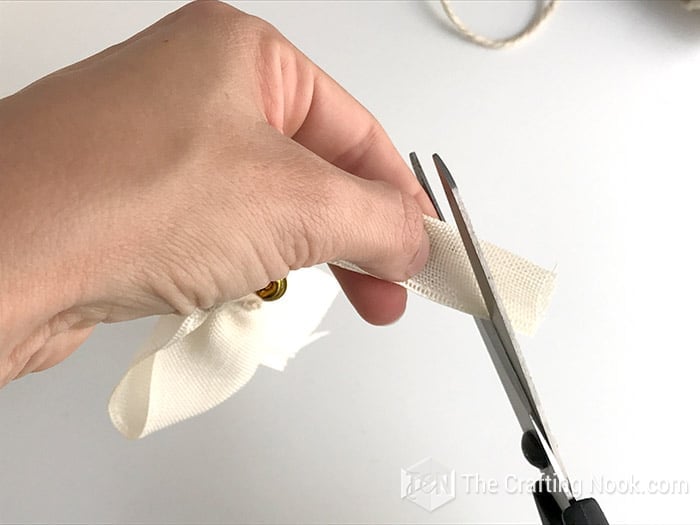

There you go! You got your bow.

Step 4: Finish the Pinecone Ornament.
Now that your pinecones should be dry after about 20 bows… LOL just kidding! Let’s finish our rustic Flocked Pinecone Christmas Ornaments, just click to keep reading!
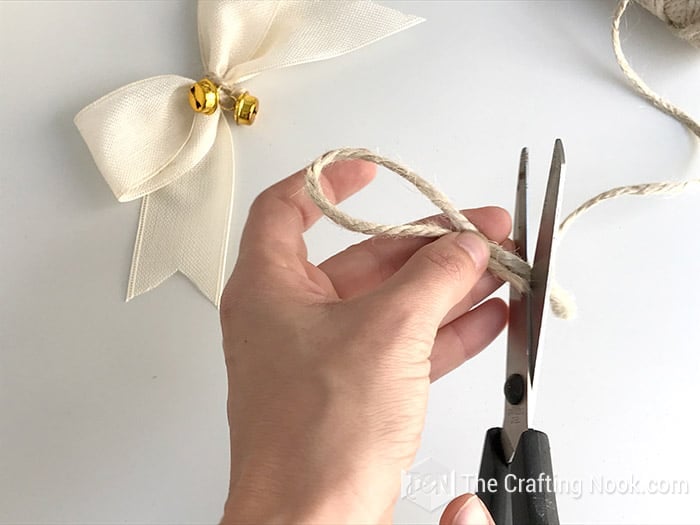
Lastly, cut a strip of twine to create the loop to hang it. Using hot glue, stick both ends to the center of the pinecone base.
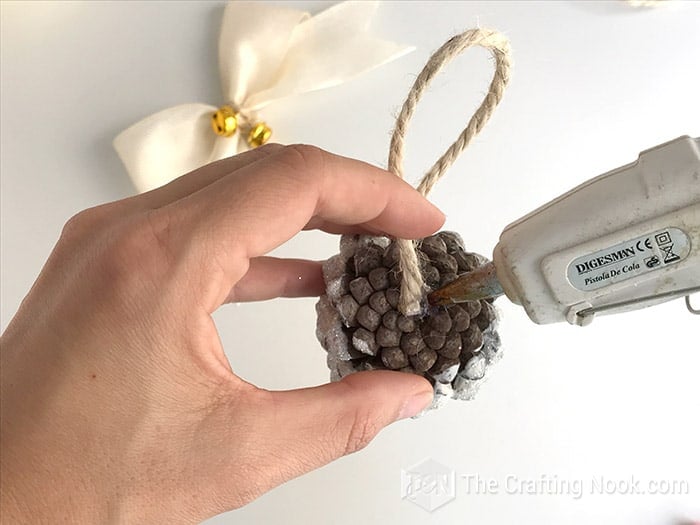
Finally, the finishing touch, glue your cute bow to the look at the base as well.
That’s it. Our rustic Flocked Pinecone Christmas Ornaments are done and ready to rock our Christmas tree.

These flocked pinecones are intended for indoor use but If you intend to use them outdoors I recommend sealing them by spraying them with a waterproof sealer.

Easy or what?
E A S Y!!!!
Crafting Tips
If you don’t want to use twine or jute, you can use the same ribbon to make the center and close the bow. Same goes for the hanger.
Use good quality glue sticks so the hanger won’t come off.
If you only want the glitter to flock the pinecone, skip the white paint.
Now you just got to put up your tree and start decorating it with these cute pine cone ornaments!


Frequently Asked Questions
I can’t say any type because I haven’t tried them all but I know for sure you can use mod podge, normal school glue, any white glue from any brand. My guess is, you have to try and test. If you try tacky glue or liquid starch it would be amazing to hear your results to improve this tutorial.
You can use a clear sealer on the pine cones. They will give them a nice shine and also preserve them so you can use them for several seasons. When you pack them away, place them in a zip-lock bag to keep them fresh.
Well, there are different ways of doing this. You can give them a bath of water and vinegar then dry them in the oven for a couple of hours in a baking sheet. Some would only put it in the oven. What I did was lay them on our patio and spray them with abundant bug spray and left it outside for a couple of days, until they didn’t smell anymore. It worked like a charm. I’ve been using my pinecone ornaments for years now and they are perfect and no bugs were found.
Pretty much anywhere you want. It might need tweaking while making them, especially the hanger but you can definitely use them on garlands, an ornament wreath, on an elegant cedar berry wreath, etc.
You can either purchase them or find them in the nature. The advantage of purchasing them is that they are already clean and ready to to be worked with. You can fidn them at your local craft stores, dollar trees and even at some department stores in the craft or holiday section. Alternatively, you can go to places where you can see pine trees, you are likely to find lots of pinecones on the ground.
More Christmas Ornaments to Try
If you like this cute pinecone Christmas ornament tutorial, you might also love these other Christmas craft ideas too:


✂️ Tutorial
DIY Rustic Flocked Pinecone Christmas Ornaments
Tools
- Needle and thread.
- Hot glue gun
- scissors
Supplies
- Pinecones {as many as you like and try to mix small and large pinecones}
- White acrylic paint
- Jute twine
- White glue
- Burlap or linen ribbon {color of your choice}
- White and silver glitter
- Jingle bells {2 per bow or you could use red berries or any other fun decor}
- 2 bowls {big enough for the pinecones to fit}
- Paper towels
Instructions
STEP 1: PREP WORK
- First, let’s make the mixtures:
- In a bowl mix paint and glue, 60-40 or 50-50 will do. You don’t have to measure much just where visually seems like good proportions.
- In another bowl mix the white and the silver glitter.
STEP 2: FLOCKING THE PINECONES
- Then roll pinecones around in the paint and glue mixture making sure that the cone was evenly covered from top to bottom, leaving the inner parts paint-free.
- Immediately after that, roll the pinecones around in the glitter mixture. Make sure you get glitter in every place where the paint is.
- What I love the most about this technique is that the paint gives the pinecones a snow tipped look and then the mix of white and silver glitter gives a cute snowy, icy effect on the pinecone edges.
- It has a much more dense frosted appearance and I love how they look against the green from the tree.
- Leave the pinecones on a paper towel to dry for a few hours.
- Once the glue has dried completely, tap the frosty pinecones onto the paper towel to remove any loose glitter. This still won’t prevent the whole house to be covered in glitter but at least will do less mess LOL.
- While the pinecones dry, let’s work on the cute bows for the perfect touch.
STEP 3: MAKING THE RIBBON BOWS
- Cut a small piece of ribbon, it will depend on the pinecone size of course. But let’s say between 10 to 15 cm (3-6 Inches), you can go up or down if your pinecones are larger or smaller.
- Lay it on your table and fold it in three sections as follows:
- Try that where the ends overlap to stay in the middle of the backside.
- Then with a needle and thread, make some stitched right in the middle.
- Pull your thread all the way to create a ruffle.
- Wrap the thread around the center twice and then go through from top to bottom of the bow with the needle.
- Make a knot and cut the thread.
- Now take your twine and insert 2 jingle bells or your faux berries if you chose to use them, for a beautiful pop of contrast.
- Wrap it twice around the middle of the bow making sure the bells are on the front and tie a knot at the back. Cut any excess.
- The final touch is cutting the ends to make it even prettier. Just fold each end in half lengthwise and cut diagonally towards the fold.
- There you go! You got your bow.
STEP 4: FINISH THE PINECONE ORNAMENT.
- Now that your pinecones should be dry after about 20 bows… LOL just kidding! Let’s finish our rustic Flocked Pinecone Christmas Ornaments, Just click to keep reading!
- Lastly, cut a strip of twine to create the loop to hang it. Using hot glue, stick both ends to the center of the pinecone base.
- Finally, the finishing touch, glue your cute bow to the look at the base as well.
- That’s it. Our rustic Flocked Pinecone Christmas Ornaments are done and ready to rock our Christmas tree.
Notes
Before I send you off to visit all the other participating bloggers, I want to express my appreciation to Diane Swanson of An Extraordinary Day, Mary Beth of Cupcakes and Crinoline and Malia of Yesterday on Tuesday. Thank you, ladies, for all your help and encouragement in hosting this amazing blog hop. It’s my favorite blog hop ever!
Here are all 31 Bloggers in order of their appearance:
Day 1 – Pet Scribbles | 2 – Yesterday on Tuesday
3 – Cupcakes and Crinoline | 4 – An Extraordinary Day
5 – Celebrating Everyday Life | 6 – Hunt and Host
7 – Love of Home | 8 – Celebrate Creativity
9 – Petticoat Junktion | 10 – What Meegan Makes
11 – Atta Girl Says | 12 – Sweet Pea
13 – Exquisitely Unremarkable | 14 – Imparting Grace
15 – In My Own Style | 16 – 504 Main by Holly Lefevre
17 – Inspiration for Moms | 18 – The Chelsea Project
19 – I Should Be Mopping the Floor
20 – My Uncommon Slice of Suburbia | 21 – Hearth and Vine
22 – Shabby Art Boutique | 23 – Remodelando la Casa
24 – Domestically Speaking | 25 – Swoodson Says
26 – Stone Gable | 27 – My Creative Days
28 – The Crafting Nook (You are HERE)| 29 – Knick of Time
30 – Lovely Etc. | 31 – Live Laugh Rowe
Share and PIN ME!

Til’ next time…


FREE WORKBOOK
Keeping your Sweet Home Organized
Learn how to create intentional habits and simple routines to Keep Your Home Organized. Plus freebies, printables, exclusive content, and tips.
Disclaimer: By clicking on the “Yes” button above you are giving me your consent to collect and use your information according to the law and My Policy Privacy. Zero Spam I promise!