DIY Glitter Candles – Easy Christmas Decoration
This post may contain affiliate links. Please read our Disclosure Policy.
Create sparkling magic this Christmas with super easy DIY glitter candles. Add a touch of whimsy and fun to your holiday decor effortlessly. Let’s light up the festivities!
This time of the year makes me SO excited and inspired to create and create! I’m also a bit addicted to glitter lately and I want to make everything sparkle.

Table of Contents
DIY Glitter Candles for Christmas
Maybe because Christmas makes me so happy, I want everything to shine light as much as I feel I’m shining! I know I’m kind of crazy. But what can I do? It’s Christmas!
So, today I’m sharing these cutes and how to make awesome glitter candles as part of a centerpiece to decorate your home. I used a normal generic candle and made it unique with a beautiful layer of glitter.
What I did was prepare to decorate my (version of) mantel. This year I wanted something special so I’m making different creations until I finish the whole mantel!
This project was really fun to make. This time I kept it really handmade and didn’t use a printer, or cutting machine, just my hands and simple supplies!

I enjoyed each step of the way because I knew it would be unique even with imperfections! But hey! If you have been following me for a while you already know I love the uniqueness of imperfection in the crafting world!
How to make these cute DIY Glitter Candles
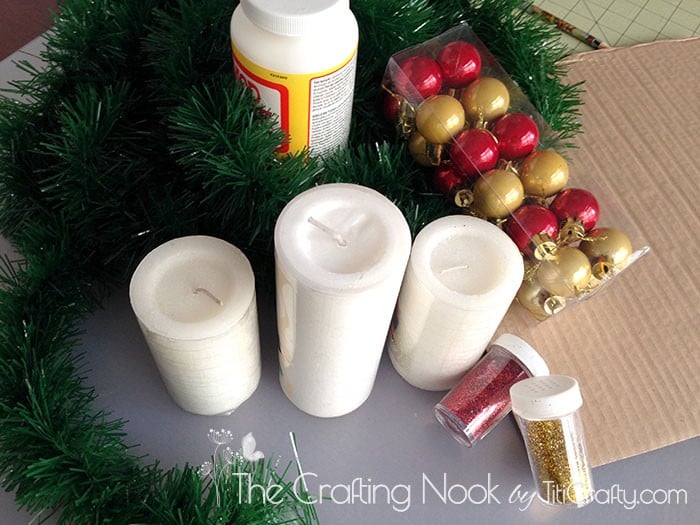
Supplies:
- Small Christmas ornaments – I used gold and red, you can use your favorite colors
- Christmas faux greenery garland
- 3 Candles 1 taller than the rest
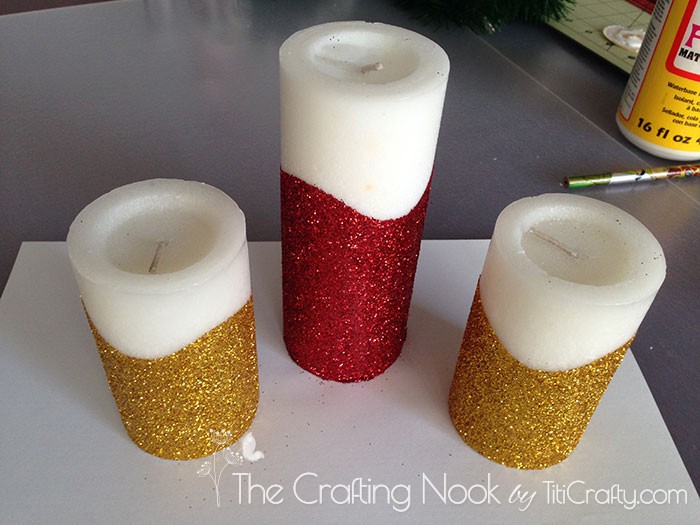
- Glitter – I used gold and red, again, you can use your favorite colors
- Mod Podge
- Pipe cleaners
- Cardboard
- Contact paper or vinyl
- Ribbons – I used white and red
Tools:
- Scissors
- Pencil
- Foam brush or paintbrush
- Hot glue gun and glue sticks
Instructions:
1. Start with the contact paper or vinyl depending on which one you will use.
2. Roughly decide how much of the candles would be glittered and how much would not.
3. Based on those calculations, draw with a pen a wavy line all along the contact paper edge.
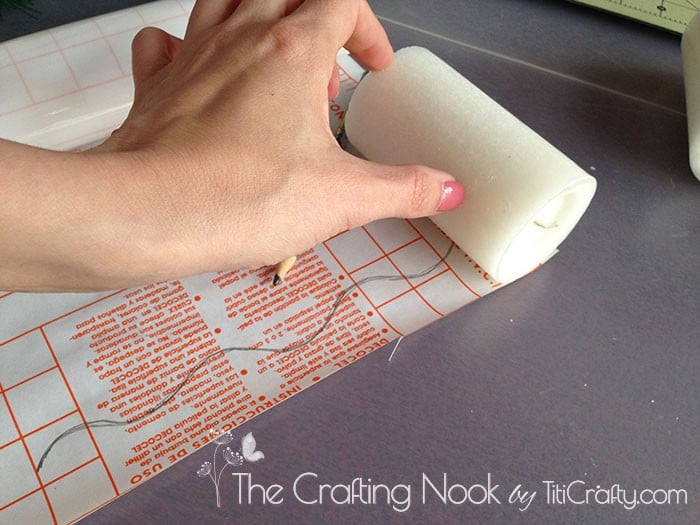
4. Cut the wave line with a scissor making sure you get a straight side and a wavy side.
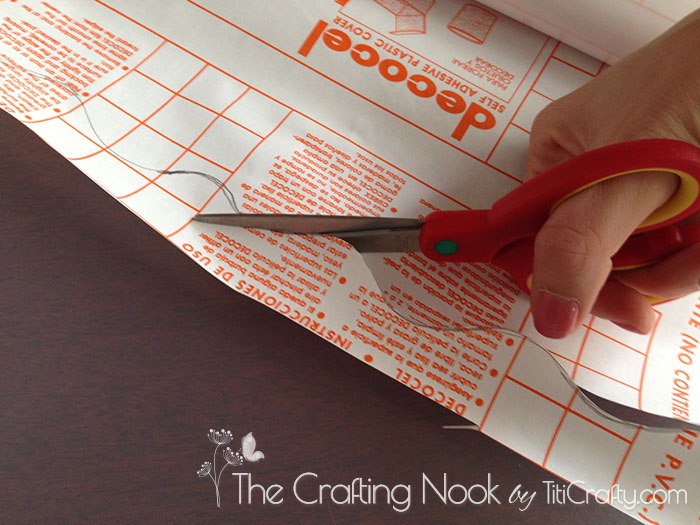
5. Measured how much of the contact paper strip is needed to go around the candles.
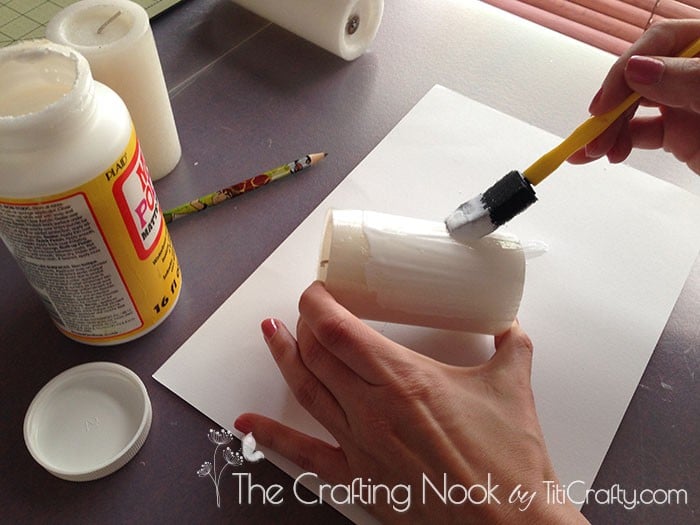
6. Cut it and apply the straight side to the top of your candle.
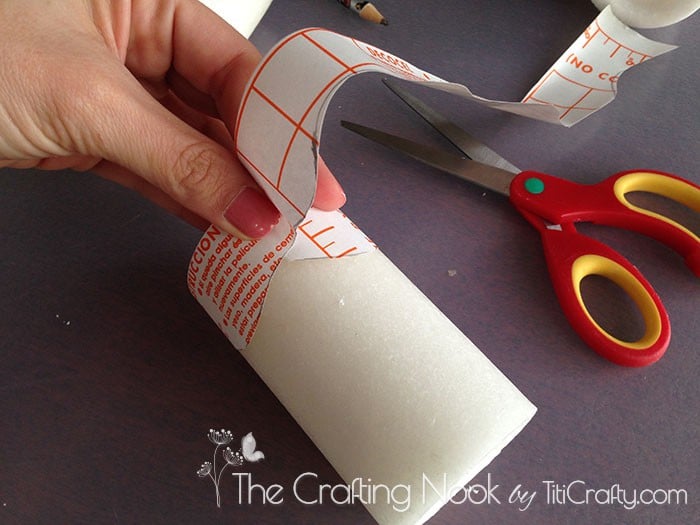
7. With your foam brush spread a thin layer of mod podge all over the uncovered candle.
8. Sprinkle abundant glitter all over it. Use a piece of paper or a tray underneath it so you don’t spread glitter all over the place.
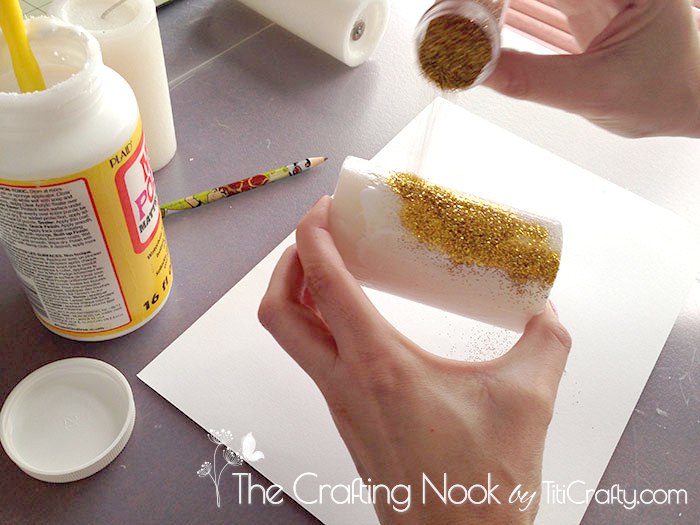
9. Let the glitter sit for a few minutes.
10. Pour out excess glitter by tapping the candle gently against the table on a piece of paper.
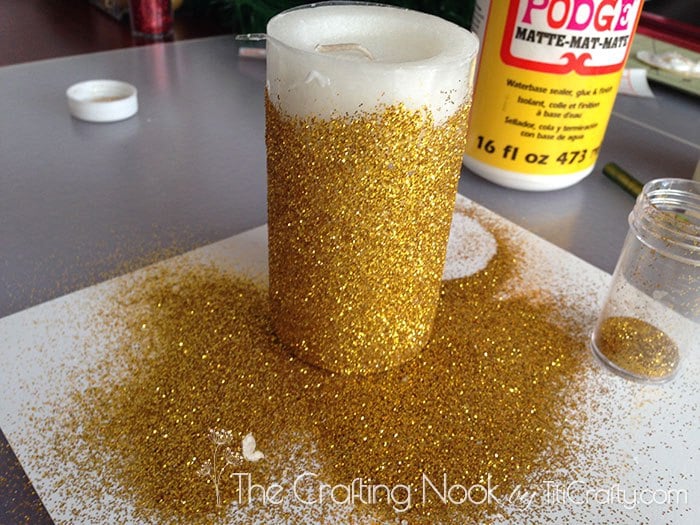
11. Peel off the contact paper stencil and let it dry for at least 2 hours.

12. Repeat the same process with the other two candles and change the glitter color if desired.
13. Now to make the centerpiece, make 3 circles with the cardboard a little bit bigger than the candle’s diameter, like ½ inch larger.

14. When the candles are dry, draw a circle around the candle on the cardboard.
15. Apply hot glue along the inner side of the drawn circle and quickly glue the candle.
16. Set aside.

17. Now let’s work with the greenery garland.
18. Cut a strip of greenery garland, long enough to make two loops on each candle.
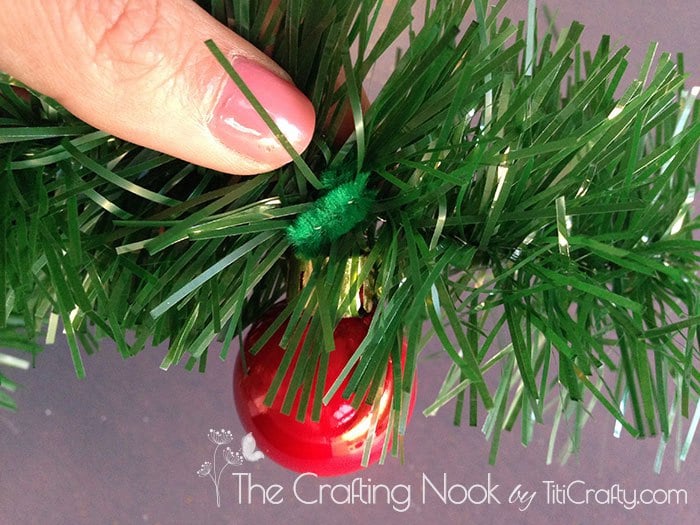
19. Then cut small strips of pipe cleaner wires like in the pic below and insert them through the ornament’s cap hole.

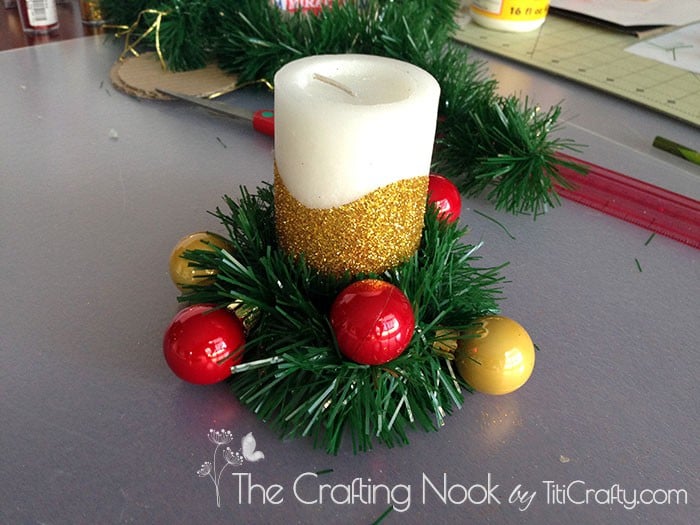
20. Tie each ornament to the greenery garland. I made it one red, one gold, one red, one gold an so on.
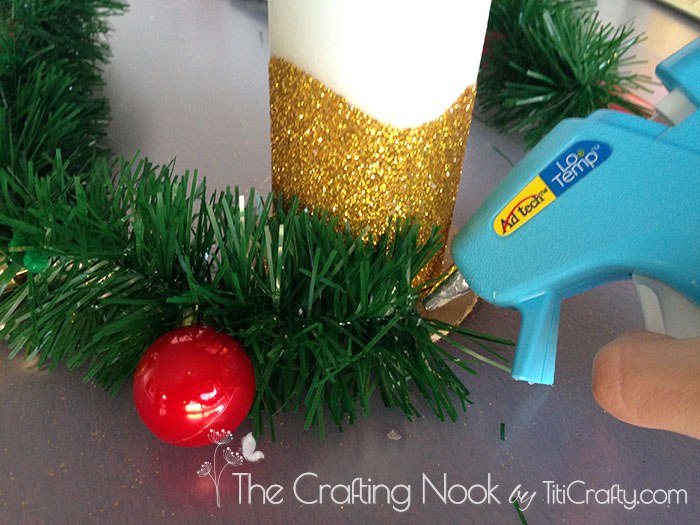
21. With hot glue, stick the garland to the cardboard around the candle.
22. Repeat with the other two candles.
You got this far. Now the final touch…
23. Make 3 cute ribbon bows and glue them to the garland.

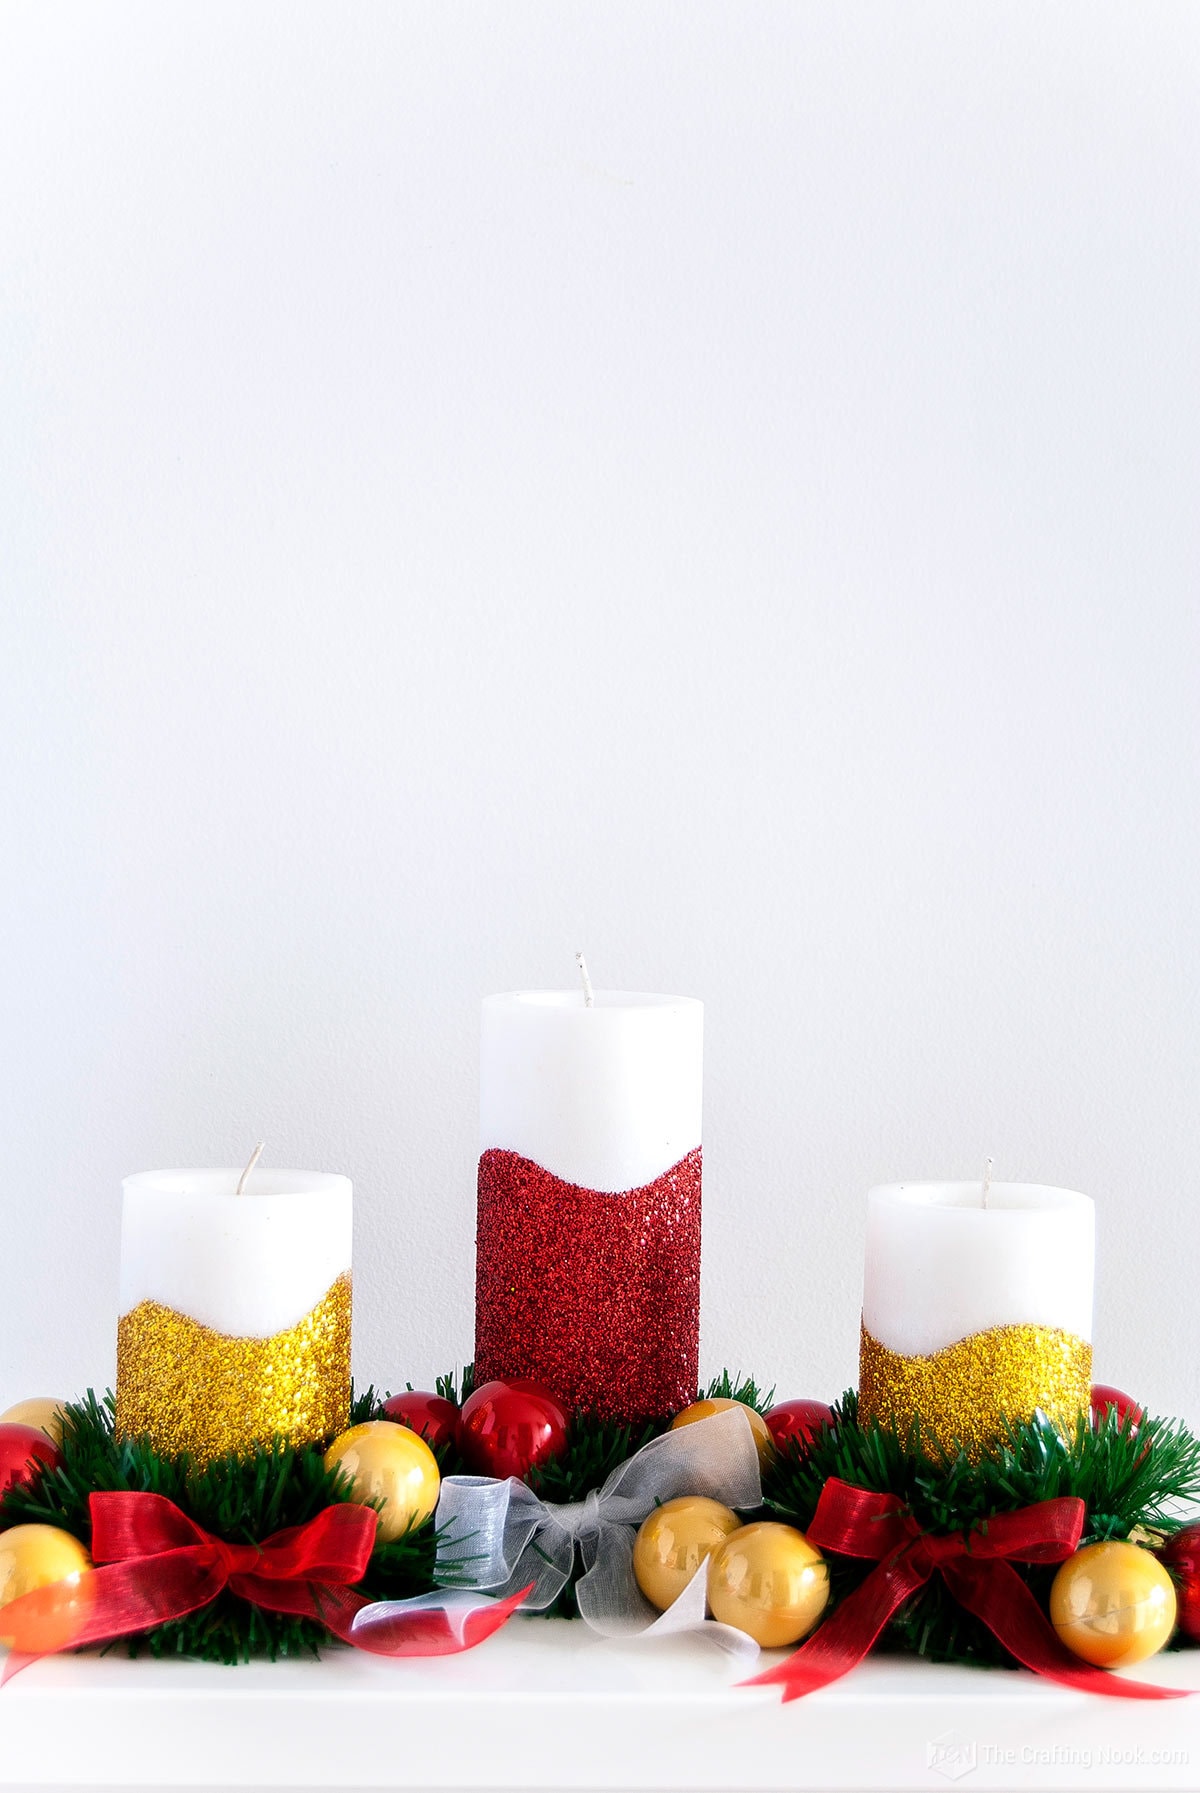
Tadaaaaaa!!!!!

You got a really cute DIY Glitter Candles centerpiece to decorate your mantel or dining table.

What do you think? Don’t they look super cute?
Crafting Tips
- Make sure the candles are clean and dry before putting on the stencil so it sticks well.
- Try using different glitter colors and types to create different looks. You can combine different colors or create a smooth transition by using multiple shades of glitter one on top of the other.
- To avoid too much glitter falling off, put a little bit of clear glue or Mod Podge on top of the glitter after sticking it to the candle. This will make sure that the glitter stays in one spot.
- To make things look nicer, try using candles of different sizes and shapes. Put them together in different heights to make an attractive centerpiece or use them separately to add a festive touch in different areas.
- Try using different colors for Christmas instead of just the usual ones. Try using different colors like light pastels or shiny metallics to make a cool and modern version of the typical glitter candle.


What do you think? Pretty or what???
Frequently Asked Questions
Yes, you can use different kinds of candles like big candles, small candles in a jar, or even tiny ones called tea lights. Just ensure that the surface is even and free of dirt to achieve the best outcome.
First, use a pencil or pen to trace the shape you want on the contact paper or vinyl. Then, use scissors or a craft knife to carefully cut along the lines and remove the shape from the material. Take off the paper on the back and put the stencil on the candle, pushing it down hard to make sure it sticks well.
If you don’t want too much glitter falling off, you can prevent it by putting a thin layer of clear glue or Mod Podge on top of the glitter after it’s stuck to the candle and dry. This will help make sure the glitter stays in one spot.
Absolutely! When you combine and use different colors of glitter, it can make really pretty and special effects. Try different combinations to create the look you want.
The time it takes for the glue to dry can be different depending on the kind of glue used and how thick the layer of glitter is. It is usually advised to wait for at least 24 hours for the glitter and glue on the candles to completely dry before touching or moving them.
Carefully clean the glitter candle’s surface with a soft brush or duster to get rid of dust or dirt. Don’t use water or strong cleaning products because they can harm the design.
More Christmas Projects To Try
If you enjoyed this cute diy glitter candles tutorial, you might also love these other Christmas project ideas too:

✂️ Tutorial

DIY Glitter Candles – Easy Christmas Decoration
Tools
- scissors
- Pencil
- Foam brush
- Hot glue gun and glue sticks
Supplies
- Small Christmas ornaments – I used gold and red you can use your favorite colors
- Christmas faux greenery garland
- 3 Candles 1 taller than the rest
- Glitter – I used gold and red again, you can use your favorite colors
- Mod Podge
- Pipe cleaners
- Cardboard
- Contact paper or vinyl
- Ribbons – I used white and red
Instructions
- Start with the contact paper or vinyl depending on which one you will use.
- Roughly decide how much of the candles would be glittered and how much would not.
- Based on those calculations, draw with a pen a wavy line all along the contact paper edge.
- Cut the wave line with a scissor making sure you get a straight side and a wavy side.
- Measured how much of the contact paper strip is needed to go around the candles.
- Cut it and apply the straight side to the top edge of the candle.
- Spread mod podge all over the un covered candle.
- Sprinkle abundant glitter all over it. Use a piece of paper or a tray underneath it so you don’t spread glitter all over the place.
- Let the glitter sit for a few minutes.
- Remove the excess glitter by tapping the candle gently against the table on a piece of paper.
- Remove the contact paper stencil and let it dry for at least 2 hours.
- Repeat the same process with the other two candles and change the glitter color if desired.
- Now to make the centerpiece, make 3 circles with the cardboard a little bit bigger than the candle’s diameter, like ½ inch larger.
- When the candles are dry, draw a circle around the candle on the cardboard.
- Apply hot glue along the inner side of the drawn circle and quickly glue the candle.
- Set aside.
- Now let’s work with the greenery garland.
- Cut a strip of greenery garland, long enough to make two loops on each candle.
- Then cut small strips of pipe cleaner wires like in the pic below and insert them through the ornament’s cap hole.
- Tie each ornament to the greenery garland. I made it one red, one gold, one red, one gold an so on.
- With hot glue, stick the garland to the cardboard around the candle.
- Repeat with the other two candles.
- Now the final touch…
- Make 3 cute ribbon bows and glue them to the garland.
- Tadaaaaaa!!!!! You got some really cute DIY Glitter Candles centerpiece to decorate your mantel or dining table.
Share and PIN ME!!!

Til’ next time…


FREE WORKBOOK
Keeping your Sweet Home Organized
Learn how to create intentional habits and simple routines to Keep Your Home Organized. Plus freebies, printables, exclusive content, and tips.
Disclaimer: By clicking on the “Yes” button above you are giving me your consent to collect and use your information according to the law and My Policy Privacy. Zero Spam I promise!