Twine Ball Christmas Ornament Tutorial
This post may contain affiliate links. Please read our Disclosure Policy.
If you want to add to your Holiday Season a rustic yet glamorous touch to your Christmas tree, here you have a cute Twine Ball Christmas Ornament Tutorial, it’s super easy to make, super rustic, and adds such natural beauty to your tree!
No season of the year gives me such joy and excitement like Christmas. Does it happen to you too? Usually, it’s barely starting the Fall and I’m eager to start decorating for Christmas.

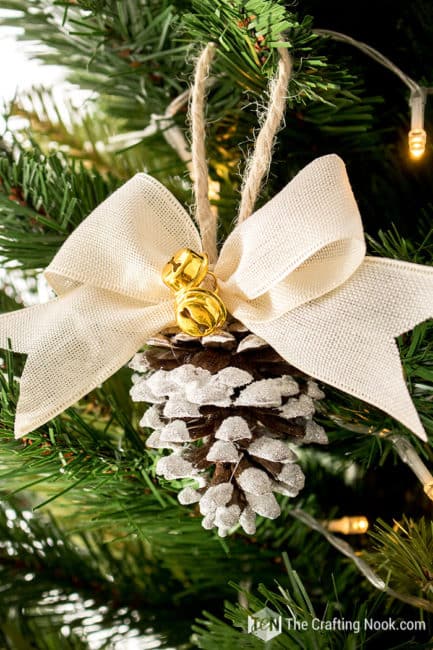
You might also love these other Christmas ornament ideas: DIY Rustic Flocked Pinecone Christmas Ornaments, DIY Rustic Hearts and Stars Burlap Christmas Ornaments, and DIY Buffalo Check Christmas Ornament
Table of Contents
DIY Twine Ball Christmas Ornament
This season makes me happy and I love seeing people putting lights up, doing crafts, and decorating the front of the houses, shops, and soon everywhere will be even smelling like Christmas!
This year I wanted to join the rustic style and make lots of handmade ornaments. Today I’m sharing with you these cute DIY Twine Ball Ornaments Tutorial to see if I can inspire you as much as I was.

You see, this ornament was inspired by my dear friend Lauren from The Thinking Closet. In my opinion, she was ahead of time, she was already aiming for rustic decor years ago and I wonder why I didn’t see it before.
Her Glitter twine ball ornament got stuck in my mind and as soon as I realized rustic/farmhouse was so in this year, I knew this was the year to finally make it.
…And here it is! I made a variation from her original ornament. I used bells, ribbon bows and in some also used white yarn to make them pop up.
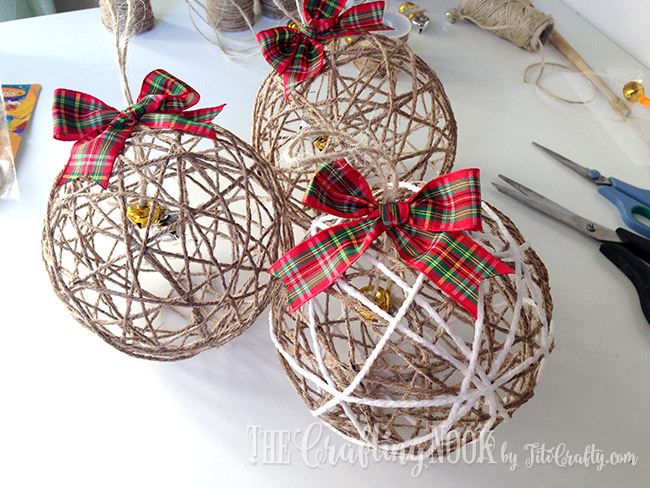
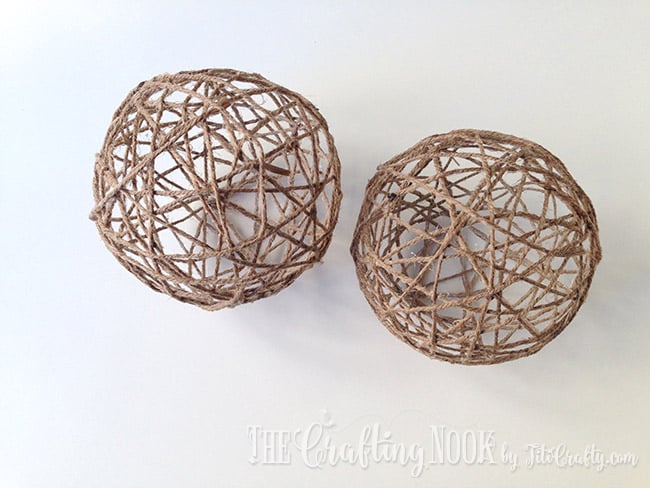
I’m in love with how it turned out. It’s super easy to make. It only takes a bit of time if you are making several as I did. I made a total of 8 twine ball Christmas ornaments and I might make 2 more if the tree requires it. This project is totally suitable to make with kids and they will enjoy it so much!
In this same line of idea, I’m making some Stars so stay tuned for the full tutorial of that one too. I think this year you will get tons of handmade rustic decorations around here! Hope you enjoy and stick around for a while!
How to make this Twine Ball Christmas Ornament
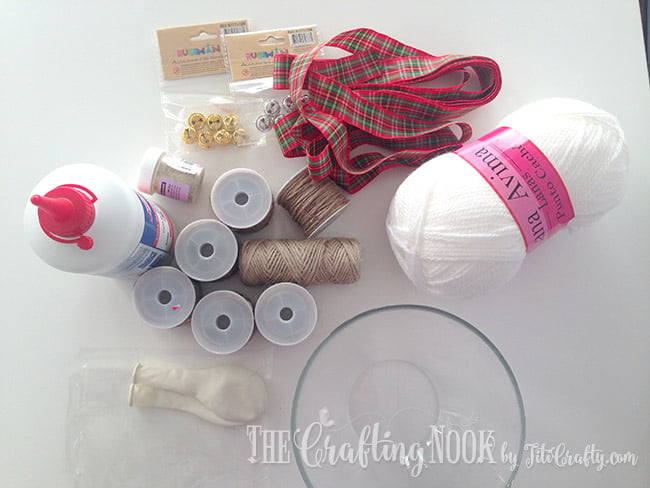
Supplies:
- Twine or jute… A lot of twine LOL
- White yarn {optional}
- White glue or Mod Podge. I used white glue for wood.
- Glitter (optional) to add sparkle.
- Christmas bells {gold and silver}
- Plaid Ribbon
- Balloons
Tools:
- Hot Glue Gun and glue sticks
- Glass bowl
- Scissors
Variation and alternatives:
You can use other types of twine if you don’t like the rustic one, yarn, white cotton twine, or rope.
Instructions:
Follow these easy steps:
I created this quick video tutorial to make it easy for you! However, if you are more of a photo step-by-step kind of person just scroll down and keep reading!
Before we begin, be sure to follow us on Pinterest, Facebook, Instagram, and YouTube, and also sign up for our email list (at the end of this post), so you’ll never miss a post!
Step 1: Prep Work
Blow up your balloons to the size you want the twine ball to be. I first blew it up big and then released the air until I found the perfect size. What this did is to get a more circular shape than a pear.
Love Grows Wild recommends wrapping your balloon in a layer of plastic wrap to keep the balloon from sticking to the glue. I loved that idea but tried without and it went perfectly for me. But I leave you this tip here!
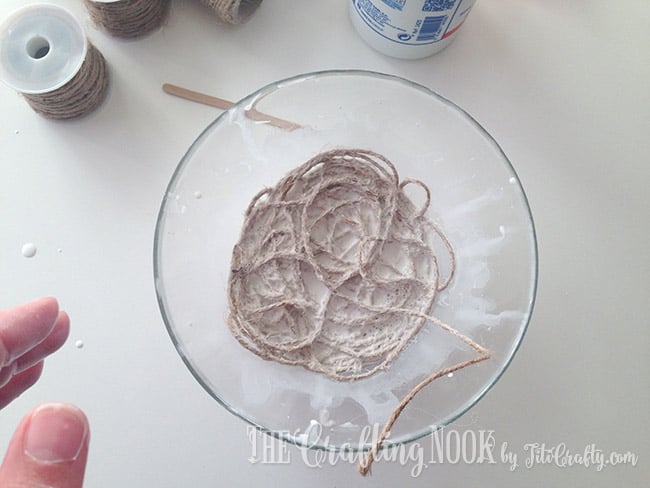
In a small glass bowl mix 2 parts of glue for each part of water. This makes the glue a little thinner (with a soupy consistency) and easier to handle. I know some friends use glitter mod podge or just mod podge but I had plenty of white glue around.
I used about 10 meters {11 yards} of twine for each ball. And about 3 meters {3.2 yards} of yarn for those that had yarn.
Step 2: Soaking the twine
Soak your twine in the glue.
Then take one end and with your thumb and index finger remove the excess glue pressing and pushing the glue along the twine.
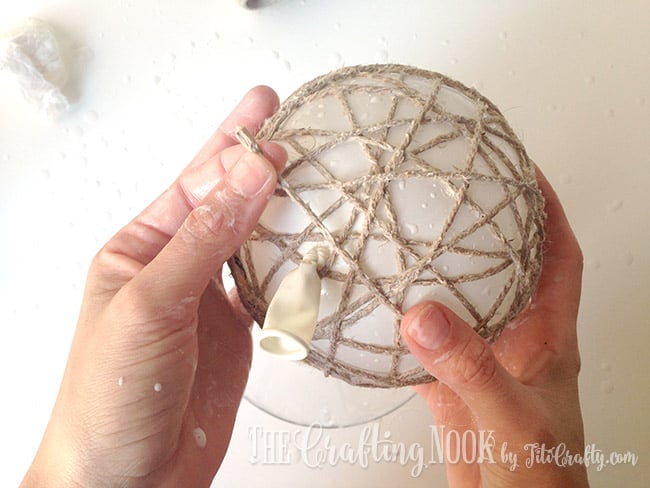
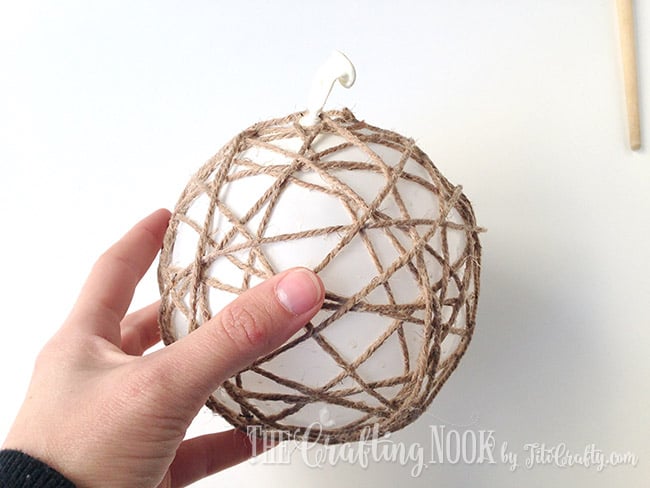
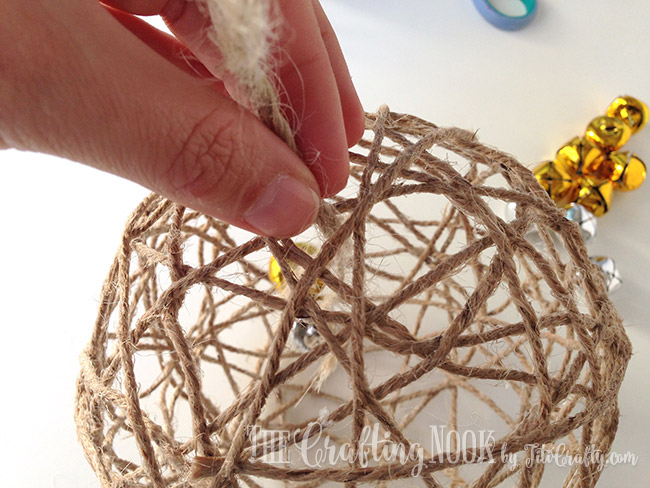
Step 3: Wrapping the Balloons
Wrap the twine around the balloon randomly. I started putting one end of the twine close to the knot of the balloon and then made loops without a pattern.
It’s important to keep the string tight against the balloon as you wrap it because it could unravel. It happened a couple of times and it’s so annoying.
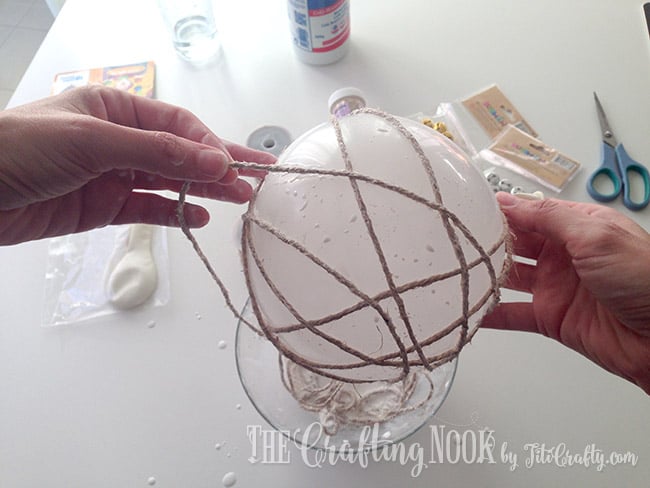
When you feel like you’ve wrapped enough the balloon, tuck the end under the closest twine string.
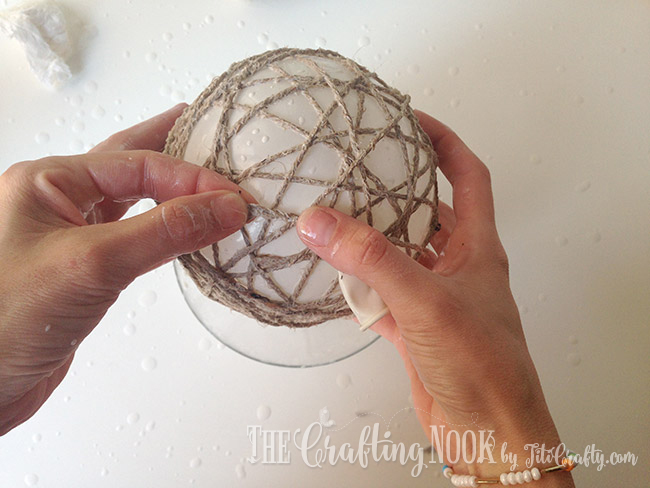
If you feel the ball is too wet you can remove excess with a paper towel by making quick but soft pats around the ball.
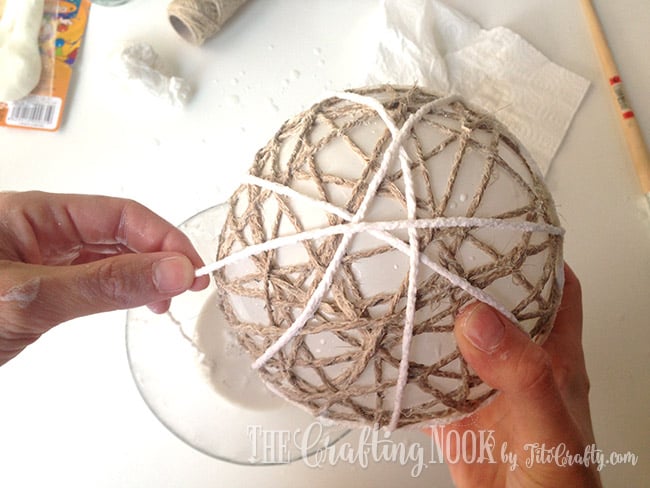
You can add yarn right after applying the twine apply the yarn tucking one end under any string of twine and start wrapping randomly until there’s no more yarn.
Tuck the other end under a string of twine as well and hang it to dry.
Step 4: Let dry the twine ornaments
Hang the balls and place some plastic bags or plastic wrap on the floor below them to avoid drips directly on the floor. You can use a wire ornament hanger or like me just some clothespins!
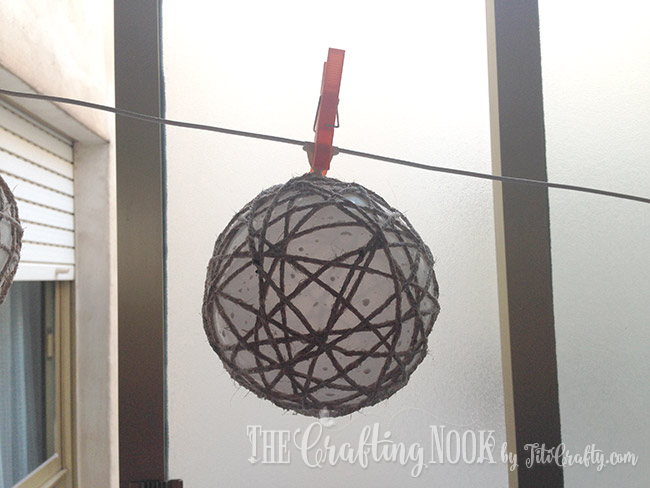
Let them dry overnight.

Step 5: Removing the Balloon
The next day, you should have a dry and hard twine ball, pretty and ready to be decorated.
Pop the balloon. I unattached the balloon from the twine first. Just tuck your finger through the open spaces between strings and you will hear it sound like cracks. Then I popped it with a needle. FUN!!!!
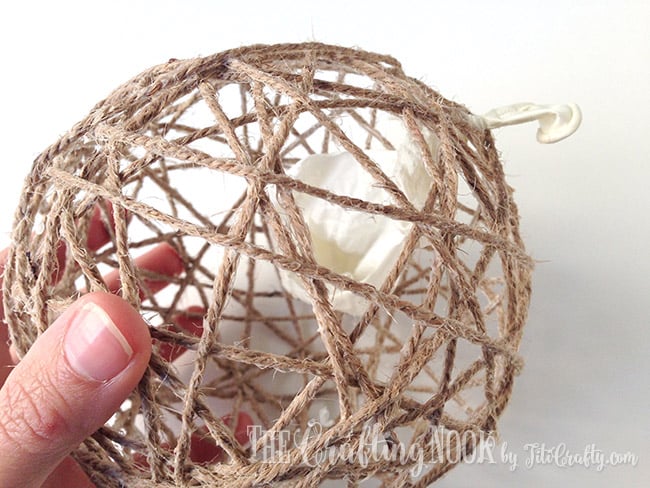
Carefully remove the balloon {or pieces of balloon} through the widest opening of your twine ball.
There you go!

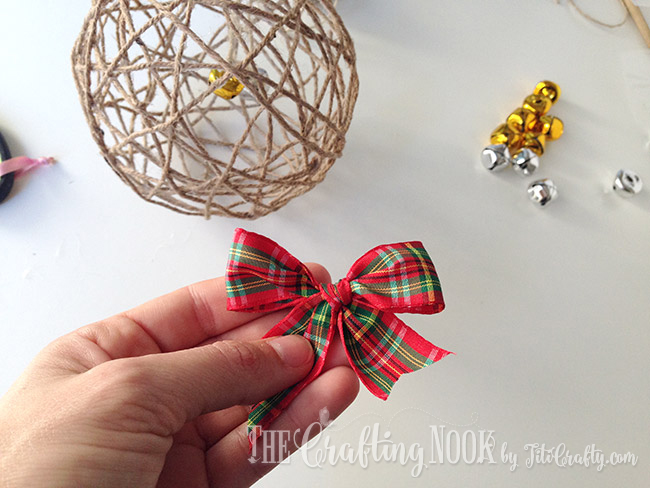
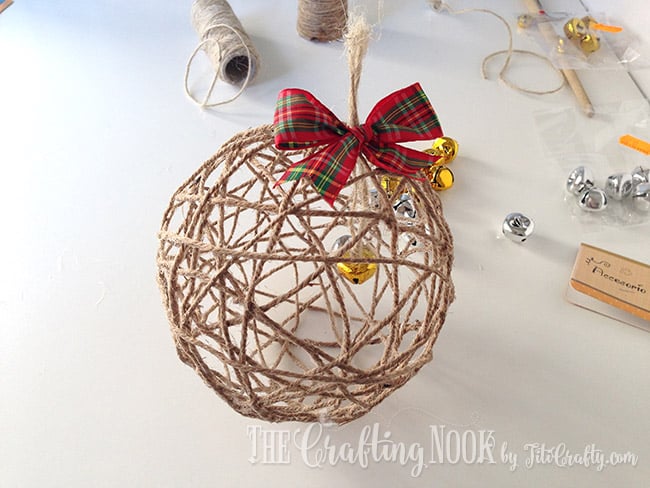
Step 6: Rustic ornament decoration – Add a pretty bow.
Cut small strings of twine.
With a knot hang a bell on each end of the twine. I used silver and gold on each string.

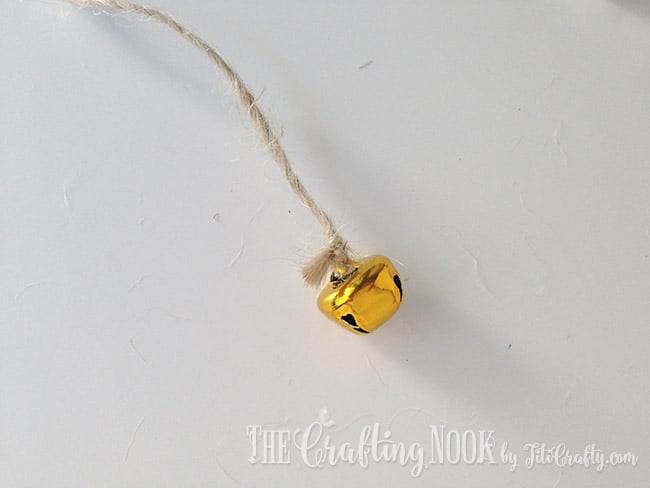

Fold the string making sure one bell gets lower than the other.
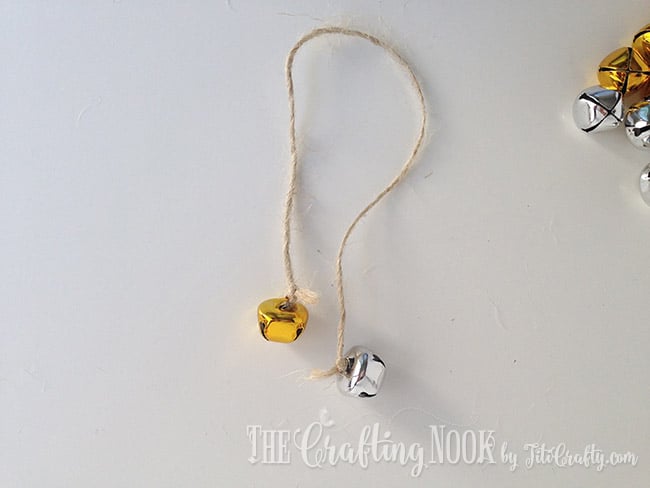
Insert both bells through the largest hole on your ball until the desired height.
Insert the folded end through the closest string, make a loop back where you inserted the bells, and make a knot.
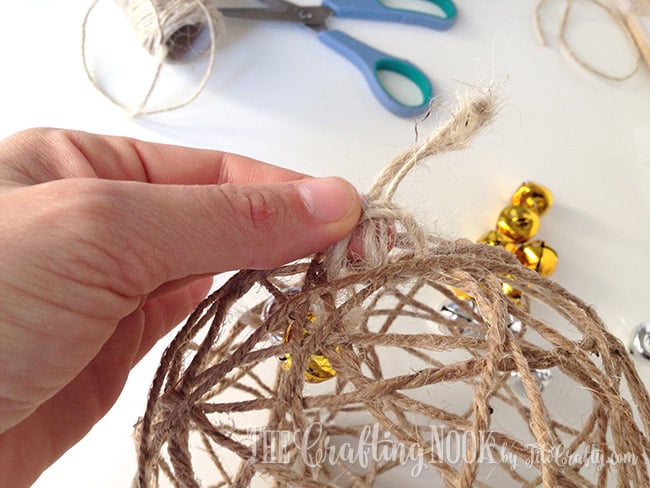
You will get your hanger.
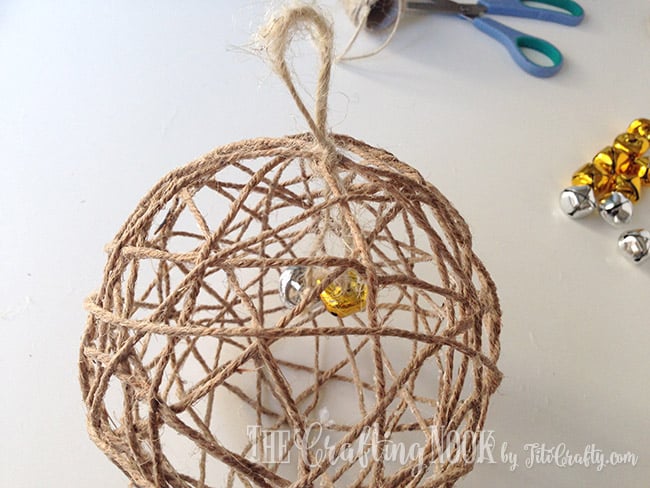
Finally, the last touch is making a cute ribbon bow and glue it with your glue gun to the base of your hanger on the knot. If you are aiming for an even more rustic look, you can include burlap ribbon. It will make it look so beautiful!!
That’s it!
Step 7: Hang your twine ornaments
Your Twine Ball Christmas Ornament is ready to add a little bit of rustic charm to your tree.

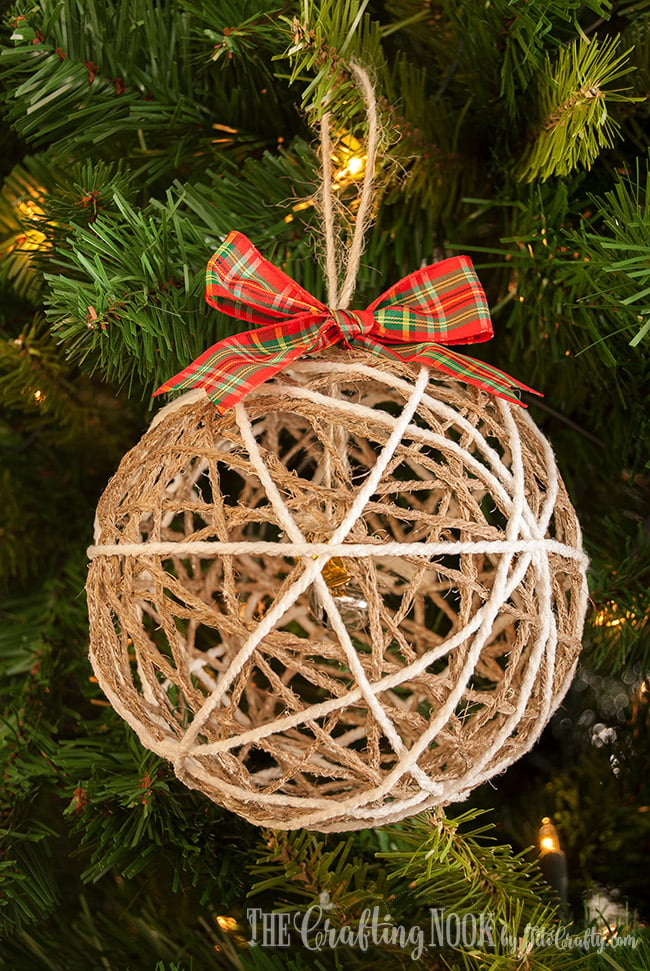
You can make as many as you like, as big or small as you like. Just make it as you feel you love and you will get a gorgeous ornament!
Thank you, Lauren, for this great inspiration and for always waking up my creativity!!!
Frequently Asked Questions
Yes, absolutely. Imagination is the limit and also the absorption of the material. You can use any of the different types of twine, yarn, white cotton twine, or any color for that matter, I just like white LOL.
I can’t say any type because I haven’t tried them all but I know for sure you can use mod podge, normal school glue, any white glue from any brand. I know other crafty friends used tacky glue and liquid starch and say it works wonderfully. So my guess is, you have to try and test.
hardening twine or rope can help it keep a specific shape for your project. One of the simplest ways to stiffen craft material is to use diluted glue or corn starch. Mixing water and corn starch create a thick mixture that soaks into the cloth and other materials such as twine and rope. Once the glue or starch dries, it makes the material stiff.
More Christmas Projects to Try
If you like this twine ball Christmas ornament tutorial, you might also love these other Christmas Project ideas too:


✂️ Tutorial

Twine Ball Christmas Ornament Tutorial
Tools
- Hot glue gun and glue sticks
- Glass bowl
- scissors
Supplies
- Twine or jute… A lot of twine LOL
- White yarn {optional}
- White glue or mod podge. I used white glue for wood.
- Glitter optional to add sparkle.
- Christmas bells {gold and silver}
- Plaid Ribbon
- Balloons
Instructions
- Blow up your balloons to the size you want the twine ball to be. I first blew it up big and then released the air until I found the perfect size. What this did is to get a more circular shape than a pear.
- In a small glass bowl mix 2 parts of glue for each part of water. This makes the glue a little thiner and easier to handle.
- I used about 10 me meters {11 yards} of twine for each ball. And about 3 meters {3.2 yards} of yarn for those that had yarn.
- Soak your twine in the glue. Then take one end and with your thumb and index finger remove the excess of glue pressing and pushing the glue along the twine.

- Wrap the twine around the balloon randomly. I started putting one end of the twine close to the knot of the balloon and then made loops without a pattern. It’s important to keep the string tight against the balloon as you wrap because it could unravel. It happened a couple times and it’s so annoying. When you feel like you’ve wrapped enough the balloon, tuck the end under the closest twine string.
- If you feel the ball is too wet you can remove excess with a paper towel by making quick but soft pats around the ball.
- Hang the balls and place some plastic bags or plastic wrap on the floor below them so they don’t drip directly on the floor.
- Let them dry overnight.
- Next day, you should have a dry and hard twine ball, pretty and ready to be decorated.
- Pop the ballon. I unattached the balloon from the twine first. Just tuck your finger through the open spaces between strings and you will hear it sound like cracks. Then I popped it with a needle. FUN!!!!
- Carefully remove the ballon {or pieces of balloon} through the widest opening of your twine ball.
- Cut small strings of twine.
- With a knot hang a bell on each end of the twine. I used a silver and a gold on each string.
- Fold the string making sure one bell gets lower then the other.
- Insert both bells through the largest hole on your ball until a desired height.
- Insert the folded end through the closest string, make a loop back where you inserted the bells and make a knot.
- You will get your hanger.
- Finally, the last touch is making a cute ribbon bow and glue it with your glue gun to the base of your hanger on the knot.
- Hang it and enjoy it!


Notes
I hope you enjoyed this beautiful Christmas decoration tutorial and that you create many of these adding your personal touch to inspire others!
Share and PIN ME!

Til’ next time…


FREE WORKBOOK
Keeping your Sweet Home Organized
Learn how to create intentional habits and simple routines to Keep Your Home Organized. Plus freebies, printables, exclusive content, and tips.
Disclaimer: By clicking on the “Yes” button above you are giving me your consent to collect and use your information according to the law and My Policy Privacy. Zero Spam I promise!