DIY Christmas Clothespin Angel Ornaments
This post may contain affiliate links. Please read our Disclosure Policy.
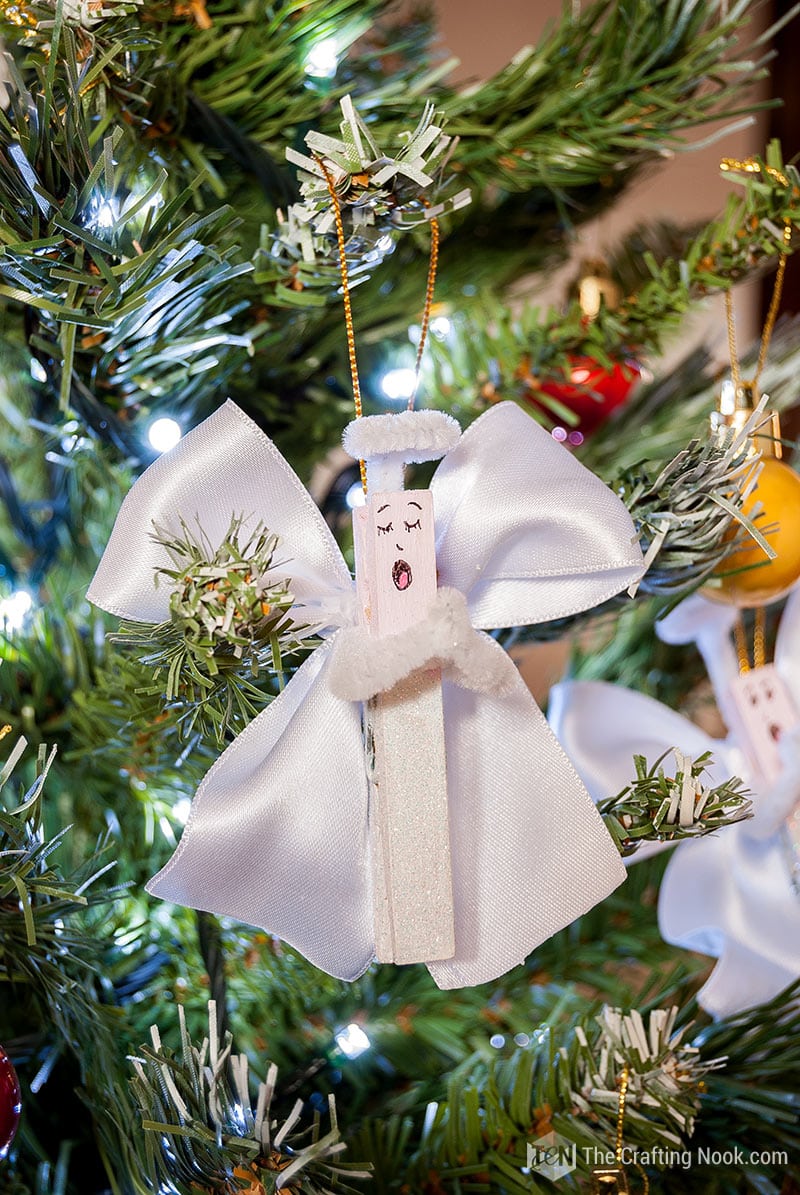
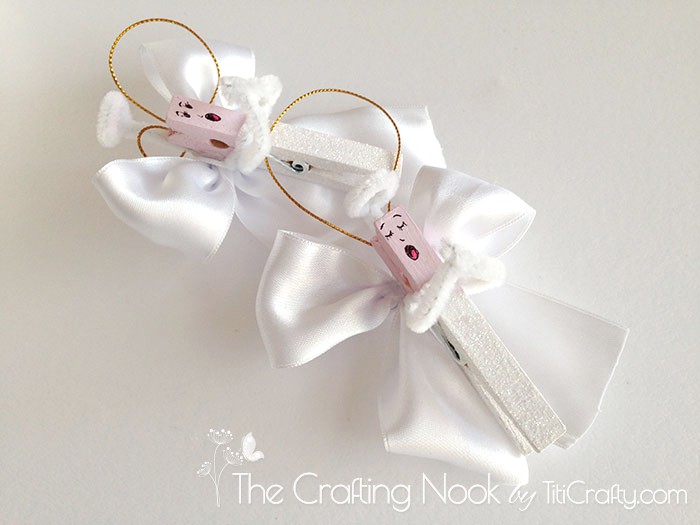
Clothespin Angel Ornaments are fun and easy to make using a few simple craft supplies. These Angels look beautiful on the Christmas Tree or are a great gift for kids to make.
Are you already thinking about Christmas? I know it’s crazy! October is not even finished yet and we are already planning and creating Christmas decorations, right?

Table of Contents
Christmas Clothespin Angel Ornaments Tutorial
Actually, the only thing that stops me from starting putting up my Christmas tree is our Halloween decoration LOL.
As you probably know by now, I joined an awesome team of gals to bring 31 Days of Handmade Christmas Ornaments and today is my turn.
I made these cute Clothespin Angel Ornaments but not before almost messing things up LOL… I’ll explain in a bit.
You see, I’m guessing you know English is not my first language so some expressions or words are not tacit to me such as Ornaments.
In my head, I translated that as anything that we can use for decoration, so since most people were working on Christmas tree stuff, I decided to go with something different…
¡¡¡BIG MISTAKE!!!
This was the perfect moment for me to follow the masses.
I created this cute Glittered Candles Centerpiece and of course, I couldn’t be more off-topic here because there’s no way I could hang those candles in the tree LOL.
For a moment I felt embarrassed and sad, I felt so dumb. But I got a happy ending woot!
Thankfully I got a bit extra time to make with something else and I came up with this cute craft idea!
I LOVE how my easy Angel ornaments turned out and can’t wait to start decorating my Christmas tree.
On the good side, I already have another Christmas decoration to share with you haha!
SO, I must tell you that if you like this project, you are going to love how easy, quick, and fun they are to make. For kids are perfect.
My girl wanted to help but in this particular case, I was in a hurry so I promised her that we would be doing the rest of the Christmas angel craft together! Yayyy can’t wait!
How to Make Clothespin Angel Ornaments
I’m telling you, not only are these angel crafts creative and budget-friendly, but they are great Christmas ornament crafts for kids.
Supplies:
- Wooden clothespins
- Acrylic paint {light pink and white, or make your own pink like I did LOL}
- White 2 Inches satin ribbon
- White pipe cleaners
- Snowy glitter
- Gold twine.
Tools:
- Black and red fine markers
- Hot glue gun and glue sticks
- Brushes
Some Variations and Alternatives
Clothespin: You can use simple wooden sticks whether flat like popsicle sticks or thick ones to have more dimension.
Wings: If you don’t have or don’t like satin ribbons, you can use any type of ribbon you like. You can also use a paper doily, fabric, and simple paper and draw some wing shapes, felt, imagination is the limit.

Before we begin, be sure to follow us on Pinterest, Facebook, Instagram, and YouTube, and also sign up for our email list (at the end of this post), so you’ll never miss a post!
Instructions:
Ok so, first clean your clothespins so they are free from dust.
Step 1: Make the Angel’s Body
Then paint the bottom {from spring to the end} in white and then the top in light pink since it’s going to be the head of the angel.

Let them dry for 30 minutes

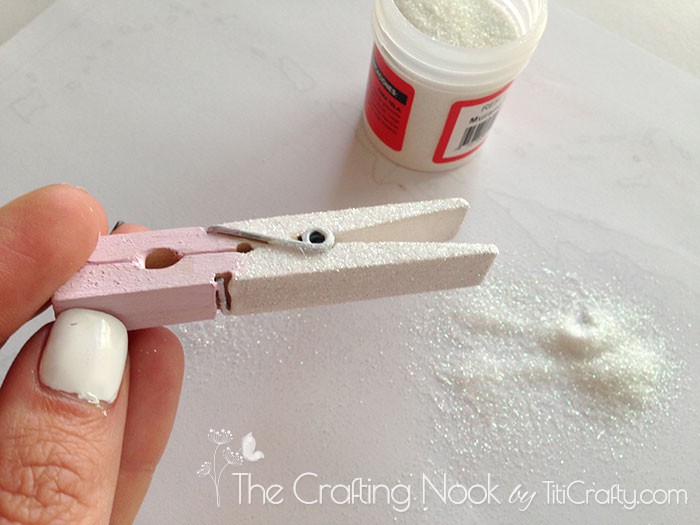
Then spread white glue or mod podge in the white area and add glitter all over and let it dry for a few minutes {30 minutes is best}. Looks so cute!

Step 2: Make the Angels’ Wings
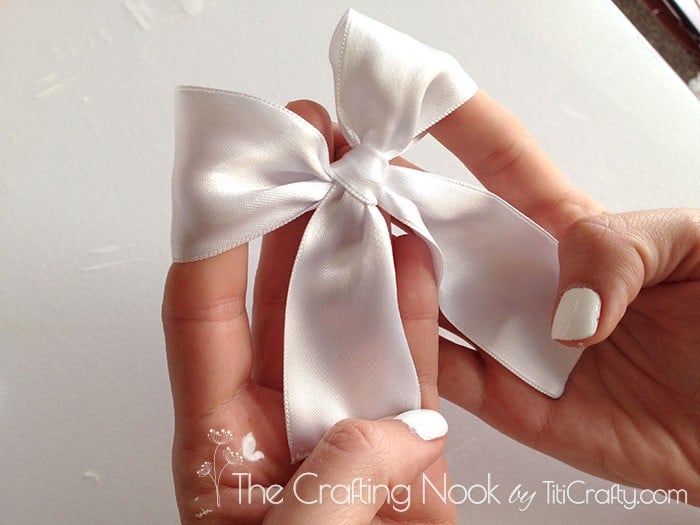
While it dries, create bows with your satin ribbon.
Make them as big as you want the wings or the Angel to be.
Let the tails long too and then cut as needed.
The trick here is to make the first bow and adjust it until you like how it looks with the clothespin size.
Once you are fine then cut the excess of ribbon and then use that as a base to cut the strips for the rest.
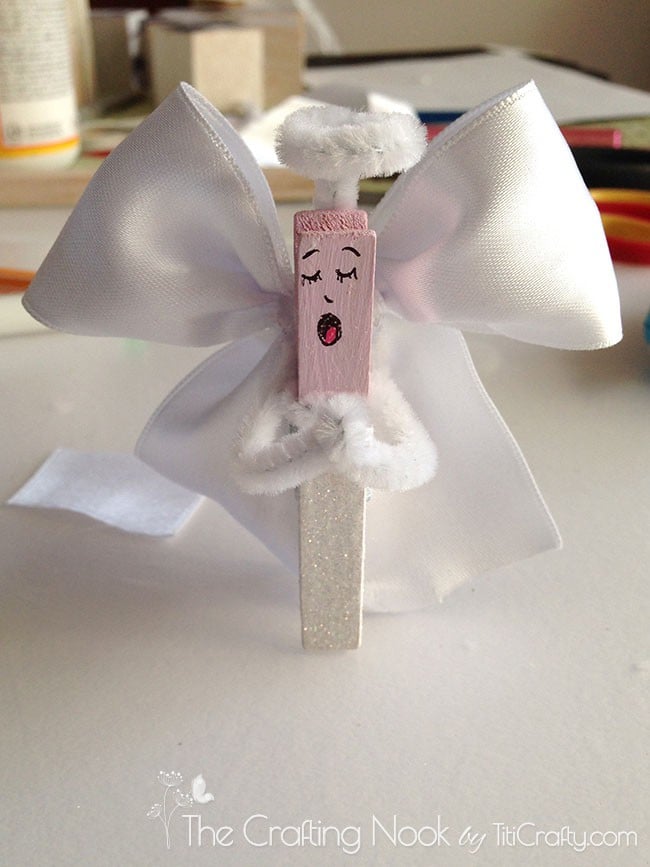
Step 3: Drawing the little Angel’s Face
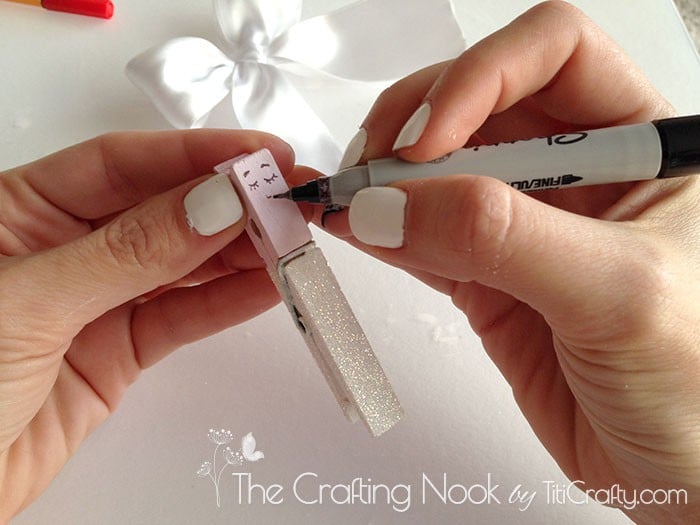
Once the clothespins are dry, let’s play with the angel’s head. Paint the faces with your markers.
I love making them with eyes closed and open mouths like they are singing… Wink!
Don’t worry if you feel like you are not very good at drawing, you can do this by just making basic shapes like circles, half-circles, or just sticks. We are not seeking perfection, just having fun!
If you feel like it, you could even paint the hair and add more details. I’m just sticking with the basics.
Then cut a piece of pipe wire. In my case was about half of the whole piece. But since it may vary, just do some trial and error with the size first.
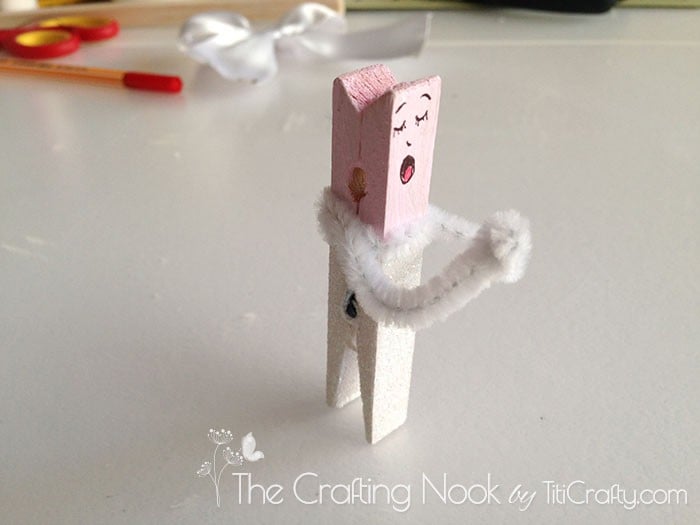
Start placing the middle of the pipe cleaner in the front of the angel where you see the metal parts. Then go around the back of the clothespin, twist it and come back to the front.
Step 4: Make the Angels’ Arms and Halo
Now you have the belt and the arms.

Shape the arms like he’s praying. I did it folding both ends.
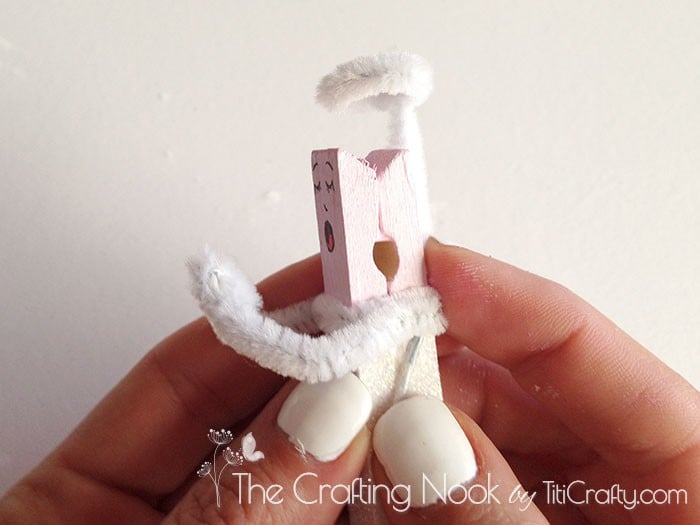
Next, cut another piece of pipe cleaner for the halo of about 2 inches. Fold about 2/3s 90 degrees.
Then using a marker big enough to make a circle with the longest part create small loops like shown below:

With the hot glue tool, glue it to the back of the angel.
Finally, glue the ribbon to the back of the Angel making sure it covers all the uglies.

Step 5: The Ornament hanger
And last but not least glue a piece of gold twine so you can hang it!
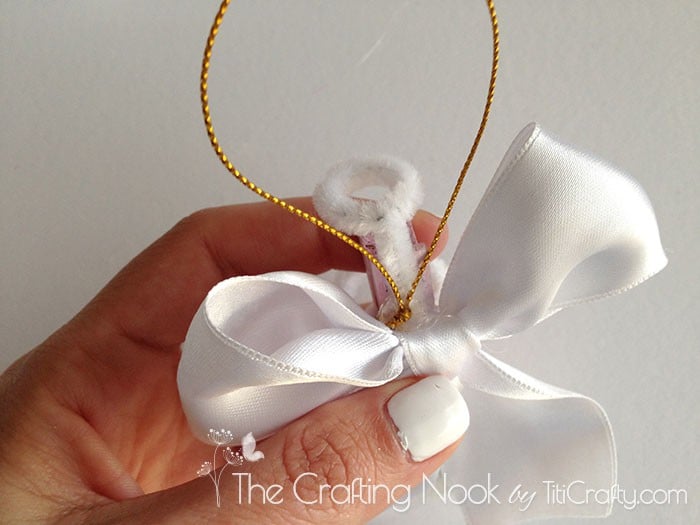
There you go!!!
You have made a really cute Angel Christmas ornament for your Christmas tree!!!
Now it’s time to make some more cute little angels!
Easy enough or what???


Frequently Asked Questions
You can use simple wooden sticks whether flat like popsicle sticks or thick ones to have more dimension.
I used a satin ribbon but if you don’t have or don’t like satin ribbons, you can use any type of ribbon you like. You can also use a paper doily, fabric, and simple paper and draw some wing shapes, felt, imagination is the limit.
You can make so many things. But here are some of the most common types of crafts you can make with clothespins: Ornaments, Paper Holders, Wreaths, Jewelry, Planters, Decorative Cards, Clips for Food Bags, and Photo Holders, just to name a few.
More Christmas Ornaments to Try
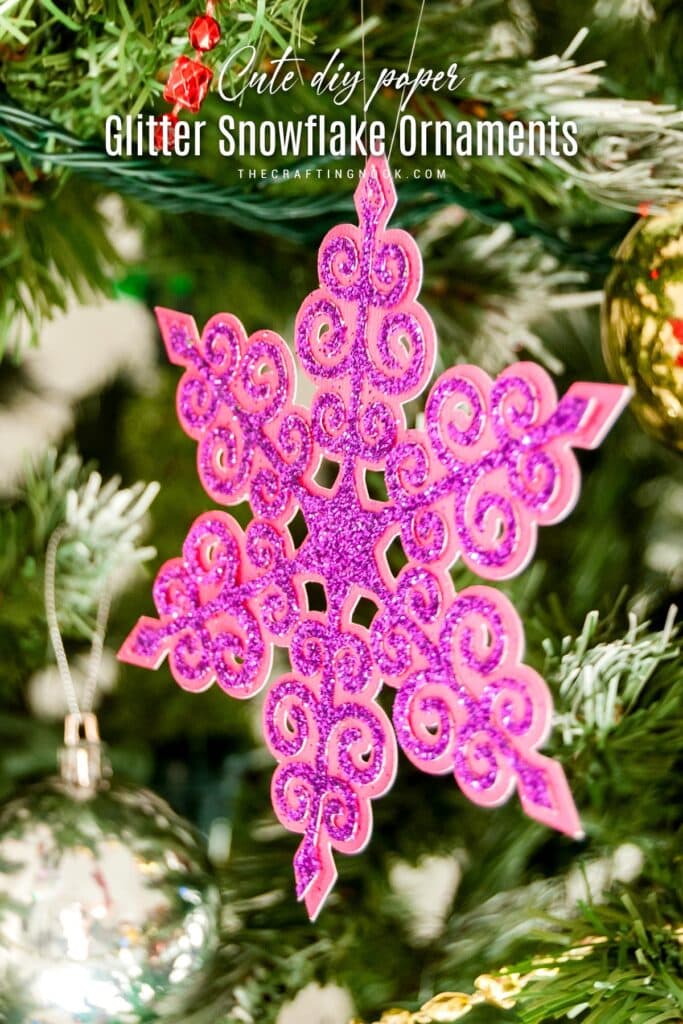
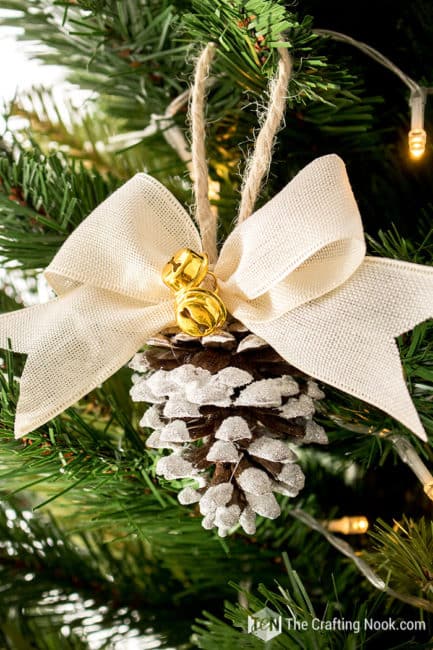
If you liked this cute clothespin angel ornament tutorial, you might also love these other Christmas Projects too:

✂️ Tutorial

DIY Christmas Clothespin Angel Ornaments
Tools
- Black and red fine markers
- Hot glue gun and glue sticks
- Brushes
Supplies
- Wooden clothespins
- Acrylic paint {light pink and white or make your own pink like I did LOL}
- White 2 Inches satin ribbon
- White pipe cleaners
- Snowy glitter
- Gold twine.
Instructions
STEP 1: MAKE THE ANGEL’S BODY
- Then paint the bottom {from spring to the end} in white and then the top in light pink since it’s going to be the head of the angel.
- Painting the clothespin fro the angel body
- Let them dry for 30 minutes
- Then spread white glue or mod podge in the white area and add glitter all over and let it dry for a few minutes {30 minutes is best}. Looks so cute!
- Sprinkling some glitter on the white paint of the clothespin
STEP 2: MAKE THE ANGELS’ WINGS
- While it dries, create bows with your satin ribbon.
- Make them as big as you want the wings or the Angel to be.
- Let the tails long too and then cut as needed.
- The trick here is to make the first bow and adjust it until you like how it looks with the clothespin size.
- Once you are fine then cut the excess of ribbon and then use that as a base to cut the strips for the rest.
STEP 3: DRAWING THE LITTLE ANGEL’S FACE
- Once the clothespins are dry, let’s play with the angel’s head. Paint the faces with your markers.
- I love making them with eyes closed and open mouths like they are singing… Wink!
- Don’t worry if you feel like you are not very good at drawing, you can do this by just making basic shapes like circles, half-circles, or just sticks. We are not seeking perfection, just having fun!
- If you feel like it, you could even paint the hair and add more details. I’m just sticking with the basics.
- Then cut a piece of pipe wire. In my case was about half of the whole piece. But since it may vary, just do some trial and error with the size first.
- Start placing the middle of the pipe cleaner in the front of the angel where you see the metal parts. Then go around the back of the clothespin, twist it and come back to the front.
STEP 4: MAKE THE ANGELS’ ARMS AND HALO
- Now you have the belt and the arms.
- Shape the arms like he’s praying. I did it folding both ends.
- Next, cut another piece of pipe cleaner for the halo of about 2 inches. Fold about 2/3s 90 degrees.
- Then using a marker big enough to make a circle with the longest part create small loops like shown below:
- With the hot glue tool, glue it to the back of the angel.
- Finally, glue the ribbon to the back of the Angel making sure it covers all the uglies.
STEP 5: THE ORNAMENT HANGER
- And last but not least glue a piece of gold twine so you can hang it!
- There you go!!! You have made a really cute Angel Christmas ornament for your Christmas tree!!!
- Now it’s time to make some more cute little angels!
Now it’s your turn, my lovely friend, what kind of ornaments have you made yourself? What kind of ornaments is your favorite??? Tell me all about it in the comments!
Want to see more projects from our 31 Days of Handmade Christmas Ornaments blog Hop? Here you have them! Enjoy the flow of inspiration!
Here are all 31 Bloggers in order of their appearance over the 31 Days.
Yesterday on Tuesday | Cupcakes and Crinoline | Celebrating Everyday Life | AnExtraordinaryDay | All Things Heart and Home | Petticoat Junktion | Sew a Fine Seam | Shabby Art Boutique | Morena’s Corner | From My Front Porch To Yours | Pet Scribbles | Sweet Pea | Dukes and Duchesses | Simply Kelly Designs | Town and Country Living | One Artsy Mama | The Crafting Nook (This one) | Our Southern Home | StoneGable | Love of Home | Lovely Etc. | Remodelando la Casa | 504 Main | nick of Time | Refresh Restyle | The Cottage Market | My Uncommon Slice of Suburbia | Heathered Nest | Sum of their Stories

Til’ next time…


FREE WORKBOOK
Keeping your Sweet Home Organized
Learn how to create intentional habits and simple routines to Keep Your Home Organized. Plus freebies, printables, exclusive content, and tips.
Disclaimer: By clicking on the “Yes” button above you are giving me your consent to collect and use your information according to the law and My Policy Privacy. Zero Spam I promise!
Thank you, I really like it.
Your angels are so adorable. What a clever idea.
Thanks for sharing at Wake Up Wednesday,
Bev
Love, love angel ornament! This is the cutest ever! Love the singing face!
Both of your creations are beautiful, Cami! I’m so glad you shared them and your little angel’s face (and everything else about her) is absolutely adorable.
hugs, mb
THANKYOU so much Mary Beth, So glad you like both projects! I felts so dumb when I realized I had done the wrong project LOL. But I have now another Christmas project to share soon!
Hugs
Adorable! Love the facial expressions! So stinking cute!
Debbie
Thank you LOTS Debbie, so appreciated having you visiting and leaving me this lovely compliment! So glad you like it!!!
XOXO
This is such a cute idea!
Thank you so much Jill!!! Glad you like it!!!
XOXO
These are adorable! Pinned!
Thank you so much Angie!!!
XOXO
These are adorable! My daughter (4 yrs) has fallen in love with these cuties :) Thank you so much for sharing! This has been added to my To Do List for Christmas….and you can bet my daughter will enjoying the crafting with me!!
So glad you liked it!!! It’s so super easy to make. My girl is 4 too!!!! and she loved it too!
XOXO
They are SO cute, I love the little faces! Can I tell you a secret? I’m English and I wasn’t sure if ornaments meant only things that can hang on a tree! Ornaments/decorations Potato/Patato. Looking forward to seeing how your made your pretty candles another day.
these are darling! Absolutely irresistible! xo
This is adorable! I’m with Kelly, I love their faces, you’re so creative! I’m so glad to be Christmas crafting with you this year.
SO GORGEOUS! I love it!
I love the sweet angels that you created. My 6th graders would love to make these for their tree. Thanks for the idea!
these are so adorable, pinning so I make them with the kids!
I’m planning on making a bunch more with my kid too!! SO much fun! Thank you for taking the time to stop by!
XOXO
Cami… these angels are so sweet! Oh how fun to have a tree full of them singing Christmas carols. ;) You are so talented and such a good sport about the mix up. Thank you for your understanding and thank you for joining us these #31Days. {hugs]
That’s my idea Diane! making some more with Em so we can have many of them singing on our tree haha! Thank you so much for your sweet words. I’m happy to be part of this blog hop!!!
XOXO
I love the faces you created for these angels. The glitter candles you made are beautiful too. My favorite ornaments are the ones that remind me of a memory like a vacation or a Halloween costume, etc. Our tree is very eclectic because of this! Thanks for sharing your creativity.
Thank you so much Kelly!!! Our tree is eclectic too.. I love adding anything that brings me joy so there’s no way we can set just one theme! I’ll enjoy so much this year with these cuties!
Thanks for stopping by!!!
XOXO