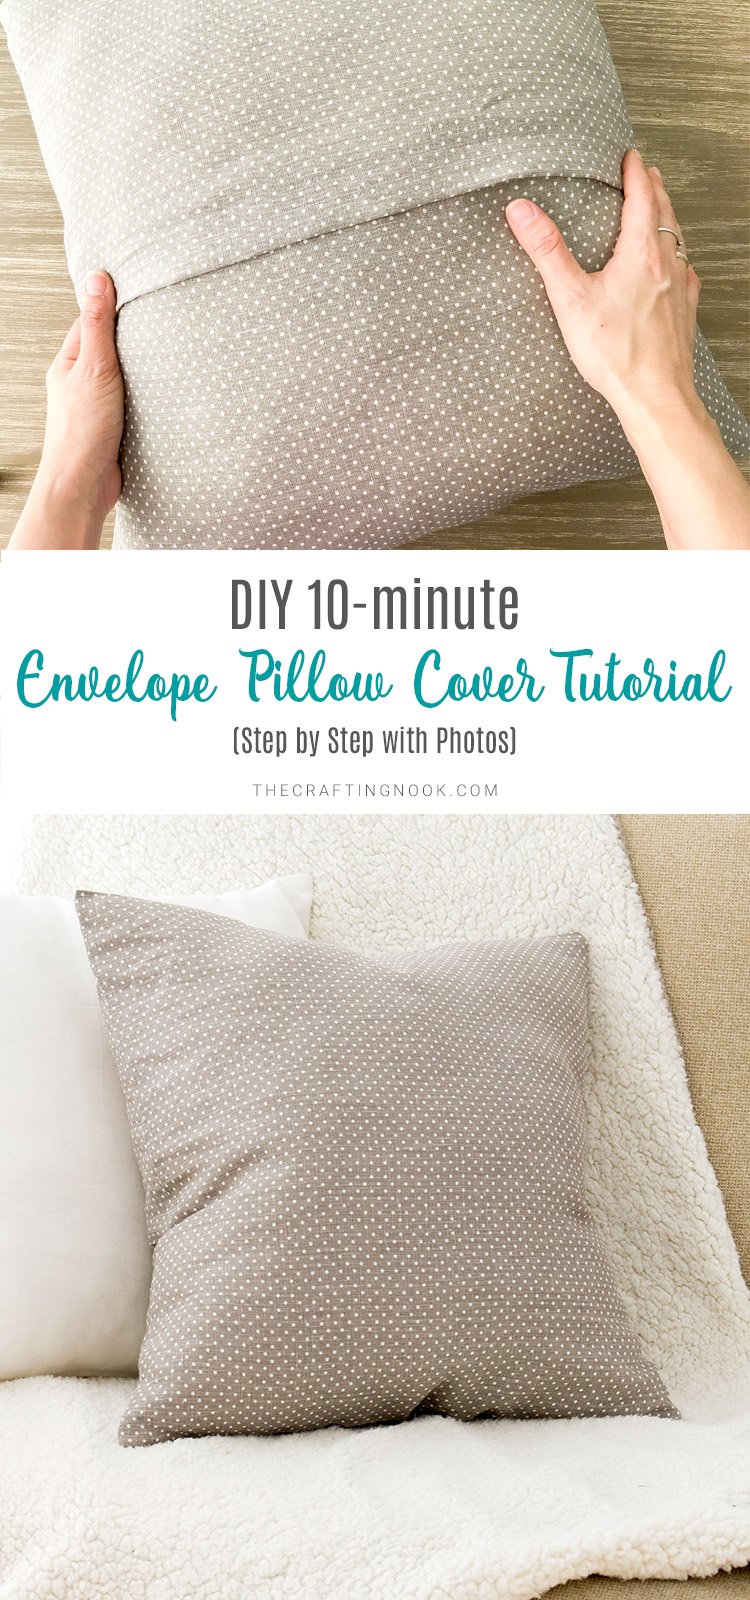
DIY 10-minute Envelope Pillow Cover Tutorial
This post may contain affiliate links. Please read our Disclosure Policy.
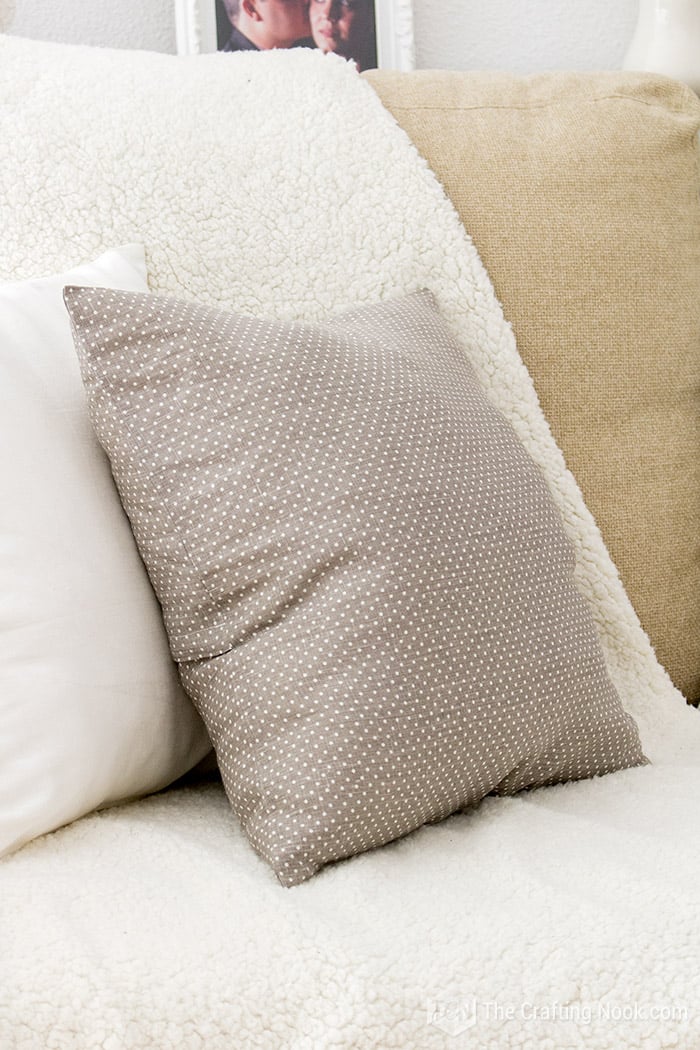
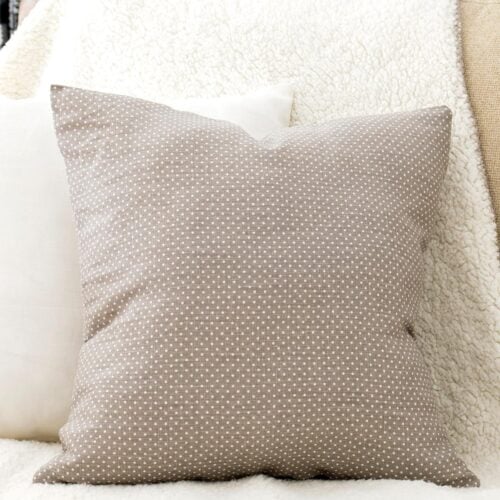
This super easy tutorial to make an envelope pillow cover is one of my favorites and the perfect beginner project if you’re on a tight budget or just want an easy sewing project to enjoy. This 10-minute envelope pillow cover is super easy to make, wash, and put back in use. What else can we ask for?
Don’t you love pillows? I’m kind of obsessed lately with pillows, and I love having pillows everywhere. I just can’t help it; whenever I see one, I need to buy it. They make such a difference in our home decor strategy.

Table of Contents
Make an Envelope Pillow Cover in Minutes
Today I’m sharing with you the most basic and easy pillow cover you will find out there: A 10-minute envelope Pillow cover. From here, you can tweak and vary in so many different ways as I have.
I’ve made many pillow covers using different styles and techniques, but this easy envelope pillow cover is the perfect place to start. I’ll be sharing more pillow cover tutorials soon, showing different ways I’ve made them.

What is an Envelope Pillowcase or Pillow cover?
Envelope pillow covers have become very popular lately. While most pillowcases are open on the ends, an envelope pillowcase has a particular envelope closure at the back of the case that resembles an actual envelope. So, the pillow is tucked in and out of sight for a more finished look when decorating your couch or bed.
A Quick Note Before You Start
This envelope pillow cover really is fast to make. Once you decide the size, the rest comes together quickly and easily.
You don’t even need a sewing machine. These pillow covers can be hand-sewn as well. It will take a little longer than using a machine, but the construction is simple and very doable.
I know this from experience. Before I owned a sewing machine, I hand-sewed an entire wall diaper stacker for my baby girl. It took more time, but it wasn’t difficult — just slower. The same applies here.
If you’d like, let me know in the comments and I can put together a simple hand-sewing tutorial too.

How to make an Envelope Pillow Cover with one piece of fabric in 10 min
I can usually make this envelope pillow cover in about 10 minutes on a sewing machine. If you’re sewing by hand, it will take a bit longer — but the steps are exactly the same.
Supplies:
- Your favorite fabric.
- A pillow insert (of course)
- Matching-color thread.
- Measuring tape or ruler
- Fabric marker or chalk
Tools:
- Sewing machine or needle (If you are going hand-sew)
- Scissors or rolling cuter
Instructions:
Before we begin, be sure to follow us on Pinterest, Facebook, Instagram, and YouTube, and also sign up for our email list (at the end of this post), so you’ll never miss a post!
I’ll start by showing you some graphics of how this works so you have a better idea on how to determine the size of your pillow and then I’ll share a step-by-step photos tutorial, alright?
Wanna know the best part of this envelope pillow cover?
Prepare yourself for awesomeness…
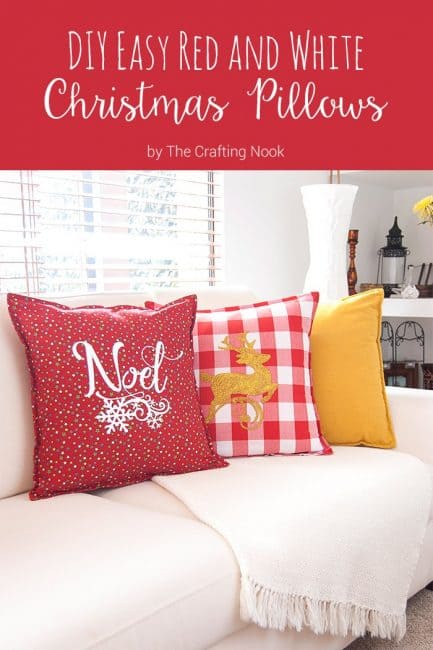
A while ago, I would cut 3 separate fabric pieces, as I did for these Christmas Pillow covers (2 for the back and 1 for the front panel), and pin them together (I also love Laura’s technique, so clever!). Ha.
Now, (Ready???) improved envelope pillow covers to ONE piece.
You heard that right. ONE piece. Front piece and back pieces all in one piece.
Nice huh!
Step 1: Prep Work
Let’s start with the envelope pillow cover pattern. There’s no need for a printable since it’s all about your pillow’s size and some math.
This envelope pillow cover works for any pillow insert size because the fabric is measured using percentages, not fixed dimensions.
Start with fabric that is the same width as your pillow insert.
For the length of the fabric, it’s divided into three sections:
- The center section equals 100% of the pillow width
- Each back section equals 75% of the pillow width (this includes the hem)
When folded, the two 75% sections overlap in the back, creating the envelope closure that keeps the pillow in place.
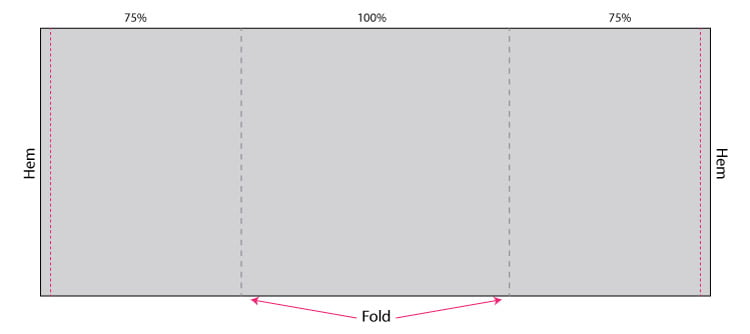
Seam allowances are added to the outer edges after measuring the main sections.
For example, if your pillow insert is 18 inches wide, the center section will be 18 inches, and each back section will be about 13½ inches.
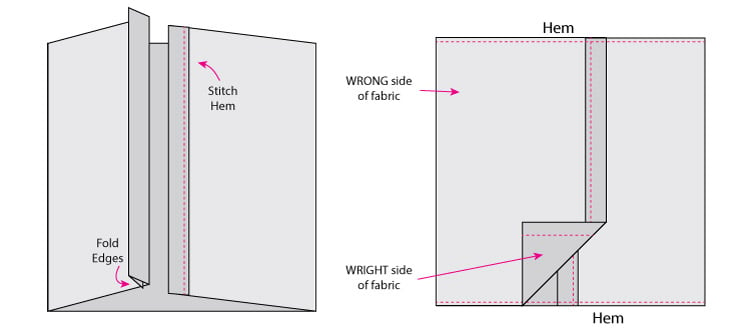
From there, it’s just about folding and stitching basically. Double-fold your hems and then fold and stitch the pillow cover.
Step 2: Trace your pattern onto the fabric
- Once you cut your fabric with the right measurements, make sure you mark well your folding lines.
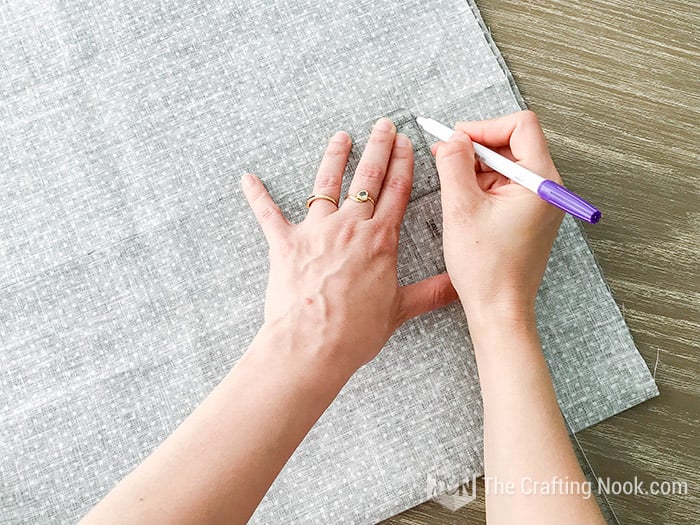
- Iron your fabric. This isn’t necessary, but it will make your sewing job so much easier if you do!
Step 3: Mark the foldings
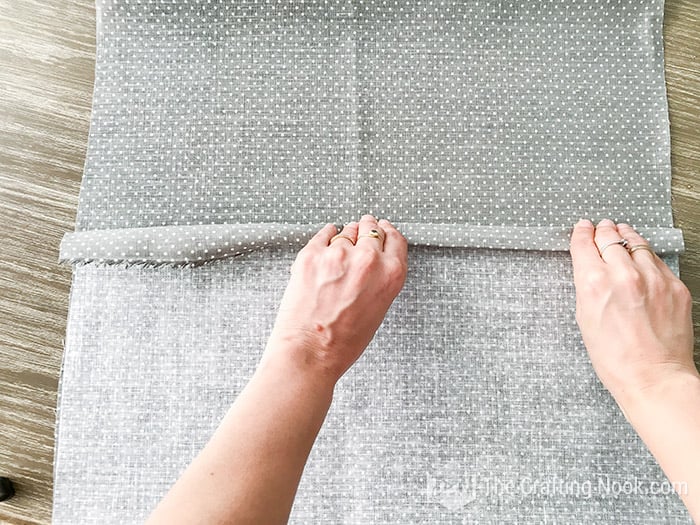
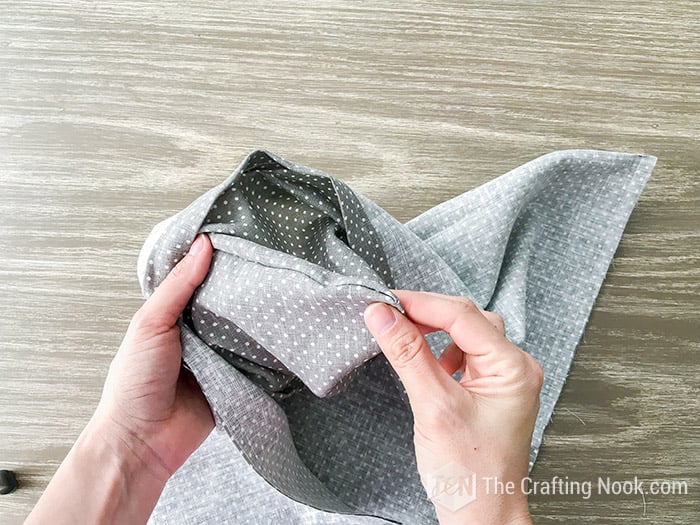
- In this step, you’ll fold the fabric to create the overlapping envelope back.
- Fold one 75% section toward the center.
- Fold the opposite 75% section over it, creating an overlap.

- Make sure the folded edges are aligned and the overlap is centered.
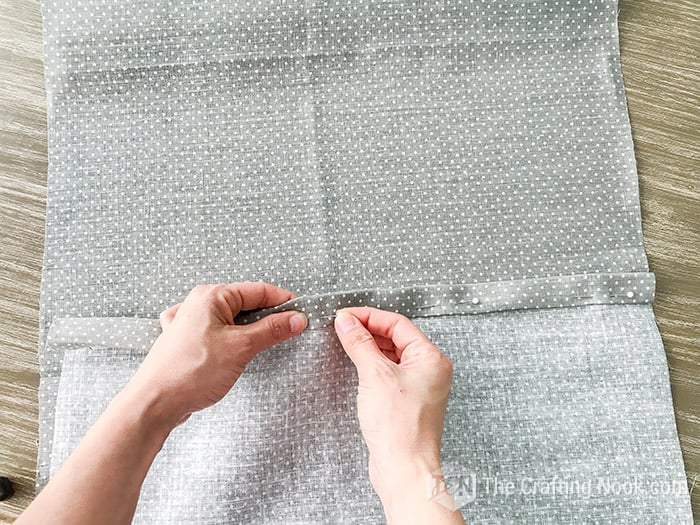
At this point, your fabric should match the diagram above, with the two back panels overlapping in the center.
Step 4: Stitch the end’s Hems
- Unfold one side at a time to hem the short edges. I like a thicker hem, so I make mine just under 1 inch.
- Measure the hem allowance, fold the edge once, then fold it again to hide the raw edge completely.
- Iron the fold to keep it crisp, then pin along the hem.
- Lay both hems in place before sewing to make sure they’re even and look the way you want. Adjust if needed.

- Once you’re happy, sew a straight line along the hem. Repeat the same process on the other short end.
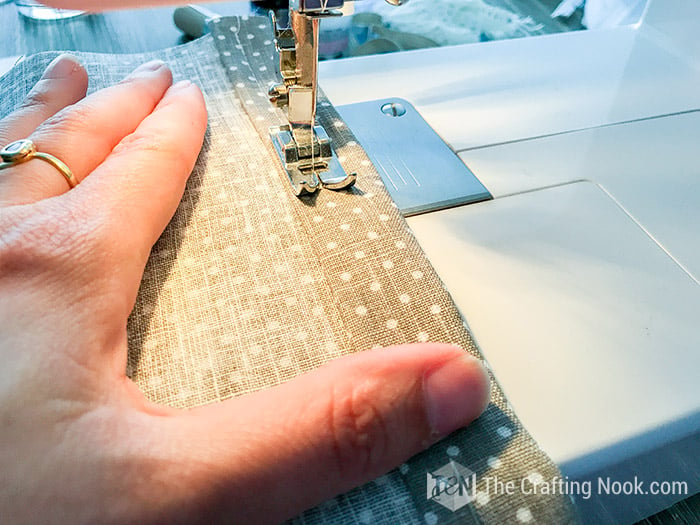
Both short ends should now have clean, finished hems with no raw edges showing.
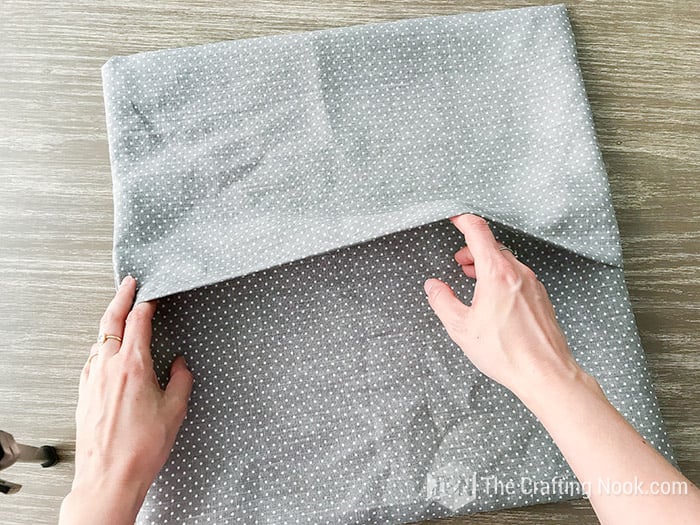
Step 5: Assemble the envelope pillow cover
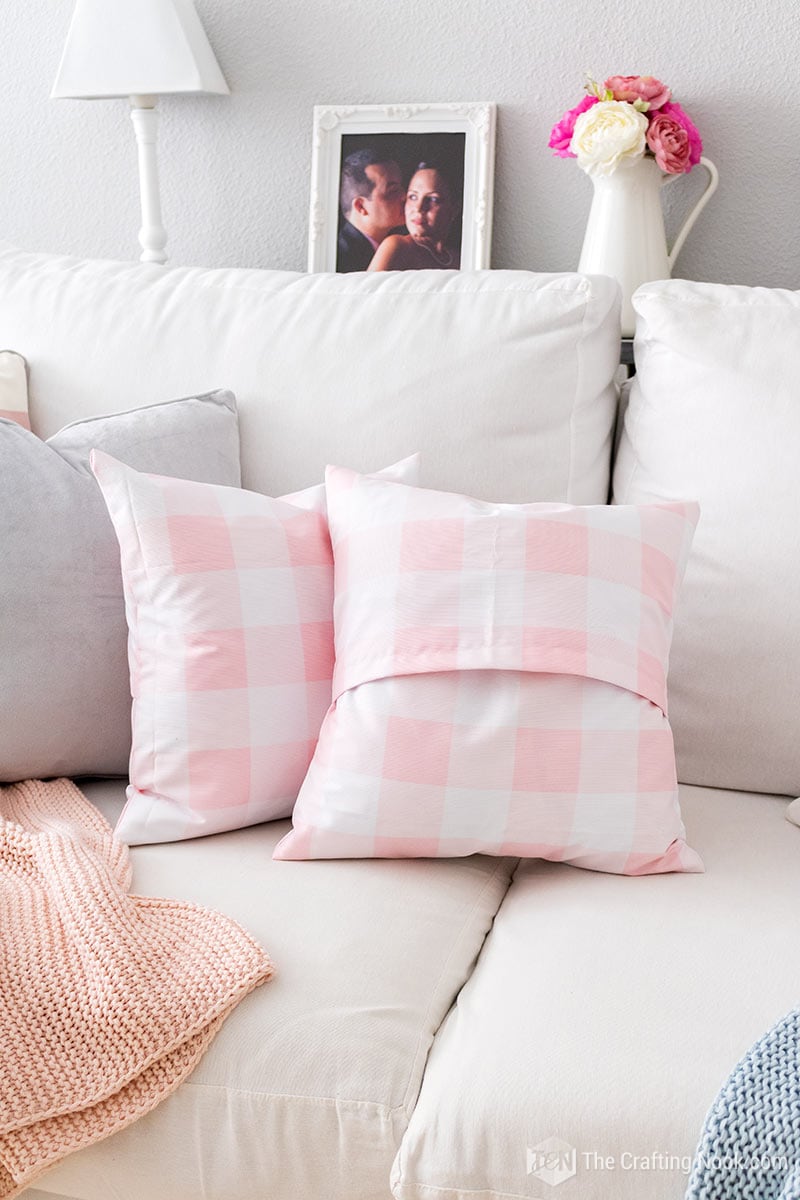
Turn the envelope pillow cover right side out and iron it flat.
Insert the pillow, adjust the corners, and you’re done.
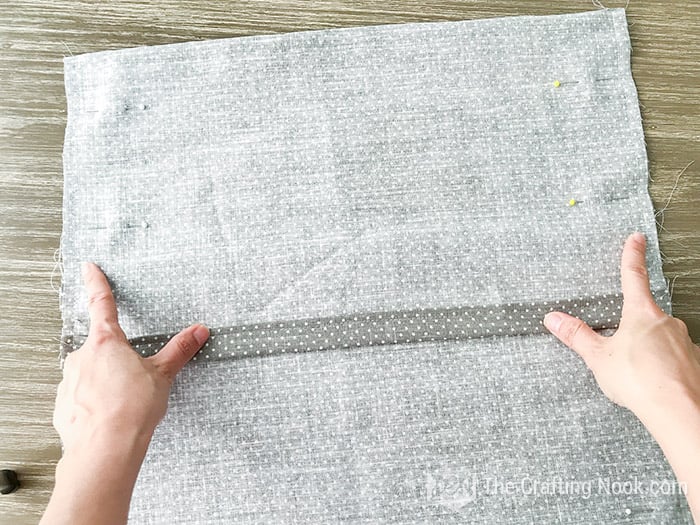
- Fold the fabric back into the envelope shape, right sides together, just like in Step 3.
- Check the final width of the cover. It should match the width of your pillow insert (16 inches in my case).
- Adjust the folds if needed, then pin along the top and bottom edges.
- Sew a straight line along both pinned sides. I like to backstitch and reinforce the areas near the finished hems since that’s where the pillow gets the most wear when inserting and removing it. This only takes a few extra seconds and makes the cover last longer.
- I like zig-zag stitches along the edges to avoid fraying and have a nice finished edge.
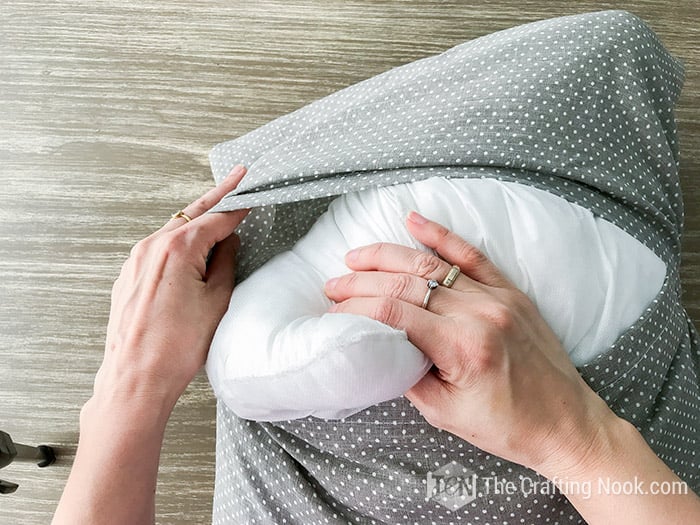
- Turn the pillow cover right side out and iron it flat.
- Insert the pillow, adjust the corners, and you’re done.
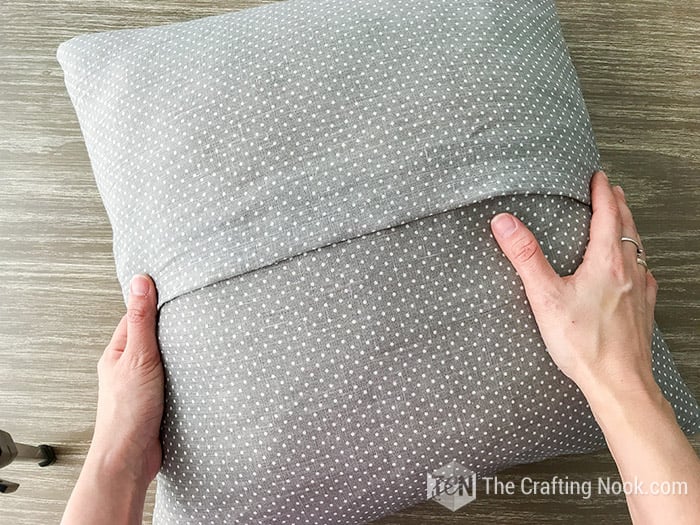
The back should overlap neatly, the pillow should fit snugly, and the seams should feel secure.
Now you have a brand-new throw pillow.
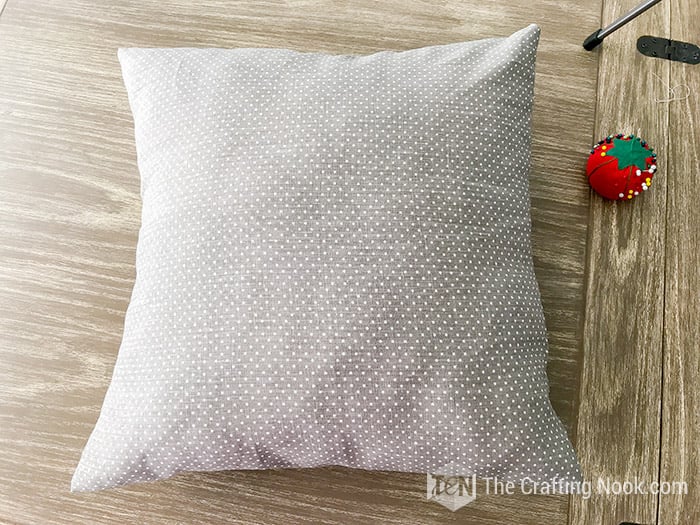
Once you’ve made one, it’s easy to make several more and start playing with different fabrics, stencils, or trims—just like I did.
Isn’t it pretty and easy?
I made another one stenciled and then another one part stripped and part solid with a cute tassel ribbon in between. SOOO cute!

You should try. I’ll be sharing the tutorial for these cute pillows and also how I make zipper pillow covers! So, stay tuned!
Common Mistakes to Avoid
Even though this envelope pillow cover is very beginner-friendly, these small details make a big difference in how the final pillow looks and fits.
- Not pressing the folds before sewing
Skipping the iron can cause the fabric to shift, which leads to uneven edges or a crooked envelope opening. - Forgetting to hem the short edges first
The short sides must be hemmed before assembling the envelope. Sewing the sides first will trap raw edges inside. - Not checking the final width before sewing
Always measure the width of the folded fabric before stitching the sides. It should match the width of your pillow insert for a snug fit. - Too little overlap in the back
Make sure the two back panels overlap enough so the pillow doesn’t peek out when it’s inside the cover. - Skipping reinforcement near the hems
The areas near the finished hems get the most stress when inserting and removing the pillow. A quick backstitch there helps the cover last much longer.
What do you think?
Sewing Tips
These small tips make a big difference, especially if you’re new to sewing pillows.
- Use a rotary cutter if you can. Cutting fabric with a rotary cutter, acrylic ruler, and cutting mat gives you much straighter edges than scissors. I started using this setup a few years ago, and it honestly changed everything. If you don’t have one yet, scissors will work — but a rotary cutter makes the process faster, cleaner, and far less frustrating.
- Stick to 100% cotton as a beginner. Cotton fabric is the easiest to work with and behaves well when folding and pressing. If you’re new to making pillow covers, I recommend gaining a bit of confidence before experimenting with thicker or slippery fabrics.
- Buy a little extra fabric. Always get more fabric than the exact amount you need, especially when you’re starting out. It gives you room to fix mistakes without having to start the project all over again.
- Start with a new needle and fresh thread. Old needles can cause skipped stitches, fabric pulls, or uneven seams. Use a sharp needle suitable for cotton fabric and brand-new thread. Save old threads for hand crafts — your sewing machine will thank you.
- Keep a seam ripper nearby. Mistakes happen, and a seam ripper will save you time and frustration. Just be careful — they’re sharp, and it’s easy to cut fabric if you rush.
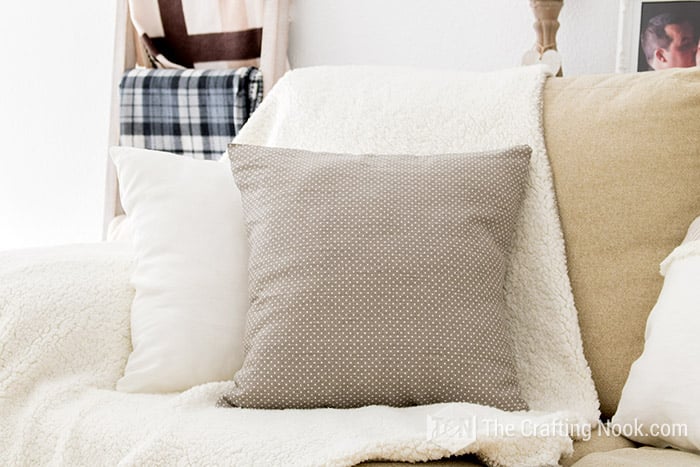
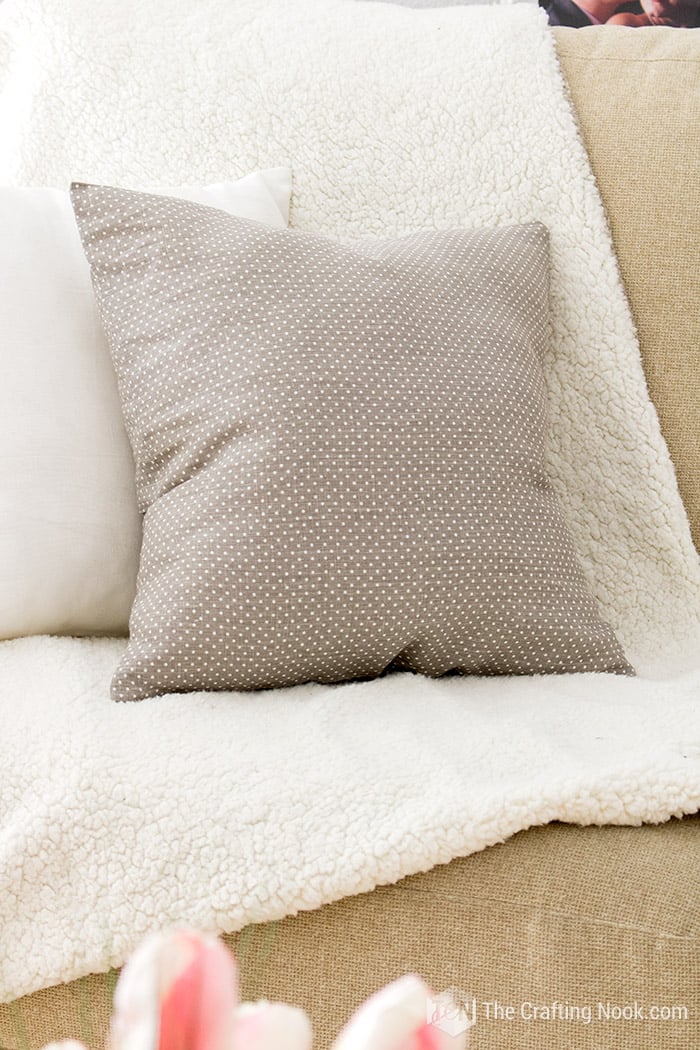
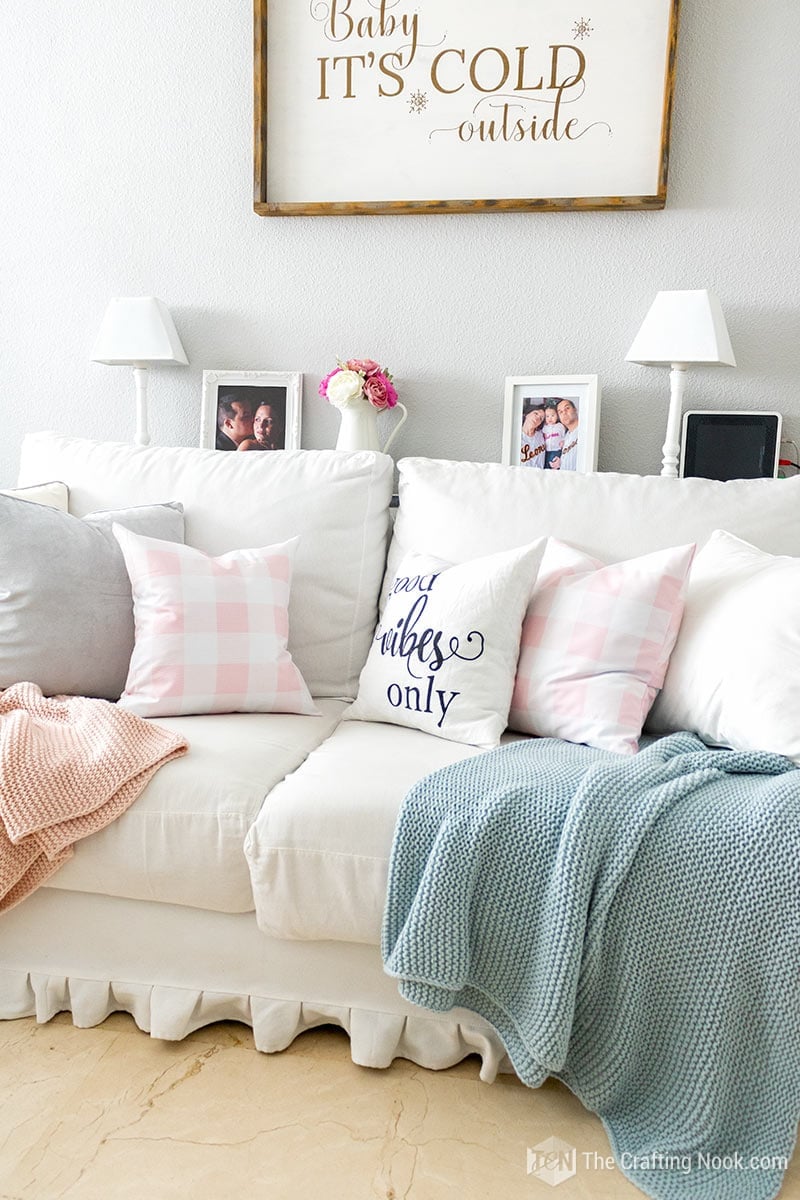
How can I style this Pillow cover?
Once your envelope pillow cover is finished, here are a few easy ways to style it around your home:
- Mix it with other pillows on your sofa or couch
- Add iron-on designs or vinyl accents
- Stencil painted designs or simple words
- Layer it over a folded blanket on a reading chair
- Mix and match colors and textures on your bed
If you make one (or a few), tag me — I love seeing your projects and sharing them
Frequently Asked Questions
The amount of fabric depends on the size of your pillow insert. This method uses percentages based on the pillow width, so it works for any size without a fixed pattern.
100% cotton fabric is the easiest to work with, especially for beginners. It presses well, doesn’t slip, and holds its shape after sewing and washing.
The two back panels should overlap by several inches so the pillow insert stays fully covered and doesn’t peek through when in use.
Yes, this pillow cover can be sewn by hand using a strong backstitch. It will take longer than using a sewing machine, but the construction is the same.
No, envelope pillow covers do not use zippers. The overlapping back panels hold the pillow insert securely in place.
Yes, as long as you use washable fabric. Turn the cover inside out and wash according to the fabric manufacturer’s instructions.
More Sewing Projects to Try
Like this Envelope Pillow Cover project? You might definitely love these other sewing project ideas too:
✂️ Tutorial
DIY 10-minute Envelope Pillow Cover Tutorial
Tools
- Sewing Machine
Supplies
- Your favorite fabric.
- A pillow of course, :p
- Matching-color thread.
- Sewing machine or needle If you are going hand-sew
- Measuring tape or ruler
Instructions
You will need to cut your fabric like follows:
- 100% means your pillow’s size (hem allowance only on top and bottom because you are folding sides).
- 75% means the percentage of the front size you will use for the back panels. You can use less but I love thick hems on the ends and large overlap. SO you can adjust as you like you can use 65% for example if you like thin hems.
- In a life example if your pillow is 16×16 Inches, your 100% would be about 16 x 16.6 Inches and then your back panels (75%) would be about 12 x 16.6 Inches. Sum all the widths and you have the length of you main piece.
- From there, it’s just about folding and stitching basically. Double fold your hems and then fold and stitch the pillow cover.
- Let’s go to the details shall we?
- Once you cut your fabric with the right measurements, make sure you marked well your folding lines.
- Iron Your Fabric. This isn’t necessary, but it will make your sewing job so much easier if you do!
- Fold the fabric with right sides together. Fold one of the short sides over, make sure it’s straight, then fold the other side over. Pin in place close to the folding line.
- Work on the hems: as I mentioned I love thick hems, so I made it a little less than 1 inch. So measure it, fold it once and fold it again. Iron it. Pin it. Sew it. Repeat on the other end.
- Lay them in place to make sure you like it or if you want to give more or less to the hems.

- Check the width; it should be the width of the pillow (16” in my case). Adjust until it’s right, and pin along the top and bottom.
- When everything is ok there, then sew two straight lines (I do reverse the machine and go over each finished end again for reinforcement since that’s where the pillow gets the most abuse from inserting and removing the pillows, but that takes maybe an extra 5 seconds). Did I mention this was a super easy project?
- I like zig-zag stitching along the edges to avoid fraying.
- Turn the envelope pillow cover right side out, stuff it with a pillow, and enjoy your finished work.


Video

If you like this simple yet super fun and decorative project please share it with your friends!
Til’ next time…


FREE WORKBOOK
Keeping your Sweet Home Organized
Learn how to create intentional habits and simple routines to Keep Your Home Organized. Plus freebies, printables, exclusive content, and tips.
Disclaimer: By clicking on the “Yes” button above you are giving me your consent to collect and use your information according to the law and My Policy Privacy. Zero Spam I promise!
