DIY 3-Pieces Envelope Pillowcase for Christmas
This post may contain affiliate links. Please read our Disclosure Policy.
If you want to try something new or just want a simple sewing project to enjoy, then this step-by-step tutorial on how to make an envelope pillowcase is right for you! Simple to make, wash, and reuse, these 3-piece envelope pillowcases are easy to make. Could there be anything better?
I’ve been excited for weeks about this post. It’s been torture having to wait until today but here we are Yayyyy.

I’m being silly, I know. But the thing is I loved so much how these red and white Christmas pillows turned out that I was dying to share it.
Why didn’t I share this before, you may ask? Well, I’m a part of an awesome group Called Silhouette Challenge and we have a monthly challenge that goes live on the second Monday of each month. This was my project for it so now you see why I had to wait.
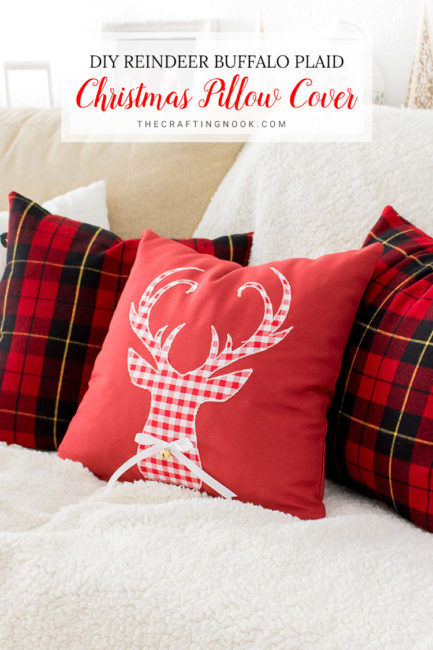
You might also love these other easy sewing project ideas: DIY 10-min Envelope Pillow Cover, How To Make a Duvet cover, and DIY Reindeer Buffalo Plaid Christmas Pillow Cover.
Table of Contents
3-Pieces Envelope Pillowcase for Christmas Tutorial
The problem was not the waiting itself, the problem is that I was so excited about this month’s challenge that I was ready like over two weeks ago LOL.
Yes, I know I got a little carried away…
But hey! It’s Christmas and Christmas makes me too happy and inspired!
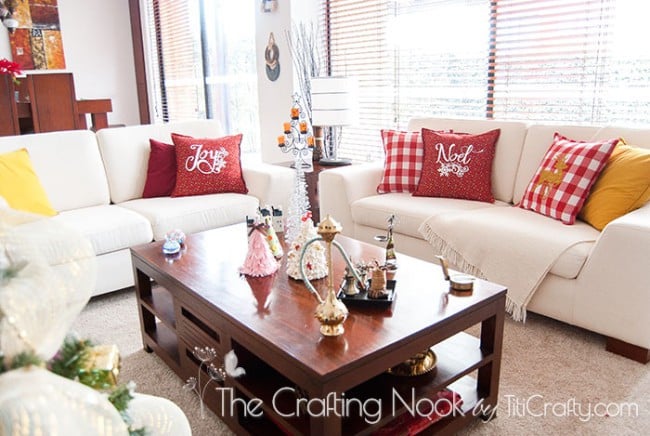
I recently shared our Christmas Decoration Home Tour 2015 where you can see all the decorations we made. These pillows turned out to be the perfect addition and I can’t be happier. Hope you like these too!
Pillows are one of the easiest ways to add coziness and style to your home decor. I’m obsessed with them!
In today’s post, I’m going to show you how to make the second most basic and easiest pillow cover you’ll find on the internet: a 3-pieces envelope pillowcase.
You can edit and vary this from here in several different ways, as I have.
I’ve made quite a few pillows with different decorations and styles already and I’ll give you some ideas to start with. You will learn how to make this super easy envelope pillow cover, then stay tuned for more pillow case tutorials where I will show you all the ways I have made them.
What is an Envelope Pillowcase?
Recently, envelope pillowcases have become very popular. An envelope pillowcase differs from other pillowcases in that it has a special envelope closure at the back that resembles a real envelope instead of the traditional open or zipper closure. In this way, the pillow will remain hidden, creating a more finished aesthetic when decorating your couch or bed.
How To Make An Envelope Pillowcase.
Before we begin, be sure to follow us on Pinterest, Facebook, Instagram, and YouTube, and also sign up for our email list (at the end of this post), so you’ll never miss a post!
Supplies:
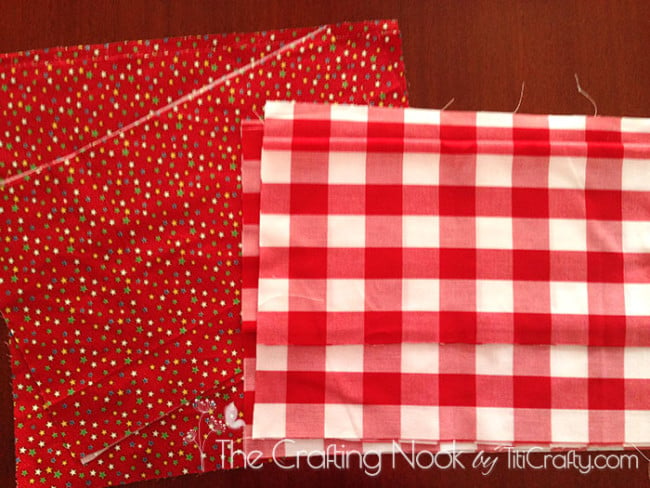
- 1 yard of your favorite fabrics or more depending on the size of your pillows {I used red with stars and a buffalo check plaid white and red}
- Stencil material {I confess I used contact paper}
- White heat transfer vinyl
- Gold fabric paint
- Gold glitter
- Fabric Glitter glue.
- Matching thread
- Pillow insert
- Measuring tape, plastic ruler, scissors or rotary cutter.
Tools:
- Sewing Machine
- Cutting machine *optional if you want to decorate the pillows.
Instructions
For this project, I used the 3-pieces technique to make the pillowcases instead of the one-piece technique, and two techniques for the decoration.
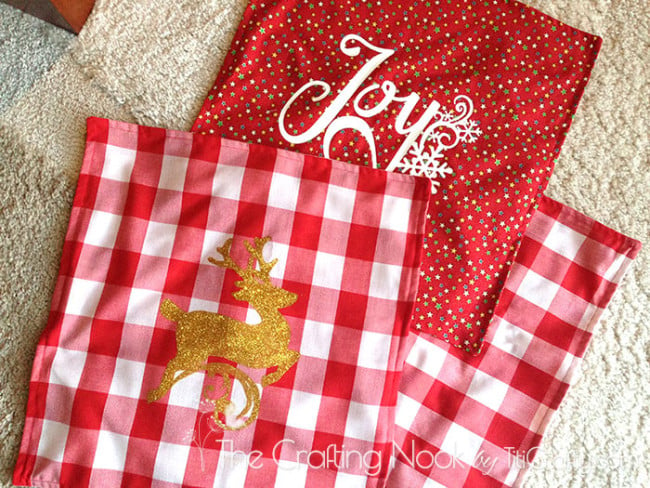
On some, I used Heat transfer vinyl and on others, I used stencil, paint, and glitter. I used basically for our home decoration 3 colors: red, white, and gold.
Without decorating the pillowcases, making them takes about 20 minutes to put together. If you want to add decoration then it will take a little longer, but don’t let these scares you, you can have quite a few pillows done in one day.
So, let’s get show you how to make your own envelope pillow cover!
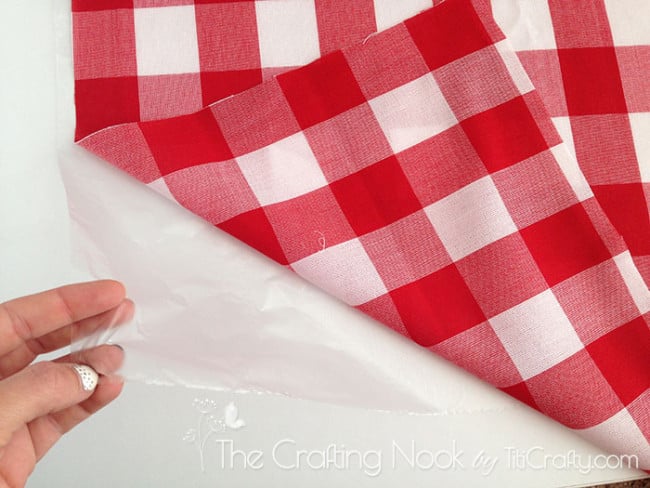
Step 1: Cut the Envelope Pillowcase pieces
As I said this project involves only 3 fabric pieces. so first, cut the pieces of your fabric. In my case, my pillows were squared which made the job easier.
I also decided I wanted to make them with a french seam finish which means I need to add the extra seam allowance to create it.
Or course the first thing to do is define the size of your pillow.
For a pillow’s size 46X46 cm (18×18 Inches), cut:
- Front: 1 piece 50×50 cm (19.5×19.5 Inches).
- Back: panels 2 pieces 50x 35 cm (19.5×14 Inches).
These measurements include 1/8 inch seam allowance and the french seam.
Once the pieces of all your pillows are cut, it’s time to decorate them before sewing the pieces together.
Step 2: Create the Envelope Pillowcase Design
This is a totally optional step. If you are not planning on decorating your pillows, you can skip this step and move on to the assembling part.
Also, if you want to decorate your pillow but don’t have a cutting machine that’s cool too. You can find numerous designs on the internet to purchase or in craft stores. Some are heat transfer vinyl and others are stencils for you to paint on the fabric.
Let’s work on the design.
Technique #1: Heat Transfer Vinyl design

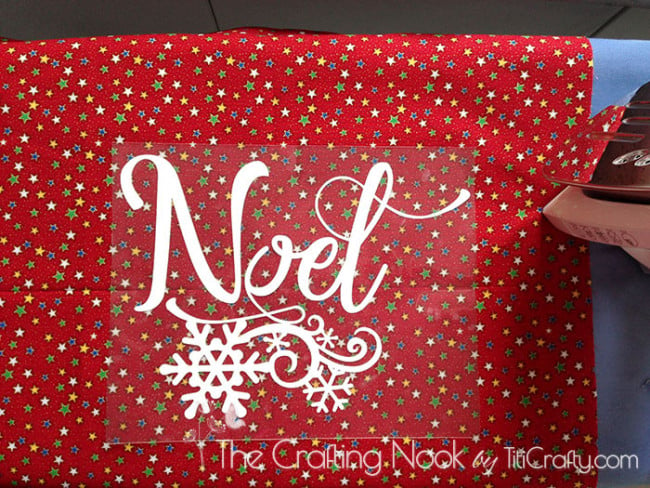
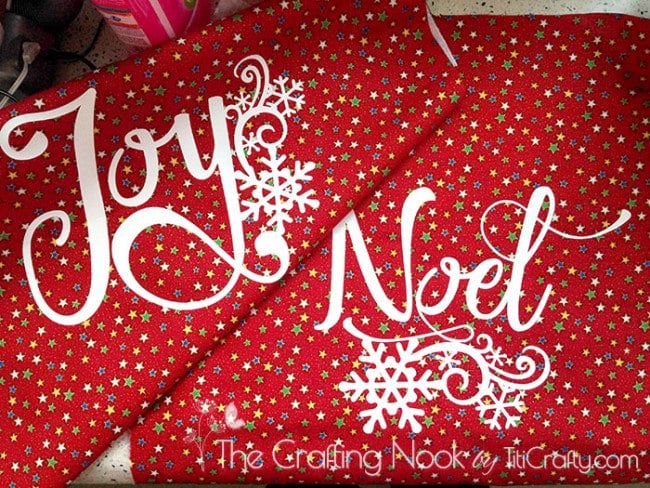
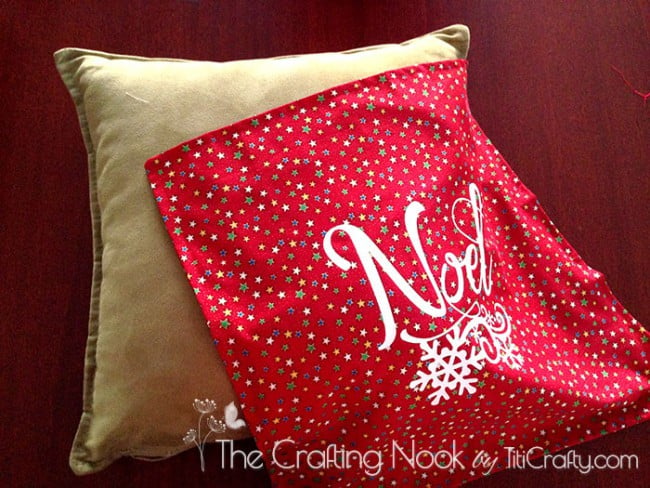
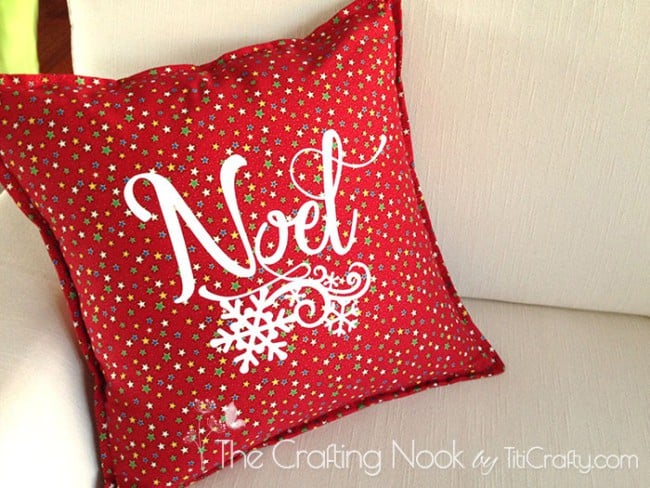
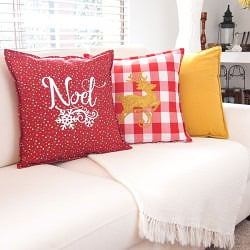
I made a design for heat transfer using the words Joy and Noel using my own fonts for it and a cute winter design from the Silhouette store.
Then I weld them together to make one single design ready to cut.
It’s also important that you make sure you have you define the size of the pillow decorating area so you set the right width and height on the cutting machine app.
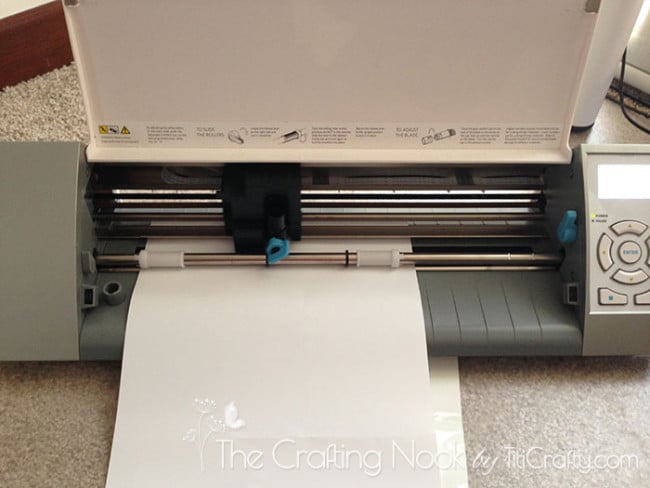
For cutting, since I’ll be using heat transfer, I mirrored the image and set the knife according to Silhouette settings.
Send to cut.
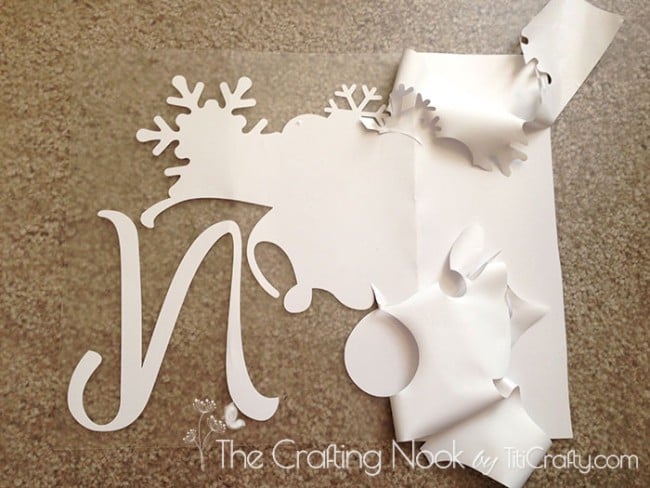
Once cut, use the hook tool to remove all the unwanted pieces. Including all the surrounding HTV.
Place the Image centered on your fabric front panel, right side up and laid a t-shirt piece of fabric on top of the design.
Iron in cotton settings pressing down firmly for about 40-60 seconds {it might vary between irons} until you make sure the image is really stuck to the fabric. If you peel away the plastic and the vinyl is not set, continue ironing for a few more seconds.
I let it cool for a few seconds and started peeling away the plastic very carefully.
To wash it you can just machine wash and dry inside out {the lower the heat the better}.
There you go, your pillow design is ready!
I did this with the other pillow.
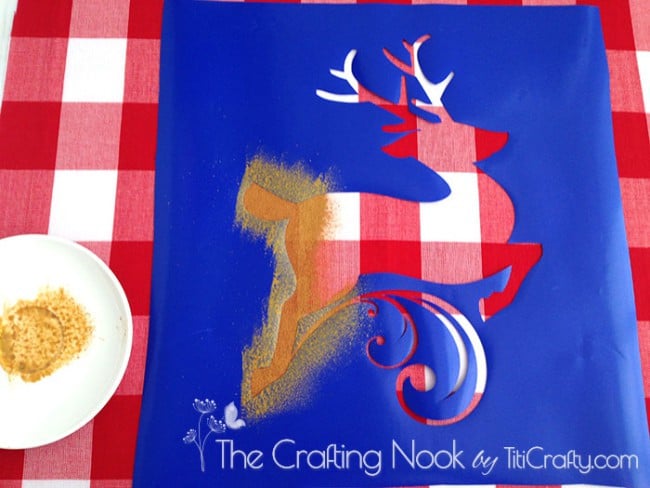
Technique #2: The Stencil painted design
I used a reindeer design from the silhouette store for the painted pillow. In this case, there is no need to mirror it.
Just send to cut and set the knife to the suggested settings.
Protect with plastic the surface where you are going to work.
Place your fabric over the plastic, right side up.
Place your design stencil centered in the fabric.

Start painting. In my case seems like the type of fabric rejected the contact paper. But didn’t let this stop me.
I just had to be extra careful to paint it. Using a sponge I painted only tapping over the design. I applied 2 layers of paint. Let it dry a bit. I waited about 20 minutes.
Protect the surroundings of your design and applied carefully the glitter glue for fabric with a clean sponge and spread the glitter all over the design.
Then, wait at least 25 minutes before removing the excess of glitter.
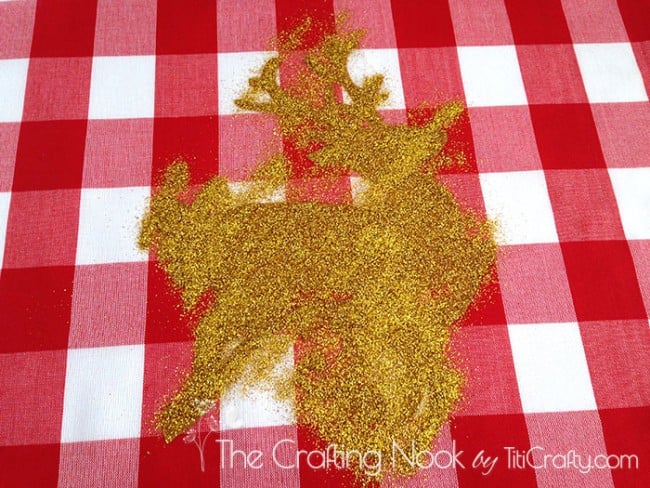
After removing the glitter you will still have some glitter around, leave it and take it outside {if your weather allows it} or close to a window to let it completely dry. It would take a couple of hours.
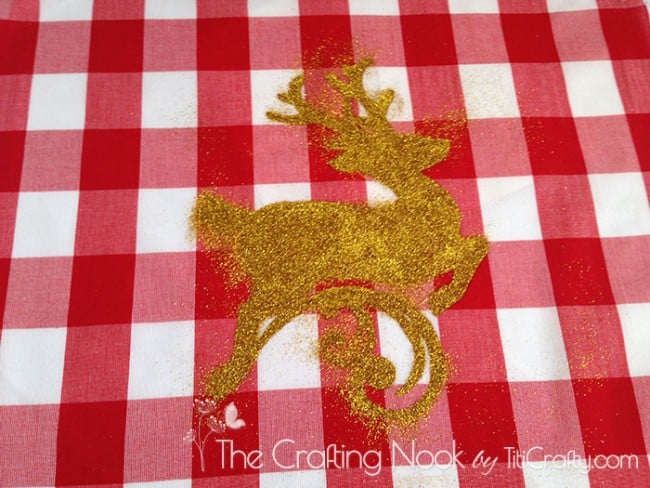
After a couple of hours had passed, it was completely dry and with the help of a brush, I remove any remaining glitter from the design leaving only the stuck glitter.
Importantly, I suggest doing this outdoors or over a protected surface so you don’t get glitter all over your house!
Step 3: Sew the pillow cases.
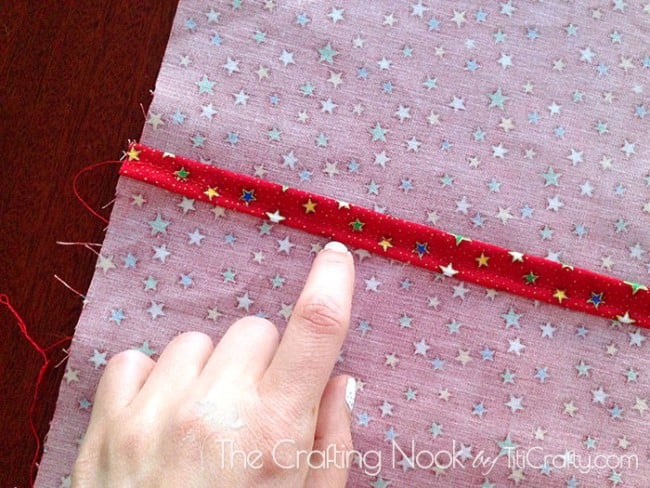
Firstly, start making the hems on the back panels.
Double fold over one of the long edges of your back pieces about 1/8 inch each and stitch. Do this for both back pieces.
Then, with your front piece facing up, place both back pieces facing down (right sides together) on top of it as shown. Make sure they overlap correctly.

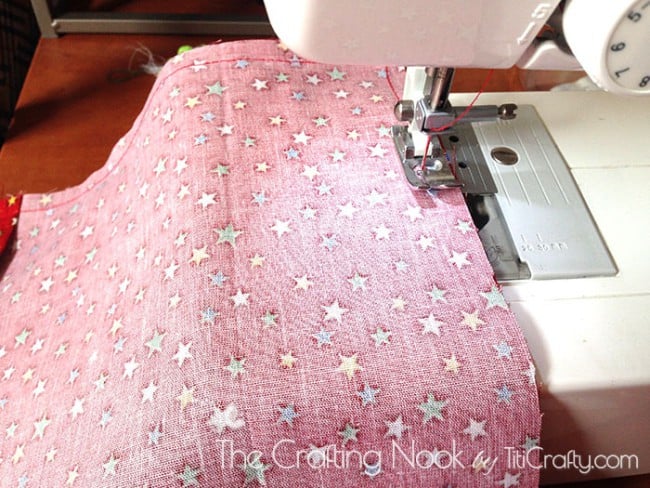
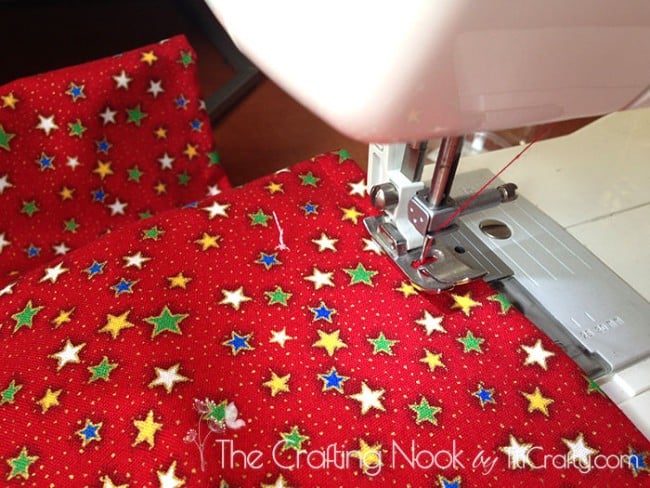
Pin all the way around and stitch all the way around the edges respecting the seam allowance.
I love to zig-zag stitch after stitching to avoid fraying on the raw edges. This is more than enough and you don’t a serger for this.

For best results, Iron your pillowcase to flatten the edges and remove wrinkles.

Flip your pillow cover inside out (wrong sides together) and straight stitch all the way around the edges again leaving 1/4 inch to create the french seam.
That’s it! How easy right?
Making these pillow covers without any design should take you no more than 20 minutes each. I made all 4 pillow covers in about 3 hours including designs and photos LOL.
Finally, insert your pillows inside your covers and voila!
Of course, do the same with the rest of the covers you might want to make.
Step 4: Decorate your Couch!
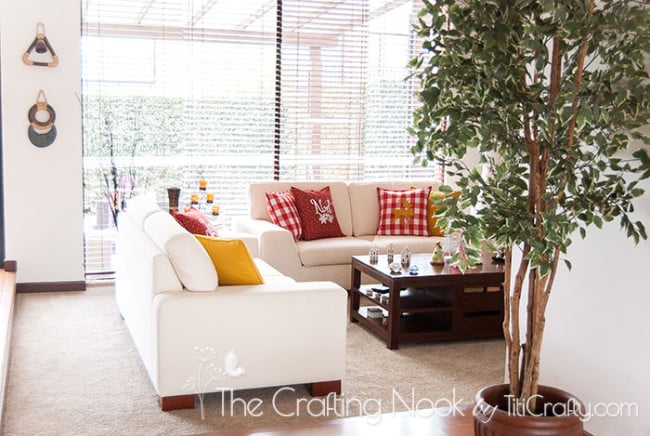
I SO crazily love how these red and white Christmas pillows turned out!
The living room looks so festive and bright! I’m really happy with the results.
We already had these yellow pillows that went perfectly with the color combo!

Sewing Tips
* Cutting the corners of your pillowcase will ensure that when you turn it inside out and add a pillow insert, you’ll be able to get crisp corners on your finished pillow. It’s not hard, just when you approach a corner, stop with your needle down about an inch from the corner. Then turn your fabric so you sew your stitch at a 45-degree angle. Once you’re done, cut the corners off before moving on your zig-zag stitch to finish the edge.
* Cutting your fabric the same dimensions as your pillow insert will ensure a snug fit and that your pillow is nice and plump without “dog ears” at the corners.

Frequently Asked Questions
This sewing tutorial is great for all levels. It’s easy enough for beginners and super fun and quick to make if you’re already an expert!
Envelope pillowcases are perfect for square pillows of any size, But it works on rectangular or even circular pillows by adjusting the size and shape of the fabric based on the size of your specific pillow form.
Absolutely! As long as the fabric you choose is washable, your pillow cover will be totally washable. If you decorated them then follow washing instructions from the material used.
More Pillow cover projects to Try
If you like this 3-pieces envelope pillow cover tutorial, you might also love these other sewing project ideas too:

If you want to check out our Christmas Decoration Home Tour 2015, feel free to visit! I’ll be more than happy to have you for a while longer!
✂️ Tutorial
DIY 3-Pieces Envelope Pillowcase for Christmas
Tools
- Sewing Machine
- Cutting machine *optional if you want to decorate the pillows.
- Measuring tape, plastic ruler, scissors or rotary cutter.
Supplies
- 1 yard of your favorite fabrics or more depending on the size of your pillows {I used red with stars and a buffalo check plaid white and red}
- Stencil material {I confess I used contact paper}
- White heat transfer vinyl
- Gold fabric paint
- Gold glitter
- Fabric Glitter glue.
- Matching thread
- Pillow insert
Instructions
STEP 1: CUT THE ENVELOPE PILLOWCASE PIECES
- As I said this project involves only 3 fabric pieces. so first, cut the pieces of your fabric. In my case, my pillows were squared which made the job easier.
- I also decided I wanted to make them with a french seam finish which means I need to add the extra seam allowance to create it.
- Or course the first thing to do is define the size of your pillow.
For a pillow’s size 46X46 cm (18×18 Inches), cut:
- Front: 1 piece 50×50 cm (19.5×19.5 Inches).
- Back: panels 2 pieces 50x 35 cm (19.5×14 Inches).
- These measurements include 1/2 inch seam allowance and the french seam.
- Laying out the 3 pieces needed for the envelope pillowcases I’m making
- Once the pieces of all your pillows are cut, it’s time to decorate them before sewing the pieces together.
STEP 2: CREATE THE ENVELOPE PILLOWCASE DESIGN
- This is a totally optional step. If you are not planning on decorating your pillows, you can skip this step and move on to the assembling part.
- Also, if you want to decorate your pillow but don’t have a cutting machine that’s cool too. You can find numerous designs on the internet to purchase or in craft stores. Some are heat transfer vinyl and others are stencils for you to paint on the fabric.
TECHNIQUE #1: HEAT TRANSFER VINYL DESIGN
- The design for the pillocases made on Silhouette Studio App
- I made a design for heat transfer using the words Joy and Noel using my own fonts for it and a cute winter design from the Silhouette store.
- Then I weld them together to make one single design ready to cut.
- It’s also important that you make sure you have you define the size of the pillow decorating area so you set the right width and height on the cutting machine app.
- For cutting, since I’ll be using heat transfer, I mirrored the image and set the knife according to Silhouette settings.
- Send to cut.
- Once cut, use the hook tool to remove all the unwanted pieces. Including all the surrounding HTV.
- Place the Image centered on your fabric front panel, right side up and laid a t-shirt piece of fabric on top of the design.
- Iron in cotton settings pressing down firmly for about 40-60 seconds {it might vary between irons} until you make sure the image is really stuck to the fabric. If you peel away the plastic and the vinyl is not set, continue ironing for a few more seconds.
- I let it cool for a few seconds and started peeling away the plastic very carefully.
- To wash it you can just machine wash and dry inside out {the lower the heat the better}.
- There you go, your pillow design is ready!
- I did this with the other pillow.
TECHNIQUE #2: THE STENCIL PAINTED DESIGN
- I used a reindeer design from the silhouette store for the painted pillow. In this case, there is no need to mirror it.
- Just send to cut and set the knife to the suggested settings.
- Protect with plastic the surface where you are going to work.
- Place your fabric over the plastic, right side up.
- Place your design stencil centered in the fabric.
- Start painting. In my case seems like the type of fabric rejected the contact paper. But didn’t let this stop me.
- I just had to be extra careful to paint it. Using a sponge I painted only tapping over the design. I applied 2 layers of paint. Let it dry a bit. I waited about 20 minutes.
- Protect the surroundings of your design and applied carefully the glitter glue for fabric with a clean sponge and spread the glitter all over the design.
- Then, wait at least 25 minutes before removing the excess of glitter.
- After removing the glitter you will still have some glitter around, leave it and take it outside {if your weather allows it} or close to a window to let it completely dry. It would take a couple of hours.
- After a couple of hours had passed, it was completely dry and with the help of a brush, I remove any remaining glitter from the design leaving only the stuck glitter.
- Importantly, I suggest doing this outdoors or over a protected surface so you don’t get glitter all over your house!
STEP 3: SEW THE PILLOW CASES.
- Firstly, start making the hems on the back panels.
- Double fold over one of the long edges of your back pieces about 1/8 inch each and stitch. Do this for both back pieces.
- Hemming the reaw edges of the back pannels of the envelope pillowcase
- Then, with your front piece facing up, place both back pieces facing down (right sides together) on top of it as shown. Make sure they overlap correctly.
- Pin all the way around and stitch all the way around the edges respecting the seam allowance.
- I love to zig-zag stitch after stitching to avoid fraying on the raw edges. This is more than enough and you don’t a serger for this.
- The sewing machine stitching along the edges of the fabric respecting the seam allowance
- The cute envelope pillowcase design seen through the opening of the cover
- For best results, Iron your pillowcase to flatten the edges and remove wrinkles.
- Flip your pillow cover inside out (wrong sides together) and straight stitch all the way around the edges again leaving 1/4 inch to create the french seam.
- That’s it! How easy right?
- Making these pillow covers without any design should take you no more than 20 minutes each. I made all 4 pillow covers in about 3 hours including designs and photos LOL.
- Finally, insert your pillows inside your covers and voila!
- Of course, do the same with the rest of the covers you might want to make.
STEP 4: DECORATE YOUR COUCH!
- Put them on your couch along some cozy blankets and you are good to go!
Want to Check Out More Silhouette Projects?
My Silhouette Challenge buddies and I are all sharing projects on our blogs today, so peruse the projects below for a wealth of Silhouette inspiration!
1. Beauty in the Mess // 2. JustTyra // 3. Dream a Little Bigger // 4. Simply Kelly Designs // 5. The Stamp Doc // 6. From Wine to Whine // 7. TheKimSixFix // 8. unOriginal Mom // 9. HaberdasheryFun // 10. Tastefully Frugal // 11. Sisters, What! // 12. Small Stuff Counts // 13. Where The Smiles Have Been // 14. Whatcha Workin’ On? // 15. Designed Decor // 16. Architecture of a Mom // 17. Decor Adventures // 18. Create & Babble // 19. Tori Grant Designs // 20. Tried & True // 21. The Thinking Closet // 22. Creative Ramblings // 23. Get Silvered // 24. McCall Manor // 25. Cutesy Crafts // 26. Ginger Snap Crafts // 27. My Favorite Finds // 28. Cupcakes&Crowbars // 29. Pineapples & Pinecones // 30. The Crafting Nook // 31. It Happens in a Blink // 32. Alayna’s Creations
Share and PIN ME!

Til’ next time…


FREE WORKBOOK
Keeping your Sweet Home Organized
Learn how to create intentional habits and simple routines to Keep Your Home Organized. Plus freebies, printables, exclusive content, and tips.
Disclaimer: By clicking on the “Yes” button above you are giving me your consent to collect and use your information according to the law and My Policy Privacy. Zero Spam I promise!