DIY Pink Christmas Card – A Winter Magic
This post may contain affiliate links. Please read our Disclosure Policy.
Create your own adorable Pink Christmas Card with this super easy and fun DIY tutorial. Spread joy and love this holiday season with a personalized touch.
It’s been so long since my last Card post. I made this super cute Winter magic Pink Christmas Card last year for my mom. This year I was so behind that I didn’t have the time to share it. I LOVE how it turned out among others I made that I’ll be sharing soon.

Table of Contents
A Winter Magic DIY Pink Christmas Card
The most wonderful time of the year is just around the corner, and what a great way to make people happy at Christmas than by making your own Christmas Greeting Card?
Before we start crafting, let’s go over the materials you will need. First, get some different types of thick colored paper in different shades of pink. Imagine the sweetness of cotton candy, bubblegum, and rosy blush color.
Also, grab some ribbons in colors that go well with your papers. We’re talking about the type that instantly gives you a sensation similar to opening a gift, even if it’s just a card. It’s all about the small things that make the season feel special.
Now, let’s make your creation even more adorable. Get ready to see a cute picture that will make your loved ones say “aww”. This illustration will make you happy and feel warm when you receive it.
Are you excited to start crafting? Then get ready, take your scissors, and let’s go on a fun card-making adventure. We will make a nice Christmas card that Santa himself would like to give.
How to Make This Pink Christmas Card
Let’s get started.
SUplies:
- Free Template Patterned
- White cardstock 12×6 inches.
- Scrapbooking paper of your taste – I used a flower-patterned one that is light pink with pink flowers and then a pink background with light pink flowers.
- Dark pink or fuchsia cardstock
- Light pink embossed paper 6.8×6.8 inches.
- An illustration. I used this cute one called Annabelle and the Tree from Wild Rose Studio but you can use your favorite one or even a photo.
- Red satin Ribbon
- Silver marker
- A Sentiment cut on a paper ribbon.
- Pink and clear rhinestones.
- Universal Glue
- Double-sided tape
- Foam Double-sided tape to give volume.
Tools:
- Ruler
- Scissors
- Pencils
- Craft Knife
- Cutting Mat
- Hot glue gun and glue sticks
- Tweezers
Instructions:
Firstly, start creating your different card pieces. Follow the Free Template Patterned shared HERE for measurements and shapes. Also, print the illustration or photo.

The card pieces in the template file are 100% of their size so you can print and cut them to use them as templates for the actual materials you are going to use. For the envelope, however, you need to draw it on a larger cardstock piece following the pattern because it didn’t fit in a letter sheet.
Once you have all the pieces cut we can start.
The Card
Ok so first, fold in half the main white cardstock as it will be the card base. Leave it aside.
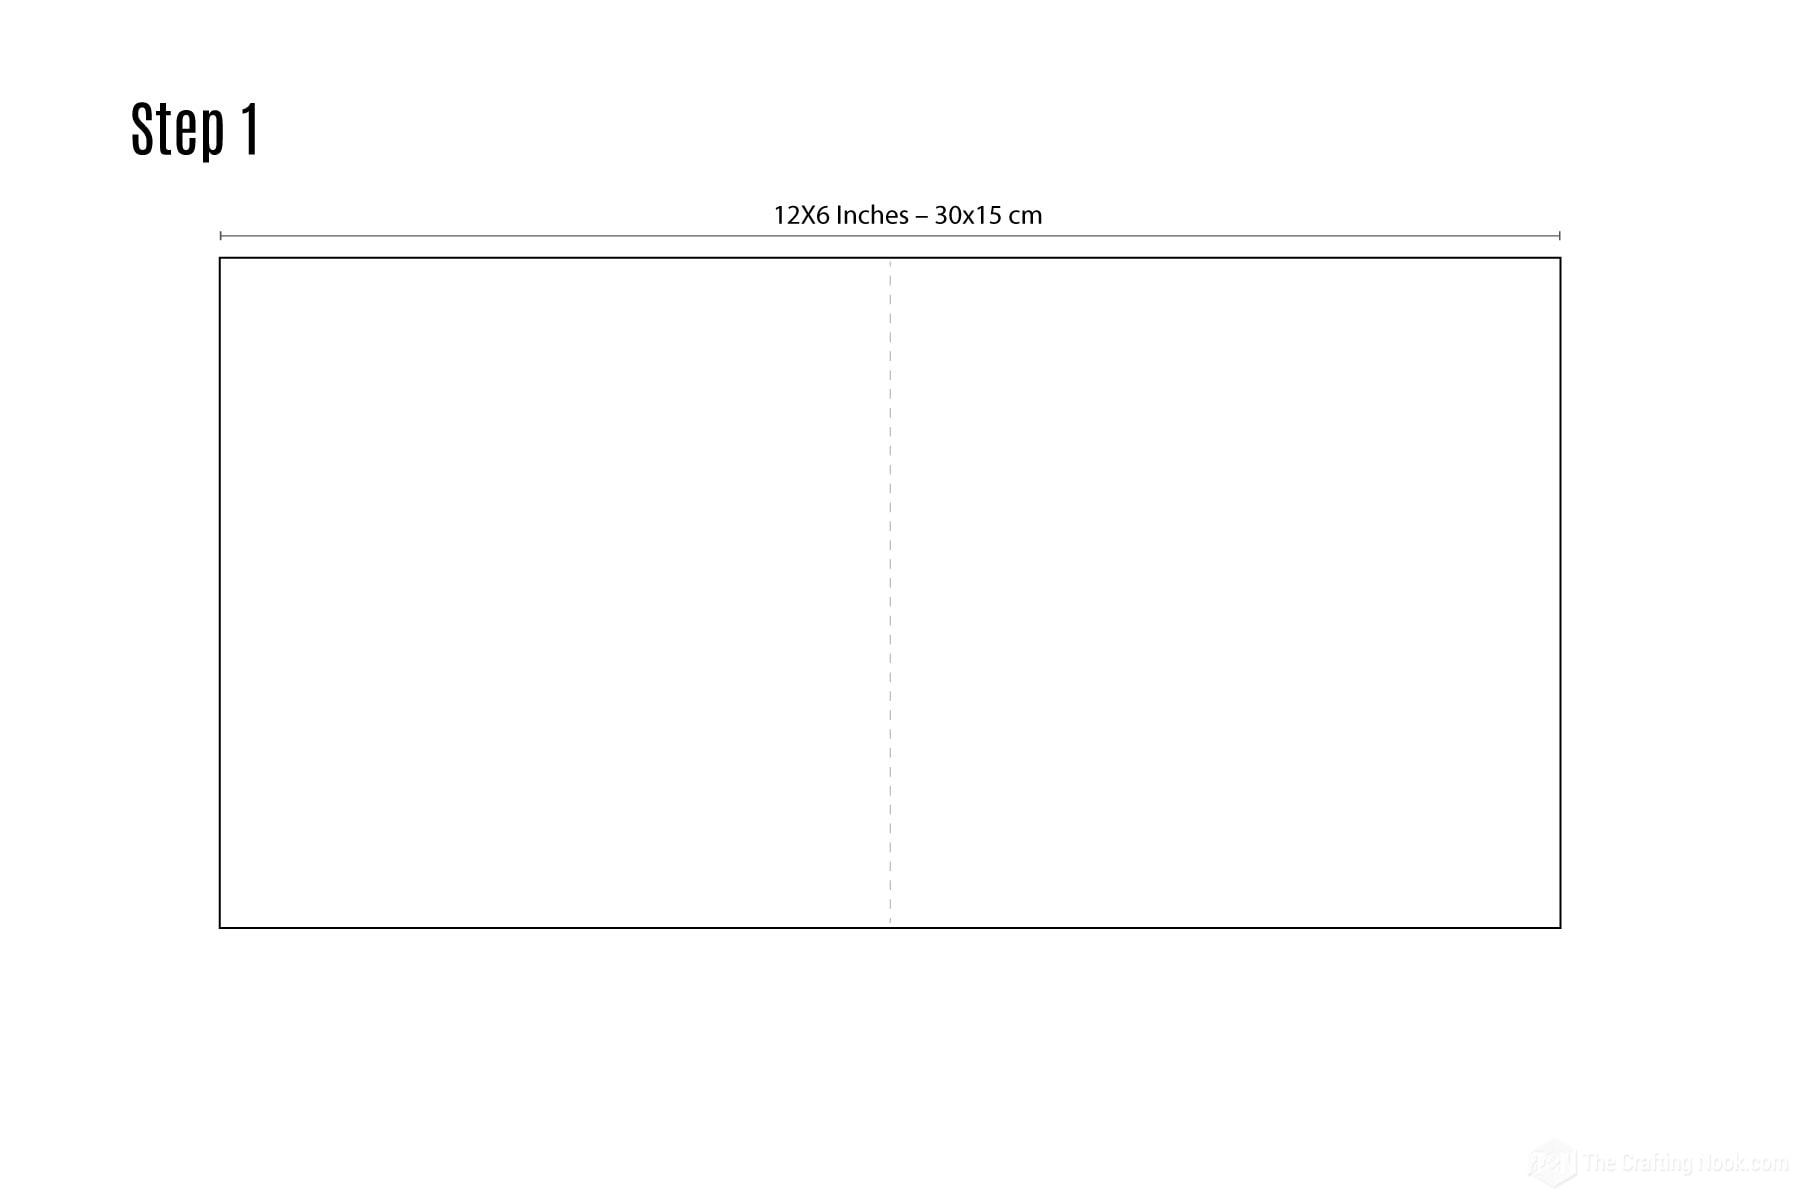
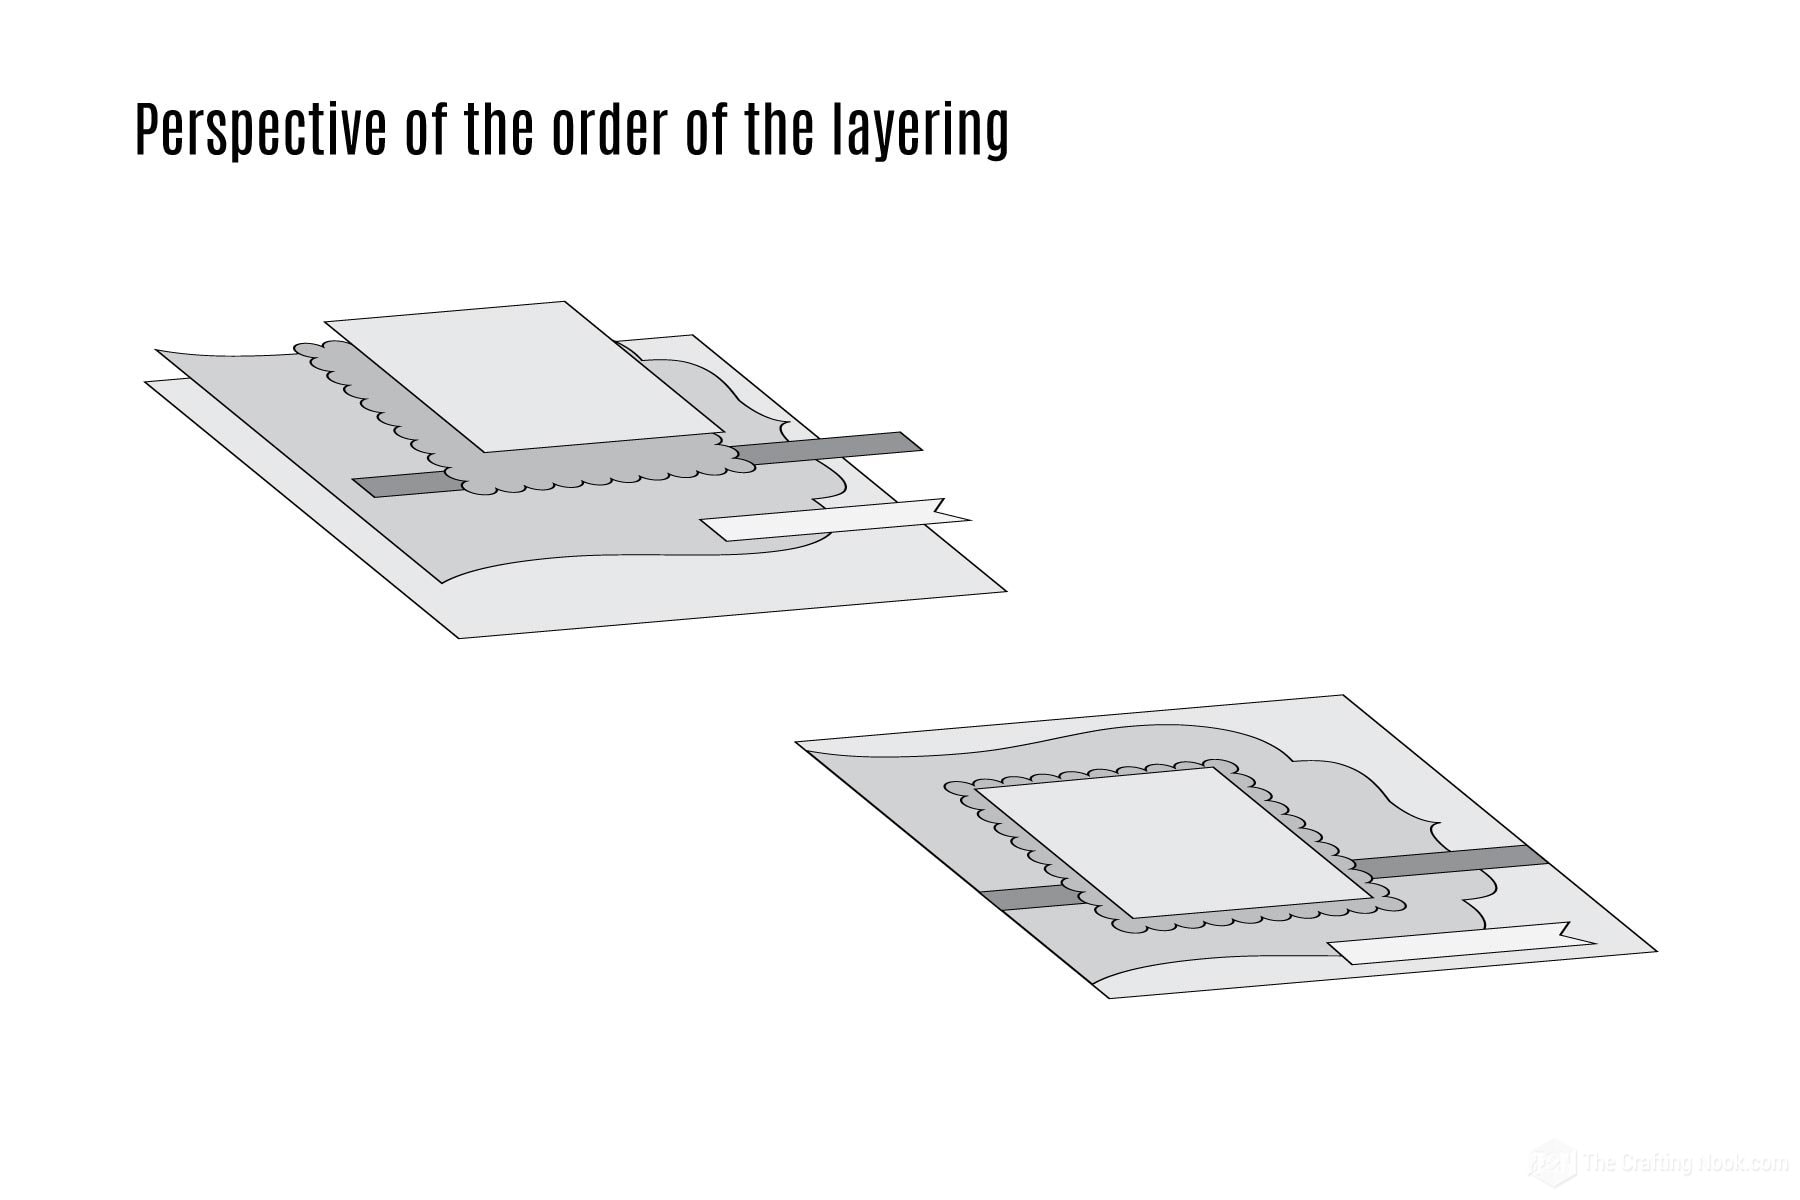
Use the light pink embossed cardstock (or the one you chose for this piece) or Layer 2 from the pattern as a temporary base. You will be assembling all the pieces on this piece and later glue it to the main card.
Glue your Layer 3 (patterned paper or scrapbooking paper) shape on the layer 2 aligned to the left edge.

Cut a strip of red satin ribbon longer than the layer 2, place it on top of layers 2 and 3, and glued it with hot glue on the back at about 2/3 of the card from the bottom up.
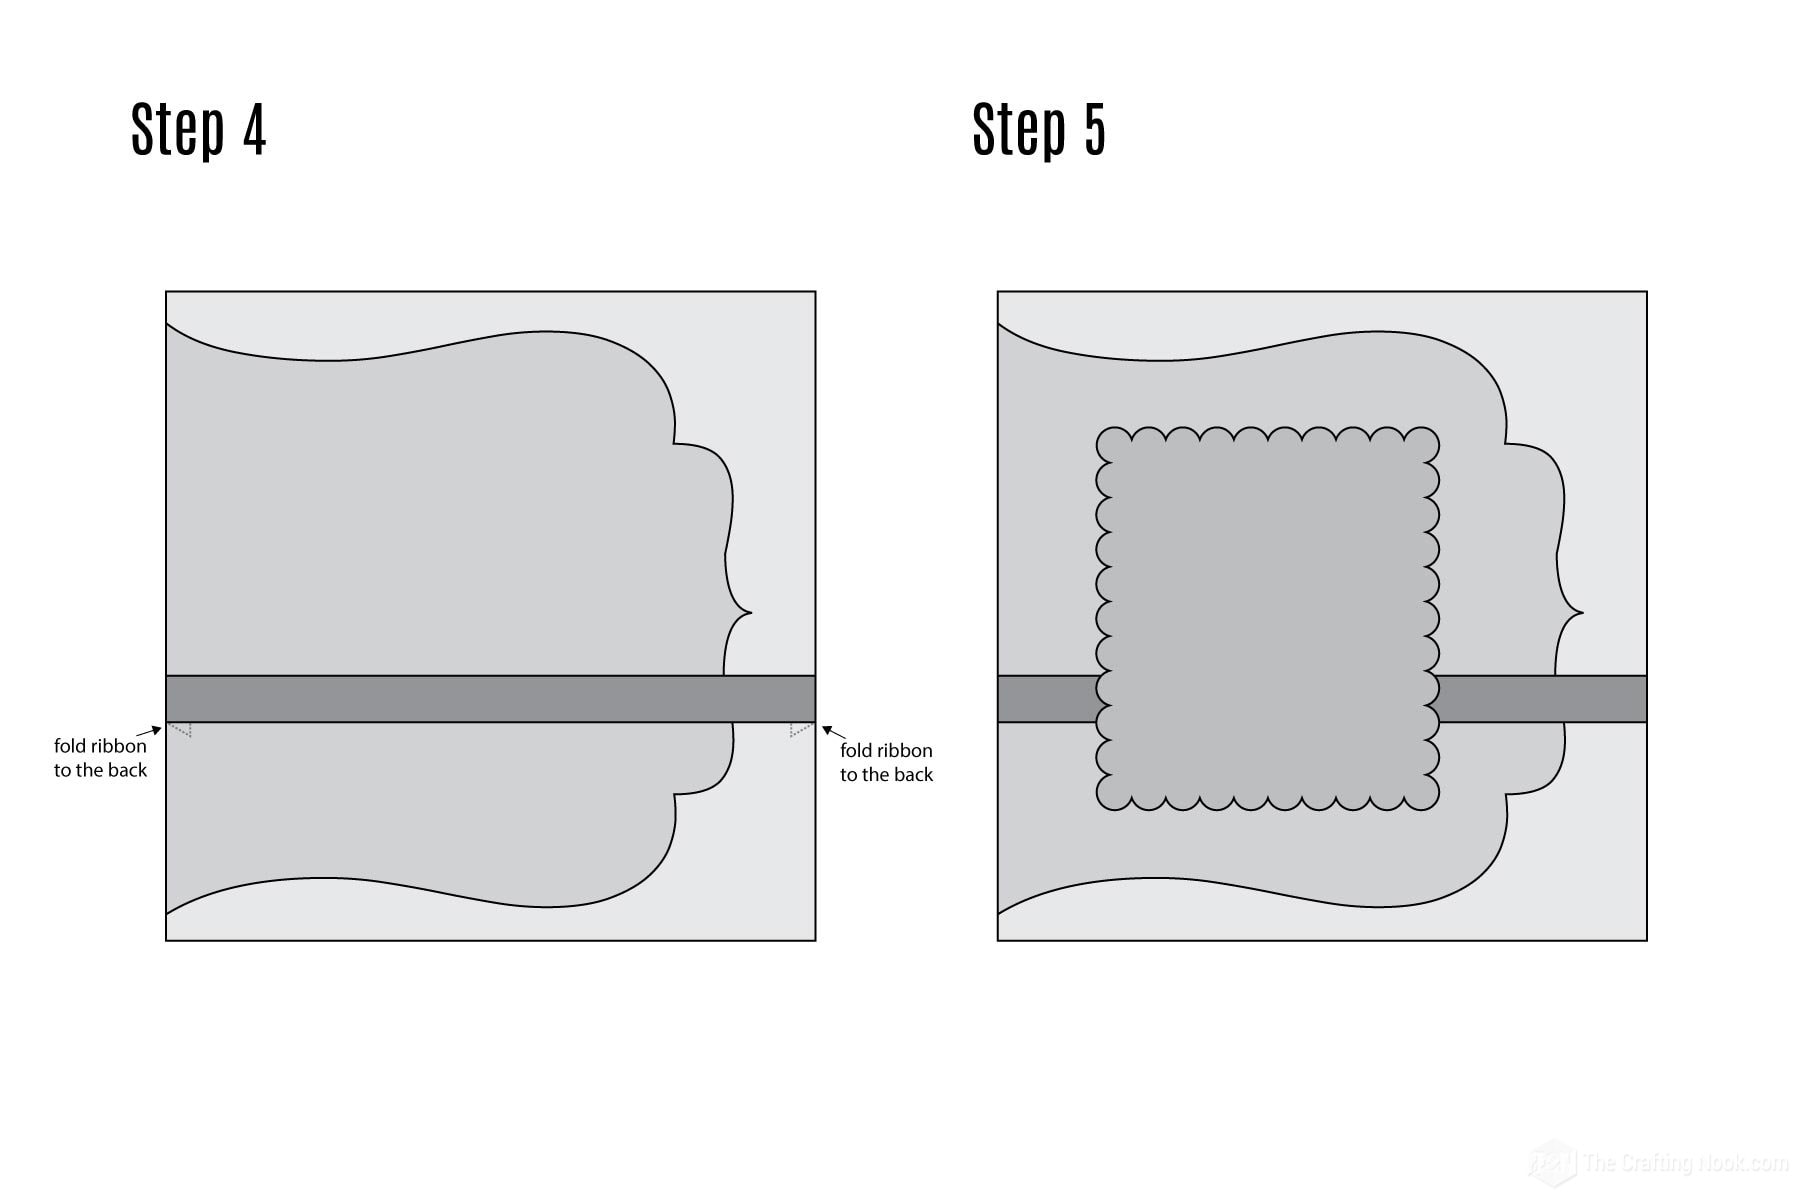
Take layer 4 (scalloped rectangle) and put foam double-sided tape pieces around the back and glue it to the card right in the center of layer 3 and on top of the ribbon.
This will create a feeling of 3D, volume on the card.

Then get your illustration and glue it in the center of layer 4. You can use glue or double-sided tape. Also, you can choose flat or foam double-sided tape.
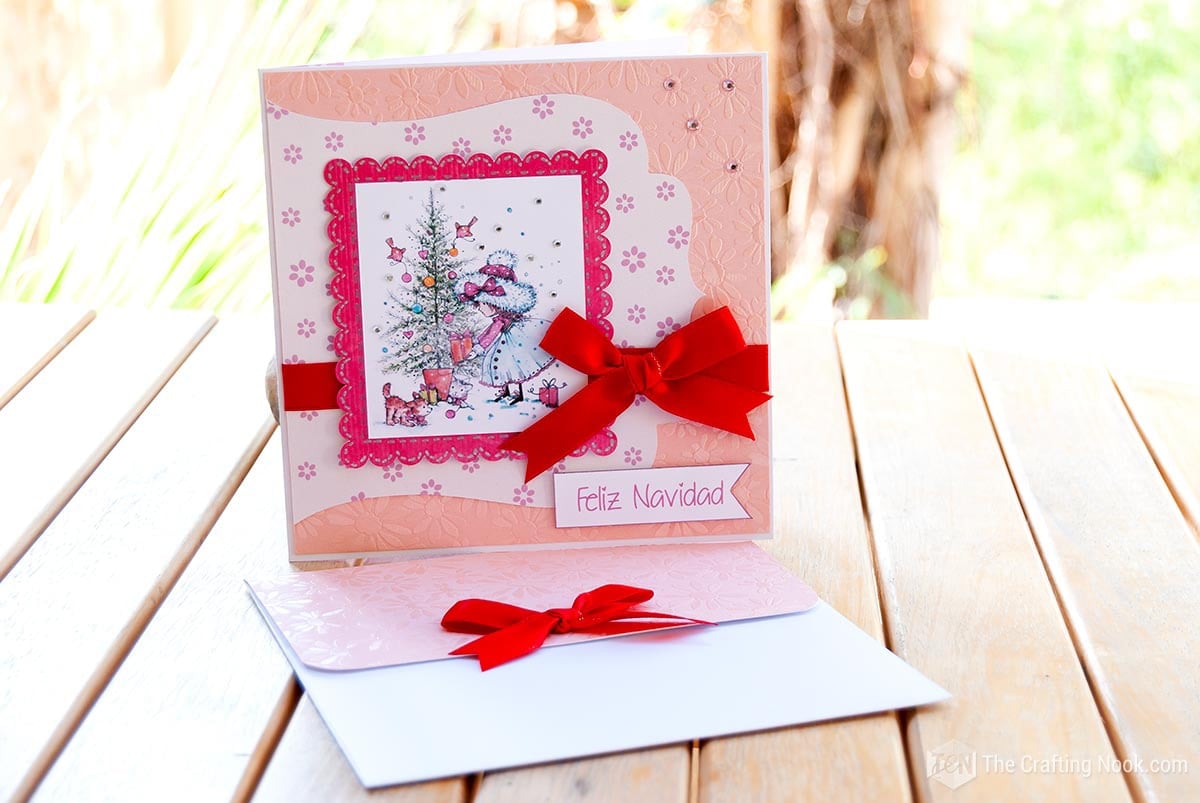
At the bottom right of the composition, place your paper ribbon sentiment. I made it in Spanish since my mom speaks Spanish and it means “Merry Christmas”.
Use the foam double-sided tape to make it stand out like the illustration.
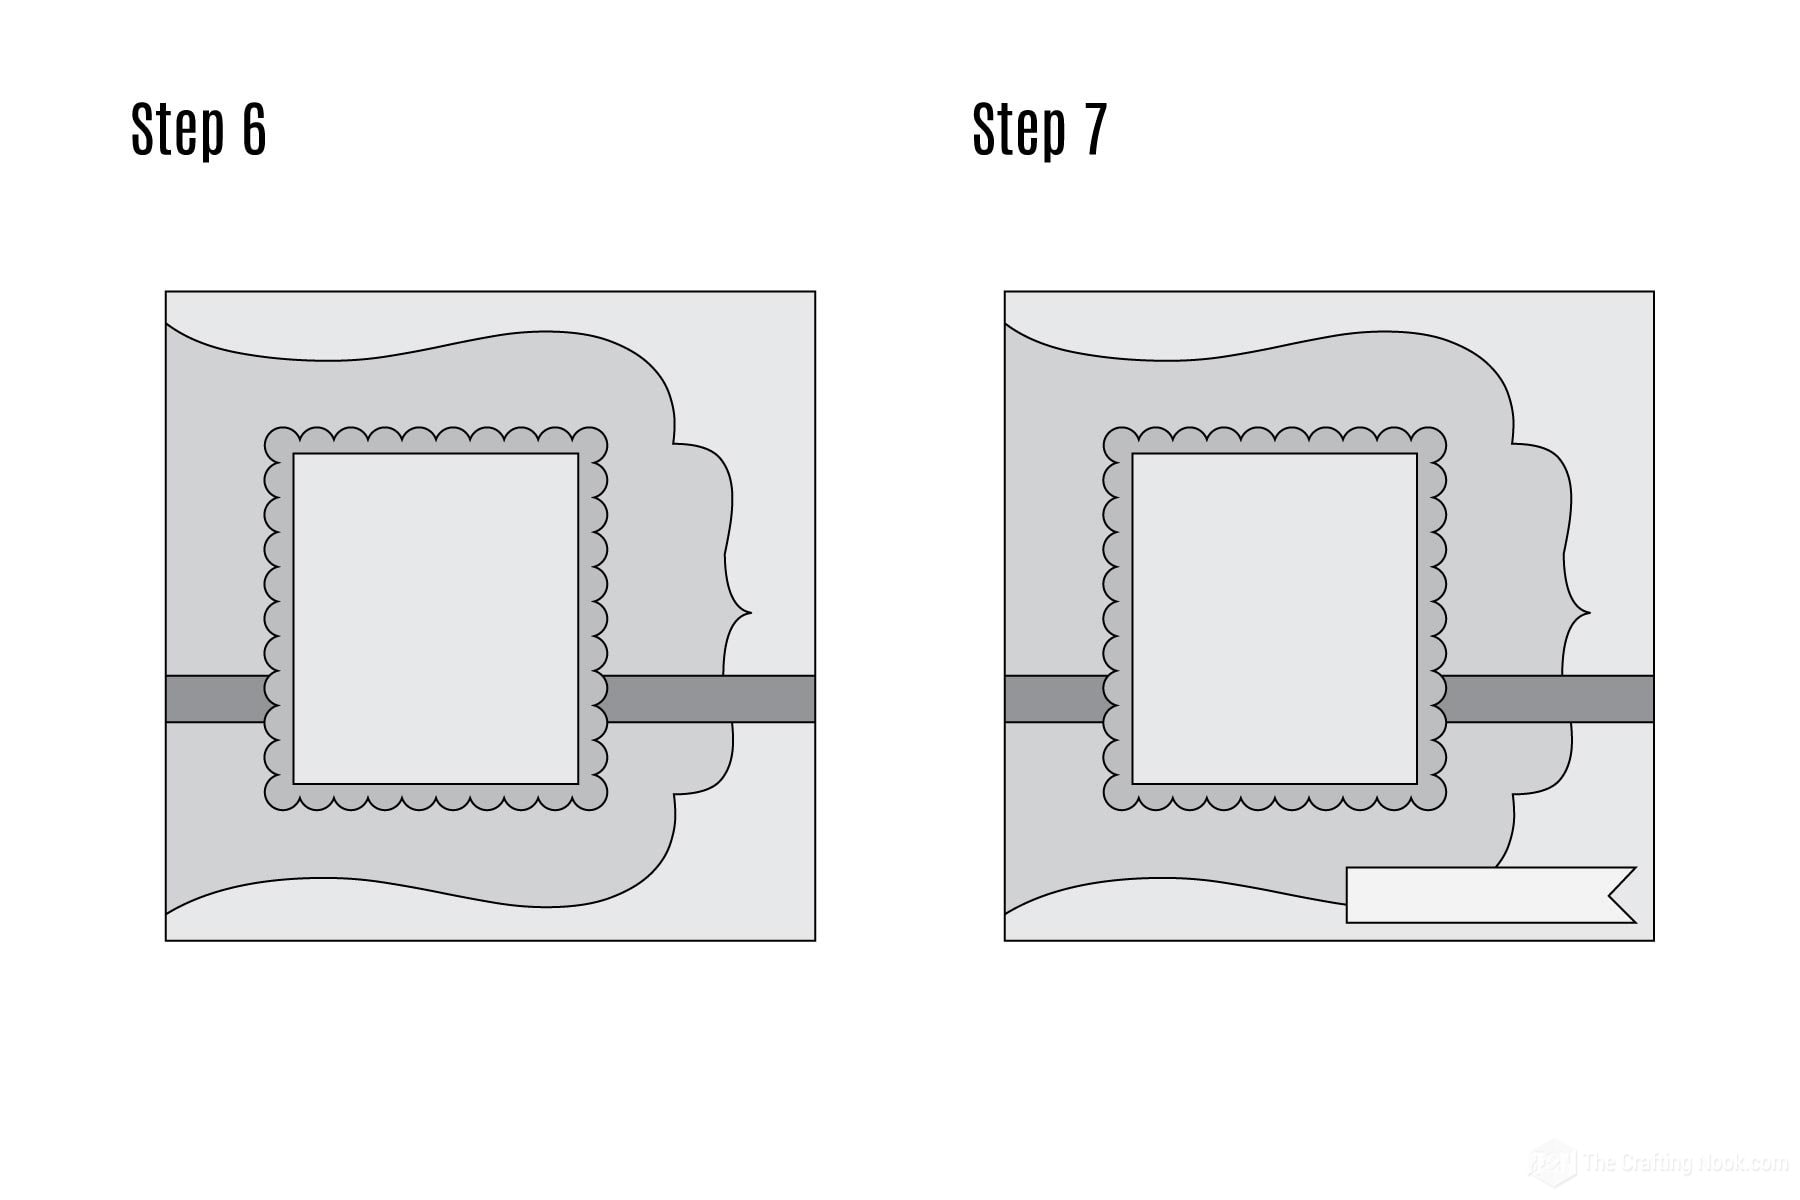
Here’s a quick overview of how the layers should look like:
Then make a cute ribbon bow with the same satin ribbon you already used for the card and glue on the ribbon strip right next to layer 4 overlapping the illustration.
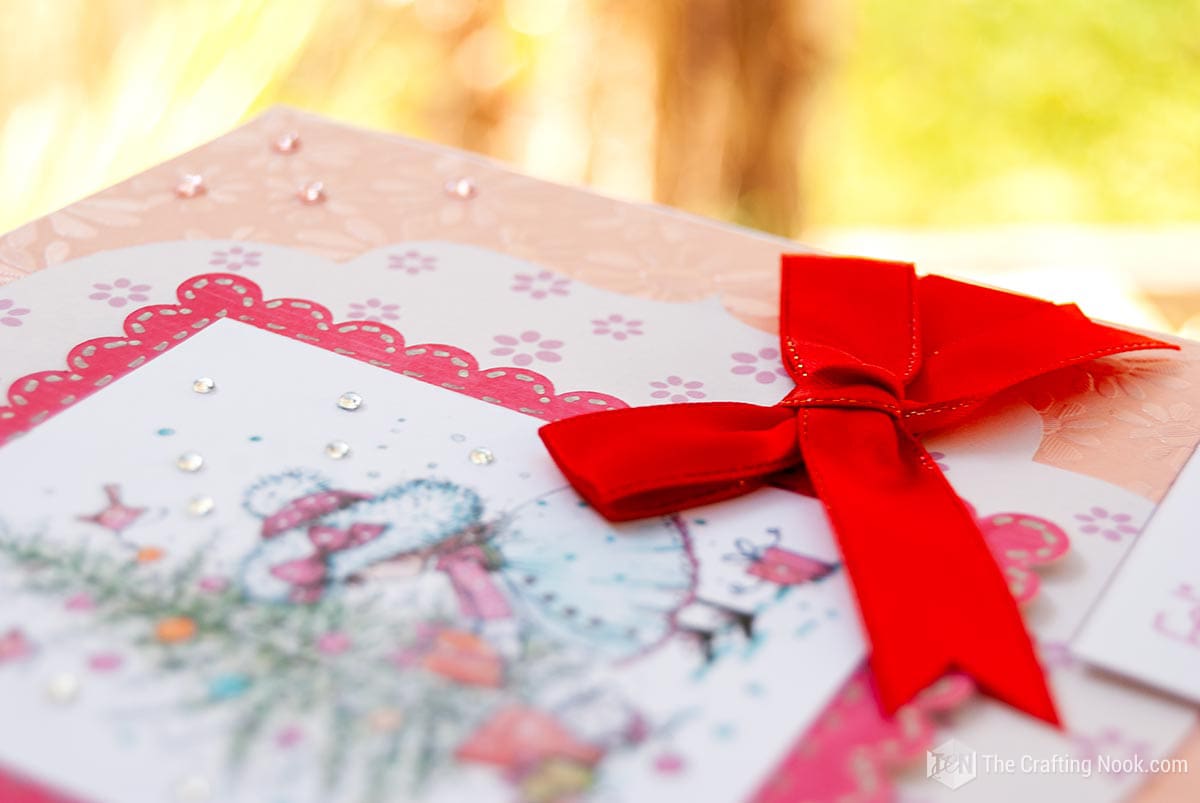
To add a touch of sparkling magic, glue a few light pink rhinestones on the embossed cardstock where it makes sense. In my case, I used them as the center of the embossed flowers. And also put some clear rhinestones on the illustration as the snowflakes.
Cut an 8×6-inches piece of scrapbook paper in inverted color from the one used in layer 3 and glue it to the inside of the left side of the card. Basically, place it where you would not be writing.
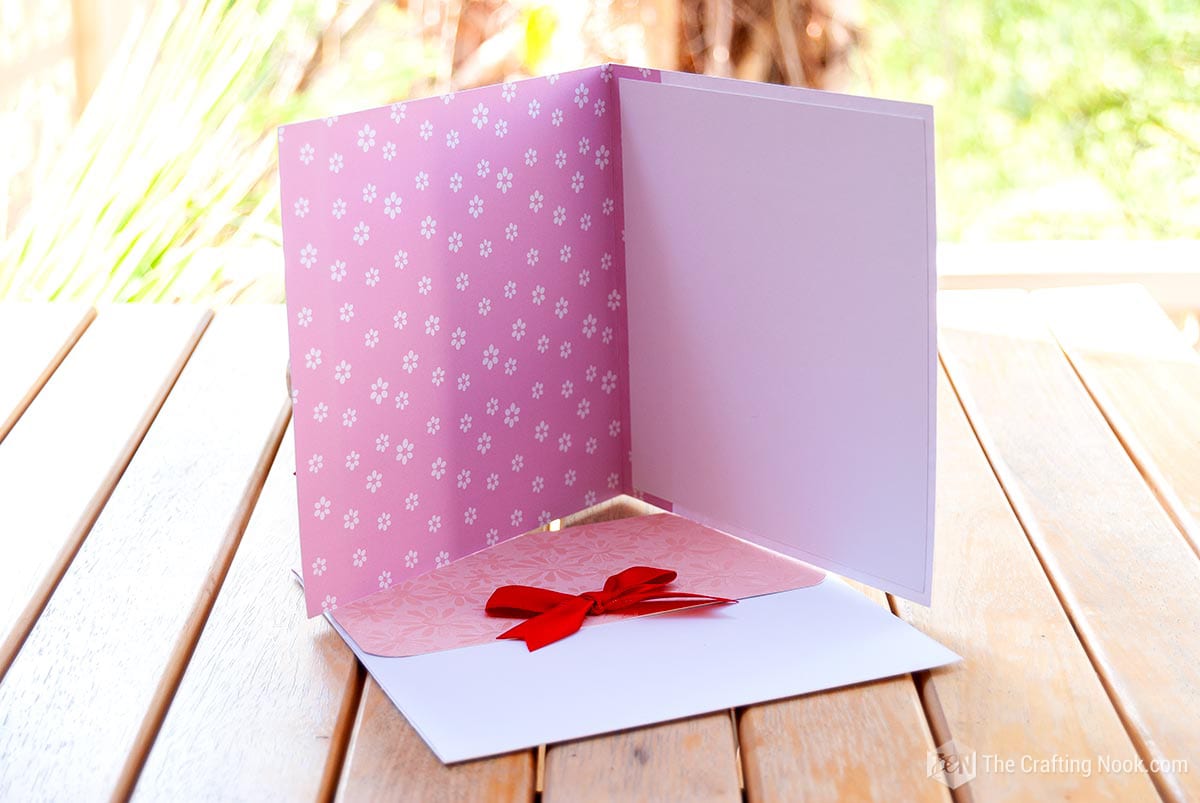
Finally, glue the layer 2 with the whole decoration as centers as possible to the front side of the card with foam double-sided tape.
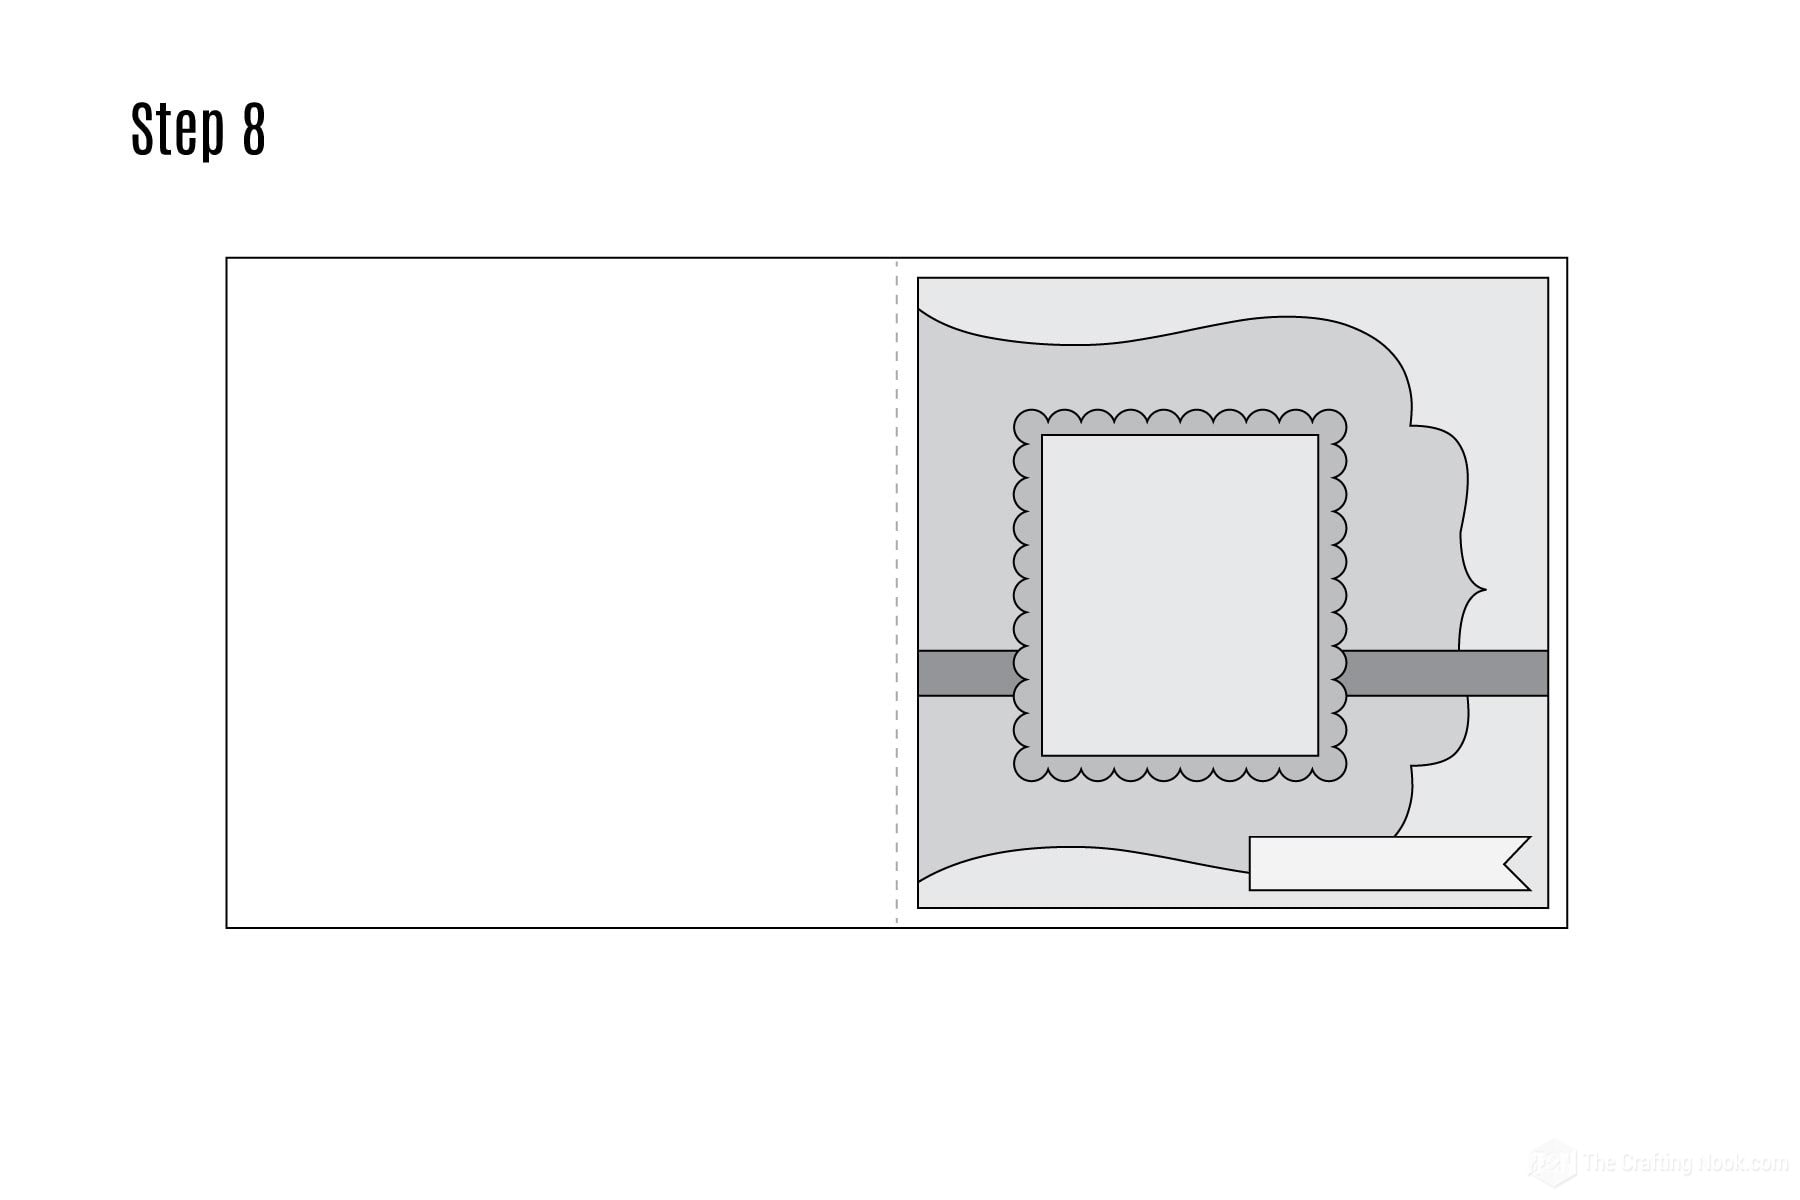
Your card is finished!

Envelope
This envelope is super simple (I’ll show a more detailed tutorial on how to make one in another post).
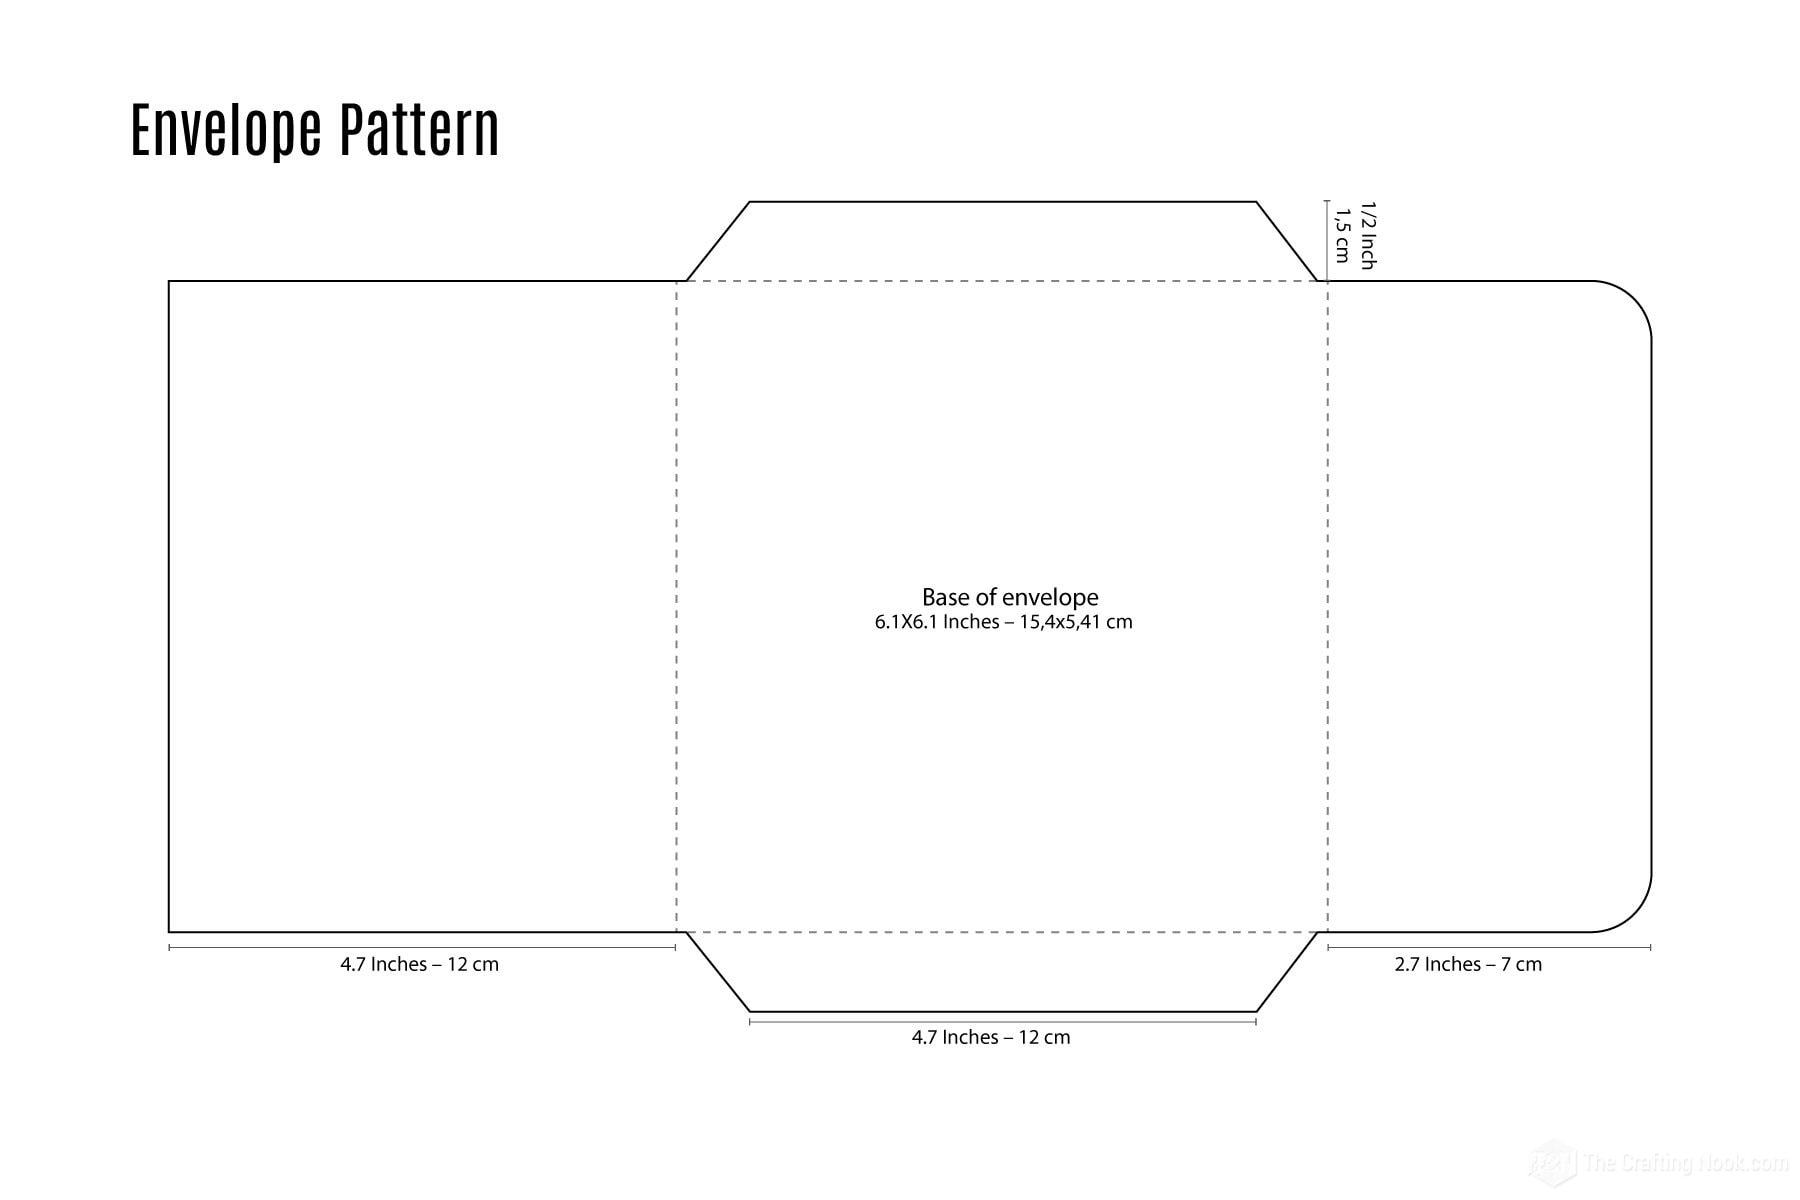
Having the envelope pattern cut, fold through the score lines shown above.
First, fold the lateral flaps.
Apply a line of glue along the flaps and fold over the longer (inward) flap and press to adhere it well.
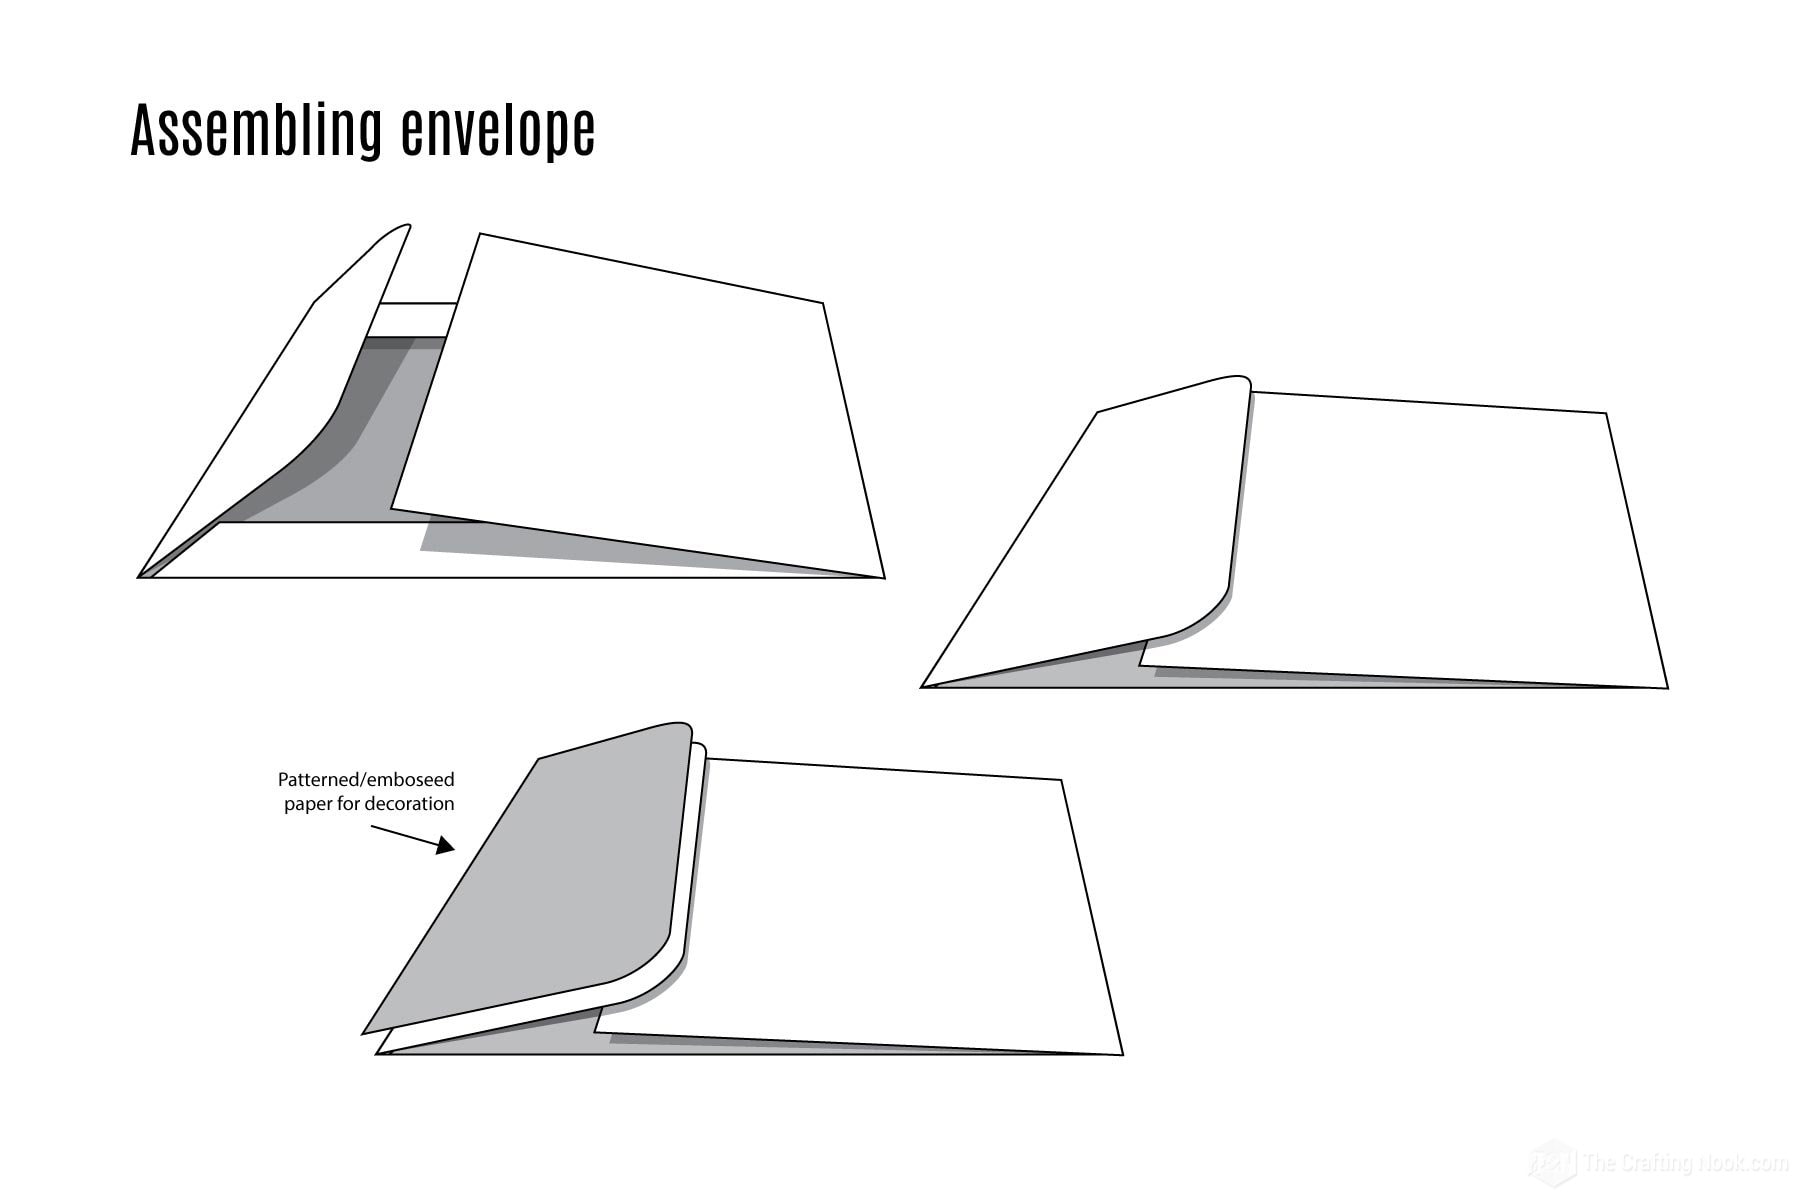
Cut a piece of cardstock (preferably the same one you used in layer 2) the size and shape of the top closing flap of the envelope.
The final touch is a cute ribbon bow glued in the center bottom of the closing flap!

That’s it. A cute and full of love Christmas card for your beloved ones!
Crafting Tips
- Instead of cutting shapes from your cardstock, try doing the opposite. Draw the outline of the shape you want on the back of the thick paper and then cut it out. In simpler terms, this means that your design will have a very clean and smooth surface without any pencil marks showing.
- Don’t choose only one kind of cardstock. Try out different kinds of things that feel different to make your Card more interesting to look at. You may want to use shiny or textured paper like metallic, glitter, or embossed instead of the usual kind. The different textures will make your card really noticeable.
- Learn how to enhance your scrapbook-style illustration by adding layers of sturdy paper. Take different parts of your design and cut them out on separate pieces of thick paper. Stick them together using glue. This method creates depth and makes your drawing stand out on the card. It’s like making a small, fun scene.
- Add some sparkle to your Card by carefully putting glitter on it. Make certain parts, like snowflakes or the sides of your design, shiny and magical by adding a little sparkle.
- Try using different types of paper for your project backgrounds instead of just plain white. You can use patterned or colored paper to add more visual interest.

Frequently Asked Questions
When you pick cardstock, choose a strong one that can support the weight of your design and decorations. Search for a thick and sturdy type of paper with a smooth texture for a neat and polished appearance.
To make sure your ribbon stays in place, use strong sticky tape or a glue gun. Put small dots or lines of glue on the back of the ribbon, then press it down onto the cardstock firmly.
Absolutely, You have different options for the designs. You can use ready-made illustrations, and printable designs, or draw your own designs by hand. Just make sure they match the theme, size, and style of your Christmas card. Don’t forget, you need to pick something adorable and holiday-themed that goes well with the whole outfit.
Precision is very important when working with complex shapes. You can use small, sharp scissors or buy craft knives or punches to create more detailed designs. Take your time and cut slowly to make sure the edges are smooth. Alternatively, if you decide to do this on a regular basis, you can consider buying a cutting machine such as Silhouette Cameo or Cricut.
Personalization makes anything more unique and special. You can try using fancy pens or markers to write a nice message inside the card. You can also put the person’s name or initials on the letter using stickers or stamps.
More Christmas Projects To Try
If you enjoyed this DIY Pink Christmas Card tutorial, you might also love these other Christmas project ideas too:
✂️ Tutorial
DIY Pink Christmas Card – A Winter Magic
Tools
- Ruller
- scissors
- Pencils
- Craft knife
- Cutting mat
- Hot glue gun and glue sticks
- Tweezers
Supplies
- White cardstock 12×6 inches.
- Scrapbooking paper of your taste – I used a flower-patterned one that is light pink with pink flowers and then a pink background with light pink flowers.
- Dark pink or fuchsia cardstock
- Light pink embossed paper 6.8×6.8 inches.
- An illustration. I used this cute one called Annabelle and the Tree from Wild Rose Studio but you can use your favorite one or even a photo.
- Red satin Ribbon
- Silver marker
- A Sentiment cut on a paper ribbon.
- Pink and clear rhinestones.
- Universal Glue
- Double-sided tape
- Foam Double-sided tape to give volume.
Instructions
- Firstly, start creating your different card pieces. Follow the Free Template Patterned shared on the blog post for measurements and shapes. Also, print the illustration or photo.
- The card pieces in the template file are 100% of their size so you can print and cut them to use them as templates for the actual materials you are going to use. For the envelope, however, you need to draw it on a larger cardstock piece following the pattern because it didn’t fit in a letter sheet.
- Once you have all the pieces cut we can start.
THE CARD
- Ok so first, fold in half the main white cardstock as it will be the card base. Leave it aside.
- Use the light pink embossed cardstock (or the one you chose for this piece) or Layer 2 from the pattern as a temporary base. You will be assembling all the pieces on this piece and later glue it to the main card.
- Glue your Layer 3 (patterned paper or scrapbooking paper) shape on the layer 2 aligned to the left edge.
- Cut a strip of red satin ribbon longer than the layer 2, place it on top of layers 2 and 3, and glued it with hot glue on the back at about 2/3 of the card from the bottom up.
- Take layer 4 (scalloped rectangle) and put foam double-sided tape pieces around the back and glue it to the card right in the center of layer 3 and on top of the ribbon.
- This will create a feeling of 3D, volume on the card.
- Then get your illustration and glue it in the center of layer 4. You can use glue or double-sided tape. Also, you can choose flat or foam double-sided tape.
- At the bottom right of the composition, place your paper ribbon sentiment. I made it in Spanish since my mom speaks Spanish and it means “Merry Christmas”.
- Use the foam double-sided tape to make it stand out like the illustration.
- Here’s a quick overview of how the layers should look like:
- Then make a cute ribbon bow with the same satin ribbon you already used for the card and glue on the ribbon strip right next to layer 4 overlapping the illustration.
- To add a touch of sparkling magic, glue a few light pink rhinestones on the embossed cardstock where it makes sense. In my case, I used them as the center of the embossed flowers. And also put some clear rhinestones on the illustration as the snowflakes.
- Cut an 8×6-inches piece of scrapbook paper in inverted color from the one used in layer 3 and glue it to the inside of the left side of the card. Basically, place it where you would not be writing.
- Finally, glue the layer 2 with the whole decoration as centers as possible to the front side of the card with foam double-sided tape.
- Your card is finished!
THE ENVELOPE
- This envelope is super simple (I’ll show a more detailed tutorial on how to make one on another post).
- Having the envelope pattern cut, fold through the score lines shown above.
- First, fold the lateral flaps.
- Apply a line of glue along the flaps and fold over the longer (inward) flap and press to adhere it well.
- Cut a piece of cardstock (preferably the same one you used in layer 2) the size and shape of the top closing flap of the envelope.
- The final touch is a cute ribbon bow glued in the center bottom of the closing flap!
- That’s it. A cute and full of love Christmas card for your beloved ones!
Share and PIN ME!!!

What do you think? Would like to make one like this??? Have you done cards like this Pink and Red Christmas Card before?? Tell me all about it in the comments.
Til’ next time…


FREE WORKBOOK
Keeping your Sweet Home Organized
Learn how to create intentional habits and simple routines to Keep Your Home Organized. Plus freebies, printables, exclusive content, and tips.
Disclaimer: By clicking on the “Yes” button above you are giving me your consent to collect and use your information according to the law and My Policy Privacy. Zero Spam I promise!


