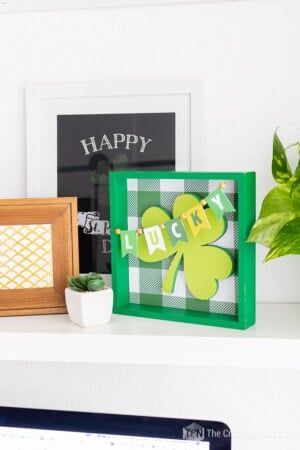
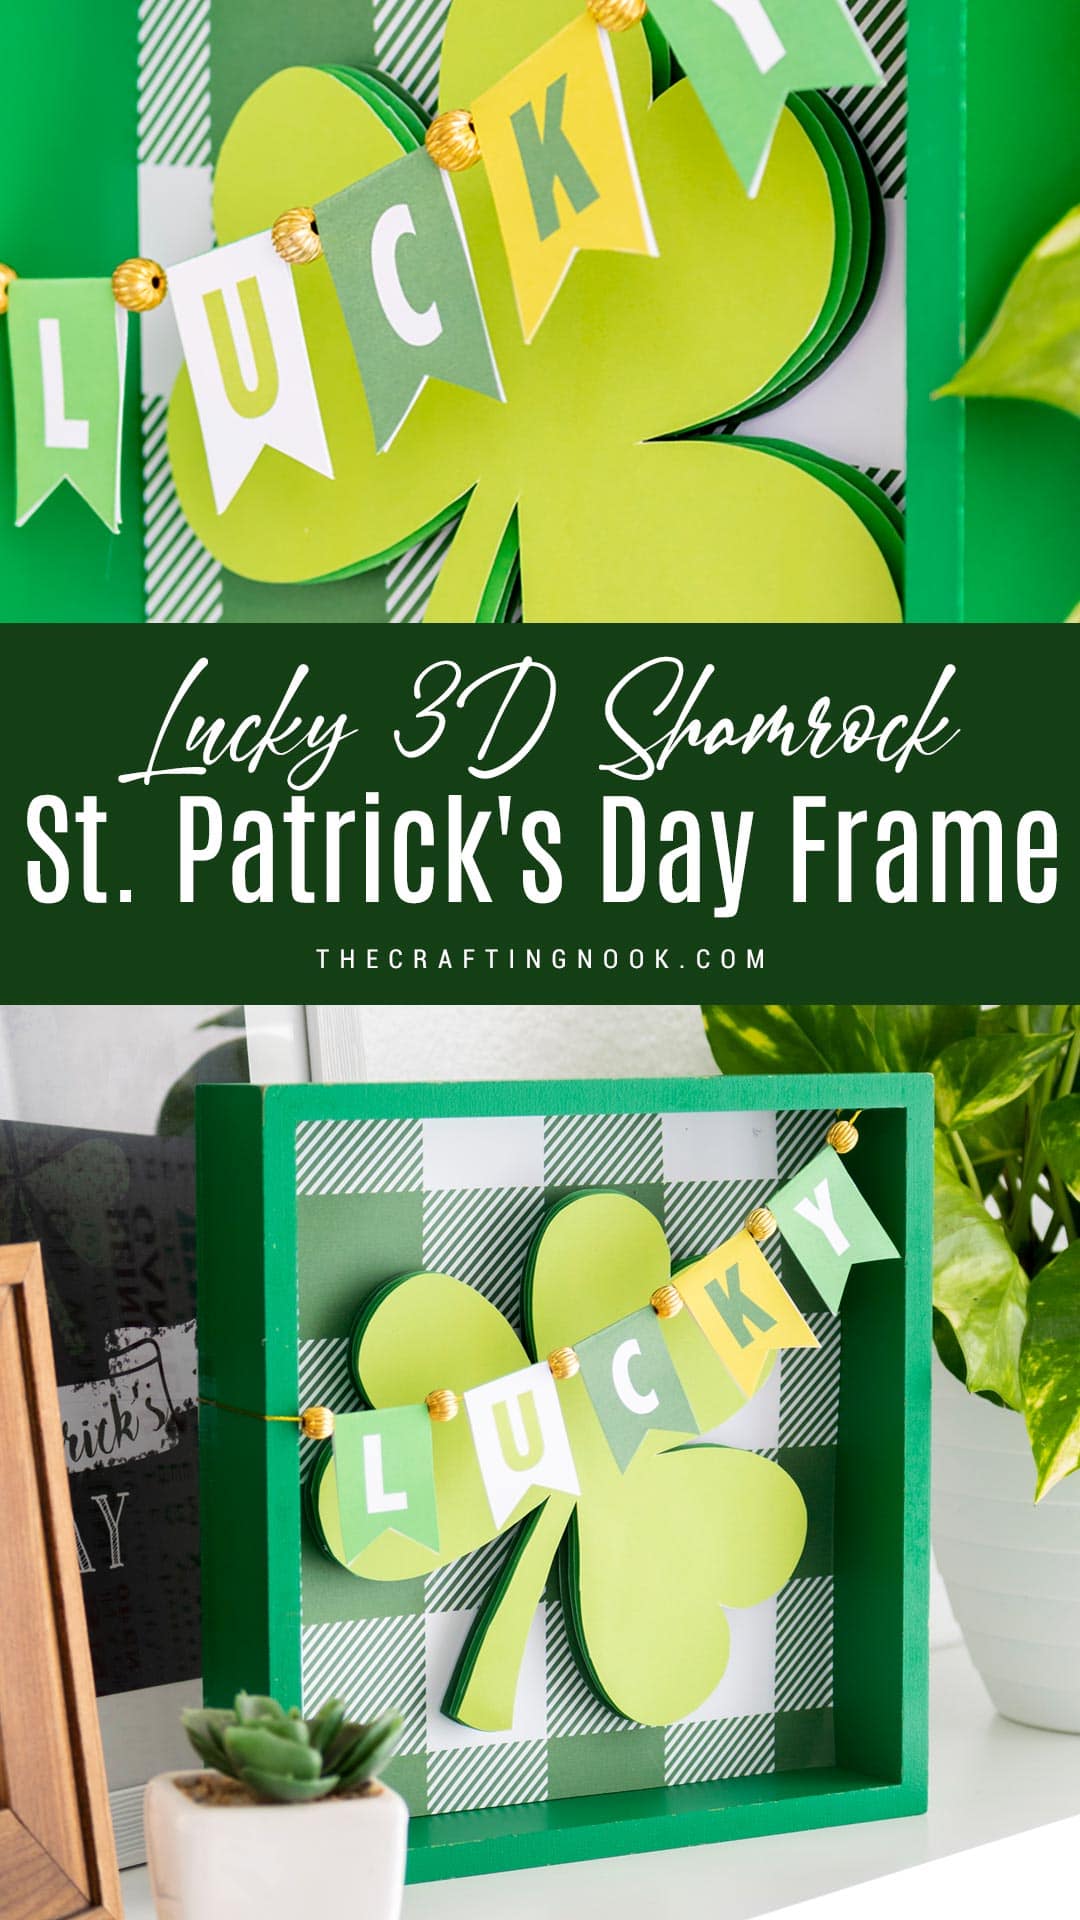
DIY Lucky 3D Shamrock Frame for St. Patrick’s Day
This post may contain affiliate links. Please read our Disclosure Policy.
This Lucky 3D Shamrock Frame for St. Patrick’s Day was a very special, fun, cute, and easy one to make. Using only simple supplies and repurposing an old frame you can definitely create such pretty St. Patrick’s Day decorations.
St. Patrick’s Day is around the corner and I wanted to create something that would be easy enough, super fun, and that anyone would be able to make it.

Table of Contents
Lucky 3D Shamrock Frame for St. Patrick’s Day Tutorial
To be honest I didn’t spend a dime on this project because I had everything at home. But if happen to not have any of the supplies, I can assure you it’s going to be a very inexpensive project.
This Frame was a Christmas frame from Michael’s. I got like four of these and I knew it would be useful someday. And here it is, coincidentally, it was green and it was perfect for a St.Patrick’s Day craft.
I’m not very into the green color so I didn’t want to buy different green shades of cardstock so I decided to just print each element in the greens I needed including the buffalo check pattern.
The good thing about this project is that if you don’t have any frame like this one, you can use any frame you have around or make a frame with cardstock like my friend Karina over at Living and Crafting did.

As I always say, imagination is the limit
This simple craft is the perfect project for a crafty night with kids, the whole family, or why not? a crafty night by ourselves!
I created the files so you can print and cut the elements yourself and also share the SVG cutting files in case you have a cutting machine to make your life easier. For the sake of this project, I cut everything with scissors and a cutter to show you that it’s totally doable!
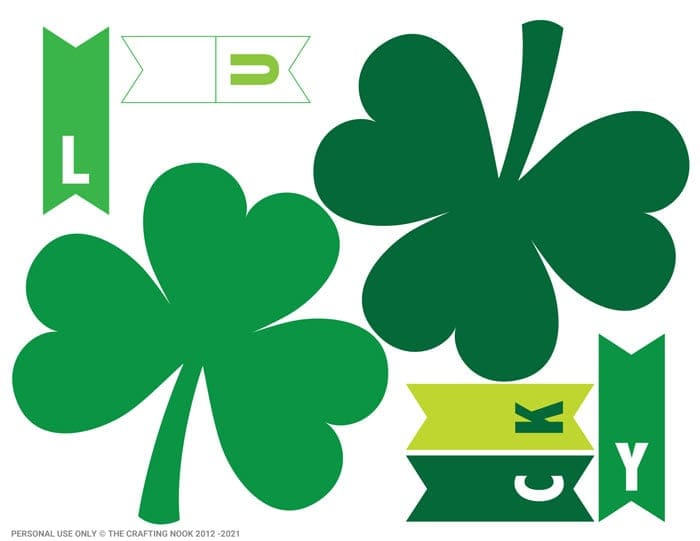
I used a buffalo check background that you can find in the printable files too but you can use as the background pretty much anything you like. You can use a rainbow, maybe a glitter gold cardstock. Imagination is the limit.
Also, you will notice that I don’t damage the frame in any way. I love making crafts that can be reused later on. This frame can go back to being Christmas decor or use it for something else.
I used removable 3M clear tape to stick the buffalo check backing to the frame so it won’t peel off the paint later.
Let’s start.
How to make this Lucky 3D Shamrock Frame
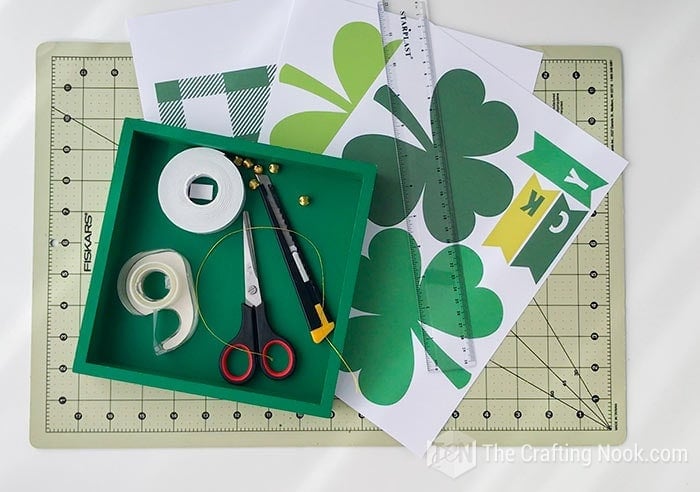
Supplies:
- White heavy cardstock
- 6 gold beads
- Gold thread, twine or ribbon.
- Glue
- Double-sided foam take (like the one used for scrapbook)
- Clear adhesive tape
- An old frame. If it’s not green, you can paint it and if you don’t have any frame you can make one yourself with cardstock.
- Printer
- Scissors and cutter
Lucky Shamrock Frame Instructions:
Before we begin, be sure to follow us on Pinterest, Facebook, Instagram, and YouTube, and also sign up for our email list (at the end of this post), so you’ll never miss a post!
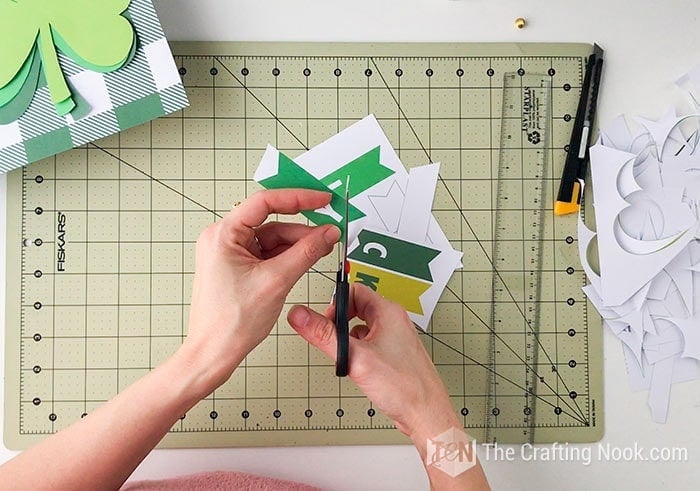
Step 1: Prep Work
Firstly Print your files. I recommend printing them at high quality.
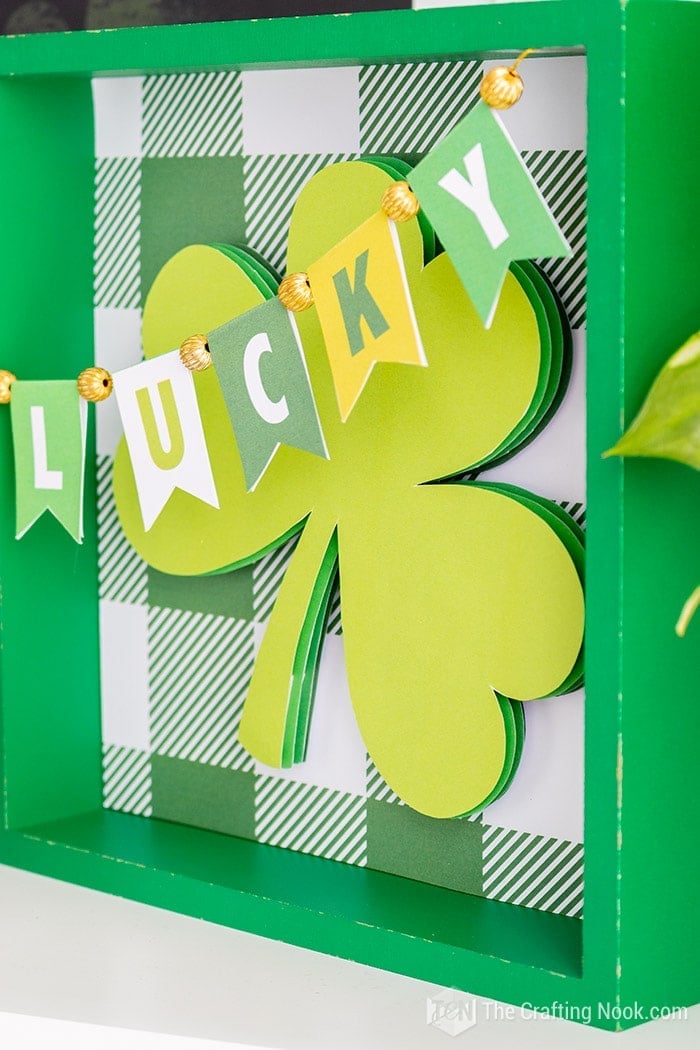
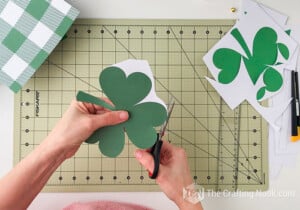
Then cut all your pieces, you should have 4 paper shamrock shapes (in 4 different shades of green), 5 buntings (LUCKY) and the buffalo check backing.

Step 2: Layer The Lucky 3D Shamrock
Once you have all your pieces ready, take the darkest green shamrock. This will be your base. Cut pieces of double-sided foam tape. I wanted a thick separation between shamrocks so I doubled the tape.
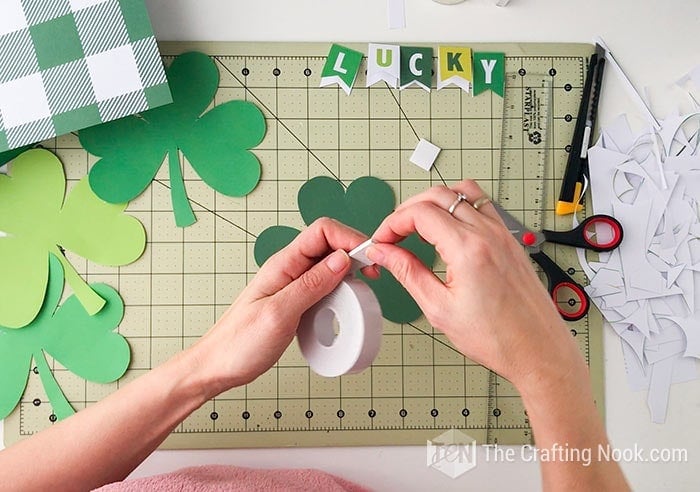
Place the foam takes in each leaf and a narrower one in the stem.
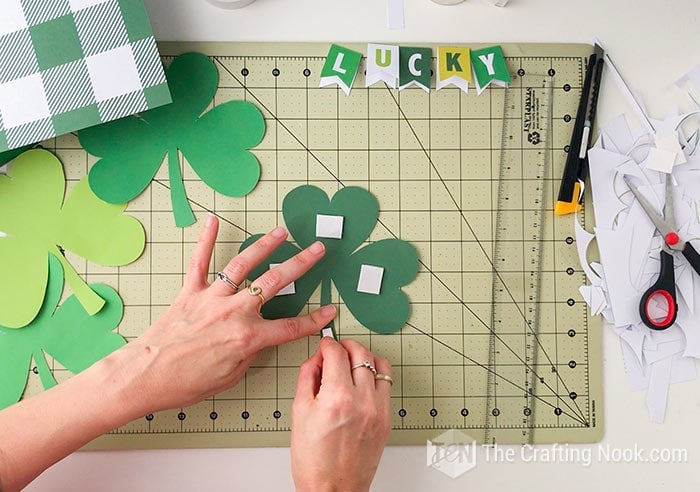
Peel off each tape backing and place the second shamrock on to as aligned as you possibly can.

Repeat the process with each layer.
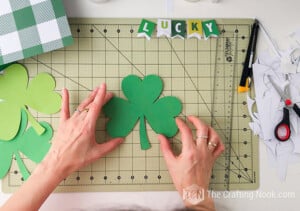
When you are done you should have something like this:

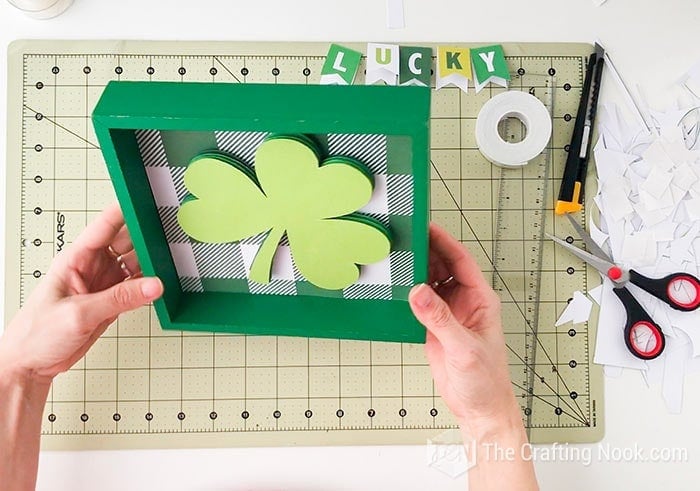
Now it’s time to stick the shamrock to the buffalo check backing.
I applied a single layer of double-sided tape on the back of the shamrock and placed it as centered as possible over the backing.


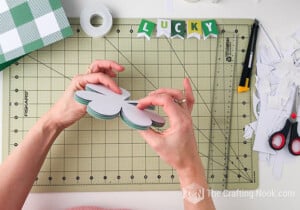
Step 4: Assembling the Frame
Then using removable 3M clear tape I secured the backing to the inner back of the frame.

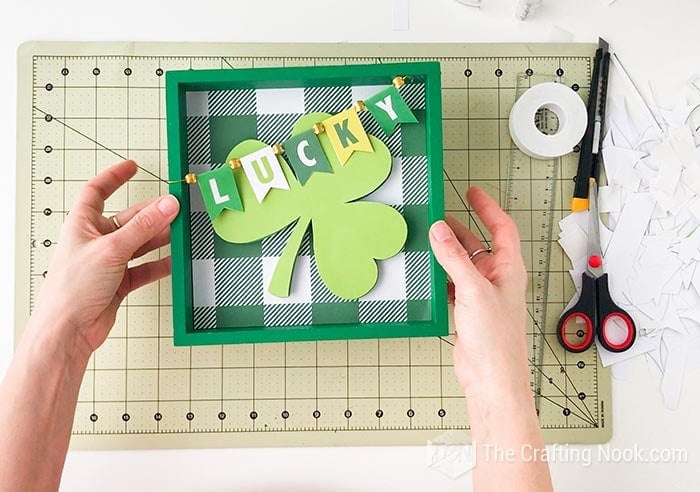
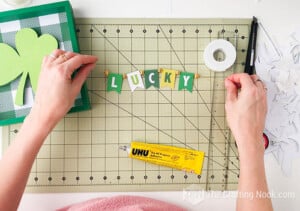
Step 5: Create the banner.
Start folding your buntings in half and glue it with the string inside.

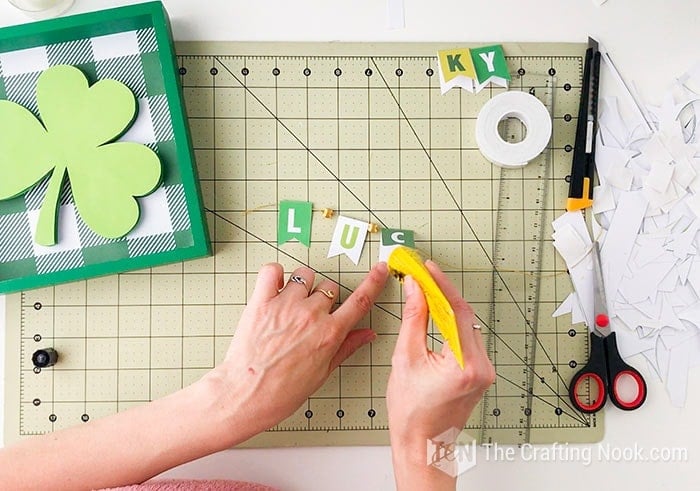
Then alternate bunting and beads until you finish it.
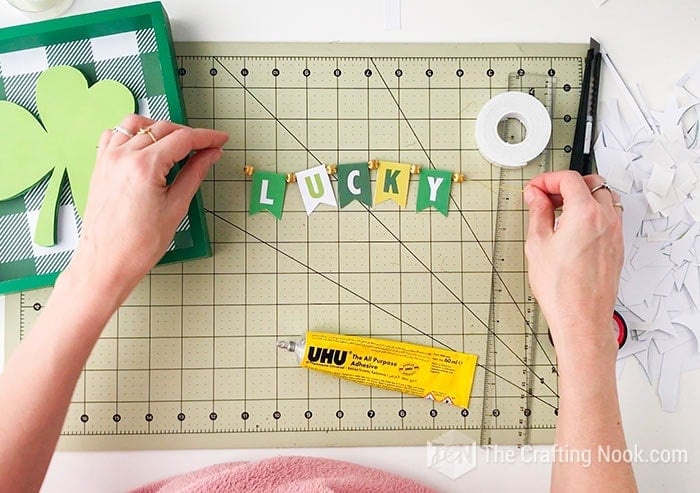
Here again, I didn’t want to damage the frame with hot glue so I used a super clear tape to secure the string.
Decide where you want the banner to be and apply a small piece of tape over the string and rub it well against the frame so it’s not so visible.
If you don’t care much about the frame or if hot glue won’t damage it you can go for it too.
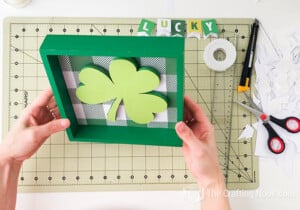
You are done!!!
Crafting Tips
Upcycle any old frames. Give them a new life with a fresh coat of paint if needed.
Don’t limit yourself to green cardstock, consider rainbow or glitter gold for a personalized touch.
You can keep the frame versatile. Use removable clear tape to attach elements, ensuring it can be repurposed for future decor.
Ensure a crisp look by printing your files at high quality. It makes a noticeable difference in the final result.
While the tutorial suggests buffalo check, feel free to choose backgrounds that resonate with your style – be it a classic pattern or something more unique.

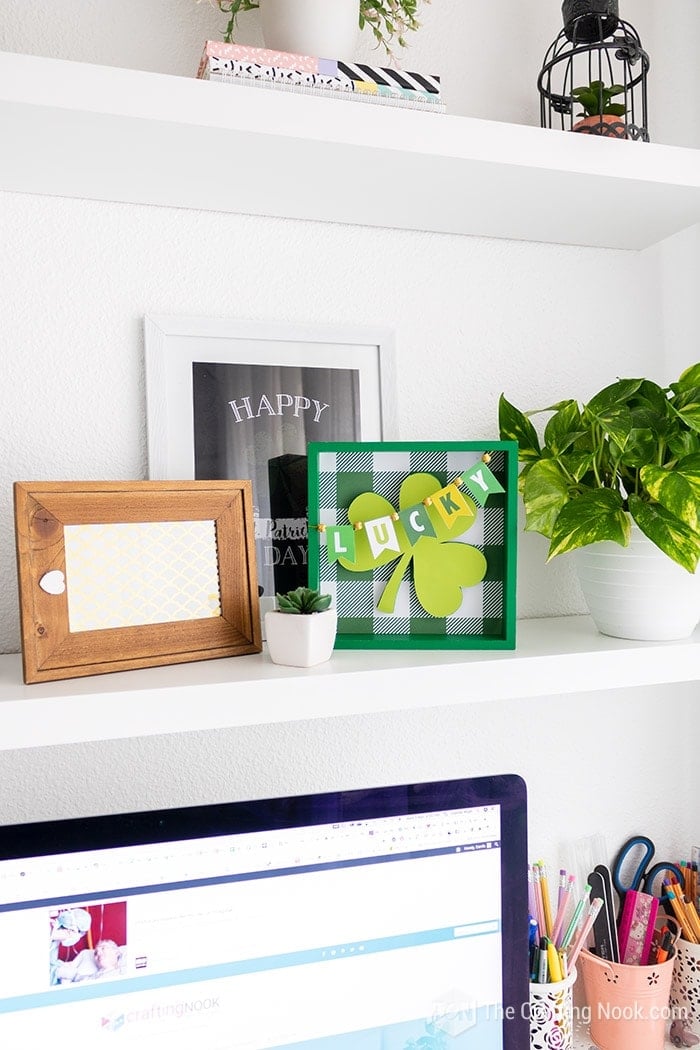
Our super cute Lucky Shamrock St. Patrick’s Day Frame is ready to rock. Choose a special place to put it and enjoy!

Hope you like this simple tutorial. I so enjoy easy crafts especially if I repurpose things or used supplies I already have.
Frequently Asked Questions
I used plain white cardstock because I was going to print all the pieces. But If you want to use something different and don’t want to print it, then you could use scrapbook paper, pattern paper, or any type of cardstock you like.
Any frame can be used. The idea is to use what you have. You can use picture frames, old grames, shadow boxes, and even create a frame with cardstock yourself like my friend Karina from Living and Crafting did.
Absolutely! I’ve included different types of files so you can cut them however you want.
More St. Patrick’s Day Craft Projects to try
If you enjoyed this Cute Lucky 3D Shamrock Frame tutorial, you might also love these other St. Patrick’s Day Project ideas too:


Some other St.Patrick’s Day Projects from my favorite Bloggers
- How To Make Paper Four-Leaf Clovers Using Craft Punches by Dinah over at DIY Inspired.
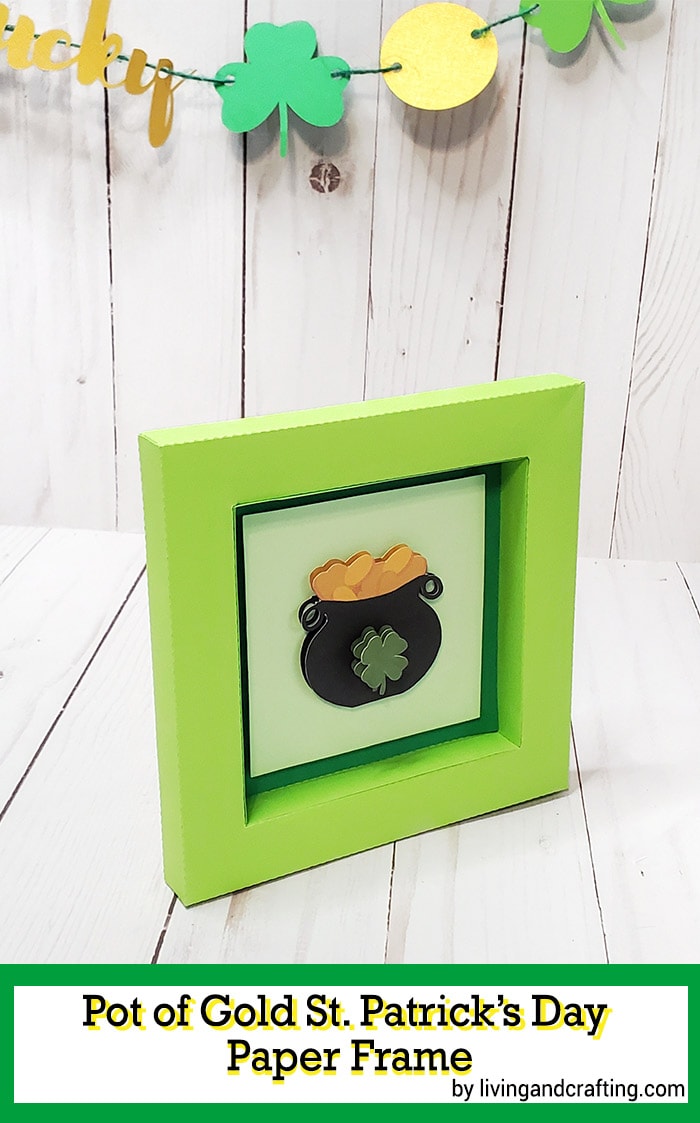
- Pot Of Gold St. Patrick’s Day Favor Box by Karina over at Living and Crafting.
- DIY Plaid Shamrock by Michelle over at Weekend Crafts.
- Lucky Shamrock Wreath by Flamingo Toes
- Paper Shamrock Wreath by The Craft Patch
✂️ Tutorial

DIY Lucky Shamrock Frame for St. Patrick’s Day
Tools
- Printer
- Scissors and cutter
- Cutting mat
Supplies
- White heavy cardstock
- 6 gold beads
- Gold thread or twine.
- Glue
- Double-sided foam take like the one used for scrapbook
- Clear adhesive tape
- An old frame. If it’s not green you can paint it and if you don’t have any frame you can make one yourself with cardstock.
Instructions
- Firstly Print your files. I recommend printing them at high-quality.
- Then cut all your pieces, you should have 4 shamrocks (in 4 different shades of green), 5 buntings (LUCKY) and the buffalo check backing.

- Once you have all your pieces ready, take the darkest green shamrock. This will be your base. Cut pieces of double-sided foam tape. I wanted a thick separation between shamrocks so I doubled the tape.
- Place the foam takes in each leaf and a narrower one in the stem.
- Peel off each tape backing and place the second shamrock on to as aligned as you possibly can.

- Repeat the process with each layer.
- When you are done you should have something like this:
- Now it’s time to stick the shamrock to the buffalo check backing.
- I applied a single layer of double-sided tape on the back of the shamrock and placed it as centered as possible over the backing.
- Then using removable 3M clear tape I secured the backing to the inner back of the frame.
- The next step is creating the banner.
- Start folding your buntings in half and glue it with the string inside.
- Then alternate bunting and beads until you finish it.
- Here again I didn’t want to damage the frame so I used a super clear tape to secure the string.
- Decide where you want the banner to be and apply a small piece of tape over the string and rub it well against the frame so it’s not so visible.
- If you don’t care much about the frame or if hot glue won’t damage it you can go for it too.
- You are done!!!
- Our super cute Lucky Shamrock St. Patrick’s Day Frame ready to rock. Choose a special place to put it and enjoy!

Head over to Karina’s Blog and learn how to make this super cute St. Patrick’s Day pot of gold paper frame:
PIN and share it with friends!
Til’ next time…


FREE WORKBOOK
Keeping your Sweet Home Organized
Learn how to create intentional habits and simple routines to Keep Your Home Organized. Plus freebies, printables, exclusive content, and tips.
Disclaimer: By clicking on the “Yes” button above you are giving me your consent to collect and use your information according to the law and My Policy Privacy. Zero Spam I promise!