Masking Tape Photo Frame (Memory Keepsake)
This post may contain affiliate links. Please read our Disclosure Policy.
Looking for a fun, easy and inexpensive project to do at home maybe involving your kiddos? This masking tape Photo Frame will look very pretty and unique.
The supplies are cheap and readily available, so, whatever your needs are, it’s perfect for a group project or just a fun hour for yourself. This project is relaxing and so rewarding. It could even be good enough to hang as it is or to give away as a one of a kind gift. In my case, it was all about memory keepsake.

How to make Masking Tape Photo Frame
As I mentioned in my Daddy’s Mod Podge Photo Frame post, I’m making a series of photo frames to keep my girl’s memories alive so she doesn’t forget her family and beloved friends while we are away from them.
This time I revamped a simple metallic photo frame with this Scotch decorated masking tape and it turns out great!!!
What is the difference between masking tape and washi tape?
In simple words, washi tape is a high-quality masking tape made of rice paper. But more than that, washi tape is a material which is beautiful yet useful at the same time. You can tear it, stick it, reposition it, write on it… The low tack adhesive makes it extremely easy to use (and reuse). Nowadays, masking tape comes in gorgeous colors and patterns which makes it fun to work with but it’s still tougher than washi tape.
It was so enjoyed making this project. I found this cute masking tape at Target and it’s as fun as washi tape and it has lots of pretty patterns too.
One of my favorite patterns was this one I’m using and it was on sale too. Win-Win!
This time I made a photo frame for my sisters. Emma spent so little time with them and I don’t want her to forget them.
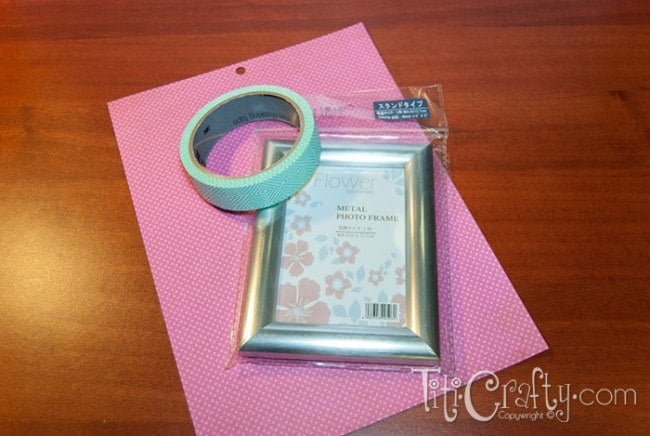
Photo Frame Supplies:
- Patterned scrapbook paper
- Masking tape (patterned)
- Ribbon
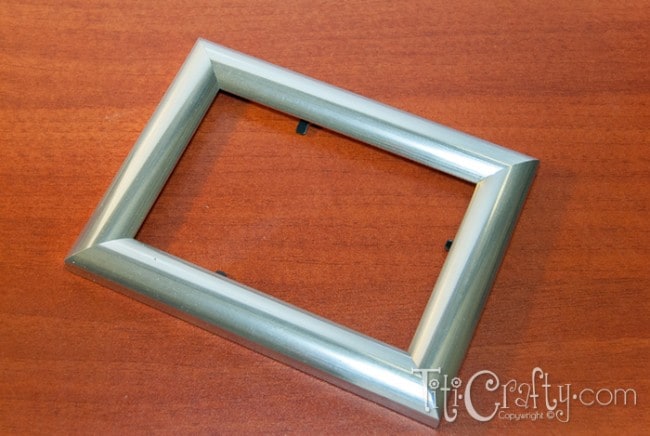
- Old or ugly Photo frame.
- Hot glue.
- Cutter and scissors.
Masking Tape Photo Frame Tutorial
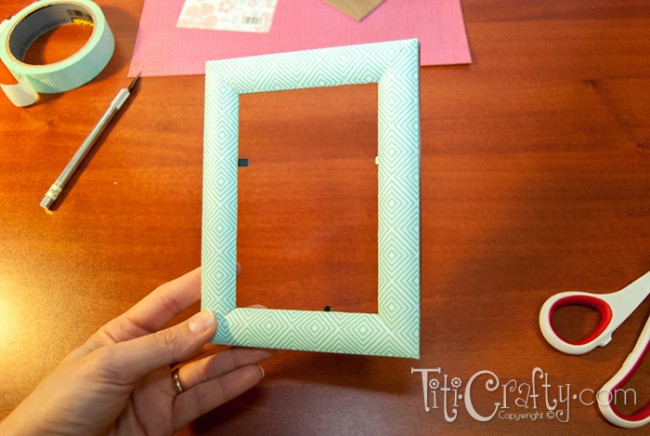
Firstly, clean the frame to remove dust or grease.
Then, start applying the masking tape. I tried my best to match the pattern on corners.
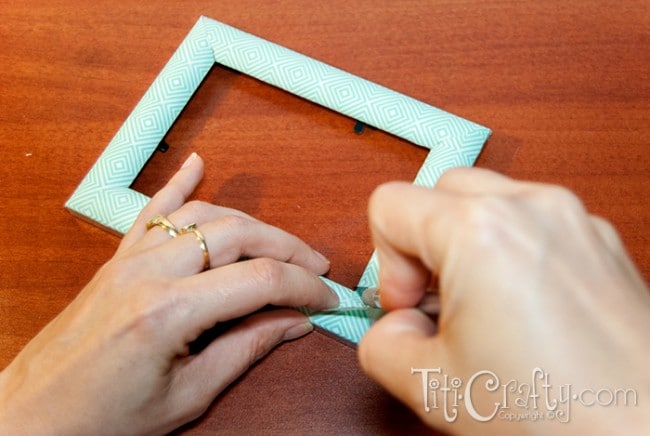
On the corners, I made a diagonal cut so the tapes wouldn’t overlap.
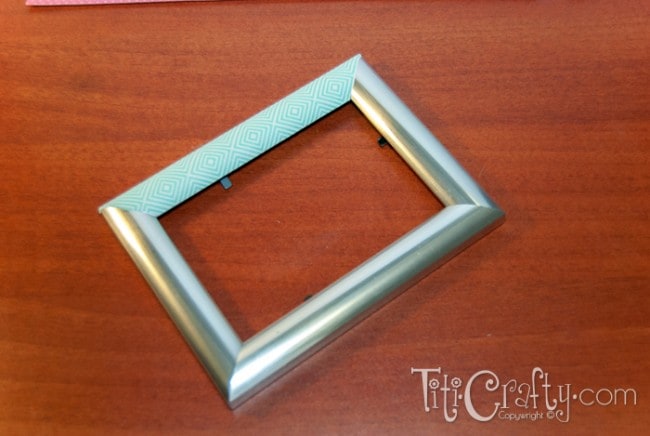
Masking is done.
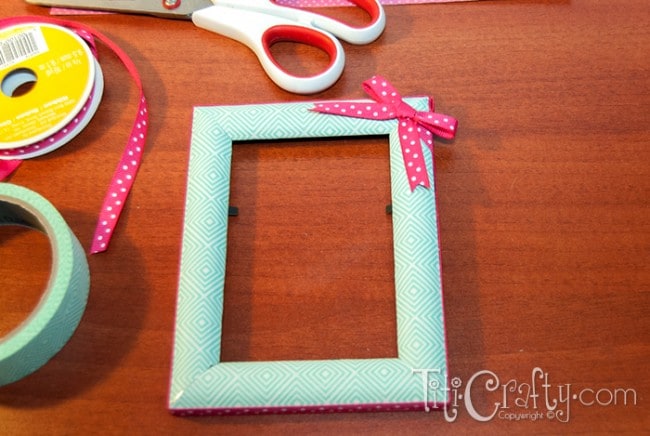
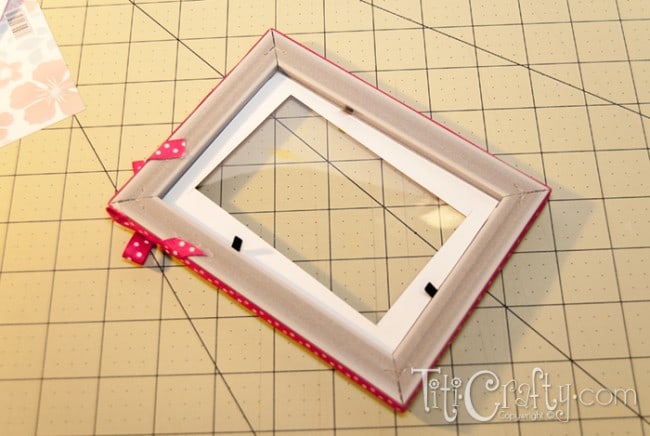
The next step is gluing the ribbon with the hot glue gun to the sides of the frame.

I made a cute bow and placed it to one corner. This is totally optional.

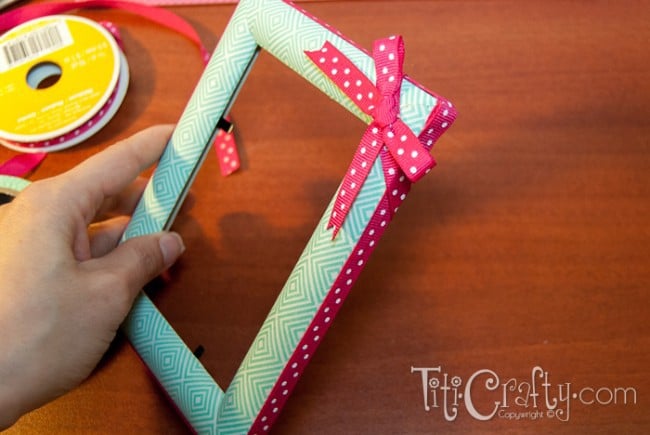
Almost done!!!
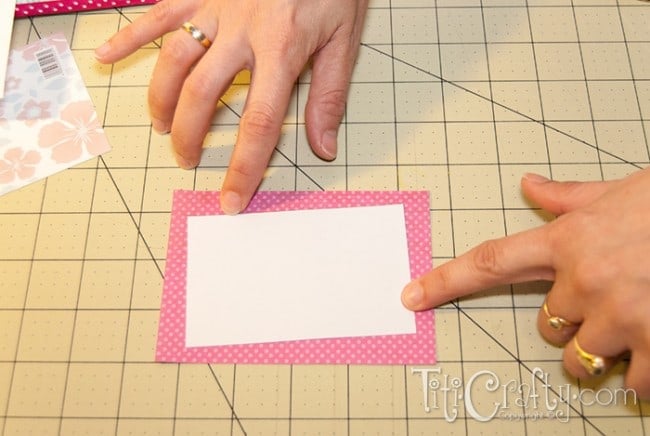
Using the paper that comes with the frame as a reference to cut on the patterned paper.
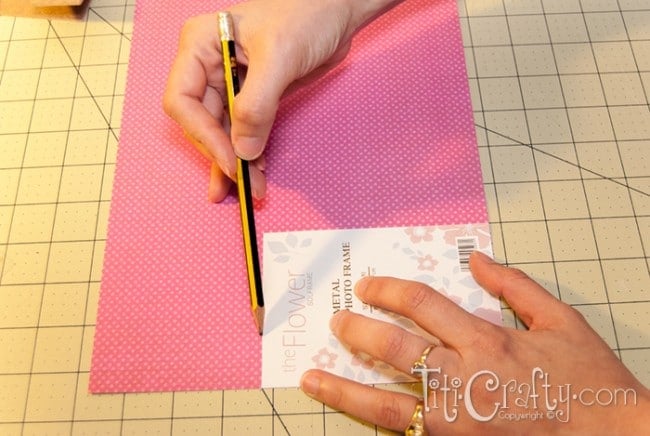
Then cut a rectangle inside to create another frame. I displaced it a bit to make it a bit fun!
Finally, put back the glass and place the patterned paper facing the glass.
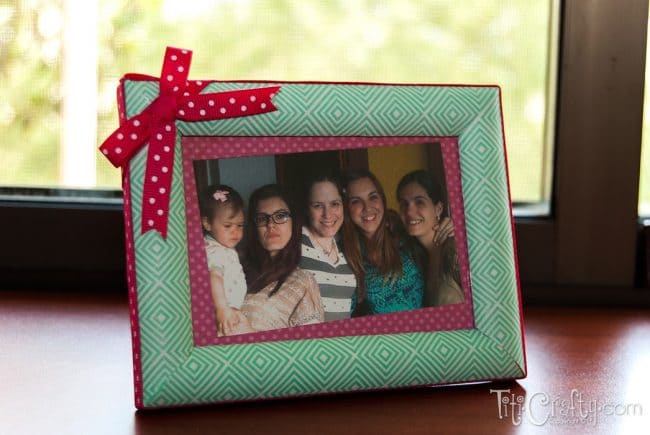
I chose the best pic I had of my sisters and placed it right after the patterned paper. Voila!
There you have it!!!
I putt it next to my hubby’s frame and the collection started!
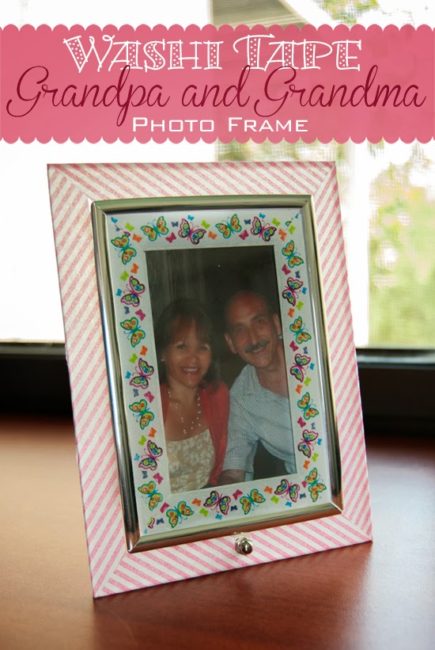
The next one I plan to make is Emma’s grandparent’s photo frame!
")
What do you think? Isn’t it cute??? Do you like photo Frames???
Other masking tape projects I love from fellow bloggers
- DIY photo frame masking tape craft by Kathy over at Merriment Designs
- My Washi Wall by Ann Kelle.
If you like this project you can see these other frames I’ve made:

Til’ next time…


FREE WORKBOOK
Keeping your Sweet Home Organized
Learn how to create intentional habits and simple routines to Keep Your Home Organized. Plus freebies, printables, exclusive content, and tips.
Disclaimer: By clicking on the “Yes” button above you are giving me your consent to collect and use your information according to the law and My Policy Privacy. Zero Spam I promise!
Great Frame. Thanks so much for sharing with Wednesday’s Adorned Link Party. Have a great Thanksgiving.
Debi and Charly @ Adorned From Above
http://www.adornedfromabove.com
Hey Debi, I’m glad you like it! Thanks so much for stopping by!
XOXO
Cami
Cami this is darling, love this idea. And love that you’re trying to keep your family in your girl’s mind.
Hi Britni, Yessss I’m so far away from family and friends that I feel like I don’t want her to forget! Thanks so much for your sweet comment! It totally makes my day!
Xoxo
Cami
Very cute photo frame! Looks easy to make too! Thanks for sharing at our Mommy Club Linky Party! I can’t wait to see more ideas and projects that you have!
Yayyy Thanks so much for stopping by! I’m glad you like it!
XOXO
Hi Cami, thanks so much for sharing at the Krafty Inspiration Thursday party! Your awesome project has been featured on our Social Media spotlight Post and websites. Have a wonderful SundayMaria @ Krafty Cards etc. http://kraftycardsetc.com/
Super cute! Thanks for sharing! Pinned ;)
that is seriously sooo adorable!!!! love the colors! found you at Sew Darn Crafty!
This is so cute!!
Thanks for joining the Link Up this week!
love it!! Adding this to my Must Make list! Thanks for linking up to Snickerdoodle Sunday!
Hi lovely lady.
This is my first time on your blog loving this great Idea’s sweet. I hope you will come over and see me also and I am hoping you have a wonderful week with your family.
Diane
What a great idea! I love how quick and easy it looks with the tape, and yet the final product looks so fancy.