DIY Candy Pouches For Valentine’s Day (with Free SVG)
This post may contain affiliate links. Please read our Disclosure Policy.
Get ready to spread the love with these adorable Valentine’s Day DIY Candy Pouches! Crafted with patience and lots of love, these cuties are perfect for sharing sweet treats. Snag the freebie cutting files and make your own heartwarming creations!
Did you know you can make your own candy pouch favors for Valentine’s Day, or any other time you want to give a special little treat? Well, you definitely can! If you are looking for the perfect DIY candy favors for your loved ones, then you will absolutely love these super cute V-Day Candy Pouches.

Table of Contents
Valentine’s Day Candy Pouches with Free Cutting Files
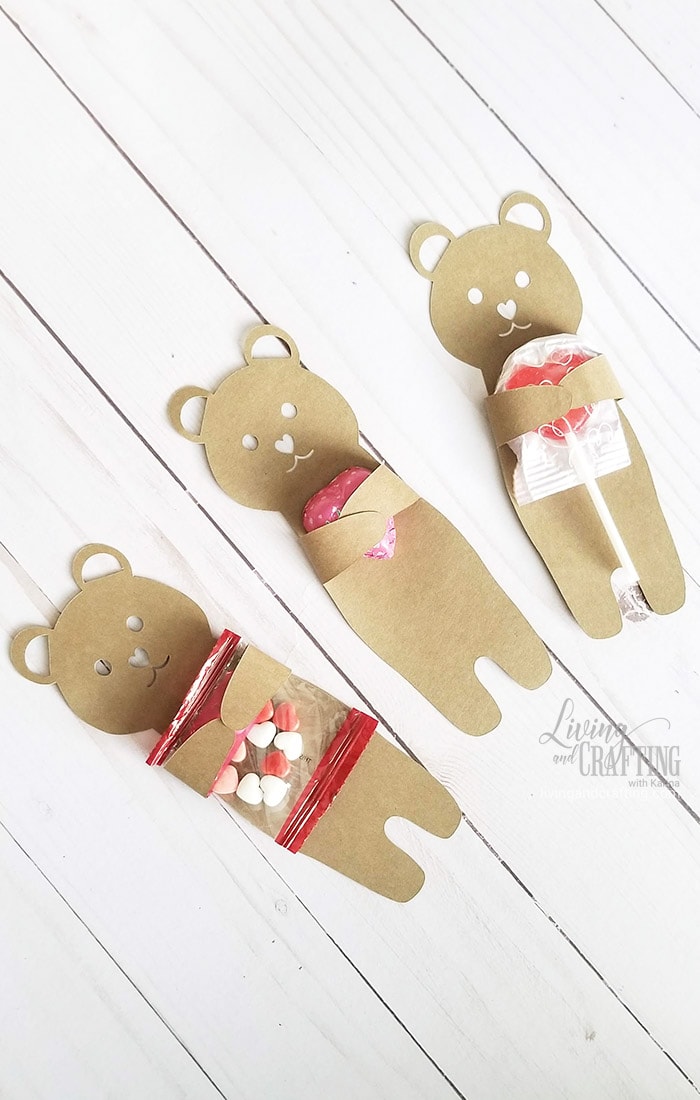
Today I’m sharing a cute craft that I was eager to make ever since I saw it at Keeping it Simple. Kaysi made some of these cuties for Halloween, then for Christmas and now she made the cutest Candy Pouches ever for Valentine’s Day.
I was so inspired by her creativity that I REALLY wanted to make them and give some lovely treats here at home.

The one thing I learned from this inspired craft is that I chose kind of complicated shapes. Since we have to cut all the plastic remaining, scallops don’t make it easy AT ALL. I really wanted to make these so I had a lot of patience {and stubbornness}.

I would really advise using plain and simple shapes though. My pouches are not as perfect as Kaysi’s but I really love them because I put a lot of love into them.
So, I’m sharing the cutting files I made for the pouches just in case you are a meticulous and patient person. You can always use it as labels or anything you want, can’t you?
Snag FREE the Cutting File HERE
Personal use only!

How to make these cute V-Day Candy Pouches
Supplies:
- Ziplock bags
- Cutouts shapes or printables
- Treats/candy of choice
Tools:
- Cutting Machine – Silhouette or Cricut will do the work.
- Hot glue gun
- X-acto knife or craft knife
- Scissors
Instructions:
1. First, cut the shapes and prepare the table where you will work.
2. Cut the shapes about 6 inches lengthwise.


3. Apply hot glue around the edges of the back part of the pouches and quickly place the zip-lock bag to stick to it.
4. Then put some candies inside the bag and center them on the cutout shape.
5. Place the top part of the pouch over the bag matching the shape and put the hot glue directly on the bag so when you press the cardboard down it will melt the plastic and seal the pouches.
I had to make it in small portions of the pouches so I had time to seal it before melting completely and not sticking.

I was so focused on making it right that I didn’t take enough step-by-step photos. I’m planning on making some more and I promise I’ll make it more detailed.
6. Here was the annoying part LOL. With an X-acto knife, slowly cut the leftover plastic following closely the edges of the shape of the pouches. Sadly in my case, some parts of the plastic are visible but I could cut most of it.

7. Make as many pouches as you like repeating the process. I made lots of them.
Here you go, cute and so inspiring Valentine’s Day DIY Candy Pouches!

How cute are these? Is not perfect but I love them!
Crafting Tips & Tricks
Opt for plain and simple shapes to make the process smoother. Complicated shapes might test your patience, but hey, a little challenge never hurt anyone!
Spread the Love: When applying hot glue, make sure to spread it evenly around the edges of the back part of the pouch. This ensures a secure seal and a tidy finish.
While using an X-acto knife to cut the leftover plastic, take your time and follow the edges closely. Some parts may be visible, but with a steady hand, you can trim most of it for a clean finish.


Frequently Asked Questions
Absolutely! Feel free to get creative with shapes that speak to you. Just keep in mind that simpler shapes might make the process smoother
Yes, you can experiment with small, clear plastic bags or even repurpose clean, unused food packaging for an eco-friendly twist.
Absolutely! These pouches can be made in advance. Just ensure they are stored in a cool, dry place to maintain their shape and treat freshness.
Definitely! Add personal touches like stickers, and ribbons, or even write sweet messages on the pouches to make them extra special.
More Valentine’s Day Crafts to Try
If you like this DIY Valentine’s Day DIY Candy Puches tutorial, you might also love these other Valentine’s Day craft projects too:


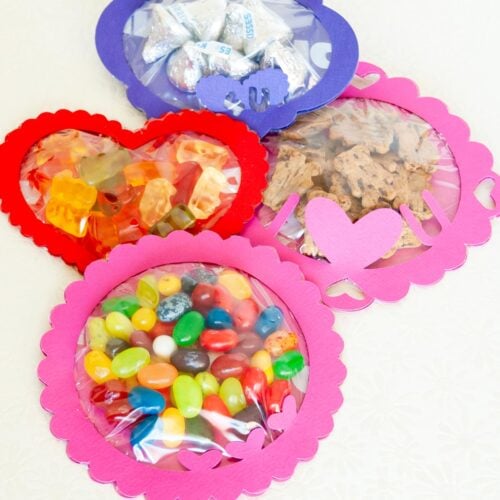
Need another Valentine’s Day Candy project ideas? Make sure you stop by Living and Crafting, she’s sharing a cute DIY Candy Wrapper!!!
✂️ Tutorial
DIY Candy Pouches For Valentine’s Day (with Free SVG)
Tools
- Cutting Machine – Silhouette or Cricut will do the work.
- Hot glue gun
- X-acto knife or craft knife
- scissors
Supplies
- Ziplock bags
- Cutouts shapes
- Treats/candies etc
Instructions
- First, cut the shapes and prepare the table where you will work.
- Cut the shapes about 6 inches lengthwise.
- Apply hot glue around the edges of the back part of the pouches and quickly place the zip-lock bag to stick to it.
- Then put some candies inside the bag and center them on the cutout shape.
- Place the top part of the pouch over the bag matching the shape and put the hot glue directly on the bag so when you press the cardboard down it will melt the plastic and seal the pouches.
- I had to make it in small portions of the pouches so I had time to seal it before melting completely and not sticking.
- I was so focused on making it right that I didn’t take enough step-by-step photos. I’m planning on making some more and I promise I’ll make it more detailed.
- Here was the annoying part LOL. With an X-acto knife, slowly cut the leftover plastic following closely the edges of the shape of the pouches. Sadly in my case, some parts of the plastic are visible but I could cut most of it.
- Make as many pouches as you like repeating the process. I made lots of them.
- Here you go, cute and so inspiring Valentine’s Day DIY Candy Pouches!
What do you think??? Would you try to make these too??? I would love to know all about it!
Share and PIN ME!!!

Til’ next time…


FREE WORKBOOK
Keeping your Sweet Home Organized
Learn how to create intentional habits and simple routines to Keep Your Home Organized. Plus freebies, printables, exclusive content, and tips.
Disclaimer: By clicking on the “Yes” button above you are giving me your consent to collect and use your information according to the law and My Policy Privacy. Zero Spam I promise!
Nice work. They look really pretty!
Thank you so much!!!
I never knew how to make these cute pouches before. Thanks for sharing.
Such a fun idea! These were one of my “knockouts” from last week’s Hit Me With Your Best Shot party! Thanks SO much for linking up!
These are beautiful, Cami! And I know my kids would love them! Thanks so much for linking up at Hit Me with Your Best Shot! Have a wonderful week!
~Abby =)
these are just so cute. I would love a machine like yours. Fun stuff! Thank you for helping to make the Thursday Favorite Things Blog hop so much fun. Big Hugs ♥
Genius! Love these!
What a great idea, very pretty. Thanks for linking up to Sweet and Savoury Sunday, stop by and link up again this weekend.
Hi Cami! These are so cute. I’m afraid they are way beyond my ability though. You should have a video tutorial to go with this project. That would be fun. Thanks for sharing this with our Let’s Get Real readers. You have inspired me to create treat bags. I wonder how they will turn out? They may not be the same as yours, but will be filled with lots of love as yours are.
Stopping by from Pin It Party. These are so cute!!!
That is so neat! Totally ingenious. I don’t have a nifty shape cutter to make it with but I might be able to cut some pretty hearts! Thanks for linking it up to Snickerdoodle Sunday.
So creative, Cami! Thanks for sharing it with us at Sewlicious Home Decor! Pinned to the party board! :)Marti
So cute! My favorite of your Valentine crafts so far! (adding to Pinterest)