DIY Halloween Wood Blocks
This post may contain affiliate links. Please read our Disclosure Policy.
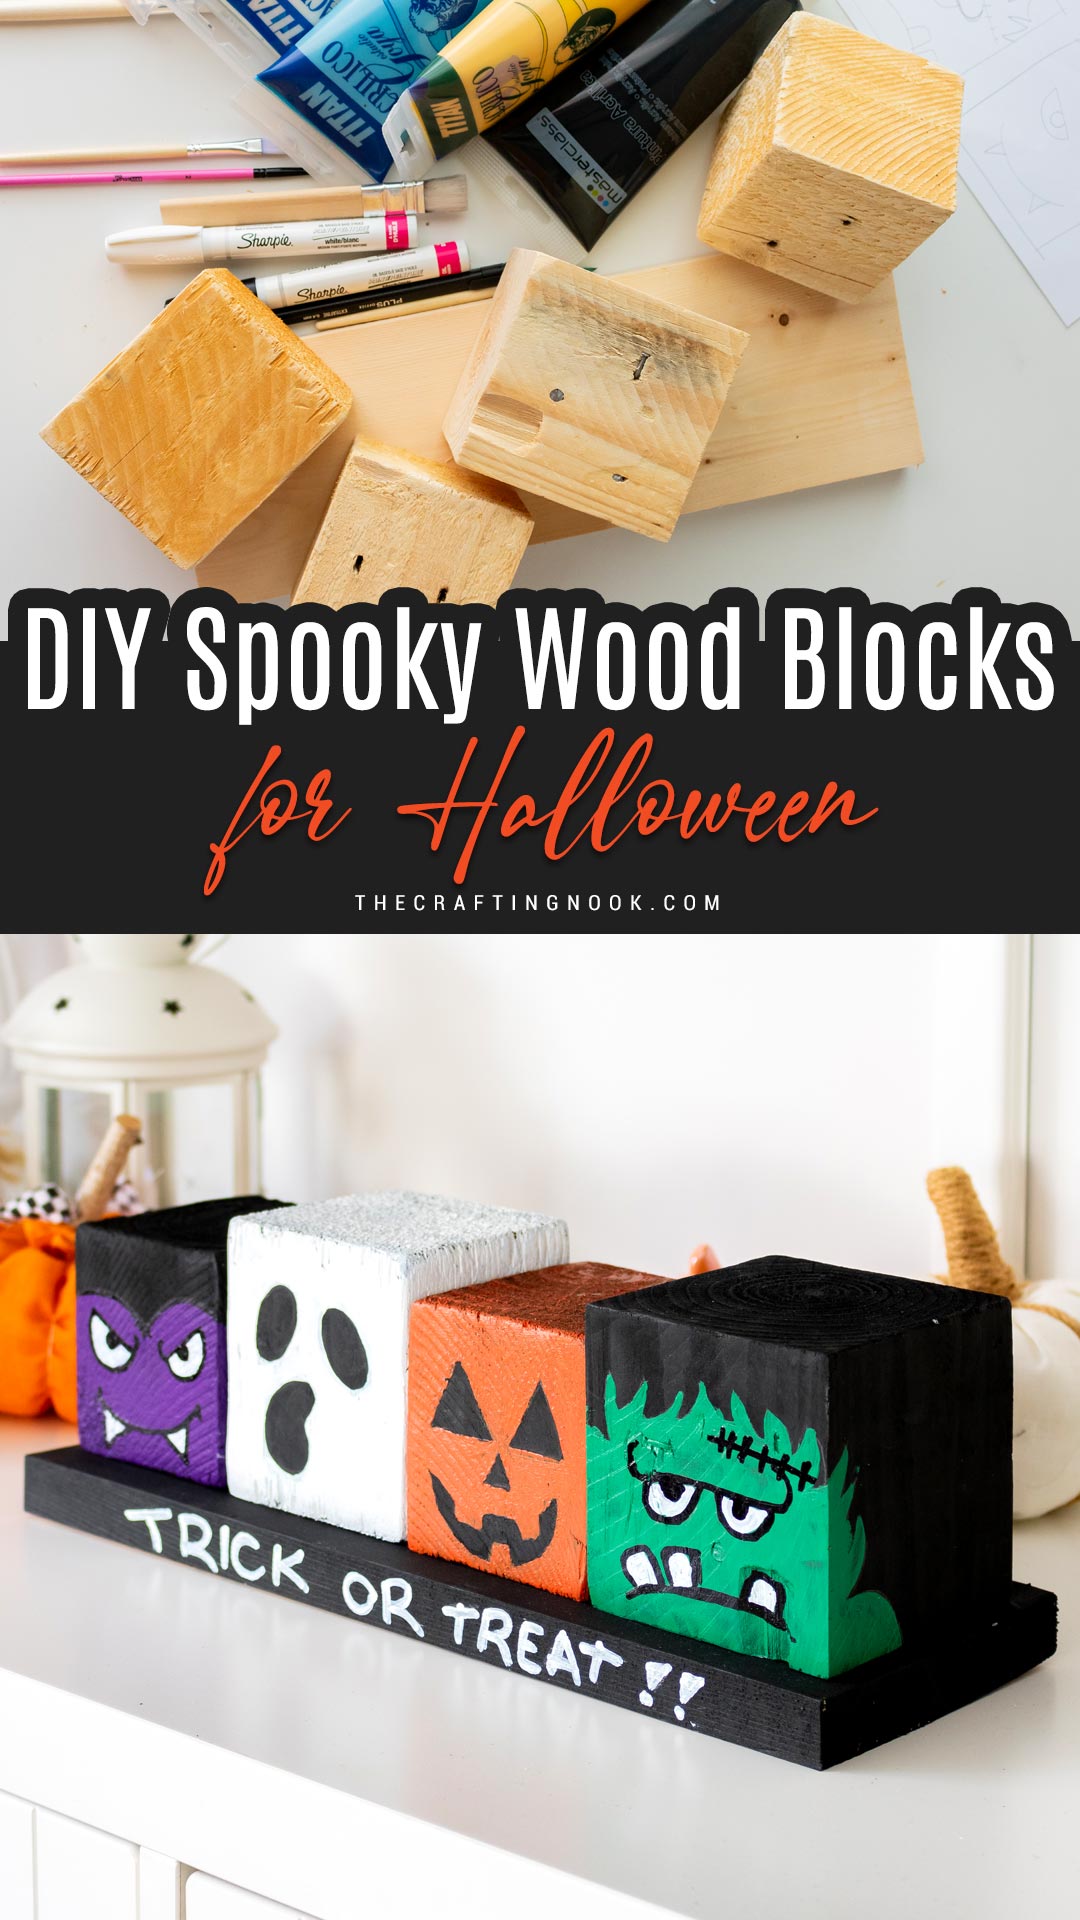
Create some adorable DIY Halloween wood blocks with spooky character faces! This easy project adds fun Halloween vibes to your home decor and it’s perfect to make with kids.
Halloween has always been one of my favorite times to make crafts (besides Christmas, or course!). It’s like the perfect excuse to mix fun, spookiness, and creativity.
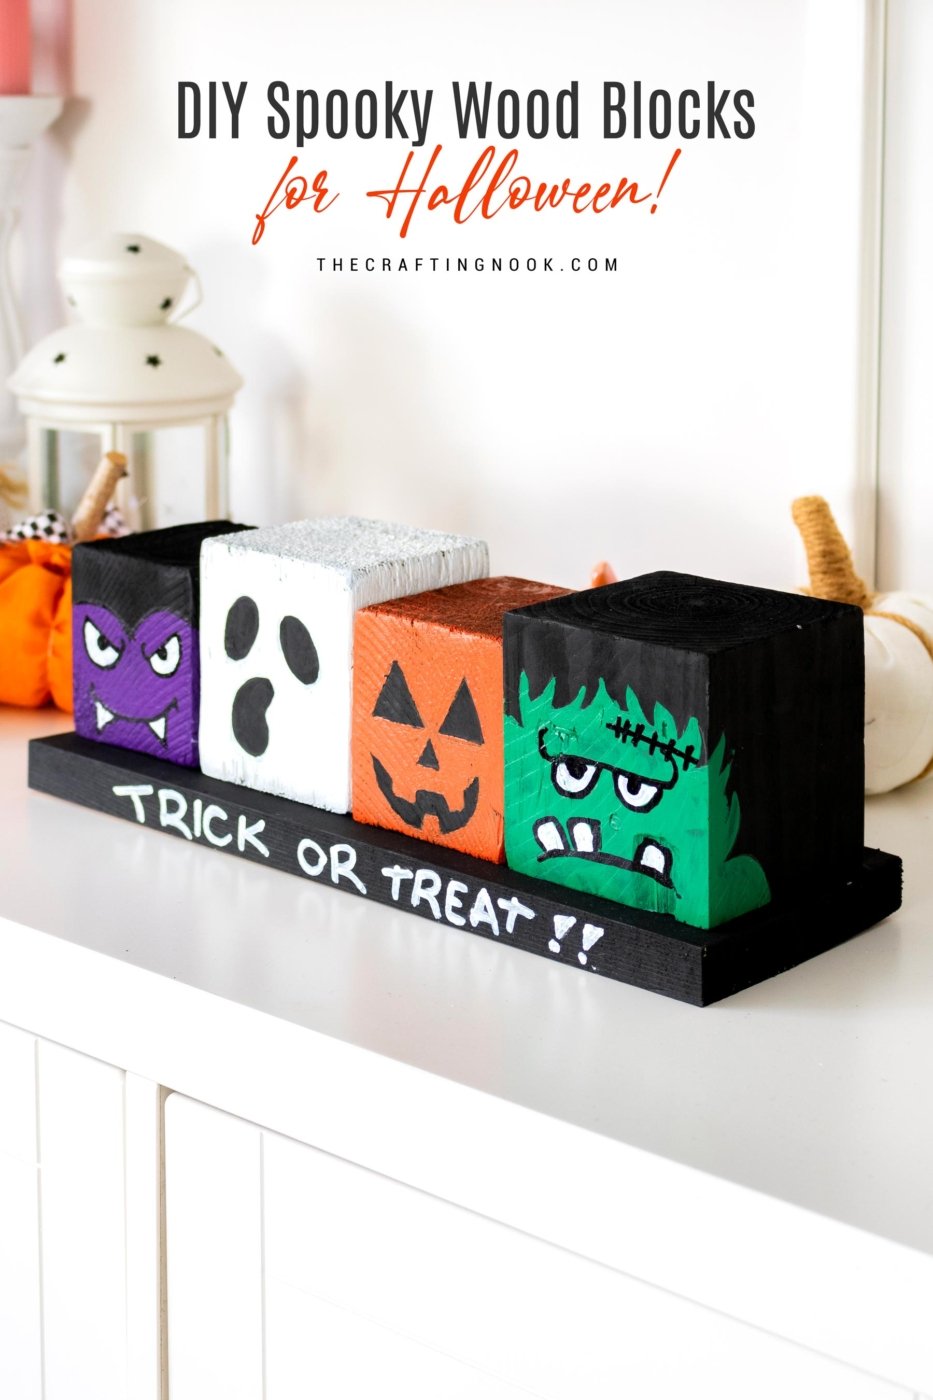
Table of Contents
DIY Wood Blocks for Halloween
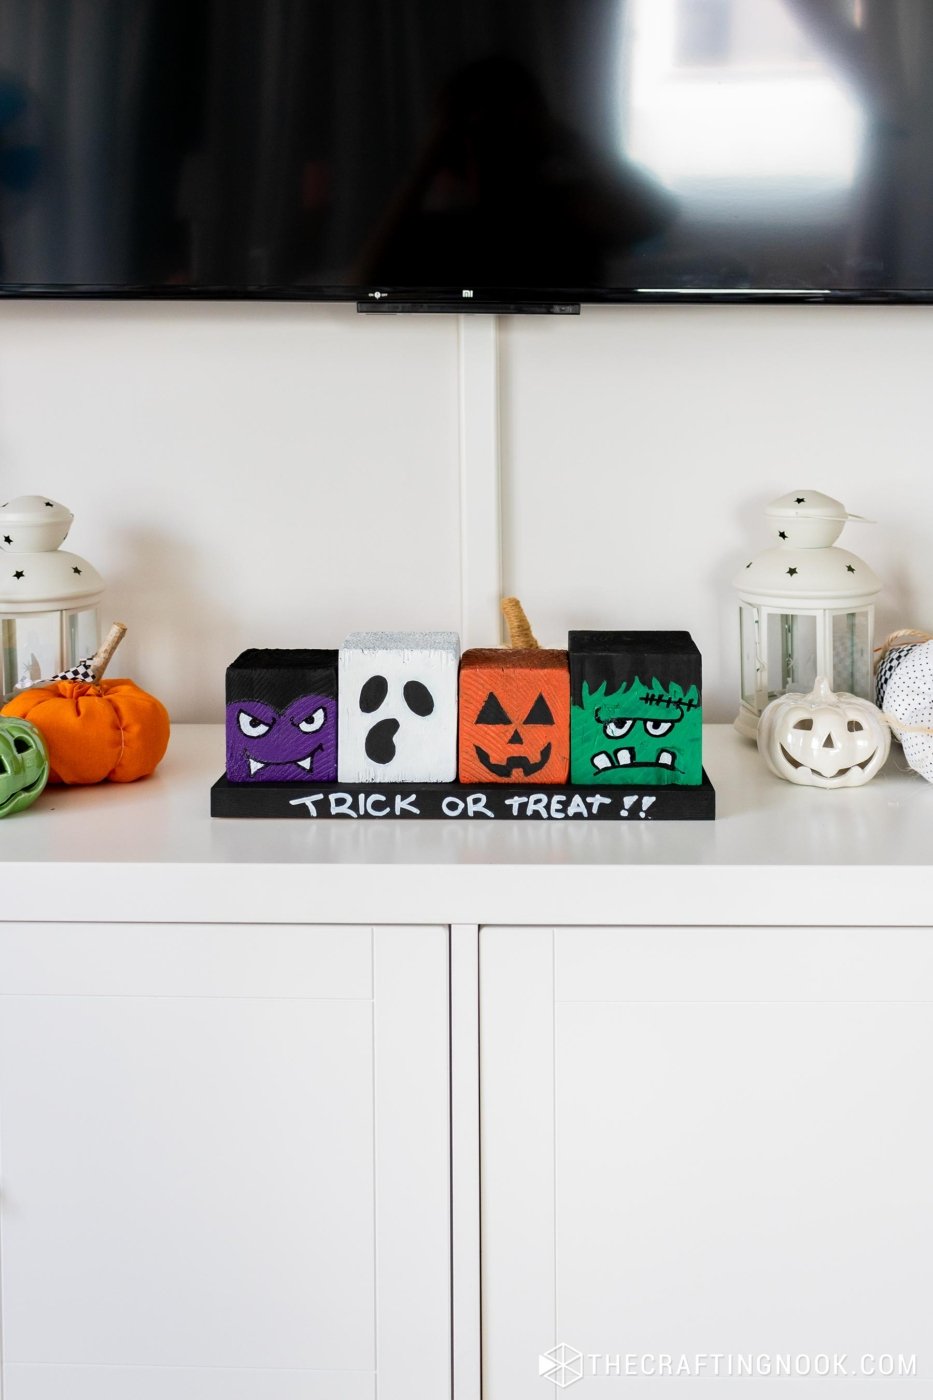
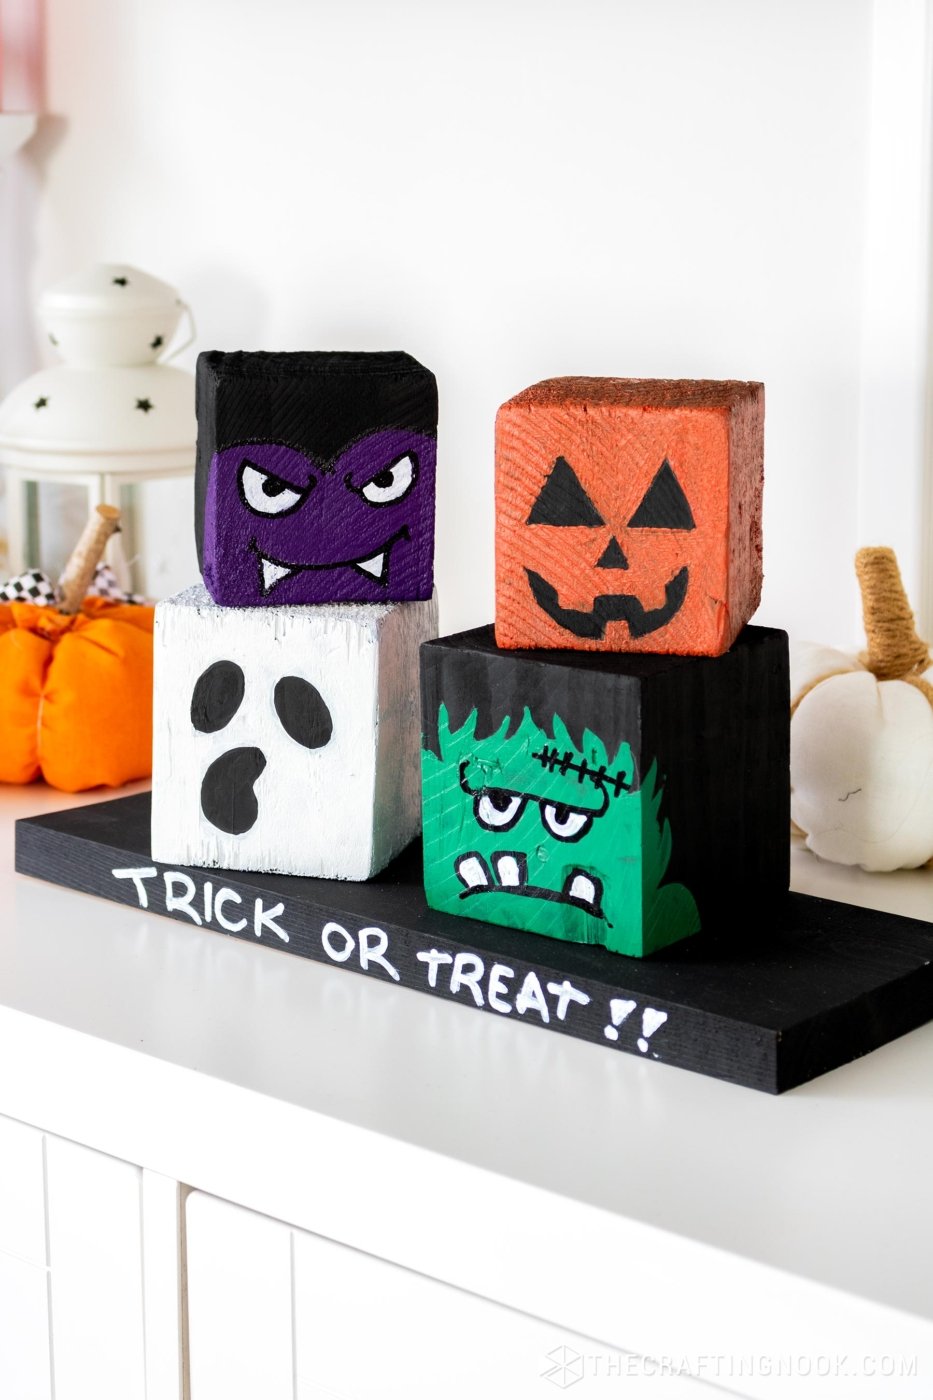
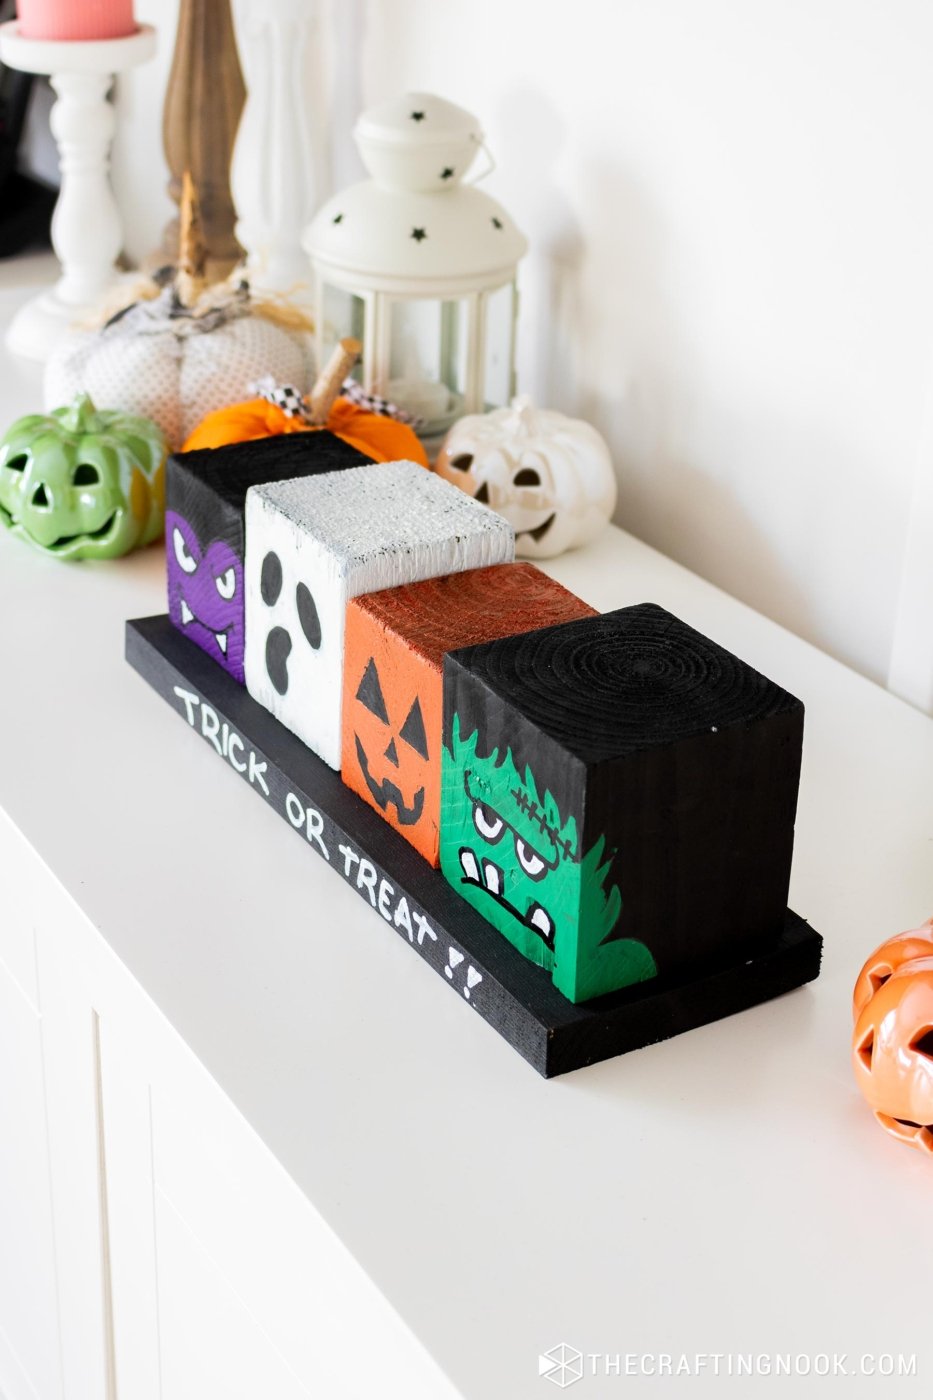
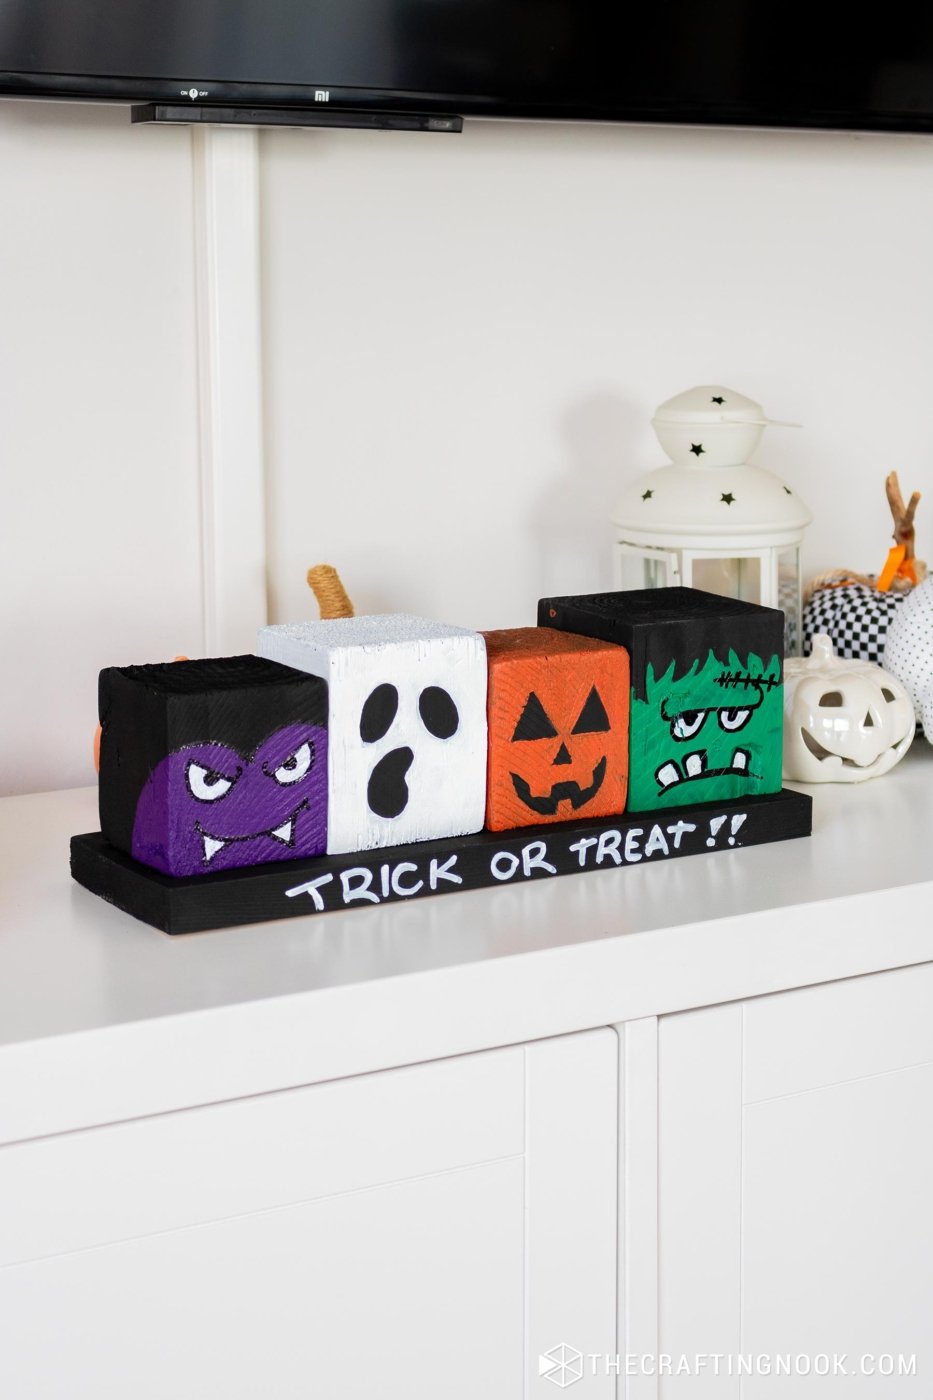
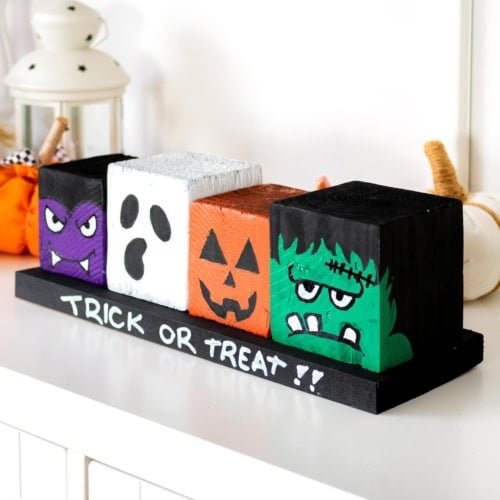
Every year, I find myself adding something new to my decorations, and this time, I couldn’t resist making these cute little DIY Halloween Wood Blocks. I upcycled some wood blocks and a board piece from an old project, gave them a spooky makeover, and now they’ve turned into Frankenstein, Dracula, a ghost, and a jack-o-lantern.
They’ve already made my entryway feel so festive, and I can’t wait to share how you can make your own!
What I love most about this project is how easy it is and that it’s all about having fun—no perfect lines or fancy tools needed. So, if you’re in the mood for a little Halloween crafting and want something that adds a personal touch to your décor, you’re in the right place.
How to make Halloween Wood Blocks
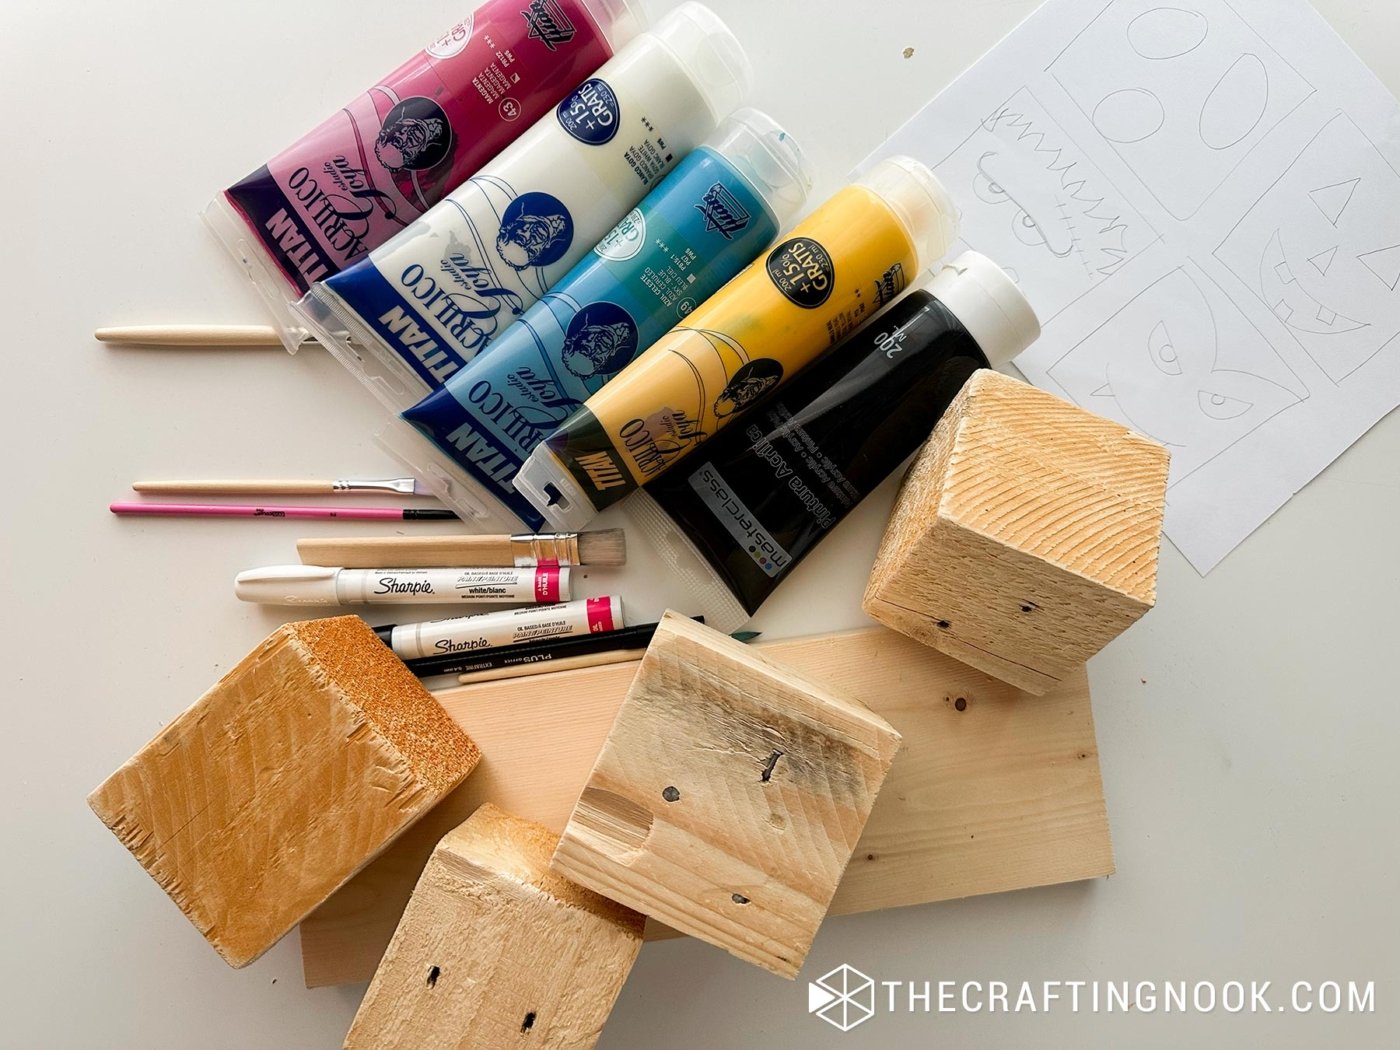
Supplies:
- 4 scrap wooden blocks – mine are upcycled from pallets, and they’re all different sizes—You can purchase some blocks if you don’t have scraps.
- 1 wood base slightly longer than all 4 wood blocks together – I used a leftover piece from another project.
- Acrylic paint: black, purple, orange, green, white – Craft paint will do too.
- Oil-based black and white markers.
- Craft sealer –optional, to protect your work
- Sandpaper –optional, for smoothing edges
Tools:
- Paintbrushes
- Pencil for sketching faces
- Surface protection
Instructions:
Step 1: Prep Your Wood Blocks
Gather all your wood pieces. I used pallet scraps, so mine are all a bit different in size. If yours are too rough, give them a quick sand to smooth out any sharp edges and remove splinters.
You’ll also need a wood base to display your blocks—I had one left over from another project, but any sturdy piece will work.
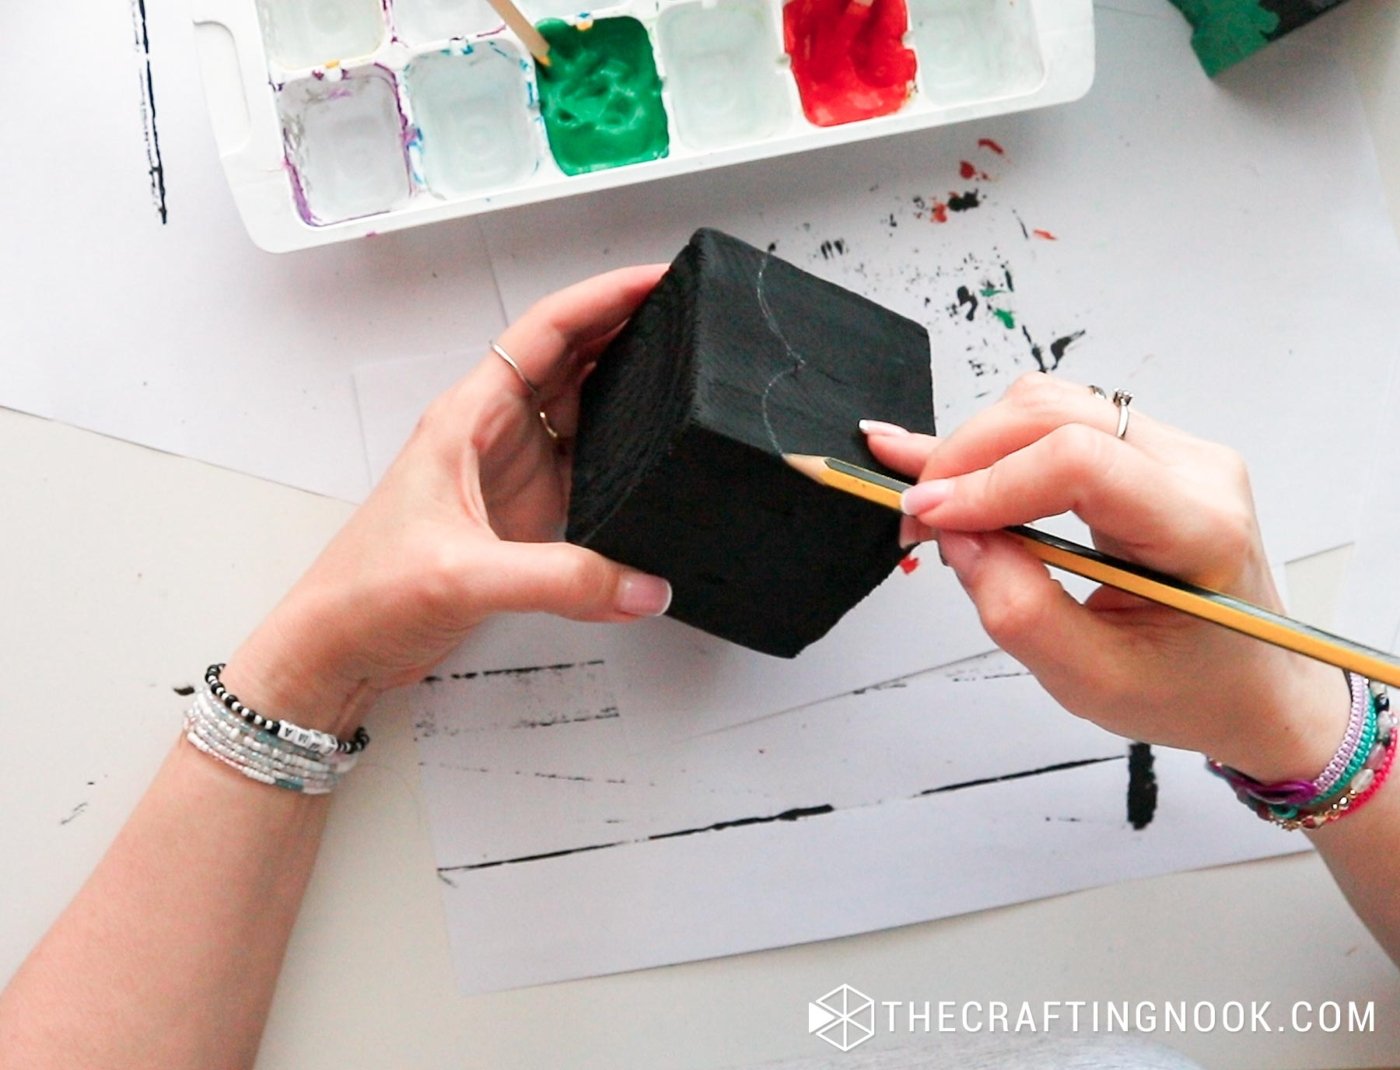
Step 2: Paint the Black Base Coat
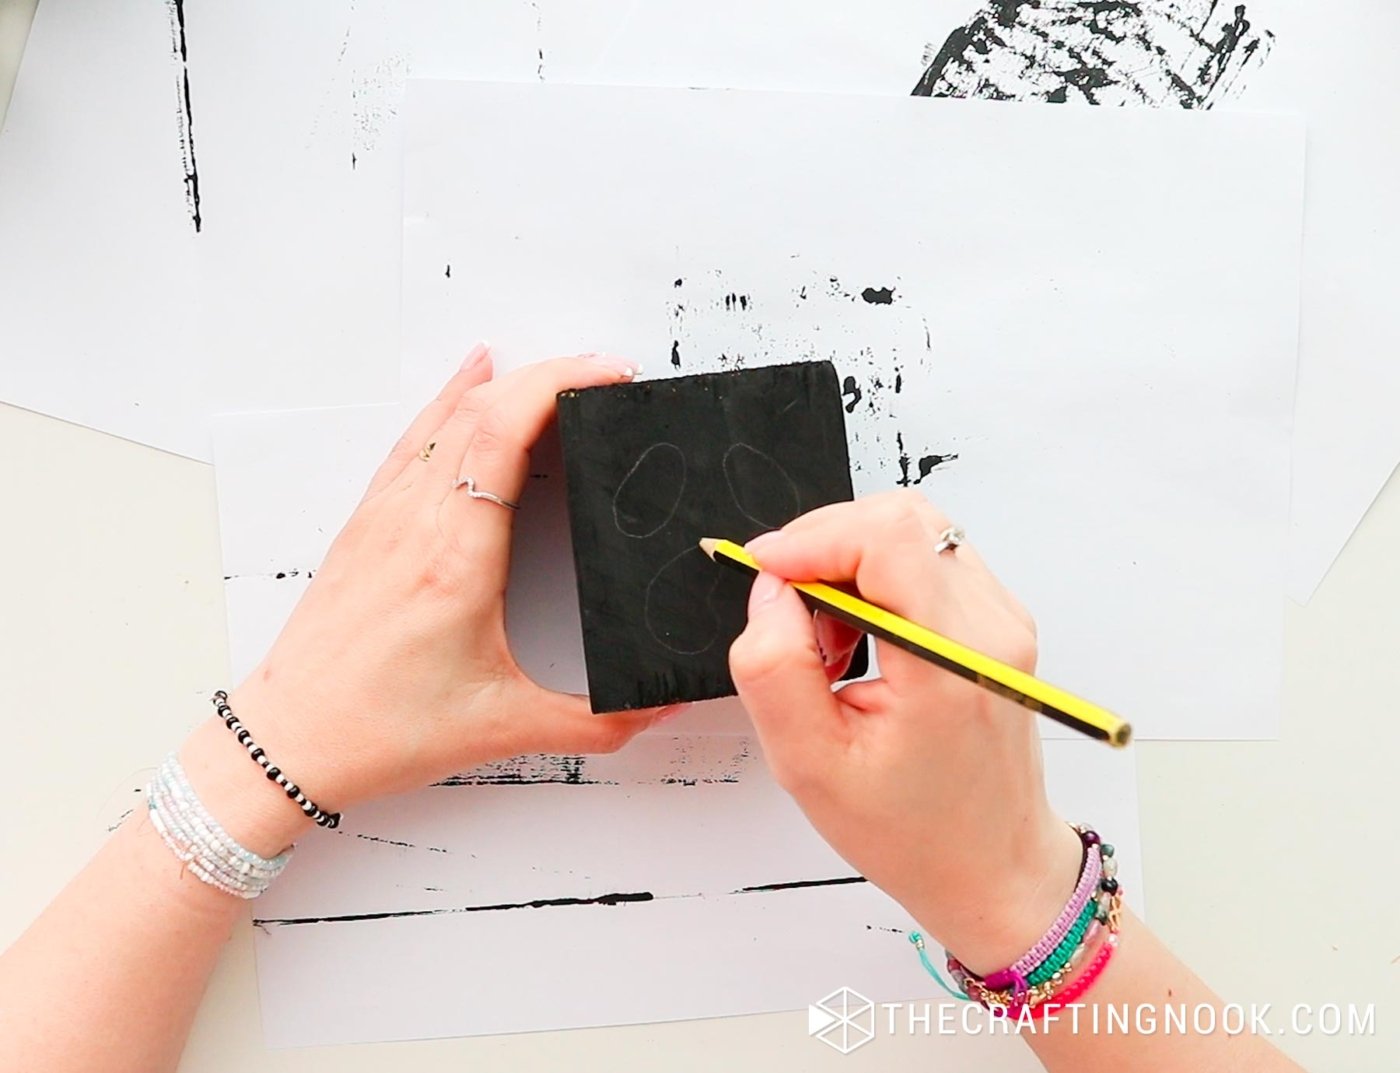
To give our blocks that spooky, night-time vibe, I started by painting all the blocks with a solid coat of black acrylic craft paint. I also love that due to wood imperfections, the black will be visible which gives that extra spooky vibe.
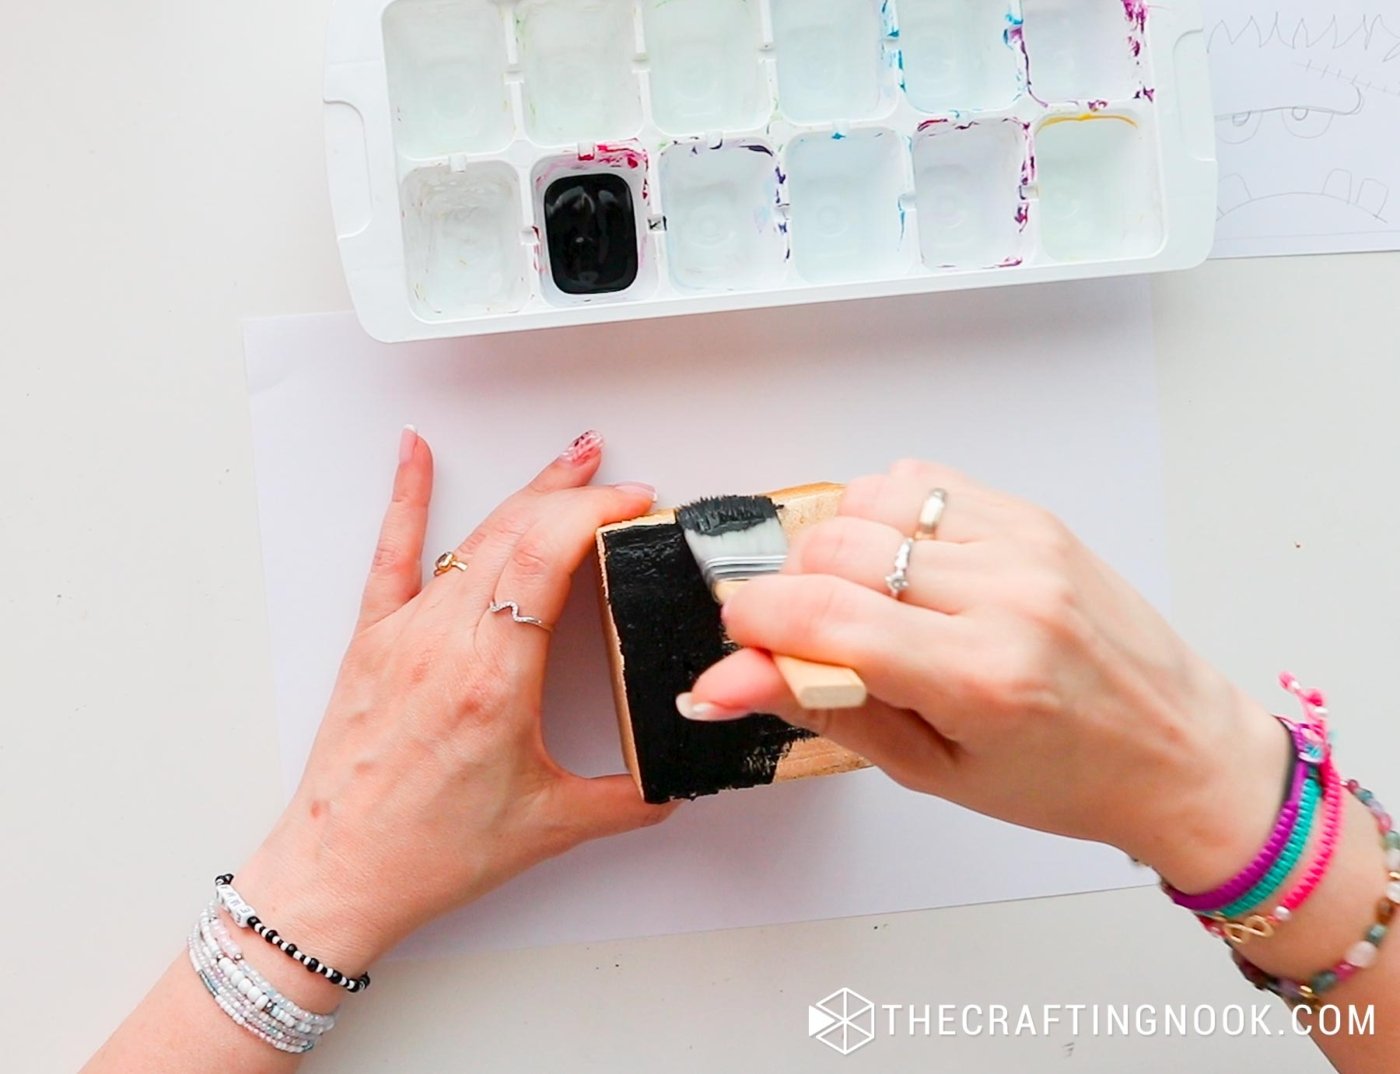
Don’t forget to paint the flad wood base too—this will be the backdrop for your blocks when we’re done.
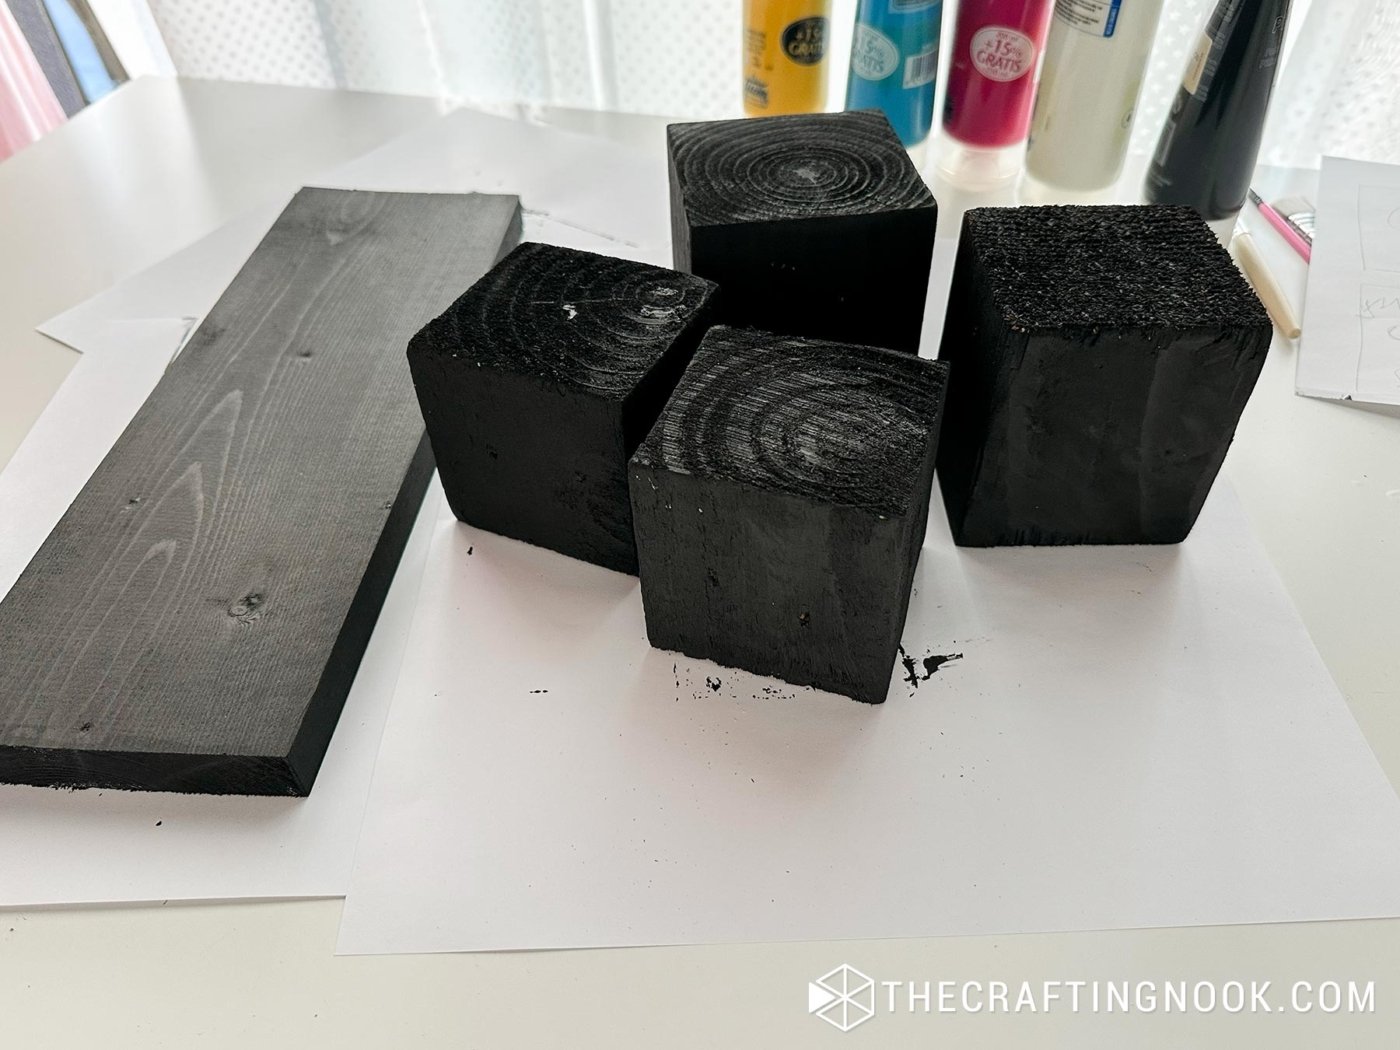
Let it all dry completely.
Step 3: Paint Your Characters
I went with four classic Halloween characters: a ghost, Frankenstein, Dracula, and a jack-o-lantern. You can totally switch it up with your favorite spooky characters!
I hand-drew them on a sheet of paper. As you can see, there’s no need for illustrator skills. Because these are monsters, imperfection is your best ally.
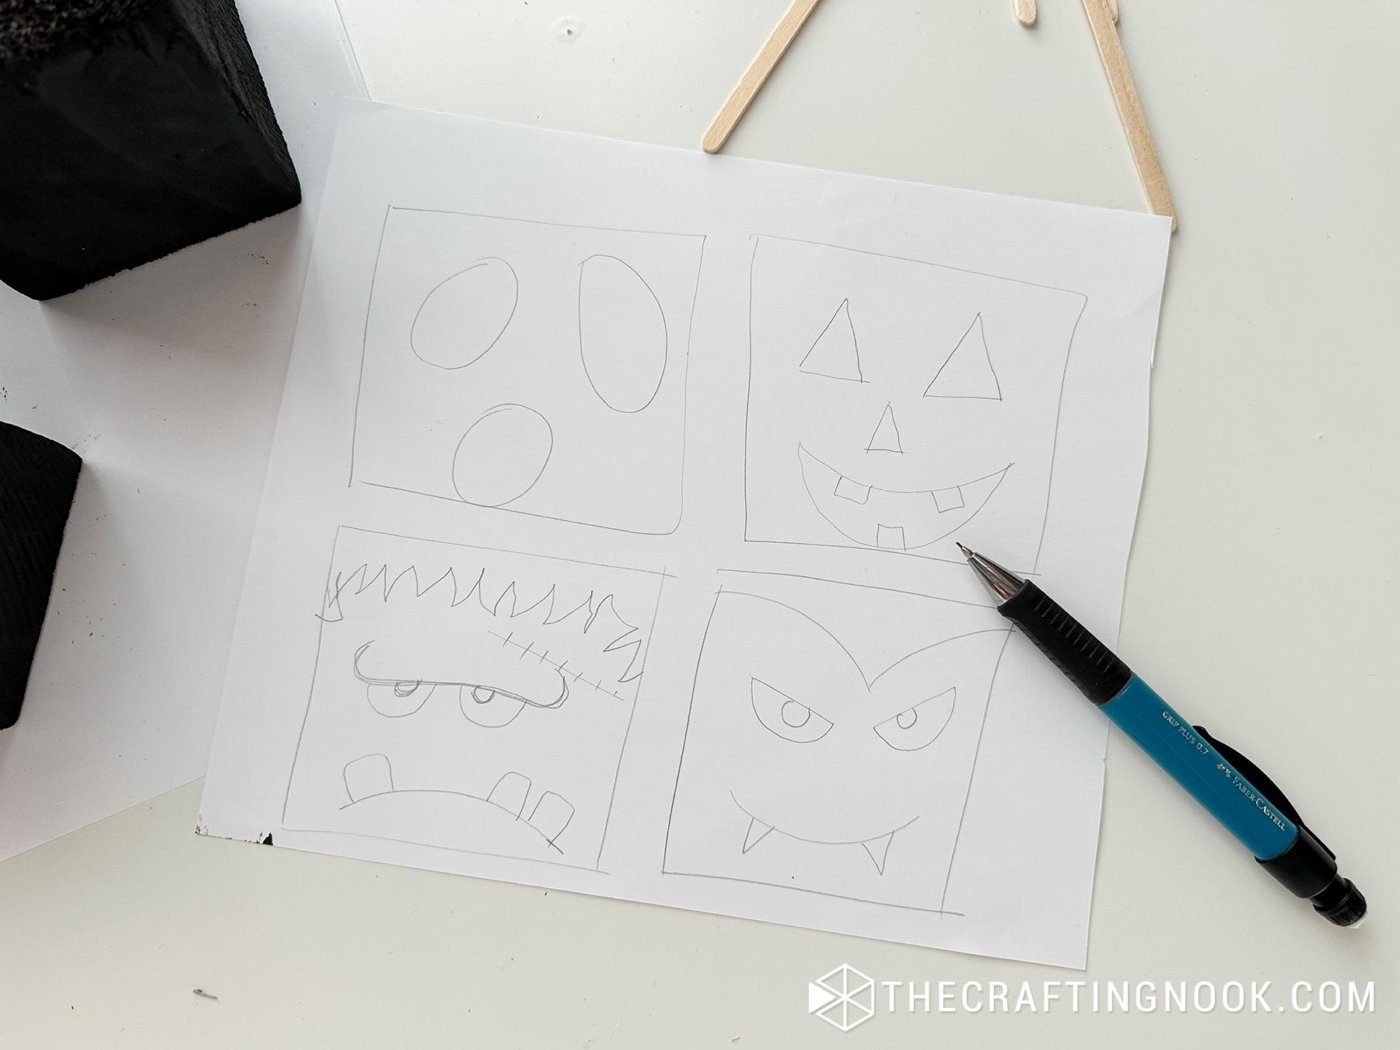
Ghost:
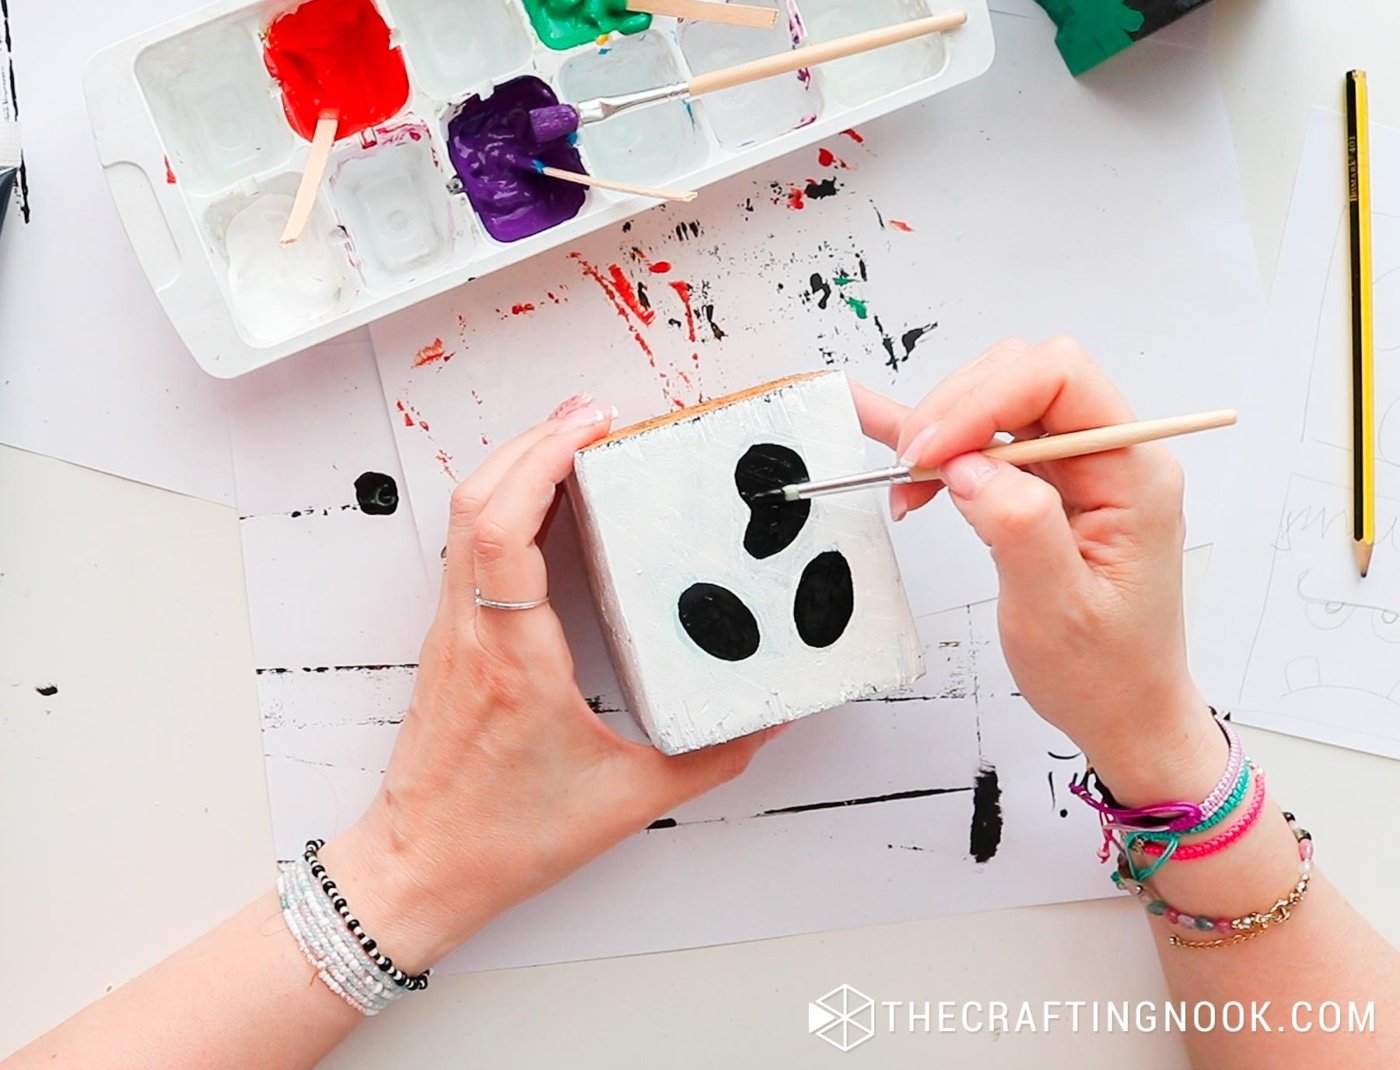
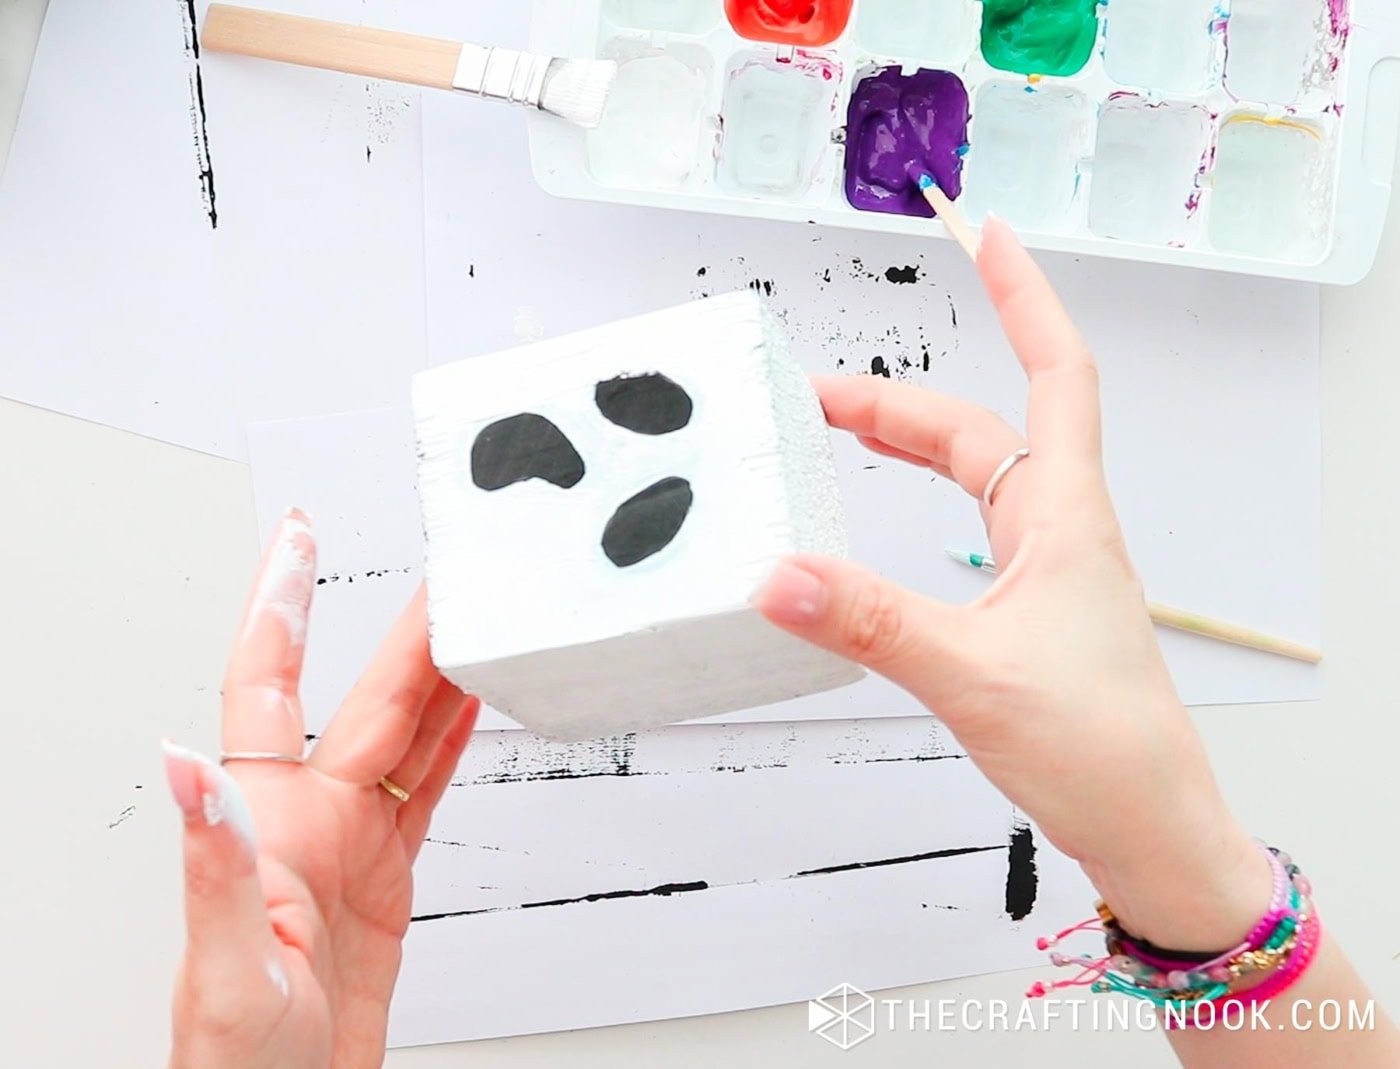
With a pencil, I hand draw the ghost’s face, giving it those classic, shocked eyes and mouth.
Then with a fine brush and white paint, I traced the eyes and mouth and then painted the whole block white as a second coat of paint.

Set it aside to dry.
Then I retouch the paint, lines, and shapes with the white and black paint and a fine brush.
Let it dry.
Jack-o-lantern:
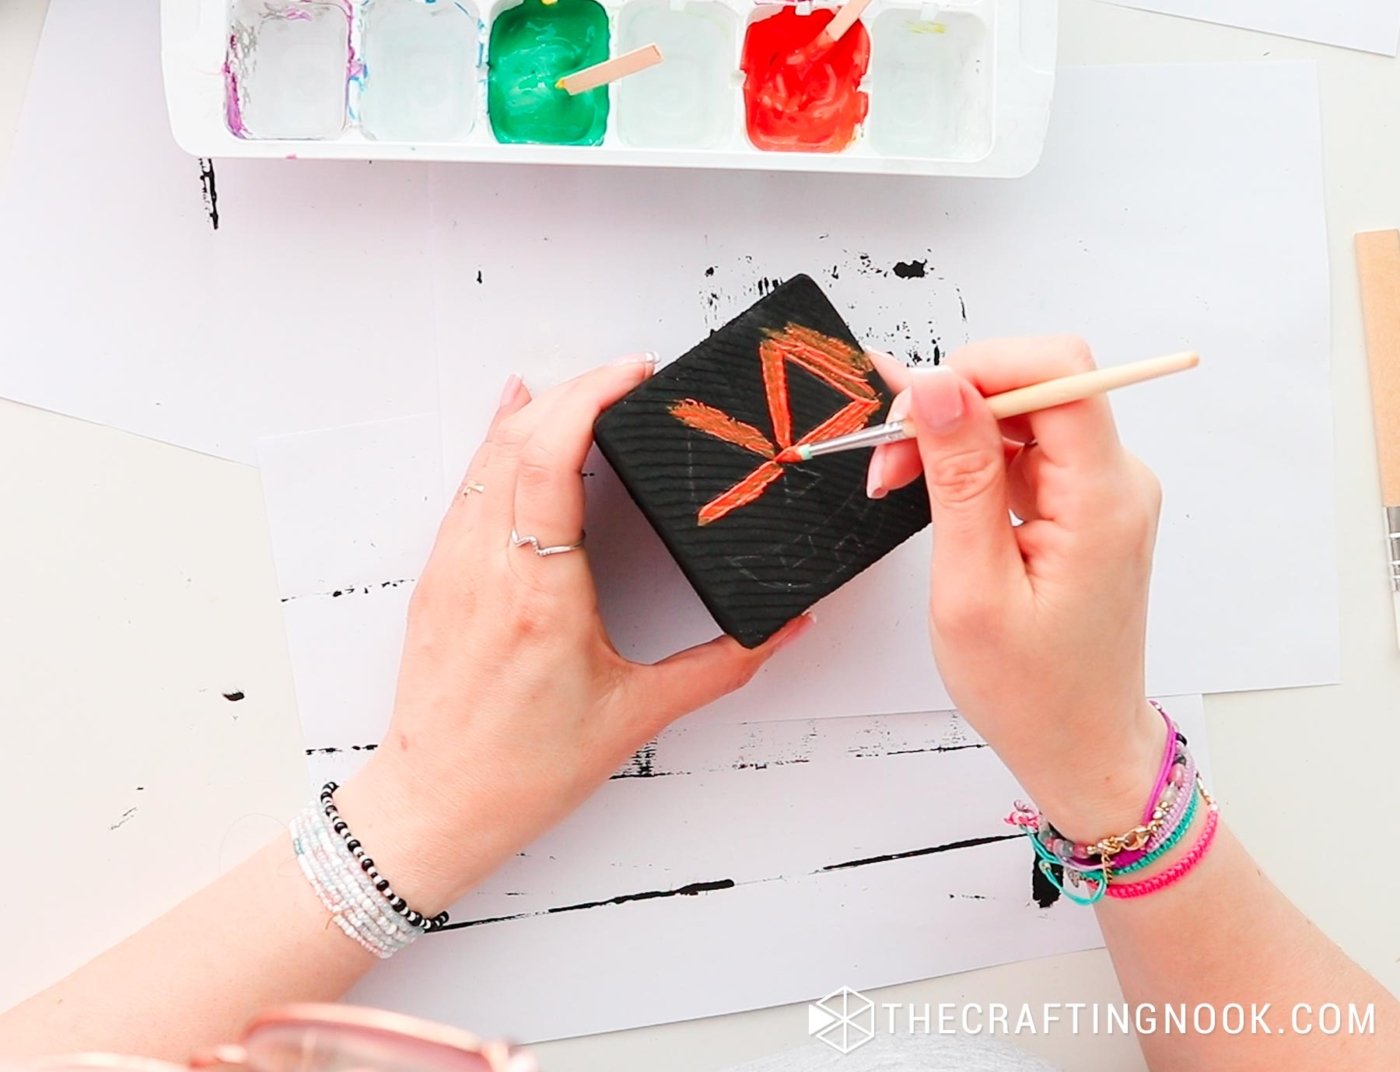
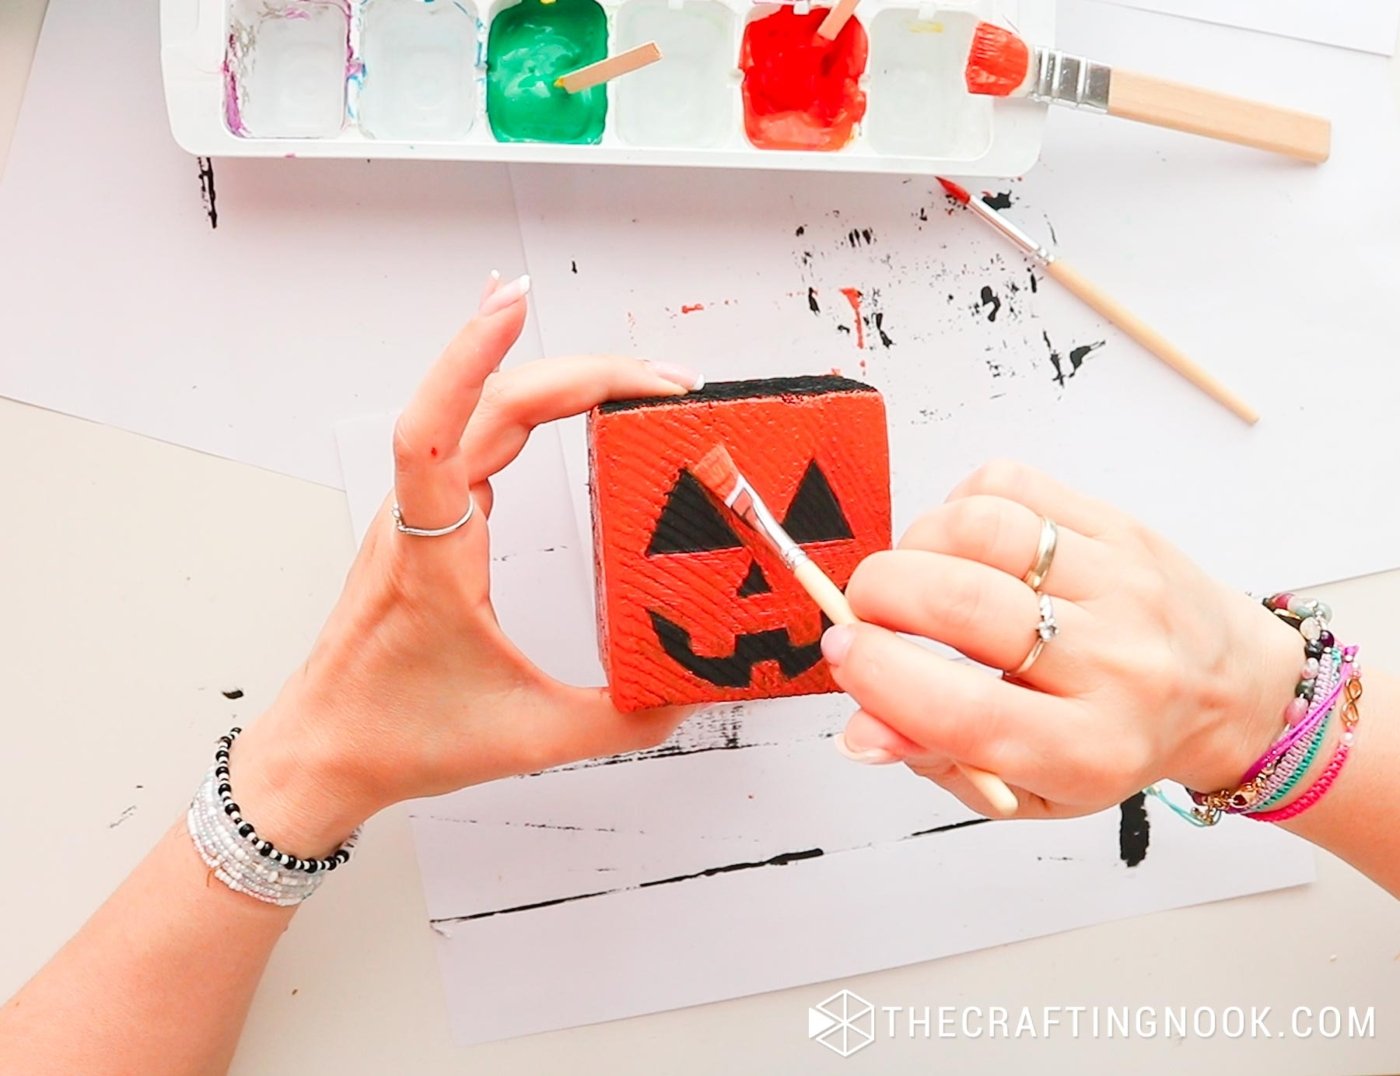
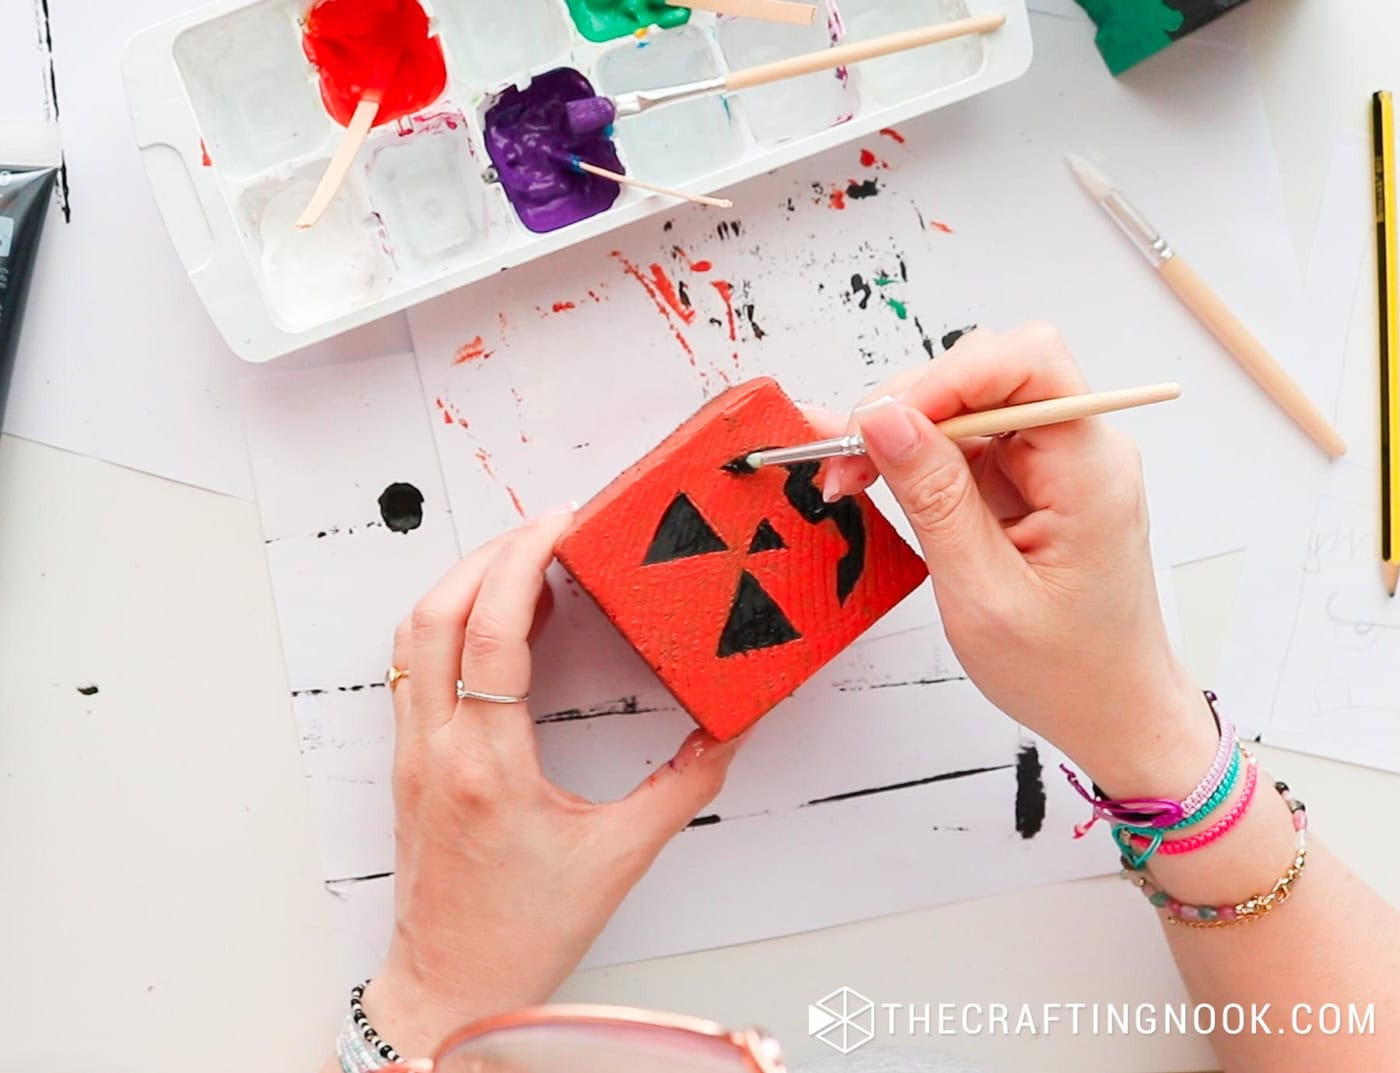
I did the same as with the ghost, I drew on a triangle-eyed, jagged-toothed face.
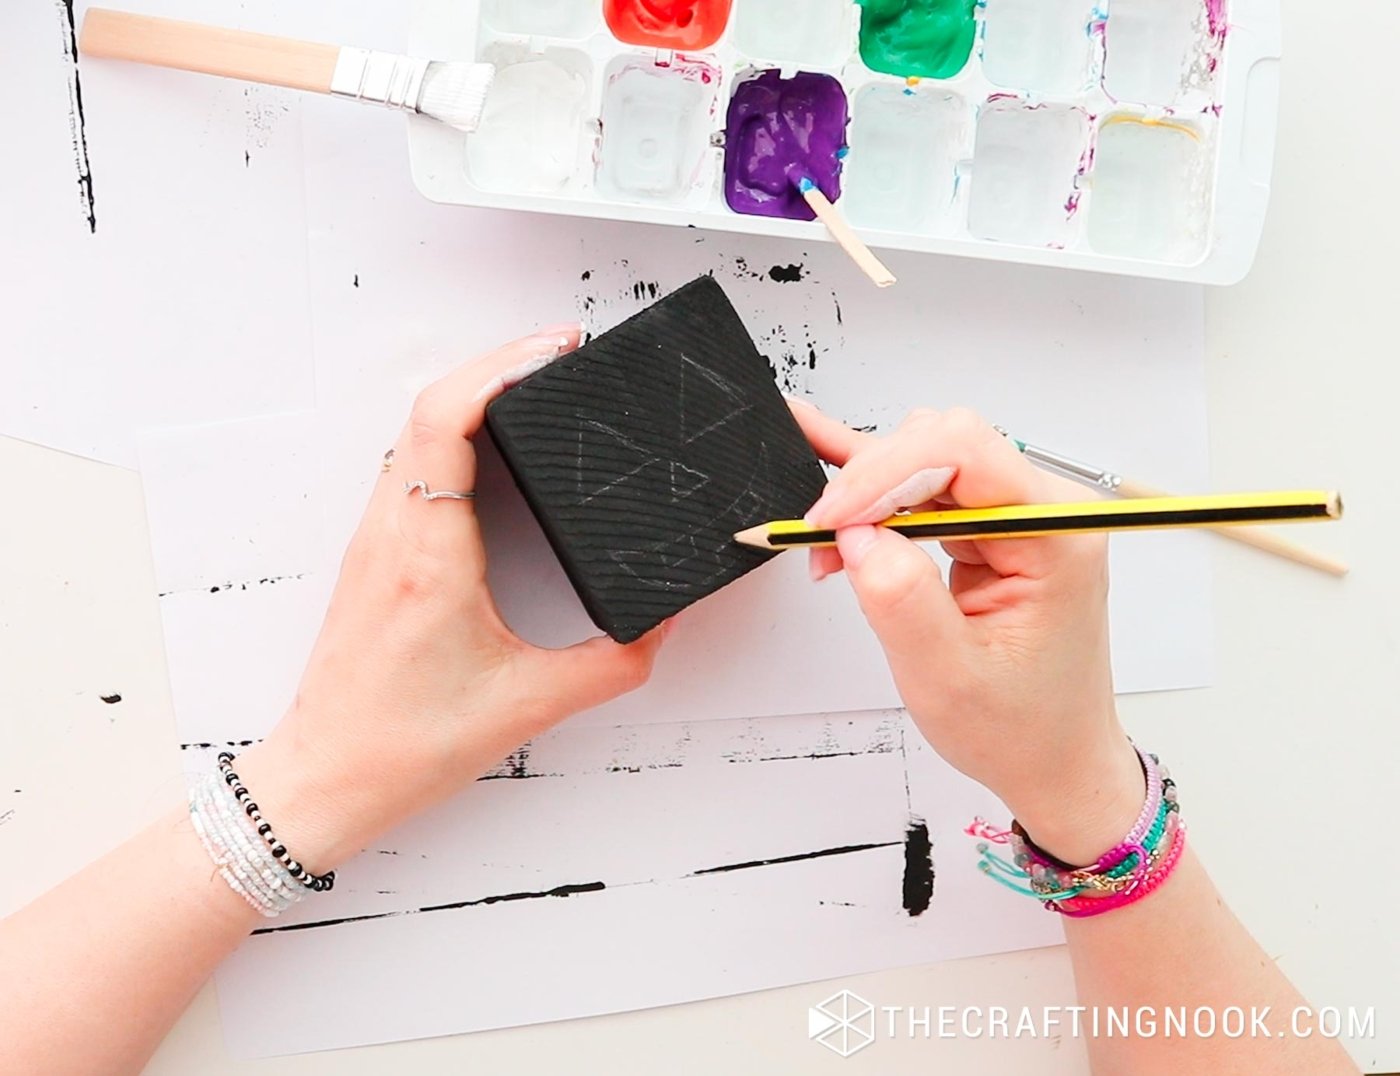
Then with a fine brush, I traced the shapes with orange paint followed by painting the whole block with a second coat of orange paint.
Set it aside to dry.
Then I retouch the paint, lines, and shapes with orange and black paint and a fine brush.
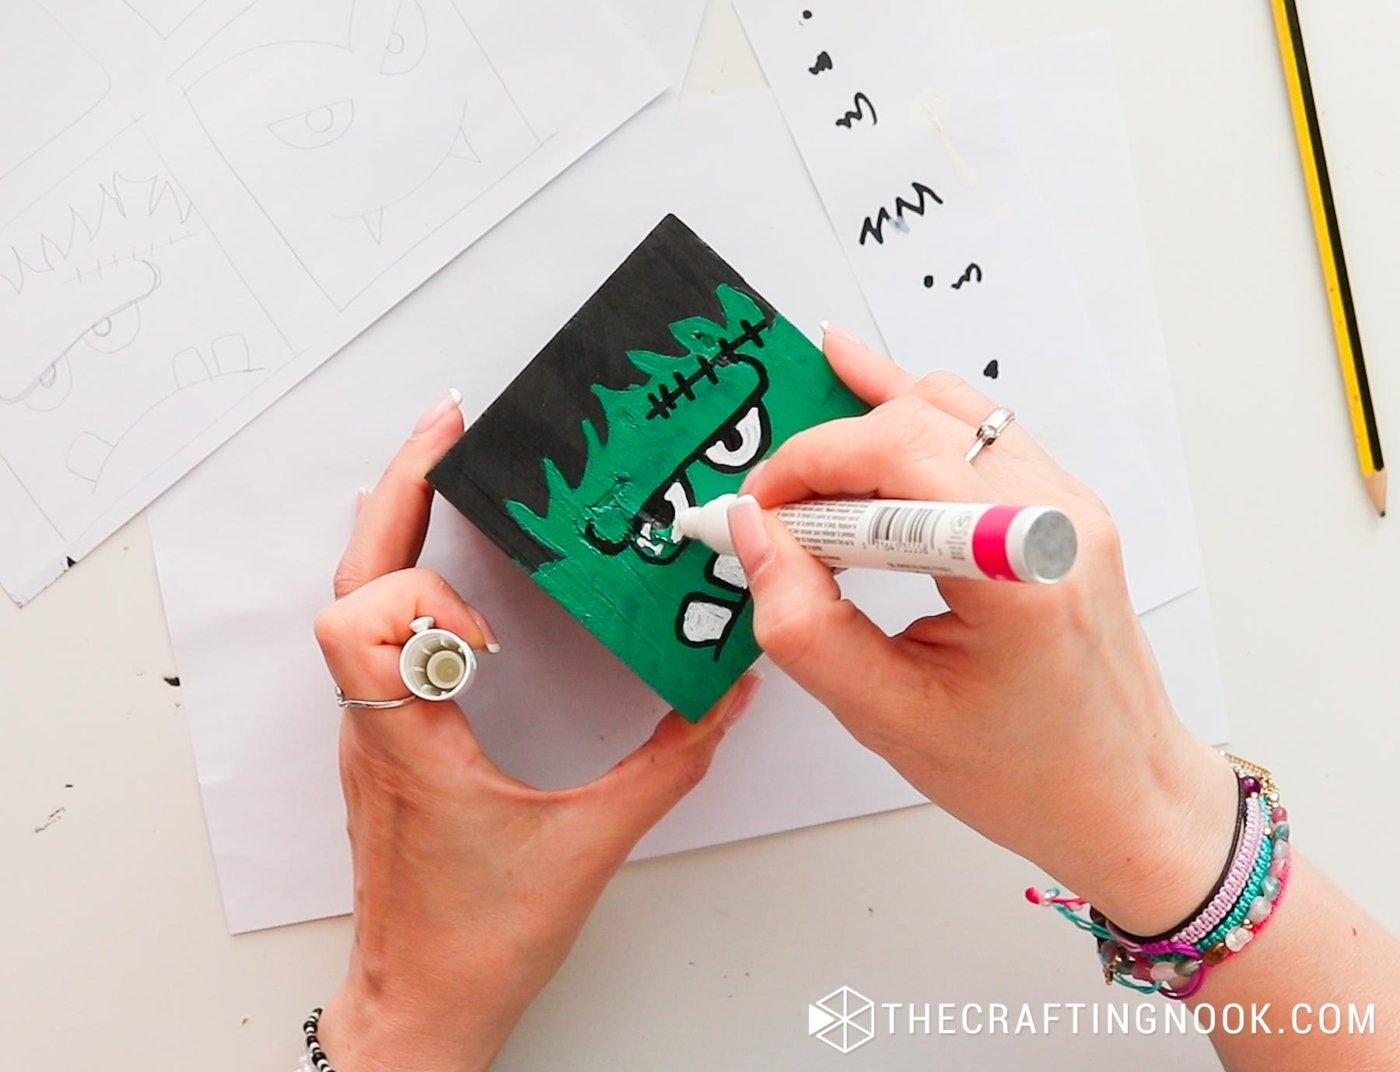
Frankenstein:
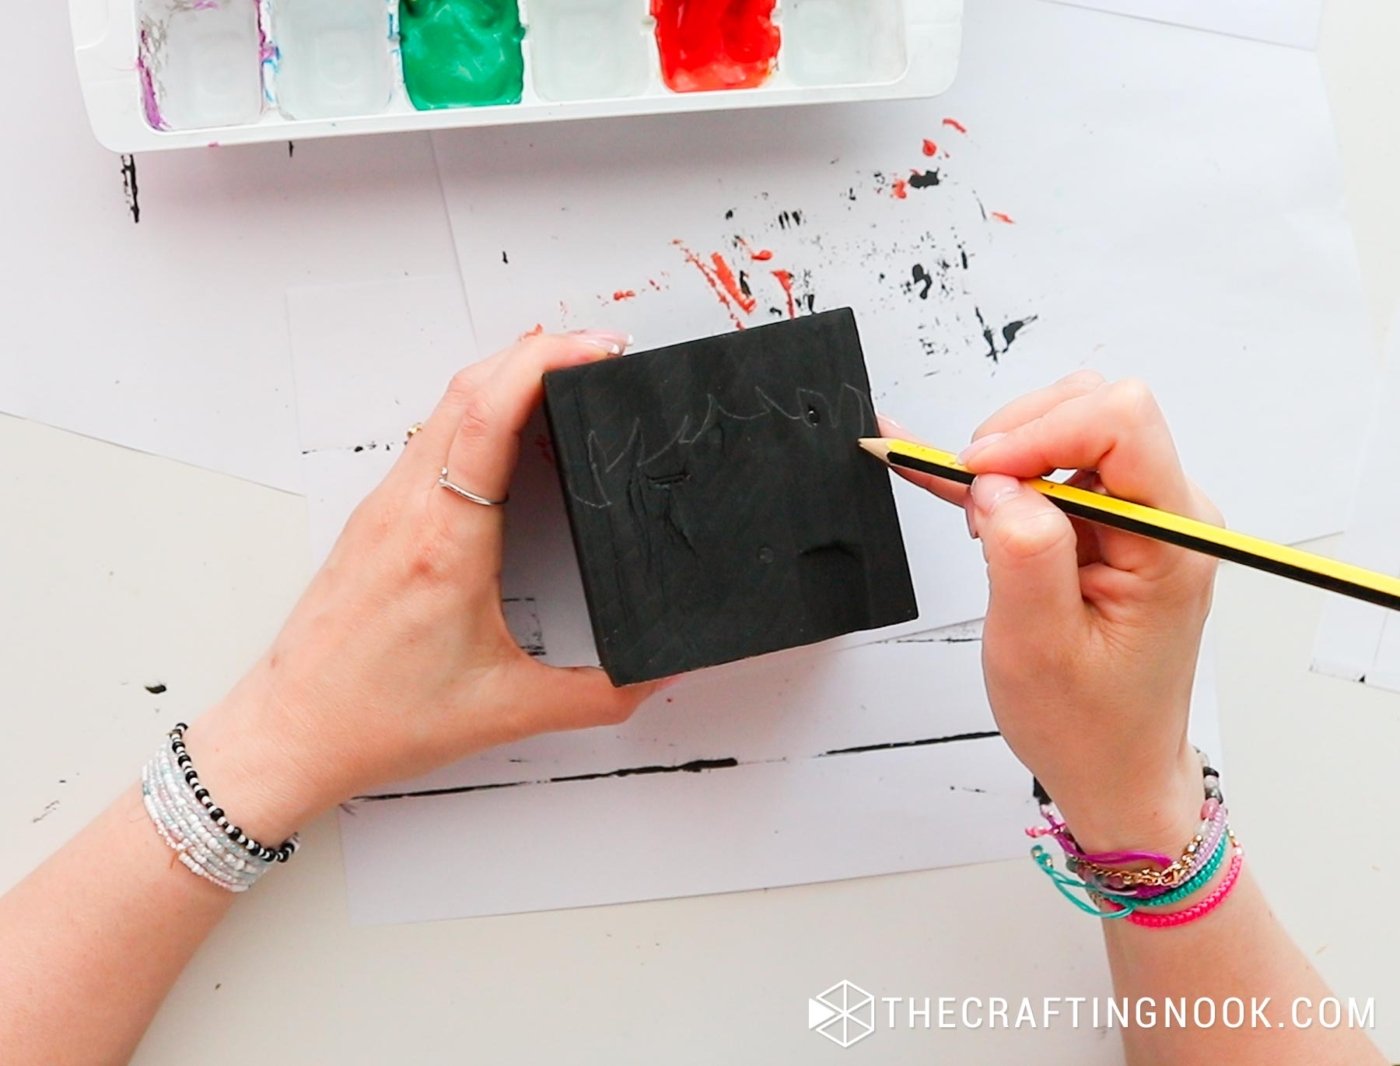
I traced the shape of the hair at the top and a small part of the sides of the blocks.
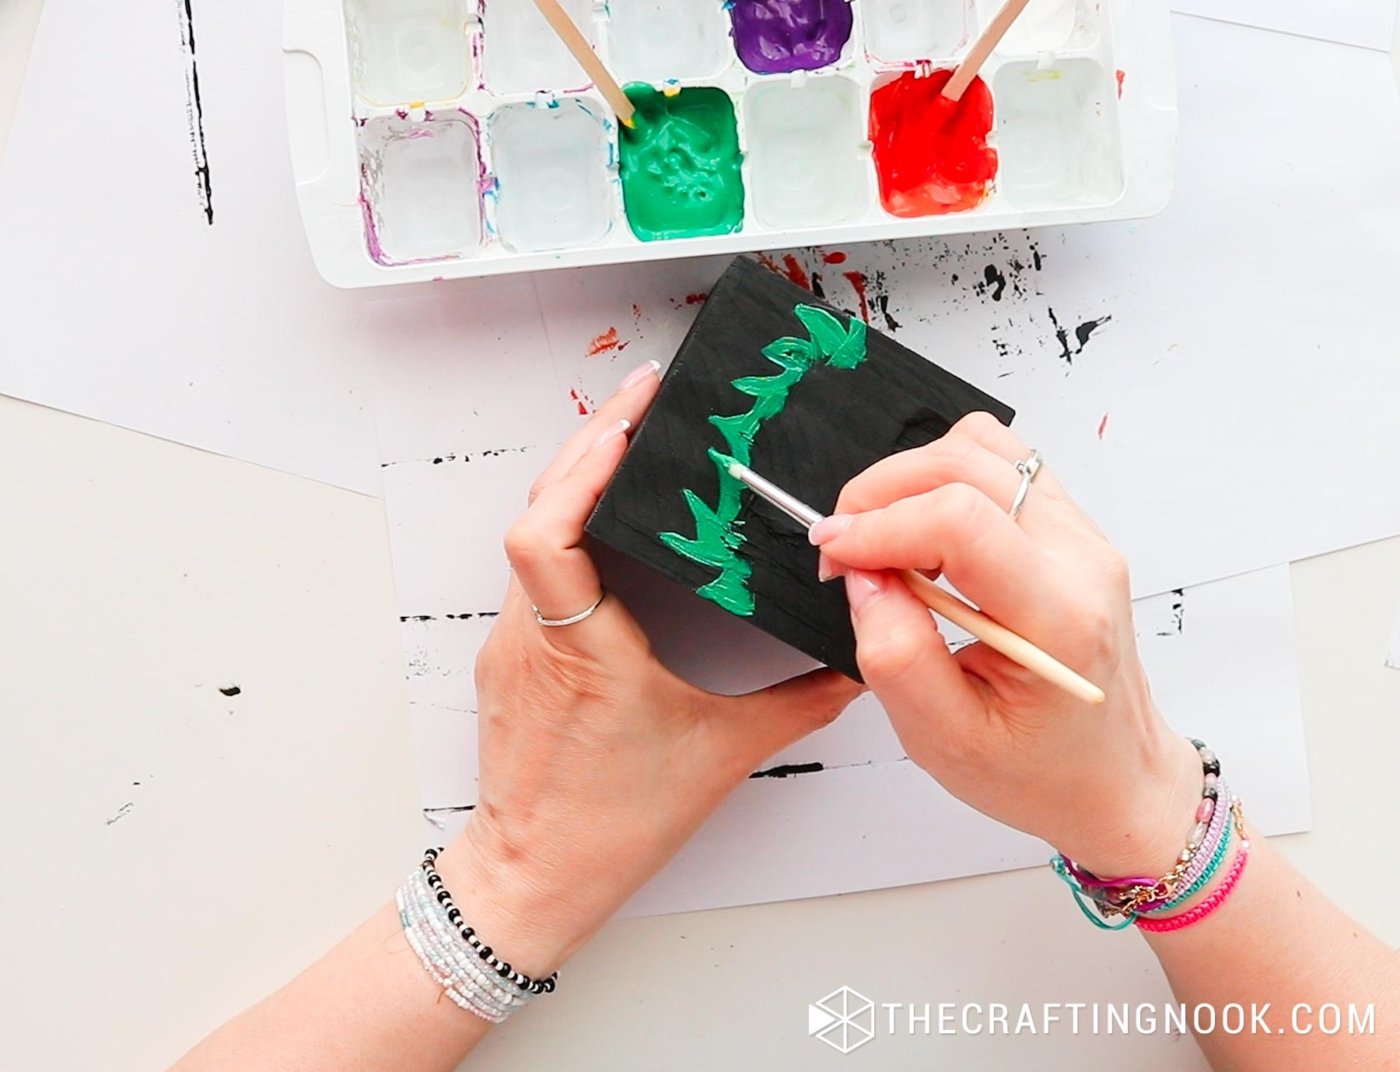
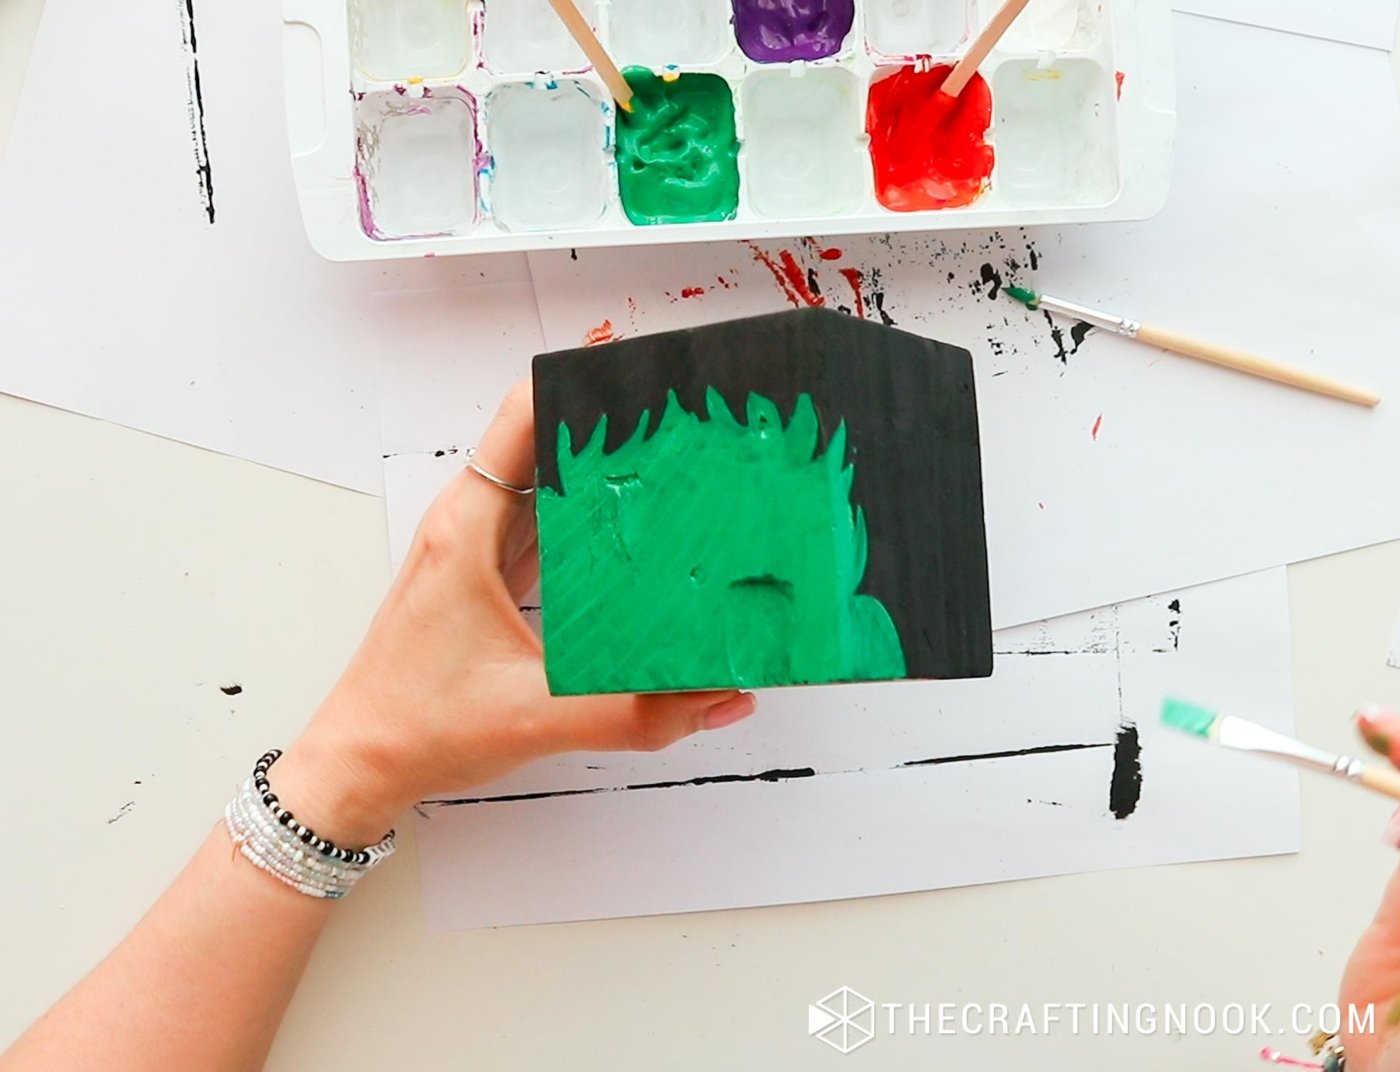
Then I used green paint and covered the front side tracing and leaving the hair-like shape on the top.
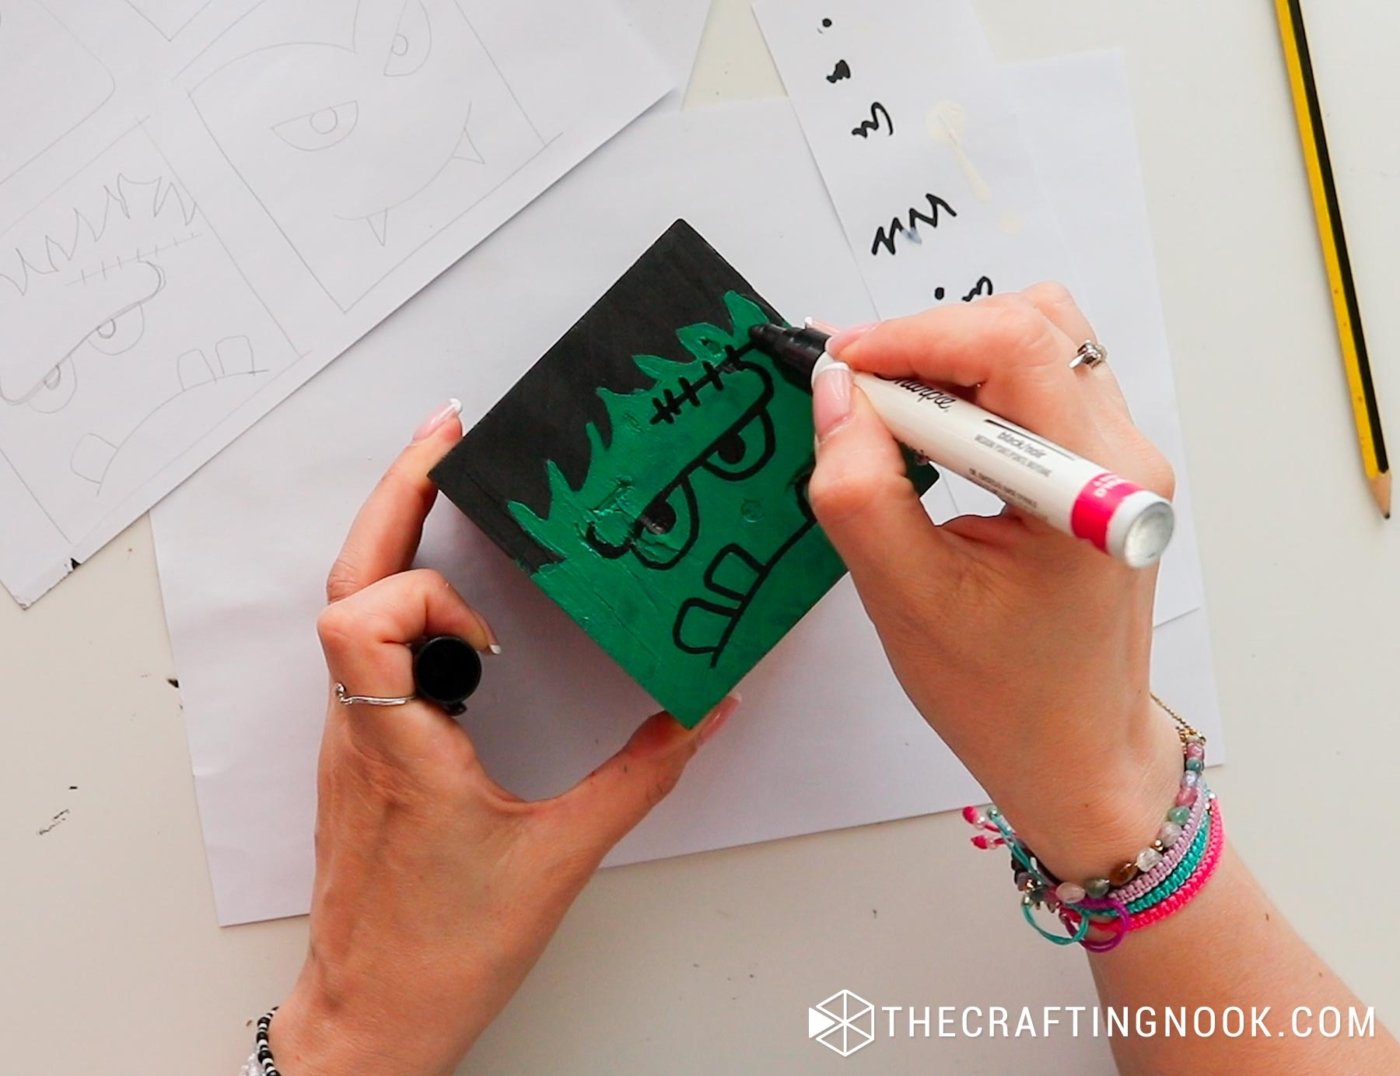
Once dry, add details like scars, a stitched-up brow, sad eyes, and a sad mouth with creepy teeth coming out with your oil-based black and white markers or paint pens.
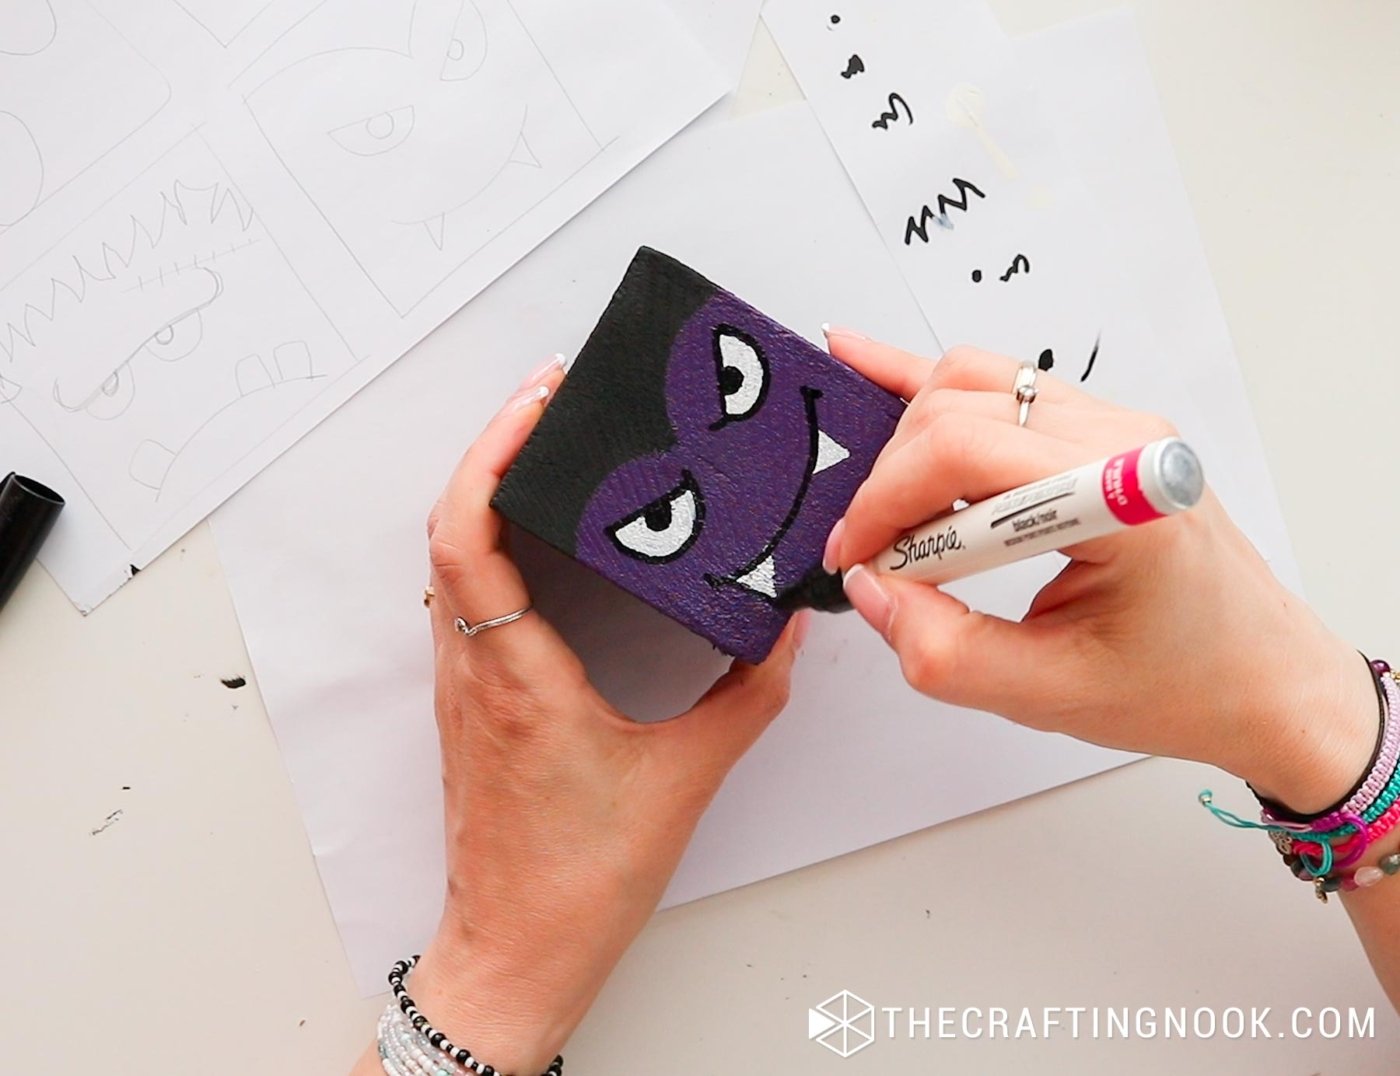
Dracula:
Just like like did with Frankenstein, I hand-drew the classic widow’s peak hair with a pencil and gave a little bit of face on the sides of the block.
Then, I painted with purple paint all the face area. Let it dry.
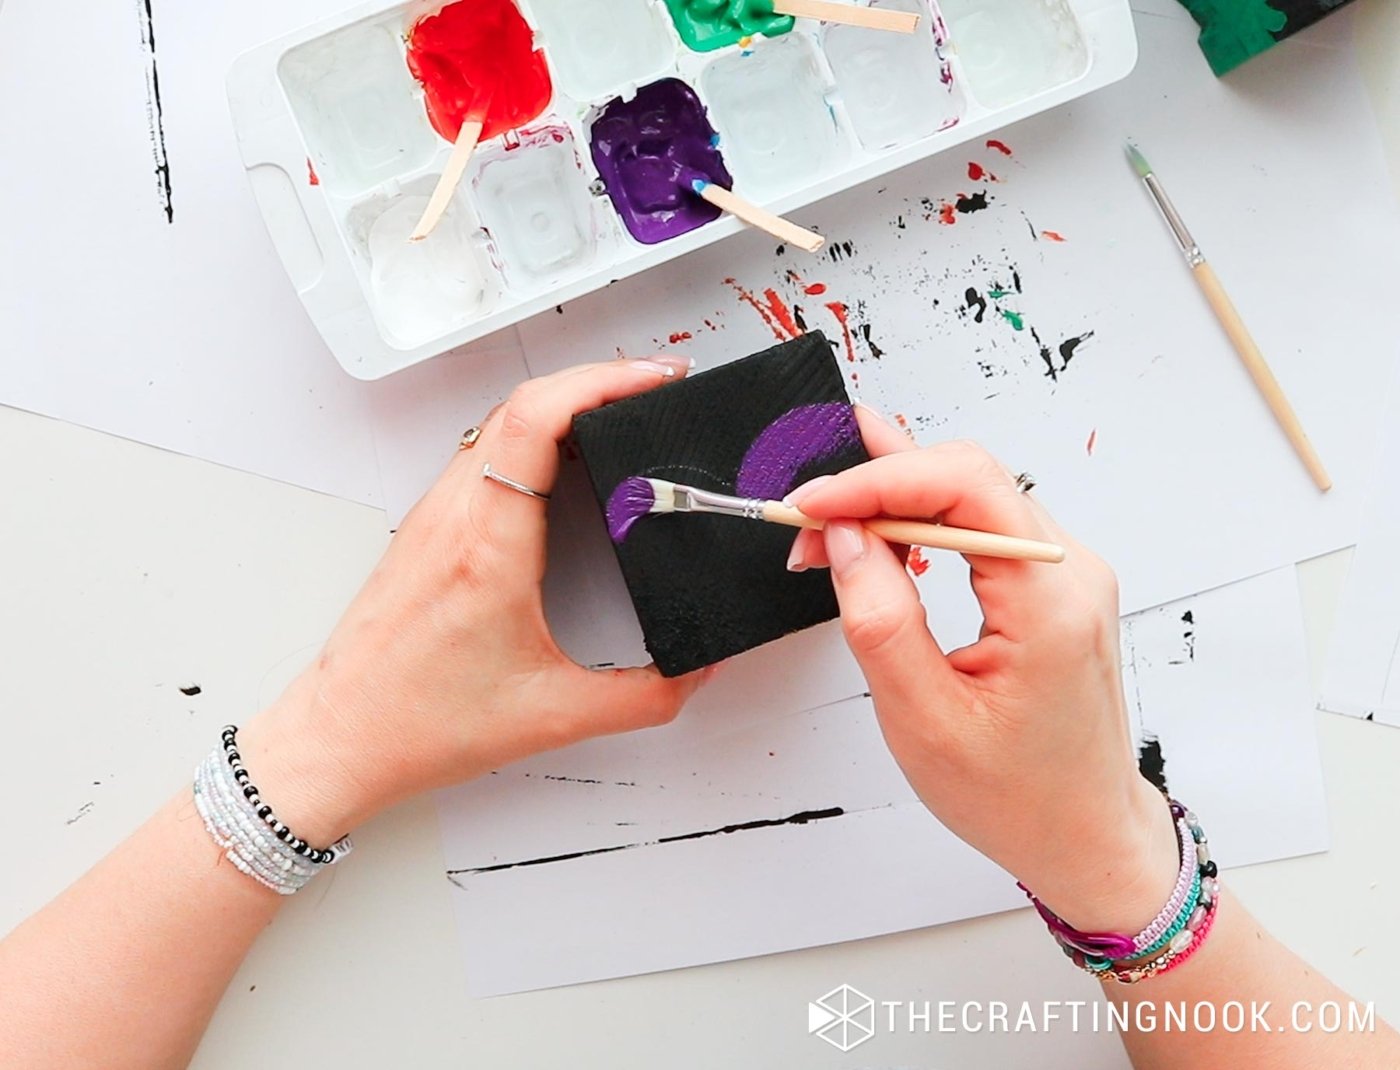
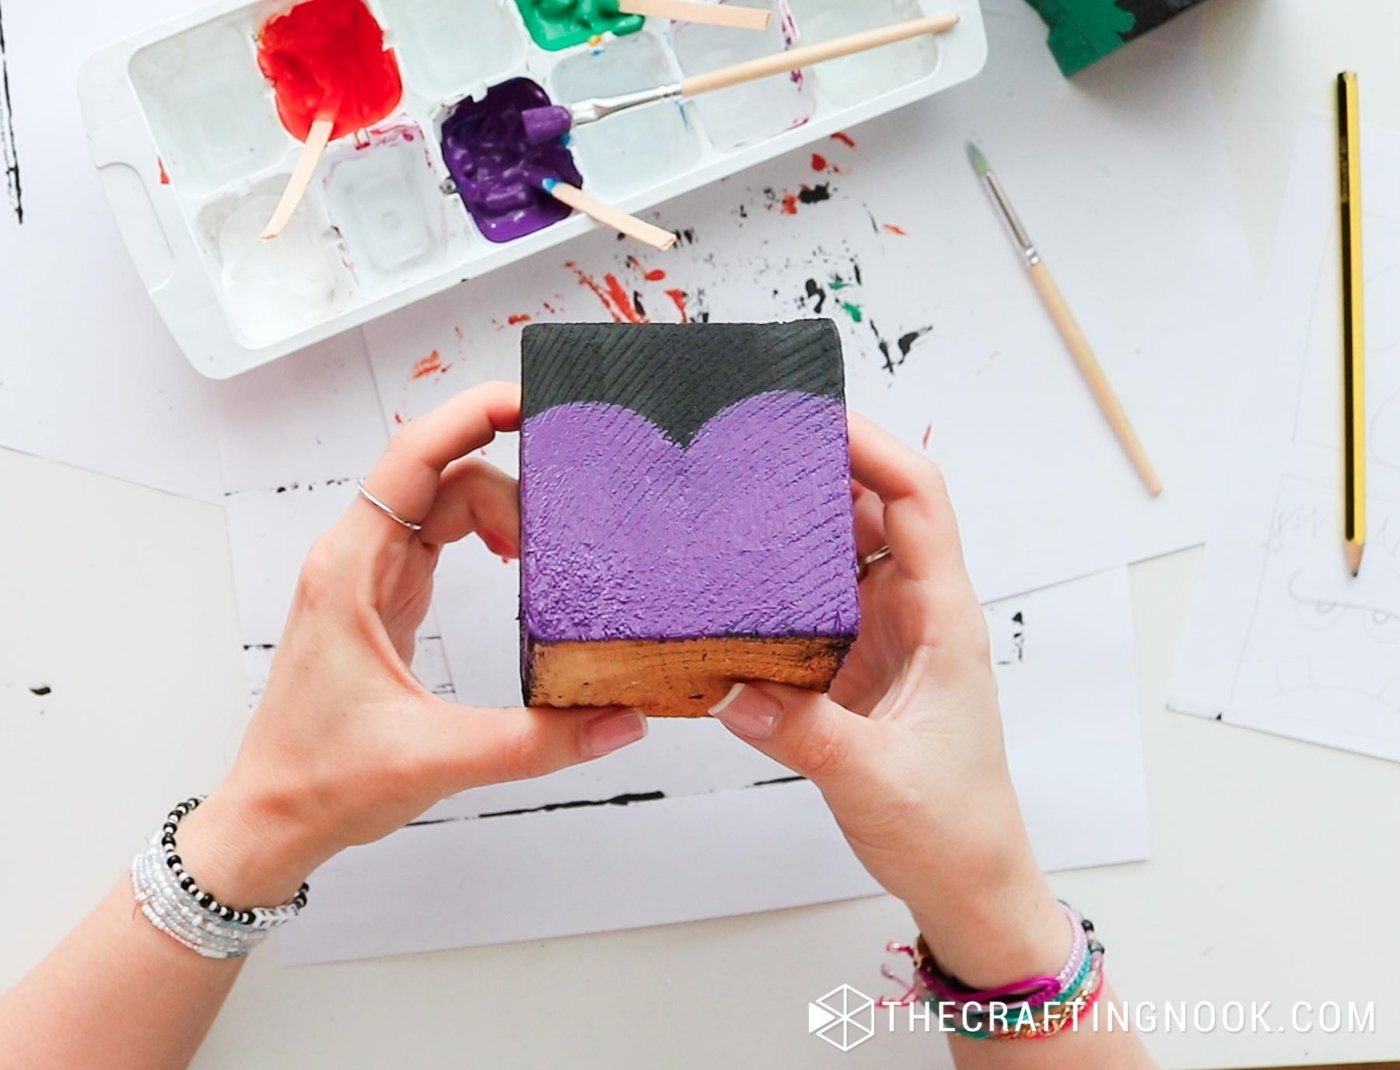
Once dry, I drew sharp fangs, and creepy eyes with my black and white oil base markers.
Feel free to get creative with the faces—you can make them as spooky or silly as you want!
Let them all dry well.
Step 4: Prepare the Wooden base
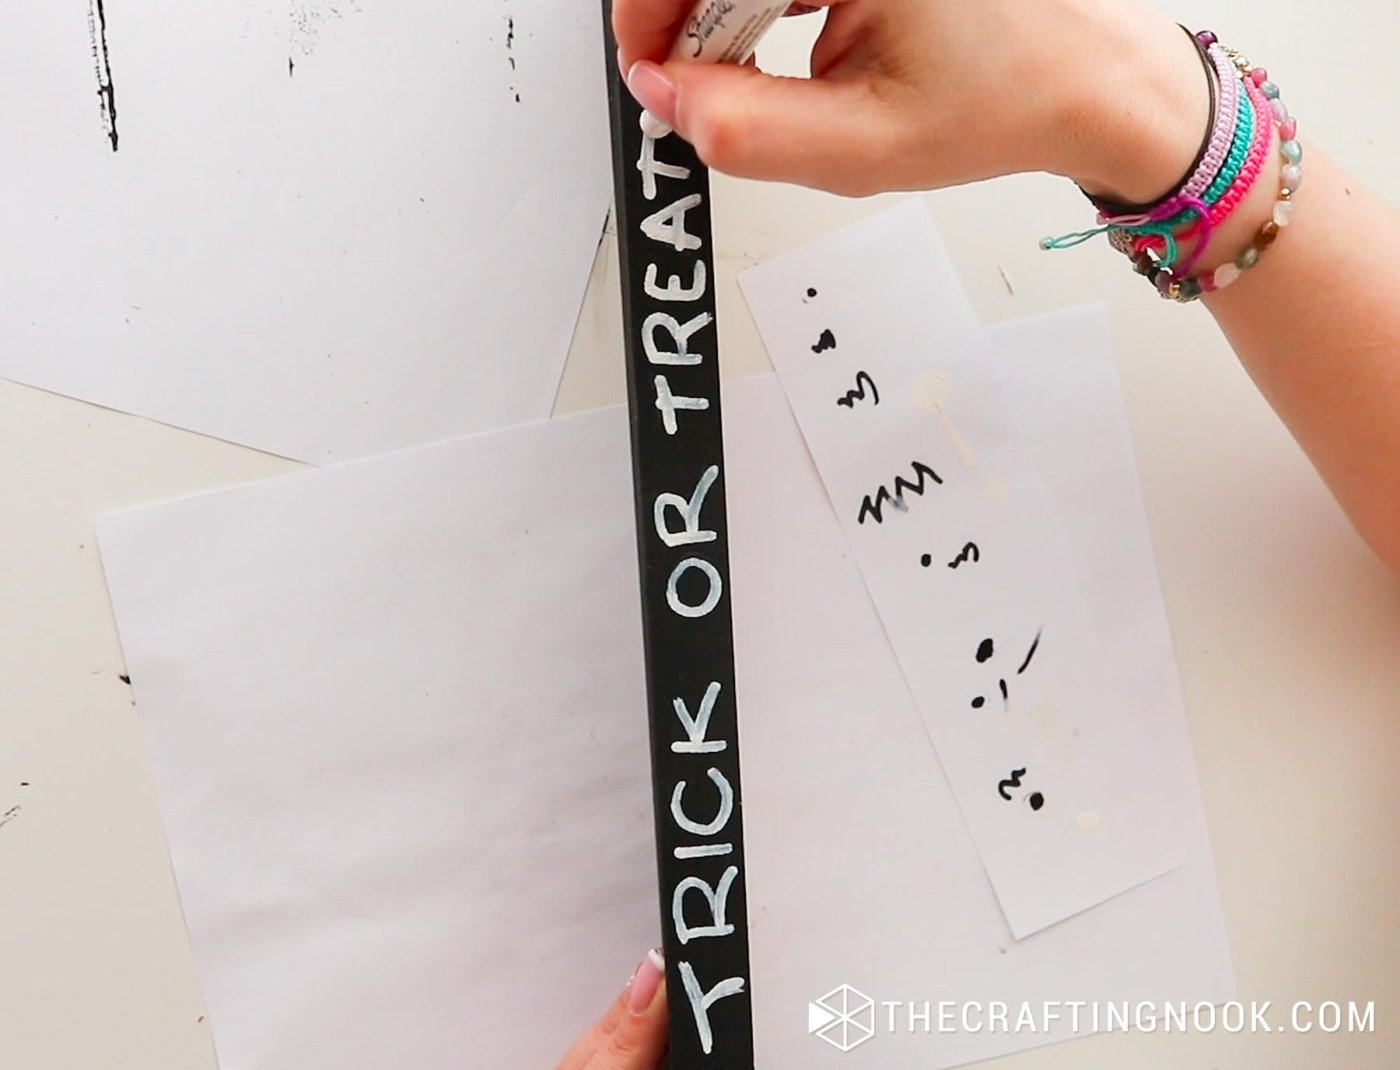
I hand-wrote “Trick or Treat!” on the front of the black base with my oil-based white marker. You can add any Halloween message you like. Have fun with it!
Once everything is dry, you can seal the blocks with a craft sealer to keep them looking fresh year after year.
Step 5: Assemble Your Blocks
Once all your characters are done and completely dry, it’s time to bring it all together.
I placed my four Halloween blocks on top of the black wood base, side by side, creating a fun little lineup of spooky monsters.
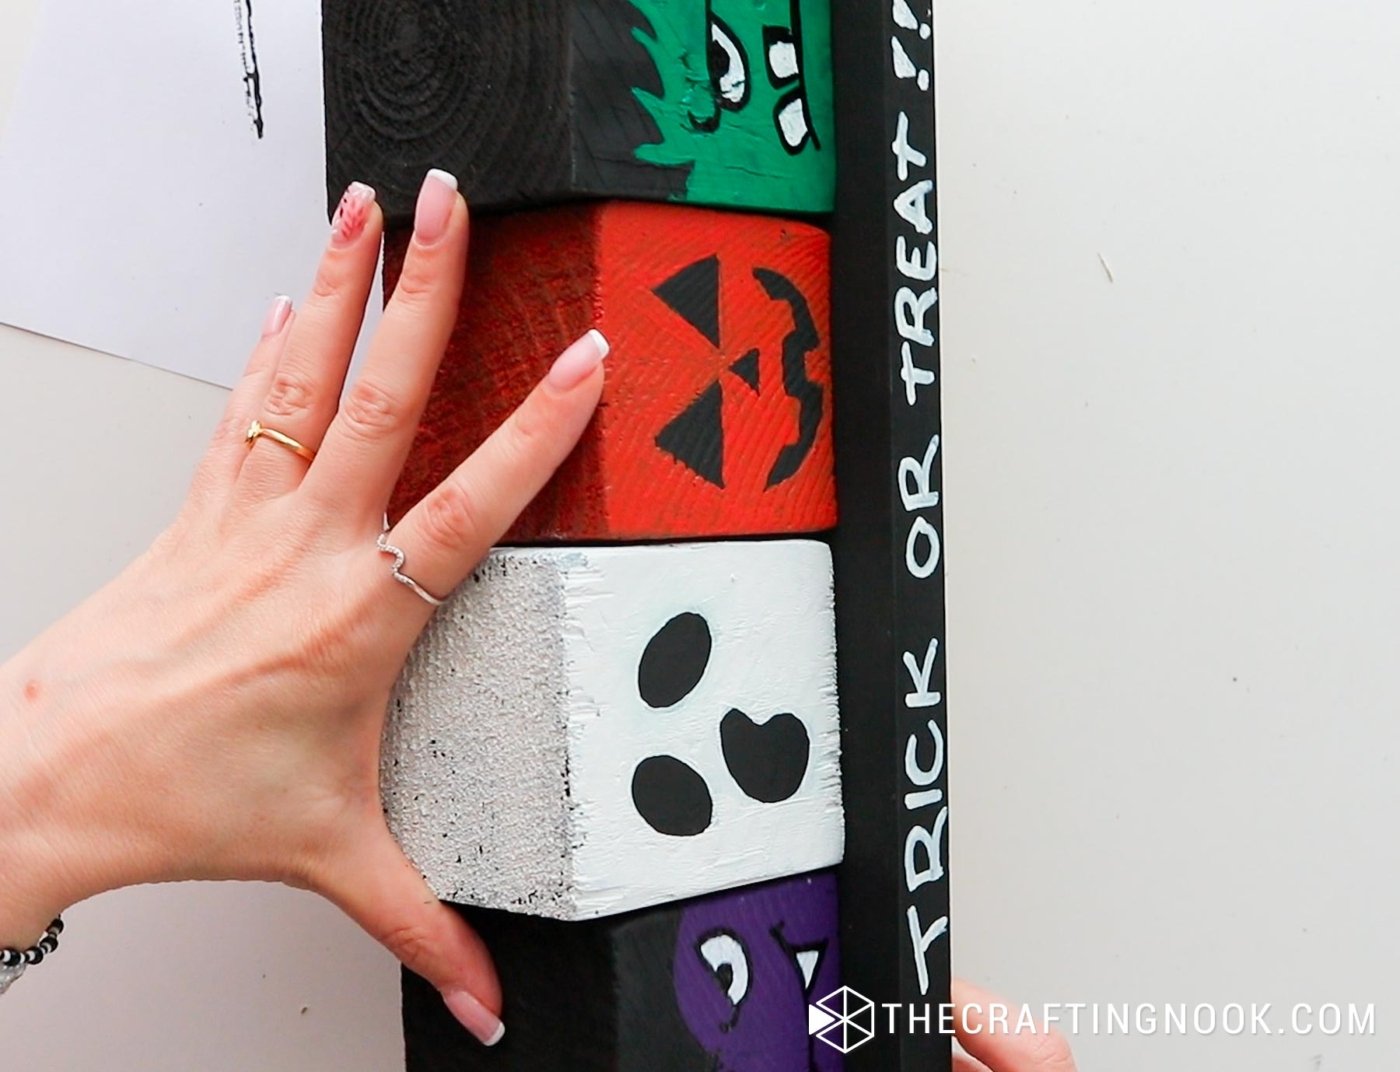
You can glue them down with a hot glue gun if you want them fixed in place, but I left mine loose so I can switch them around or even use them individually in different parts of the house.
And You’re Done!
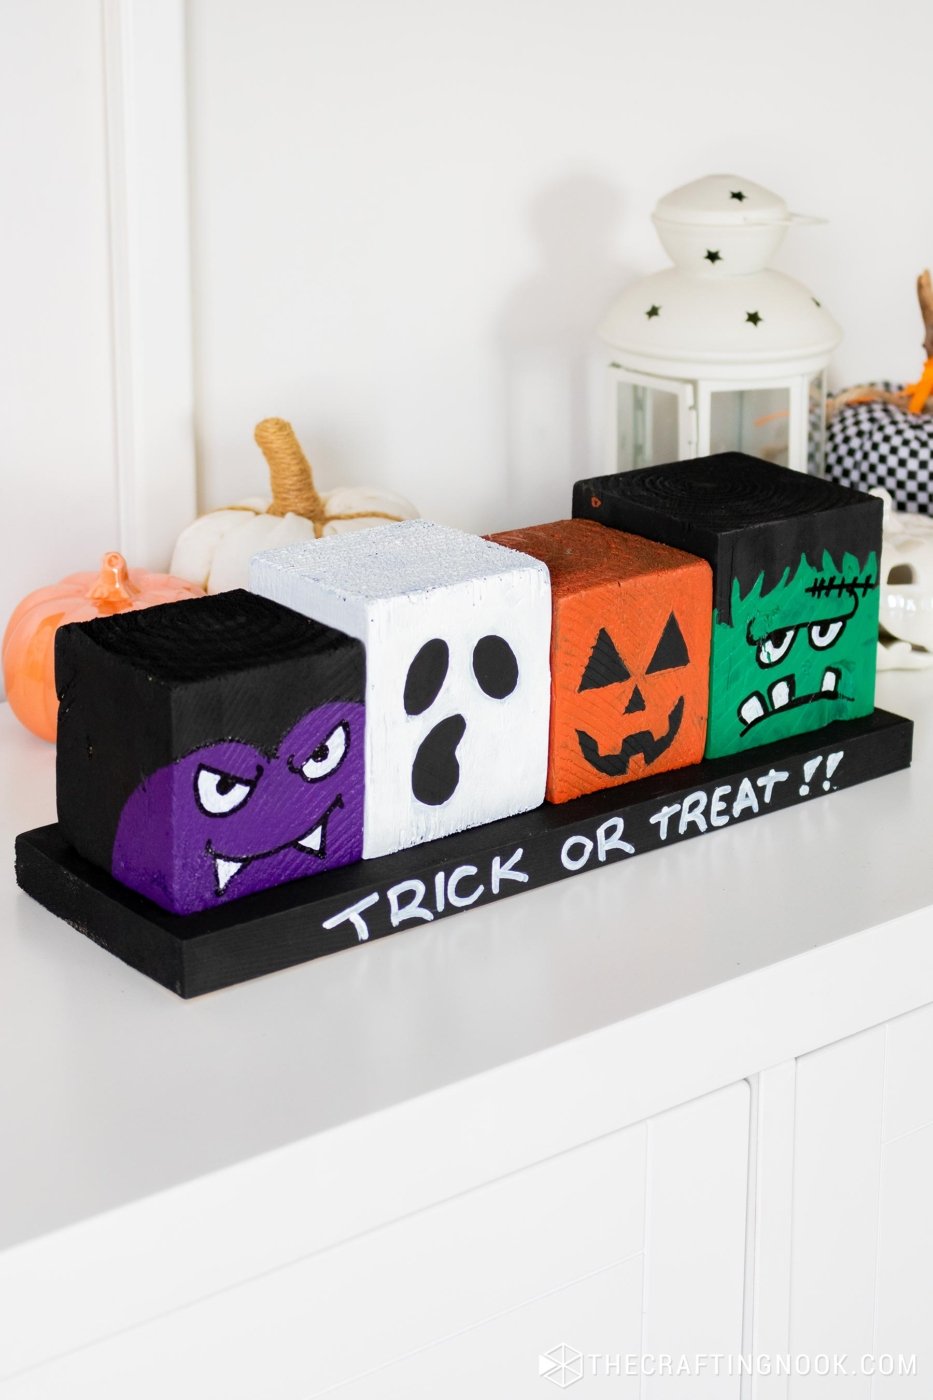
Now you’ve got an adorable set of DIY Halloween Wood Blocks to dress up your entryway or mantel.
The best part is, that this project is so customizable—change up the characters, add different colors, or even make a few extra blocks to create a whole spooky village!
I hope this project inspires you to get crafty this Halloween. Let me know what spooky characters you come up with!
Crafting Tips
- If freehand painting isn’t your strong suit, use stencils or trace designs onto the blocks before painting. You can even print out templates of spooky faces and transfer them using tracing paper.
- The beauty of Halloween decor is in the quirky, imperfect details! Don’t stress about perfectly straight lines or matching the colors exactly. The more “handmade” it looks, the spookier it is.
- Get the whole family involved! Kids love painting, and this project is simple enough for them to join in. They can choose their own spooky characters or paint their favorite Halloween colors.
- Don’t feel limited to Frankenstein and Dracula—add your own twist! Think witches, black cats, or even a spooky mummy.
- To make your wood blocks last longer, especially if you plan on displaying them outside, seal them with a coat of Mod Podge or a matte varnish. This will protect the paint and keep them looking fresh for many Halloweens to come!
Alternatives and Substitutions
If you don’t feel like hand-draw, print out spooky character faces, cut them out, and decoupage them onto the blocks using Mod Podge. It’s a quick way to get detailed faces without needing to hand-paint anything.
If you don’t have wood or foam blocks, small cardboard boxes work just as well. You can paint or wrap them in colored paper before drawing or gluing on your Halloween characters.
Also, you could paint different characters on each side of the blocks! You could have four spooky characters on one side and switch it up with fun Halloween patterns (like bats, pumpkins, or spiderwebs) on the other.
You could make it even more fun by turning one block into a Halloween countdown by painting numbers or using chalkboard paint, so you can change the number of days left until Halloween.
Frequently Asked Questions
I recommend acrylic paint because it dries quickly, is easy to work with, and comes in a variety of colors.
Sealing the blocks isn’t necessary, but I recommend it if you want them to last for many Halloweens to come, especially if you plan to display them outside. A clear spray sealer or Mod Podge works great for protecting your paint job and keeping the blocks looking fresh year after year.
Absolutely! If you don’t have access to power tools or simply don’t want to deal with cutting wood, you can buy pre-cut wood blocks from a craft store or use foam blocks. Both options make this project totally tool-free!
No worries! If you’re not confident in freehand drawing, you can use stencils or templates to trace the faces before painting. You can also print out character faces and decoupage them onto the blocks with Mod Podge for a cleaner look.
Yes! This project is super kid-friendly. Let them help paint the blocks or even come up with their own Halloween characters. Just make sure to supervise if they’re using markers or small tools.
Yes! This project is super versatile. You can paint other holiday characters like snowmen or Santas for Christmas, or even create a fall harvest theme with pumpkins and scarecrows. Just swap out the blocks and have fun with it!
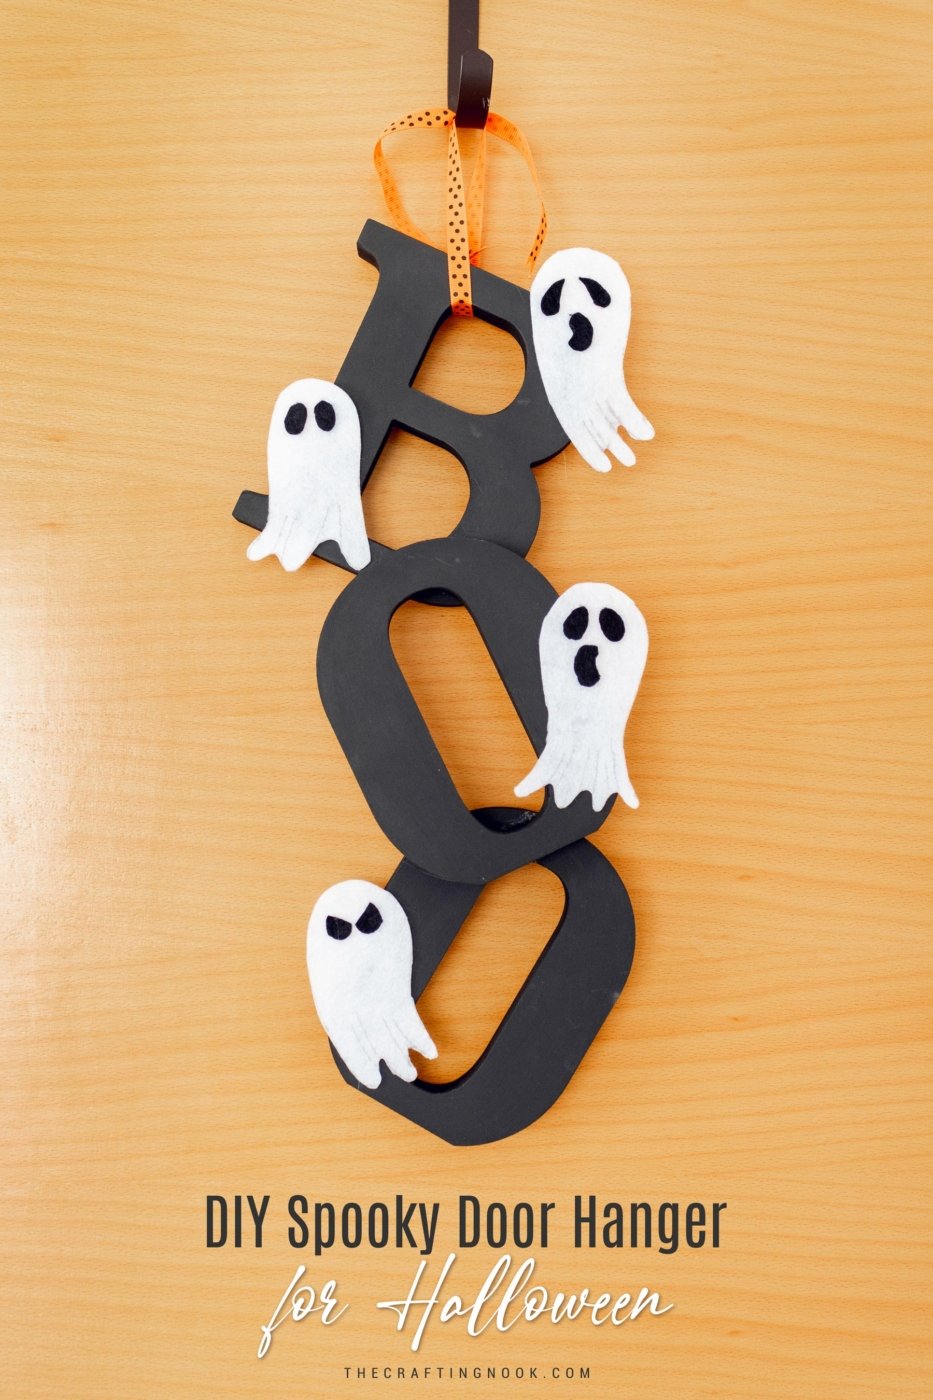
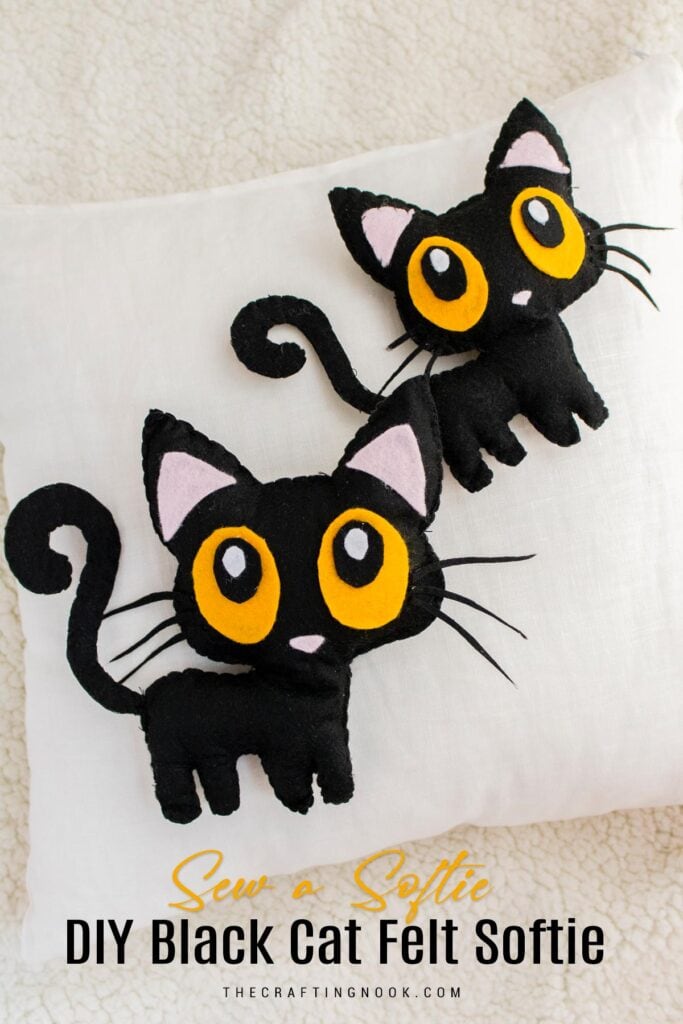
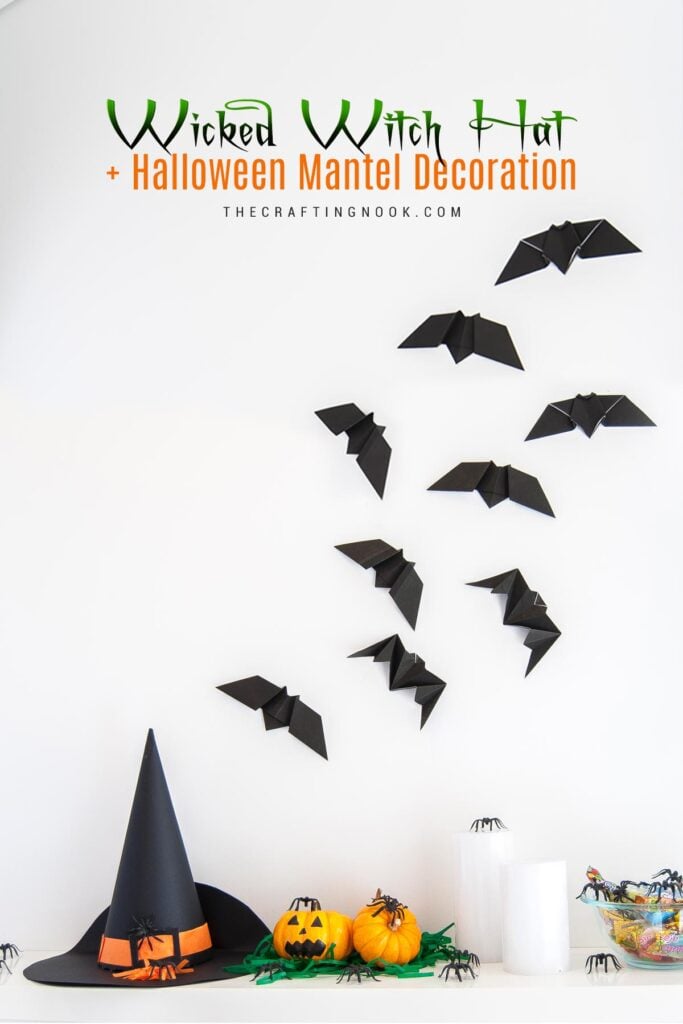
More Halloween Projects To Try
Like this DIY Halloween wood blocks tutorial? You might definitely love these other Halloween project ideas too:
You might also enjoy these cute Vintage Halloween Blocks made by Amy over at Mod Podge Rocks.
✂️ Tutorial
DIY Halloween Wood Blocks
Tools
- Paintbrushes
- Pencil for sketching faces
- Surface protection
Supplies
- 4 scrap wooden blocks – mine are upcycled from pallets and they’re all different sizes—You can purchase some blocks if you don’t have scraps.
- 1 wood base slightly longer than all 4 wood blocks together – I used a leftover piece from another project.
- Acrylic paint: black purple, orange, green, white – Craft paint will do too.
- Oil-based black and white markers.
- Craft sealer –optional to protect your work
- Sandpaper –optional for smoothing edges
Instructions
Step 1: Prep Your Wood Blocks
- Gather all your wood pieces. I used pallet scraps, so mine are all a bit different in size. If yours are too rough, give them a quick sand to smooth out any sharp edges and remove splinters.
- You’ll also need a wood base to display your blocks—I had one left over from another project, but any sturdy piece will work.
Step 2: Paint the Black Base Coat
- To give our blocks that spooky, night-time vibe, I started by painting all the blocks with a solid coat of black acrylic craft paint. I also love that due to wood imperfections, the black will be visible which gives that extra spooky vibe.
- Don’t forget to paint the flad wood base too—this will be the backdrop for your blocks when we’re done.
- Let it all dry completely.
Step 3: Paint Your Characters
- I went with four classic Halloween characters: a ghost, Frankenstein, Dracula, and a jack-o-lantern. You can totally switch it up with your favorite spooky characters!
- I hand-drew them on a sheet of paper. As you can see, there’s no need for illustrator skills. Because these are monsters, imperfection is your best ally.
- Ghost:
- With a pencil, I hand draw the ghost’s face, giving it those classic, shocked eyes and mouth.
- Then with a fine brush and white paint, I traced the eyes and mouth and then painted the whole block white as a second coat of paint.
- Set it aside to dry.
- Then I retouch the paint, lines, and shapes with the white and black paint and a fine brush.
- Let it dry.
- Jack-o-lantern:
- I did the same as with the ghost, I drew on a triangle-eyed, jagged-toothed face.
- Then with a fine brush, I traced the shapes with orange paint followed by painting the whole block with a second coat of orange paint.
- Set it aside to dry.
- Then I retouch the paint, lines, and shapes with orange and black paint and a fine brush.
- Frankenstein:
- I traced the shape of the hair at the top and a small part of the sides of the blocks.
- Then I used green paint and covered the front side tracing and leaving the hair-like shape on the top.
- Once dry, add details like scars, a stitched-up brow, sad eyes, and a sad mouth with creepy teeth coming out with your oil-based black and white markers or paint pens.
- Dracula:
- Just like like did with Frankenstein, I hand-drew the classic widow’s peak hair with a pencil and gave a little bit of face on the sides of the block.
- Then, I painted with purple paint all the face area. Let it dry.
- Once dry, I drew sharp fangs, and creepy eyes with my black and white oil base markers.
- Feel free to get creative with the faces—you can make them as spooky or silly as you want!
- Let them all dry well.
Step 4: Prepare the Wooden base
- I hand-wrote “Trick or Treat!” on the front of the black base with my oil-based white marker. You can add any Halloween message you like. Have fun with it!
- Once everything is dry, you can seal the blocks with a craft sealer to keep them looking fresh year after year.
Step 5: Assemble Your Blocks
- Once all your characters are done and completely dry, it’s time to bring it all together.
- I placed my four Halloween blocks on top of the black wood base, side by side, creating a fun little lineup of spooky monsters.
- The Halloween Wood Blocks finished and ready to decorate the home
- You can glue them down with a hot glue gun if you want them fixed in place, but I left mine loose so I can switch them around or even use them individually in different parts of the house.
- And You’re Done!
Share and PIN ME!!!
Til’ next time…


FREE WORKBOOK
Keeping your Sweet Home Organized
Learn how to create intentional habits and simple routines to Keep Your Home Organized. Plus freebies, printables, exclusive content, and tips.
Disclaimer: By clicking on the “Yes” button above you are giving me your consent to collect and use your information according to the law and My Policy Privacy. Zero Spam I promise!