DIY Table Runner No Sew (Easy Tutorial)
This post may contain affiliate links. Please read our Disclosure Policy.
This DIY table runner no sew is the perfect crafty diy project to get a start on your home decorating for any holiday season. I’ll show you how easy and simple it is to make that anyone can make one within minutes!
My mom loves table runners… I like them but mom LOVES them LOL. She wanted a simple and easy diy one to give some life to her dining table over at her vacation house in Miami.

Since we don’t have a sewing machine over there, I made this super cute and easy table runner no sew for her.
You won’t believe how awesomely easy LOL.
I really love how it looks on the table and the orchids give just the right touch to make the place so warm and homey!
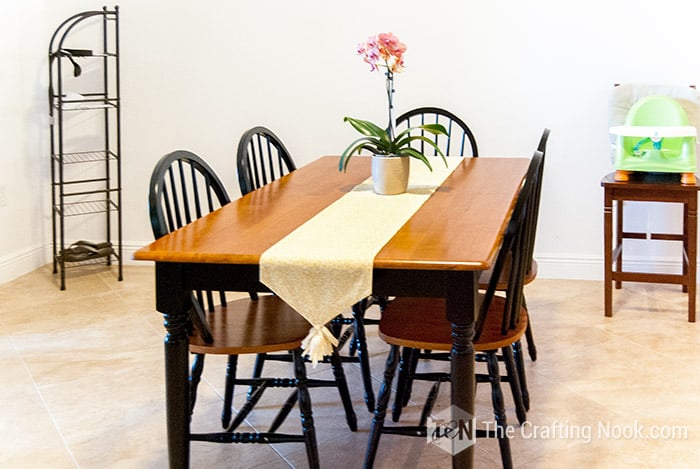
Table of Contents
How to Make a DIY Table Runner NO SEW
I agree with my mom and table runners do dress up a table, they look a lot more elegant even when they are rustic. Since this house is a vacation one, I decided to go for summer color.
This project can be done in minutes, I literally with photos and all finished it in less than an hour and I love how it turned out.
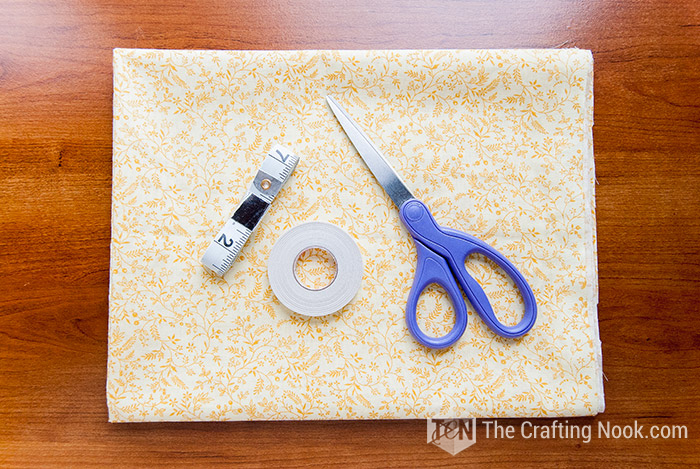
Supplies:
- The fabric of your choice (at least 15 Inches longer than the length of your table and 24 inches wide)
- Fusible tape – Double-sided iron-on fabric adhesive
- 2 safety pins
Tools
- Fabric scissors or rotary cutter
- Measuring tape
- Iron
- Ruler
- Fabric magic markers Mark-B-Gone
Instructions:
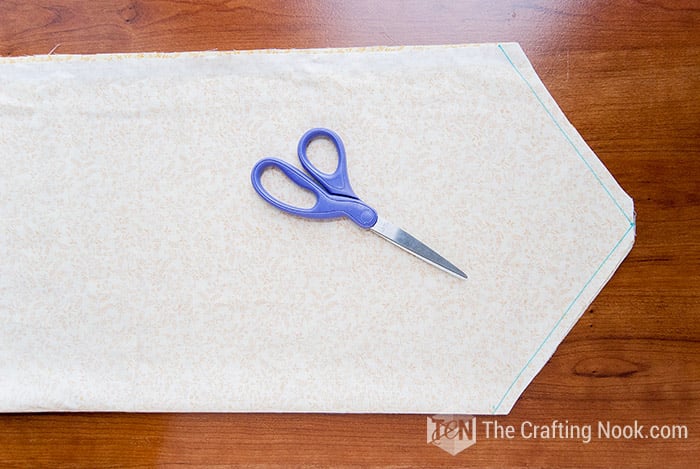
Step 1: Cutting the Fabric
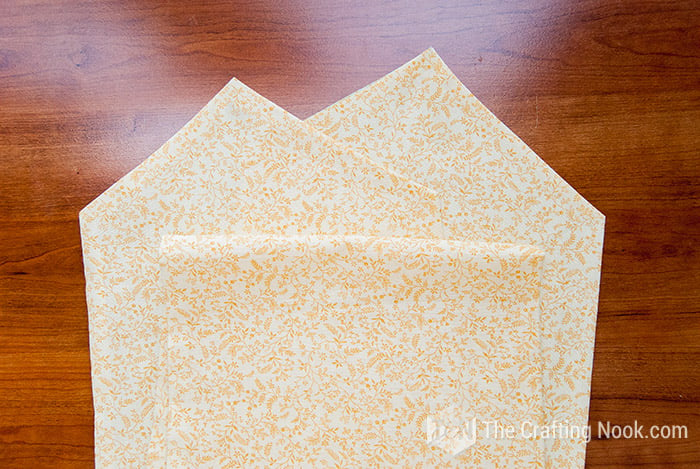
I cut 60 inches (1,5 m.) long by 24 inches (60 cm.) wide piece of fabric and folded in half lengthwise, yours should meet your table’s length. Make sure the right sides are together.

Using your hot iron, press it and draw a triangle on both ends to create the pointy end of the table runner.
TIP: Find the center of the end of the table runner, and mark it. Then on both sides mark 2 to 3 Inches down. Connect both sides with the center point and you are done.

Cut along the lines leaving a margin of 0,4 Inches (1 cm.).
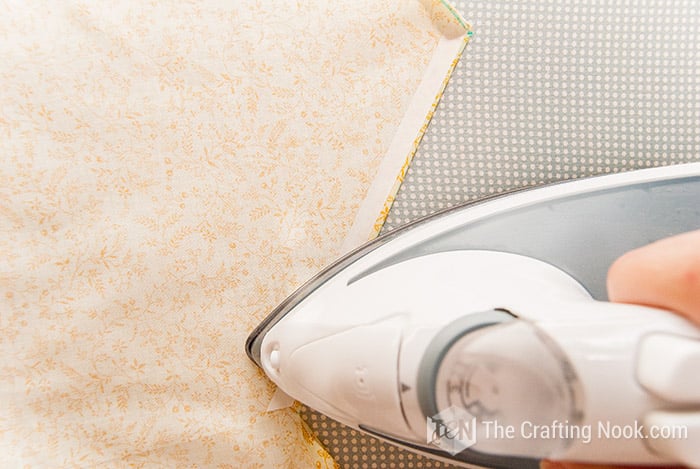
Step 2: Creating the table runner
Iron the borders of the fabric to the inside as if you were making a hem.


Once all your ends are ironed, fold the table runner again but with the wrong sides together.

Step 3: Applying the Iron-on adhesive tape
I recommend always reading and following the Iron-on tape’s instructions. However, here’s how I did it.
Apply the iron-on adhesive on one folded hem on the back side of the fabric and iron it for 2-3 seconds.
Wait until it cools.
Then peel off the paper liner carefully. if the adhesive comes off, put it back and iron it for a couple more seconds.

Place the other side of the table runner on top, and align the edges well. Press and hold the iron for 8 seconds on each section until the entire piece was bonded.
And the main piece of the table runner is done!!!
Step 4: The decoration
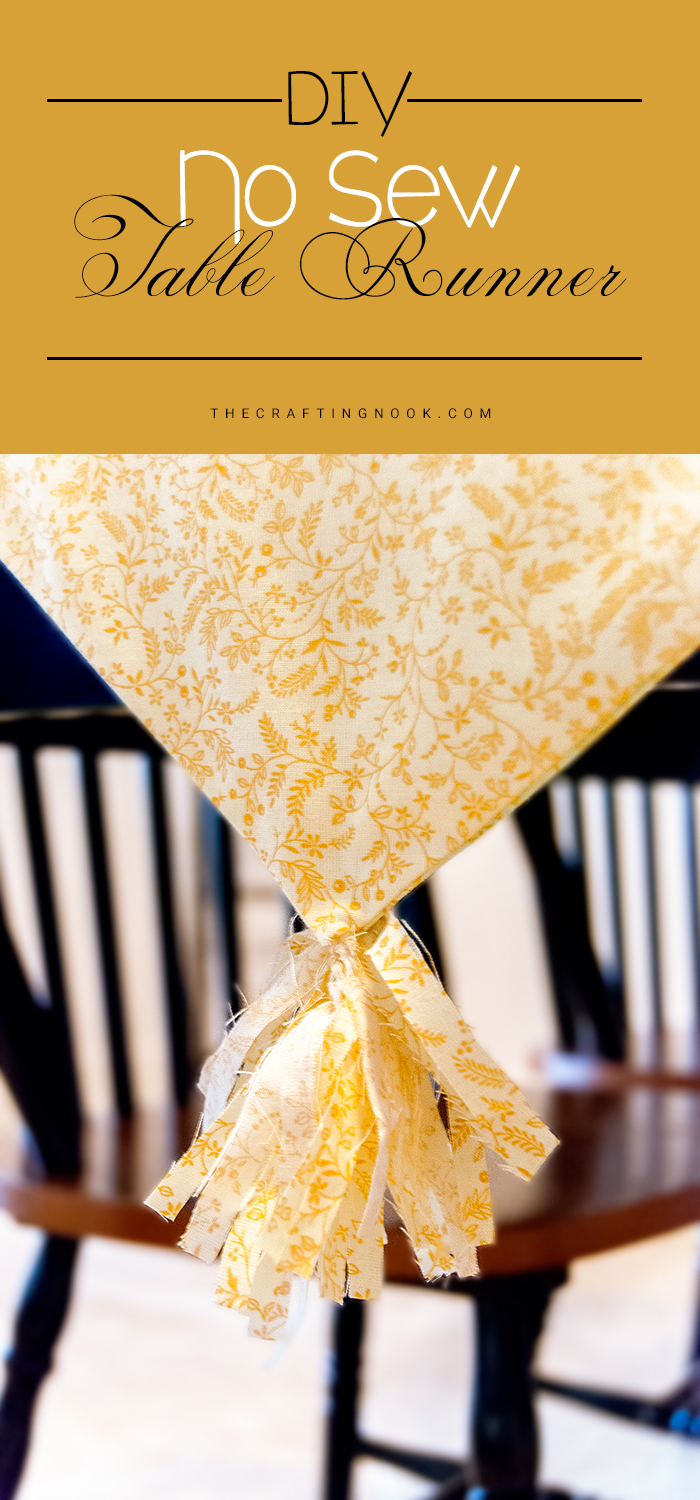
This step is optional, you can totally leave it as is or you can add other types of decoration like ribbons, tassels, etc.
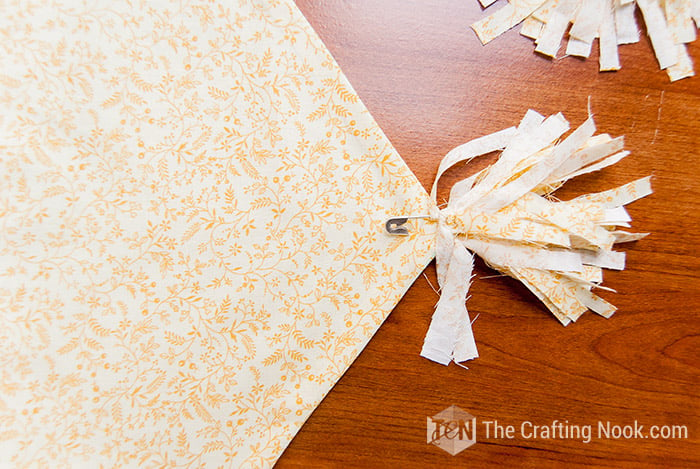
Cut many strips of the same fabric (you can make it with another fabric) and made 2 bunches.

Knott one by one to the safety pins until they look like pom-poms.
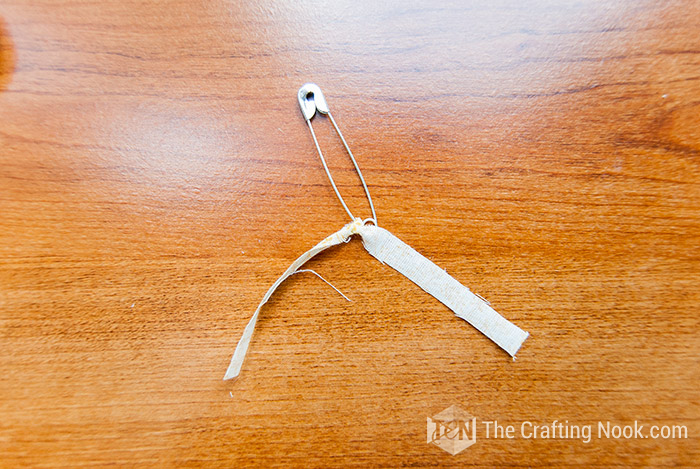


Finally, pin the safety pins to both ends of the table runner on the side that will not be visible.
Here you go!… Put it on your table, add a cute vase with fresh flowers and enjoy.
A simple and cute table runner no sew. =D
You can also add some more details!!!


Frequently Asked Questions
Well, to put it in a simple way, table runners give your table settings color, and texture and provide a feeling of elegance, style, and tradition. Also, can bring seasons to your table. They’re a great way to dress up your kitchen or dining room table and keep things clean. In my opinion, it’s more like a decoration thing than having a specific purpose.
Usually, a table runner should hang over each side of the table where the ends fall. This is a lot more aesthetically pleasing to the eyes than a runner that stops where the table ends or is slightly shorter than the table. The amount of hang should be the same on both sides and can vary, just like the drop length of a tablecloth. But, at the end of the day, there are no strict rules, it’s all about how it looks and how you style it. I’ve used shorter ones and they look pretty too.
Fusible Tape. This sewing alternative is used to adhere fabrics together with pre-cut, double-sided strips of tape and an iron. Fusible Web. Adheres fabrics together and can be cut to size. Fusible Adhesive. Similar to fusible tape and comes in sewable and no-sew varieties on a roll much like fabric. Fabric Glue.
It’s for a permanent bond that is machine washable and fabrics sensitive to heat.
In most cases, yes. While using fusible tape is a quick alternative to sewing a hem or attaching fabric pieces together in place, it is permanent and cannot be removed. I advise you to always read instructions and information from the manufacturers.
Fusible tape is used for clothing and fabric items where a permanent no-sew hem is required. It is placed under the hem and ironed to activate the glue. This special tape can be washed and lasts extremely well.
More Easy Crafts to try
If you enjoyed this table runner no sew tutorial, you might also love these other easy crafts too:


✂️ Tutorial

DIY Table Runner No Sew Tutorial
Tools
- scissors
- Measuring tape.
- Iron
- Ruler
- Fabric magic markers Mark-B-Gone
Supplies
- The fabric of your choice at least 15 Inches longer than your table and 24 inches wide
- Fusible tape – Double-sided iron-on fabric adhesive
- 2 safety pins
Instructions
STEP 1: CUTTING THE FABRIC
- I cut 60 inches (1,5 m.) long by 24 inches (60 cm.) wide piece of fabric and folded in half lengthwise, yours should meet your table’s length. Make sure the right sides are together.
- Iron it and draw a triangle on both ends to create the pointy end of the table runner.
- TIP: Find the center of the end of the table runner, and mark it. Then on both sides mark 2 to 3 Inches down. Connect both sides with the center point and you are done.
- Cut along the lines leaving a margin of 0,4 Inches (1 cm.).
STEP 2: CREATING THE TABLE RUNNER
- Iron the borders of the fabric to the inside as if you were making a hem.
- Once all your ends are ironed, fold the table runner again but with the wrong sides together.
STEP 3: APPLYING THE IRON-ON ADHESIVE TAPE
- I recommend always reading and following the Iron-on tape’s instructions. However, here’s how I did it.
- Apply the iron-on adhesive on one folded hem on the back side of the fabric and iron it for 2-3 seconds.
- Wait until it cools.
- Then peel off the paper liner carefully. if the adhesive comes off, put it back and iron it for a couple more seconds.
- Place the other side of the table runner on top, and align the edges well. Press and hold the iron for 8 seconds on each section until the entire piece was bonded.
- And the main piece of the table runner is done!!!
STEP 4: THE DECORATION
- This step is optional, you can totally leave it as is or you can add other types of decoration like ribbons, tassels, etc.
- Cut many strips of the same fabric (you can make it with another fabric) and made 2 bunches.
- Knott one by one to the safety pins until they look like pom-poms.
- Finally, pin the safety pins to both ends of the table runner on the side that will not be visible.
- Here you go!… Put it on your table, add a cute vase with flowers and enjoy.
Some other no-sew projects I love from my favorite bloggers:
- No Sew DIY Burlap Table Runner by Jenna Kate at Home.
- DIY No Sew Pillow Covers by Amy from Homey Oh My!
- How To Make a No Sew Sock Bunny from Home and Gardening Ideas
If you liked this fun and easy tutorial, don’t forget to share it with friends and save it for later!
What do you think? Do you like table runners as much as mi mom??? How do you like them?
Til’ next time…


FREE WORKBOOK
Keeping your Sweet Home Organized
Learn how to create intentional habits and simple routines to Keep Your Home Organized. Plus freebies, printables, exclusive content, and tips.
Disclaimer: By clicking on the “Yes” button above you are giving me your consent to collect and use your information according to the law and My Policy Privacy. Zero Spam I promise!