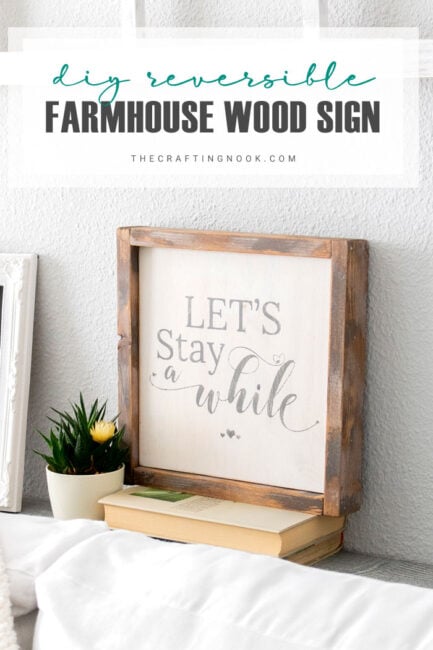
DIY Oversized Rustic Wood Sign (also reversible)
This post may contain affiliate links. Please read our Disclosure Policy.
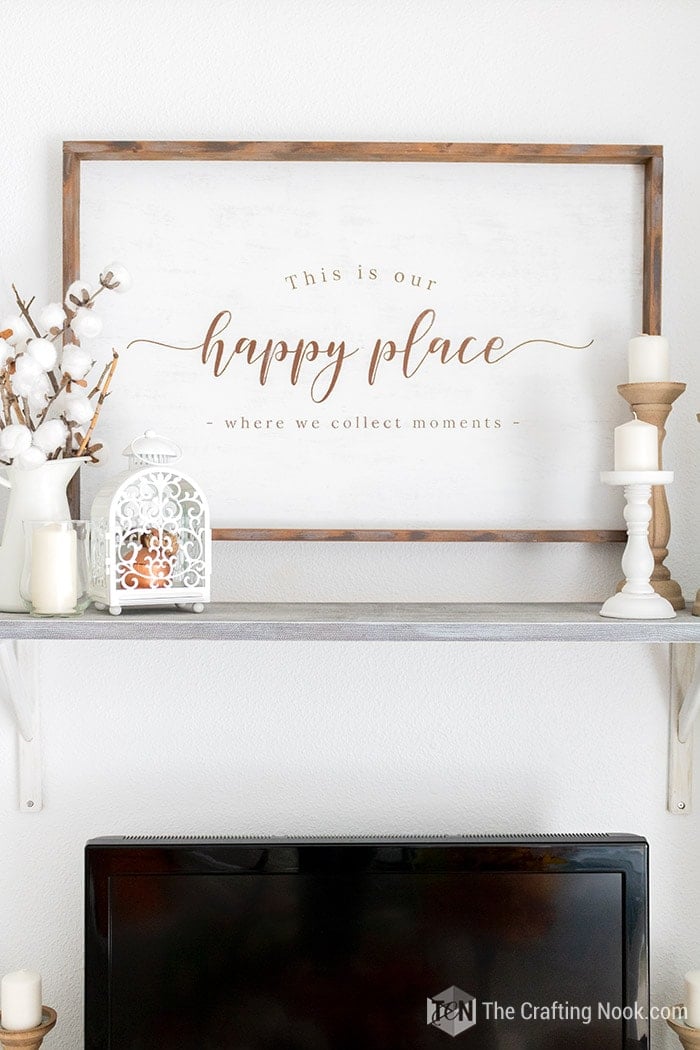
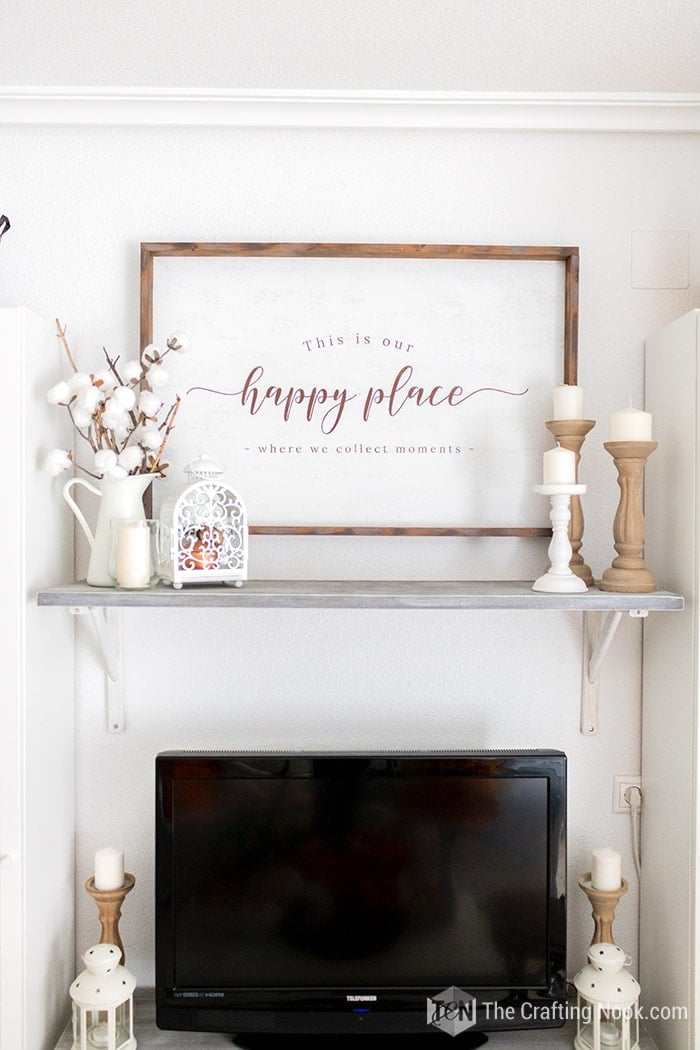
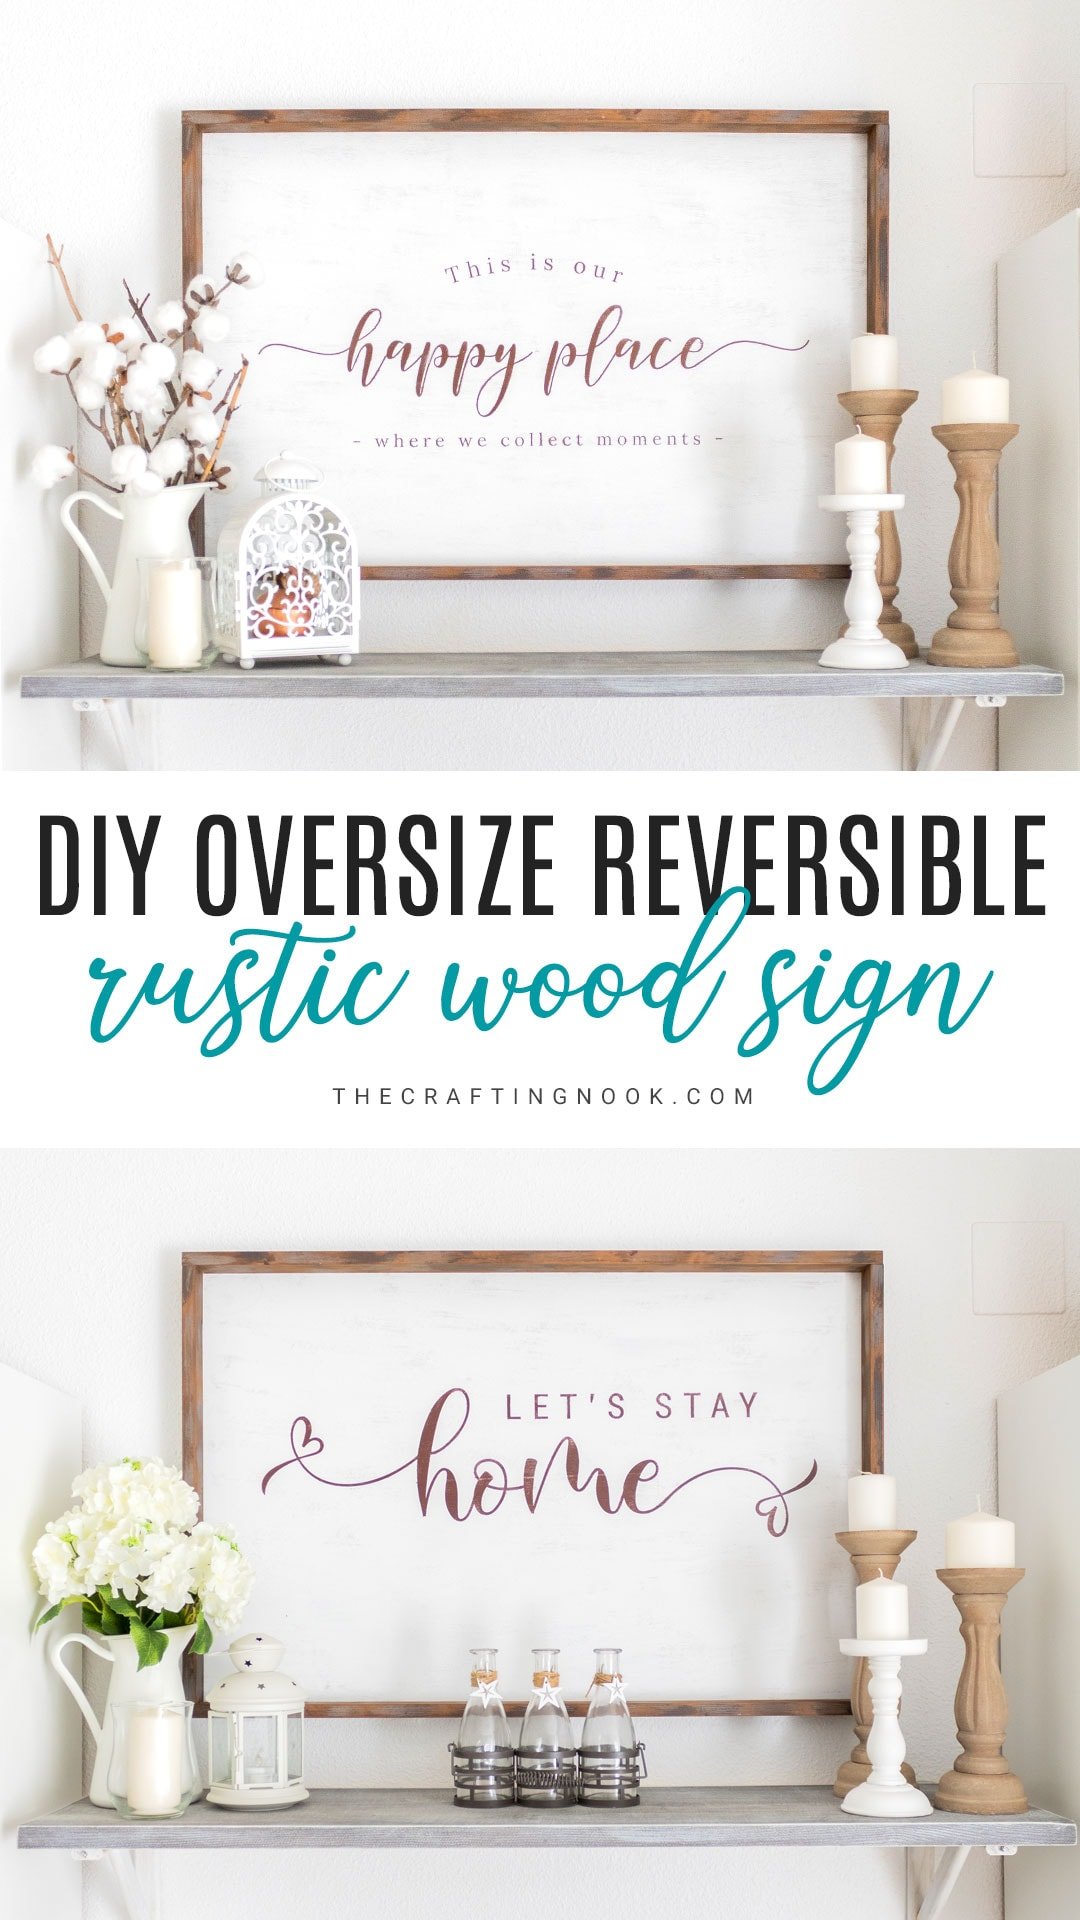
Not only is this Oversized Rustic Wood Sign gorgeous but it is also reversible without losing the Farmhouse look. The perfect touch for your rustic home decor.
This Rustic Wood Sign is a special project because I really wanted a flexible wood sign with that wonderful rustic farmhouse style for my living room.
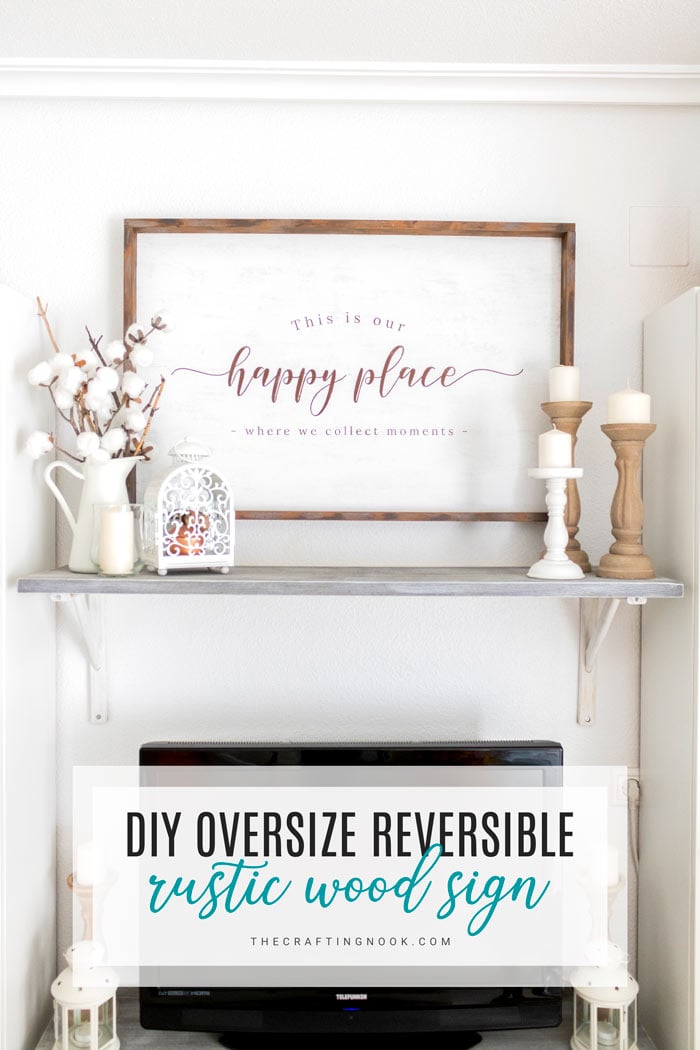
Table of Contents
Farmhouse Oversized Rustic Wood Sign
Having a really small apartment means I can’t just keep making wood signs like crazy because I have no place to store them, so I planned it carefully when I made it for my Christmas wood sign last year. Making it reversible makes it the perfect wall art for any occasion and season.
This way I can have different sentiments for different seasons in just one single rustic frame!
Isn’t it really cool?
If we think about it we can have about 3 plywood boards and have 6 different rustic wood signs, not bad huh!
Wanna know the best part?
Depending on the size of the boards you choose, 2 of them can be stored in the wood sign frame itself and the rest you make can be stored behind the sofa, under the bed or mattress and behind any door.
If you ask me, it’s a total freakin’ win-win!
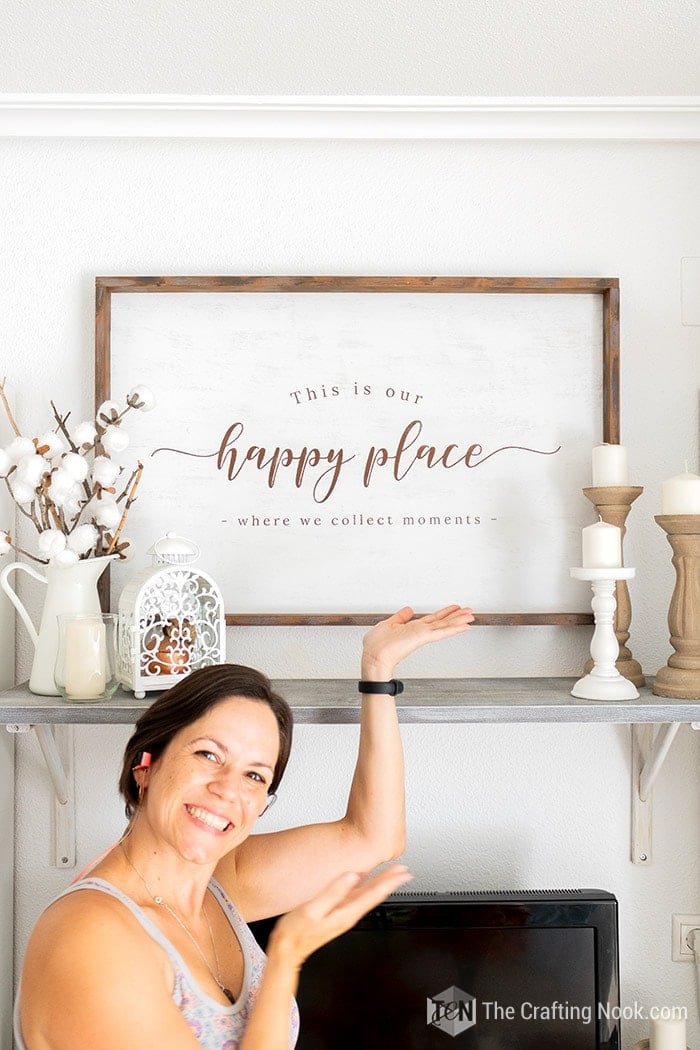
I just love how it turned out.
I never thought it would turn out so good since it was so big and I don’t have much available space to work on and I have very limited tools too, but hey! Look, I did it and so can you!
I have to say this, I’m not a carpenter and don’t have much experience working with wood. Probably there are many other ways to create this but like I said I don’t have many tools or space so I had to manage with I could buy and what already had.
I mean, that’s the point of all this creative thing, right? If you have it all and can buy it all what’s the point? Anyways, I always try my best to stay on a budget and assuming not everyone has a garage full of tools, like me, I barely have a saw and a drill LOL.
Wood Painting Technique
I decided to use my beloved dry-brushed technique for the blank rustic wood sign and the worn-out/weathered wood look for the frame.
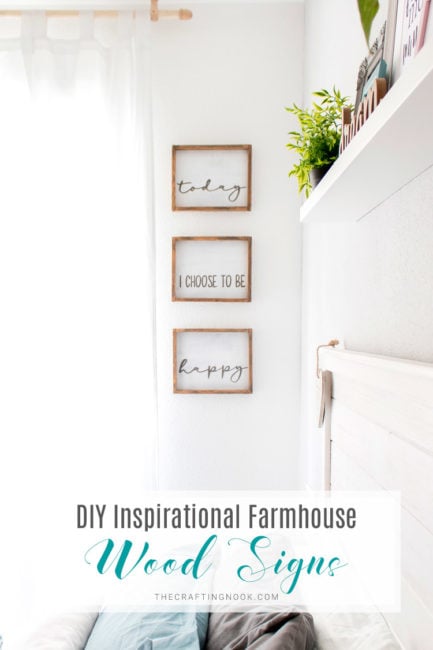
I used the dry brushed technique before with my Inspirational Farmhouse Wood Signs and my TV Console Table in 2 different ways: Limewashed look and distressed wood look in case you want to check it out!
How to make a Custom Rustic Wood Sign
Because of its size and the drying time I had to make it in parts. It’s not hard at all just a little bit tricky at some points.
Supplies:
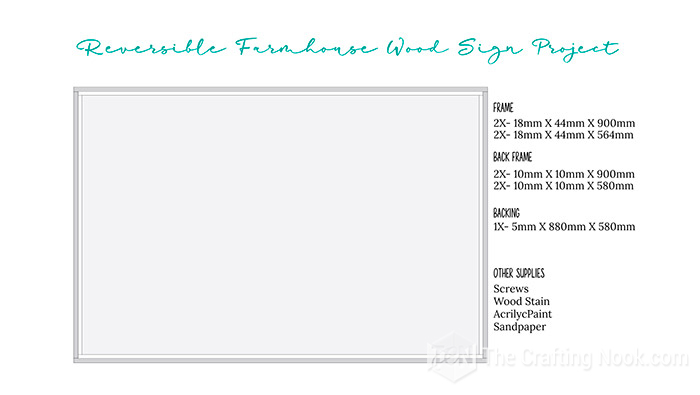
- Pinewood boards as follows below
- Plywood as follows below
- Wood Stain
- White furniture acrylic paint
- Brown/walnut color acrylic paint
- Grey acrylic paint
- Wood headless nails
- Screws
- About 10 L shaped Hook Screws
- Brushes (the cheapest the better)
- Sandpaper 150 grit
- Piece of cloth.
- Felt (Optional)
- Your favorite sentiment stencil (since mine was large I had it cut in a shop, and if you don’t have a cutting machine or a place to get it cut fo you, you can order a custom vinyl decal on Etsy!)
- Drill
- A towel.
- Transfer tape – or masking tape if you don’t have it.
Tools:
- Drill and wood drill bit
- Screwdriver
- Hammer
Instructions
Step 1: Prep Work
Firstly and most importantly, make sure the plans are right for your local store sizes. Mine are in millimeters so if you need to use a converter to the metrics you are most familiar with.
My wood sign is in total 900 mm X 600 mm (35,43 In X 23,62 In)
Most likely your local store can cut your wood for you.
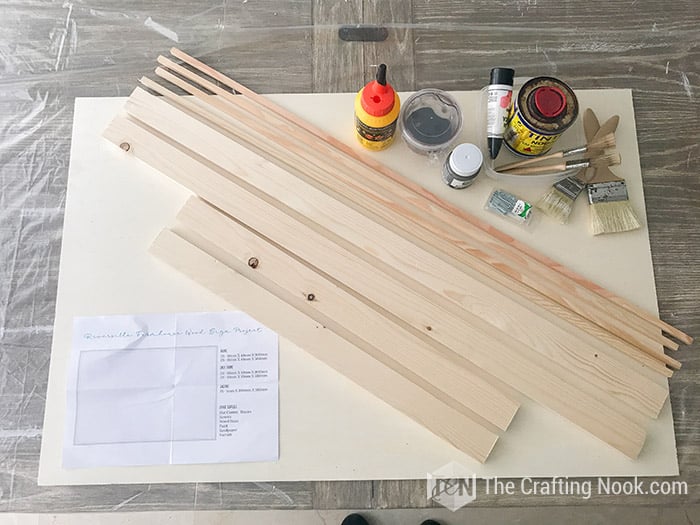
So once you have all your supplies ready, clean them up to avoid dust and grease.
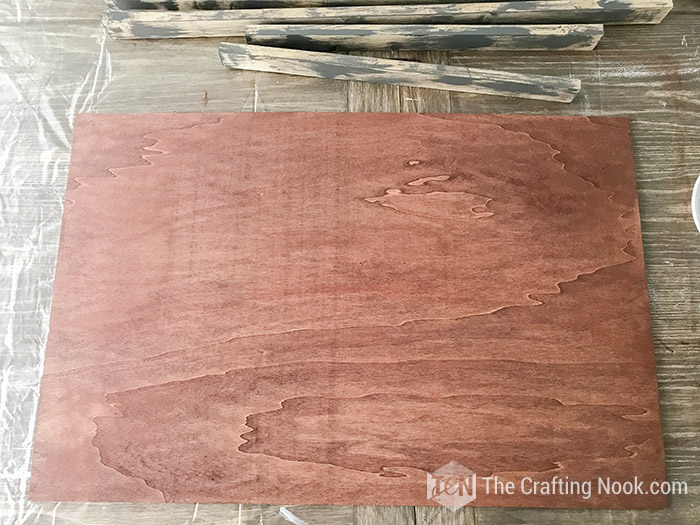
Step 1: Staining the wood sign backing
Using your favorite wood stain, paint all your backing plywood. I created mine for this specific piece because I found out that the brands I can find here, usually affect the white paint I use on top. So I diluted a brown acrylic paint with 1 part water and 1 part paint.
Let it dry.
Take your frame pieces and let’s make it look worn out.
On a plate pour some white and grey paint separately.
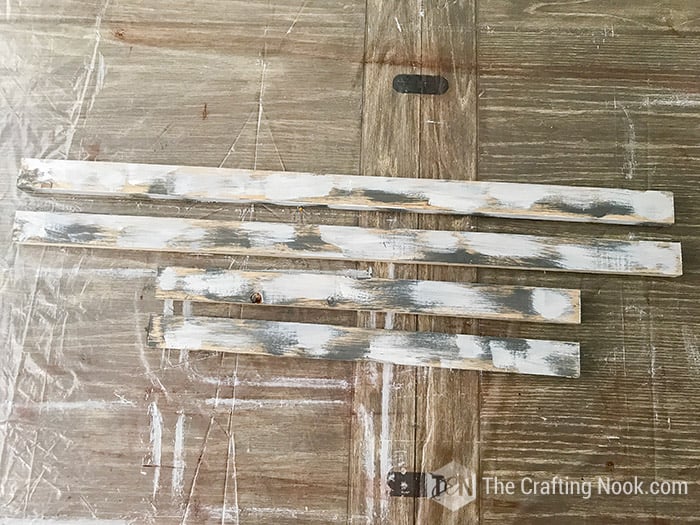
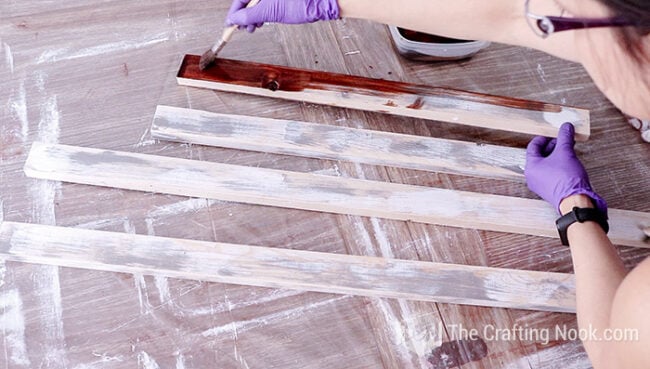
Step 2: Start creating the weathered look on your frame boards
Firstly, with grey acrylic paint apply rough and uneven strokes all along the boards. You are going to dry brush on a thin coat of paint.
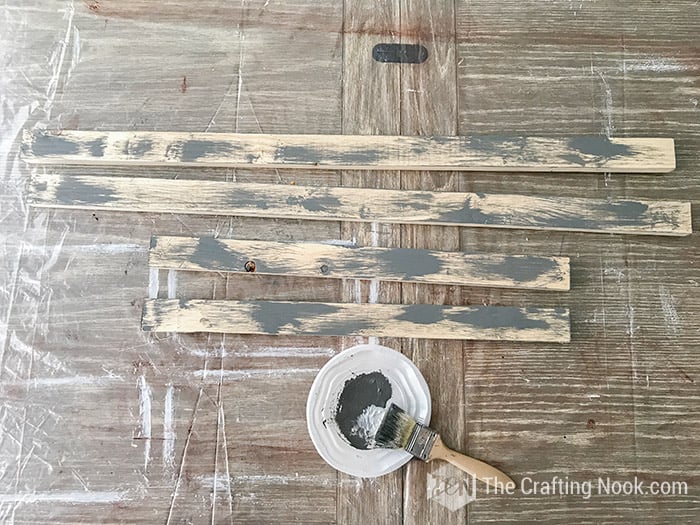
No perfection here, just creates strokes here and there.
When you are done it should look something like this:
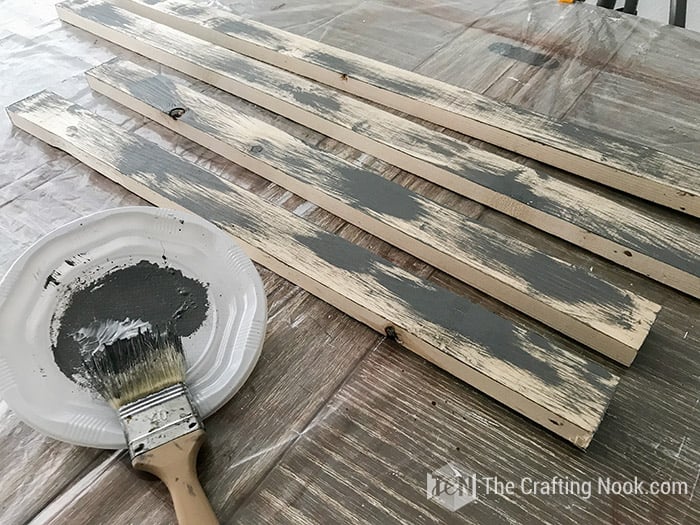
Once the paint dries, do exactly the same but with the white paint. In my experience, if your paint is fast drying, by the time you finish the last board, you can start over with the first right away.
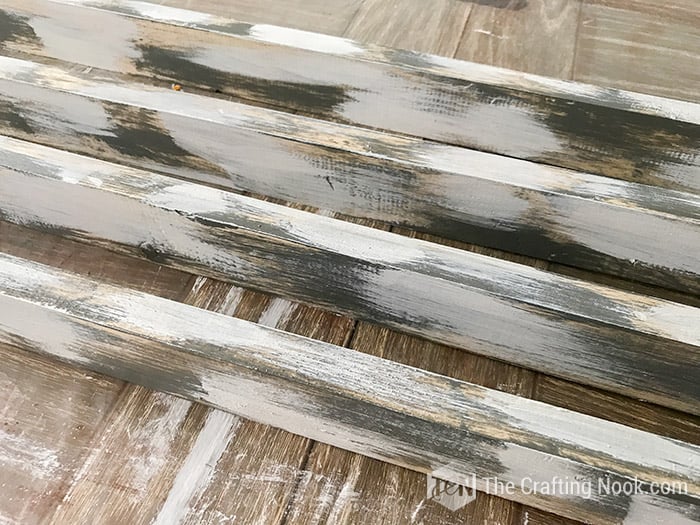
Set aside to let them dry very well now.
Step 3: Dry brush paint your wood sign backing board.
Going back to the backing, I started painting with white using my dry brushing technique to achieve a distressed wood look.
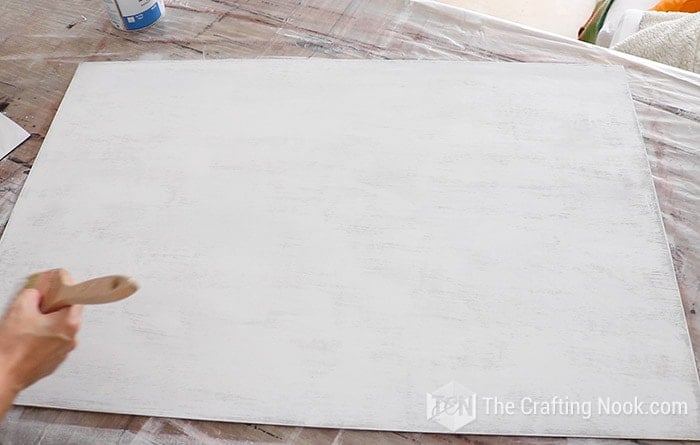
Apply as many coats as you like. I wanted it really white but still be able to see imperfections from the color base.
Let it dry very well.
Step 4: Sand off the paint from your frame boards
Now that your frame pieces are dry, you are going to sand them with your 150-grit sandpaper.
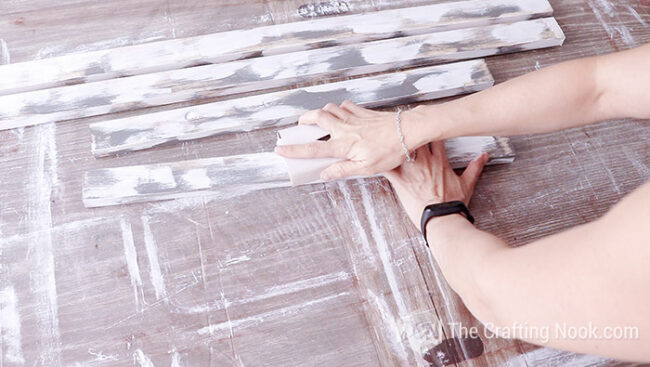
Sand it like you want to remove all that paint. When you are done the boards should look like the remaining paint is all damaged.
Clean your boards well to remove all the dust from sanding.
Time to stain your pieces. Apply your wood stain and then rub it with a piece of cloth.
Let them dry.
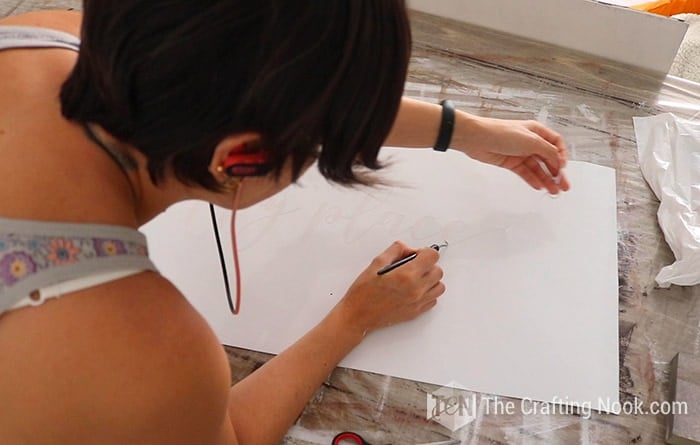
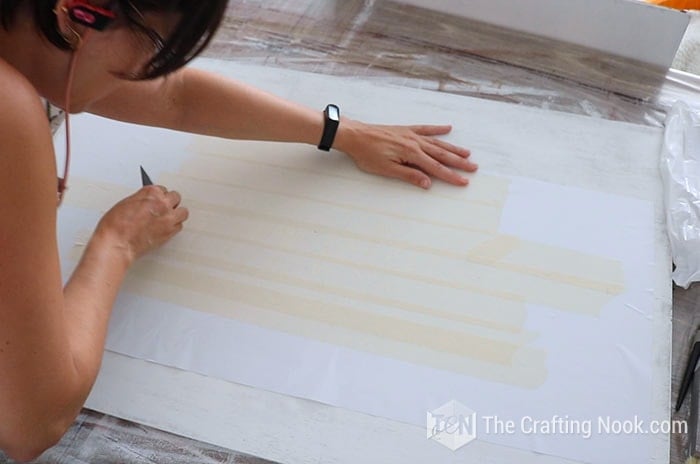
Step 5: Prepare your stencil
Take your backing board back and let’s apply the stencils. As I mentioned, I designed mine but I had it cut in a shop. I have a cutting machine but I didn’t want to puzzle it up.
You can also find gorgeous stencils in craft stores.
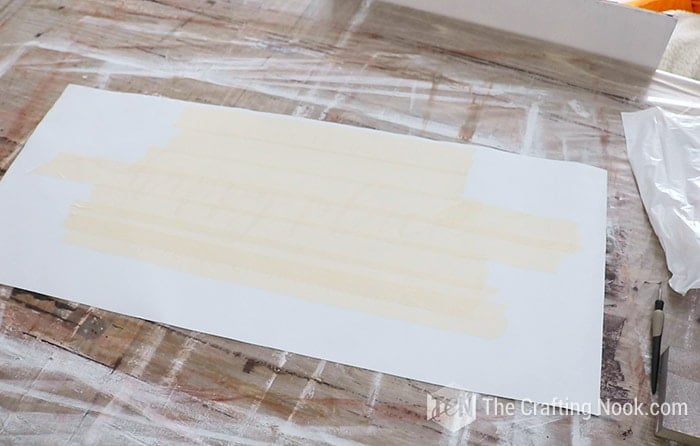
Once cut I weeded out all the stencil paper that didn’t belong to the design.
Then used masking tape (because I didn’t have that much transfer tape) and applied it to the stencil with the help of my scraper.
Step 6: Apply the stencil and paint
Remove the backing paper of the stencil carefully and then stick it to the towel. This helps remove the excessive stickiness of the stencil material so it won’t leave glue remains on the wood. This step is optional. I found that most stencil vinyl here is very strong and leaves glue on my signs and I don’t like it.
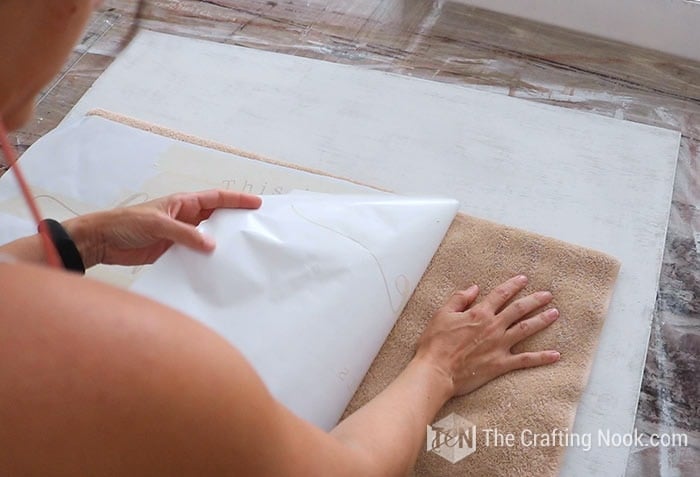
Place the stencil on the board making sure it’s straight and centered. I secured the design using the scraper and removed the masking tape.
If you like the design you can snag the file for free right here!
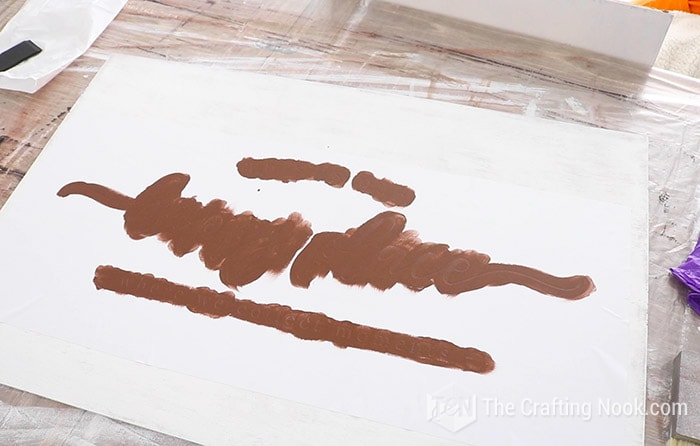
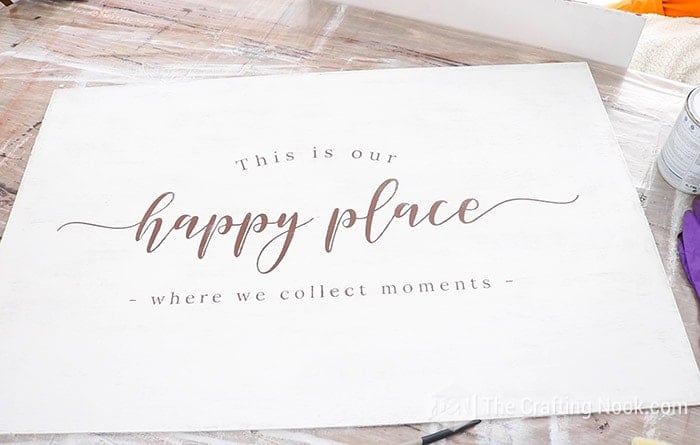
Paint your stencil with your brown acrylic paint and tel it dry.
Step 7: assemble the frame.
Lay down your pieces to form the shape of your frame. Longer boards should go top and bottom and the shorter ones should go left and right.

Longer boards should go over the end of the shorter ones as shown below.
To make it easier to screw the frame together (I don’t have a nail gun so I went for screws) I drilled 2 holes on each end of the long pieces to mark the path of the screw. Use a drill tip smaller than the screw you are going to use.
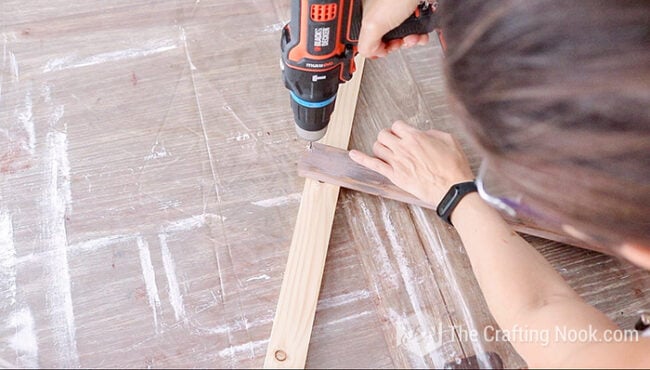
Apply some glue and screw your pieces together.
Set aside and let the glue dry for a while.
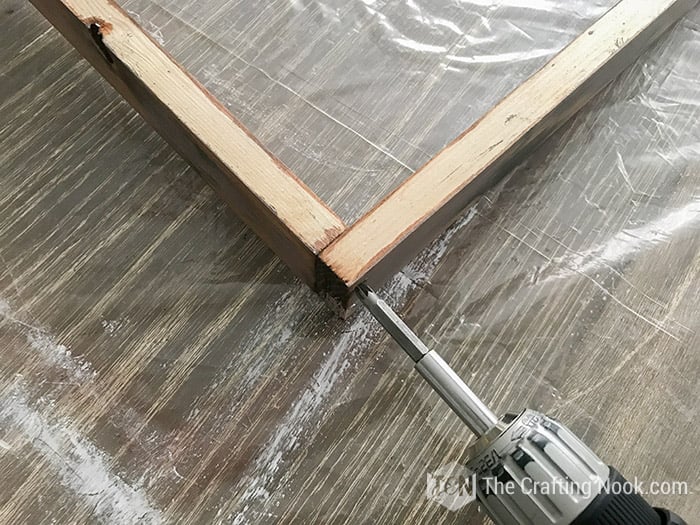
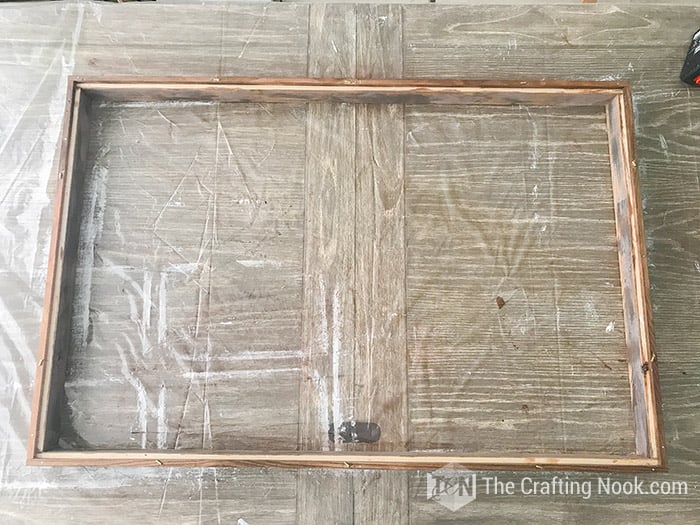
When it’s dry you need to create the back frame that will house your wood sign.
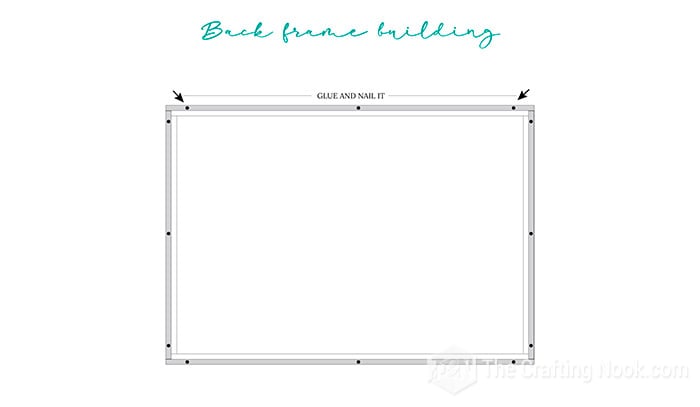
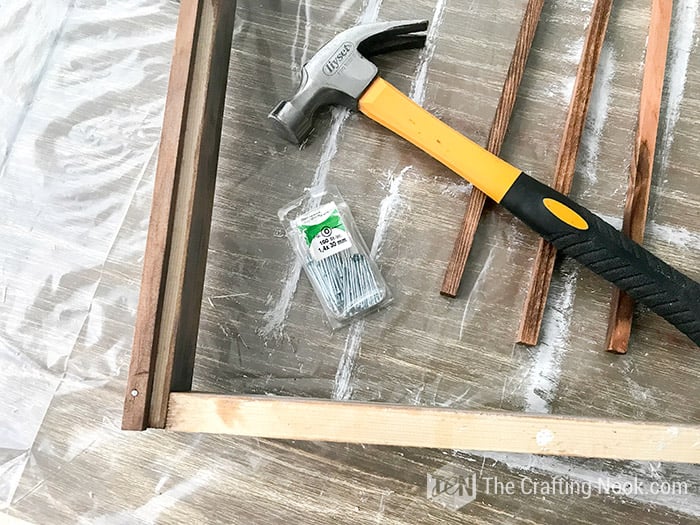
For this, you will set your wood sticks the same way as your main frame but this time you will just glue and nail them in place.

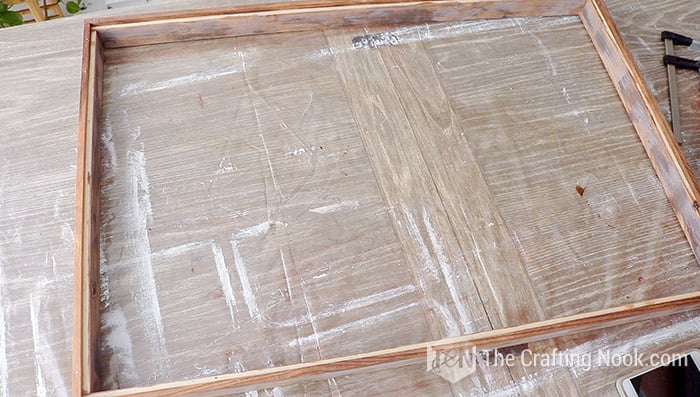
Align your frame pieces with the outer edge of the main frame. Apply wood and use clamps to secure your pieces in place.
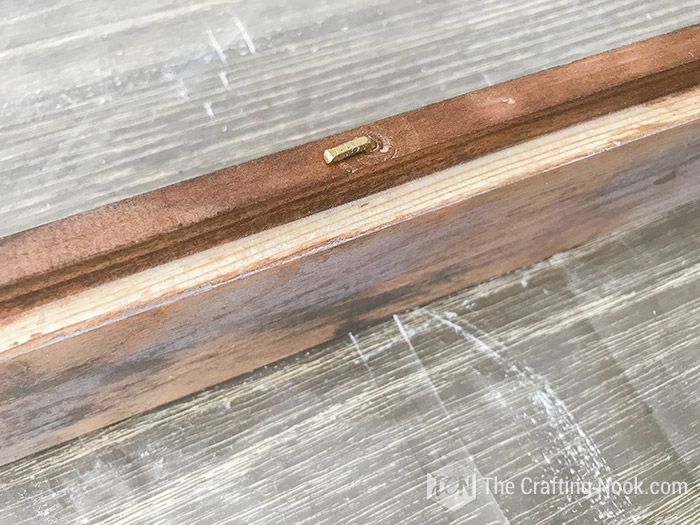
Once dry, nail it on a few spots just to double secure it.
Your frame is done!
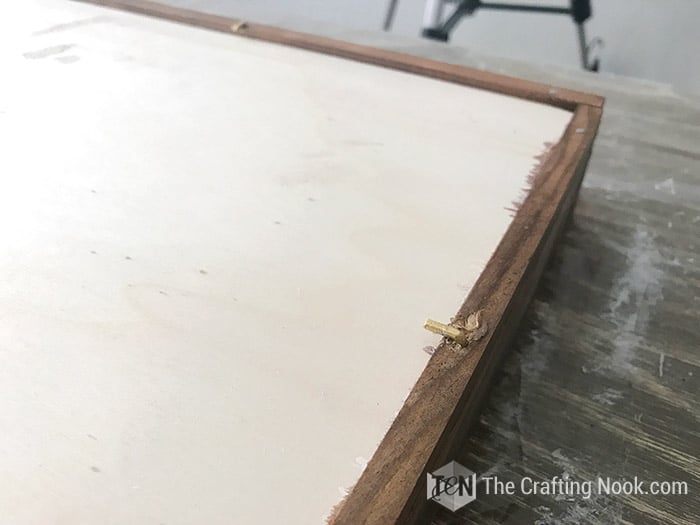
Now to keep your wood sign in place, you can use L-shaped Hook Screws if you are on a budget.

Just drill carefully some holes to mark the path of your hooks on at least 3 spots on the long sides and 2 on the short ones.
Then screw your hooks in place all the way down!
Step 8: Finish Wood sign backing board
So, now, let’s work on our backing board. With the help of a hook, peel off the stencil. Be careful so you don’t damage or scratch the wood.
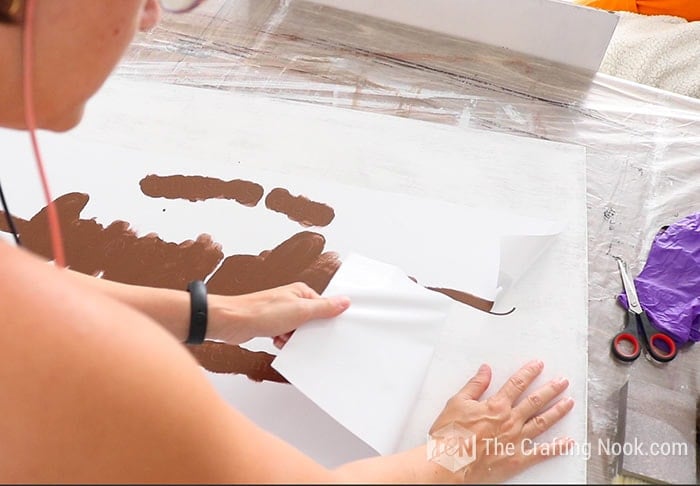
Once your design is revealed again, sand it very well and distress some places as you see fit.
Clean your board well and seal it or varnish it. Let it dry.
Step 9: Assemble the rustic wood sign
It’s time to fit your gorgeous wood sign in.
Place your wood sign facing down
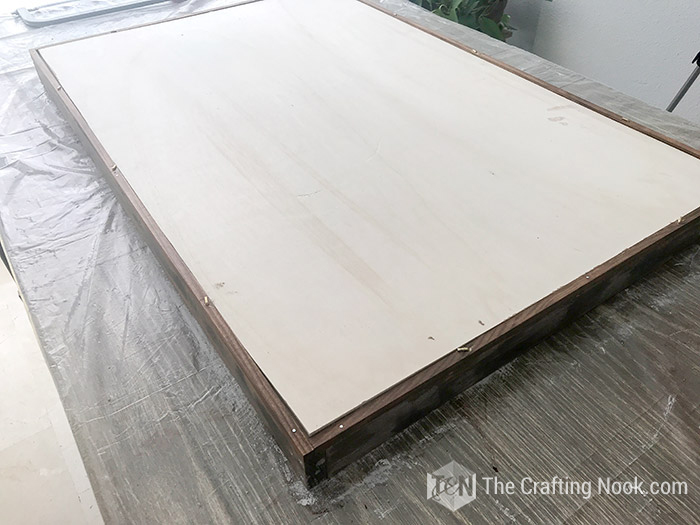
Turn all your hooks over the board to secure them. If they are a bit lose, just cut small pieces of felt and put them between the board and the hook so your board doesn’t get scratched.
WOOHOO!!!!!
Your Oversized Rustic Wood Sign is all ready to rock!
Now to be one step further, before you mount your wood sign board in your frame, you can turn it over and create another wood sign for another season or mood.

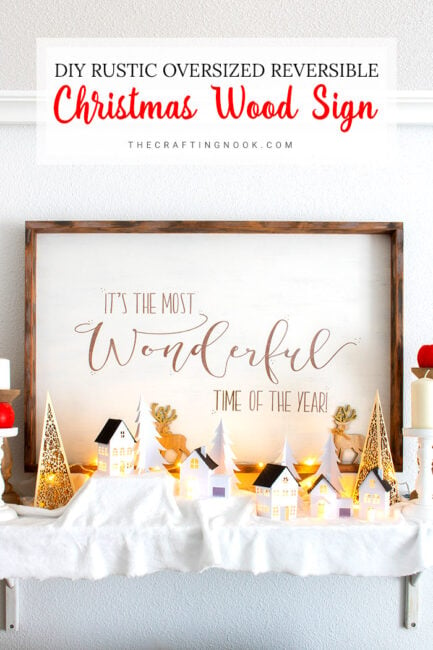
My Christmas wood sign was created with a similar technique but instead of painting the stencil over the white paint, I placed the stencil in positive (just the written words) before the dry brushing technique so it would reveal the wood stain color.
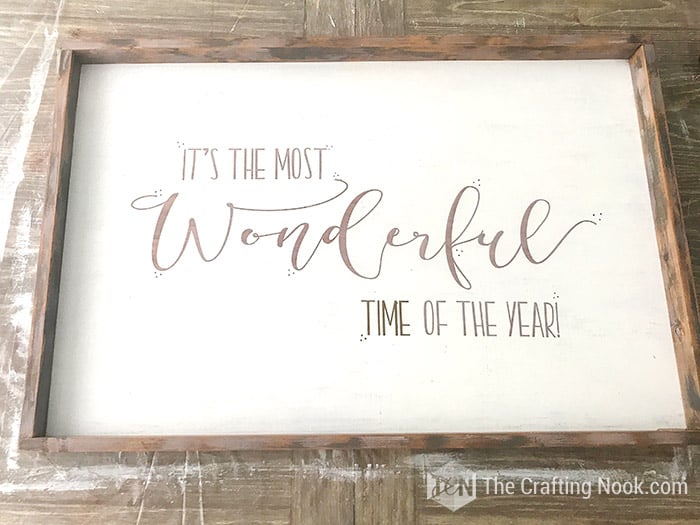
From now on you can keep creating woos signs and just change it for each season without having to make frames over and over again!
Cool, right?

I just love how mine turned out. It was quite a challenge for me considering the space I have available to create it and record the whole process LOL but I already have made 6 different signs.
Hope this project inspires you to create lots of gorgeous Rustic Farmhouse Wood Signs. Let me know your thoughts, it always makes my day!
Crafting Tips:
You can also buy wood stains from the home improvement store, and keep your eyes on the clearance section. Often you can find takebacks for a fraction of the original price.
You can use reclaimed wood to make this wood sign, wood scraps from a construction site, or even re-do a wood sign from a thrift store.
If you don’t have a cutting machine, you can order a custom vinyl decal on Etsy! There are hundreds of shops on Etsy that will print or cut the design of your dreams for you, in the exact size you like.

Frequently Asked Questions
I have good news! You can order a custom vinyl decal on Etsy! There are hundreds of shops on Etsy that will print or cut the design of your dreams for you, in the exact size you like.
It is also a good idea to search according to what you are looking for. For instance, if you are looking for a mountain design, search for “farmhouse vinyl decal.” If the seller does not have the size, you need listed, ask if they can make it just for you. There is a good chance they will.
Alternatively, you can join Facebook groups like Cricut for Dummies or Silhouette Design Inspiration. Other members may be willing to work with you on cutting something.
It doesn’t really matter which type of wood you select – pine is fine, and it’s inexpensive. You can go to a home improvement store like Home Depot and choose a new wood base. They will even cut it for you. Also, check out thrift stores to see if you can find a sign that you can re-do. Ask if you can have scrap lumbers at a construction site and lastly look on sites like Freecycle or Craiglist – sometimes people are giving away lumber for free in your area.
If you want the background of your sign to be completely white, yes, make sure to use this stain-blocking primer on wood before painting. Otherwise, any knots (or random spots) on the plywood will turn the paint into a brownish/yellowish tint over time. But if want a more rustic farmhouse look, you don’t need to use primer, it will definitely end up with more of a farmhouse rustic feel.
More Wood Sign Ideas to try
Enjoying this Rustic wood sign tutorial? You might also love these other rustic woodworking project ideas too:
✂️ Tutorial

Diy Oversized Rustic Wood Sign (Also Reversible)
Tools
- Drill and wood drill bit
- Screwdriver
- Hammer
Supplies
- Pinewood boards as follows below
- Plywood as follows below
- Wood Stain
- White furniture acrylic paint
- Brown/walnut color acrylic paint
- Grey acrylic paint
- Wood headless nails
- Screws
- About 10 L shaped Hook Screws
- Brushes the cheapest the better
- Sandpaper 150 grit
- Piece of cloth.
- Felt Optional
- Your favorite sentiment stencil since mine was large I had it cut in a shop, and if you don’t have a cutting machine or a place to get it cut fo you, you can order a custom vinyl decal on Etsy!
- Drill
- A towel.
- Transfer tape – or masking tape if you don’t have it.
Instructions
STEP 1: PREP WORK
- Firstly and most importantly, make sure the plans are right for your local store sizes. Mine are in millimeters so if you need to use a converter to the metrics you are most familiar with.
- My wood sign is in total 900 mm X 600 mm (35,43 In X 23,62 In)
- Most likely your local store can cut your wood for you.
- So once you have all your supplies ready, clean them up to avoid dust and grease.
- All the supplies gather together for the rustic wood sign
- STEP 1: STAINING THE WOOD SIGN BACKING
- Using your favorite wood stain, paint all your backing plywood. I created mine for this specific piece because I found out that the brands I can find here, usually affect the white paint I use on top. So I diluted a brown acrylic paint with 1 part water and 1 part paint.
- Let it dry.
- Take your frame pieces and let’s make it look worn out.
- On a plate pour some white and grey paint separately.
STEP 2: START CREATING THE WEATHERED LOOK ON YOUR FRAME BOARDS
- Firstly, with grey acrylic paint apply rough and uneven strokes all along the boards. You are going to dry brush on a thin coat of paint.
- No perfection here, just creates strokes here and there.
- When you are done it should look something like this:
- Once the paint dries, do exactly the same but with the white paint. In my experience, if your paint is fast drying, by the time you finish the last board, you can start over with the first right away.
- Set aside to let them dry very well now.
STEP 3: DRY BRUSH PAINT YOUR WOOD SIGN BACKING BOARD.
- Going back to the backing, I started painting with white using my dry brushing technique to achieve a distressed wood look.
- Apply as many coats as you like. I wanted it really white but still be able to see imperfections from the color base.
- Let it dry very well.
STEP 4: SAND OFF THE PAINT FROM YOUR FRAME BOARDS
- Now that your frame pieces are dry, you are going to sand them with your 150-grit sandpaper.
- Sand it like you want to remove all that paint. When you are done the boards should look like the remaining paint is all damaged.
- Clean your boards well to remove all the dust from sanding.
- Time to stain your pieces. Apply your wood stain and then rub it with a piece of cloth.
- Stain the frame boards over the sanded frame boards
- Let them dry.
STEP 5: PREPARE YOUR STENCIL
- Take your backing board back and let’s apply the stencils. As I mentioned, I designed mine but I had it cut in a shop. I have a cutting machine but I didn’t want to puzzle it up.
- You can also find gorgeous stencils in craft stores.
- Once cut I weeded out all the stencil paper that didn’t belong to the design.
- Then used masking tape (because I didn’t have that much transfer tape) and applied it to the stencil with the help of my scraper.
STEP 6: APPLY THE STENCIL AND PAINT
- Remove the backing paper of the stencil carefully and then stick it to the towel. This helps remove the excessive stickiness of the stencil material so it won’t leave glue remains on the wood. This step is optional. I found that most stencil vinyl here is very strong and leaves glue on my signs and I don’t like it.
- Remove the backing paper of the stencil carefully and then stick it to the towel. This helps remove the excessive stickiness.
- Place the stencil on the board making sure it’s straight and centered. I secured the design using the scraper and removed the masking tape.
- If you like the design you can snag the file for free right here!
- Paint your stencil with your brown acrylic paint and tel it dry.
STEP 7: ASSEMBLE THE FRAME.
- Lay down your pieces to form the shape of your frame. Longer boards should go top and bottom and the shorter ones should go left and right.
- Longer boards should go over the end of the shorter ones as shown below.
- To make it easier to screw the frame together (I don’t have a nail gun so I went for screws) I drilled 2 holes on each end of the long pieces to mark the path of the screw. Use a drill tip smaller than the screw you are going to use.
- Apply some glue and screw your pieces together.
- Set aside and let the glue dry for a while.
- When it’s dry you need to create the back frame that will house your wood sign.
- For this, you will set your wood sticks the same way as your main frame but this time you will just glue and nail them in place.
- Align your frame pieces with the outer edge of the main frame. Apply wood and use clamps to secure your pieces in place.
- Once dry, nail it on a few spots just to double secure it.
- Your frame is done!
- Now to keep your wood sign in place, you can use L-shaped Hook Screws if you are on a budget.
- Just drill carefully some holes to mark the path of your hooks on at least 3 spots on the long sides and 2 on the short ones.
- Then screw your hooks in place all the way down!
STEP 8: FINISH WOOD SIGN BACKING BOARD
- So, now, let’s work on our backing board. With the help of a hook, peel off the stencil. Be careful so you don’t damage or scratch the wood.
- Once your design is revealed again, sand it very well and distress some places as you see fit.
- Clean your board well and seal it or varnish it. Let it dry.
STEP 9: ASSEMBLE THE RUSTIC WOOD SIGN
- It’s time to fit your gorgeous wood sign in.
- Place your wood sign facing down
- Turn all your hooks over the board to secure them. If they are a bit lose, just cut small pieces of felt and put them between the board and the hook so your board doesn’t get scratched.
- WOOHOO!!!!! Your Oversized Rustic Wood Sign is all ready to rock!
Some awesome rustic wood crafts from my favorite crafters
- Create Beautiful Art out of an Old Wooden Spool by Lisa over at Recreated Designs.
- Hand Lettered DIY Wood Sign Video Tutorial by Kristi over at Making it in the Mountains.
- How to Build and Paint a Wood Sign by Sarah over at Creative Ramblings.
Share and PIN ME!
Til’ next time…


FREE WORKBOOK
Keeping your Sweet Home Organized
Learn how to create intentional habits and simple routines to Keep Your Home Organized. Plus freebies, printables, exclusive content, and tips.
Disclaimer: By clicking on the “Yes” button above you are giving me your consent to collect and use your information according to the law and My Policy Privacy. Zero Spam I promise!