How to Make DIY Wood Signs with a Farmhouse Look
This post may contain affiliate links. Please read our Disclosure Policy.
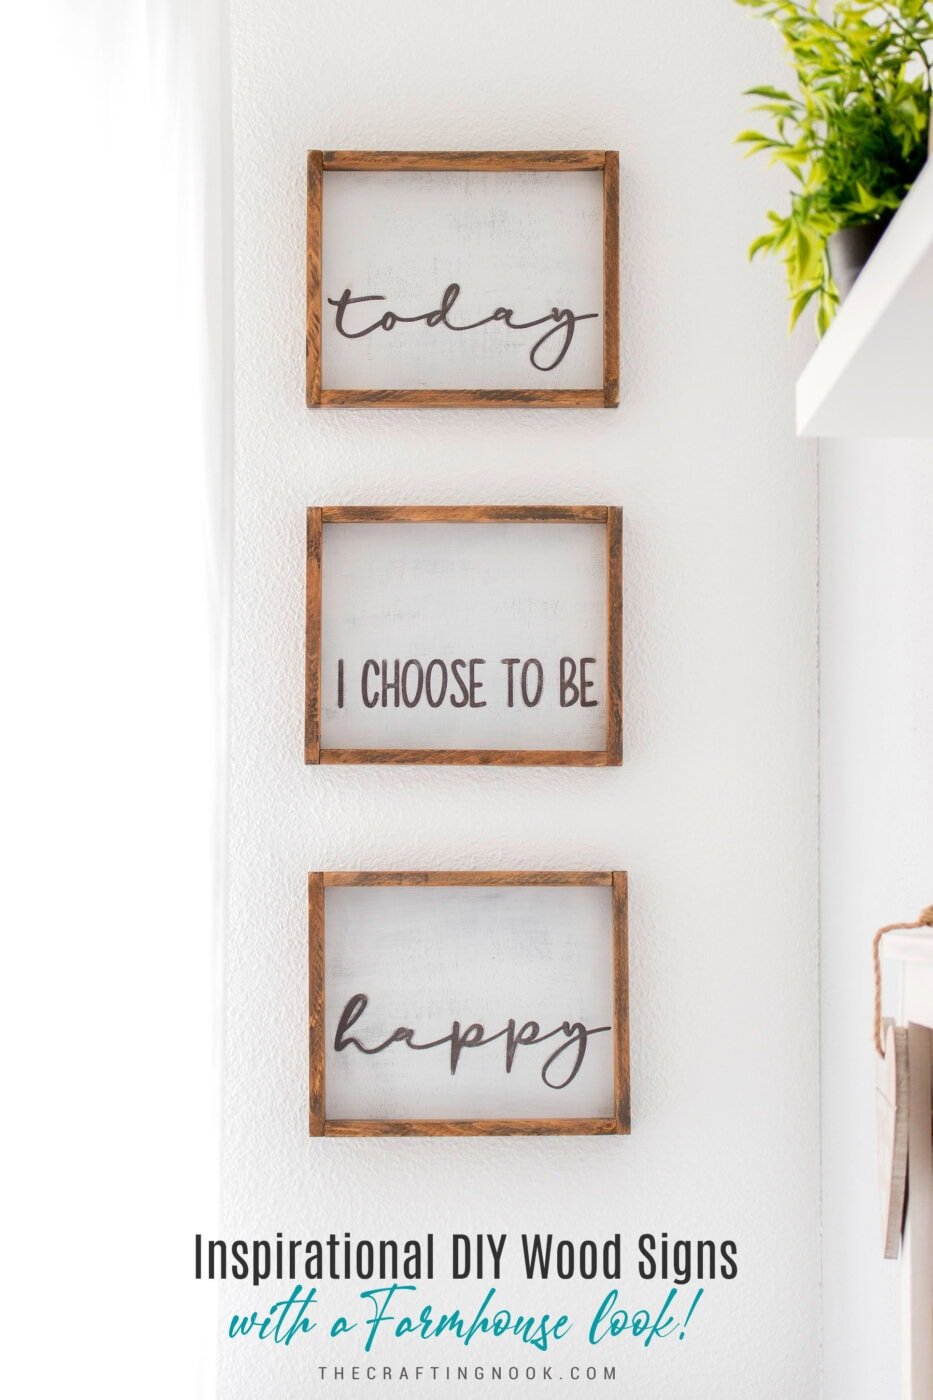
Let’s learn how to make these pretty, bright, and inspirational trio of DIY Wood Signs with a farmhouse look using a cutting machine and some really cool lettering fonts! Here’s how.
This post is sponsored on behalf of FontBundles. It may contain affiliate links which, when purchased through, provide a small commission to The Crafting Nook at no additional cost to you.
Table of Contents
Inspirational DIY Farmhouse Wood Signs
Life can be chaotic, right? Between juggling work, home, kids, and everything else, it’s easy to get caught up in the hustle and lose sight of the simple joys around us. That’s why I love creating projects like these DIY farmhouse wood signs. They’re a great reminder to pause, reflect, and make spaces in our homes that inspire peace and positivity.
Because I know myself and I tend to forget that I wanted to have that reminder really close, to be happy. Because as hard as things can get we can still be happy and thankful for just being alive and having the family we have.
The farmhouse style has always held a special place in my heart—it’s timeless, rustic, and cozy. These wood signs, with their hand-painted, weathered look, add just the right amount of charm to any space. Plus, they’re a fun and creative way to display words that mean something to you and your family.
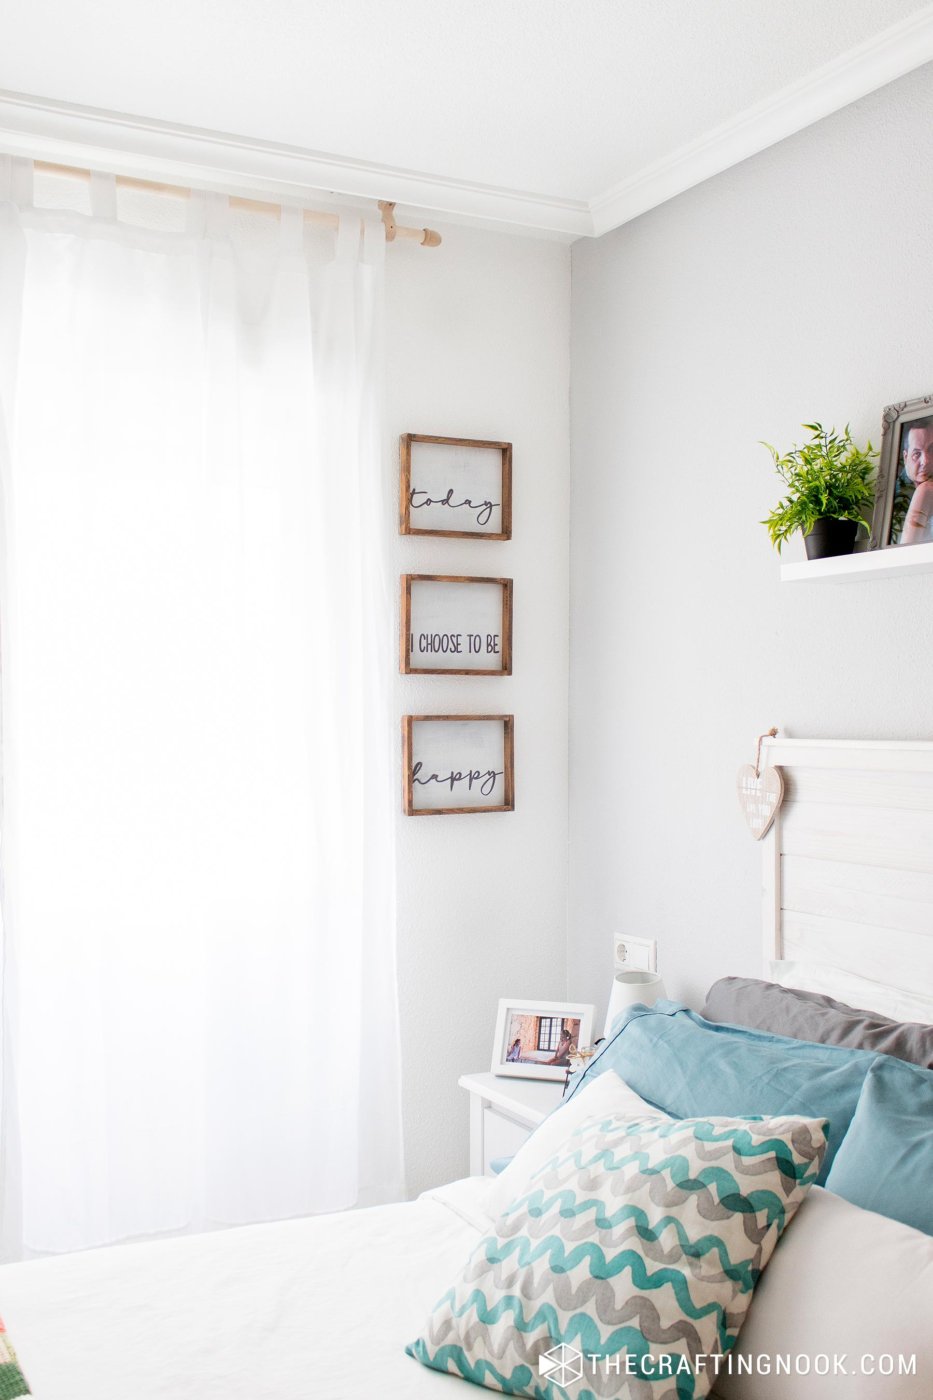
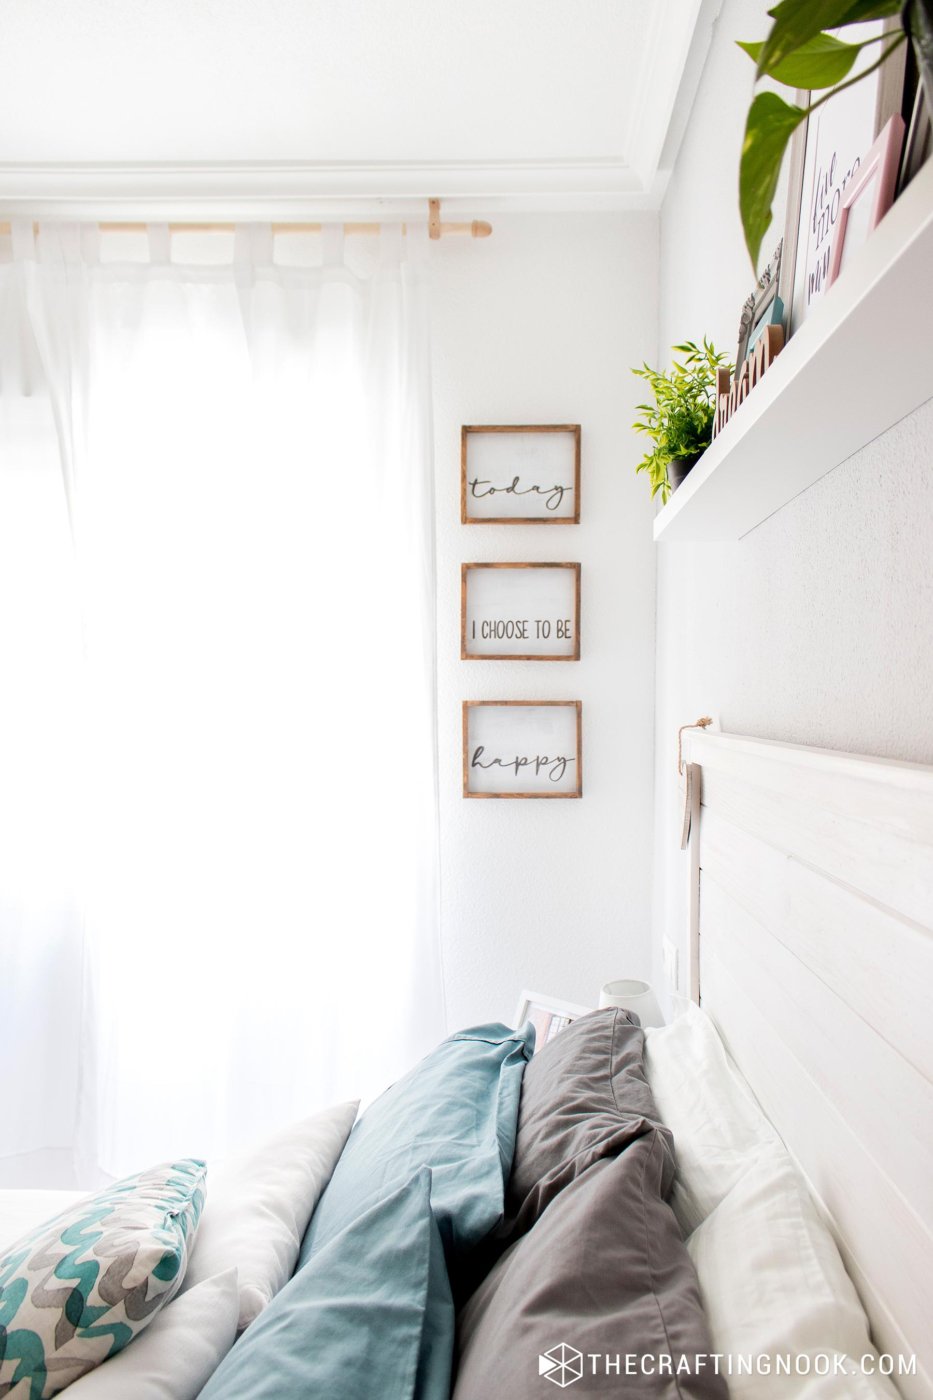
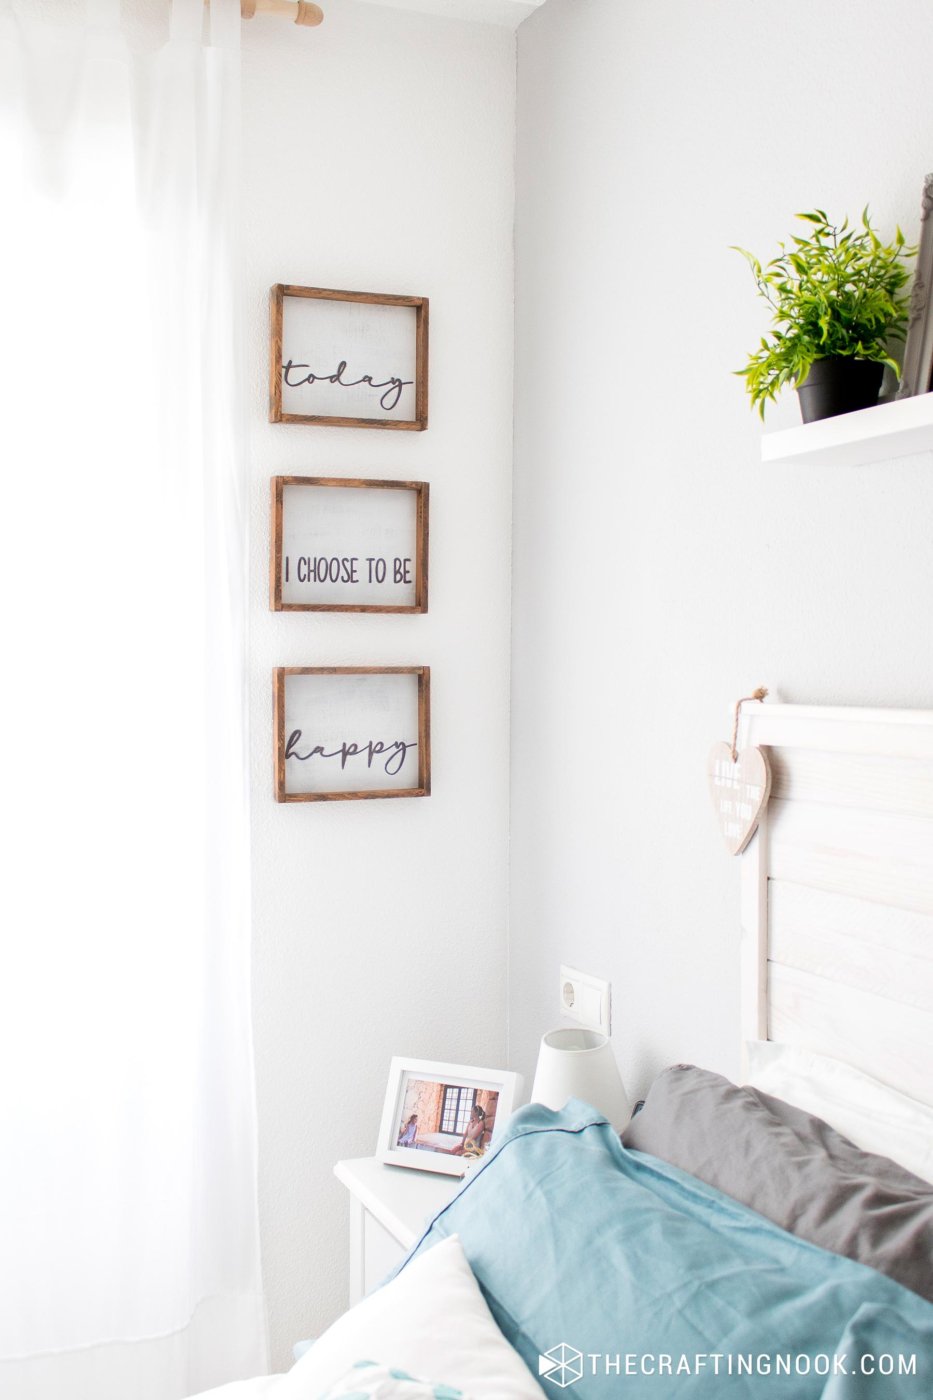
While working on our Master Bedroom decor, I noticed that I had a section of a wall next to the window and right next to our bed that would be the perfect spot for wall art. Or should I say 3?

I particularly love wood signs and triptychs so, why not join the two ideas in one? FontBundles offered their products for any project I wanted and I knew right away it would be so perfect for some pretty inspirational farmhouse signs project.
So, if you’re ready to dive into a craft that’s not only therapeutic but also brings a touch of farmhouse vibe to your home, keep reading! I’m walking you through each step to create your very own inspirational wood signs.
How to make these Inspirational Farmhouse Wood signs
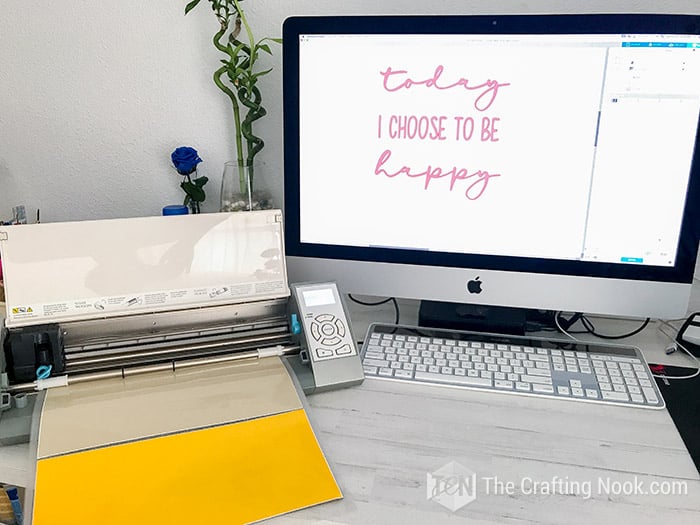
Firstly, you need to choose your perfect pairing fonts. I used fonts from Font Bundles because I fell in love with the mostly sunshine font that was included in one of their bundles.
Download the font files to your computer and then install your chosen fonts. Open your cutting machine software and design your quote, I chose “Today I Choose to Be Happy”, so I read it every morning when I wake up. For this, I used Mostly Sunshine for Duo from that bundle.
Once ready, let’s get crafty!!!
Supplies:
- Vinyl
- Transfer Tape
- Scrapper (credit card will do too)
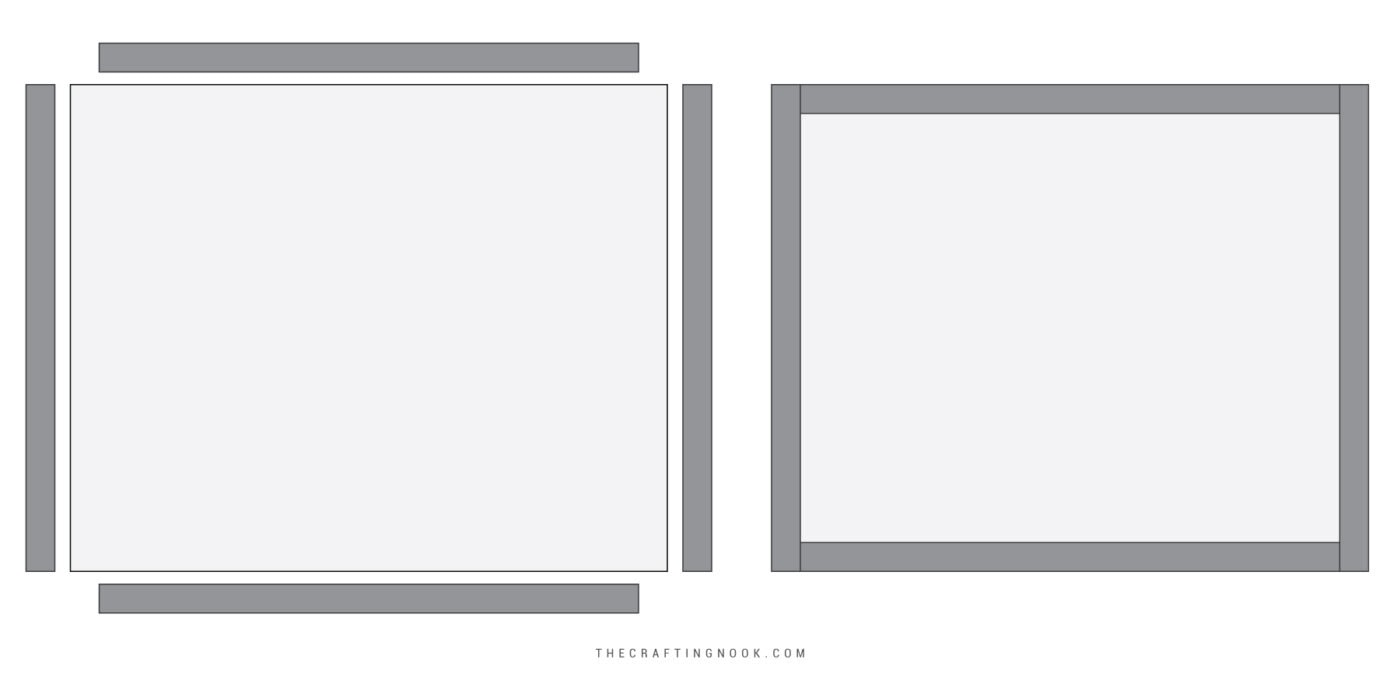
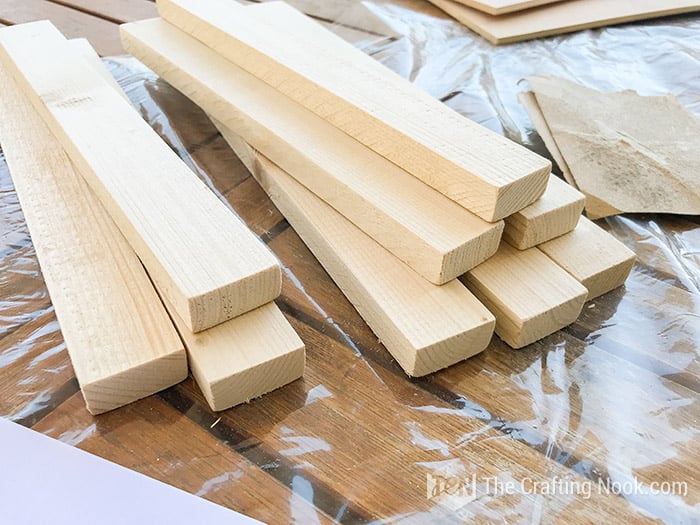
- 3 – 1/8″ plywood (size of your choice)
- 6 – 1×2 @ Same height as your plywood (side frame pieces)
- 6 – 1×2 @ Width of your Plywood minus thickness of your 2 side pieces (top frame pieces)
- White acrylic paint
- Grey acrylic paint
- Wood stain (I used walnut)
- Piece of cloth
- Sandpaper (I used 150-grit)
- Wood glue
- Finishing nails (3d) for the sides
- Finishing nails for the back (about 1” long)
Tools:
- Cutting machine and Mat – Silhouette Cameo or Cricut
- Weeding tool
- Paintbrush – different sizes.
- Hammer – or a brad nailer (and brad nails) if you have it.
- Clamps
Instructions:
Always start with the big picture of what you want to create and how you want it to look like. This helps put together the plan. Mine looked like this:
Step 1: Preparing the Stencils
1. Firstly, prepare your design in your cutting machine software. In my case, I used Silhouette Studio. I mixed hand-lettering font and San-serif font to create a pretty design.
Step 2: Cut your design
2. Cut your stencils with your cutting machine following the appropriate settings for your material and making sure the sizes will fit inside the frames.
I used pieces of Vinyl I already had. Use your stencil material if you already have them.
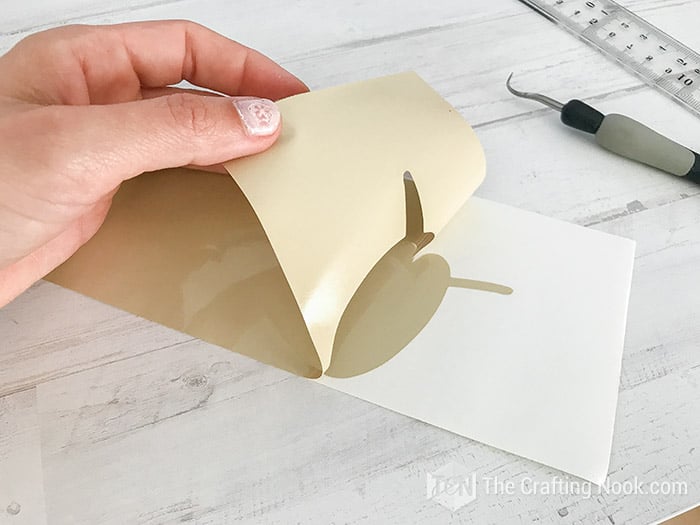
Step 3: Weed out unnecessary vinyl
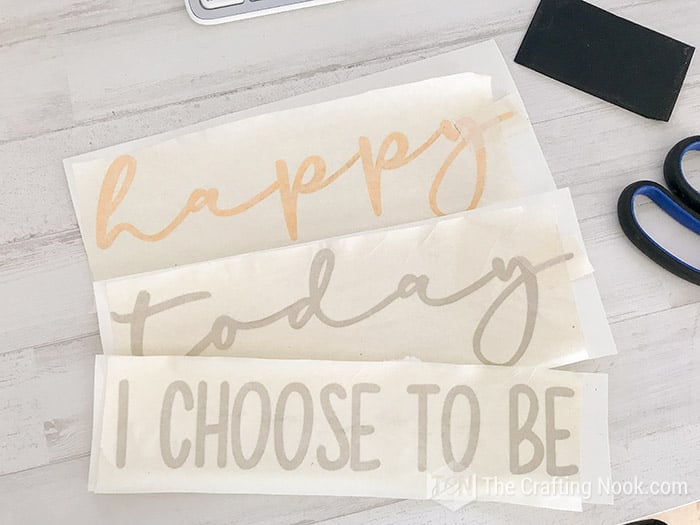
3. Once cut, use the weeding tool (the hook) to remove all the surroundings and any unnecessary pieces of vinyl.

You should get 3 vinyl decals like these:

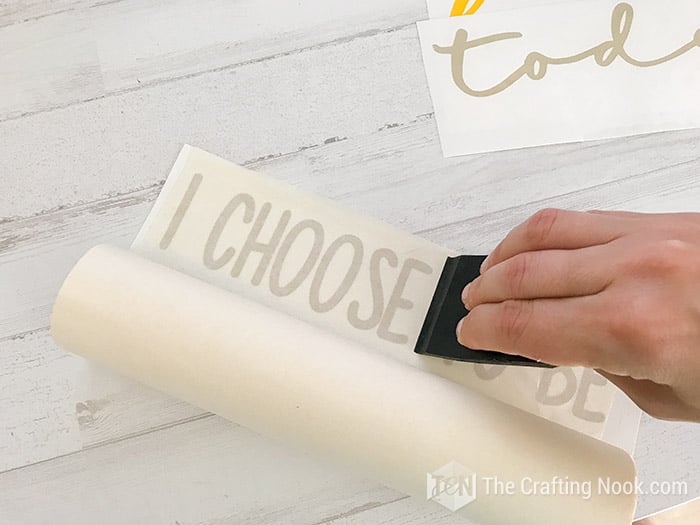
Step 4: Apply Transfer Tape
4. Then cut a piece of transfer tape and place it over one of the stencil pieces. Use the scraper to make sure the vinyl sticks well and cut each stencil to be ready to transfer.
5. Set stencils aside.
Step 5: Preparing the Wood for our Diy Farmhouse Wood Signs
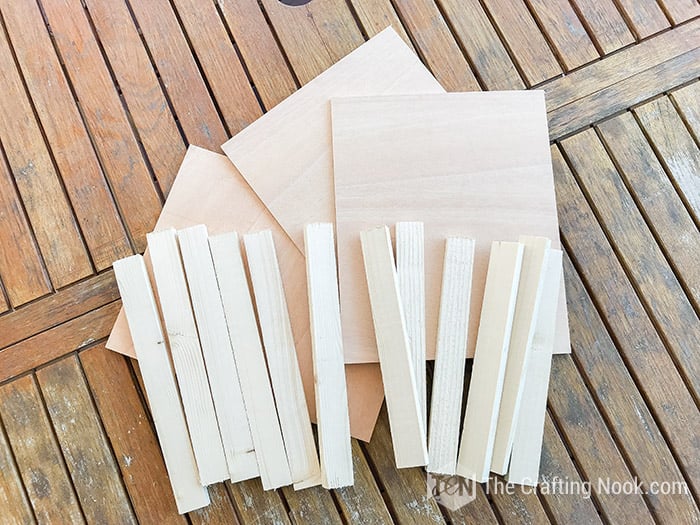
6. Firstly, sand each piece especially on the edges to get rid of imperfections, especially splinters.
7. Then regardless of what wood you will use, it’s always important to clean it off prior to painting. This will not only get rid of any loose dirt and splinters but will also provide a smoother surface to work with.
All you need to do is clean it off with a brush, cloth, and sometimes even with a damp paper towel works perfectly.
Step 6: Paint Frame Wood slats
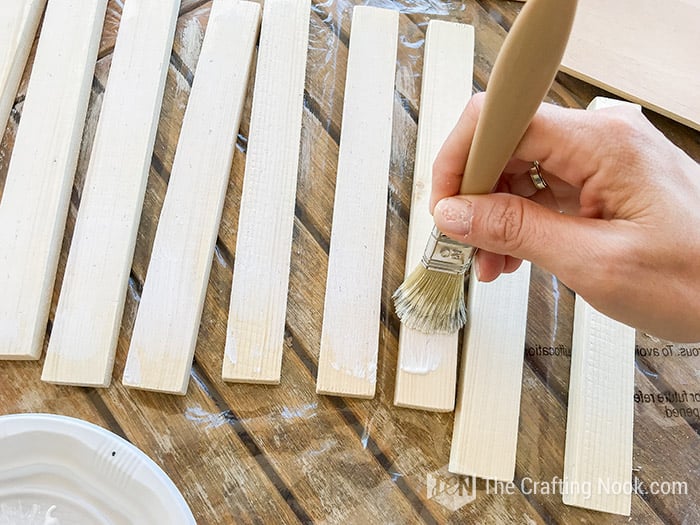
8. Using a brush, dip the tips and apply rough strokes on the wood frame pieces. Forget about perfection. Just give each piece some harsh strokes. This is only to give the wood that weathered, aged look, so the more imperfect the better.
9. I started with white paint. Apply on all sides. Let it dry for a few minutes
10. Then Apply grey paint the same way and let it dry for a few hours. It’s important that the paint is really dry.
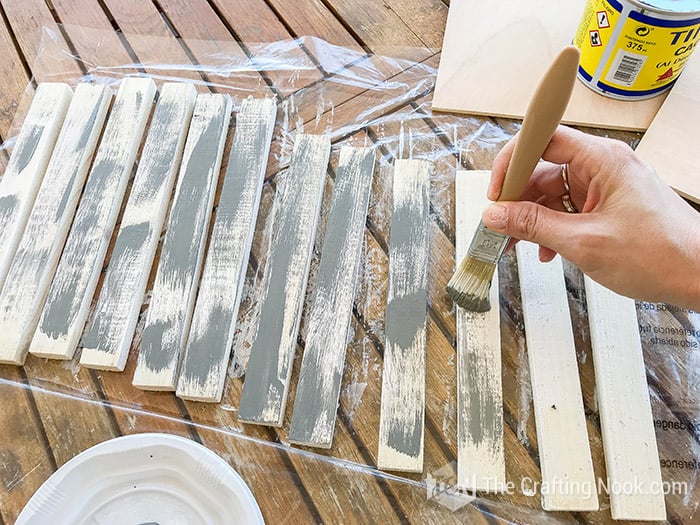
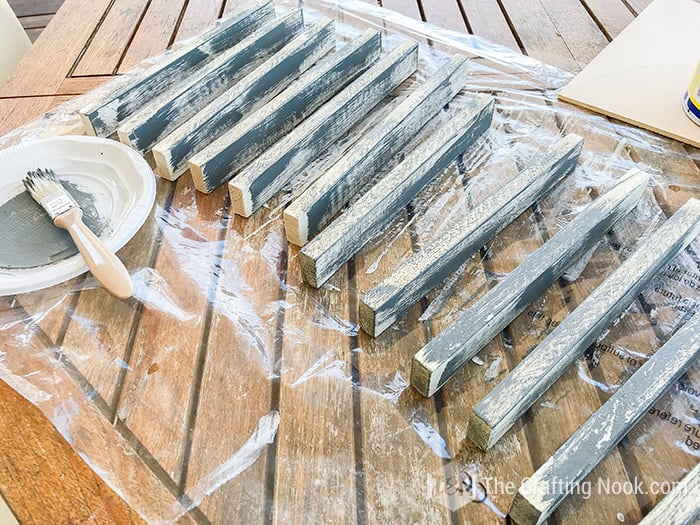
11. Once it’s dry, sand it well until the paint is barely kind of stains on the wood.
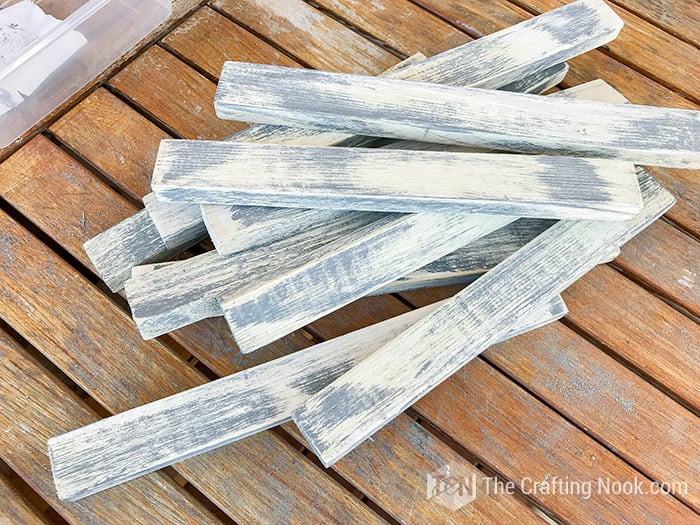
12. Clean each piece well.
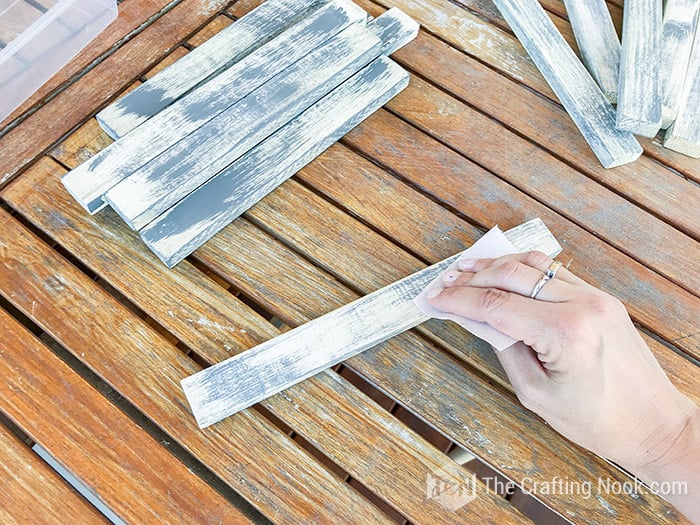
Step 7: Stain Frame Wood slats
13. It’s time to stain. Using a piece of cloth, dip a small section, and then rub it along the wood. I like to dampen the wood first and then remove the excess with another clean piece of cloth. You can repeat this step until you get the color you like.
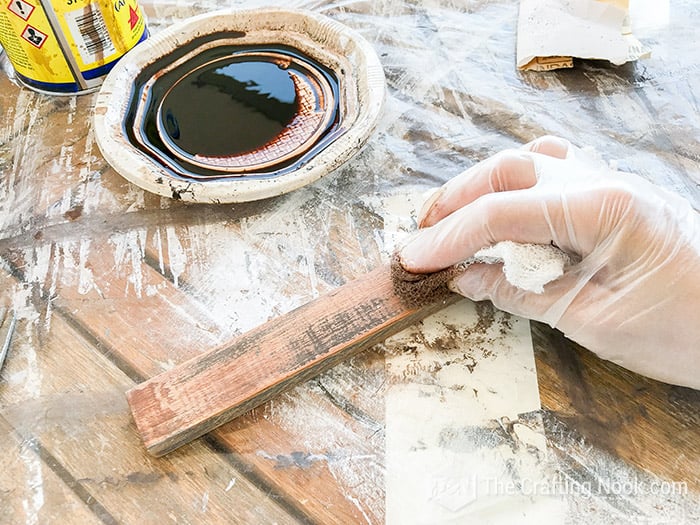
14. Let them for a few hours.
15. Use a sealer or varnish to protect each piece. Let them dry for a few more hours or overnight.
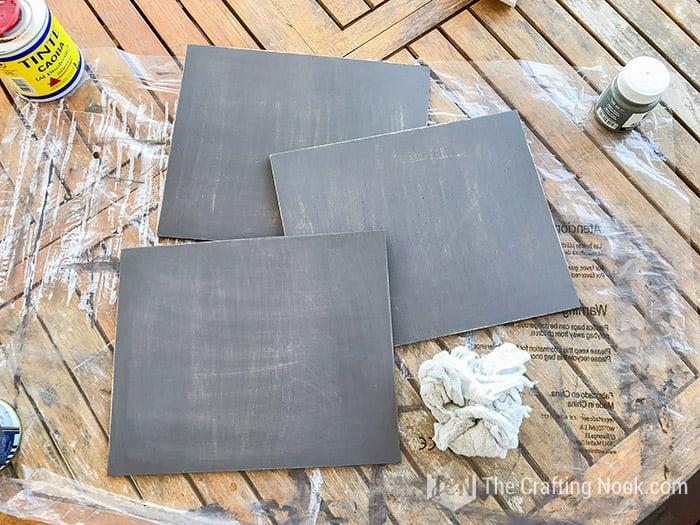
Step 8: Paint sign pieces:
16. Dilute your acrylic paint 50/50 with water and then paint the first coat on your wood board. Again, no need for perfection since you will be painting again over it with white. This will give the dark look to your lettering.
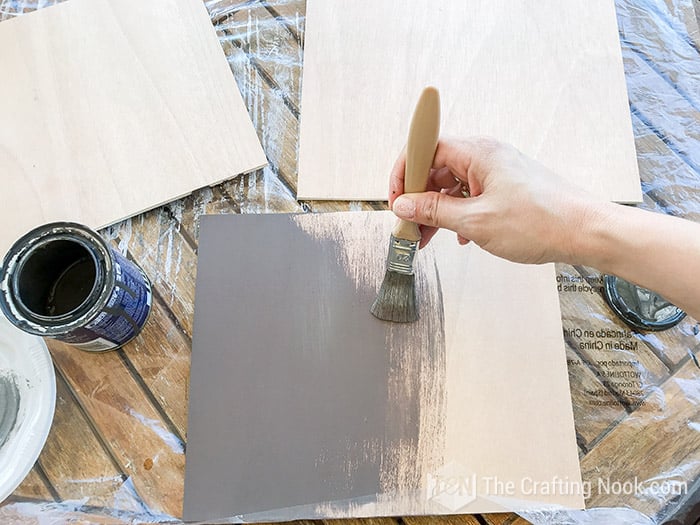
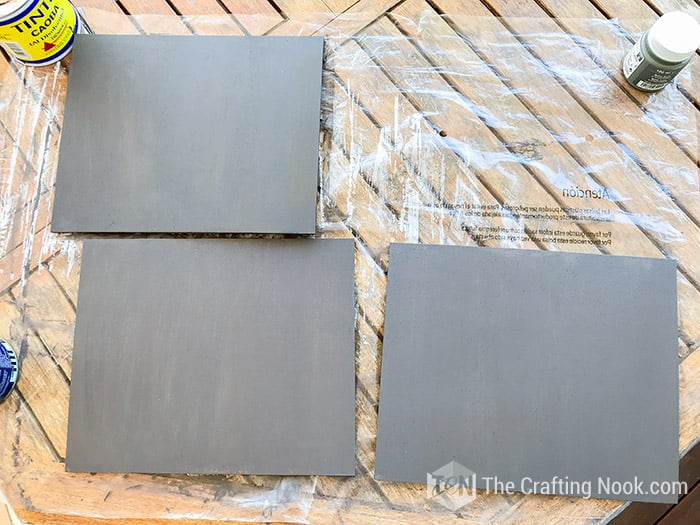
17. Let them dry well and give them a sanding.
18. Clean the surface and give another paint coat. Again, give a good sanding and clean them well.
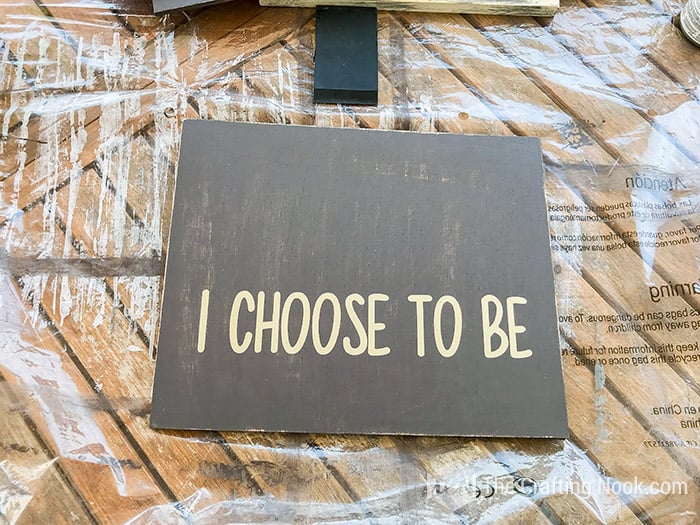
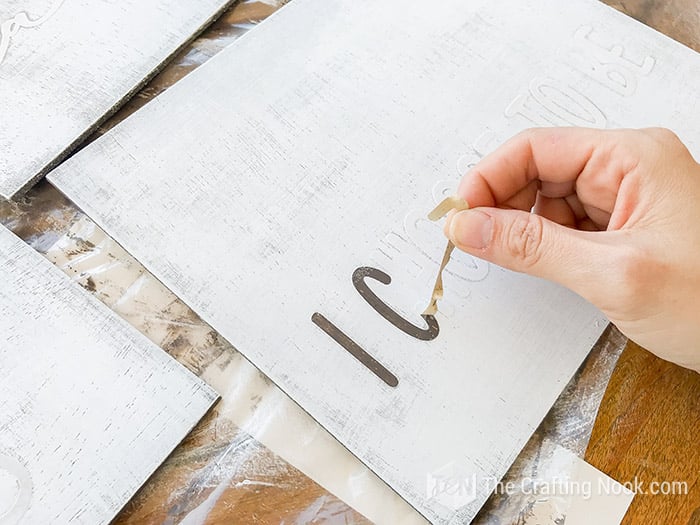
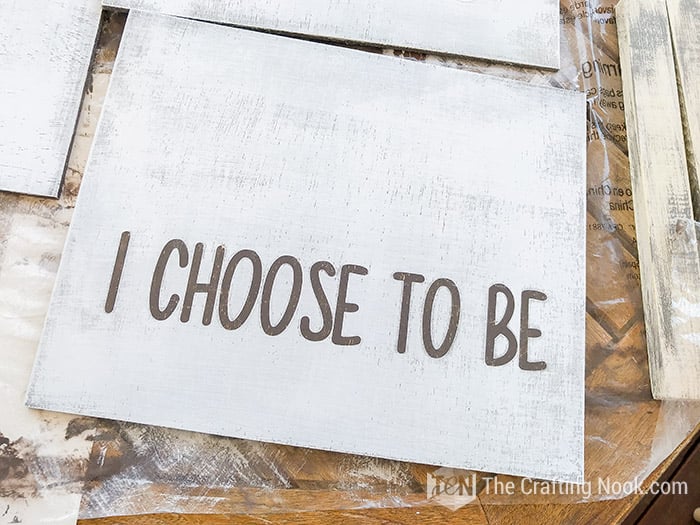
Step 9: Stencil the Rustic Wood Signs
19. Decide where your lettering will be and then peel the transfer tape off, making sure that the vinyl accompanies it.
20. Place the transfer tape on the painted wood. I chose to place mine on the bottom center of the piece keeping in mind where the frame would be.

21. Use the scraper to firmly adhere the vinyl. If I’m not using stencil material (like in this case) I first stick it to a piece of fabric so it loses slightly the adherence, otherwise, when I remove peel it off it will leave some sticky things behind. We don’t want that.
22. Carefully peel the transfer tape off, leaving only the vinyl on the wood.

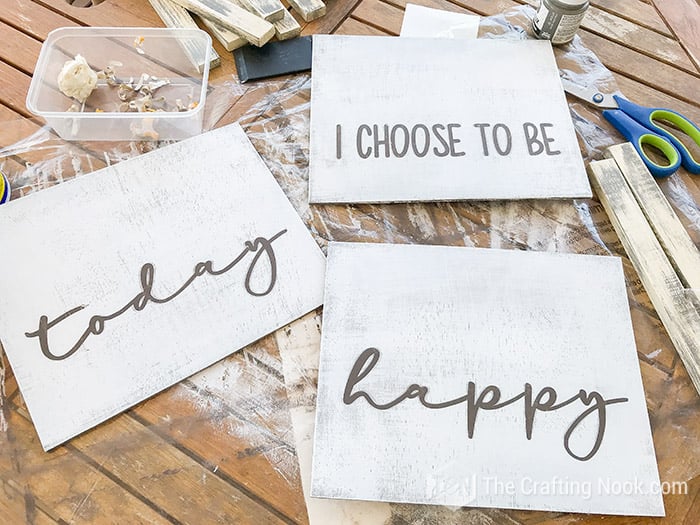
Step 10: Dry Brush the DIY farmhouse signs
The second coat of paint will be the one covering the entire board. I used the dry brush technique for this step because I wanted to get a more rustic imperfect effect on the wood.
23. If you are not familiar with that technique, first put some paint on a paper plate and spread it out kinda thin, then take a dry paint brush and just get a tiny bit of paint on the end of the bristles.
24. Then just brush this along the wood and re-dip in the paint as necessary, but don’t get carried away because you want your brush to remain almost dry.
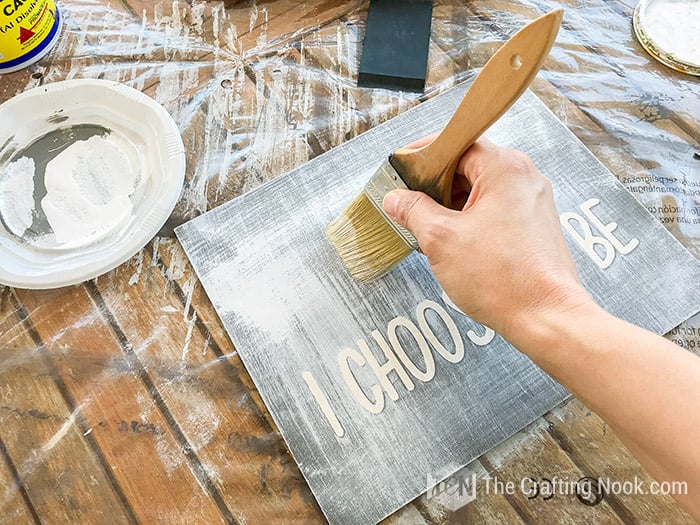
25. Repeat as many times as you need until you get the look you like. In my case, I wanted it almost white but still be able to see the wood imperfections.
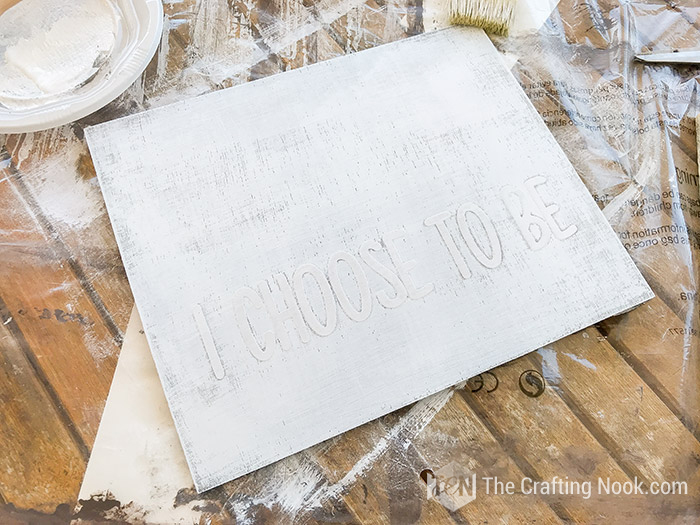
26. Repeat on the other pieces. Let the wood signs dry completely for a few hours.
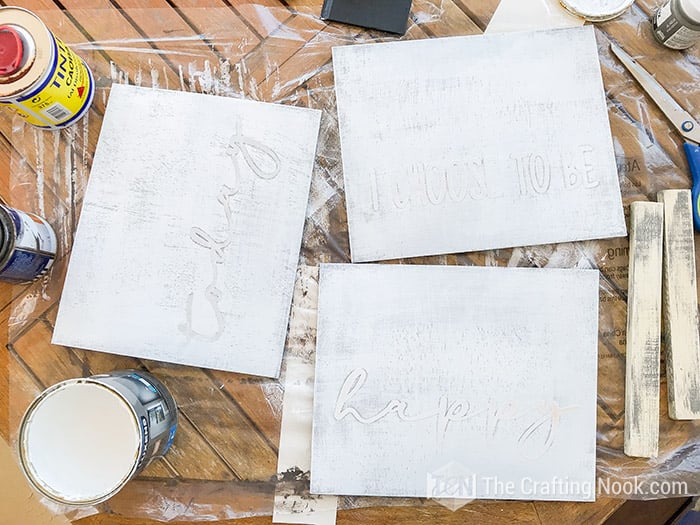
27. Then peel off carefully your stencil pieces. If you’re having a hard time pulling up small pieces of the vinyl use the hook tool for removing vinyl. Still, be careful not to damage the wood.
28. Then give it a sanding to smooth the surface and clean it well.
Step 11: frame your pretty Farmhouse Wood Signs
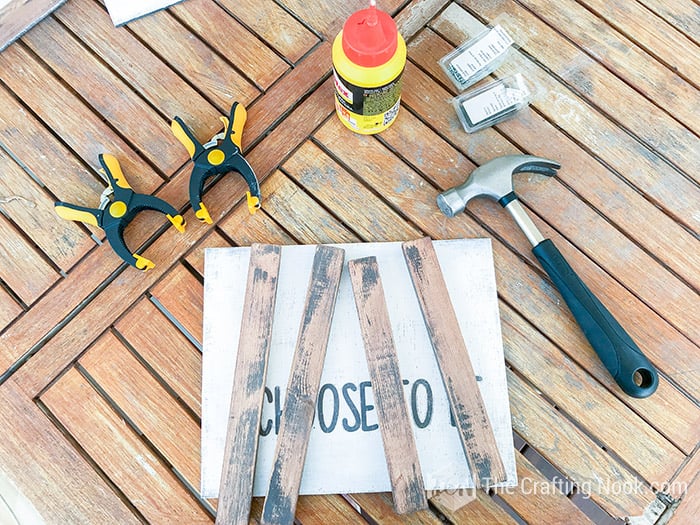
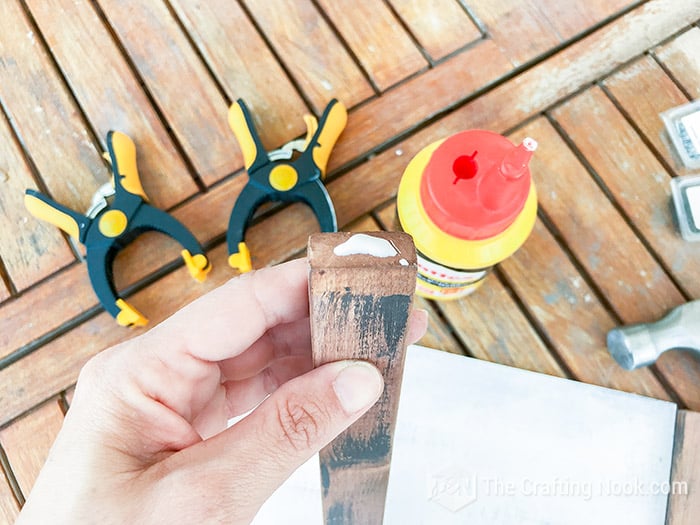
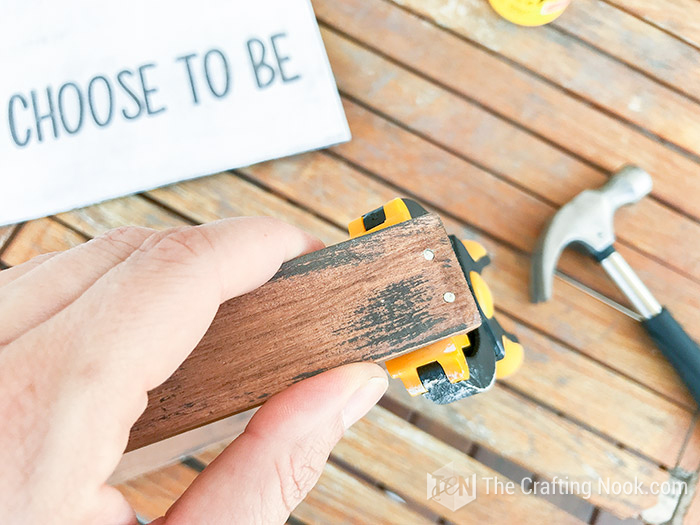
29. To make sure the frame would be strong enough to handle the curvy shape of the painted plywood, I first built each frame before attaching it to the wood signs.

30. Place the pieces on the wood sign and then apply wood glue.
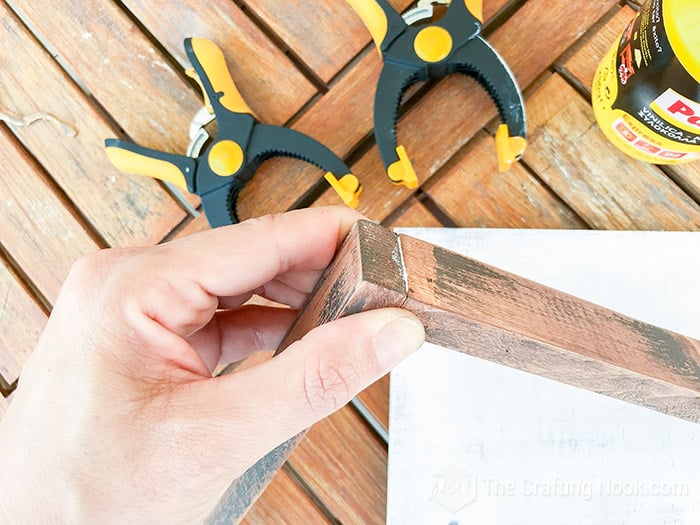
31. With the help of clamps attach each corner of your frame.
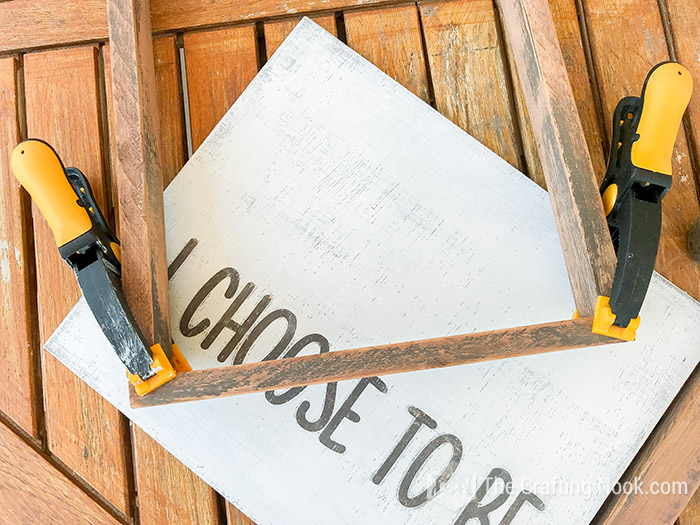
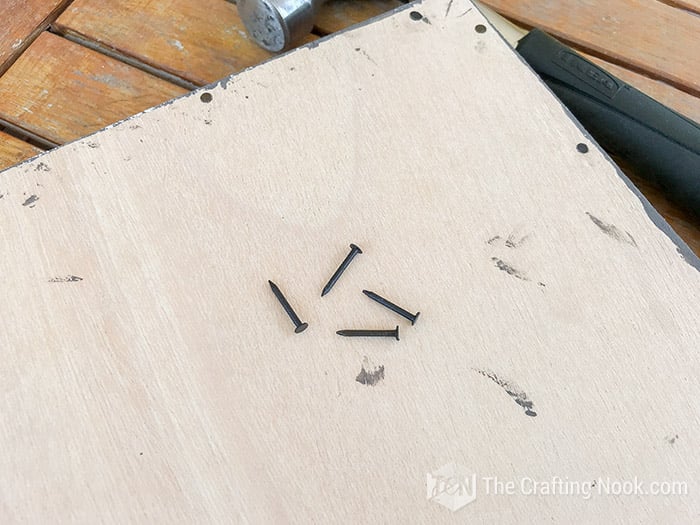
32. Nail each corner together and move on to the next frame.
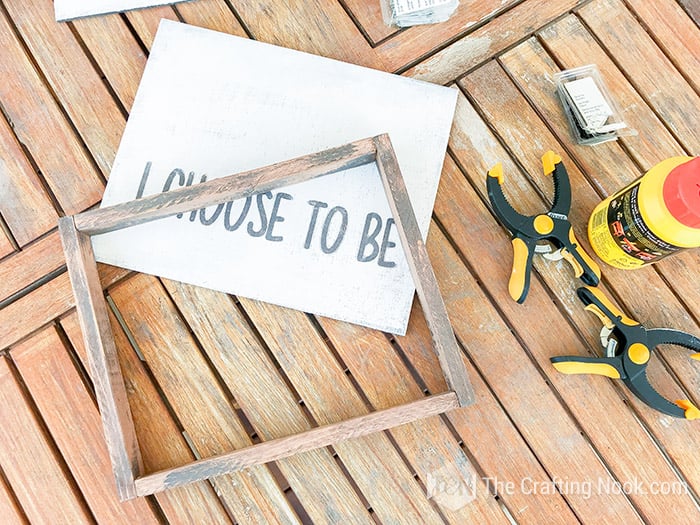
33. Then place your wood sign upside-down on the frame matching side edges well and nail it to the frame.
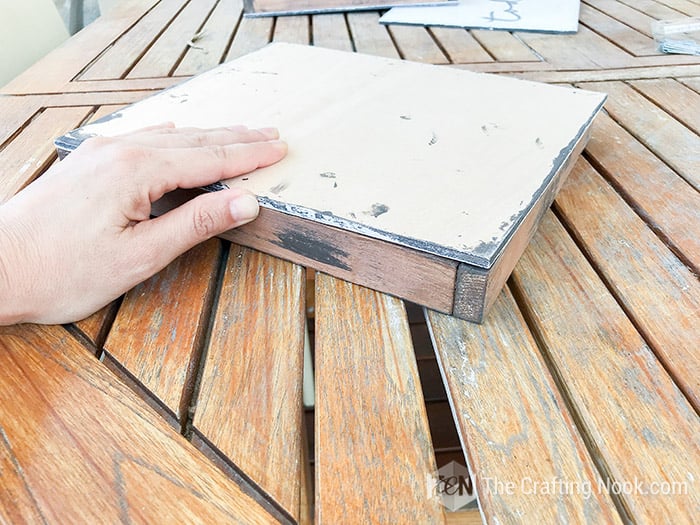
34. Repeat with the other frames.
35. Lastly, install picture hangers on the back. I like these picture framing sawtooth hangers because they give you margins of error.
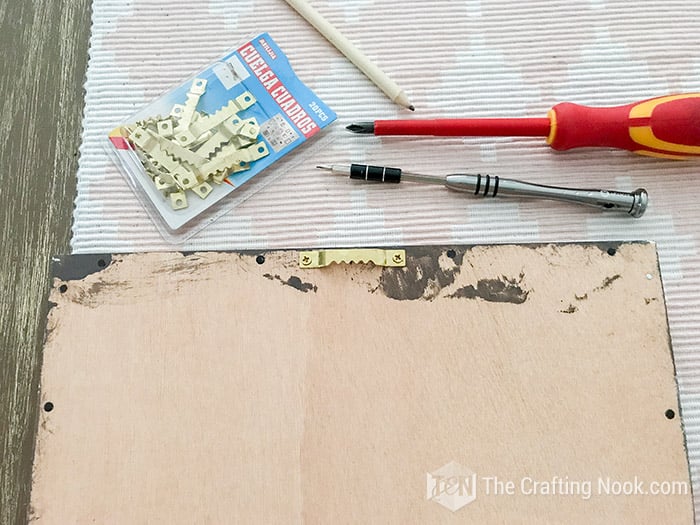

You are all done.
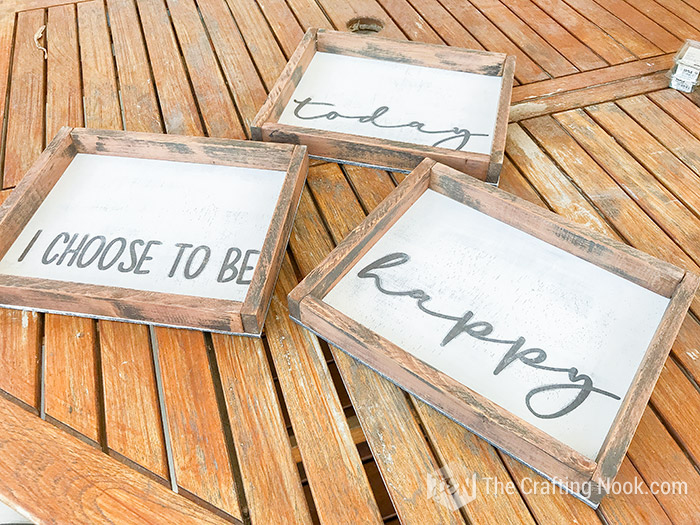
Just hang them and make your space extra pretty and special.

Don’t you love how these Farmhouse Wood Signs turned out?
Now every morning I look at it and remember that happiness is a choice and that I always should choose to be happy.
Crafting Tips
- If you cut the stencil with a cutting machine, remember to remove the excess vinyl and transfer your design. Once you’ve cut the vinyl, you’ll want to “weed” the design with your weeding tool, which means removing the negative space to reveal only your letters.
- Don’t forget those small spaces inside the letters, especially when working with script fonts. After your design is ready to go, you’ll use transfer tape to “pick up” the letters from the carrier sheet and then place them on your sign.
- If you don’t have a cutting machine, you can still make this project using the pencil transfer method or use a sheet of carbon paper.
- Print your design on computer paper. Turn the paper over, and scribble pencil marks over the areas where the text is printed. Place the paper on your surface (design facing up) and trace an outline of the printed letters with a pen.
- The pencil on the other side will make faint marks on your wood. Remove the paper and fill in the traced letters with a permanent marker, Chalk paint marker, or black paint.
- Also alternatively, you can order a custom vinyl decal on Etsy! There are hundreds of shops on Etsy that will print or cut the design of your dreams for you, in the exact size you like.
- You can also buy stains from the home improvement store, and keep your eyes on the clearance section. Often you can find takebacks for a fraction of the original price.
- You can use reclaimed wood to make this wood sign, wood scraps from a construction site, or even re-do a wood sign from a thrift store.
What do you think?
Frequently Asked Questions
I have good news! You can order a custom vinyl decal on Etsy! There are hundreds of shops on Etsy that will print or cut the design of your dreams for you, in the exact size you like.
It is also a good idea to search according to what you are looking for. For instance, if you are looking for a mountain design, search for “farmhouse vinyl decal.” If the seller does not have the size, you need listed, ask if they can make it just for you. There is a good chance they will.
Alternatively, you can join Facebook groups like Cricut for Dummies or Silhouette Design Inspiration. Other members may be willing to work with you on cutting something.
Another option is to use the carbon paper method where you transfer manually the design to the wood sign after you dry brush and paint the letters.
It doesn’t really matter which type of wood you select – pine is fine, and it’s inexpensive. You can go to a home improvement store like Home Depot and choose a new wood base. They will even cut it for you. Also, check out thrift stores to see if you can find a sign that you can re-do. Ask if you can have scrap lumbers at a construction site and lastly look on sites like Freecycle or Craiglist – sometimes people are giving away lumber for free in your area.
If you want the background of your sign to be completely white, Yes, make sure to use this stain-blocking primer on wood before painting. Otherwise, any knots (or random spots) on the plywood will turn the paint into a brownish/yellowish tint over time. But if want a more rustic farmhouse look, you don’t need to use primer, it will definitely end up with more of a farmhouse rustic feel.
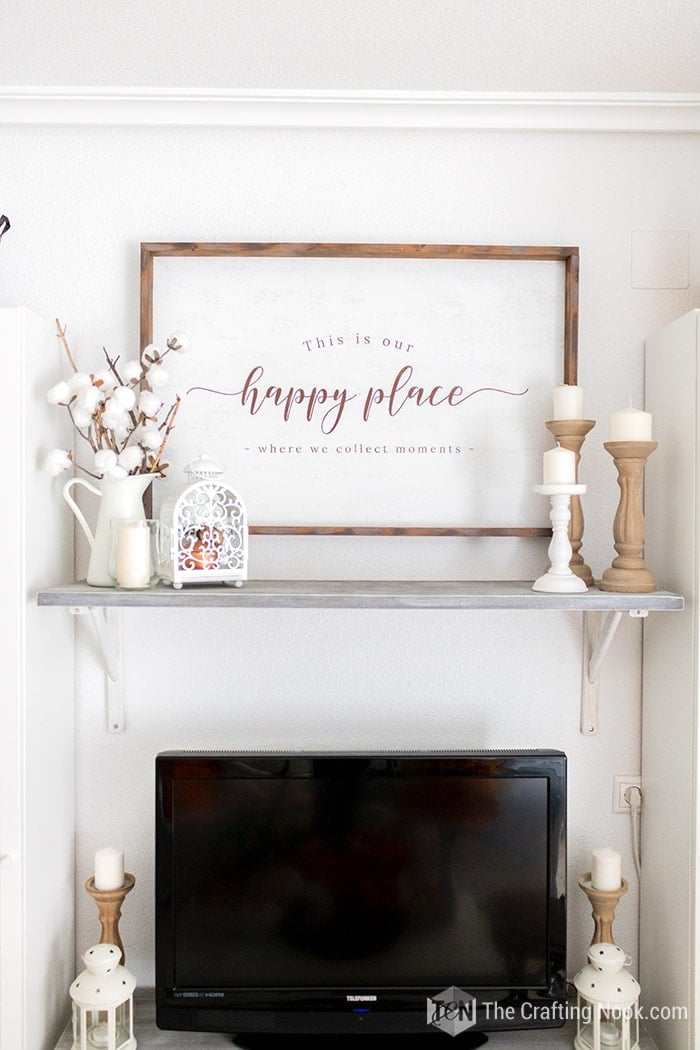
You can show off this gorgeous custom wood sign as part of your home decor in your, bedroom, bathroom, living room, office room, or in entryway. Depending on the sentiment you use, you can even put it above your bed in a horizontal display.
More Decorative Woodworking Ideas to Try
If you enjoy this Farmhouse DIY Wood Signs tutorial, you might also love these other Woodworking project ideas too:

✂️ Tutorial

Inspirational DIY Wood Signs with Farmhouse Look
Tools
- Cutting machine and Mat – Silhouette Cameo or Cricut
- Weeding tool
- Hammer
- Clamps
- scissors
Supplies
- Vinyl
- Transfer Tape
- Scrapper credit card will do too
- 1/8 ″ plywood size of your choice
- 6 – 1×2 @ Same height as your plywood side frame pieces
- 6 – 1×2 @ Width of your Plywood minus thickness of your 2 side pieces top frame pieces
- White acrylic paint
- Grey acrylic paint
- Brushes
- Wood stain I used walnut
- Piece of cloth
- Sandpaper I used 150-grit
- Wood glue
- Finishing nails 3d for the sides
- Finishing nails for the back about 1” long
Instructions
STEP 1: PREPARING THE STENCILS
- First of all, prepare your design in your cutting machine software. In my case, I used silhouette studio. I mixed script font and San-serif font to create a pretty design.
STEP 2: CUT YOUR DESIGN
- Cut your stencils with your cutting machine following the appropriate settings for your material and making sure the sizes will fit inside the frames. I used pieces of Vinyl I already had. Use your stencil material if you already have them.
STEP 3: WEED OUT UNNECESSARY VINYL
- Once cut, use the weeding tool (the hook) to remove all the surroundings and any unnecessary pieces of vinyl.
STEP 4: APPLY TRANSFER TAPE
- Then cut a piece of transfer tape and place it over one of the stencil pieces. Use the scraper to make sure the vinyl sticks well and cut each stencil to be ready to transfer.
- Set shtencils aside.
STEP 5: PREPARING THE WOOD FOR OUR DIY FARMHOUSE WOOD SIGNS
- Firstly, sand each piece especially on the edges to get rid of imperfections, especially splinters.
- Then regardless of what wood you will use, it’s always important to clean it off prior to painting. This will not only get rid of any loose dirt and splinters but will also provide a smoother surface to work with. All you need to do is clean it off with a brush, cloth, and sometimes even with a damp paper towel works perfectly.
STEP 6: PAINT FRAME WOOD SLATS
- Using a brush, dip the tips and apply rough strokes on the frame pieces. Forget about perfection. Just give each piece some harsh strokes. This is only to give the wood that weathered, aged look, so the more imperfect the better.
- I started with white paint. Apply on all sides. Let it dry for a few minutes
- Then Apply grey paint the same way and let it dry for a few hours. It’s important that the paint is really dry.
- Once it’s dry, sand it well until the paint is barely kind of stains on the wood.
- Clean each piece well.
STEP 7: STAIN FRAME WOOD SLATS
- Then it’s time to stain. I used a piece of cloth, dipped a small section, and then rub it along the wood. I like to damp the wood first and then remove the excess with another clean piece of cloth. You can repeat this step until you get the color you like.
- Let them dy for a few hours.
- Use a sealer or varnish to protect each piece. Let them dry for a few more hours or overnight.
STEP 8: PAINT SIGN PIECES
- Dilute your acrylic paint 50/50 with water and then paint your wood. Again no need for perfection since you will be painting again over it with white. This will give the dark look to your lettering.
- Let them dry well and give them a sanding.
- Clean the surface and give another paint coat. Again Give a good sanding and clean them well.
STEP 9: STENCIL THE RUSTIC WOOD SIGNS
- Decide where your lettering will be and then peel the transfer tape off, making sure that the vinyl accompanies it.
- Place the transfer tape on the painted wood. I choose to place mine on the bottom center of the piece keeping in mind where the frame would be.
- Use the scraper to firmly adhere the vinyl. If I’m not using stencil material (like in this case) I first stick it to a piece of fabric so it loses slightly the adherence, otherwise, when I remove peel it off it will leave some sticky things behind. We don’t want that.
- Carefully peel the transfer tape off, leaving only the vinyl on the wood.
STEP 10: DRY BRUSH THE DIY FARMHOUSE SIGNS
- I used the dry brush technique for this step because I wanted to get a more rustic imperfect effect on the wood.
- If you are not familiar with that technique, first put some paint on a paper plate and spread it out kinda thin, then take a dry brush and just get a tiny bit of paint on the end of the bristles.
- Then just brush this along the wood and re-dip in the paint as necessary, but don’t get carried away because you want your brush to remain almost dry.
- Repeat as many times as you need until you get the look you like. In my case, I wanted it almost white but still being able to see the wood imperfections.
- Repeat on the other pieces. Let the wood signs dry completely for a few hours.
- Then peel off carefully your stencil pieces. If you’re having a hard time pulling up small pieces of the vinyl use the hook tool for removing vinyl. Still, be careful not to damage the wood.
- Then give it a sanding to smooth the surface and clean it well.
STEP 11: FRAME YOUR PRETTY FARMHOUSE WOOD SIGNS
- To make sure the frame would be strong enough to handle the curvy shape of the painted plywood, I first built each frame before attaching it to the wood signs.
- Place the pieces on the wood sign and then apply wood glue.
- With the help of clamps attach each corner of your frame.
- Nail each corner together and move on to the next frame.
- Then place your wood sign upside-down on the frame matching sideedges well and nail it to the frame.
- Repeat with the other frames.
- Lastly, install picture hangers on the back. I like these picture framing sawtooth hangers because they give you margins of error.
- You are all done. Just hang them and make your space extra pretty and special.
Share and PIN ME!

Til’ next time…


FREE WORKBOOK
Keeping your Sweet Home Organized
Learn how to create intentional habits and simple routines to Keep Your Home Organized. Plus freebies, printables, exclusive content, and tips.
Disclaimer: By clicking on the “Yes” button above you are giving me your consent to collect and use your information according to the law and My Policy Privacy. Zero Spam I promise!