DIY Name Door Sign With Mod Podge for Kids
This post may contain affiliate links. Please read our Disclosure Policy.
Create a fun DIY name door sign for your kids room using Mod Podge! It’s easy, budget-friendly, and customizable—perfect for personalizing any room!
Every kid loves having something special that shows off their personality, and what better way to do that than with a custom DIY name sign for their room decor? I remember how excited my brother was when I made one just for him—it was such a fun, simple project that instantly made his room feel more like his own.
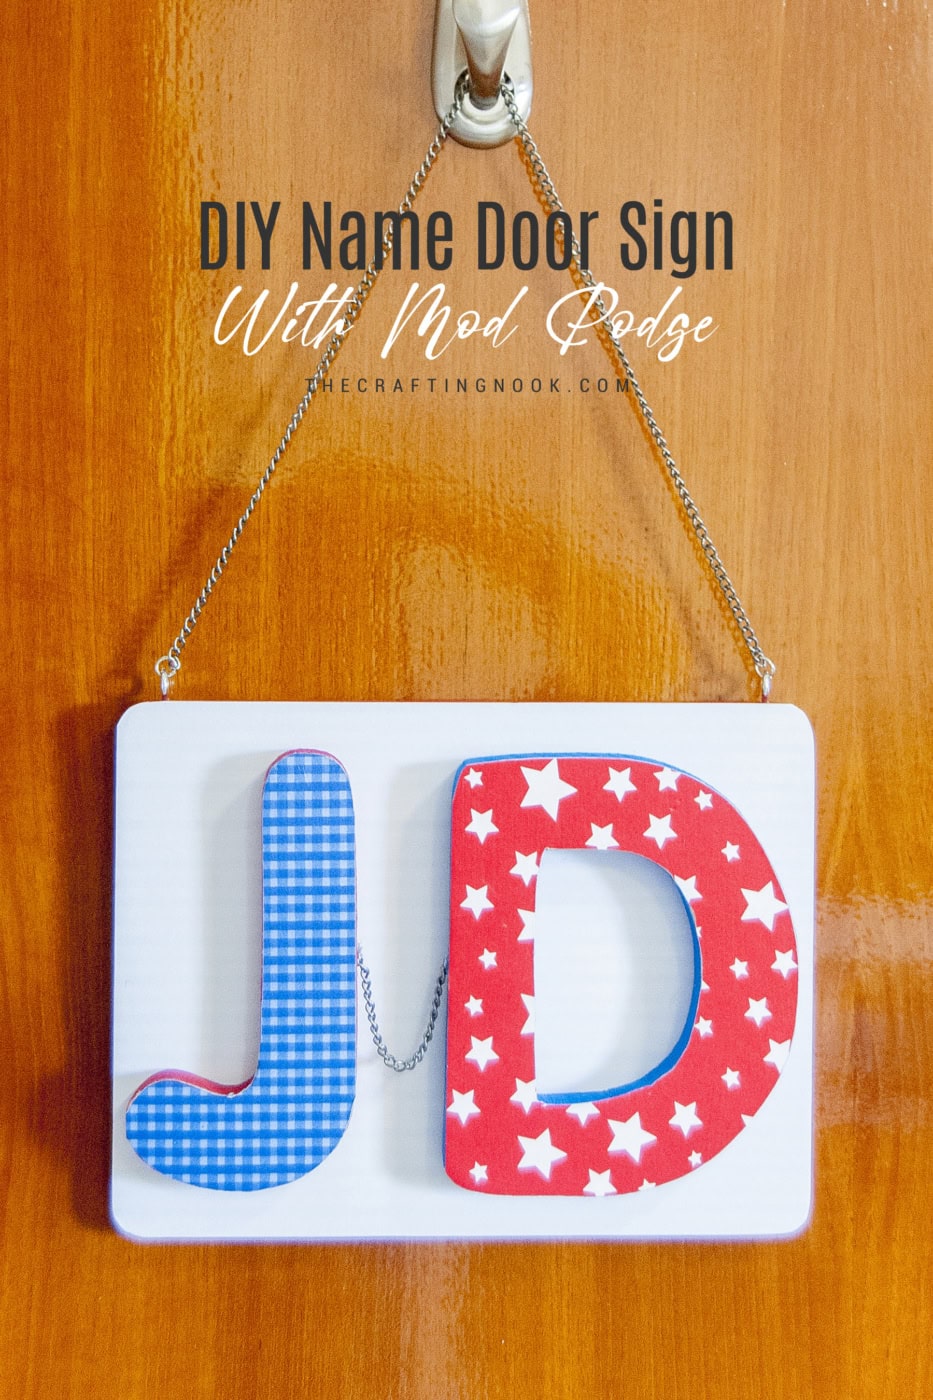
Table of Contents
Mod Podge Door Plaque for kids
If there’s one thing that most kids love, it’s the idea of owning something special that’s all theirs, and what better place to start than their bedroom door? I remember my brother was obsessed with the idea of a car plaque for his door, but we never got around to it.
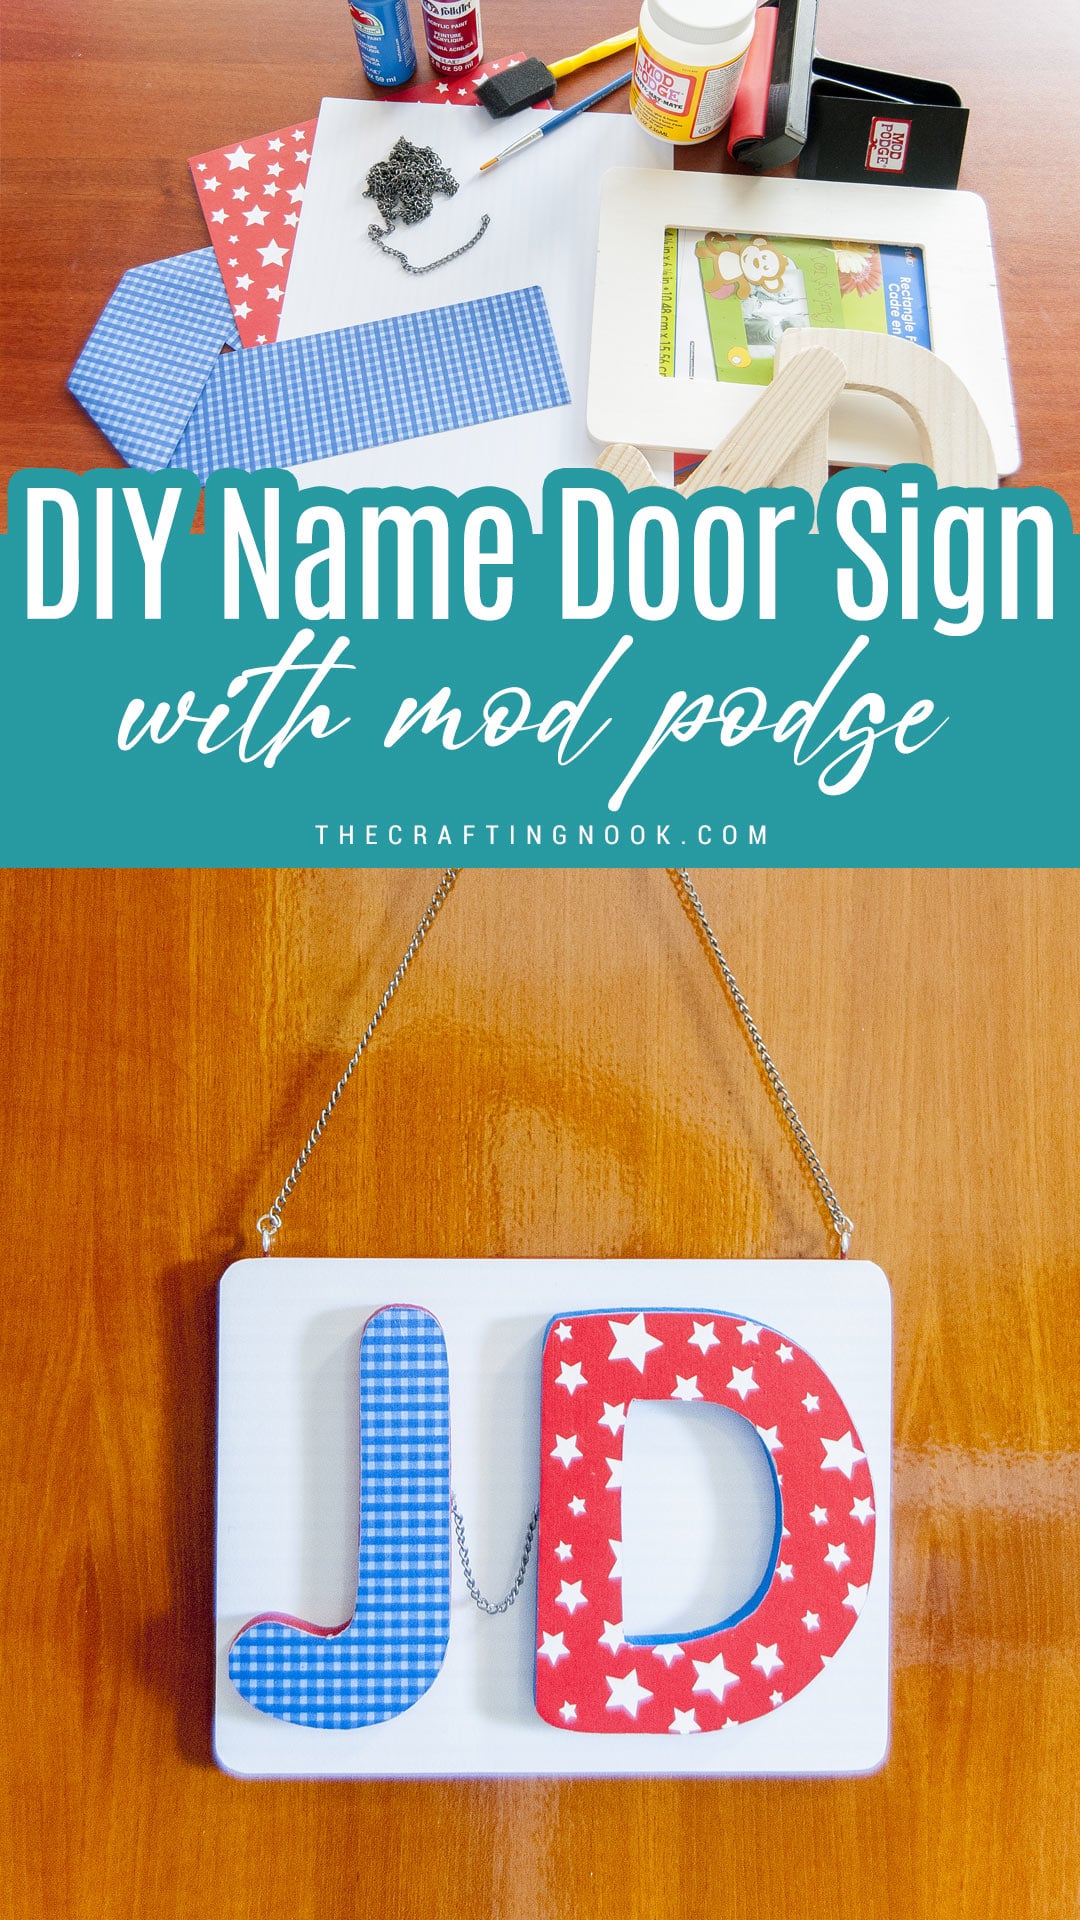
So, I decided to surprise him with something even better— a custom DIY name door wood sign using Mod Podge! It was inspired by a project I did for my baby girl monogrammed wall Art, but with a more boyish twist using chains and hooks. The best part? He got to pick his favorite colors and papers, and I brought the idea to life.
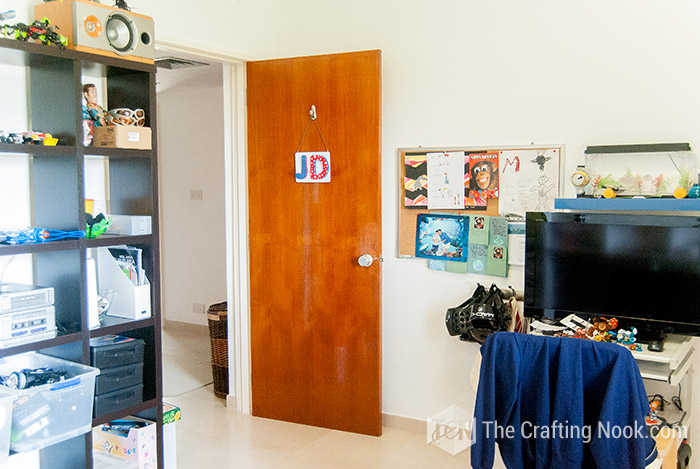
My brother loved that idea and he asked me if it could be hung with chains: “Of course!”
This one was as easy as my girls wall art. The only difference was that I had to use the chain and some hooks. It turned out quite nice for a boy’s room. He chose the papers he wanted and I made the craft LOL.
But wait, What is Mod Podge?
Before we jump into the tutorial, let’s chat about Mod Podge. You might have seen it with its iconic retro label, but if you’re unfamiliar, Mod Podge is a popular decoupage medium—an all-in-one glue, sealer, and finish that works wonders on paper, fabric, and even wood surfaces.
It’s one of my absolute favorite crafting supplies because it makes every project that much easier and more fun. Plus, the finish is gorgeous!
How to make a Mod Podge Door Plaque for kids
This project is super easy, inexpensive, and adds a personal touch to any room. Let’s dive into how you can make a wooden name sign for the door for the special little one in your life!
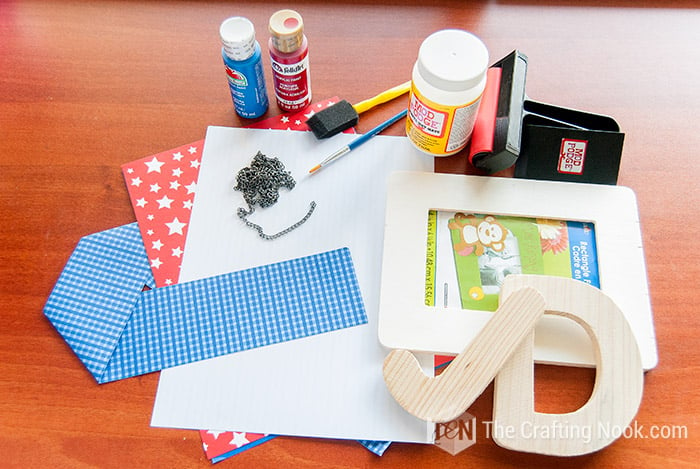
Supplies:
- A wooden board (I used a $1 frame because I couldn’t find a board where I was)
- Mod Podge
- Wooden letters
- Paper scraps or sheets of paper
- Acrylic paint
- 2 hook screws
- Chain
- 2 Jump rings
Tools:
- Hot glue gun and glue sticks
- Foam brush
- Normal brush
- Scrapper
- Nose Pliers
- Ruler, pencil, and scissors – just in case
Instructions:
Step 1: Prep Work
Protect the surface where you are going to work. Paper, cardboard, or plastic will do.
I rarely do it, but you can use gloves to protect your hands from paint and mod podge. I really enjoy the whole messy thing LOL.
Step 2: Prep and Paint
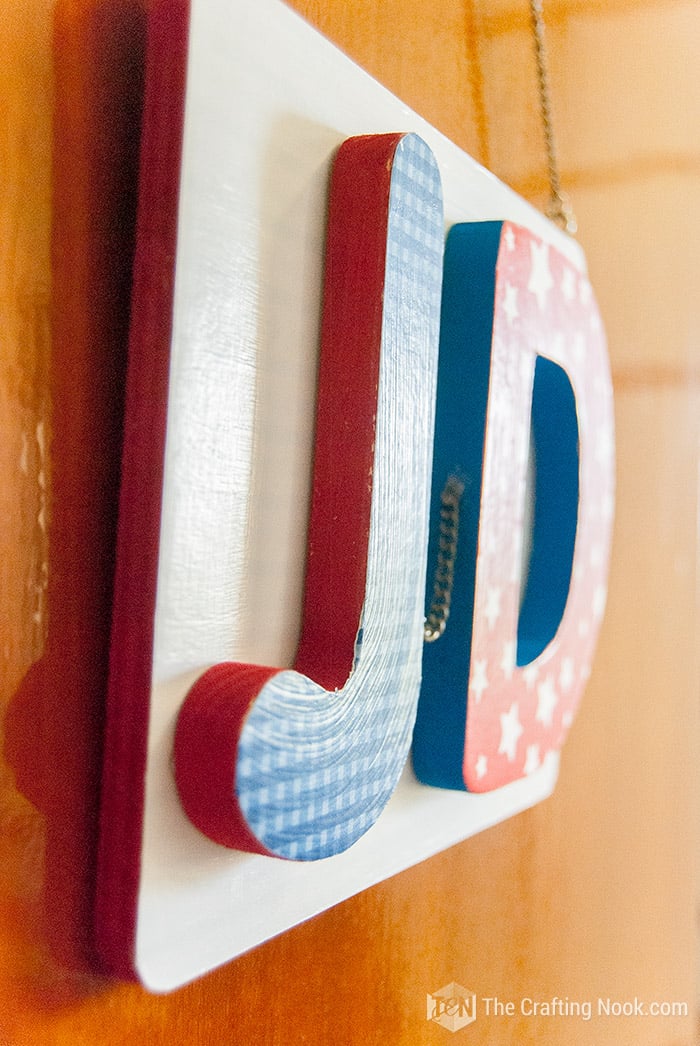
Firstly start by painting the edges of your wooden board and letters. For my brother’s sign, I used red and blue paint—bright, bold colors that made it pop.
I found this wooden frame in the $1 section at Walmart or Target (don’t remember) and it worked perfectly. But if you have a solid wood board that will do too.
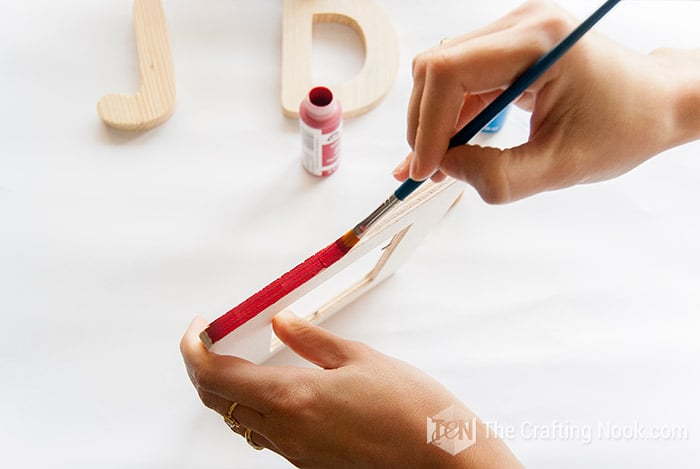
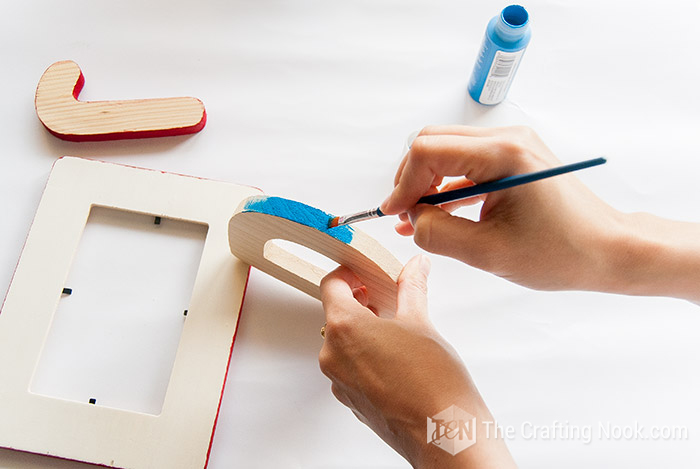
Let the paint dry completely before moving on.
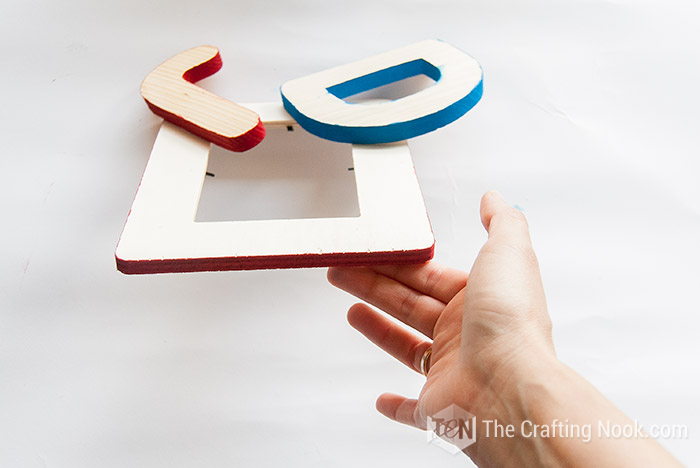
Step 3: Mod Podge the Letters and Board
Once the paint is dry, apply a layer of Mod Podge to the front of the letters and the wooden board.
For a fun contrast, I picked red paper for the blue-edged letters and blue paper for the red edges.
Place your paper scraps onto the letters and smooth out any bubbles with a scraper. Sorry I completely forgot to take photos of this step (I got carried away crafting)
Let everything dry thoroughly before proceeding.
Step 4: Trim the Paper
After the Mod Podge has dried, use a craft knife or cutter to carefully trim any excess paper around the letters and the edges of your board. Use a cutting mat for this.
Follow the natural shape of the letters and board to keep it looking clean and polished.
Step 5: Seal the paper with mod Podge
After the paper is securely in place and trimmed, it’s time to seal everything. Apply a generous layer of Mod Podge over the surface of the paper on both the letters and the wooden board.
This top coat not only seals the paper but also gives it a smooth, slightly glossy finish that helps protect it from wear and tear, keeping your project looking fresh and vibrant for years to come.
Make sure to let the Mod Podge dry completely before moving on to the next step.
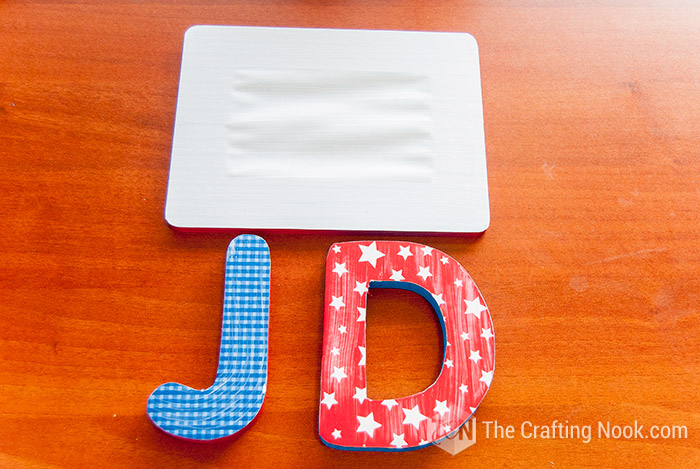
At first, you might see the Mod Podge white and filled with strikes, but it’s ok, the mod podge gets clear once dry.
Step 6: Add the Chain
This part is where the “boyish” vibe comes in! My brother wanted something cool, so I added a chain between the letters for a rugged look. Hot glue the chain to the back of the letters. It’s totally optional though.
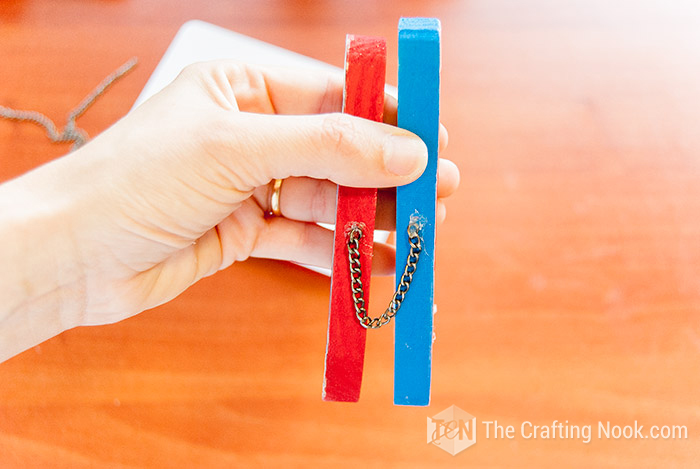
Step 7: Assembling the sign
Then glue the letters to the wooden board with hot glue. Apply abundant hot glue to make sure it’s secure.
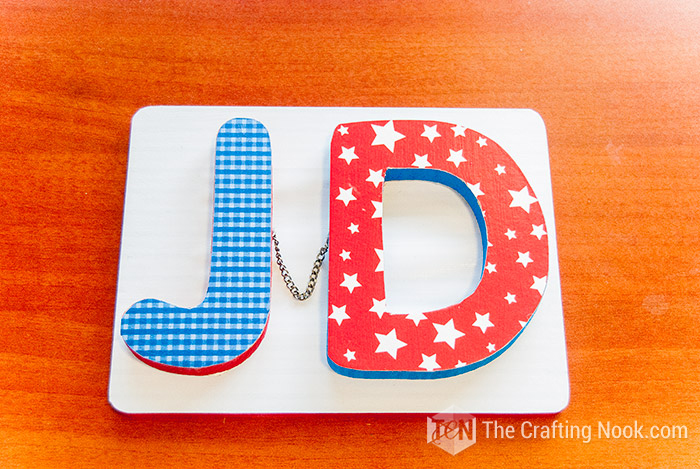
Step 8: Attach the Hanging Hardware
Next, screw two small hooks into the top corners of your board. Go slow to avoid cracking the wood.
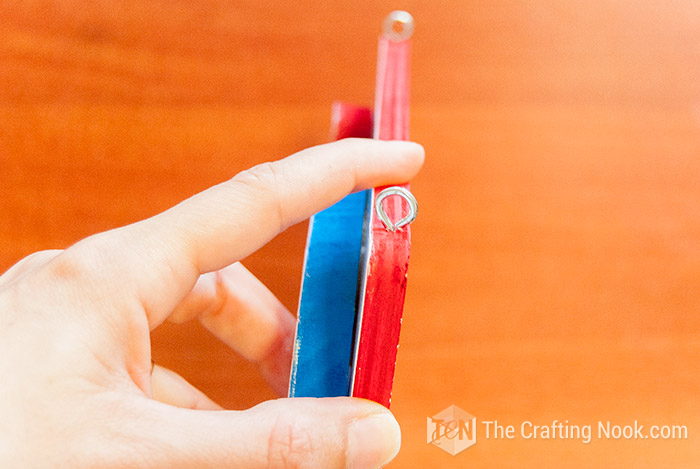
Use jump rings to connect the chain to the hooks. Open the jump rings with pliers, attach one end of the chain, hook them through the rings, and close them back up.
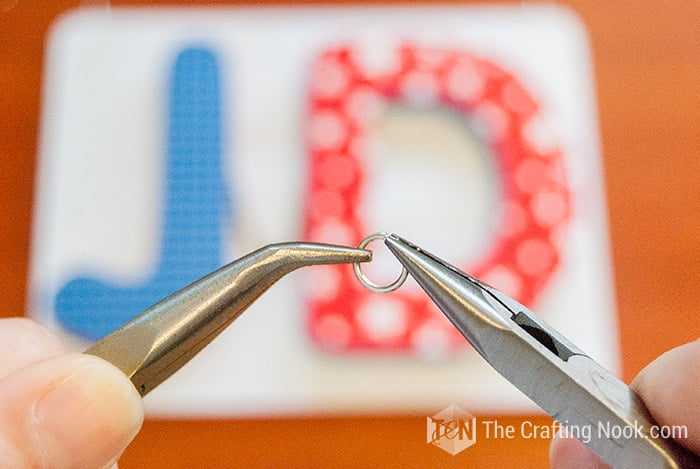
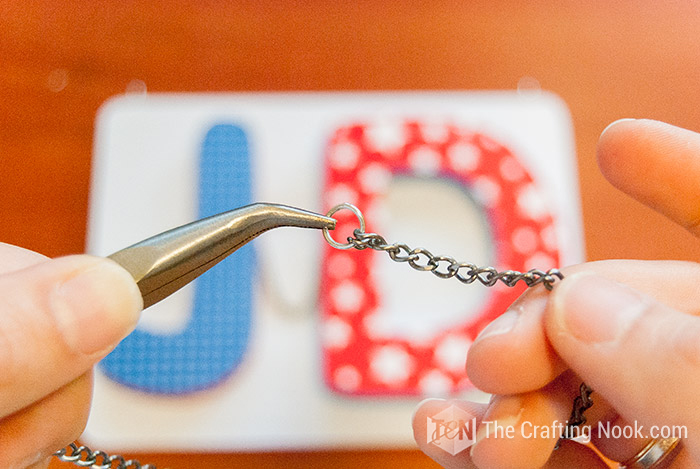
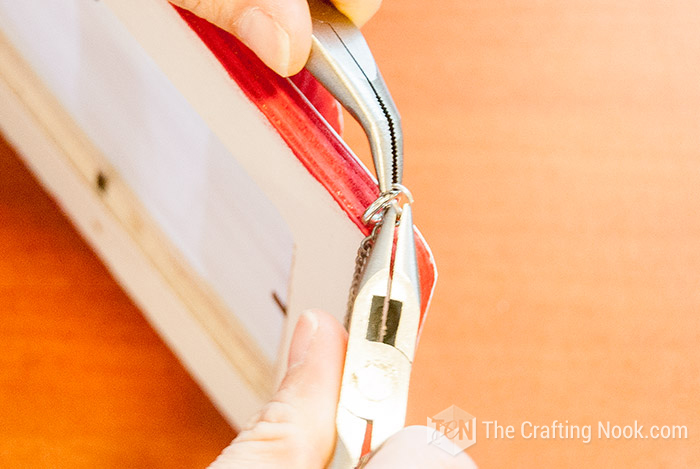
Repeat the process with the other hook.
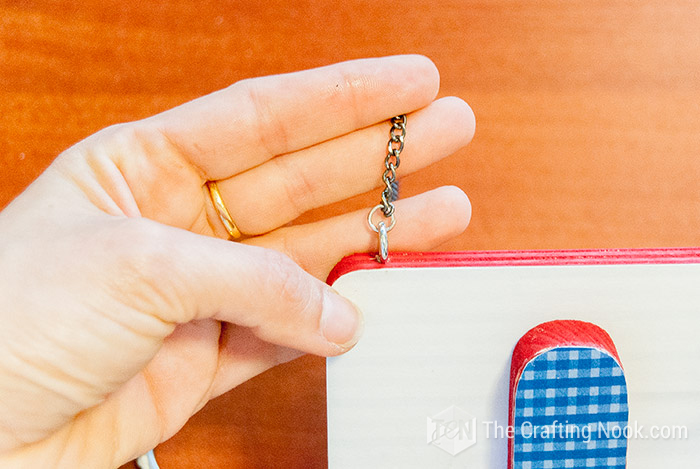
Step 9: Hang It Up!
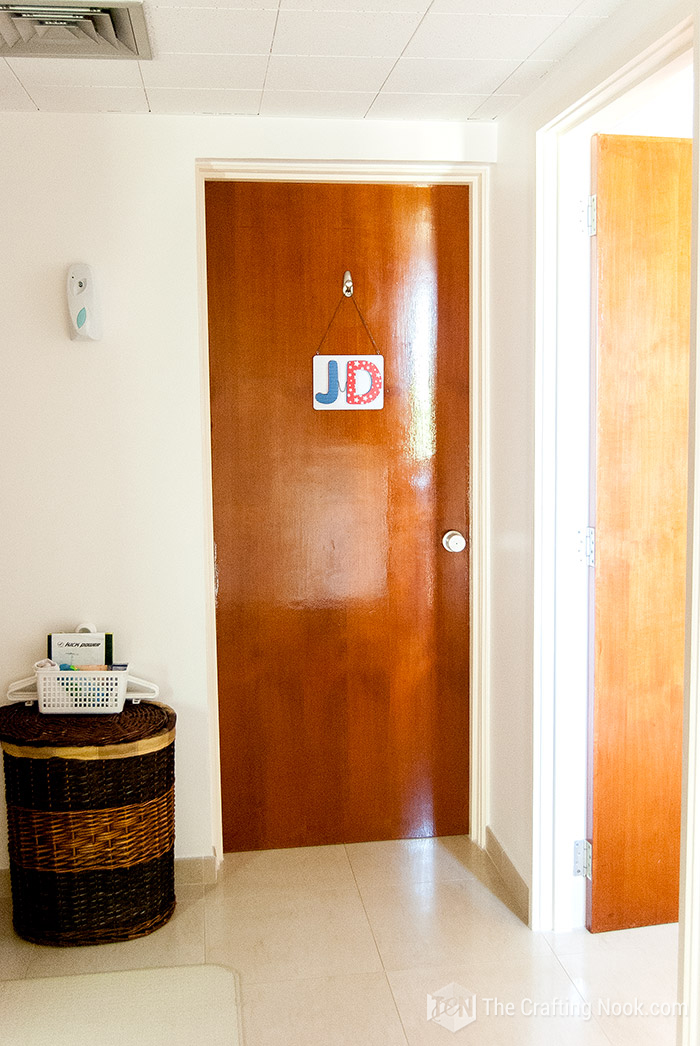
Here’s a tip: If you don’t want to drill holes into the door (like my dad), you can use heavy-duty adhesive hangers (Like 3M Command). They work like a charm and won’t damage the door.
And there you have it—your very own DIY name door sign!
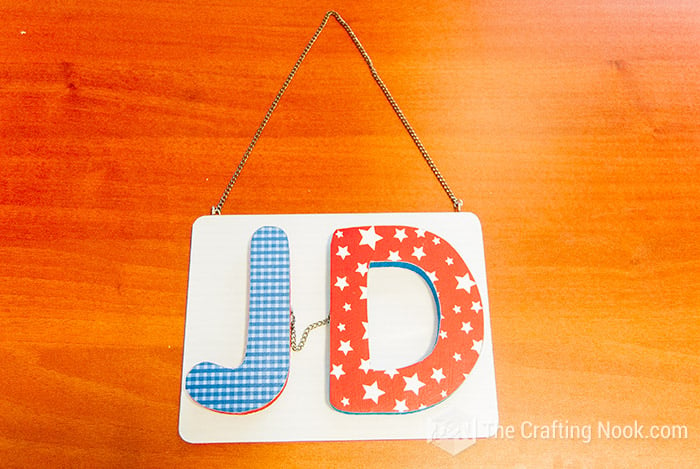
This project is not only a fun and creative way to decorate your child’s room, but it also gives them a sense of ownership over their space.
So, my brother’s bedroom looks really cool and he loved it!
Crafting Tips
- If you don’t want to drill holes into the door (like my dad), you can use heavy-duty adhesive hangers (Like 3M Command). They work like a charm and won’t damage the door.
- To avoid streaks or visible brush strokes in the Mod Podge finish, use a foam roller instead of a brush. It creates a smoother, more professional look.
- Make sure to seal the edges of the paper with Mod Podge to prevent peeling over time. Apply extra Mod Podge along the borders for better durability.
- If you’re new to cutting intricate shapes, practice with scrap paper to get a feel for trimming around the letters or board.
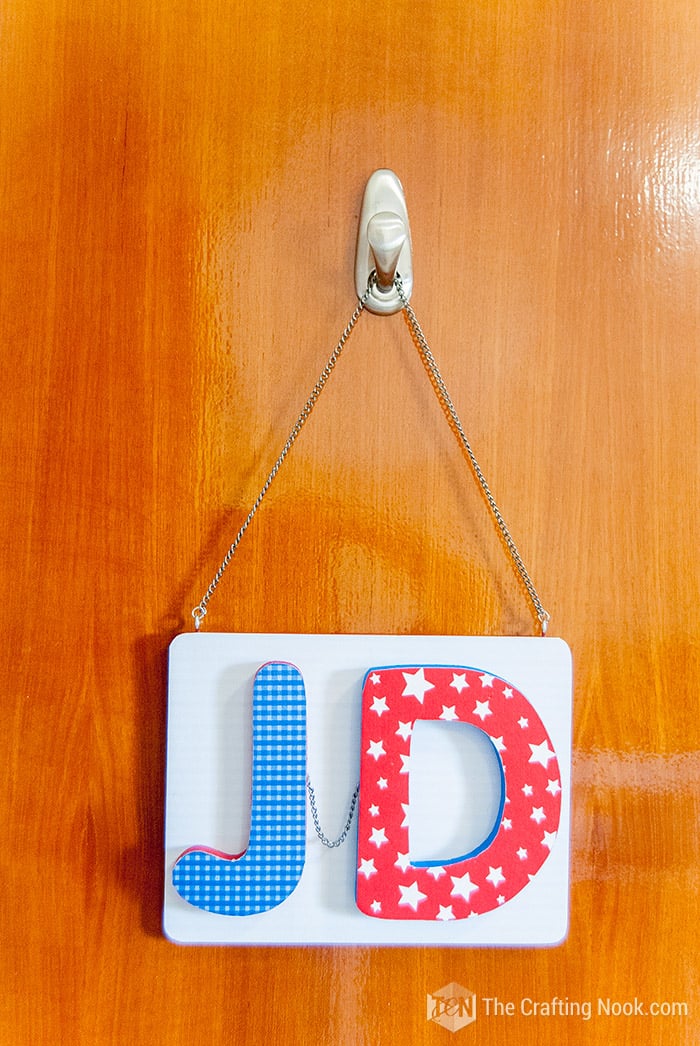
What do you think? Like it???
Alternatives and Substitutions
Instead of paper, try using fun fabric scraps! Mod Podge works great with fabric, and this gives the sign a unique texture and a cozy feel. You can use your child’s favorite patterns or old clothes for a more personal touch.
Add a little sparkle by weaving LED string lights around the letters or the back edge of the frame. Battery-operated lights are easy to secure and will give the sign a magical glow, perfect for nighttime ambiance.
Frequently Asked Questions
As I mentioned above, Mod Podge is an all-in-one medium. It can be used as a sealer to protect painted surfaces. You can paint your base item all one color, and Mod Podge cut paper or lace onto it. You can also paint designs onto it, and use Mod Podge as a finish.
Among other ideas.
Let’s clarify something here. Mod Podge is not Waterproof but it can be HIGHLY water resistant which is different (more so than regular Podges). What this means is that if you want a decoupaged item to sit on a covered porch where it is not completely exposed to weather 24 hours a day every day, you can definitely use this product by itself. You can learn a ton about Mod Podge and all its uses with Amy over at Mod Podge Rocks. She’s a pro with this product and she has awesome projects.
It’s a good idea to lightly sand the wood, especially if the surface is rough or uneven. A smooth surface ensures the paper adheres better and gives you a more polished finish.
Mod Podge usually dries to the touch in about 15-20 minutes, but for a fully cured and durable finish, it’s best to let it dry for 24 hours before handling the project.
To avoid bubbles, apply the Mod Podge evenly and use a scraper or smoothing tool to gently press out any air pockets while the paper is still wet. Work from the center outward for the best results.
More Projects For Kids To Try
Like this DIY name door sign tutorial? You might love these other Cute project ideas for kids too:
✂️ Tutorial
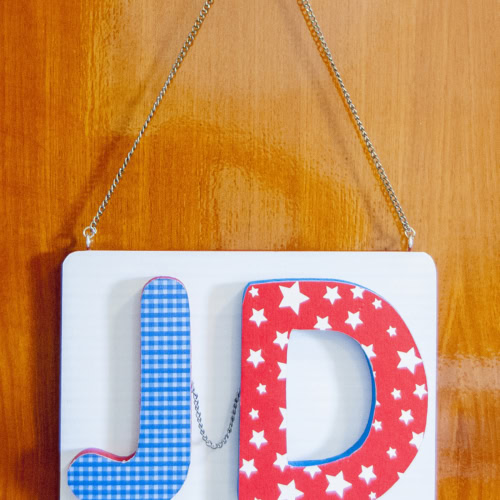
DIY Name Door Sign With Mod Podge for Kids
Tools
- Hot glue gun and glue sticks
- Foam brush
- Normal brush
- Scrapper
- Nose Pliers
- Ruler, pencil and scissors – just in case
Supplies
- A wooden board I used a $1 frame because I couldn’t find a board where I was
- Mod Podge
- Wooden letters
- Paper scraps or sheets of paper
- Acrylic paint
- 2 hook screws
- Chain
- 2 Jump rings
Instructions
Step 1: Prep Work
- Protect the surface where you are going to work. Paper, cardboard, or plastic will do.
- I rarely do it, but you can use gloves to protect your hands from paint and mod podge. I really enjoy the whole messy thing LOL.
Step 2: Prep and Paint
- Firstly start by painting the edges of your wooden board and letters. For my brother’s sign, I used red and blue paint—bright, bold colors that made it pop.
- I found this wooden frame in the $1 section at Walmart or Target (don’t remember) and it worked perfectly. But if you have a solid wood board that will do too.
- Let the paint dry completely before moving on.
Step 3: Mod Podge the Letters and Board
- Once the paint is dry, apply a layer of Mod Podge to the front of the letters and the wooden board.
- For a fun contrast, I picked red paper for the blue-edged letters and blue paper for the red edges.
- Place your paper scraps onto the letters and smooth out any bubbles with a scraper. Sorry I completely forgot to take photos of this step (I got carried away crafting)
- Let everything dry thoroughly before proceeding.
Step 4: Trim the Paper
- After the Mod Podge has dried, use a craft knife or cutter to carefully trim any excess paper around the letters and the edges of your board. Use a cutting mat for this.
- Follow the natural shape of the letters and board to keep it looking clean and polished.
Step 5: Seal the paper with mod Podge
- After the paper is securely in place and trimmed, it’s time to seal everything. Apply a generous layer of Mod Podge over the surface of the paper on both the letters and the wooden board.
- This top coat not only seals the paper but also gives it a smooth, slightly glossy finish that helps protect it from wear and tear, keeping your project looking fresh and vibrant for years to come.
- Make sure to let the Mod Podge dry completely before moving on to the next step.
- At first, you might see the Mod Podge white and filled with strikes, but it’s ok, the mod podge gets clear once dry.
Step 6: Add the Chain
- This part is where the “boyish” vibe comes in! My brother wanted something cool, so I added a chain between the letters for a rugged look. Hot glue the chain to the back of the letters. It’s totally optional though.
Step 7: Assembling the sign
- Then glue the letters to the wooden board with hot glue. Apply abundant hot glue to make sure it’s secure.
Step 8: Attach the Hanging Hardware
- Next, screw two small hooks into the top corners of your board. Go slow to avoid cracking the wood.
- Use jump rings to connect the chain to the hooks. Open the jump rings with pliers, attach one end of the chain, hook them through the rings, and close them back up.
- Repeat the process with the other hook.
Step 9: Hang It Up!
- Here’s a tip: If you don’t want to drill holes into the door (like my dad), you can use heavy-duty adhesive hangers (Like 3M Command). They work like a charm and won’t damage the door.
- And there you have it—your very own DIY name door sign!
Share and PIN ME!!!
Til’ next time…


FREE WORKBOOK
Keeping your Sweet Home Organized
Learn how to create intentional habits and simple routines to Keep Your Home Organized. Plus freebies, printables, exclusive content, and tips.
Disclaimer: By clicking on the “Yes” button above you are giving me your consent to collect and use your information according to the law and My Policy Privacy. Zero Spam I promise!

