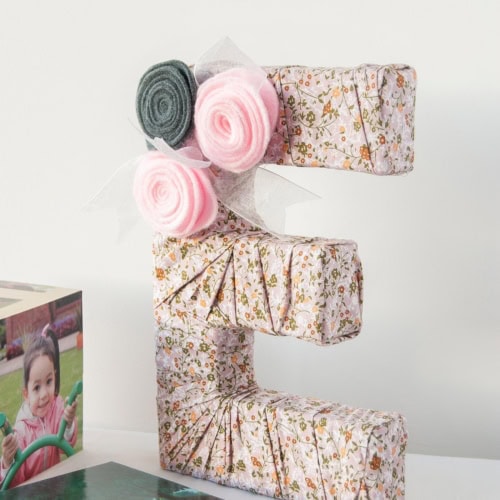
DIY Fabric Covered Letters with flowers
This post may contain affiliate links. Please read our Disclosure Policy.
This Fabric Covered Letters project is a super easy and budget-friendly craft that will add a sweet personal touch to any girl’s bedroom or nursery.
If you have been around for a while you probably know I’m all about creating a nice decoration for my girl’s bedroom. I’m slowly creating different things to make her room as girly as it can be.
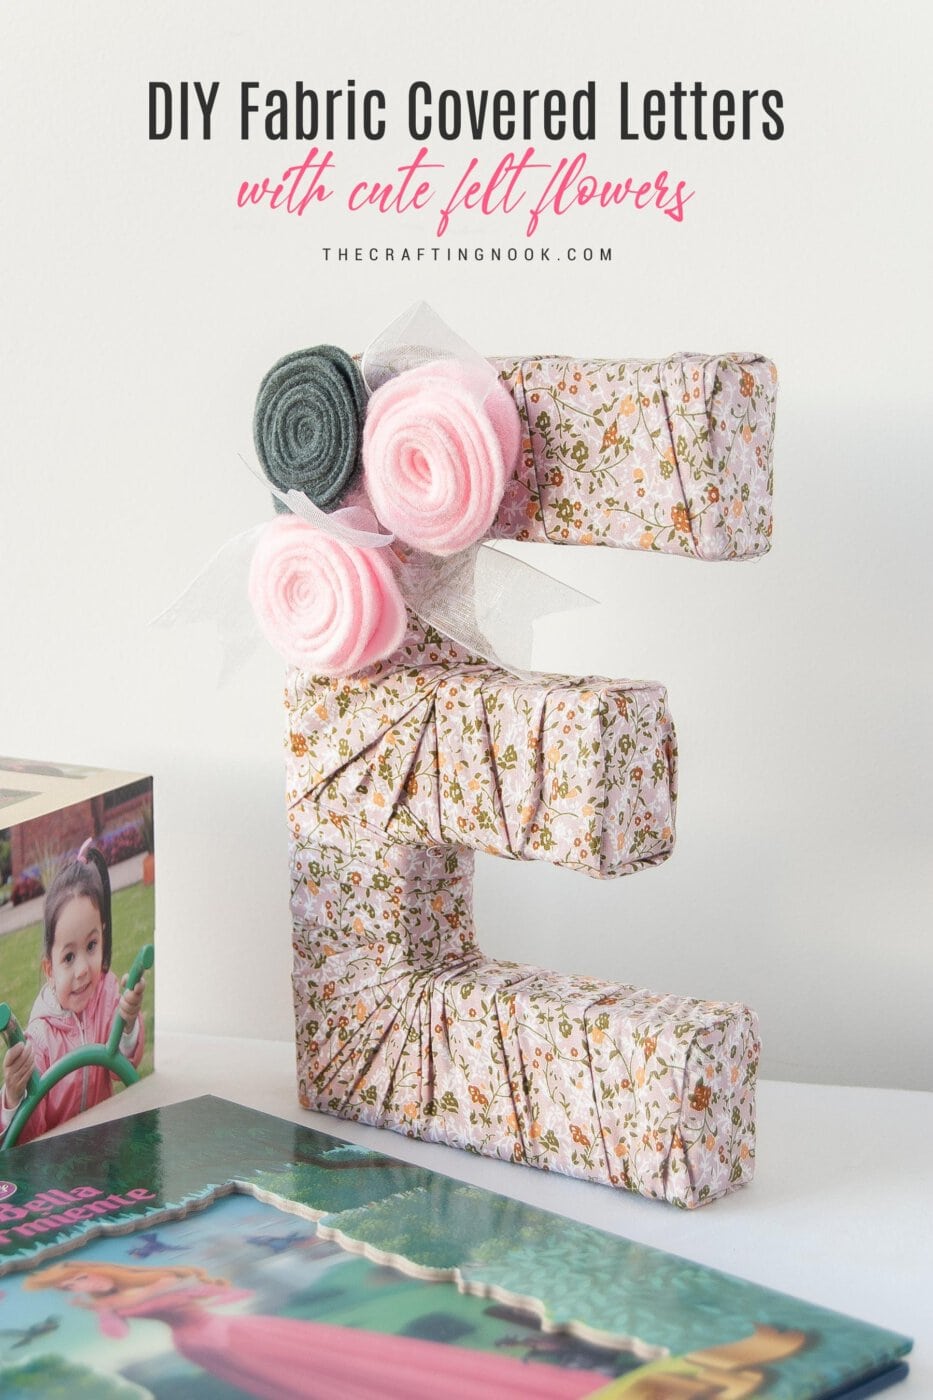
Table of Contents
Cute Decorating Fabric Covered Letters
She’s obsessed with anything absolutely girly; she only wants to wear dresses {princess-like} and bracelets, princess shoes, etc…
And her room {ahem, our room} gets no less attention. She loves to have pink stuff all over.
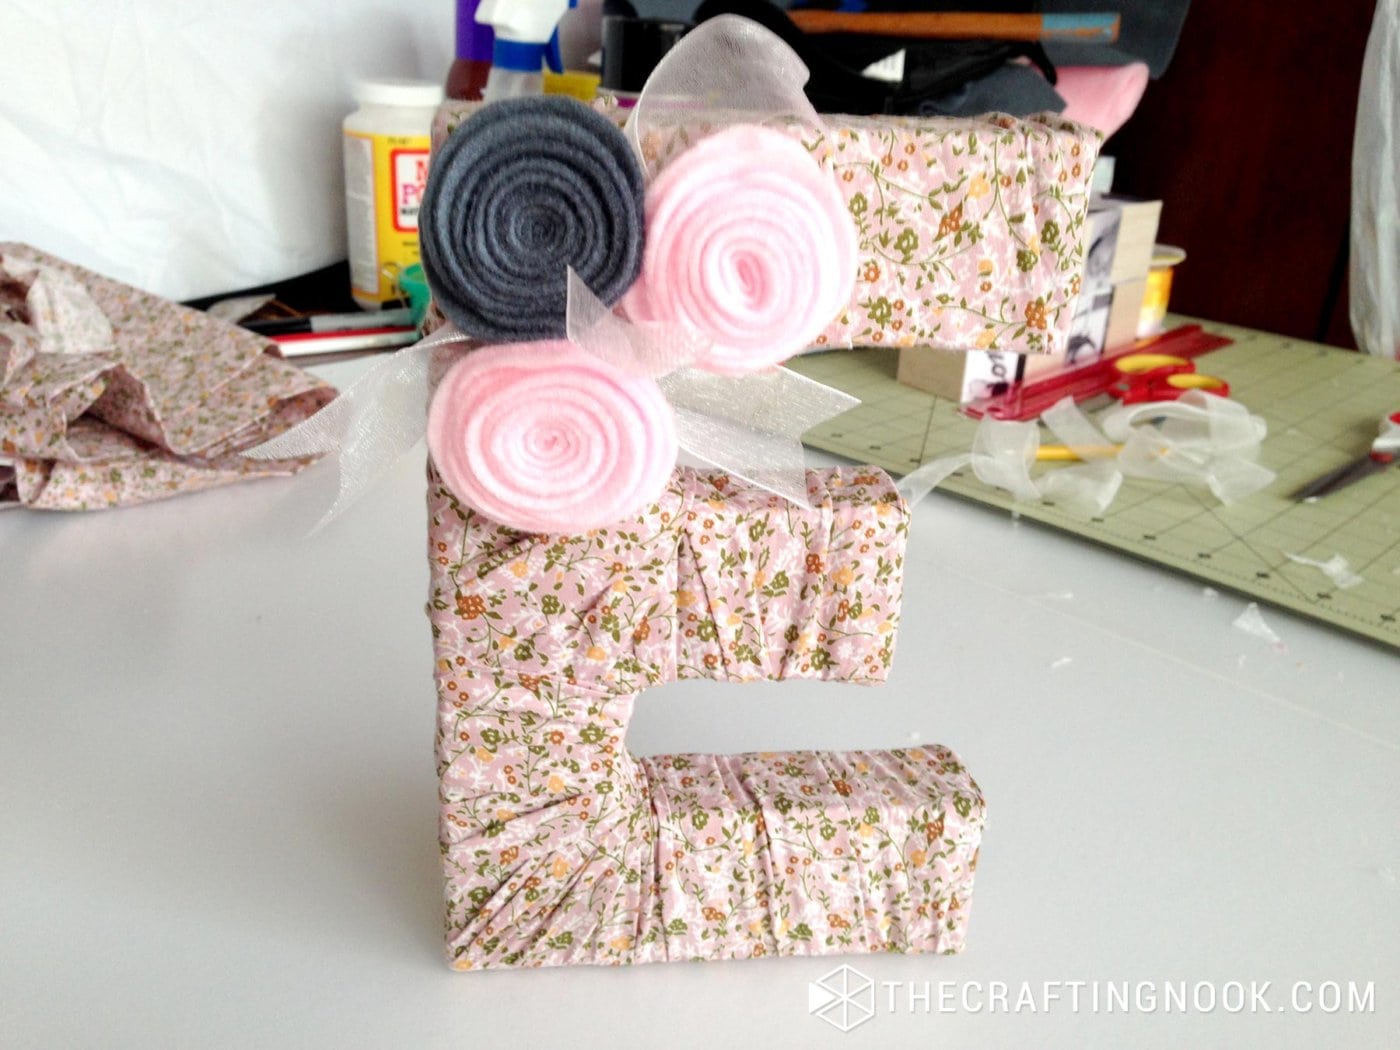
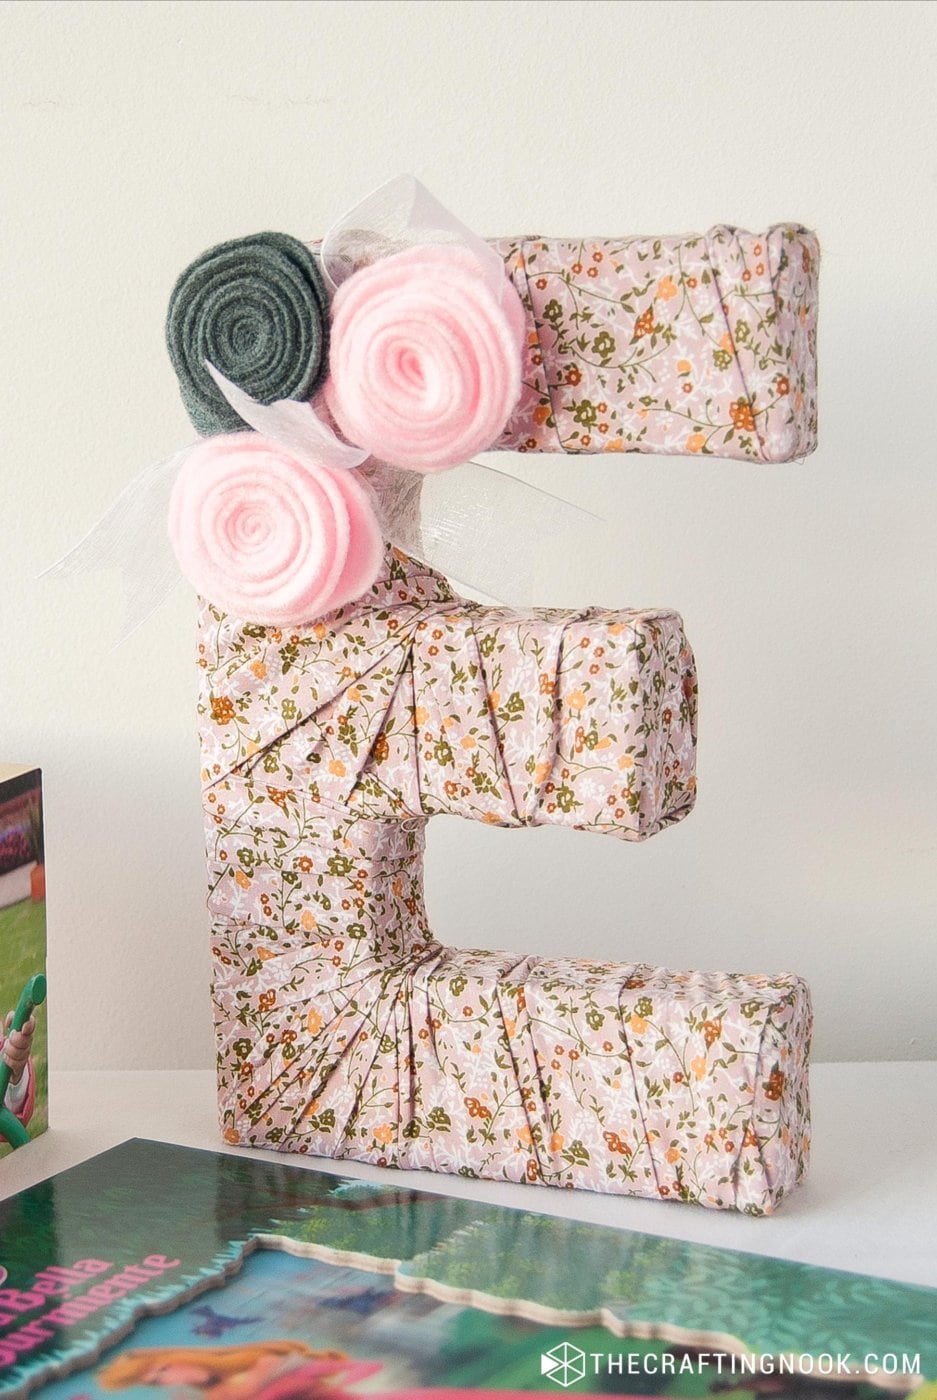
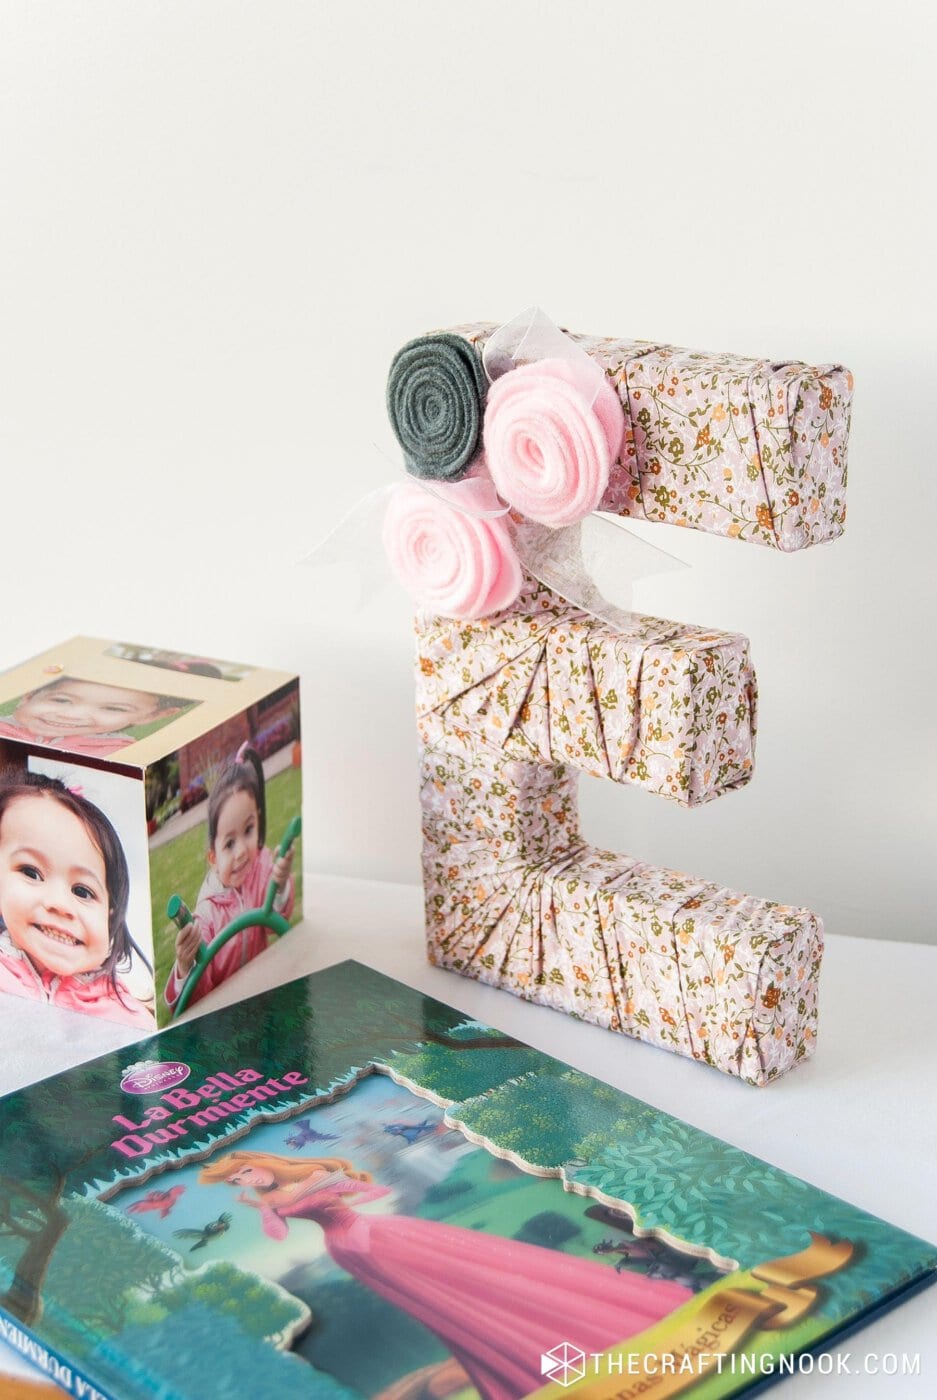
For that reason and because she’s already learning how to spell her name I made this cute fabric wrapped monogram to decorate her space.
Hopefully, when she gets a room of her own, we’ll be able to show off her room décor more beautifully but for now we do what we can.
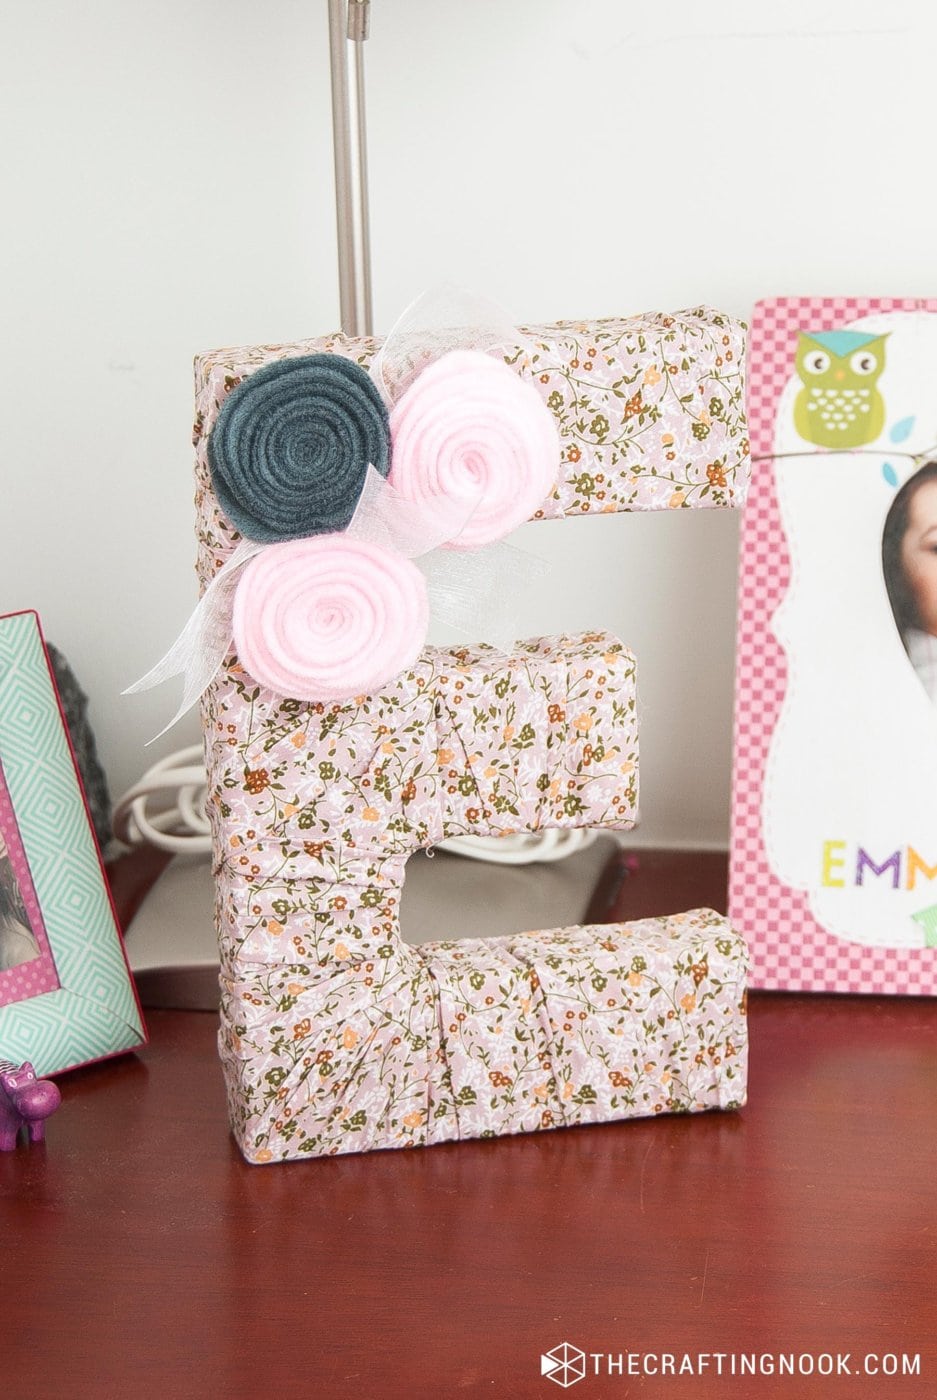
She loved how her monogram turned out and immediately she took it to her room and tried a few places. She loved it with her photo frames but at the end, she wanted it among her own stuff, so we put it in her toy’s table.
This decorative craft took me about an hour to make. It’s really easy to make and if your girl is old enough she might even enjoy making it with you. I can’t wait for mine to help me creating crafts!
How to Make Letters Covered in Fabric
Supplies:
- A letter of your choice. I used a cardboard letter E.
- Fabric of your choice.
- Felt – for flowers, colors of your choice.
- Ribbon
- Optionally a few pebbles to add weight to the base of the letter if necessary.
Tools:
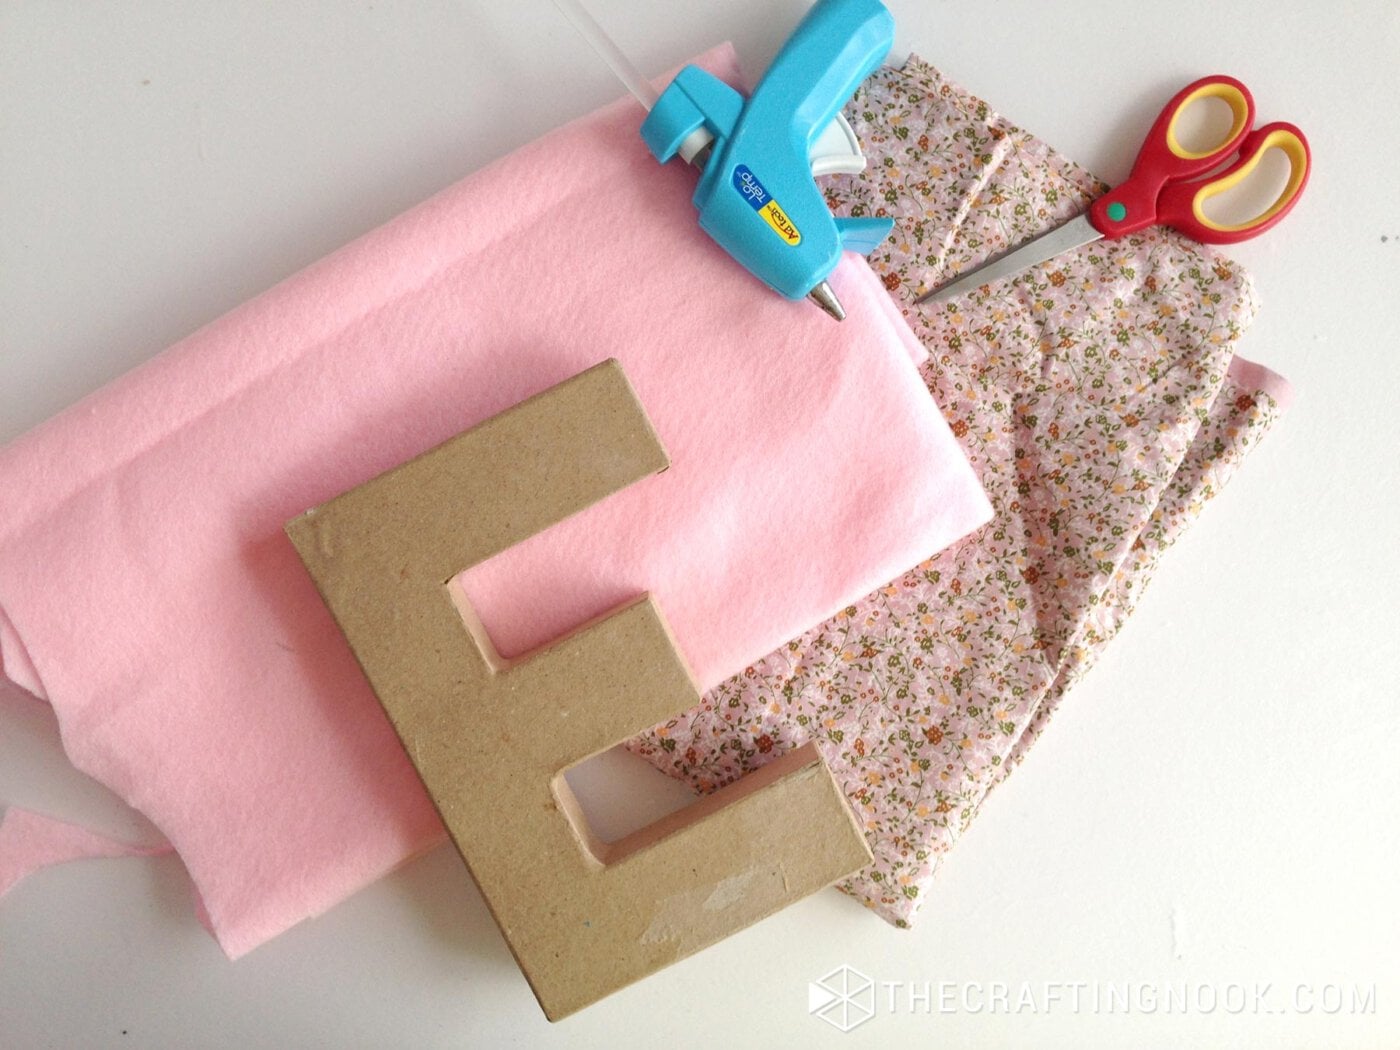
Instructions:
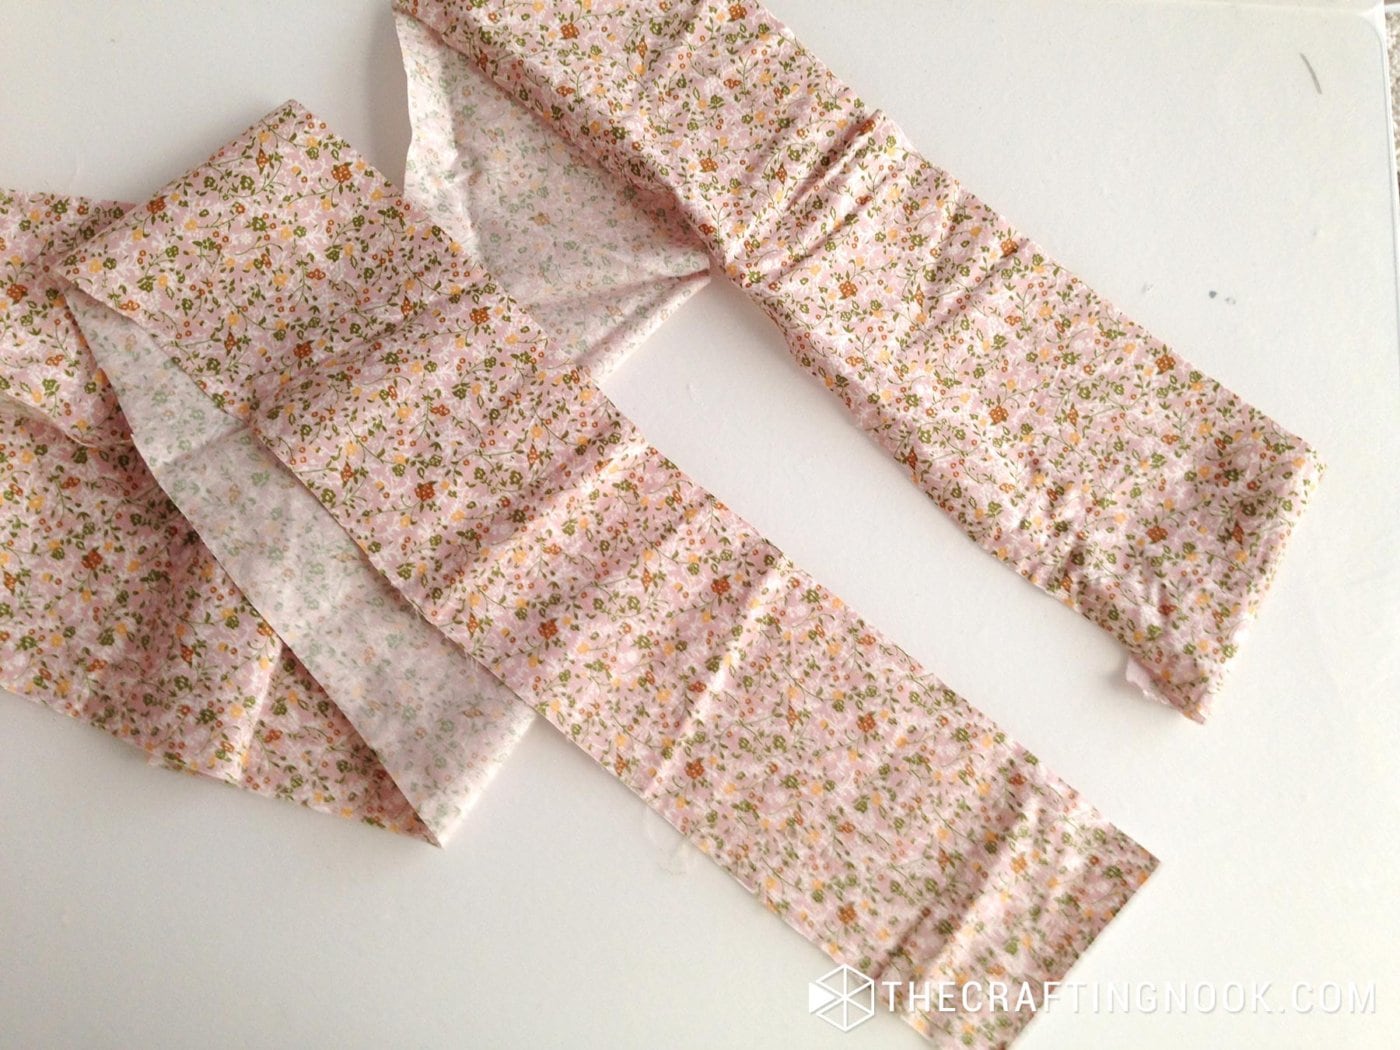
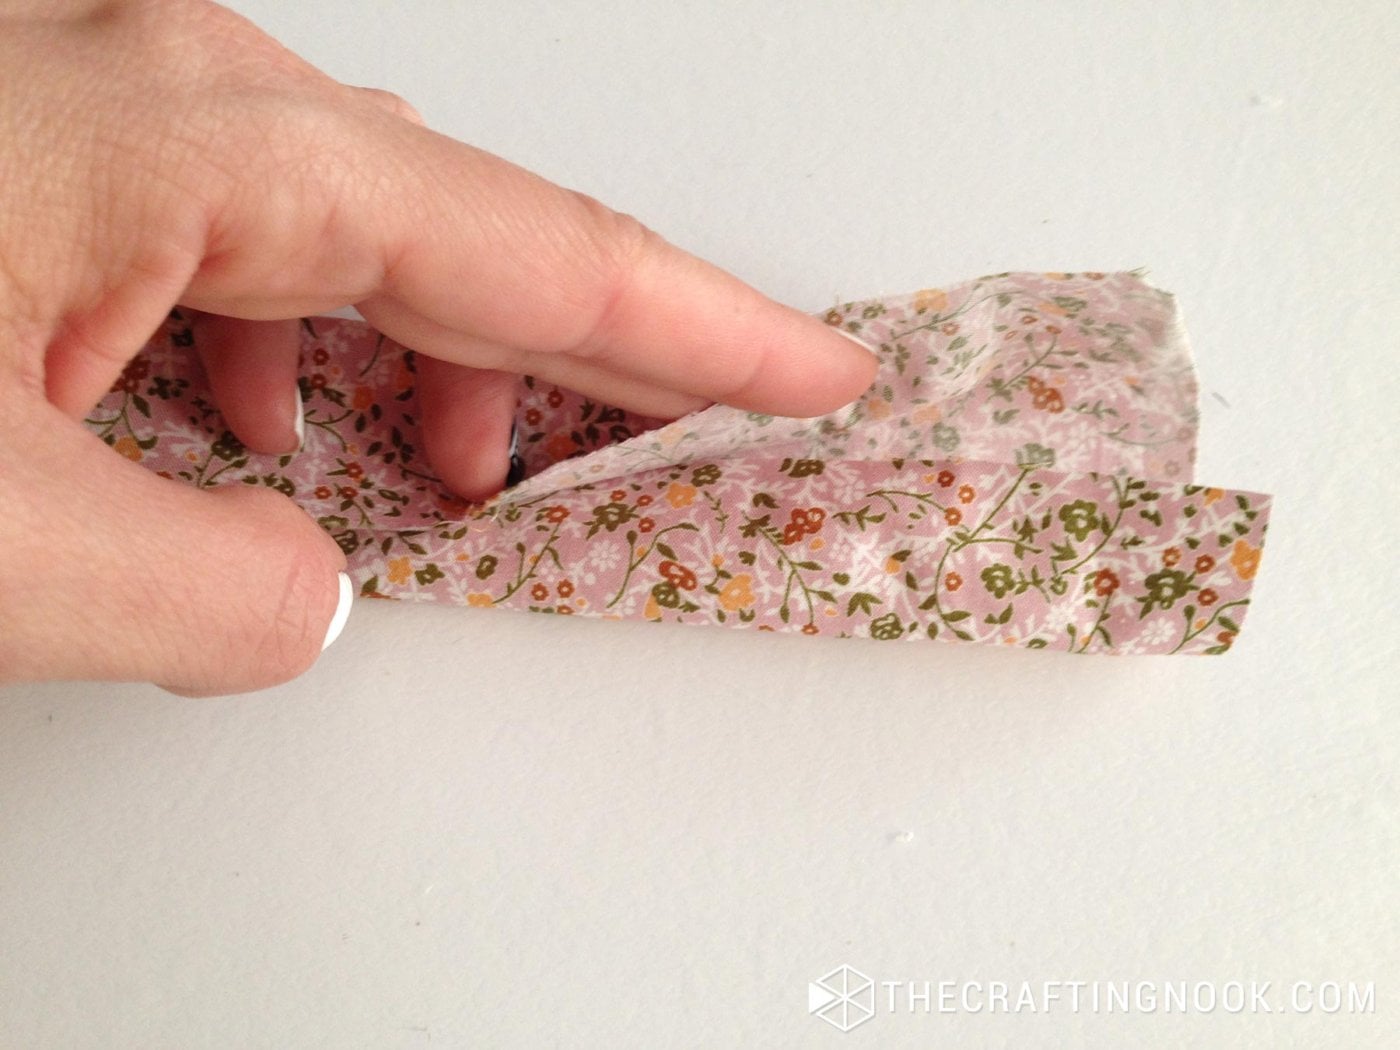
1. Cut some strips of fabric.
2. This is totally up to you, the width and length. I made 2 full fabric-width strips of the fabric because one was not enough.
Covering the Letter
3. Fold lengthwise so both raw edges go to the back.
4. Start by gluing one end of the fabric to one end of the letter. I started with the middle of the E.
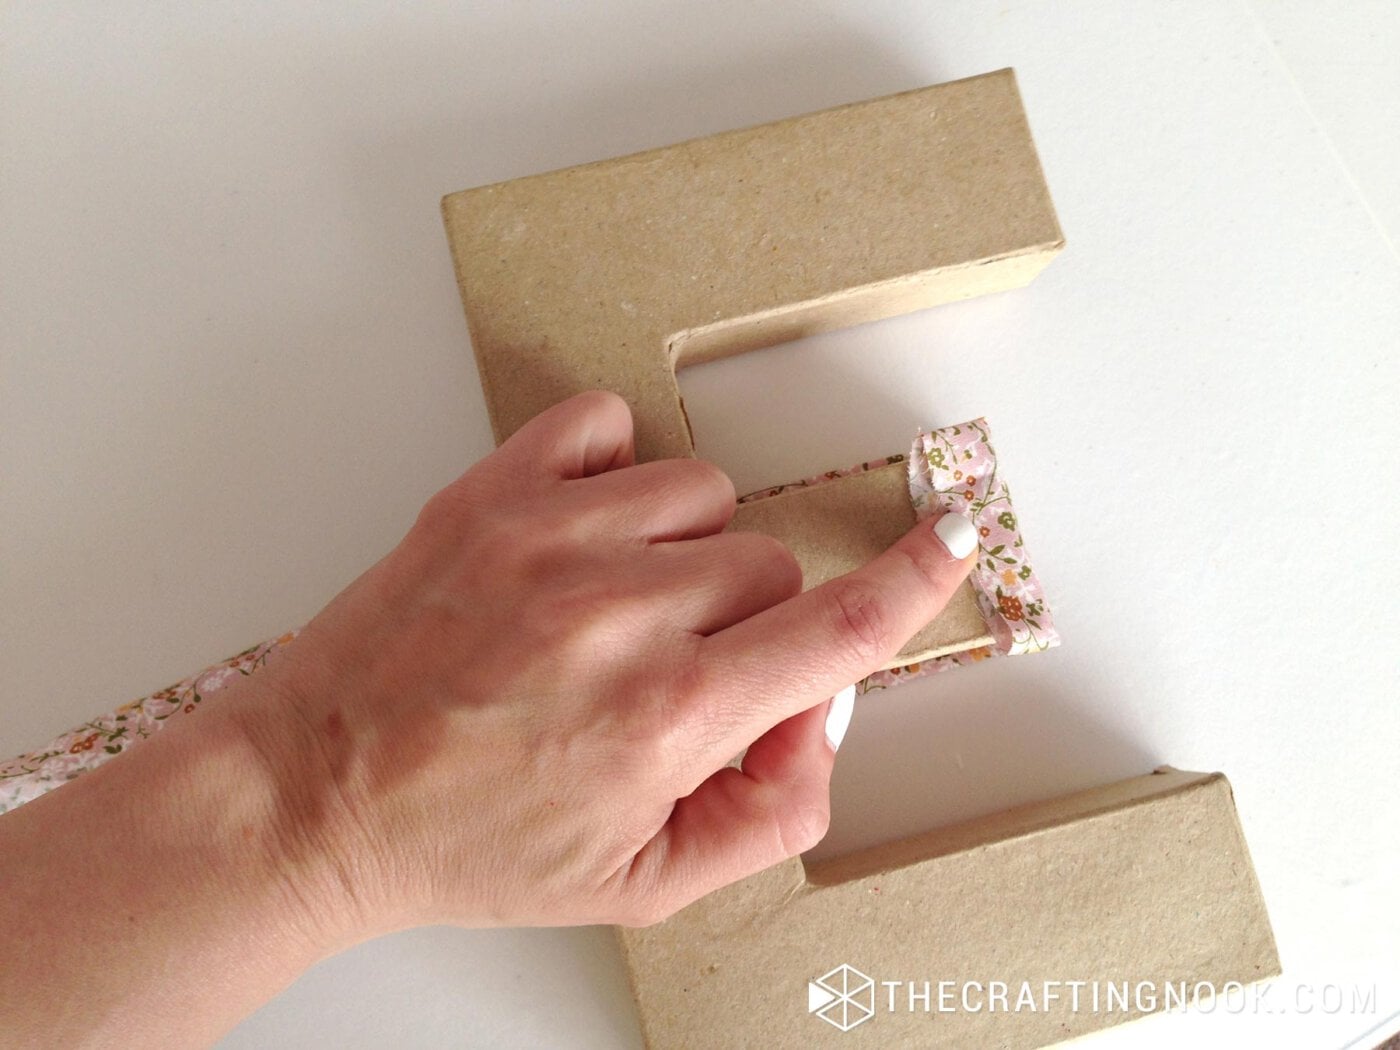
5. Start wrapping up each part of the letter, using the wrinkles to your favor, and overlap on each loop.
6. Here there is no perfect or right or wrong way. Just find your own way to cover the letter completely.
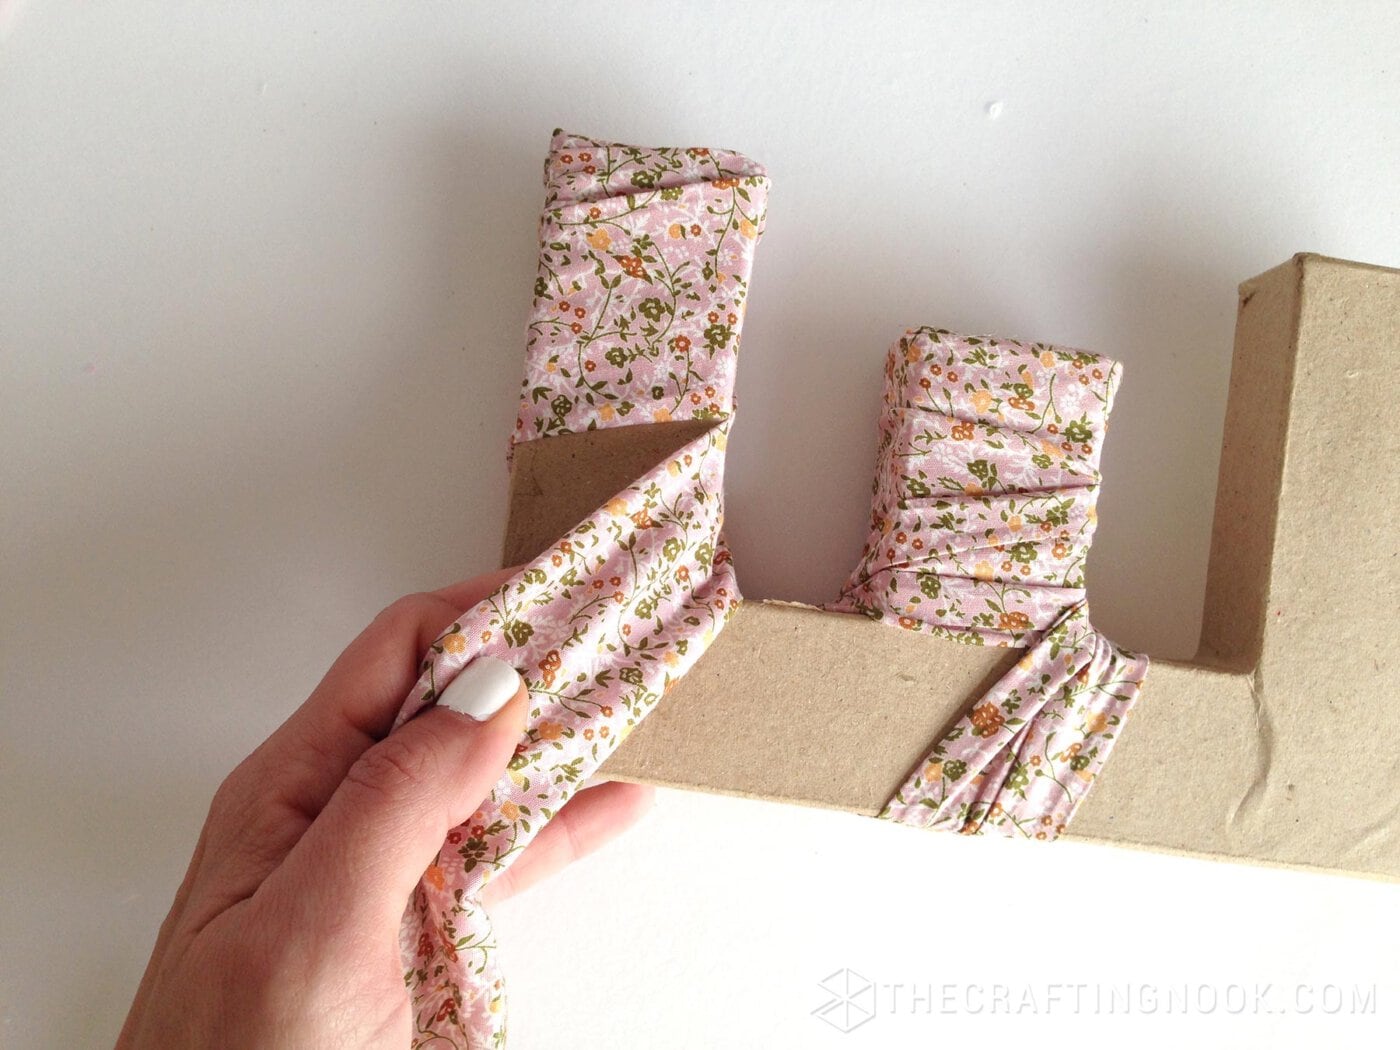
7. Pay attention to the outer corners. I covered it with the fabric leaving some on each side.
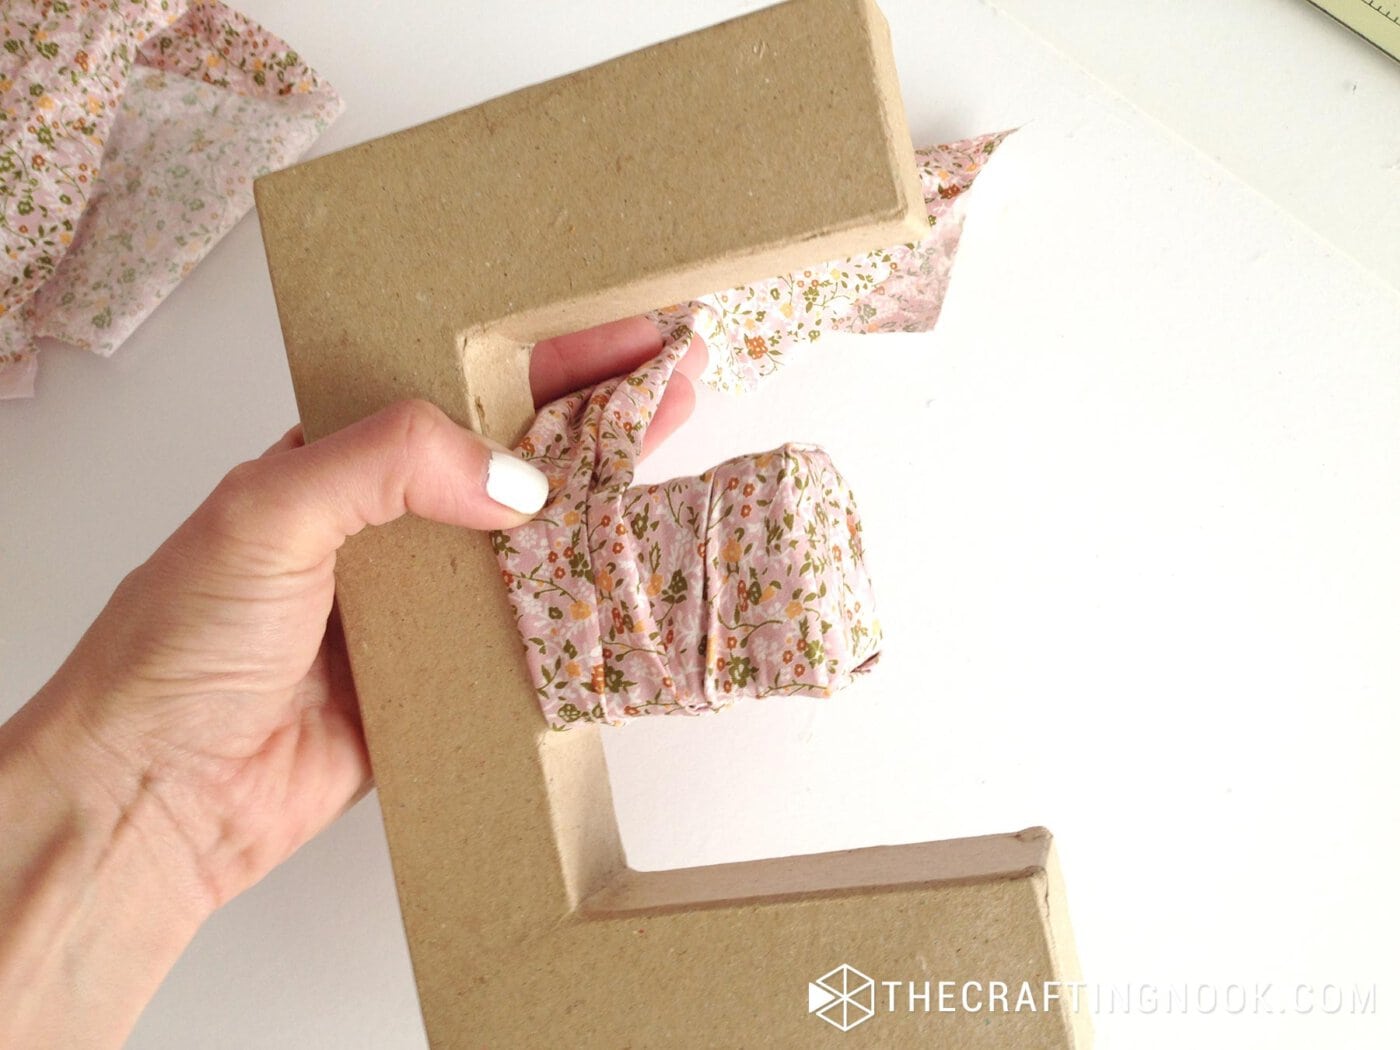
8. Make sure the end of the strip goes to the back of the letter.
In my case, I used part one strip for the center part of the letter and the other half + the other strip for the rest of the letter.
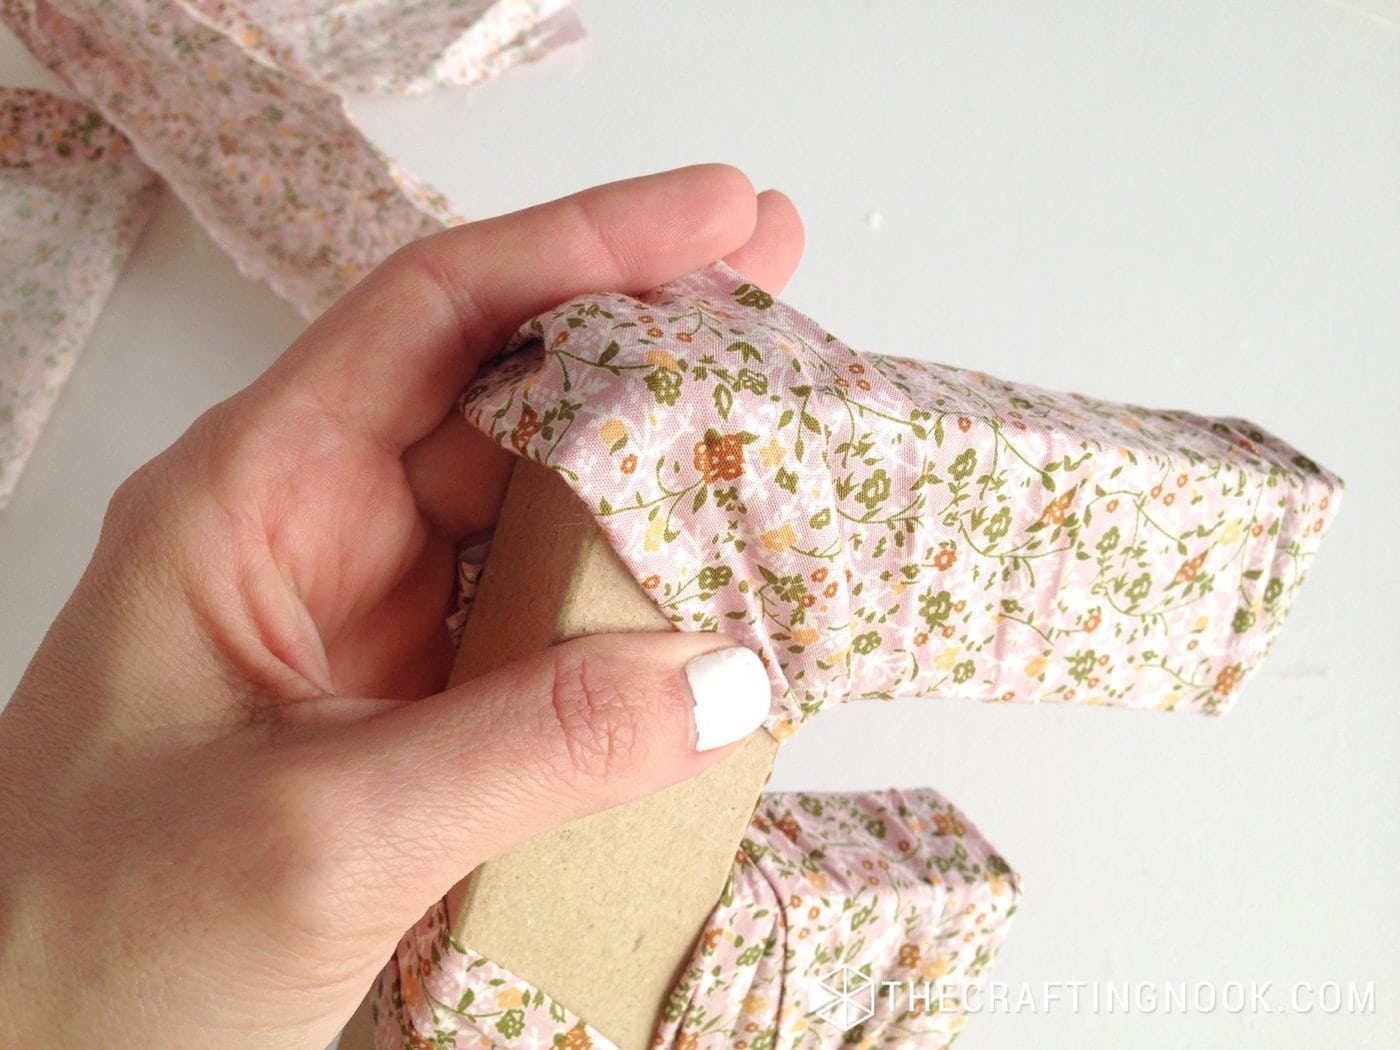
9. Finish the wrapping folding the end of the strip to the back side.
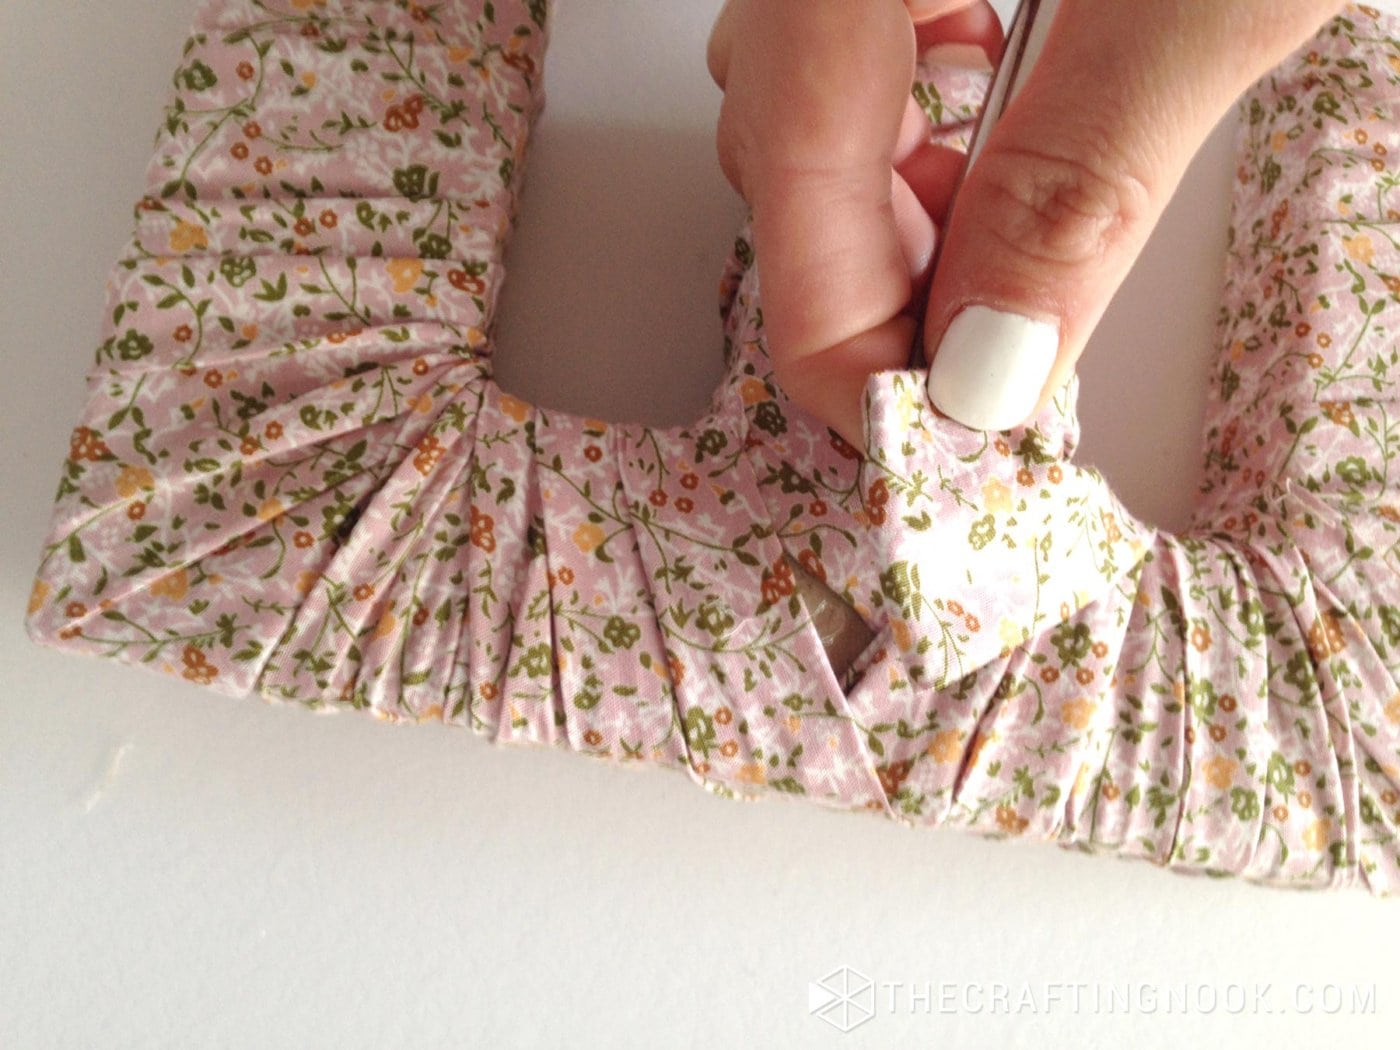
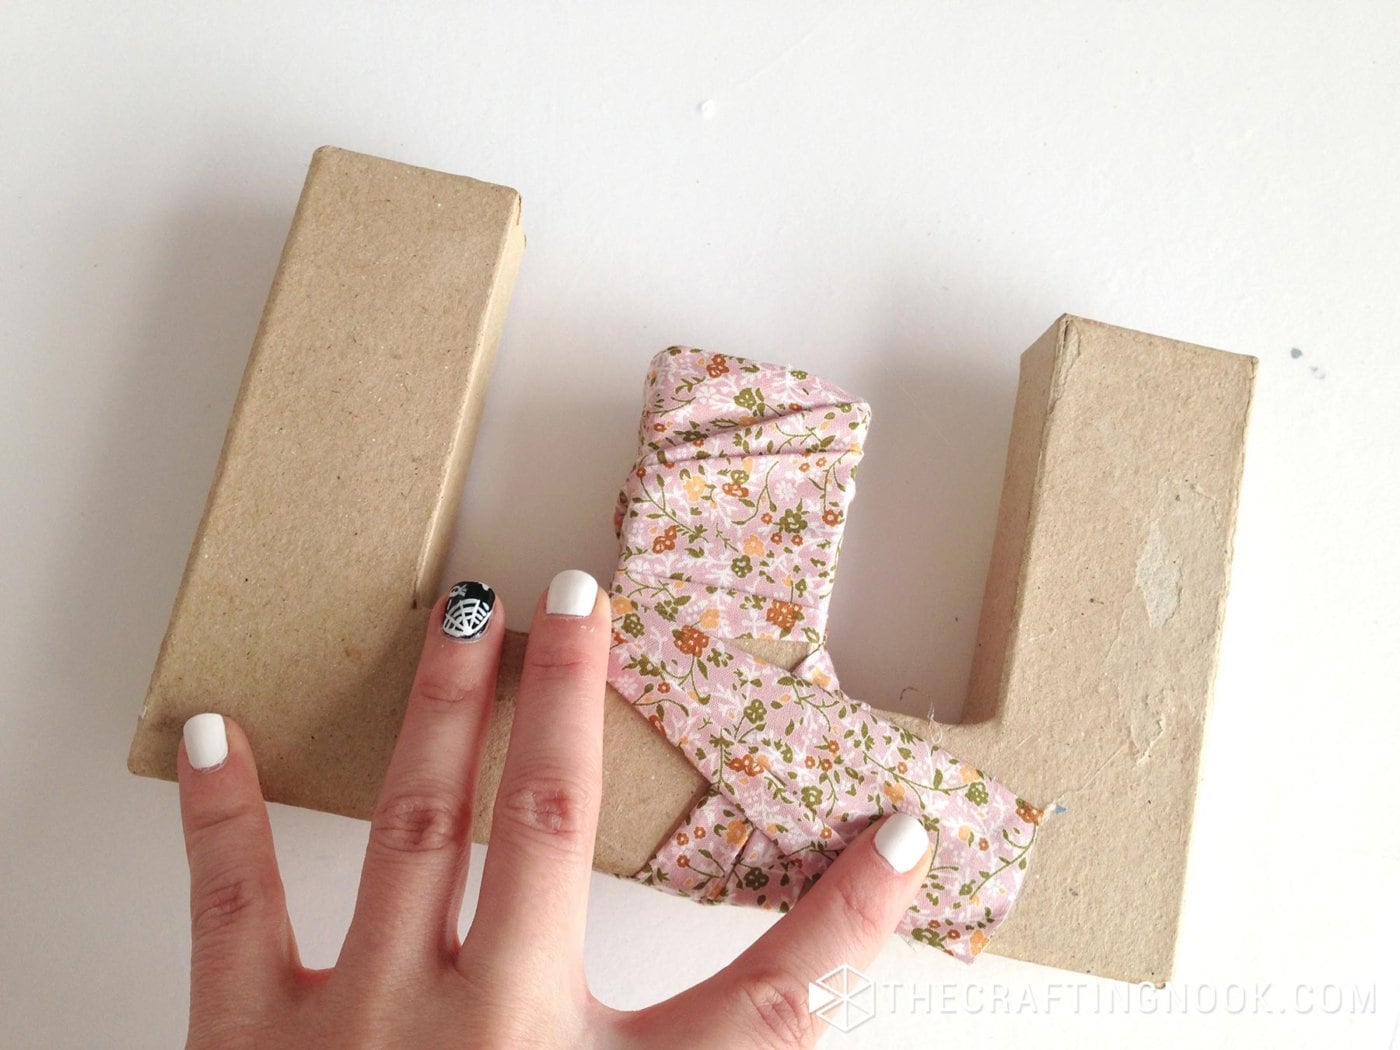
10. With the help of your scissors or any other flat tool, push the fabric strip end inside the closest fabric overlap so the finish is clean and neat.

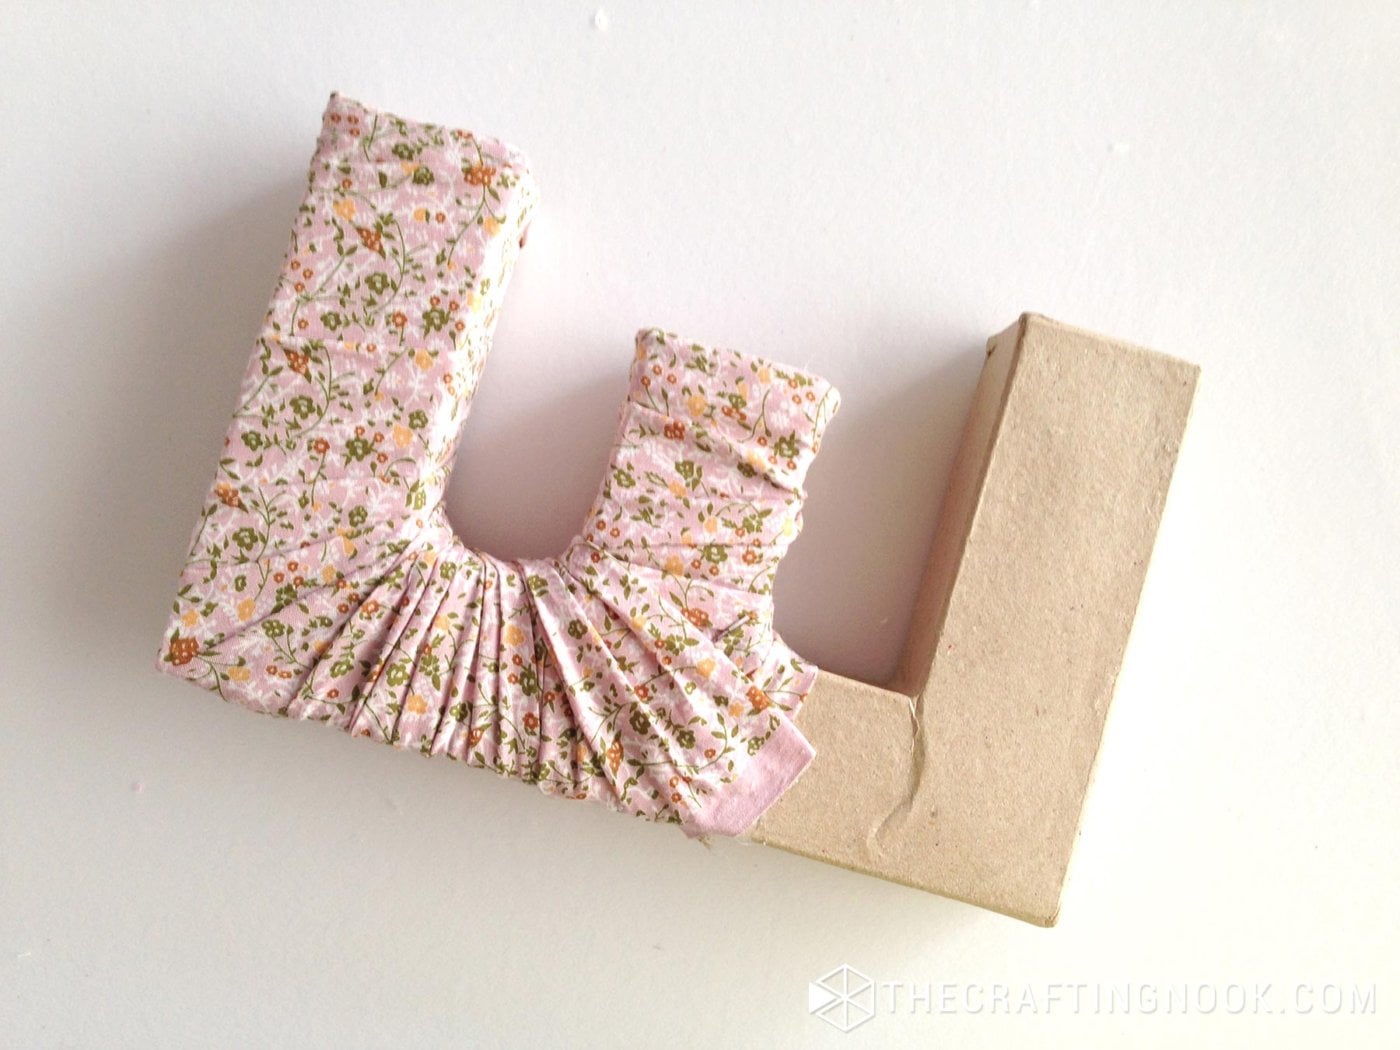
11. Secure with a few dots of hot glue.
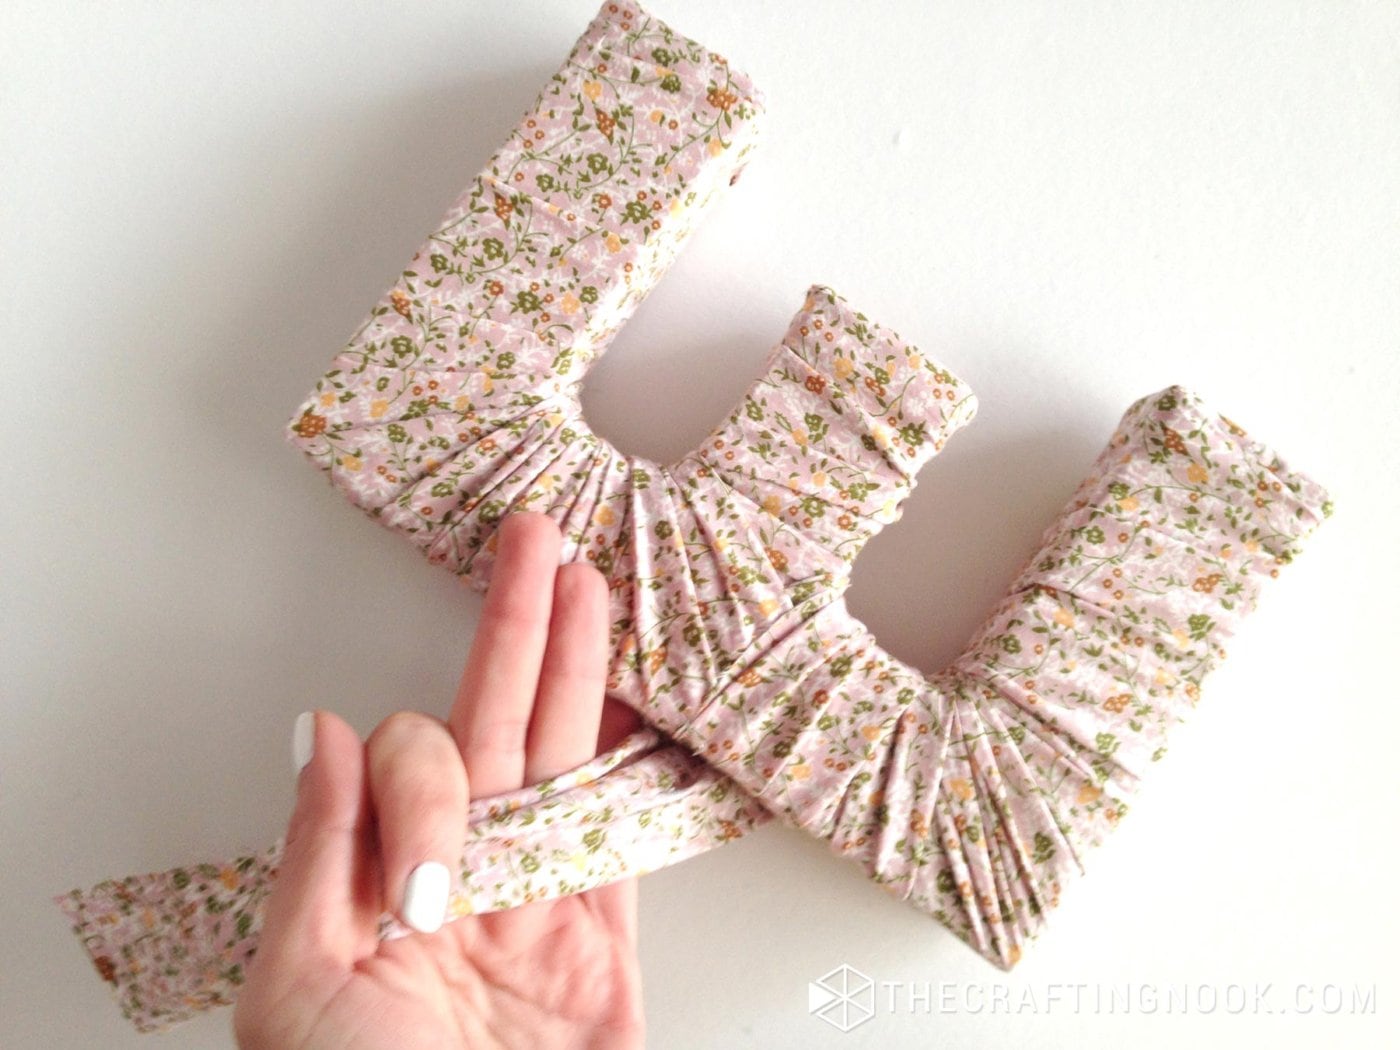
Your monogram is done!
Making The Flowers
I decided to make some cute rosettes for this project. These are super easy to make and the variations and combinations are endless. There are other cute felt flowers you can me make and you can learn how to make them here.
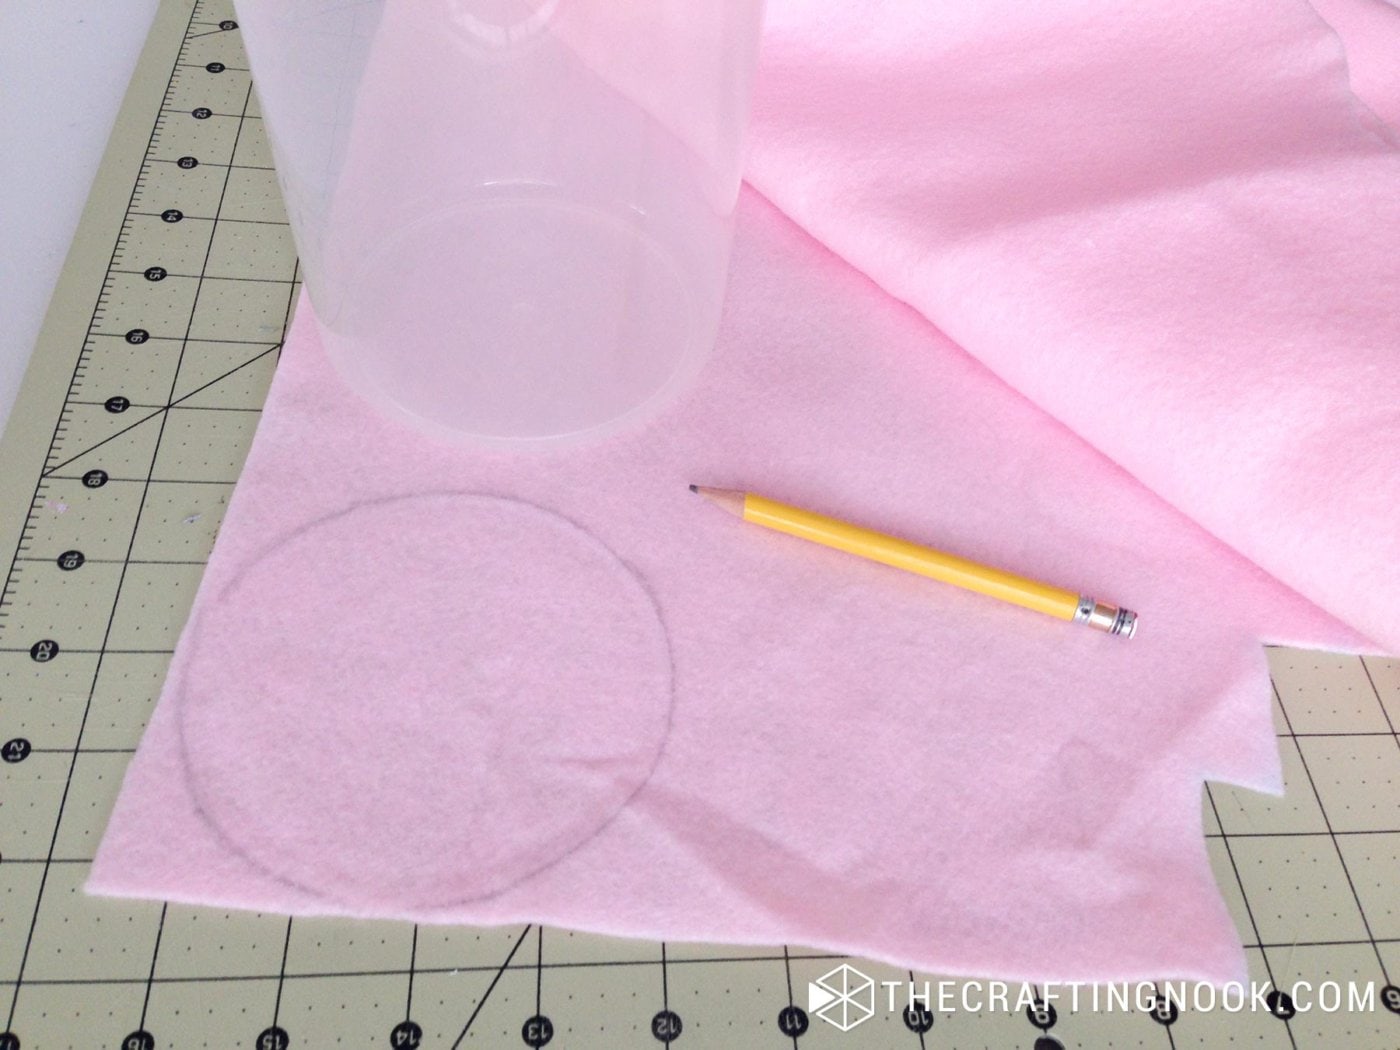
12. Pick something round like a small bowl, cup or dish.
13. Trace a circle on the felt and cut.
14. Then make another cut in a spiral way like this:
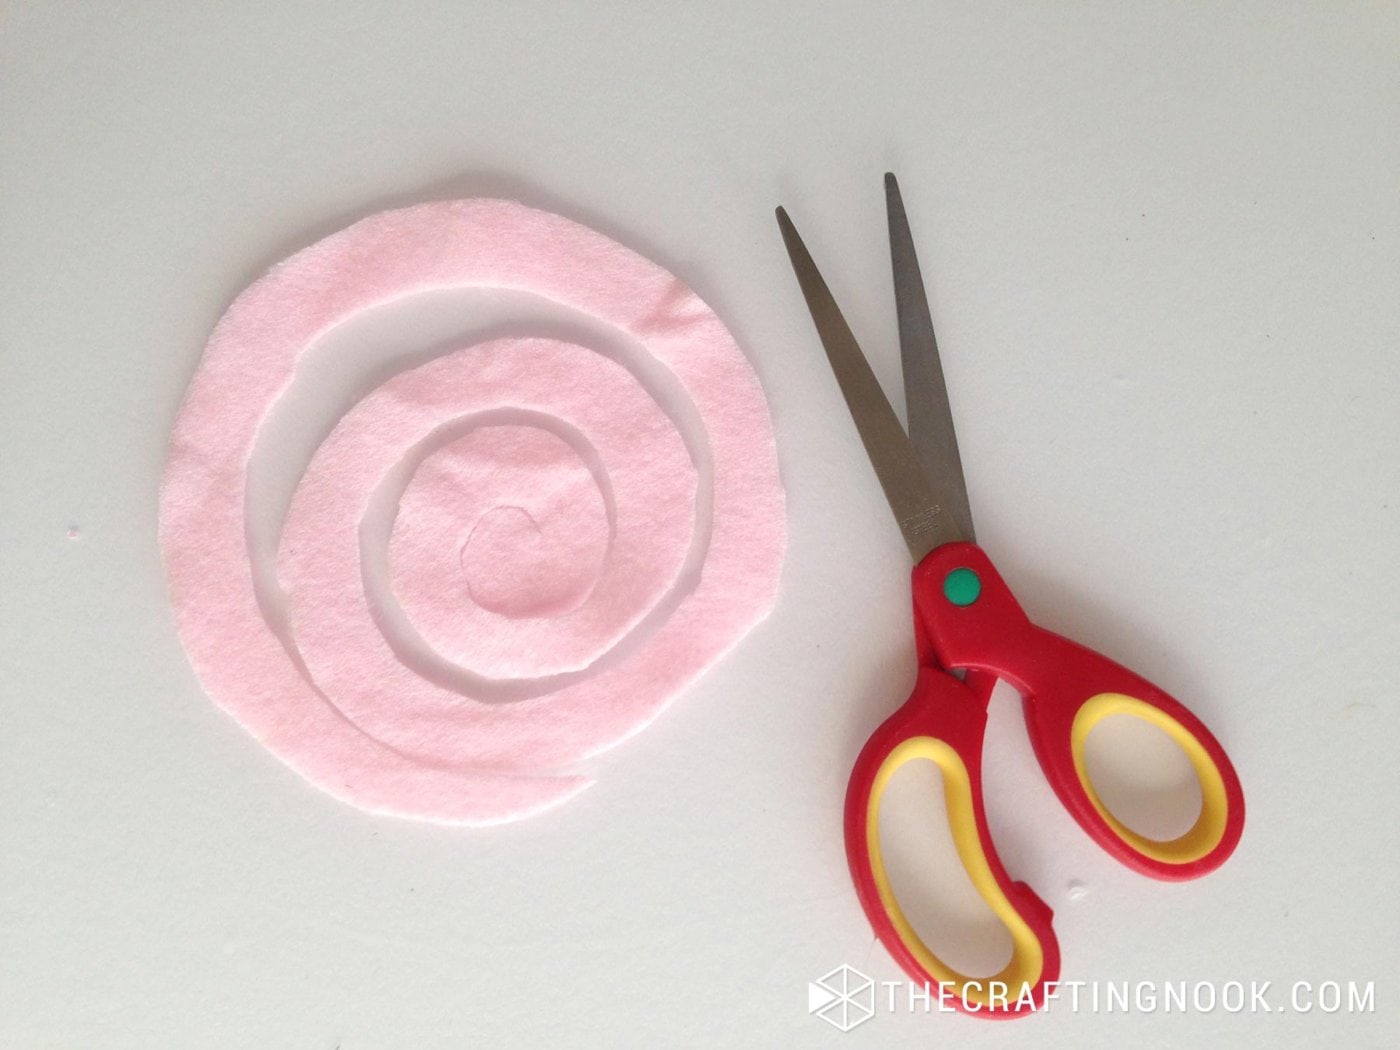
15. There’s no need to draw a perfect spiral or anything just go cutting and shaping it. The less perfect the better.
16. Begin with the outer end of the spiral and start rolling it keeping the center tight.
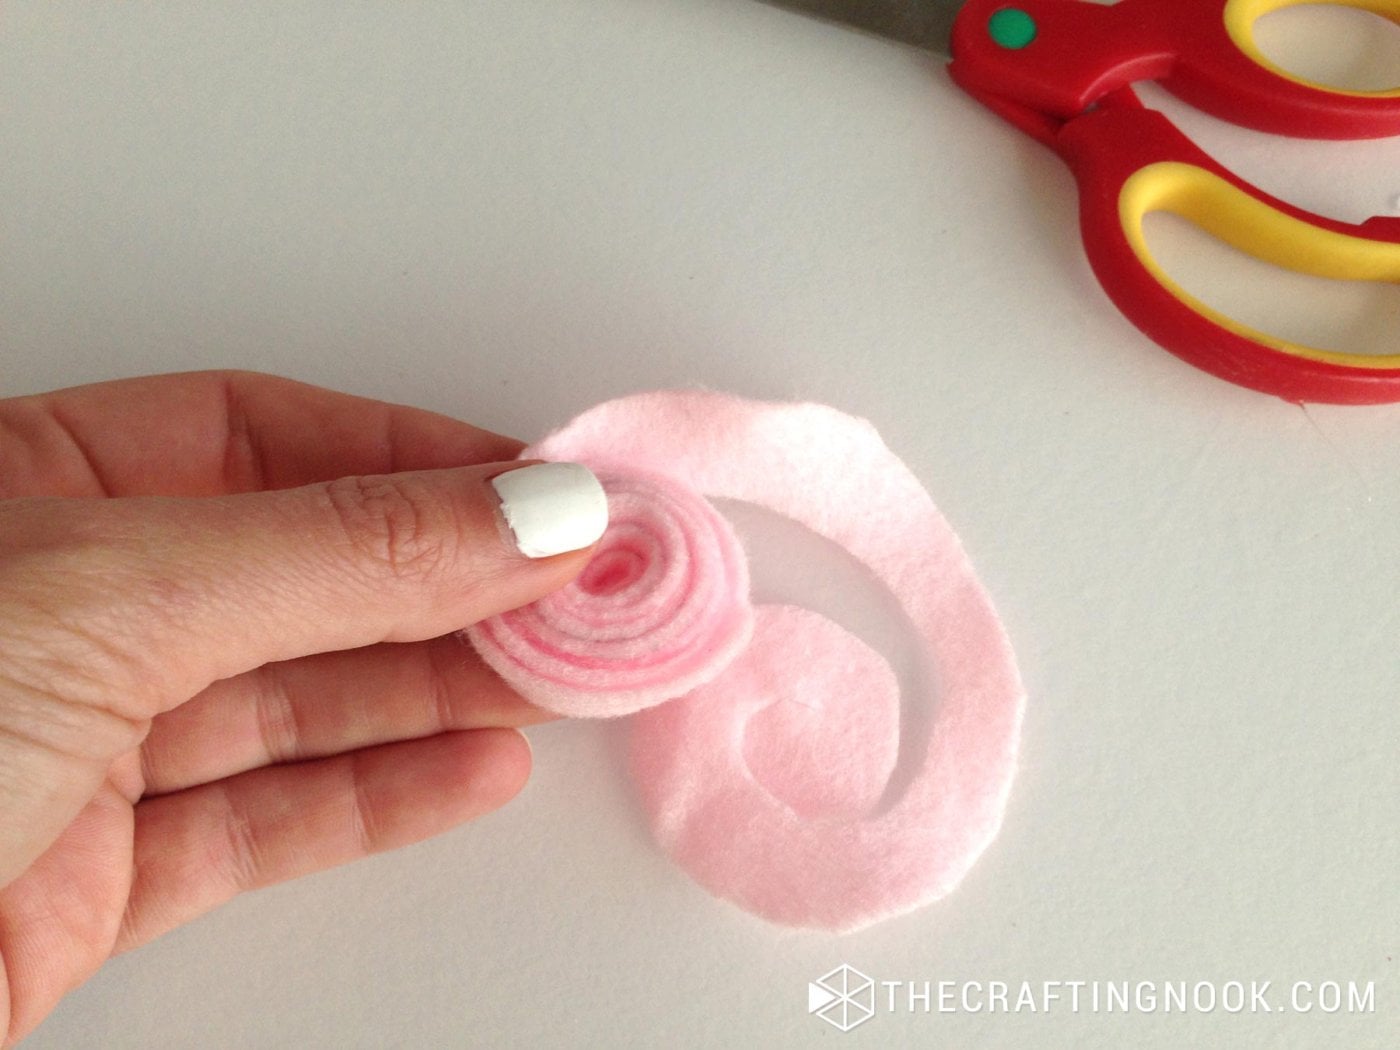
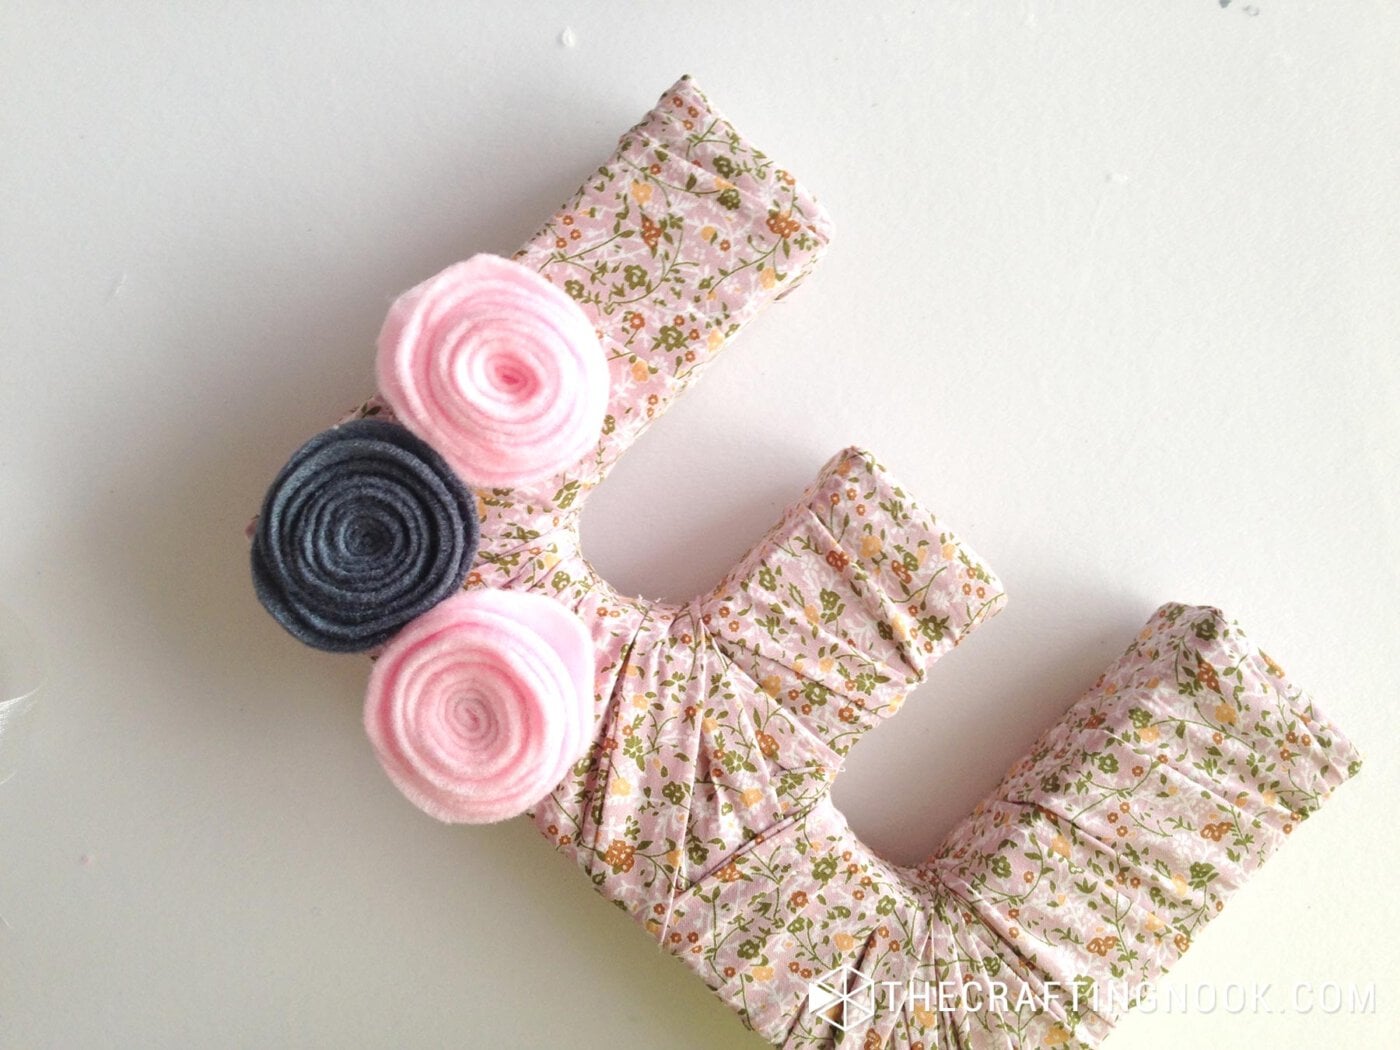
17. When you get to the other end, add some hot glue to the bottom of the flower and glue it to the end of the spiral which should be almost like a circle.

18. Do the same for other flowers and then glue them to the covered letter.
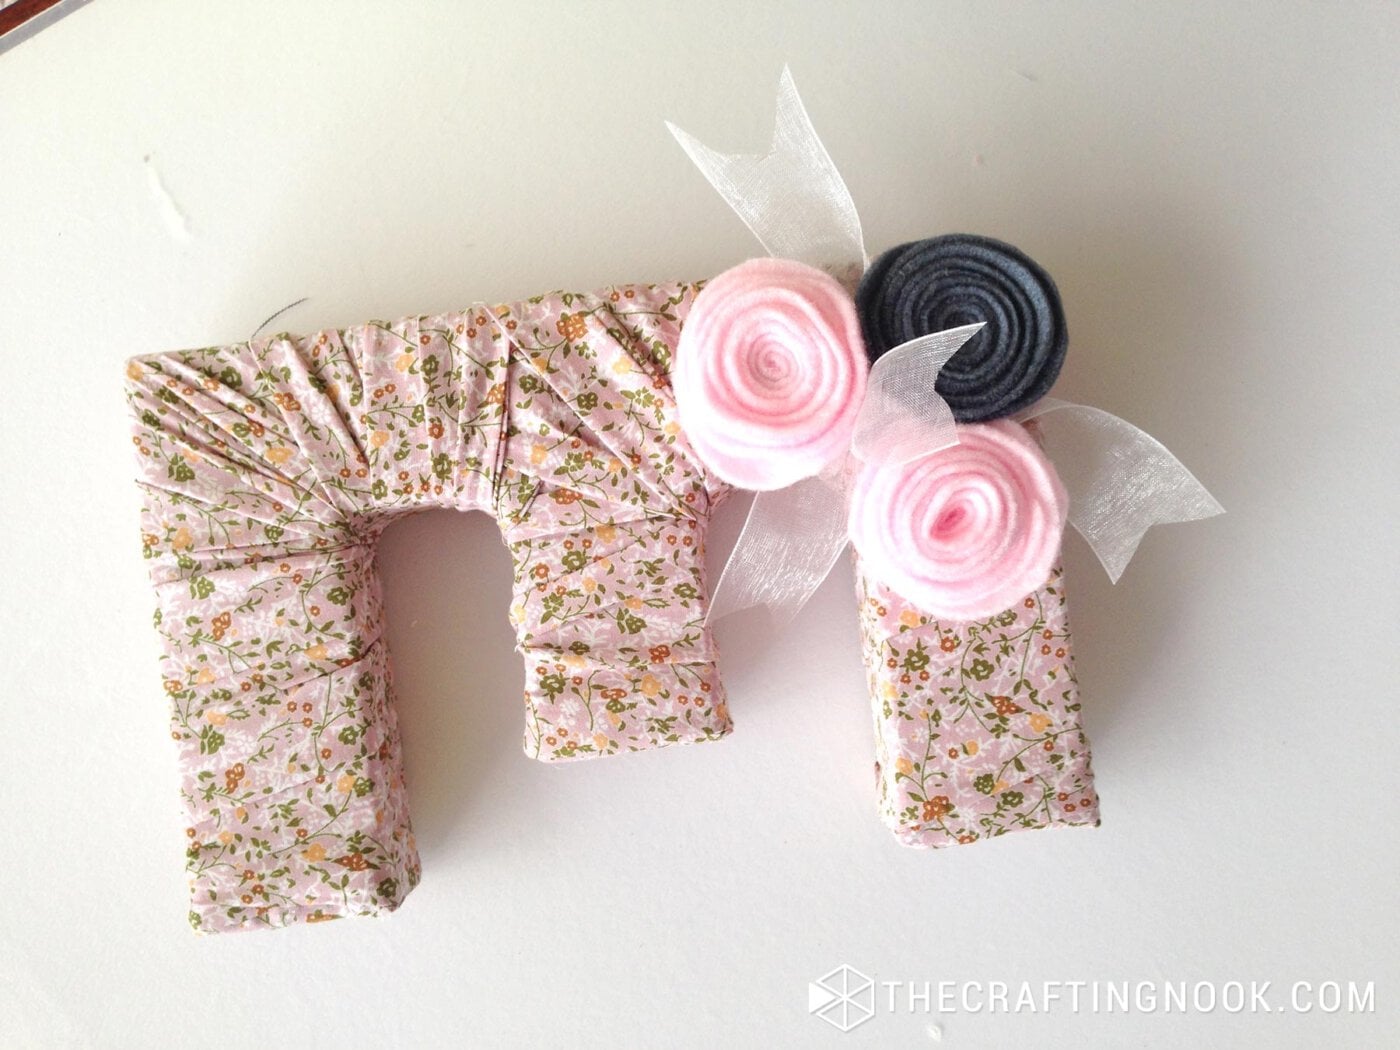
19. Now cut 2 strips of ribbon and knot them together in the middle to create something like the leaves.
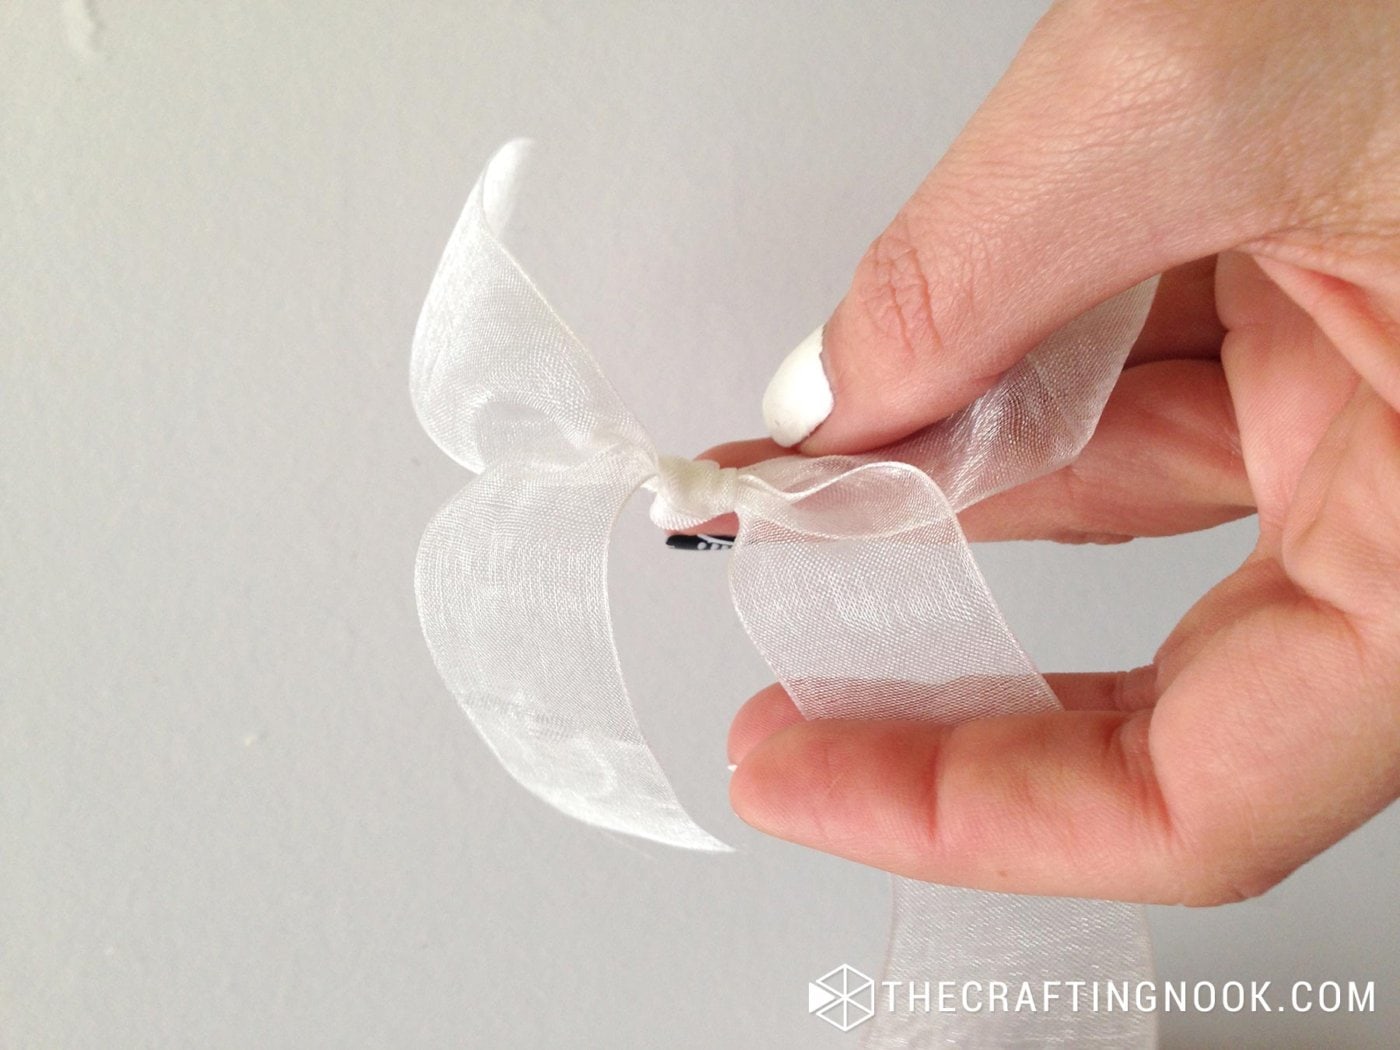
20. Glue it to the middle of the flowers and spread each end of the ribbons between the felt flowers to give an idea of leaves!
The final touch was inserting some small rocks or pebbles between fabric loops to the back bottom to let the monogram stand.
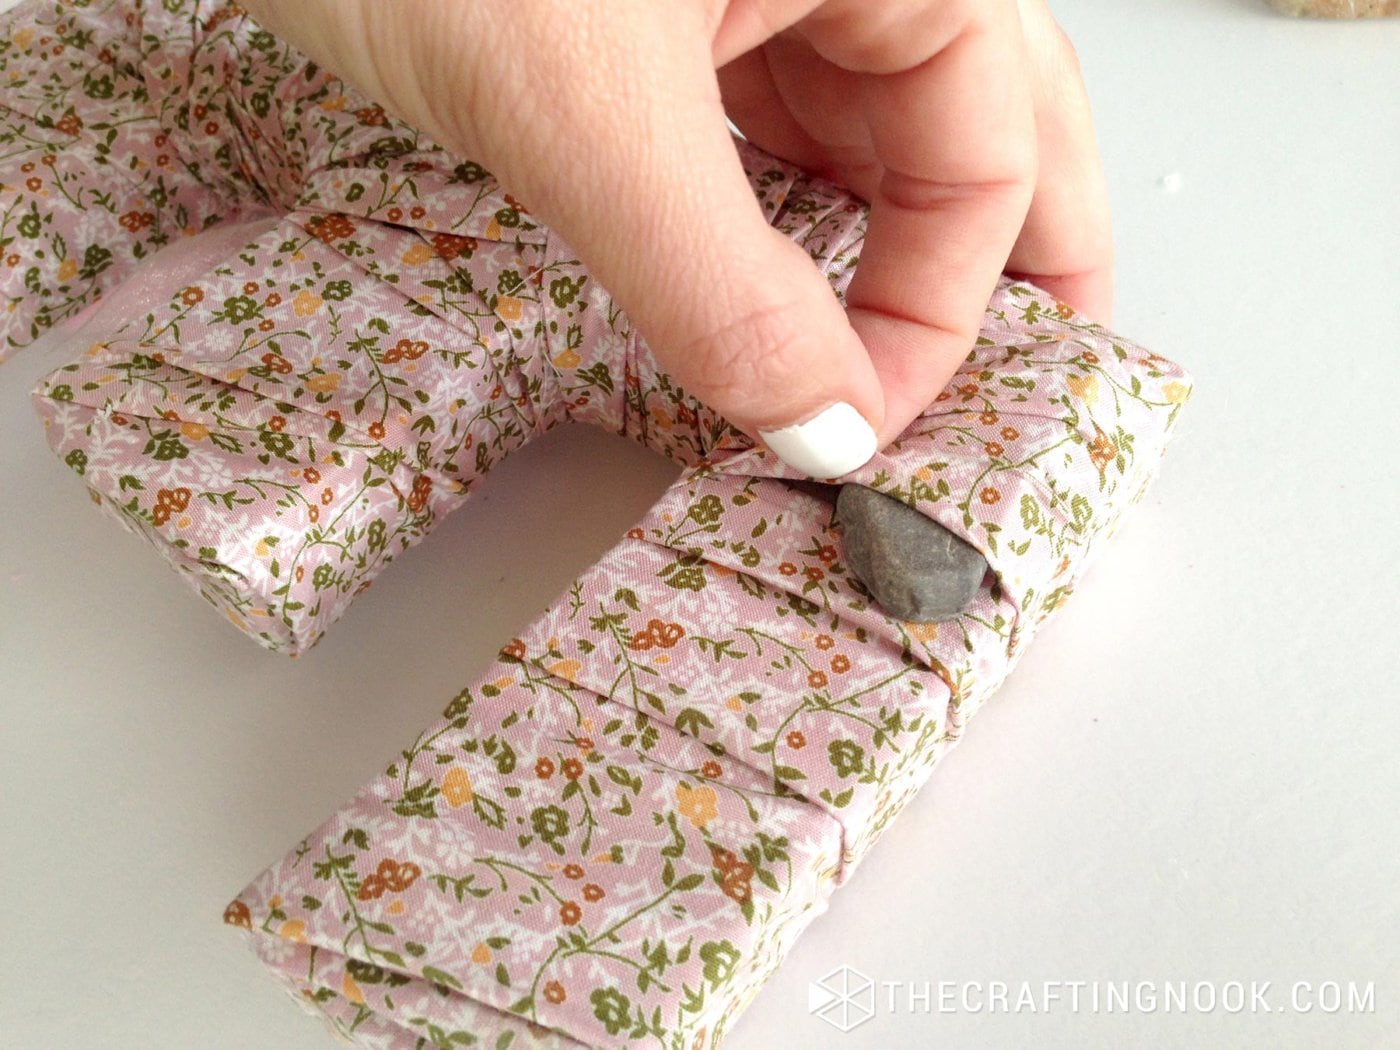
The problem was that the monogram was really light and the flowers were making it fall. The easiest way to fix that was adding weight to the back.
Crafting Tips
- Use fabrics with various patterns like polka dots, stripes, or floral prints to create a unique look. You could also mix and match fabrics for a patchwork-style letter.
- Glue beads or sequins onto the fabric for added sparkle and a touch of glam. This is perfect for a girl’s room with a princess or fairy theme.
- Instead of using only the basic spiral flowers, try making different types of felt flowers, such as roses, daisies, or succulents. This adds variety and texture to the design.
- Create a set of smaller letters to spell out a name or word, like “LOVE” or “JOY,” and arrange them as a wall display.
- Attach a ribbon to the top of the letter to hang it on a door or wall, adding a whimsical touch to any space.
TADAAAAAA!!!!! You cute Fabric Covered Letter is finished!
There you go! A cute, girly and easy-to-make fabric wrapped letters for your girl’s bedroom!
Hope you enjoyed this tutorial and try to make one! Leave me your thoughts in comments!
Alternatives and Substitutions
- For a rustic or shabby chic style, use burlap or lace instead of regular fabric. Burlap offers a natural, earthy look, while lace adds a delicate, vintage touch.
- For a more modern or edgy feel, use denim or faux leather scraps. These materials add texture and a contemporary vibe to the monogram.
- You could even choose fabrics that reflect different seasons or holidays, such as snowflakes for winter, flowers for spring, or pumpkins for fall. This makes the monogram versatile and seasonally appropriate.
- Instead of cardboard, use wooden letters for a more durable and sturdy base. These can also be painted or stained to add an extra layer of customization.
- Instead of rocks or pebbles, glue the letter to a small wooden base or plaque for a more stable stand-alone decoration.
Frequently Asked Questions
Light to medium-weight fabrics like cotton, linen, or muslin are ideal for wrapping letters because they are easy to manipulate and glue down. Thicker fabrics, such as upholstery or heavy canvas, might be harder to wrap around curves and corners.
Yes, you can use various materials, including wooden letters, foam, or papier-mâché letters. Each material offers different benefits. For example, wooden letters are more durable, while foam letters are lightweight and easy to hang.
If the letter is too light or top-heavy, add weight to the back. You can insert small rocks inside the fabric loops, fill the the letter before covering it with sand or rice to help it stand upright. Alternatively, attach the letter to a wooden base for additional stability.
Absolutely! This is a great project for older kids who can handle scissors and hot glue with supervision. For younger children, consider using safer alternatives like fabric glue and pre-cut felt flowers.
Yes, other adhesives like fabric glue, tacky glue, mod podge, white glue, or double-sided tape can be used. However, a hot glue gun provides a strong, quick-drying bond, making it the preferred choice for this project.
More Craft Projects for Kids To Try
If you like this Fabric Covered Letters tutorial, you might love these other easy diy projects for kids too:

Other cute fabric craft ideas from my favorite bloggers
- DIY Upcycled T-Shirt Dress by Infarrantly Creative.
- Girl Dress Upcycled From Men’s Shirt by All Day Chic.
✂️ Tutorial
DIY Fabric Covered Letters with flowers
Tools
- Hot glue gun and glue stick
- Sharp scissors
Supplies
- A letter of your choice. I used a cardboard letter E.
- Fabric of your choice.
- Felt – for flowers colors of your choice.
- Ribbon
- Optionally a few pebbles to add weight to the base of the letter if necessary.
- Tools:
- Hot glue gun and glue stick
- Sharp scissors
Instructions
- Cut some strips of fabric.
- This is totally up to you, the width and length. I made 2 full fabric-width strips of the fabric because one was not enough.
Covering the Letter
- Fold lengthwise so both raw edges go to the back.
- Start by gluing one end of the fabric to one end of the letter. I started with the middle of the E.
- Start wrapping up each part of the letter, using the wrinkles to your favor, and overlap on each loop.
- Here there is no perfect or right or wrong way. Just find your own way to cover the letter completely.
- Pay attention to the outer corners. I covered it with the fabric leaving some on each side.
- Make sure the end of the strip goes to the back of the letter.
- In my case, I used part one strip for the center part of the letter and the other half + the other strip for the rest of the letter.
- Finish the wrapping folding the end of the strip to the back side.
- With the help of your scissors or any other flat tool, push the fabric strip end inside the closest fabric overlap so the finish is clean and neat.
- Secure with a few dots of hot glue.
- Your monogram is done!
Making The Flowers
- I decided to make some cute rosettes for this project. These are super easy to make and the variations and combinations are endless. There are other cute felt flowers you can me make and you can learn how to make them here.
- Pick something round like a small bowl, cup or dish.
- Trace a circle on the felt and cut.
- Then make another cut in a spiral way like this:
- There’s no need to draw a perfect spiral or anything just go cutting and shaping it. The less perfect the better.
- Begin with the outer end of the spiral and start rolling it keeping the center tight.
- When you get to the other end, add some hot glue to the bottom of the flower and glue it to the end of the spiral which should be almost like a circle.
- Do the same for other flowers and then glue them to the covered letter.
- Now cut 2 strips of ribbon and knot them together in the middle to create something like the leaves.
- Glue it to the middle of the flowers and spread each end of the ribbons between the felt flowers to give an idea of leaves!
- The final touch was inserting some small rocks or pebbles between fabric loops to the back bottom to let the monogram stand.
- The problem was that the monogram was really light and the flowers were making it fall. The easiest way to fix that was adding weight to the back.
Share and PIN ME!!!

Til’ next time…


FREE WORKBOOK
Keeping your Sweet Home Organized
Learn how to create intentional habits and simple routines to Keep Your Home Organized. Plus freebies, printables, exclusive content, and tips.
Disclaimer: By clicking on the “Yes” button above you are giving me your consent to collect and use your information according to the law and My Policy Privacy. Zero Spam I promise!