DIY Hack: How to Add Doors to an IKEA Trofast Unit
This post may contain affiliate links. Please read our Disclosure Policy.
If you’re wondering whether you can add doors to an IKEA Trofast unit, the answer is yes. In this tutorial, I’ll show you how to install doors on a Trofast frame using a simple DIY hack. This is a step-by-step process that works with standard Trofast units and doesn’t require special tools or custom cabinetry.
If you are a fan of IKEA then you probably have seen the Trofast line of products. They are perfect for kids’ bedrooms and playrooms.

Table of Contents
How to make this Trofast IKEA Hack
Project snapshot
- Project type: IKEA hack / storage upgrade
- Time required: A few hours of work (spread over 1–2 days due to drying time)
- Best for: Hiding clutter in Trofast units
- Skill level: Beginner to intermediate
- Finished result: Decorative, functional
- Technique type: Painted
- Budget range: Low
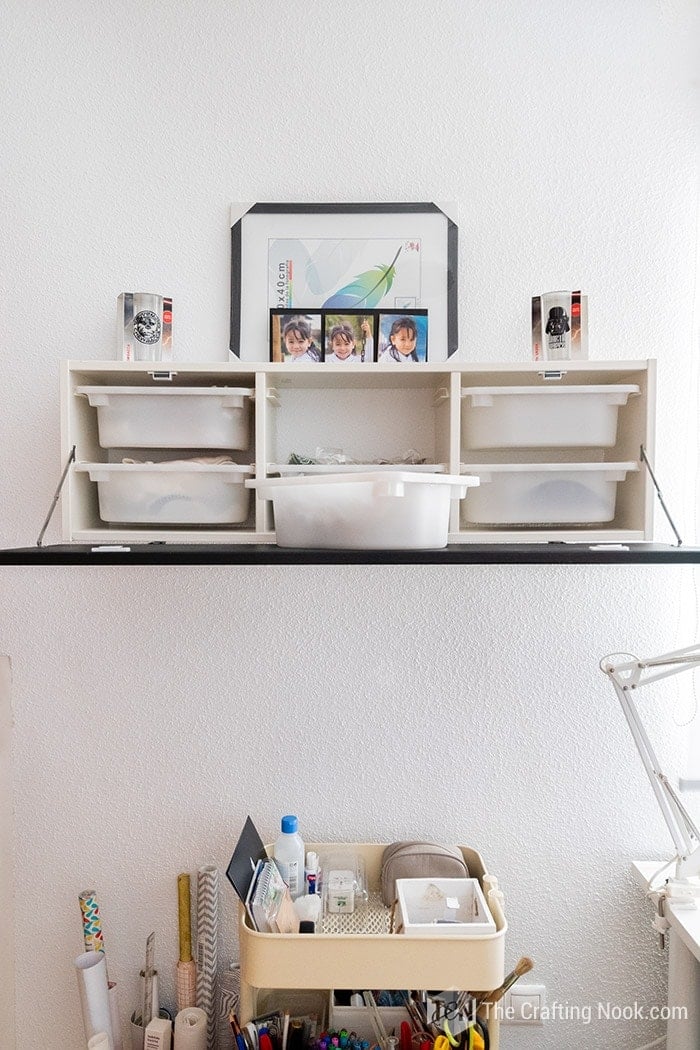
We originally bought the IKEA Trofast for our daughter to store toys and craft supplies, but when we moved it into our guest room and office space, the open drawers just didn’t work visually.
We still needed the storage, especially with her desk going there too, so getting rid of it wasn’t an option. That’s when we decided to figure out a way to add a door and hide the mess while keeping the unit functional.

Now we can’t see the mess and when our girl’s desk comes, the whole place will look super cute! She’s in a black kick lately so everything will fit perfectly with the new gaming room mood guest room decor.
This door hack has been installed for over six months now and has held up really well, which is why I’m sharing exactly how we did it.
The best part of this project is that you don’t need special or complicated equipment or tools. Also no wood glue, wood filler, or pocket holes.
Supplies:
- 1 pine board (90 x 32 x 1,9 cm) (35.4 x 12.5 x ⅔ Inches – the exact size of the trofast)
- Black wood stain
- Clear varnish
- 3 Decorative hinges – I couldn’t find the exact I used but I really love these cute hinges and these simple hinges too
- 2 Door folding hinges
- Decorative screws to match the hinges
- 2 Magnetic door catches
- Brushes
- Sandpaper
- Cloth
- Pencil
- Protective plastic
CHOOSING THE WOOD:
For this project, I used a pinewood board, but plywood works just as well.
I chose pinewood because I wanted the natural grain to show through the paint, and it gave the door a warmer, more finished look. Another reason was practical: we were able to find a pine board in the exact height and width of the Trofast unit, which meant no extra cutting was needed.
If you prefer a smoother finish or plan to fully paint the door, plywood is a great alternative and works perfectly for this type of hack.
Tools:
- Drill & Screwdriver
- Drill bits (smaller than the size of your screws)
- Hand screwdriver
- Ruler
Instructions:
Step 1: Plan and position the bottom hinges
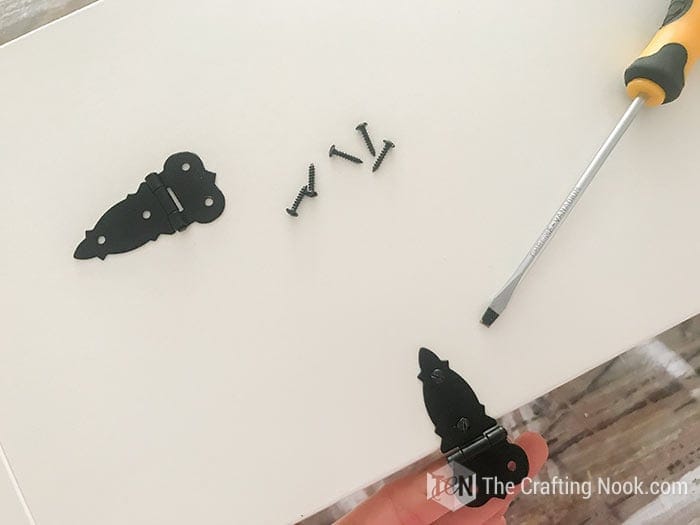
Start by installing the decorative bottom hinges on the Trofast unit. I chose to place them on the outside so they’d be visible once the door was installed.
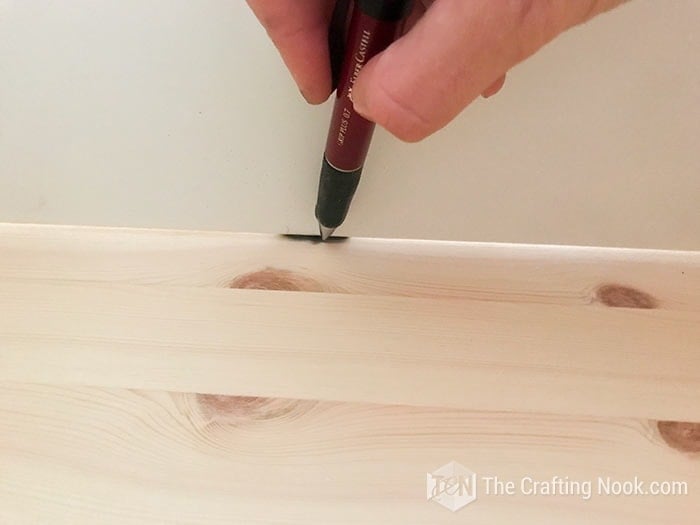
With the hinges attached, place the door against the Trofast frame. Carefully turn both pieces upside down and align them so everything sits straight. Use this position to trace the hinge shape and placement onto the door.
Step 2: Mark and prep the door for hinges
Turn the Trofast frame back to its normal position and raise it to the same height as the door using a scrap piece of wood. This helps keep everything aligned.

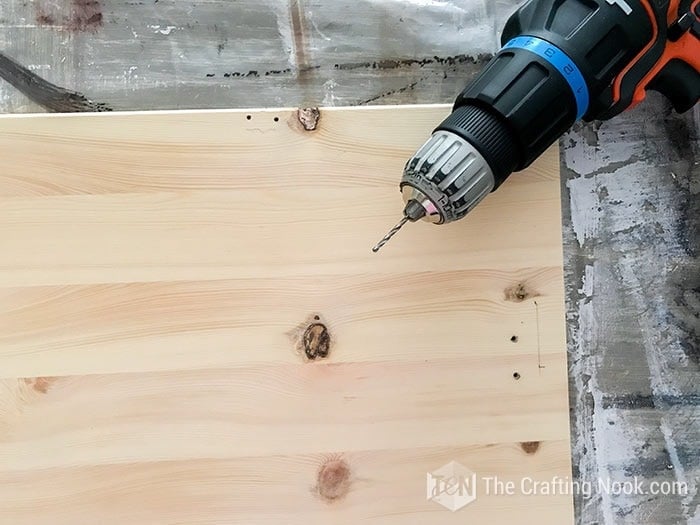
Once the door is in position, trace the screw holes for the hinges onto the door. These marks will guide your drilling in the next step.
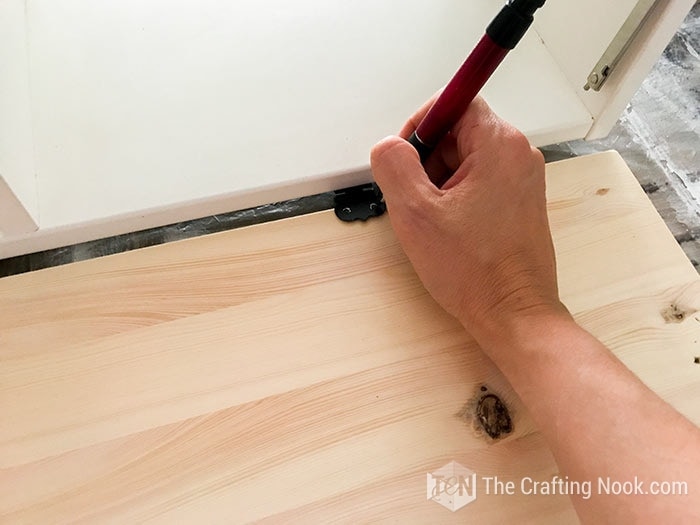
Make sure the door matches the marks you just did and draw the screw holes.
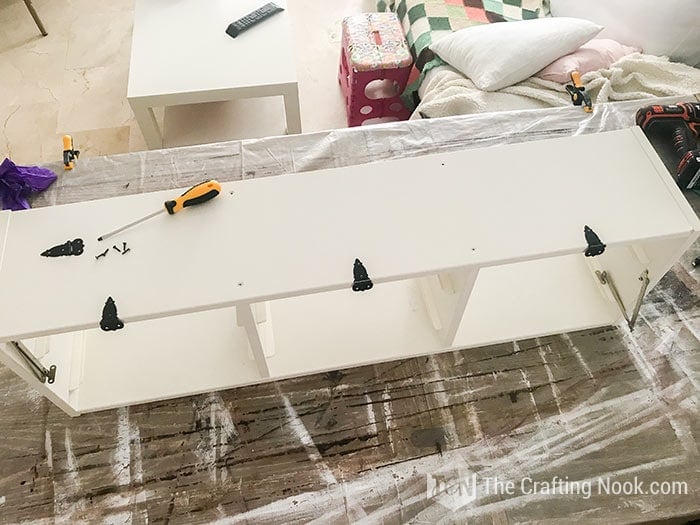
Step 3: Install the folding hinges
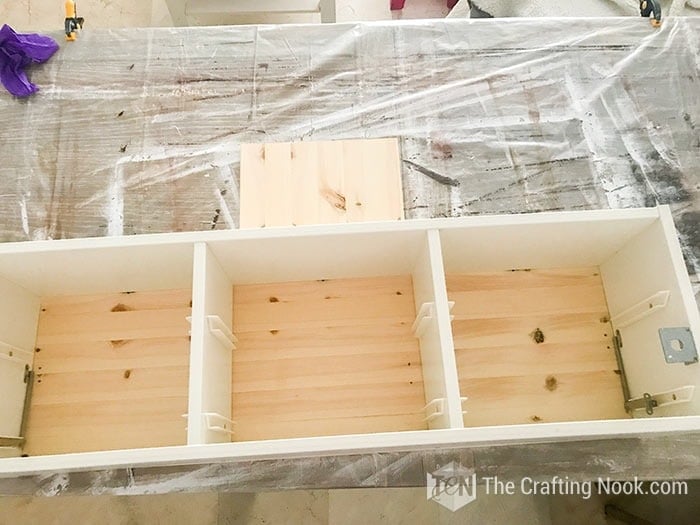
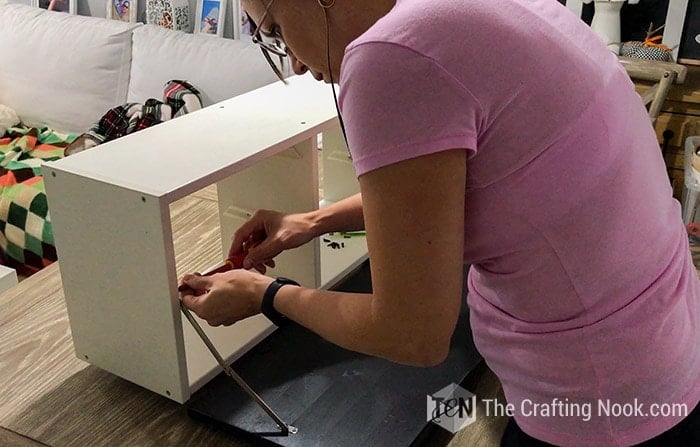
Position the folding hinges inside the Trofast frame and test that the drawers can slide in and out without interference. This step is important, so take your time here.
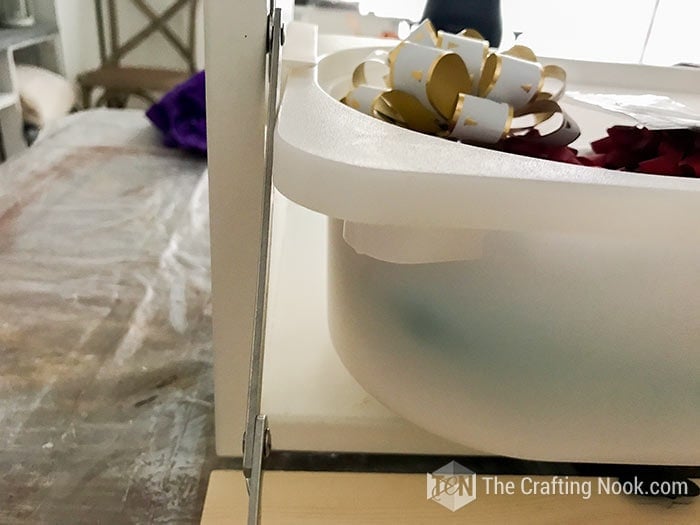
Once you’re confident with the placement, drill pilot holes and screw the folding hinges into both inner sides of the Trofast frame.
Drill all the screw paths you have already marked.
Step 4: Test fit the door and hardware
Place the Trofast frame back onto the door, align the folding hinges, and mark where the screw holes will go on the door itself.
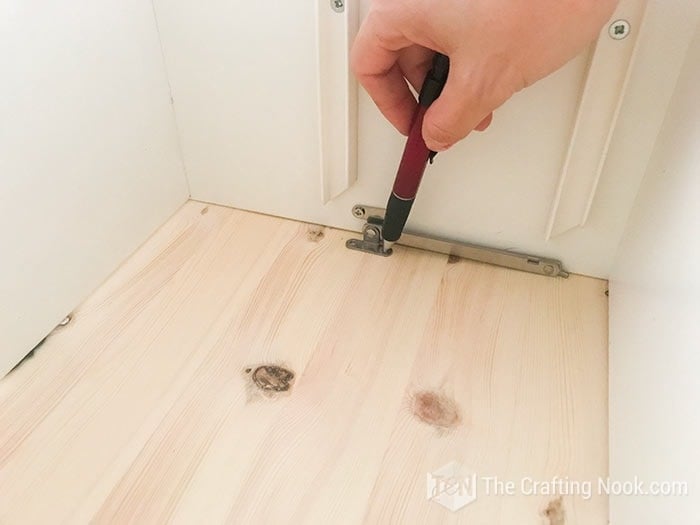
Drill all marked pilot holes. At this point, fully screw everything together to test the fit. Open and close the door to make sure everything moves smoothly.
If everything works as expected, remove the door and hardware again so you can move on to finishing.

Step 5: Paint and finish the door
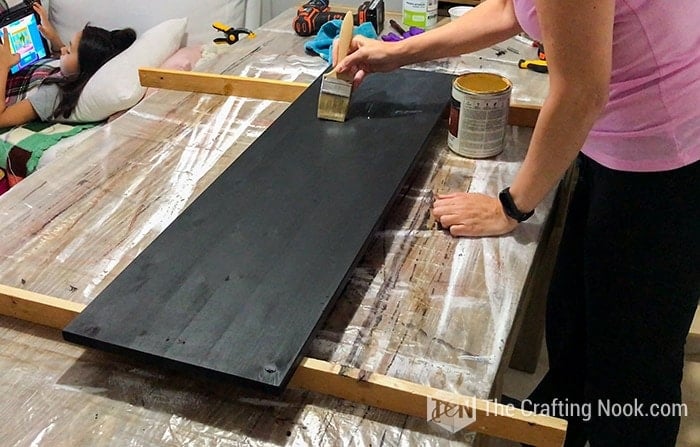
Sand the pine board thoroughly to remove splinters and smooth out any rough spots. I used a steel brush to accent the wood grain, but this step is optional.
Clean the surface with a slightly damp cloth, followed by a dry one.
Since I used wood stain, I skipped primer. Apply your stain or paint of choice. I applied three coats for a darker finish, letting each coat dry completely.
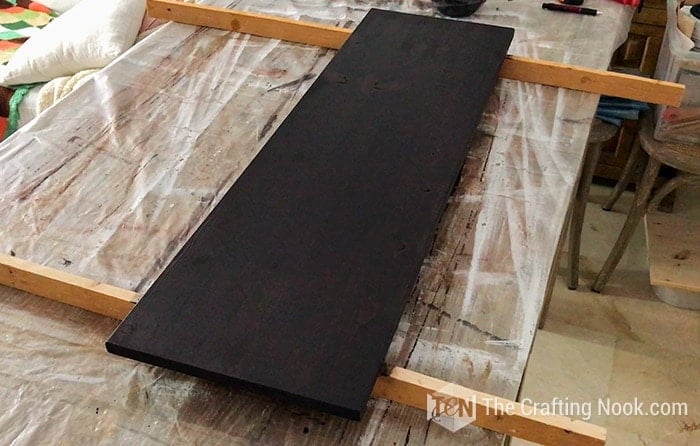
Finish with two coats of varnish for a smooth, durable surface, allowing proper drying time between coats. After the last coat, let it dry and cure completely (preferably overnight).
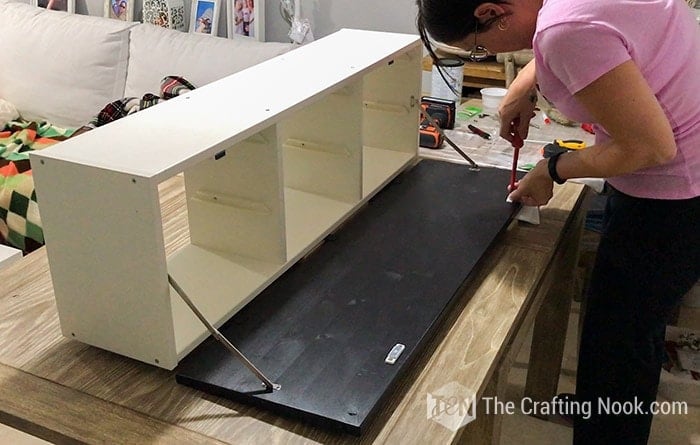
Step 6: Final door installation

Once the door is fully dry, place the Trofast frame on a scrap wood piece again and reinstall the hinges and folding hinges permanently.
Take your time here to keep everything aligned and square.
Step 7: Install the magnetic catches
Before reinstalling the drawers, install the magnetic catches to keep the door closed.

Turn the unit over, position the catches, and trace their placement on both the door and the Trofast frame. Drill pilot holes, then screw each piece into place.
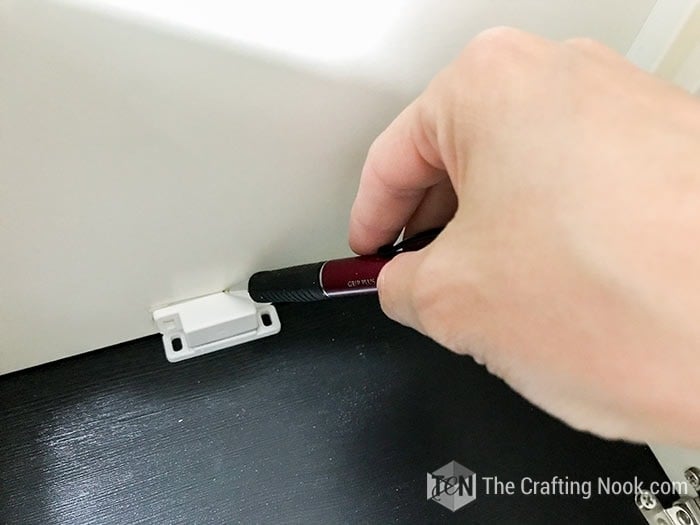
Most magnetic catches allow small adjustments, so fine-tune them until the door closes securely and lines up properly.
There you go!
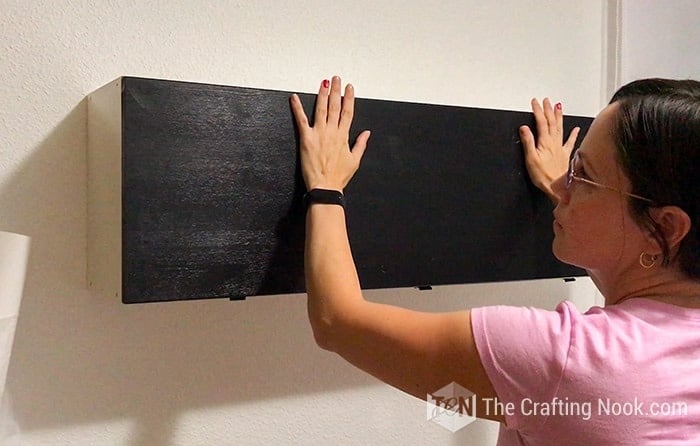
Step 8: Reinstall the Trofast unit and drawers
Reinstall the Trofast unit in its final position and slide the drawers back in.

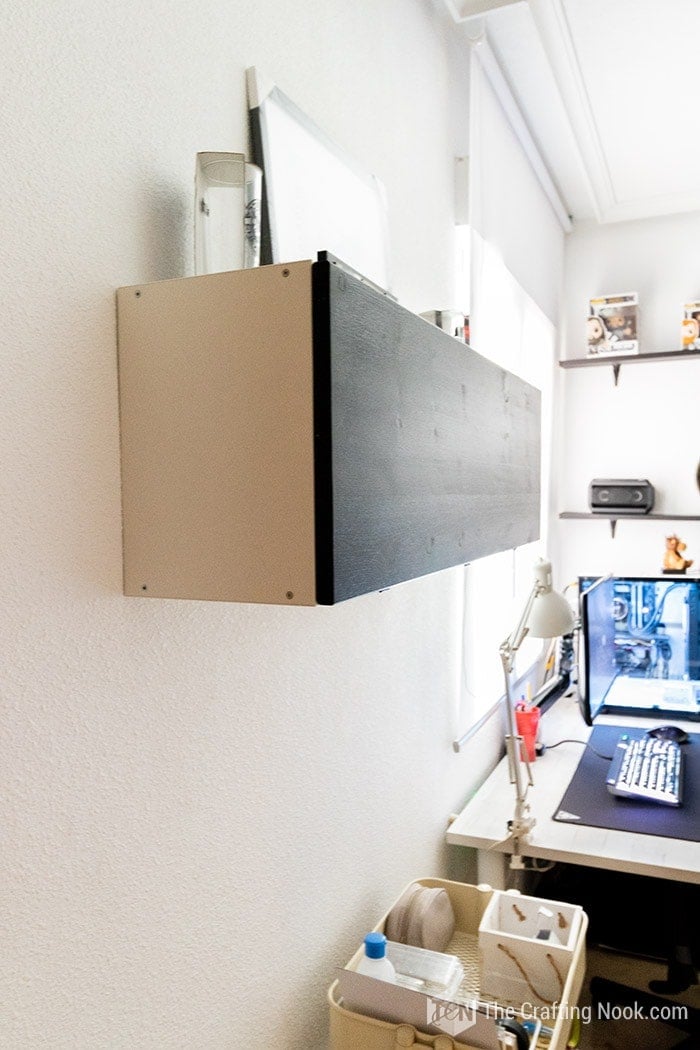
At this point, the door should open and close smoothly while hiding the messy drawers completely.
What do you think about the finished look?


Crafting Tips
- Instead of just staining the pine board, consider painting it with chalkboard paint. This way, not only does it hide the messy drawers, but it also becomes a fun space for doodling or leaving messages for your kids.
- To take the organization to the next level, attach small chalkboard sections or labels on the door, corresponding to each drawer. This way, it’s easy to identify what’s stored where without having to open each drawer.
- Go the extra mile with the look of your Trofast IKEA hack by swapping out standard hardware for decorative knobs or handles. Choose designs that complement the style of the room and add a touch of personality to the cabinet.
We didn’t want to install any door handle to keep it clean and minimalist but if you prefer you can install your favorite one!
I finished the whole thing in a few hours but considering I had several drying times in the process it took me about 2 days to finish the project.
Hope this tutorial was inspiring.
Alternatives and Variations
If this exact setup doesn’t fit your space or style, here are a few variations you can consider.
Different door finishes
Instead of staining the pine board, you can paint the door using chalkboard paint or regular wall paint to match the room. Chalkboard paint is especially fun for kids’ spaces and allows for notes or doodles.
Handle or no handle
We chose not to add a handle to keep the look clean and minimal, but you can easily install a knob or pull if you prefer easier opening. Decorative hardware can also help tie the unit into the rest of the room.
Top-opening door option
If bottom-opening doors don’t work for your layout, this hack could be adapted so the door opens upward using different hinges. Just make sure the door’s weight is properly supported.
Labeling for organization
To make drawer contents easier to identify, you can add labels or small chalkboard sections on the door that correspond to each drawer behind it.
More Furniture Projects to Try
If you liked this fun Ikea trofast hack tutorial, you might also love these other furniture project ideas too:
✂️ Tutorial
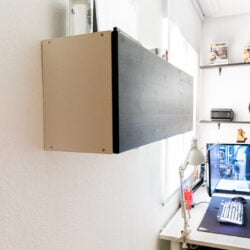
Trofast IKEA Hack: Installing a door to hide the messy drawers.
Tools
- Drill
- Screwdriver
- Brill bits (smaller than the size of your screws)
Supplies
- 1 pine board 90 x 32 x 1,9 cm (35.4 x 12.5 x ⅔ Inches – the exact size of the trofast)
- Black wood stain
- Clear varnish
- 3 Decorative hinges
- 2 Door folding hinges
- Decorative screws to match the hinges
- 2 Magnetic door catches
- Brushes
- Sandpaper
- Cloth
- Ruler
- Pencil
- Protective plastic
Instructions
PLANNING AND PREPPING THE HINGES
- Firstly, installed the bottom hinges on the Trofast piece. I chose a pretty decorative one so I installed it on the outside.
- Then I put the door in place and turned both upsidedown aligning well the door and the Trofast frame to draw the location and shape of the hinge.
- Then I put back the Trofast frame in normal position and rose it to the same level of the door by using a scrap wood piece.
- Make sure the door matches the marks you just did and draw the screw holes.
PREPPING THE FOLDING HINGES
- Present the folding hinges and test that the drawers will slide perfectly.
- Drill the screw path and screw the hinge in place on both inner sides of the Trofast frame.
- Drill all the screw paths you have already marked.
- Turn the Trofast frame on the door again, align well the folding hinge and mark where the screw holes.
- Put the Tofast frame back up again and drill the screw holes.
- At this point, it’s a good idea to screw everything to test if everything is going according to plan. If so remove everything again and let’s move on.
PAINTING THE DOOR.
- Sand your pine board well so remove splinters and smooth all the holes. I like to accent the wood lines to I used a steel brush. This step is totally optional.
- I clean the surface well with a slightly damped cloth. And then used a dry one.
- Since I was using wood stain I didn’t use a primer.
- Paint your boor away.
- Apply 3 coats and let it dry completely.
- Then apply varnish for a smooth finish. Again here I applied about 2 coats and let it dry completely.
- Put back your Trofast frame on a scrap wood piece and start screwing things in their places.
LOCKING THE DOOR CLOSED
- The last step before hanging the drawer back in its place is to install the magnetic catches.
- Like we did for the hinges, turn it over and place the catches in place.
- Draw the shapes well so you know where they go once you open the door.
- Like we always do drill the screw path first and then screw each piece in its place.
- The good thing about most magnetic catches is that they give you room to adjust, so once you have it adjust them so both pieces get in contact and close safely.
- There you go!
FILL YOUR TROFAST IKEA DOWERS
- Finally, it’s time to install back your Trofast.
- Install back the Trofast on the wall and putting back in the drawers
- What do you think about the finished look?
My Favorite Ikea Hacks from my favorite bloggers:
- Easy Ikea Shoe Cabinet Hack by Lavender Julep.
- Ikea Rast Nightstand Hack with Farmhouse Style by Feeling Nifty.
- Ikea Kallax Kitchen Island Hack by Jen Lou Meredith.
If you found it helpful, don’t forget to PIN it and share it with friends!

Til’ next time…


FREE WORKBOOK
Keeping your Sweet Home Organized
Learn how to create intentional habits and simple routines to Keep Your Home Organized. Plus freebies, printables, exclusive content, and tips.
Disclaimer: By clicking on the “Yes” button above you are giving me your consent to collect and use your information according to the law and My Policy Privacy. Zero Spam I promise!