DIY Witch Hat + Halloween Mantel Decoration
This post may contain affiliate links. Please read our Disclosure Policy.
Thinking of fun holiday crafts that can double as decorations? Why not try out this DIY witch hat that can spook up any Halloween mantel? This is a step-by-step tutorial on how to create this paper witch hat.
There’s just something special about paper crafting that I love so much. It’s crazy that with paper or cardstock you can create pretty much anything!

Table of Contents
Paper Witch Hat Craft and our Halloween Mantel Decoration
In my previous post Homemade Front Door Halloween Decoration, I mentioned that it was my first time decorating that big our house and in today’s post I’m sharing my very first mantel, Eeeek so excited to share with you our Paper Witch Hat Craft and Halloween mantel decoration. I’m so happy with how it turned out.
I’ve been really crafty lately and as much as I love my cutting machine I decided to share a few crafts that we can make with our hands without needing any machines, not even a computer {except for editing photos of it LOL}.
I must tell you, is so satisfying to get connected again with what our hands can do. It’s totally imperfect which is hard for me, but in the end, you see that the result is perfect anyway just because you put your heart into it.
It reminded me so much of when I was a teen. I used to create everything with my hands and using nothing but some supplies and my imagination. Computers were still in the Word Graphics stage so there was so little we could do with it besides those ugly banners with dot matrix printers, remember them??? LOL. I used to use any resource I could put my hands on to create what I had in mind.

So, inspired by those creative days of my life, I decided to create some halloween decor projects using only craft supplies, imagination, and my hands!
How to Make A Paper Witch Hat Craft and Mantel
This diy witch hat craft is the perfect project to involve the kids. Teach them how to use scissors and also to have some fun time with them.
Also works perfectly as part of your Halloween party decor such as party centerpieces,
Supplies:
Witch hat:
- Black cardstock or construction paper or even craft foam.
- Orange wrapping tissue
- Glue
- Pencil
The bats
- Black origami paper
- Adhesive tape
Mantel
- Green wrapping tissue
- Candles
- Mini Pumpkins
- Black marker
- Plastic Spiders.
Tools:
- Scissors
- X-acto knife
- Hot glue gun – if not working with kids.
Instructions:
Step 1: Cut the Witch Hat cone.
For this, Use black cardstock.
Use a corner of it to create the cone.
Decide the height it would have and then using a pin, thread, and a pen I make the circular shape that would give the cone shape.
It’s easy just tie one end of the thread to the pin and the other to the pen. Place the pin in the corner of your cone. Make the thread the same length as the height of your hat and then just draw a line from one side to the other tensing the thread.
Then make some zig-zag lines around the circular line. This is so you can glue the cone to the base of the hat.
Then cut.

Step 2: Assemble the cone
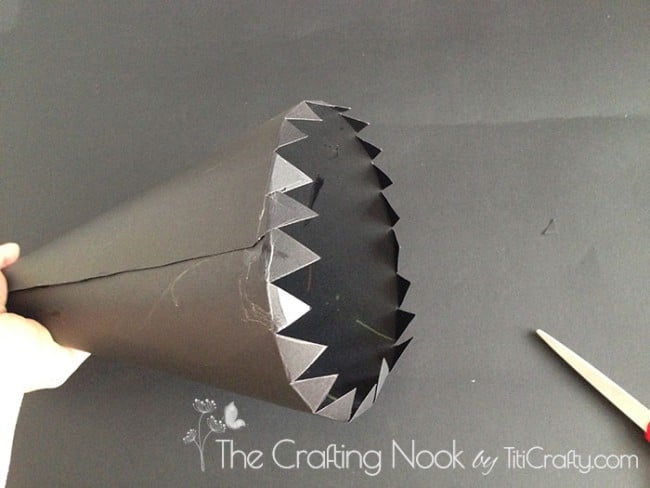
Roll the hat into a cone; join sides and making sure they line up.
Glue both edges of the cone together to close it.

Fold the triangles in the bottom of the cone inward.
Step 3: Cut the base of the witch hat
Then using a pan lid I drew a larger circle than the diameter of the cone, and cut…
Hi there, smile!!!!

Step 4: Create the beslt of the hat
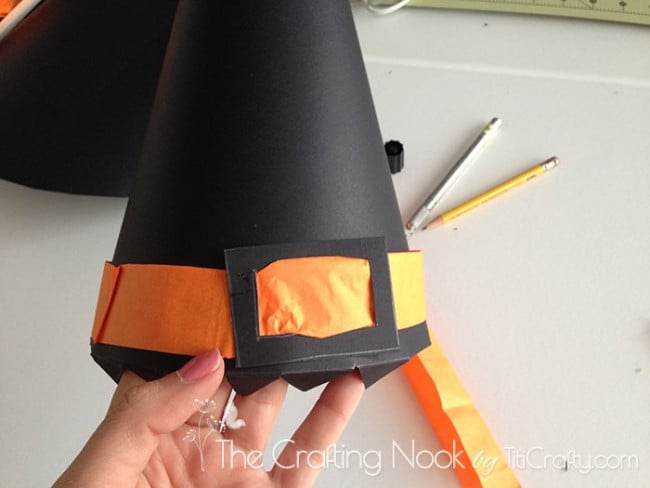
I draw a belt buckle in black cardstock with a good size so it would look nice on the hat and cut it.
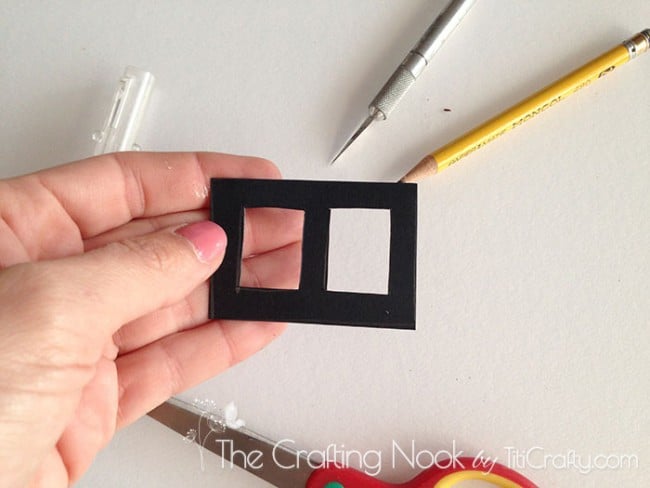
Cut a strip of orange wrapping tissue paper long enough to go around the base of the cone and wide enough to fold it longwise twice.
Inserted one end of the strip in the buckle.
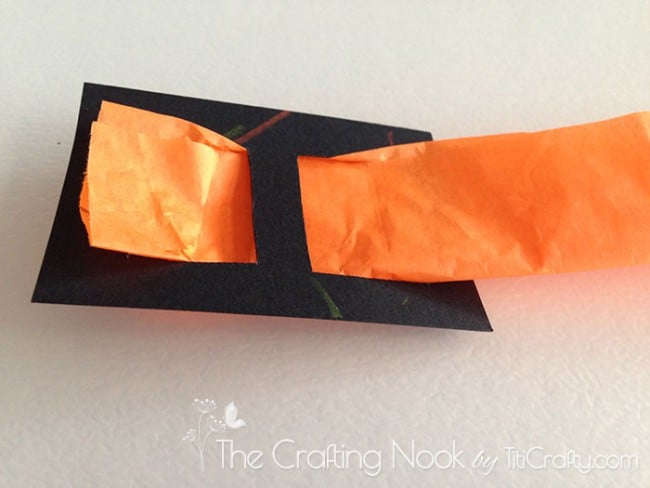
I started to glue the orange strip from the other end on the base of the cone until it reached the buckle and glued it.

Tadaaaa!!!
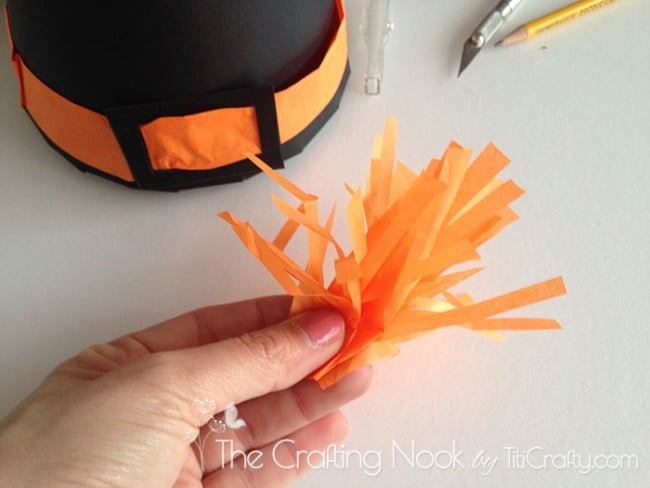
Then just as small detail, I made a small tassel from the same orange wrapping tissue and glued it behind the belt buckle too.
Step 5: Assemble the paper witch hat
It’s time to assemble the hat. Add glue to each triangle in the flap and glued it in the center of the circle you cut before.
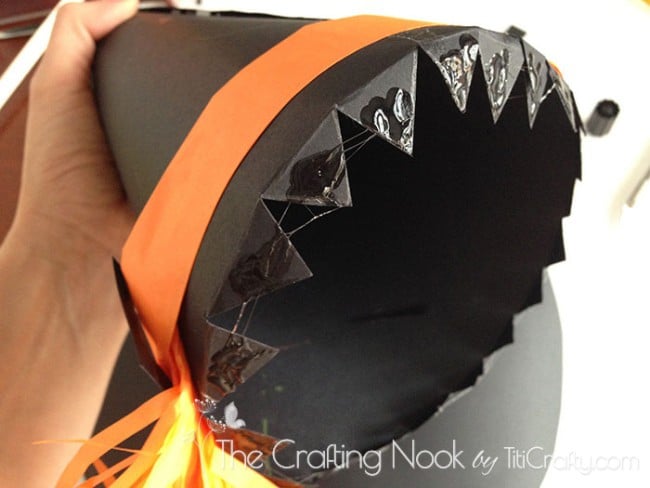
There you go!!! Hat finished.

Step 6: Decorate your Halloween Mantel
Now it’s time to decorate the mantel.
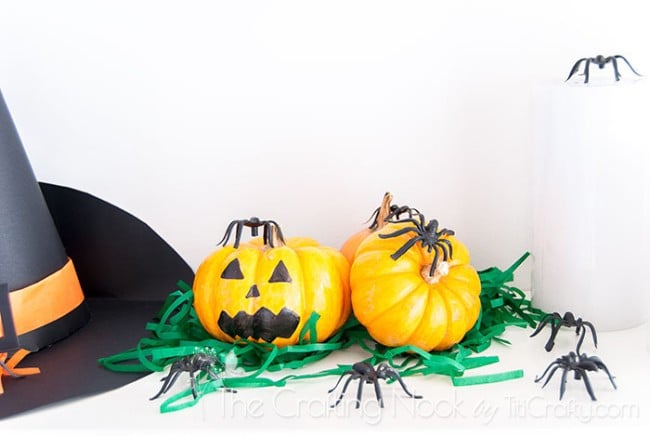
Fold a bit the hat’s brim in the back so it would fit on the mantel. Put some spider on it and around it.
Cut some strips of green wrapping tissue to use as a base for the pumpkins and I draw eyes and mouths to the pumpkins.
Place a couple of candles next to the pumpkins and a bowl full of candies.
I made some origami bats using 2 cute tutorials. You can check them HERE and HERE.
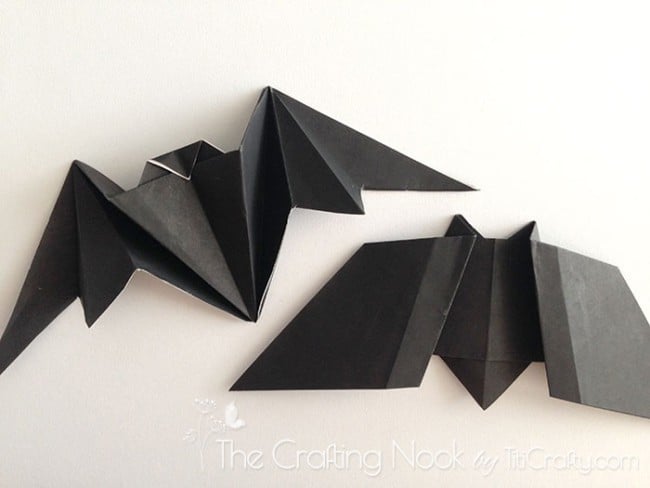
I glued them to the wall with tape about in the middle of the mantel.
The final touch was spreading spiders all over the mantel, on the hat, pumpkins, candles and even over the candy bowl.
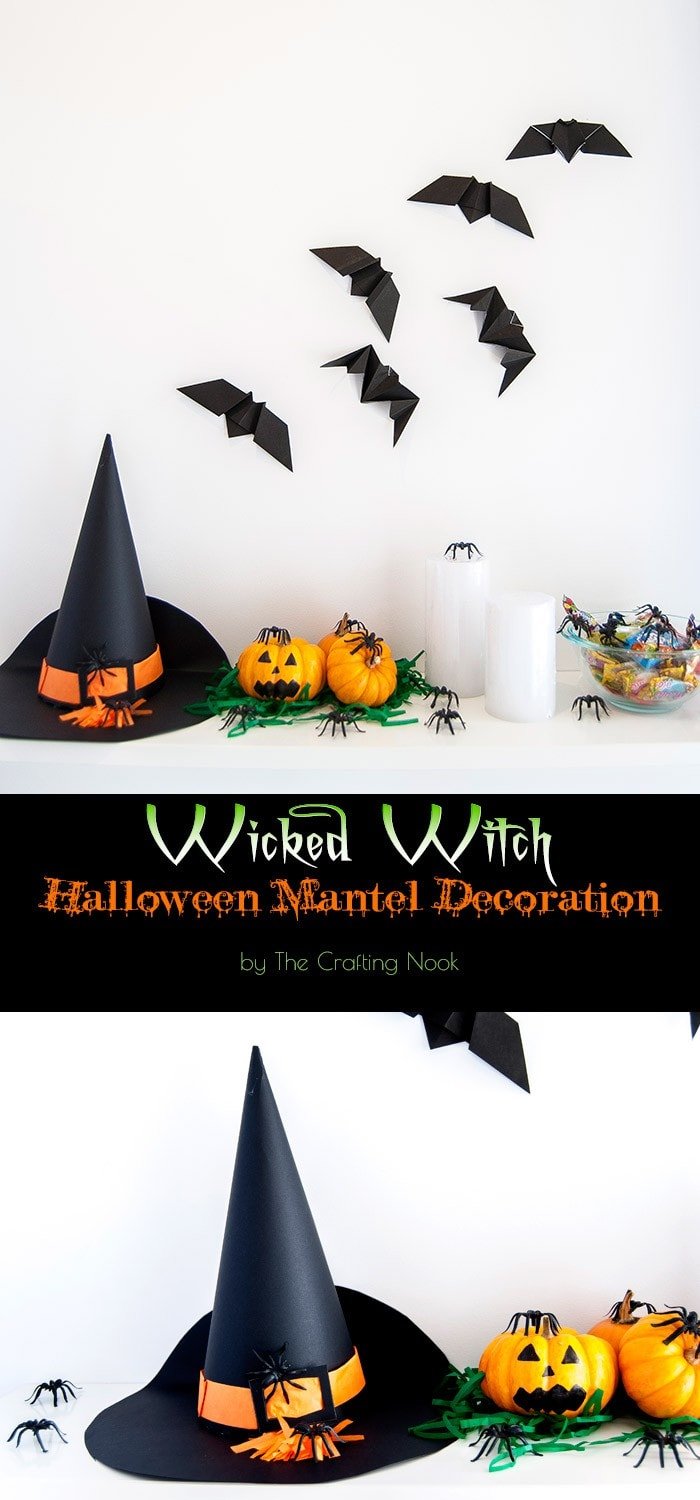
There you go!!!! A cute, simple and handcrafted Halloween mantel decoration.
Crafting Tips
- If you would like to hang the witch hat, use the fishing line. Tie a loop of clear fishing line to the top of the hat to make a hanging hook. This will let you hang the hat from the mantel or any other place you want so that it looks like it’s floating.
- Instead of using regular craft supplies, you can use small fabric scraps to decorate the hat. You can make shapes like stars, moons, or spiders from colorful fabric and stick or sew them onto the hat. This will make your decoration feel special and give it a nice texture.
- Add glow-in-the-dark paint: to make your witch hat even scarier, think about using glow-in-the-dark paint for some parts or details. This will help the hat be more noticeable in dark places or when there is blacklight.
- To make Halloween more enjoyable, you can spray a little bit of your favorite fall-scented room spray on the hat. This will make it smell nice and create the right atmosphere for the season.
- Try using different colors instead of the usual black and orange. You can make a cool and different witch hat by using dark purples, greens, or shiny colors like silver or gold.
This is such a great Halloween craft for the whole family and kids will love it!

Frequently Asked Questions
It’s better to use strong and thick paper like cardstock or construction paper for the witch hat. These materials will make the hat strong and durable so it keeps its shape.
This tutorial is for making a paper witch hat, but you can also make one using fabric if you like. But remember, when working with fabric, you may need to use sewing instead of gluing and use some kind of material to keep the shape.
You can decorate things with different things like ribbons, feathers, fake flowers, or little decorations. Use sticky craft glue or a hot glue gun to firmly stick these decorations to the hat. Use your imagination to make your witch hat unique and in line with your Halloween style.
To keep the hat in good condition for later use, gently flatten it and store it somewhere dry and cool, away from direct sunlight. You can put it between tissue paper or wrap it in bubble wrap to stop it from getting creases and being harmed.
When displaying a hat on a mantel, you can use a strong hat stand or a pretty cone-shaped item to keep the hat in place. Or, you can put a string or ribbon on the top of the hat and hang it on a hook or nail above the fireplace.
More Halloween Crafts to Try
If you liked this witch hat craft tutorial, you might also love these other Halloween project ideas too:
✂️ Tutorial

DIY Paper Witch Hat Craft + Halloween Mantel Decoration
Tools
- scissors
- X-acto knife
- Hot glue gun – if not working with kids.
Supplies
Witch hat:
- Black cardstock or construction paper or even craft foam.
- Orange wrapping tissue
- Glue
- Pencil
The bats
- Black origami paper
- Adhesive tape
Mantel
- Green wrapping tissue
- Candles
- Mini Pumpkins
- Black marker
- Plastic Spiders.
Instructions
STEP 1: CUT THE WITCH HAT CONE.
- For this, Use black cardstock.
- Use a corner of it to create the cone.
- Decide the height it would have and then using a pin, thread, and a pen I make the circular shape that would give the cone shape.
- It’s easy just tie one end of the thread to the pin and the other to the pen. Place the pin in the corner of your cone. Make the thread the same length as the height of your hat and then just draw a line from one side to the other tensing the thread.
- Then make some zig-zag lines around the circular line. This is so you can glue the cone to the base of the hat.
- Then cut.
STEP 2: ASSEMBLE THE CONE
- Roll the hat into a cone; join sides and making sure they line up.
- Glue both edges of the cone together to close it.
- Fold the triangles in the bottom of the cone inward.
STEP 3: CUT THE BASE OF THE WITCH HAT
- Then using a pan lid I drew a larger circle than the diameter of the cone, and cut…
STEP 4: CREATE THE BESLT OF THE HAT
- I draw a belt buckle in black cardstock with a good size so it would look nice on the hat and cut it.
- Cut a strip of orange wrapping tissue paper long enough to go around the base of the cone and wide enough to fold it longwise twice.
- Inserted one end of the strip in the buckle.
- I started to glue the orange strip from the other end on the base of the cone until it reached the buckle and glued it.
- The Paper Witch Hat Craft almost finished
- Then just as small detail, I made a small tassel from the same orange wrapping tissue and glued it behind the belt buckle too.
STEP 5: ASSEMBLE THE PAPER WITCH HAT
- It’s time to assemble the hat. Add glue to each triangle in the flap and glued it in the center of the circle you cut before.
- There you go!!! Hat finished.
STEP 6: DECORATE YOUR HALLOWEEN MANTEL
- Now it’s time to decorate the mantel.
- Fold a bit the hat’s brim in the back so it would fit on the mantel. Put some spider on it and around it.
- Cut some strips of green wrapping tissue to use as a base for the pumpkins and I draw eyes and mouths to the pumpkins.
- Place a couple of candles next to the pumpkins and a bowl full of candies.
- I made some origami bats using 2 cute tutorials. You can check them HERE and HERE.
- I glued them to the wall with tape about in the middle of the mantel.
- And the final touch was spreading spiders all over the mantel. On the hat, pumpkins, candles and even over the candy bowl.
- There you go!!!! A cute, simple and handcrafted Halloween mantel decoration.
What do you think, my lovely readers??? I would love to hear your thoughts and what have you done on your mantels in comments!!!
Share and PIN ME!
Til’ next time…


FREE WORKBOOK
Keeping your Sweet Home Organized
Learn how to create intentional habits and simple routines to Keep Your Home Organized. Plus freebies, printables, exclusive content, and tips.
Disclaimer: By clicking on the “Yes” button above you are giving me your consent to collect and use your information according to the law and My Policy Privacy. Zero Spam I promise!


