DIY Butterfly Shadow Box With Free Printable
This post may contain affiliate links. Please read our Disclosure Policy.
Make a butterfly shadow box with these easy DIY instructions and a free printable template. Customize this project to display your favorite butterflies as well.
Isn’t Spring the most colorful and joyful season ever?… I love Spring! When can you see so many different colors of flowers, green grass, and of course the magnificent scent of freshness in the air?

Inspired by that memory and the desire to be in it already I have created this cute spring butterfly shadow box frame with a cute free printable for you to enjoy.
You might also love these other Spring craft ideas: How to make Felt Flowers Easy and Cute, Easy DIY Rustic Spring Wreath, and 20+ Farmhouse Spring Decor ideas.
Table of Contents
Paper Butterfly Shadow Box Project
Mom bought some pretty flowers so I thought it would be such a cute decoration to place the flowers and the frame together.
Seems like Spring has a deep effect on us. With Spring comes the necessity of a change, clean, refresh, and of course something new. Spring seems to reveal the best in us because optimism and happiness flourish everywhere!
WHAT IS A SHADOW BOX?
A shadow box is an enclosed, glass front picture frame that can hold and display 3D items that have value or particular meaning for people. These shadow box frames are deeper than the standard picture frames and are designed to store and display precious memories, and special artwork, or fill them up with fun items.
How to Make a Faux Butterfly Shadow Box
Hope you like this little cute project!
Quick Note: You don’t need to have a cutting machine for this project. This butterfly was easy enough to cut by hand and you can find plenty of images and butterfly templates on the internet. So don’t let this stop you.
Supplies:
- This free Printable
- White cardstock
- Patterned cardstock (Scrapbook paper, embossed paper, etc)
- A shadow box frame or a deep picture frame (I used a Ribba frame from IKEA)
- Glue or double-sided tape
- Scissors or cutting knife – *Silouette or Cricut cutting machine Optional.
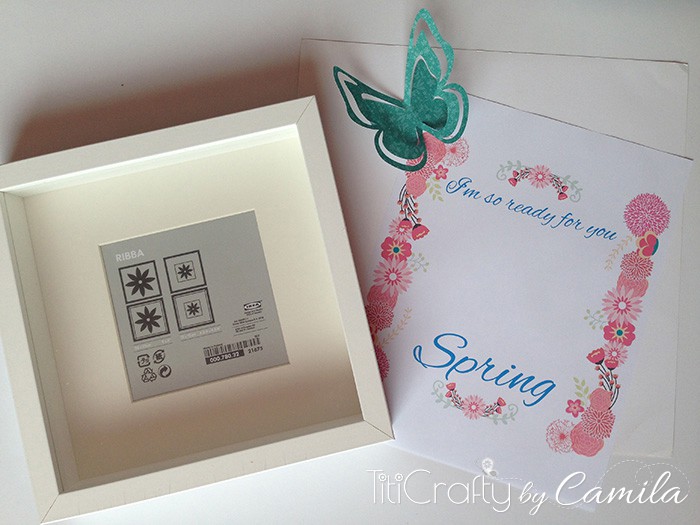
Instructions:
Before we begin, be sure to follow us on Pinterest, Facebook, Instagram, and YouTube, and also sign up for our email list (at the end of this post), so you’ll never miss a post!
Step 1: Prepping the design
First of all, I designed the printable based on the measures of the frame. Since it was a little bigger than regular paper, I made a frame like a mat board so I could print it home.
For the design, I used some cute flowers and stems from the creative guys of freepik.com.
I left a big space in the center of the design to place there the paper butterflies. I wrote, “I’m so ready for you Spring”. Once was ready, I Printed it.
Remember that each printer is different. In my case, I use Epson L355. I set my design page for a 21.5×21.5 cm {8.5×8.5 Inches} but my actual visible design is 19.5×19.5 cm {7.6×7.6 In}.
I set up my page in the printer so it would leave only a 0.2 cm {0.08 inch} margin on every side and didn’t check “fit to page”.
Then based on my printable measures and using as a reference the layout that comes with the frame (hat paper with a design that comes in the frames) I cut a square of white cardstock piece and then cut out another square from the center of 19.5×19.5 cm {7.6×7.6 In} to create my own passe-partout.

Put them together and with tape, I secure them on the back.
Step 2: Creating cute faux butterflies
Then in my Silhouette Studio, I cut this pretty butterfly from the silhouette store in the same measures as the space I let in the printable.

I decided to make only one big paper butterfly but you can make as many as you like.
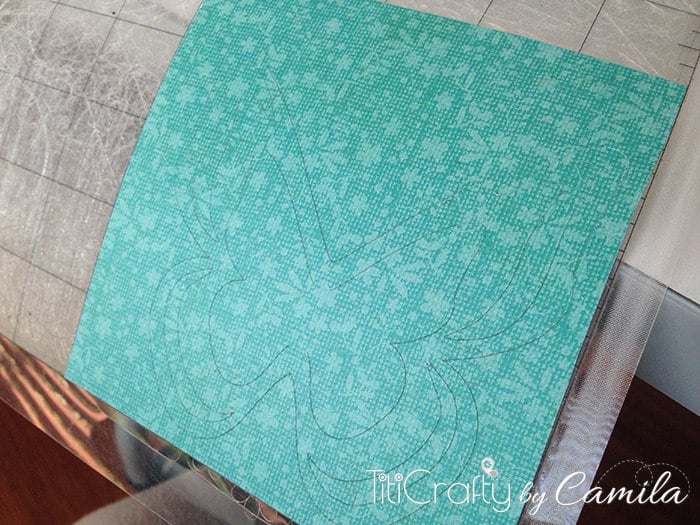
The trick is cutting out and bending the paper butterflies to provide the play of light and shadow around their 3D shape.
Using a round object like a thick marker, you can bend and shape the butterflies wings to make them look more 3D.
Step 3: Getting the Butterfly Art ready
Then I placed some strips of double-sided tape on the back of the butterfly, only on those places that will be securing the butterfly to the paper.
You can use a hot glue gun and apply a line of hot glue to those areas.
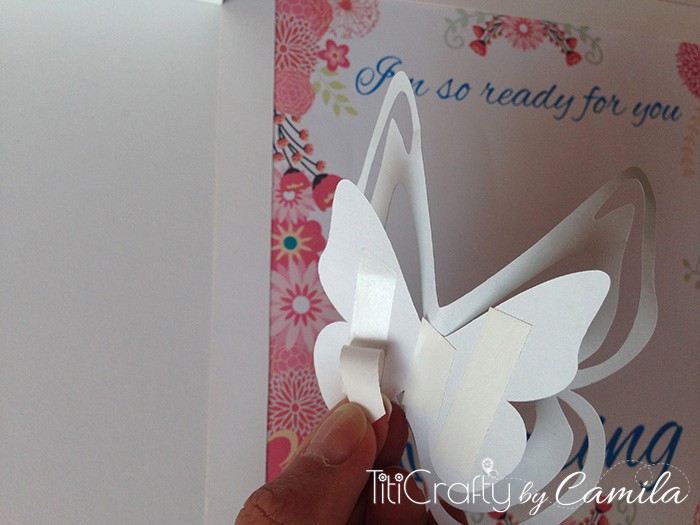
Decided on the perfect place and secure it.
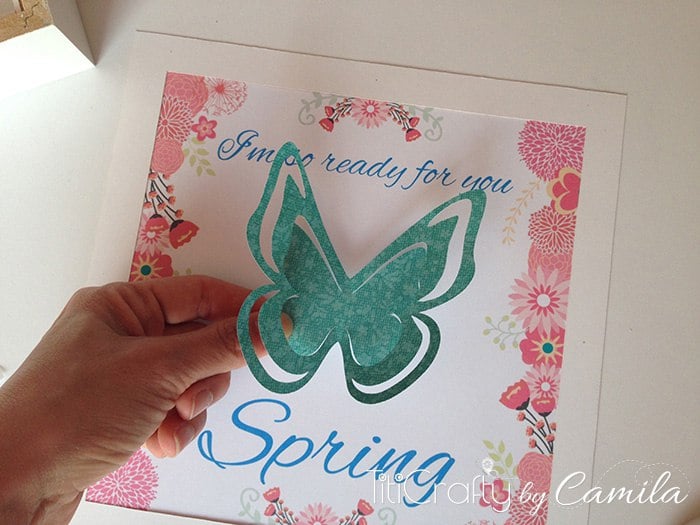
Tadaaaa!!! Cute right?

My design was meant to be simple and very paper-based. However, if you want to take it to another level, get your largest butterflies and add cute antennas by cutting inch-long pieces of metal wire and bending them in the middle with a pair of pliers.
Next, apply a small drop of hot glue near the “head” and press in the V-shaped wire.
It will look so freakin’ cute!
Anyway moving on…
Step 4: Assembling the Butterfly Shadow Box
Ok, then was the moment to put the design in the frame.
Place the frame face down on a flat surface and use a butter knife, putty knife or similar object to lift each flex tab from the back of the shadow box towards the inside edge of the frame.
Bend all the metal tabs up, leave them in place, and then lift out the cardboard so you can put the picture in place.
Put the butterfly art facing down inside of the frame and then place the paper that came with the frame too.
And finally, Closed it putting back the backing and bending the tabs back in place.

Ready!
How cute is it???


I decided to place it on a side table in the living room right next to the flower vase.
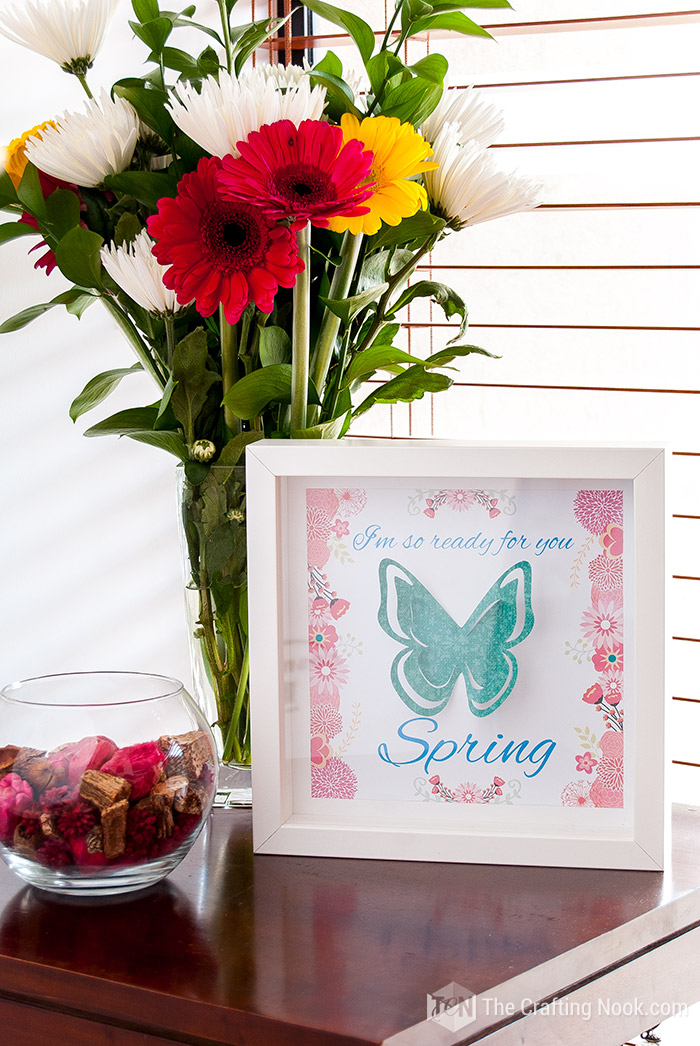

Super cute and decorative!
Frequently Asked Questions
Well, although many people use real passed-away butterflies, that’s not the only way to create this beautiful kind of art. I much rather using faux butterflies. So you can put down your butterfly net and warm up your printer or cutting machine to make this faux butterfly shadow box.
You can print hi-res real butterfly pictures and cut them out, so they would look very real. You can also make different types of paper butterflies, origami butterflies, fabric butterflies, and so much more.
Ultimately, you can just buy faux butterflies in craft stores that will most likely look very real too. It will depend on what you want to accomplish.
Although I share a free printable for this project, you can use any backing you want. I love the look of burlap as your backing for a more rustic look, also linen looks so pretty. You can print other types of patterns, use old book pages, and fabric scraps, or just a white cardboard piece just to name a few.
I’m not an expert, but when it comes to real butterflies, they seem to use pins. BUT for faux butterflies, there are many ways, you can use hot glue, universal glue, double-sided tape, and pins, among other ideas.
More Spring Projects to try
If you enjoyed this Butterfly Shadow box tutorial, you might also love these other Spring project ideas too:
✂️ Tutorial

Diy Butterfly Shadow Box With Free Printable Tutorial
Tools
- Scissors or cutting knife Optionally Cutting machine (Silhouette or Cricut)
Supplies
- The free Printable
- White cardstock
- Patterned cardstock Scrapbook paper, embossed paper, etc
- A shadow box frame or a deep picture frame I used a Ribba frame from IKEA
- Glue or double-sided tape.
Instructions
STEP 1: PREPPING THE DESIGN
- First of all, I designed the printable based on the measures of the frame. Since it was a little bigger than regular paper, I made a frame like a mat board so I could print it home.
- For the design, I used some cute flowers and stems from the creative guys of freepik.com.
- I left a big space in the center of the design to place there the paper butterflies. I wrote, “I’m so ready for you Spring”. Once was ready, I Printed it.
- Remember that each printer is different. In my case, I use Epson L355. I set my design page for a 21.5×21.5 cm {8.5×8.5 Inches} but my actual visible design is 19.5×19.5 cm {7.6×7.6 In}.
- I set up my page in the printer so it would leave only a 0.2 cm {0.08 inch} margin on every side and didn’t check “fit to page”.
- Then based on my printable measures and using as a reference the layout that comes with the frame (hat paper with a design that comes in the frames) I cut a square of white cardstock piece and then cut out another square from the center of 19.5×19.5 cm {7.6×7.6 In} to create my own passe-partout.
- Put them together and with tape, I secure them on the back.
STEP 2: CREATING CUTE FAUX BUTTERFLIES
- Then in my Silhouette Studio, I cut this pretty butterfly from the silhouette store in the same measures as the space I let in the printable.
- I decided to make only one big paper butterfly but you can make as many as you like.
- The trick is cutting out and bending the paper butterflies to provide the play of light and shadow around their 3D shape.
- Using a round object like a thick marker, you can bend and shape the butterflies wings to make them look more 3D.
STEP 3: GETTING THE BUTTERFLY ART READY
- Then I placed some strips of double-sided tape on the back of the butterfly, only on those places that will be securing the butterfly to the paper.
- You can use a hot glue gun and apply a line of hot glue to those areas.
- Decided on the perfect place and secure it.
- My design was meant to be simple and very paper-based. However, if you want to take it to another level, get your largest butterflies and add cute antennas by cutting inch-long pieces of metal wire and bending them in the middle with a pair of pliers.
- Next, apply a small drop of hot glue near the “head” and press in the V-shaped wire.
STEP 4: ASSEMBLING THE BUTTERFLY SHADOW BOX
- Ok, then was the moment to put the design in the frame.
- Place the frame face down on a flat surface and use a butter knife, putty knife or similar object to lift each flex tab from the back of the shadow box towards the inside edge of the frame.
- Bend all the metal tabs up, leave them in place, and then lift out the cardboard so you can put the picture in place.
- Put the butterfly art facing down inside of the frame and then place the paper that came with the frame too.
- And finally, Closed it putting back the backing and bending the tabs back in place.
- Ready to go!
So, your turn! How badly are you waiting for spring? Any plans for it?
Other Shadow Box ideas:
- DIY Birch Shadow Box Paper Craft by A Piece of Rainbow.
- Flower Shadow Box DIY by Leap of Faith Crafting.
- Diy Seashell Heart Shadowbox by Living Purposefully.
If you found this project fun to make, don’t forget to PIN and share it with friends!

Did you like my Spring Frame Butterfly Shadow Box?
Til’ next time…


FREE WORKBOOK
Keeping your Sweet Home Organized
Learn how to create intentional habits and simple routines to Keep Your Home Organized. Plus freebies, printables, exclusive content, and tips.
Disclaimer: By clicking on the “Yes” button above you are giving me your consent to collect and use your information according to the law and My Policy Privacy. Zero Spam I promise!
I love the faux butterfly idea. Thanks for sharing the printable.
Thank you so much! Hope you enjoy the printable!
Hugs.
This is so cute! I like simple it is, but a great decoration to add to your home! We find creative and inexpensive ways to make wall art, too! Stopping by from the #WWBH :)
This is so cute! Thanks for sharing.
I am soooo ready or spring! What a cute idea. I love the 3D butterfly!
There are some really great projects here!! I’d love it if you shared this on the DIY blog hop!
http://www.pleasuresofthenw.com/diy-party-no-3/
Aww this is so cute! Thank you for sharing in the Thursday Favorite Things link party!
Erika
http://whaterikawears.com/
Thank you Erika! XOXO
Adorable! Perfect for welcoming spring!
Thank you for sharing with us at Brag About It!
~Laurie
So girly! I love it :)
Hope you will share your printable with our Link Up – Idea box:
http://milaslittlethings.com/2015/03/idea-box-thursday-link-party-3.html
xx
Mila
The idea with the butterfly is excellent, I want to make two frames but using a pink and a magenta butterfly for my little girls.