How to Make Farmhouse Spring Tray Decor
This post may contain affiliate links. Please read our Disclosure Policy.
I wanted a simple farmhouse spring tray decor idea I could make without buying anything fancy. In this tutorial, I’ll show you how I transformed a plain wooden tray into a rustic spring decor piece using stain, paint, and a few easy styling touches. I’ll also share how I styled the tray for spring (and Easter) so it looks finished but not cluttered.
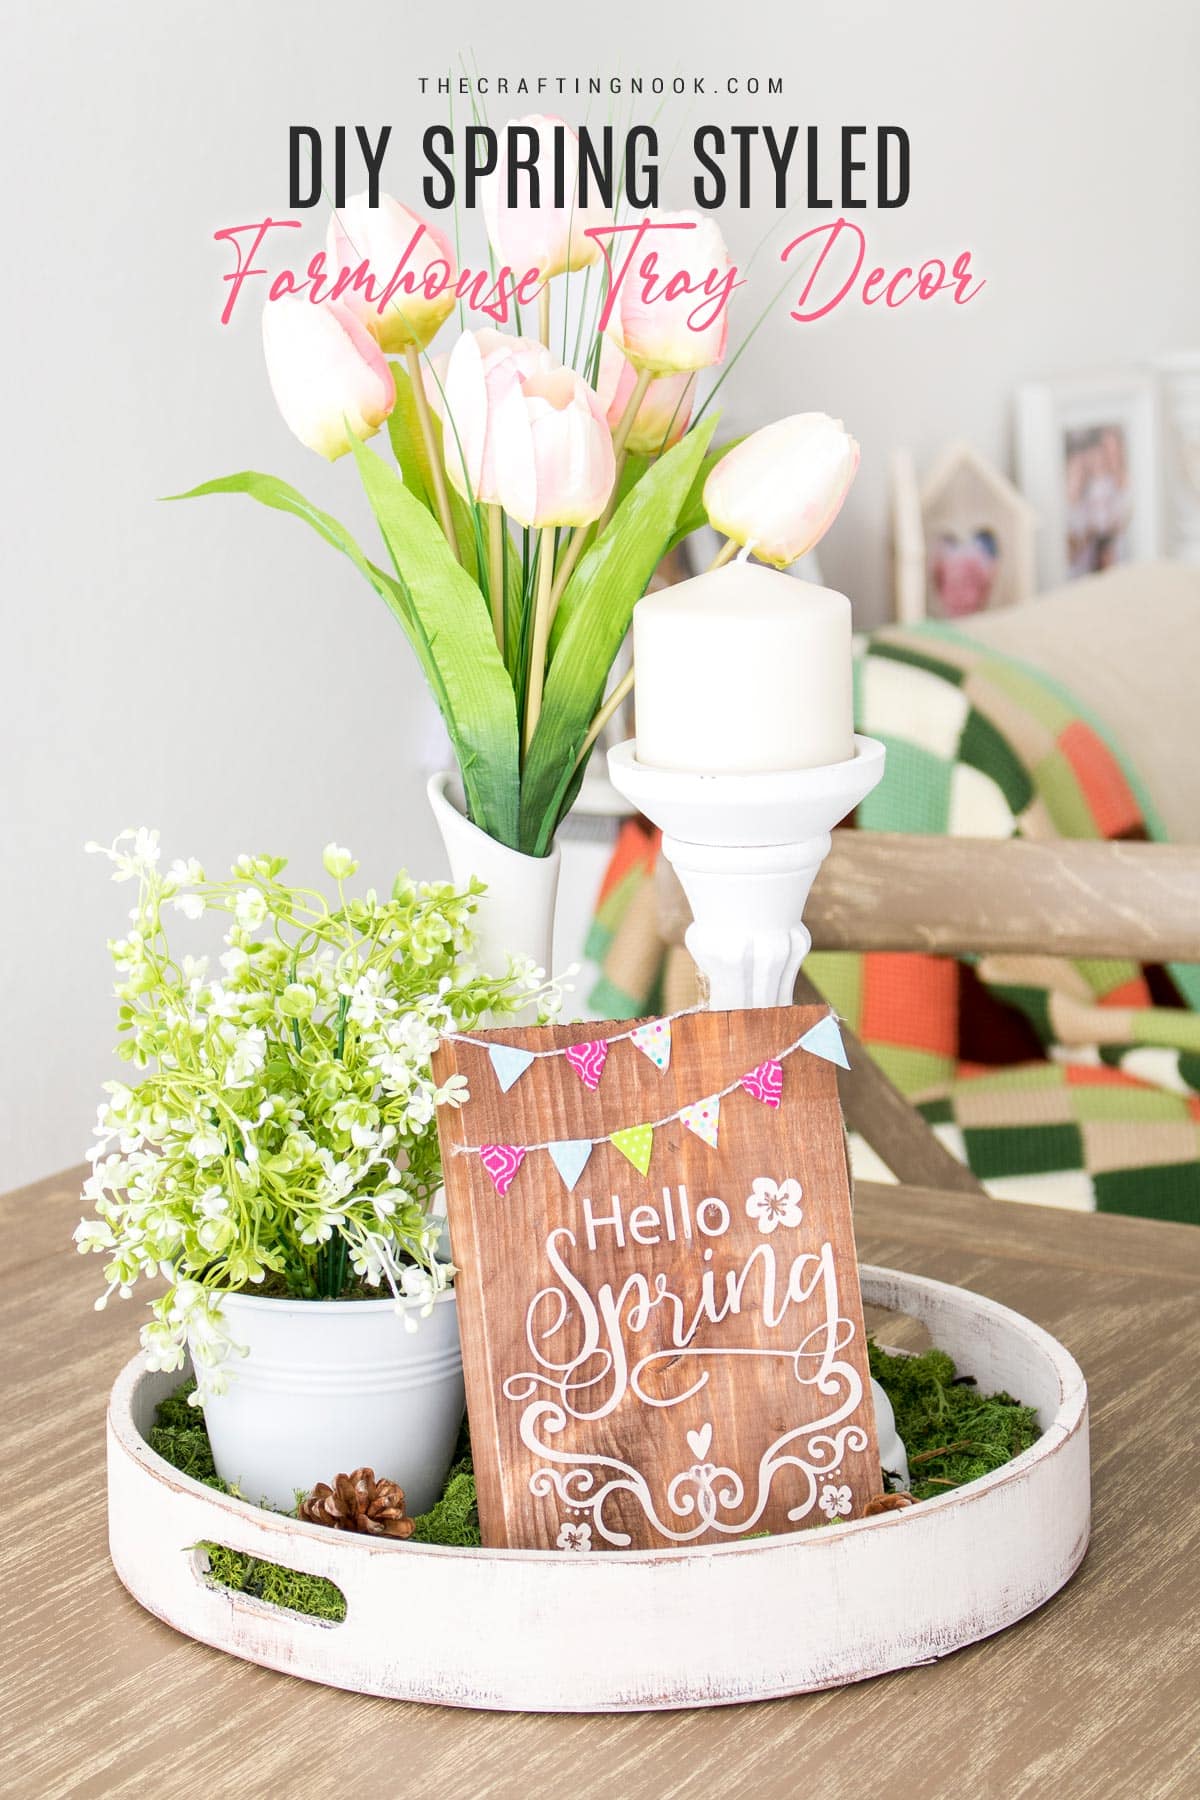
Table of Contents
How to Make a Spring Farmhouse Tray Decor
I wanted this tray to feel rustic and farmhouse-inspired without changing anything permanent in my small rental. I started with a cheap unfinished wooden tray and gave it a white, aged finish to contrast with my darker dining table.
This is a simple, beginner-friendly DIY that focuses on finish and styling rather than tools or power equipment.
Project snapshot
- Project Type: Woodworking / Decor
- Time Needed: 2-3 hours
- Budget range: Medium
- Best For: Dining table, coffee table, entry table
- Skill Level: Beginner
- Finished result: Decorative
- Customization level: Fully customizable
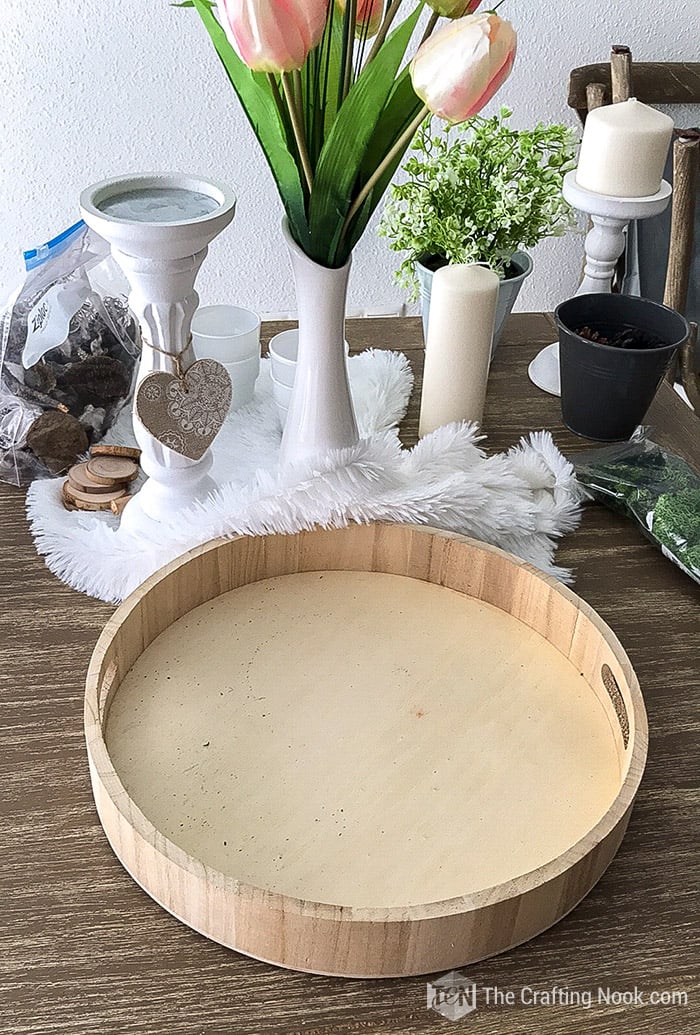
Supplies:
- A round rustic wooden tray
- A wooden rustic candle holder and candle
- Faux flowers (I used tulips)
- A faux plant pot
- Moss
- Walnut wood stain
- Chalk paint
- Spray Varnish or Clear Wax
- Plastic dish.
- Sandpaper (I used 150 grit and 80 grit)
- Cloth
Tools:
- Brush for stain and brush for chalk paint.
Instructions:
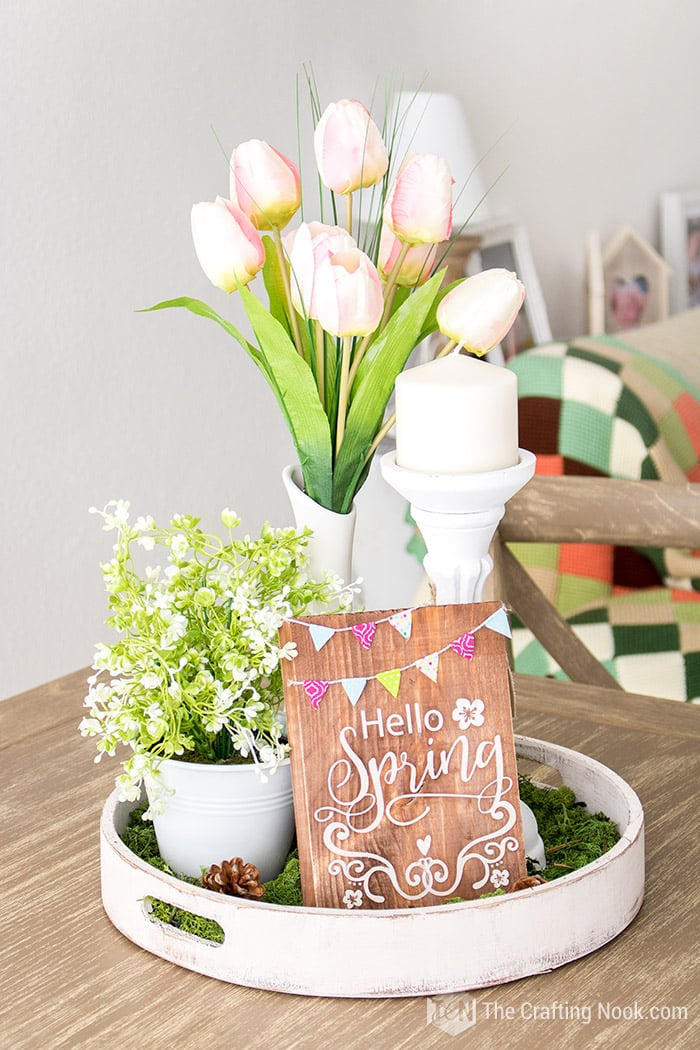
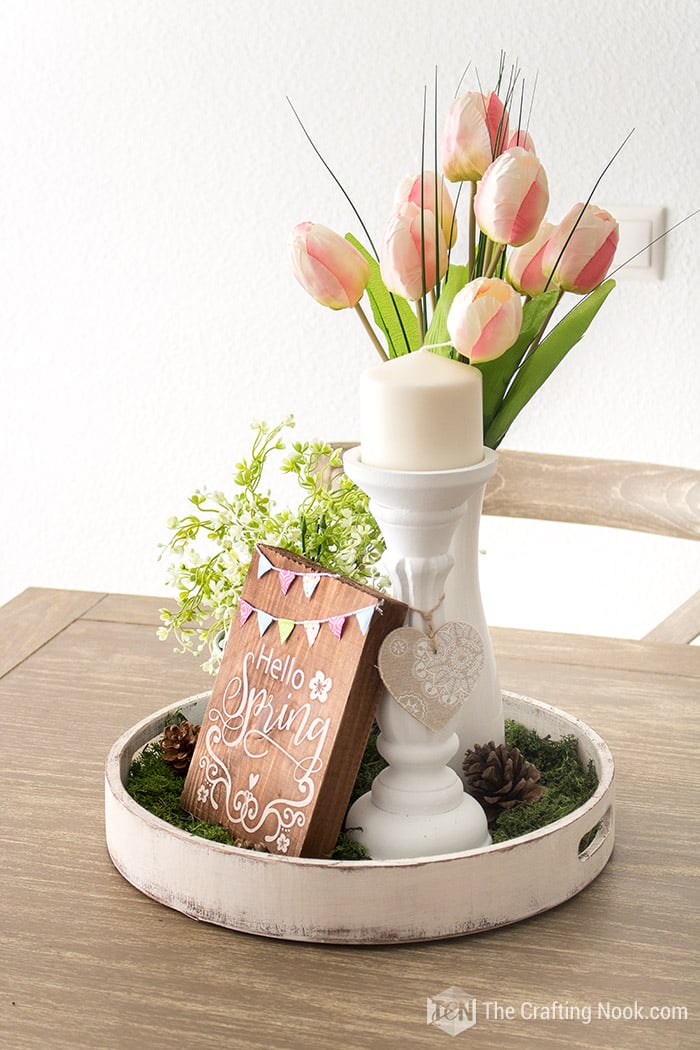
I was aiming for a more vignette look inside the tray, so I gathered a few things I already had at home and bought the flower vase and the moss. It had to have a pretty Spring look, too.
Step 1: Prepare and Stain the Tray
Protect your work surface.
Give the tray a slight sanding. Clean the tray well to remove any dust or residue.
Pour a small amount of stain into a plastic dish if the can opening is narrow.
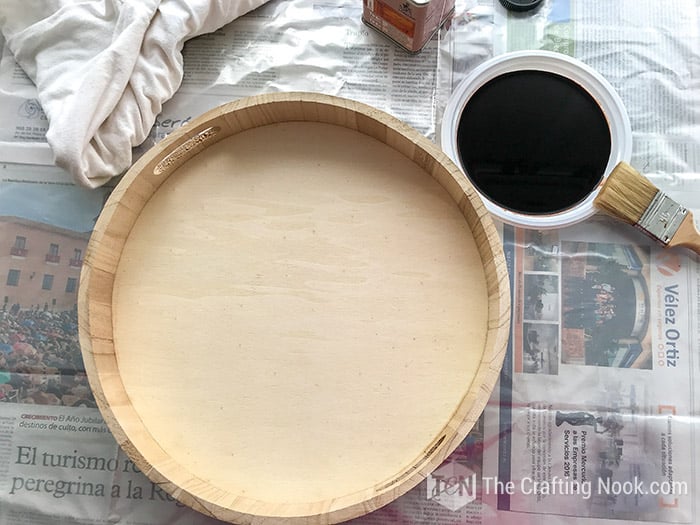
Apply the stain in sections, starting with the outer sides, then the inside, and finally the bottom.
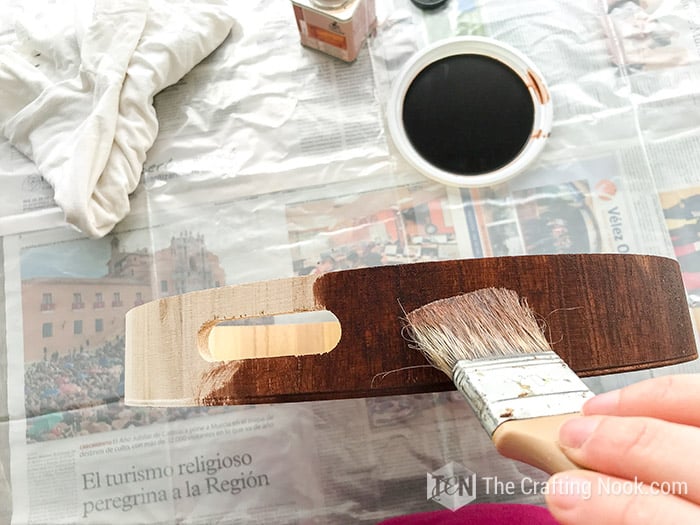
Wipe off any excess stain with a cloth and let the tray dry completely (about 2 hours, or according to the stain instructions).

Step 2: Create a Distressed, Farmhouse Finish
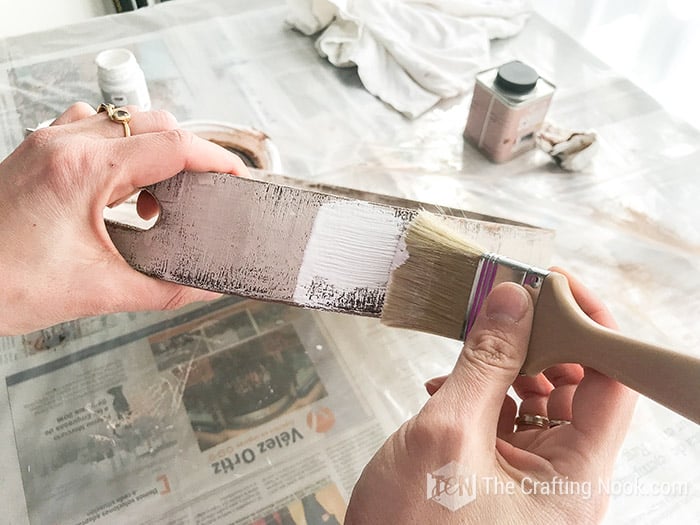
Once the stain is dry, dip just the tip of your brush into the paint and remove most of it on a paper towel.
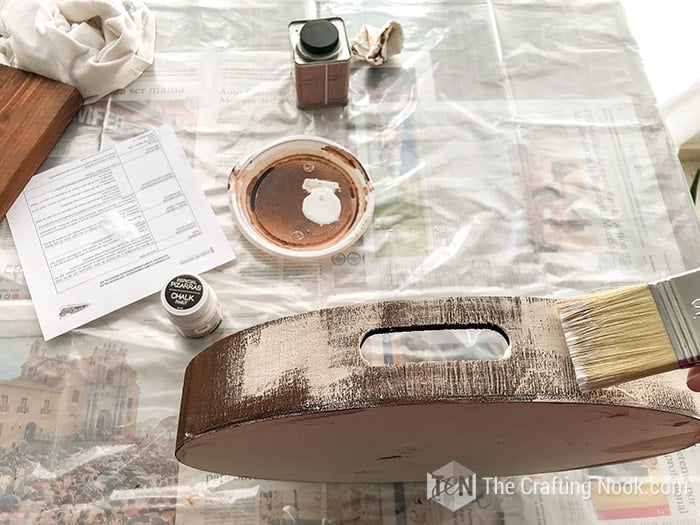
Using quick, light strokes, dry-brush the tray. You can paint only the outside or the entire tray. I painted the whole tray for a more cohesive look.
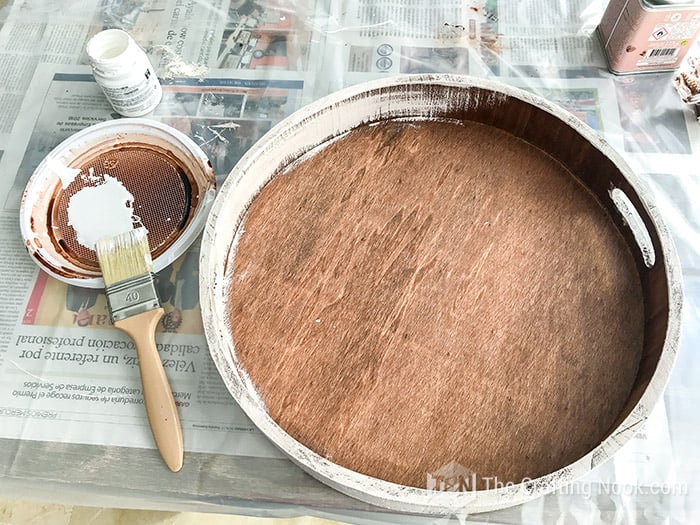
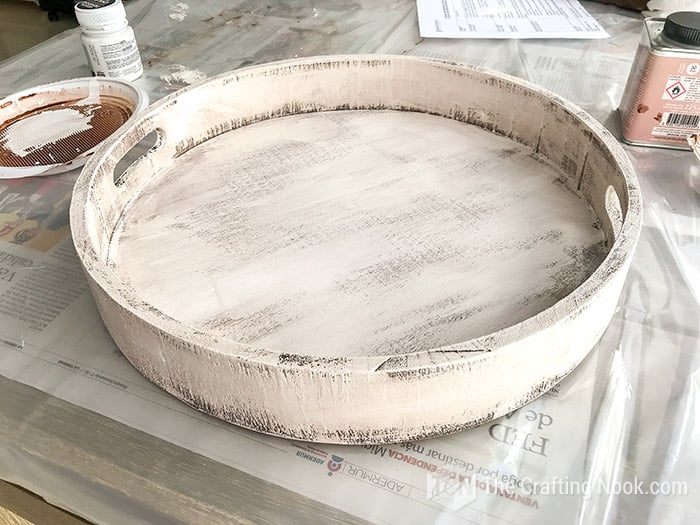
Let the paint dry for about one hour, then lightly sand using 150-grit sandpaper.

Clean off all sanding dust with a cloth.
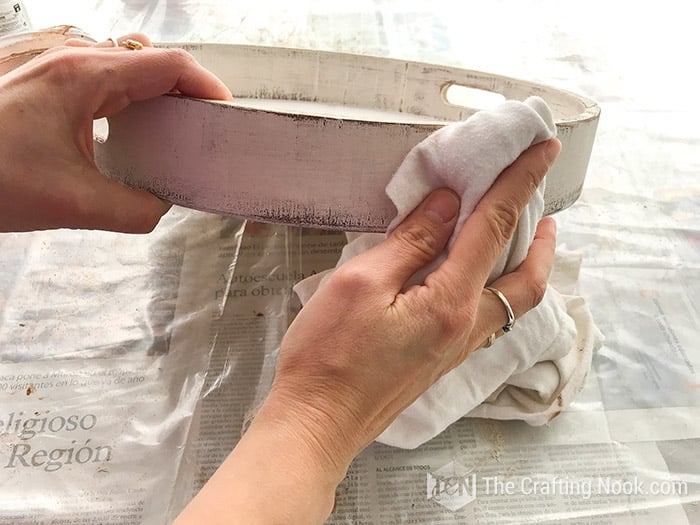
Apply a second dry-brushed coat of paint.
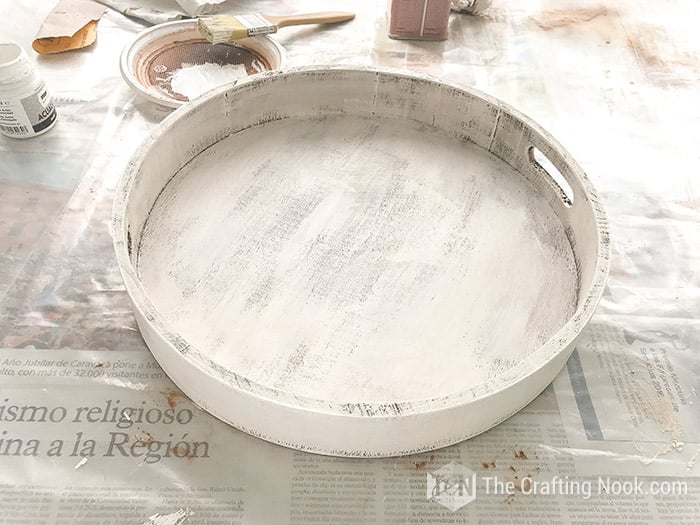
Once dry, sand again. For a more aged look, focus on edges and corners and use a rougher grit if desired.
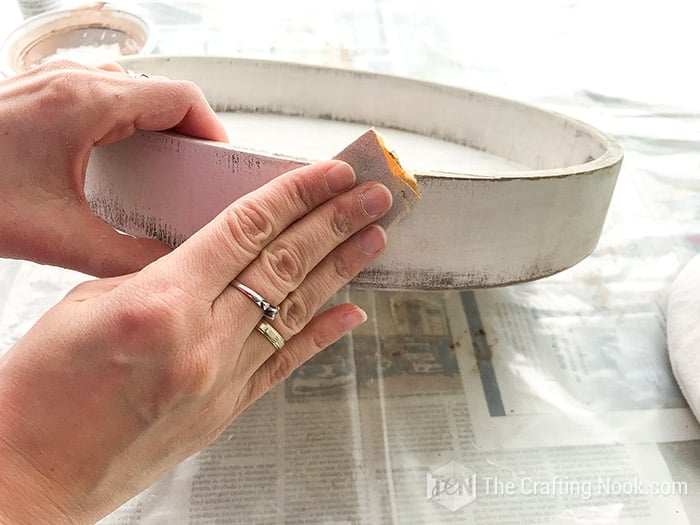
Step 3: Seal the Tray
Apply a clear spray varnish or wax to seal the tray. I prefer spray varnish for this type of finish.
Apply 2 light coats, allowing at least 30 minutes of drying time between coats.
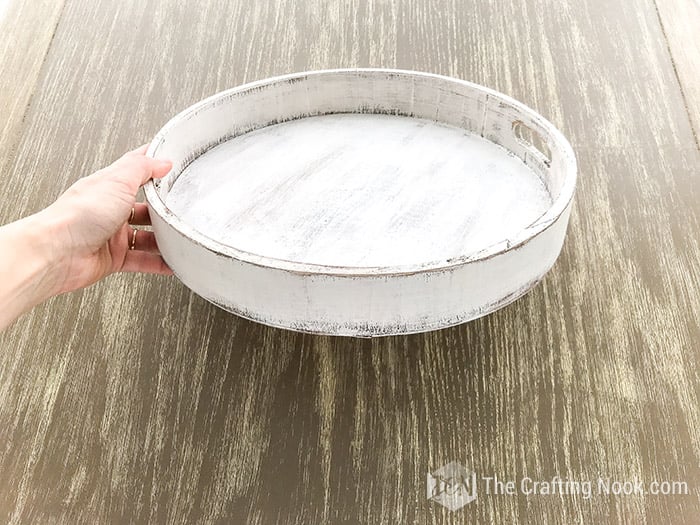
Once dry, the tray is ready to style.
There you go! You got yourself a pretty Farmhouse Tray.
Step 4: Style the Farmhouse Spring Tray
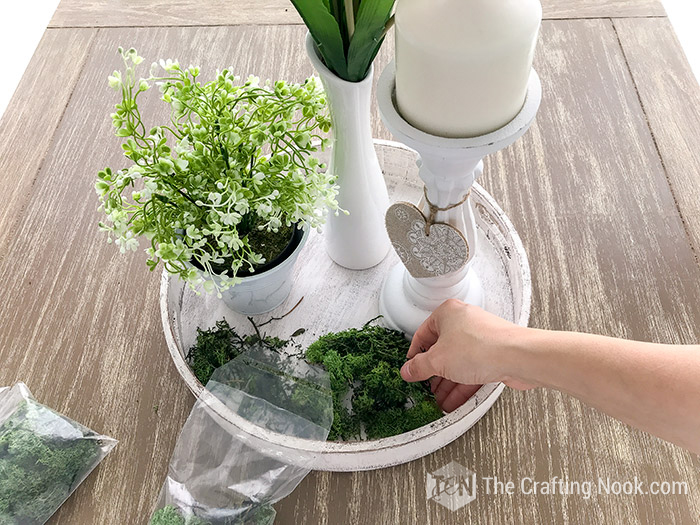
Start with one main focal item, such as a candle holder.

Add greenery using faux plants or flowers if you prefer low maintenance. I used a metal pot and a simple vase with tulips.
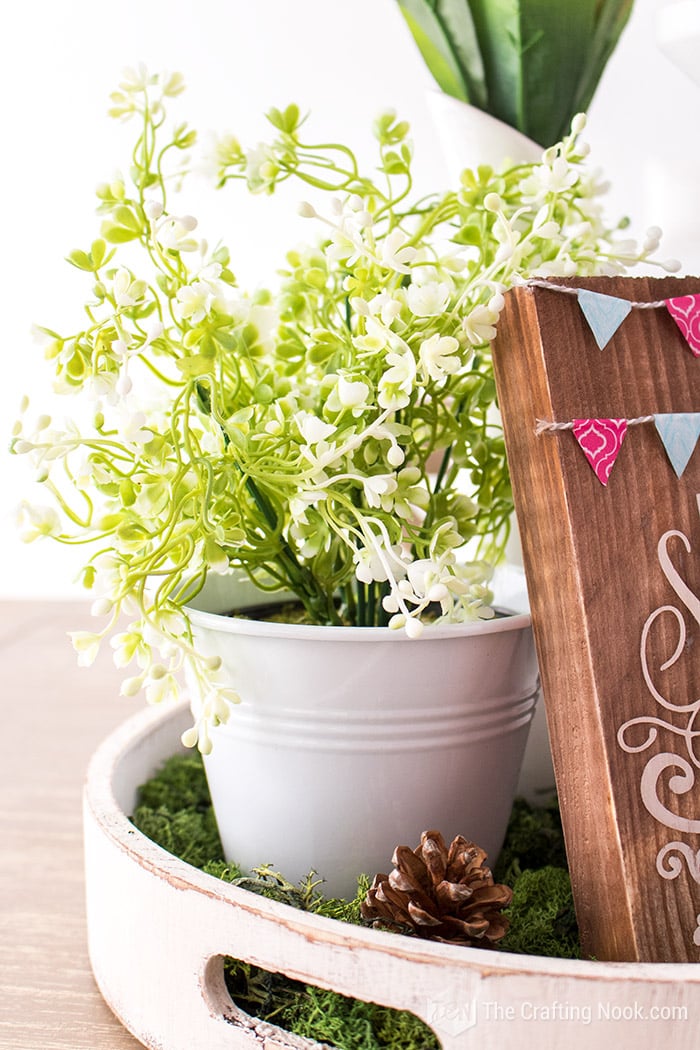

Fill the tray with moss to soften the look and add texture. Tuck in a few small accents, like pinecones or decorative pieces you already own.

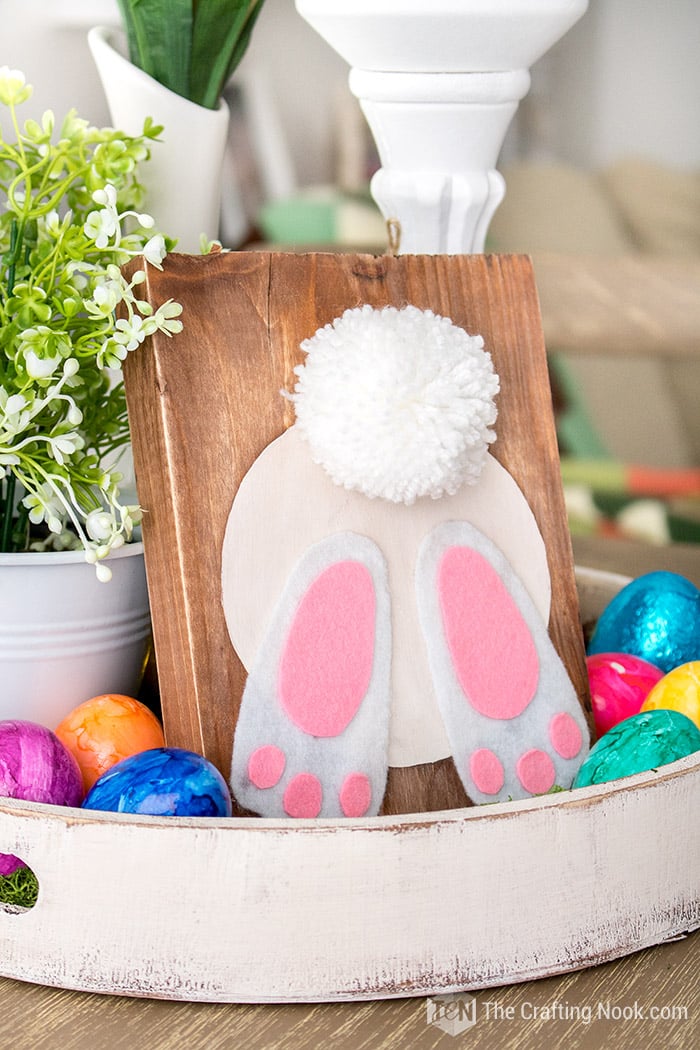
Finish with a small seasonal sign. Reversible Rustic Spring to Easter wood sign. It’s reversible, so I can easily switch it from spring to Easter.
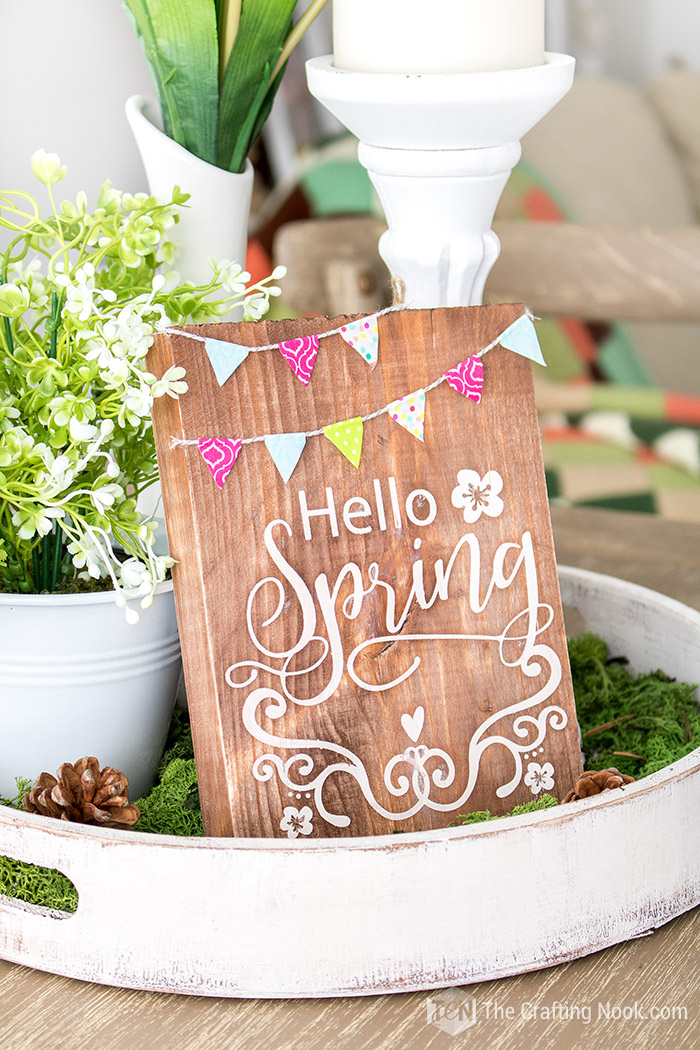
Keep the styling loose and balanced. Leave a little empty space so the tray doesn’t feel crowded.
For Easter, I’ll be showing off the bunny butt and the tray filled with cute easter eggs. When Easter has passed, I’ll go back to the Spring sign.
Crafting Tips
- Always clean the tray thoroughly before staining or painting. Even fine dust can affect how stains and paints absorb.
- Test your stain on the bottom of the tray first. Cheap or unfinished wood can take stain unevenly.
- Apply stain in full sections (one side at a time) and wipe off excess right away to avoid dark patches.
- When dry-brushing, use very little paint. Too much paint will cover the stain instead of letting it show through.
- Let each coat fully dry before sanding or adding another layer, or the finish can peel instead of distressing naturally.
I absolutely LOVE how it turned out. It will be hard to change it when the season is ending. But I still have some time to think about an even prettier tray decor.
Look how cute mine turned out!!!
Alternatives and Variations
Skip the stain and dry-brush paint directly onto raw wood for a lighter, more modern farmhouse look.
Use a darker stain and less white paint for a more rustic or industrial feel.
If your tray is already painted, lightly sand it and add a dry-brushed coat in white or cream to refresh it.
Keep the tray neutral and change only the contents—spring florals, Easter accents, summer greenery, or fall textures.
Replace moss with bead garlands, folded linen napkins, or a small runner to reduce mess and maintenance.
What to put on decorative trays?
Decorative trays are both practical and easy to style. What you place on them depends on the room and how you use the space.
Bedroom
Use a tray to keep everyday items organized and visible. Candles, perfumes, jewelry, small plants, framed photos, or a string of lights work well without making surfaces feel cluttered.
Kitchen
A tray is perfect for grouping frequently used items like salt and pepper, oil bottles, garlic, or small herb pots. It keeps everything together and makes cleaning the counter easier.
Dining Room
On a dining table, a styled tray works as a movable centerpiece. Candles, flowers, a small vase, or simple seasonal decor add style while making it easy to clear the table when needed.
Living Room
In the living room, trays help anchor decor on coffee tables or side tables. Try a candle, a few coasters, a small plant, stacked books, or one decorative accent. Keep it simple and leave some empty space.
Frequently Asked Questions
Yes, but lightly sanding it first is important so the stain or paint can adhere properly. Glossy or sealed trays need sanding to avoid peeling later.
No. Staining adds depth under the paint, but you can dry-brush directly onto raw wood for a lighter farmhouse look. The finish will just be less aged.
Matte or chalk-style paint works best because it sands easily and looks more natural once distressed. Avoid glossy paints, which don’t age well.
This tray is best used for decorative purposes. Sealing it protects the finish, but avoid standing water, hot items, or frequent scrubbing to keep it looking good.
Yes. Keeping the tray neutral makes it easy to restyle for different seasons or holidays by swapping out the contents only.
More Spring Projects to Try
If you like this Spring Farmhouse Tray Decor idea, you might also Love these creative Spring projects too:


Other Farmhouse Trays decorating ideas from my favorite bloggers:
- How to Decorate Farmhouse Trays for Spring by Simply 2 Moms.
- DIY Farmhouse Tray by Sandust 2 Stitches.
- Styling a Farmhouse Tiered Tray with Vintage Finds by Rain and Pine.
✂️ Tutorial

Diy Styled Farmhouse Tray Decor for Spring
Tools
- Brush for stain and brush for chalk paint.
Supplies
- A round rustic wooden tray
- A wooden rustic candle holder and candle
- Faux flowers I used tulips
- A faux plant pot
- Moss
- Walnut wood stain
- White acrylic or latex paint
- Spray Varnish or Clear Wax
- Plastic dish.
- Sandpaper I used 150 grit and 80 grit
- Cloth
Instructions
Step 1: Prepare and Stain the Tray
- Protect your work surface.
- Give the tray a slight sanding. Clean the tray well to remove any dust or residue.
- Pour a small amount of stain into a plastic dish if the can opening is narrow.
- The wooden tray on a protected surface ready for staining
- Apply the stain in sections, starting with the outer sides, then the inside, and finally the bottom.
- Wipe off any excess stain with a cloth and let the tray dry completely (about 2 hours, or according to the stain instructions).
Step 2: Create a Distressed, Farmhouse Finish
- Once the stain is dry, dip just the tip of your brush into the paint and remove most of it on a paper towel.
- Using quick, light strokes, dry-brush the tray. You can paint only the outside or the entire tray. I painted the whole tray for a more cohesive look.
- Let the paint dry for about one hour, then lightly sand using 150-grit sandpaper.
- Clean off all sanding dust with a cloth.
- Apply a second dry-brushed coat of paint.
- Once dry, sand again. For a more aged look, focus on edges and corners and use a rougher grit if desired.
Step 3: Seal the Tray
- Apply a clear spray varnish or wax to seal the tray. I prefer spray varnish for this type of finish.
- Apply 2 light coats, allowing at least 30 minutes of drying time between coats.
- Once dry, the tray is ready to style.
- There you go! You got yourself a pretty Farmhouse Tray.
Step 4: Style the Farmhouse Spring Tray
- Start with one main focal item, such as a candle holder.
- Add greenery using faux plants or flowers if you prefer low maintenance. I used a metal pot and a simple vase with tulips.
- Fill the tray with moss to soften the look and add texture. Tuck in a few small accents, like pinecones or decorative pieces you already own.
- Finish with a small seasonal sign. Reversible Rustic Spring to Easter wood sign. It’s reversible, so I can easily switch it from spring to Easter.
- Keep the styling loose and balanced. Leave a little empty space so the tray doesn’t feel crowded.
Share and PIN ME!!!

Til’ next time…


FREE WORKBOOK
Keeping your Sweet Home Organized
Learn how to create intentional habits and simple routines to Keep Your Home Organized. Plus freebies, printables, exclusive content, and tips.
Disclaimer: By clicking on the “Yes” button above you are giving me your consent to collect and use your information according to the law and My Policy Privacy. Zero Spam I promise!
Love it Cami!! That tray is so pretty in white and I looove the idea of live Moss… I am going to have to try and find some of that here! Such an adorable sign too ;) Great job!!
Hey Lisa!!!! Thank you, girl! I hesitated at first but then I liked it! I have to be honest when I bought it I didn’t think it was live moss LOL I was kind of shocked! But then it turned out great and different! Since I was going to place some easter eggs there as well it was a great way to spice up a little bit the Spring Decor!
Hugs