DIY Distressed Wood Look with Dry Brush Painting Technique
This post may contain affiliate links. Please read our Disclosure Policy.
Learn how to create a Distressed Wood look with the simple dry brush painting technique in just a few steps. An awesome finish in a simple way!
Distressed wood furniture works beautifully in rustic, farmhouse, cottage, and even more modern spaces when you want to add texture and character.
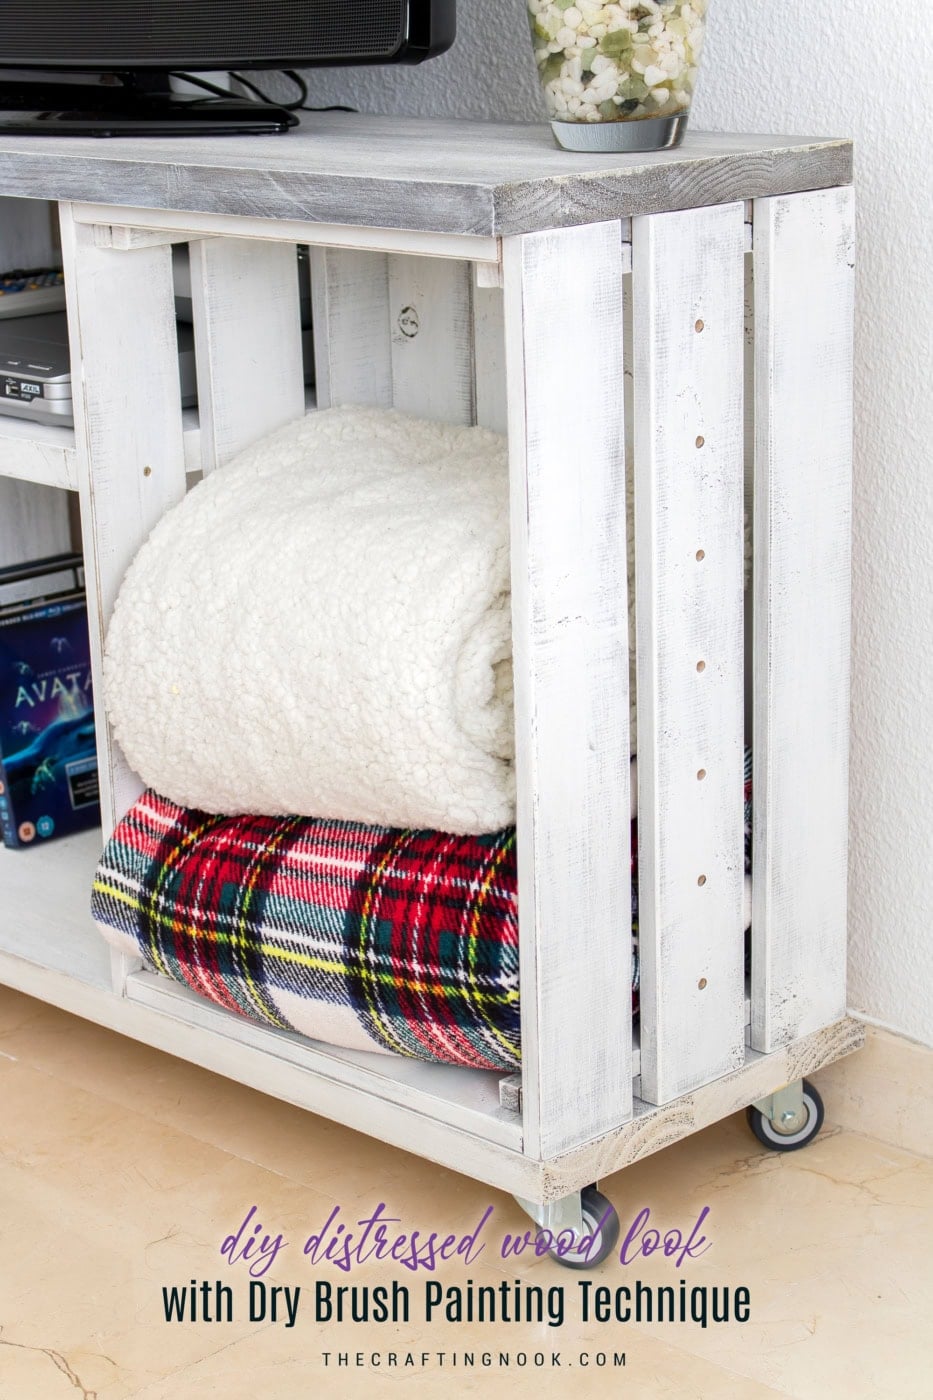
Table of Contents
Create Distressed Wood Texture with Dry Brush Painting Technique
I don’t know about you, but I’ve always loved the look of distressed wood. There’s something about those worn, imperfect finishes that makes a piece feel full of history and character.
Distressed wood looks beautiful in so many styles of homes from farmhouse, shabby chic, and country, cottage to even industrial and modern.
The great thing about this wood painting technique is that If you can’t find authentic reclaimed lumber for your project, you can use new materials and apply surface distressing techniques to simulate centuries of use and wear.
The best part?
You don’t need anything fancy. Just basic paint, stain, and a simple brush can completely transform a piece.
I started my wood journey a couple of years ago and completely fell in love with it. I’m no expert, but everything I’ve tried has helped me create pieces I truly love.
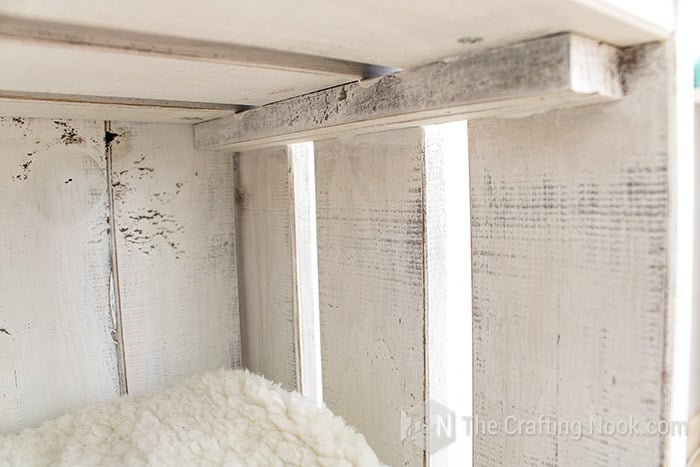
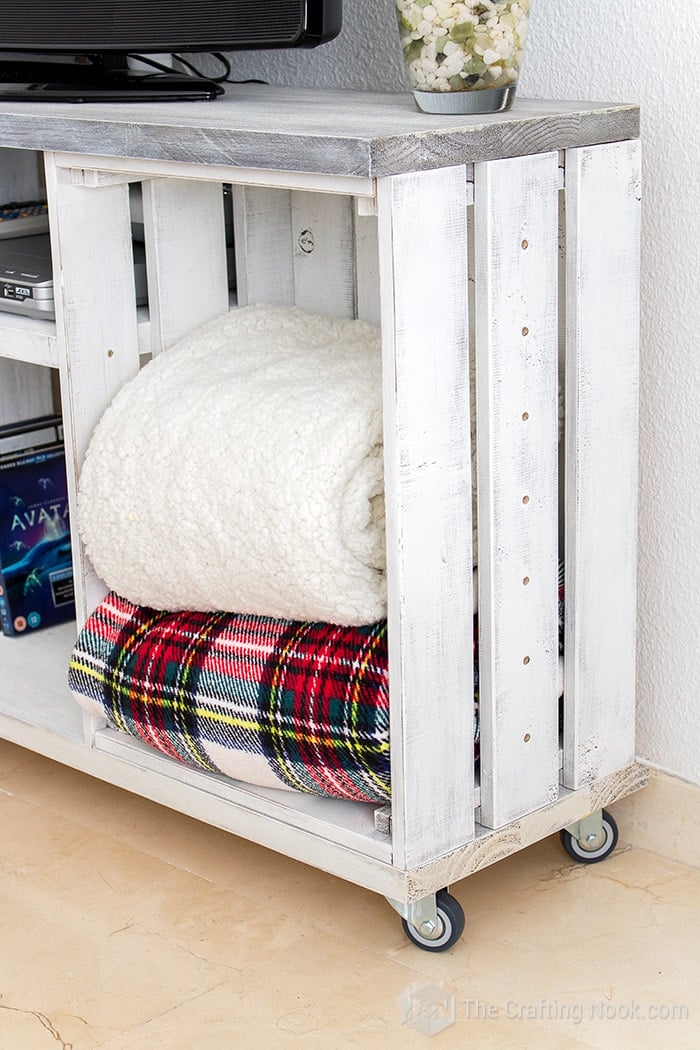
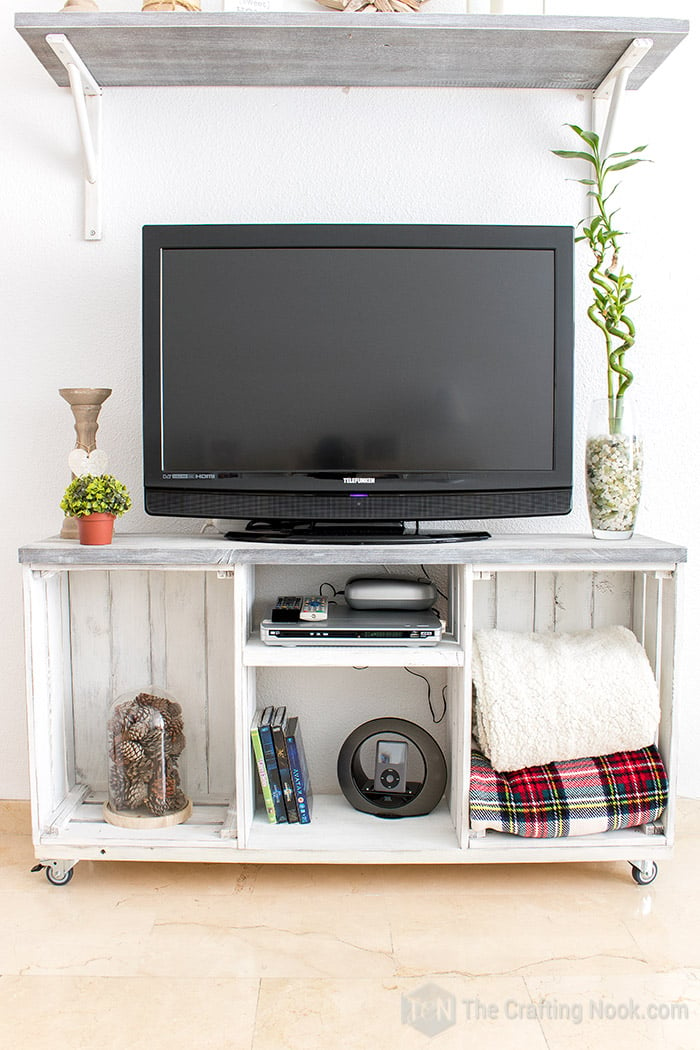
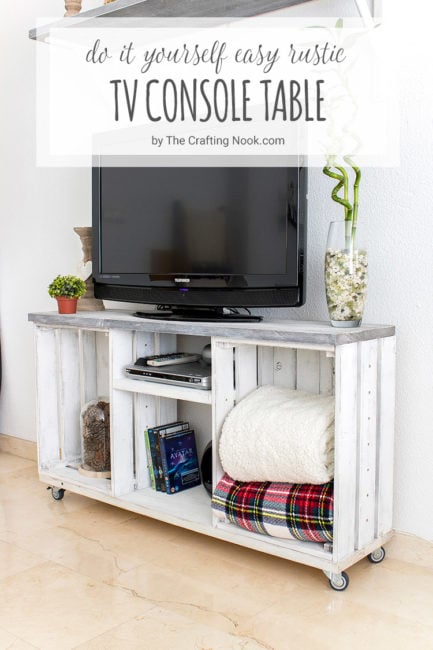
After I published my Rustic TV Console Table I got many questions about how I painted it. I thought the best way to explain was through a detailed tutorial and a video.
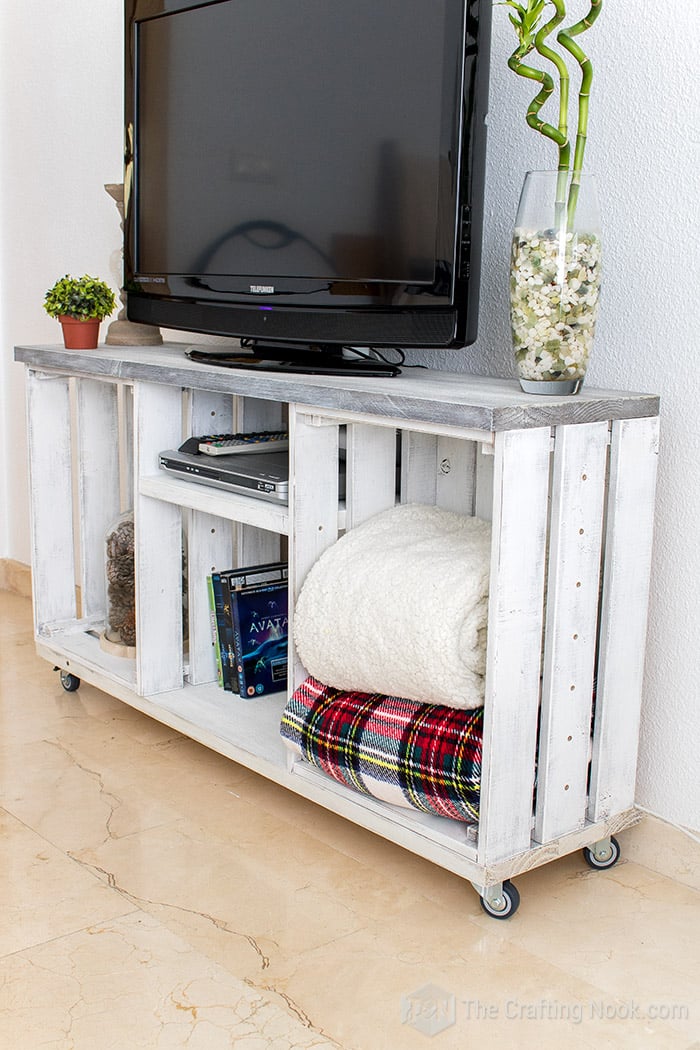
I used this technique for the bottom part of my tv console table and then simulated a Limewashed technique for the top part which you can find here.
Dry brushing furniture or any kind of wood piece is so much fun and, in many ways, even therapeutic. Although it might take up more time than just regular painting with a roller or spray paint, it just relieves stress and makes a pretty darn gorgeous result.
What I like the most about dry brushing is that, even though it takes time, you have control over how much you cover your piece. As you go applying coats, you get exactly the finish you want.
In my opinion, the most important factor of why dry brush painting is used is to make the painted surface “pop” with depth.
How to create this Distressed Wood Look
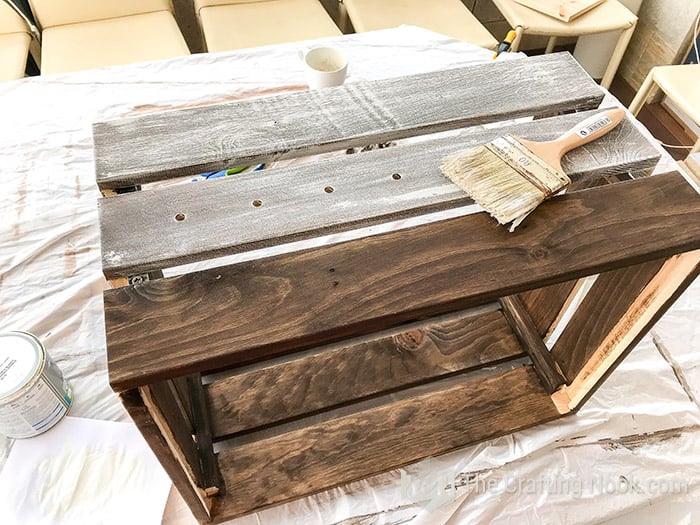
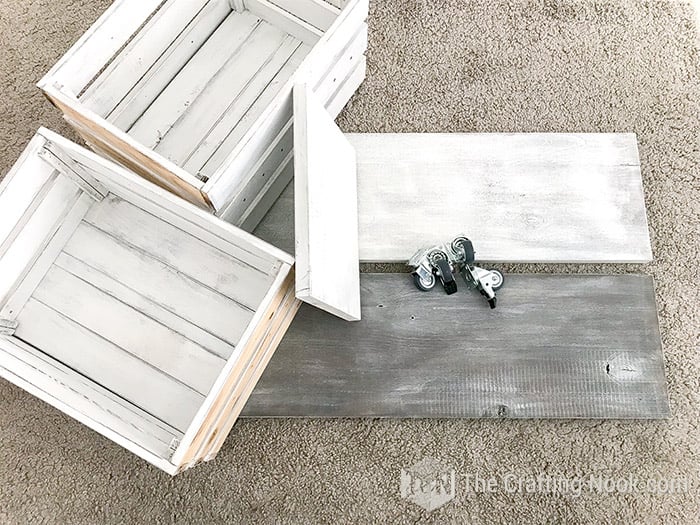
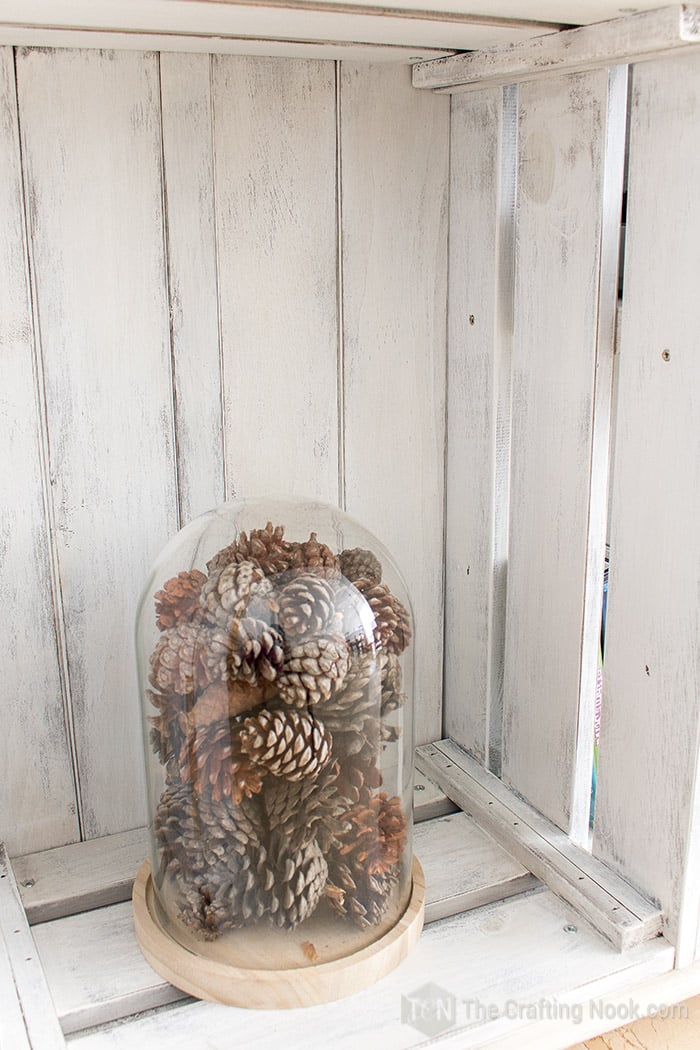
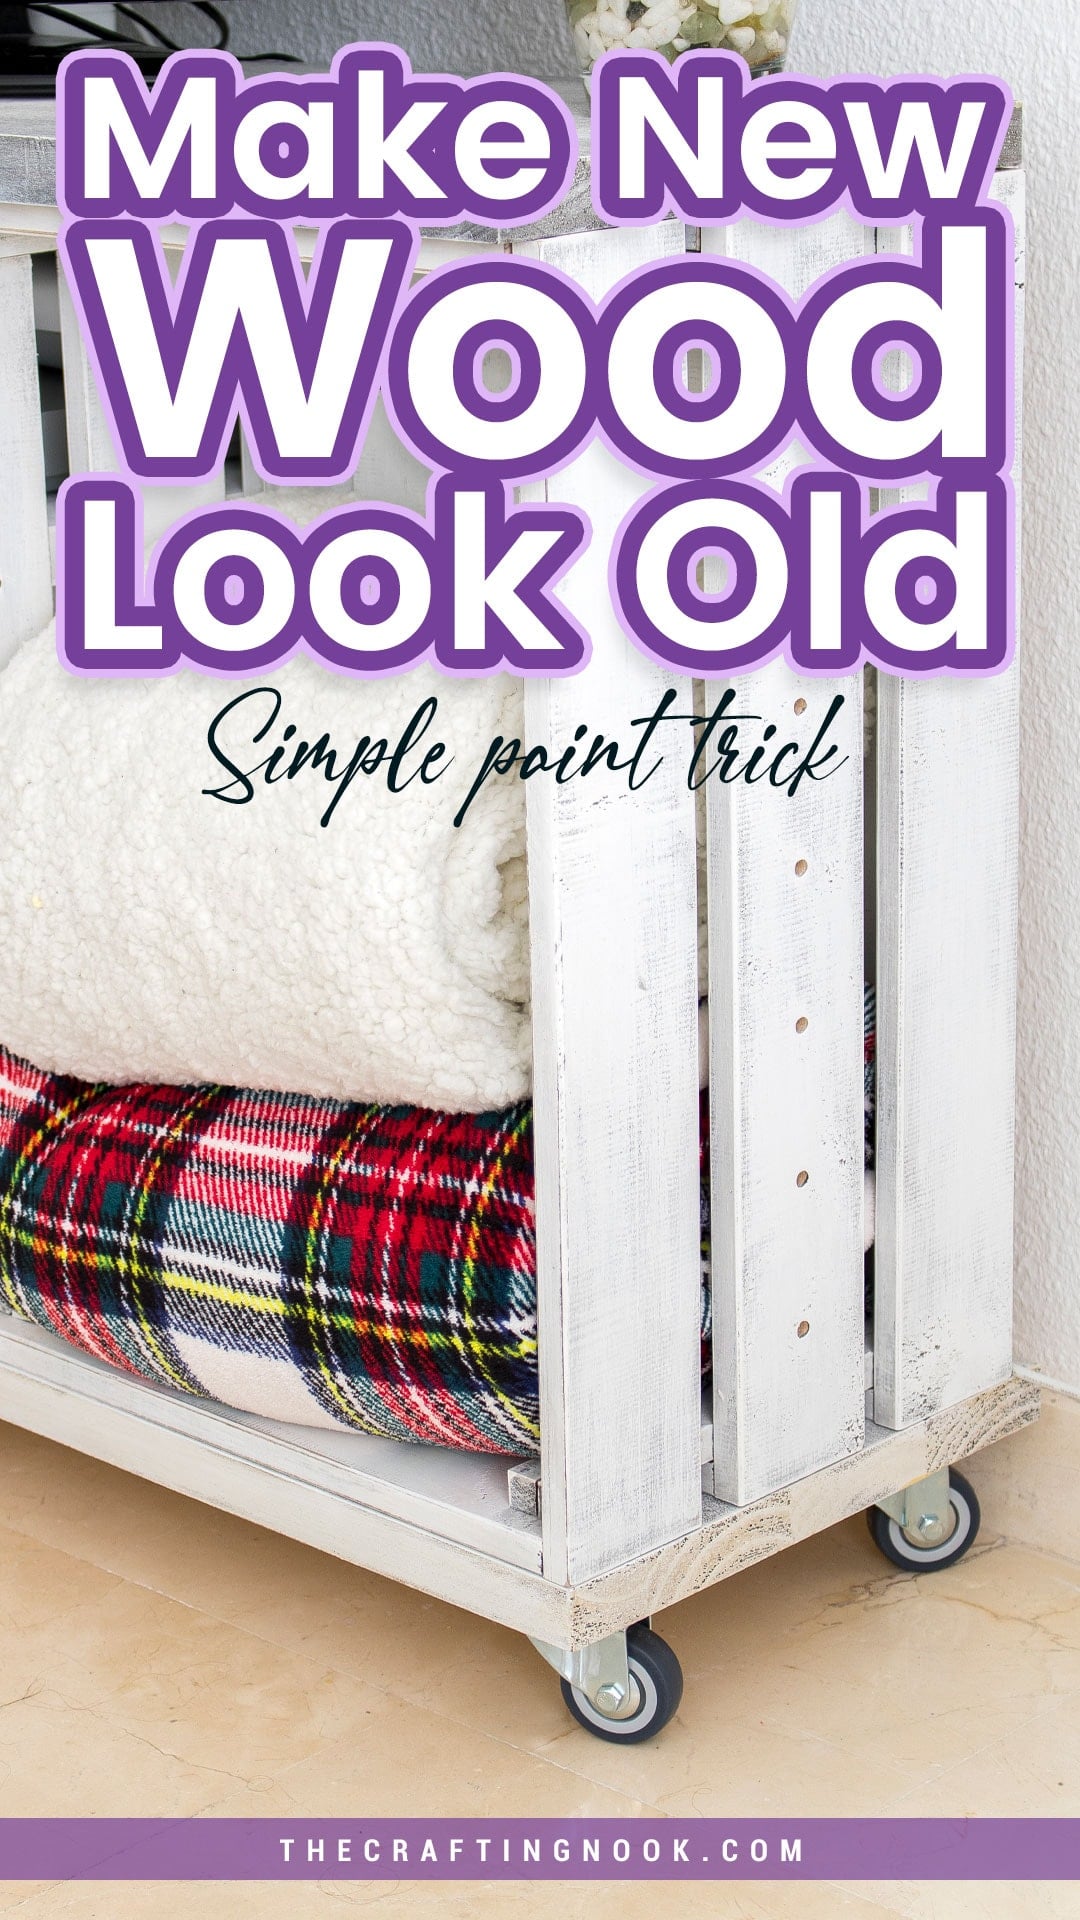
In this tutorial, I’ll show you how I created a distressed wood look by applying the dry brush painting technique to a wood board and a crate I used for my TV Console Table.
So, let’s get started.
supplies:
- Wood board.
- Dark wood stain (I used walnut)
- Cotton white latex paint
- Chip Brush.
- Plastic or paper plate
- Paper
- Sandpaper
- Steel Wool (grade 2)
- Gloves
- Brass-bristle scrub brush
- Piece of cloth
- Spray Mate Clear Varnish
- safety glasses.
Instructions:
I made a video tutorial for you on my painting process. If you are more of a step-by-step written detailed tutorial, just scroll down a little bit and keep reading.
Step 1: Prep work
Firstly, let’s avoid splinters from getting into our fingers. Sand all the edges. Only the edges because we don’t want the surface of our board to get too soft.
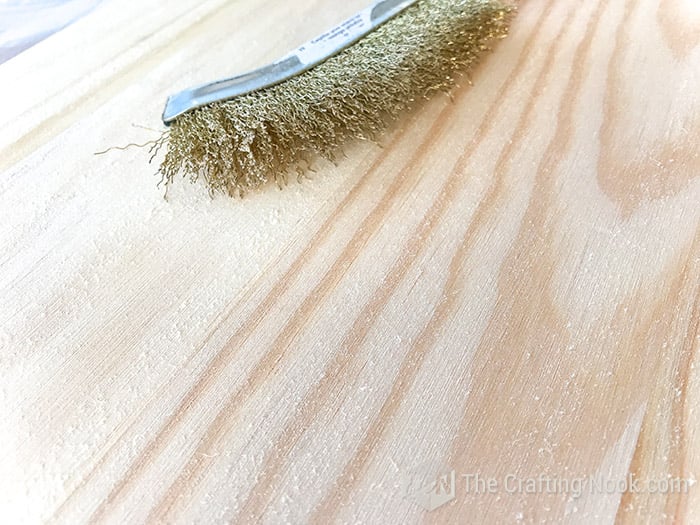
Once the edges are done, let’s enhance the whitening effects of dry brushing by opening the wood pores with the brass-bristle scrub brush before applying it.
Work the brass-bristle scrub brush along the wood grain to avoid unsightly cross-grain scratches, and clean the dust off thoroughly before applying the wood stain.
Clean each piece well to remove dust.
Step 2: Staining the wood
Stain your wood pieces with the base color of your choice. In my case, I used walnut.
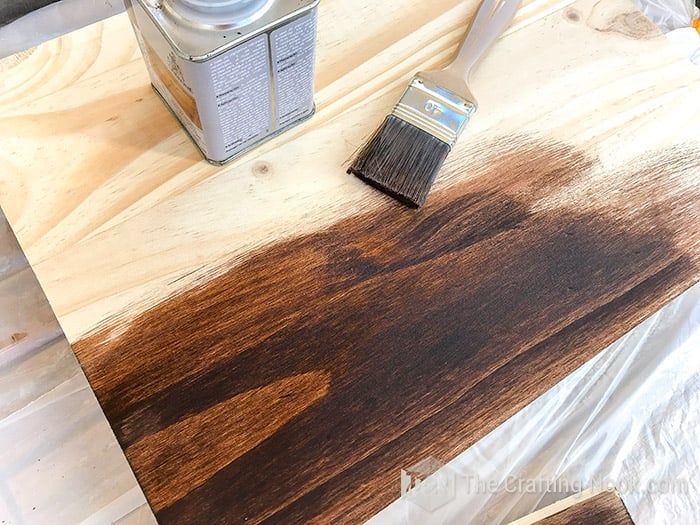
I like to rub a piece of cloth so the wood sucks the stain up more easily.
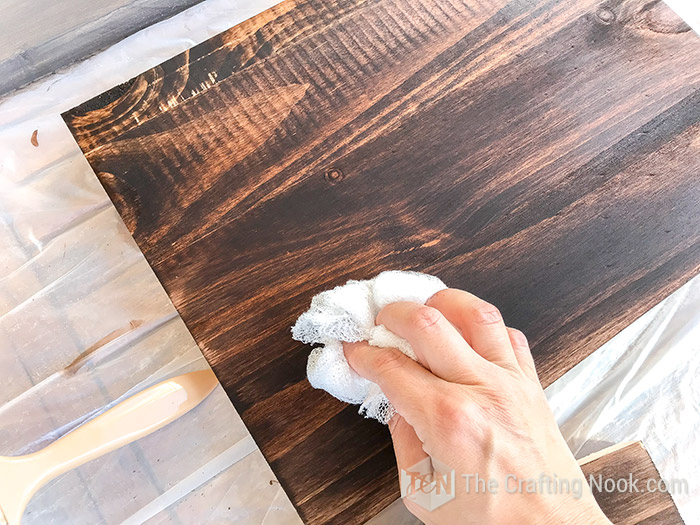
The best way to do this is by staining by sections until I cover the entire piece. That way you avoid weird overlaps in the shades of the stain.
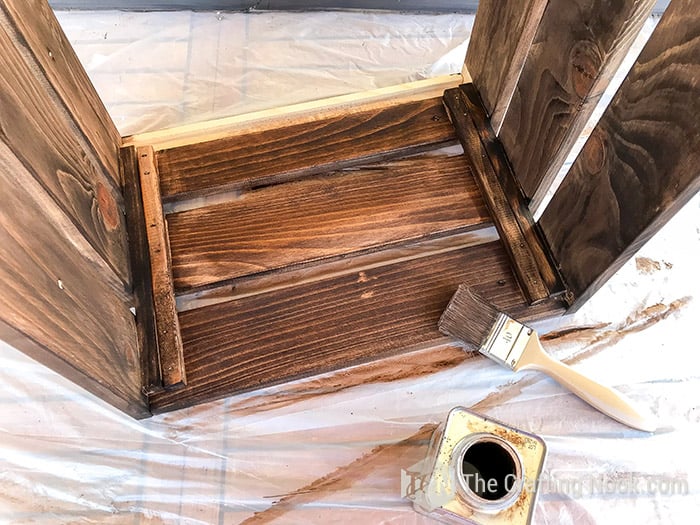
Let it dry overnight.

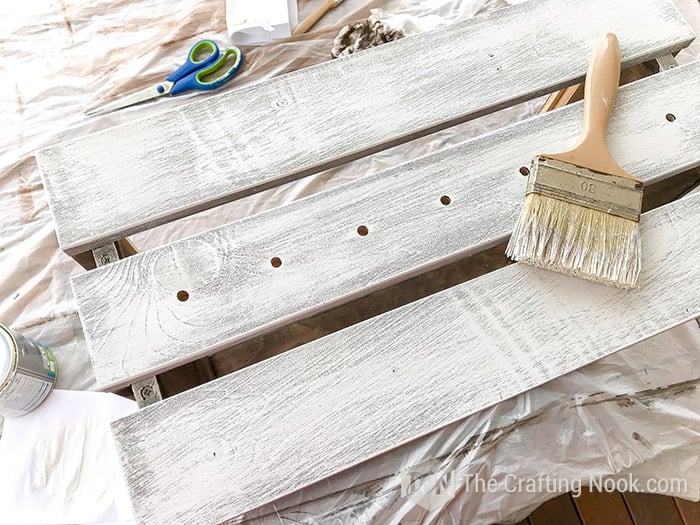
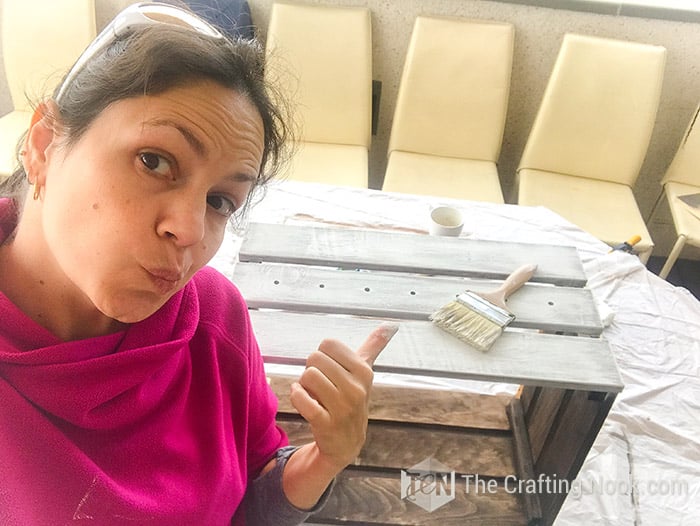
Step 3: Applying the Dry brushing technique
Add a small amount of paint to your plate.
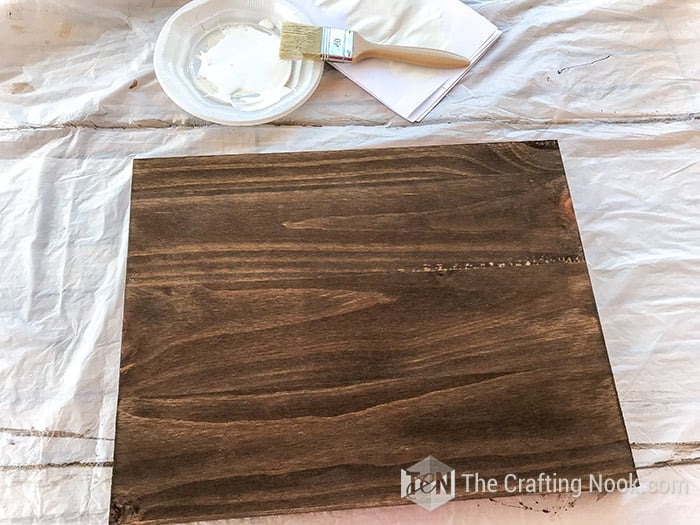
Then lightly dip just the tip of your brush into the paint and dab it onto a piece of paper or paper towel to remove the excess.
You want your brush to be almost dry, not loaded with paint. Start with very little and add more as needed once you get the feel of it.
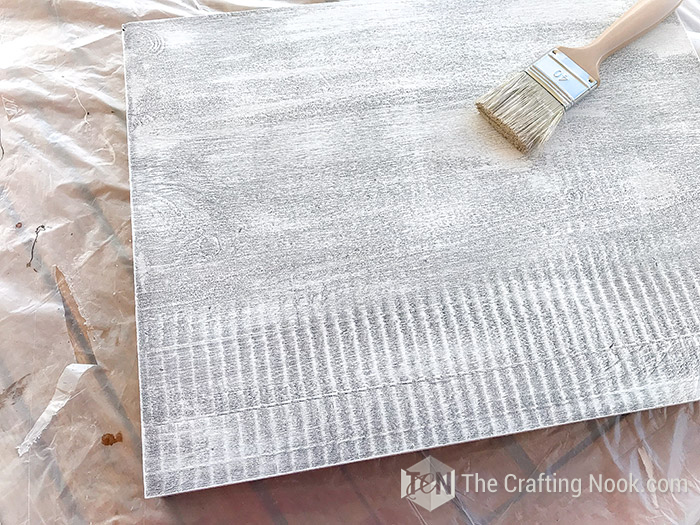
The secret to dry brush painting is to apply the paint with the very tip of your brush. You will notice the painting going up on the bristles but that’s normal as you keep brushing.
Use short, quick brush strokes in both directions (along the wood grain and across them) to give it a textured and accent the wood lines.
The key to getting an ideal dry brush effect is by using light pressure to go over the contour of the wooden furniture
There’s no right or wrong way to dry brush; so get creative with your painting, you might discover looks you didn’t even know you could love!
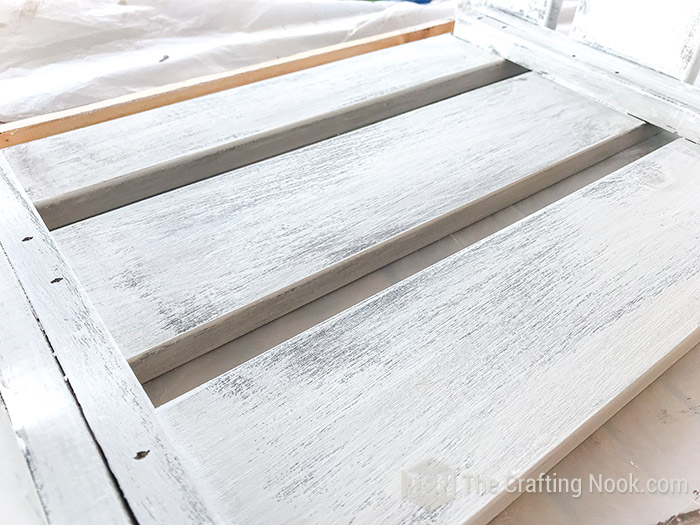
I kept brush stroking in layers until I got the coverage I was looking for.
The thing about this technique is that you already get a distressed look without even sanding yet. At the same time, you’re keeping the wood grain visible, which is what really gives it that aged, weathered look.
So, keep brush stroking until you get the finish you love.
If your strokes start looking thick or fully covering the wood, that means you have too much paint on your brush. The effect should look light, almost scratchy, with the wood still showing through.
Let it dry once finished at least 2 to 3 hours (overnight is best).
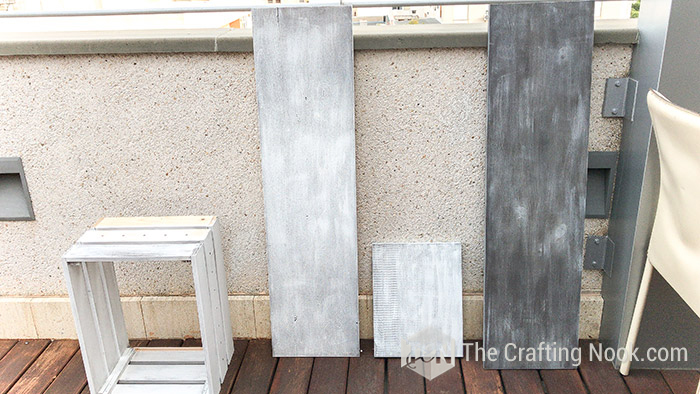
After your first pass, your piece should still look mostly like the stained wood, just with soft, uneven highlights. You’ll build the effect slowly in layers, not all at once.
Step 4: Finishing up the Distressed wood look
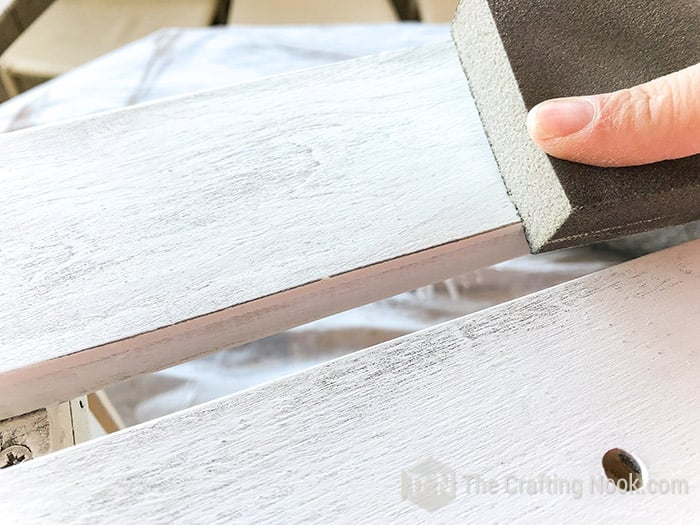
Finally, when your piece is completely dry, sand it.

What I did was:
- First, I sanded with steel wool harshly all over the piece. You definitely want to use gloves and safety glasses here.
- Then I used sandpaper to distress edges and imperfections.
Once you are happy with the distressing grade, clean your pieces to remove dust.
Spray your clear matte varnish to protect and finish your masterpiece.
Why spray?
Because if you use a brush, the applied dry brushed paint will start blending. Even though it looks pretty too, it’s not the final finish you are looking for in this case.
Let it dry and you are done!
Your distress look effect is ready to rock!
Common mistakes
A couple of quick things to watch out for:
- Using too much paint. This is the most common mistake and will cover the wood instead of highlighting it.
- Pressing too hard. Light pressure gives the best texture.
- Overworking the same area. This can make everything look muddy instead of layered.
Crafting Tips
To create a more pronounced distressed effect, sand the wood lightly before you start painting, either with 60-80 grit sandpaper or a brass-bristle scrub brush. This will give the paint something to grip onto and create a more textured look.
You can experiment with different shades of paint or layer different colors on top of each other to create a more complex and interesting distressed wood look.
If you’re working on furniture or something that will be used often, seal it at the end. A matte spray varnish works really well and won’t disturb the dry brush effect.
Embrace imperfections. That’s what makes distressed wood look real. Don’t stress about perfect strokes — the unevenness is what gives it character.r piece.
Use less paint than you think you need. Most beginner mistakes happen because the brush is too wet. Start light — you can always add more, but it’s harder to take it away.
See? Simple, right?
Now it’s your turn to try it and make it your own. Play with it, have fun, and don’t overthink it — that’s where the magic happens.
Frequently Asked Questions
The dry brushing painting technique is a coloring technique used to finish any surface in an uneven way that creates irregularity associated with aged materials. I’ve used it in so many different craft projects. Clay painting is one of them and, of course, wood which is my favorite medium.
This usually happens when there’s too much paint on the brush. The key is to keep your brush almost dry. If it looks too thick, just go back with a clean brush or lightly sand once it dries to soften the effect.
Yes, don’t worry. Let it dry and lightly sand the surface to bring back some of the wood underneath. You can also go over it again with a lighter dry brush layer to balance it out.
Not always, but I highly recommend it. The stain creates contrast and depth, which is what makes the dry brush effect stand out. Without it, the finish can look a bit flat.
In my experience, you can’t. For this technique to work, you need a rough wood texture for the dry brushing to hold on to.
This is the tricky part and also the fun part. Step back often and look at your piece from a distance. It’s very easy to overdo it, so stop when you start thinking “maybe just a little more.”
More Rustic Woodworking Ideas to Try
If you liked this Distressed Wood technique tutorial, you might also love these other rustic project ideas too:

✂️ Tutorial

Diy Distressed Wood Look With Dry Brush Painting Technique Tutrial
Tools
- Safety glasses.
- Brass-bristle scrub brush
Supplies
- Wood board.
- Dark wood stain I used walnut
- Cotton white latex paint
- Chip Brush.
- Plastic or paper plate
- Paper
- Sandpaper
- Steel Wool grade 2
- Gloves
- Piece of cloth
- Spray Mate Clear Varnish
Instructions
PREP WORK
- Firstly, let’s avoid splinters from getting into our fingers. Sand all the edges. Only the edges because we don’t want the surface of our board to get too soft.
- Once the edges are done, let’s enhance the whitening effects of dry brushing by opening the wood pores with the brass-bristle scrub brush before applying it.
- Work the brush along the wood grain to avoid unsightly cross-grain scratches, and clean the dust off thoroughly before applying the wood stain.
- Clean each piece well to remove dust.
STAINING THE WOOD
- Stain your wood pieces with the base color of your choice. In my case, I used walnut.
- A section of the wood piece stained with walnut wood stain
- I like to rub a piece of cloth so the wood sucks the stain up more easily.
- The best way to do this is by staining by sections until I cover the entire piece. That way you avoid weird overlaps in the shades of the stain.
- A create completely stained
- Let it dry overnight.
APPLYING DRY BRUSHING TECHNIQUE
- Then dribble a mall amount of paint on the plastic or paper plate.
- Stained piece of wood ready to start the dry brushing
- Then very gently dab the tip of your dry paintbrush into the paint and dabbed it on a piece of dry paper or paper towel to remove excess paint.
- You want to use just a small amount of paint to keep the tip of your paintbrush “almost dry” and not oversaturated with paint, so I suggest starting off with just a tiny bit of paint and adding more as you get comfortable with the technique.
- The secret to dry brush painting is to apply the paint with the very tip of your brush. You will notice the painting going up on the bristles but that’s normal as you keep brushing.
- Use short, quick brush strokes in both directions (along the wood grain and across them) to give it a textured and accent the wood lines.
- The key to getting an ideal dry brush effect is by using light pressure to go over the contour of the wooden furniture
- There’s no right or wrong way to dry brush; so get creative with your painting, you might discover looks you didn’t even know you could love!
- I kept brush stroking in layers until I got the coverage I was looking for.
- The thing about this technique is that you already get a distressed look without even sanding yet. At the same time, you are leaving your wood grand visible; which in my opinion is what makes the wood look weathered.
- So, keep brush stroking until you get the finish you love.
- Let it dry once finished at least 2 to 3 hours (overnight is best).
FINISHING UP THE DISTRESSED WOOD LOOK
- Finally, when your piece is completely dry, sand your pieces.
- What I did was:
- First, I sanded with steel wool harshly all over the piece. You definitely want to use gloves and safety glasses here.
- Then I used sandpaper to distress edges and imperfections.
- starting the distressed wood look with a sanding block sanding the edges
- Once you are happy with the distressing grade, clean your pieces to remove dust.
- Spray your clear matte varnish to protect and finish your masterpiece.
- Let it dry and you are done!
- Your distress look effect is ready to rock!
Other Wood Painting Techniques from my favorite bloggers:
- How to Weather Wood by Ashley over at Cherished Bliss.
- Learn How to Distress Wood and Furniture by Ananda over at A Piece of Rainbow.
- How to Make New Wood Look Old by Family Handyman.
Hope you enjoyed this tutorial and if you did don’t forget to PIN and share with friends!
Til’ next time…


FREE WORKBOOK
Keeping your Sweet Home Organized
Learn how to create intentional habits and simple routines to Keep Your Home Organized. Plus freebies, printables, exclusive content, and tips.
Disclaimer: By clicking on the “Yes” button above you are giving me your consent to collect and use your information according to the law and My Policy Privacy. Zero Spam I promise!
I was there every step. You are amazing. Love you.
Thank you so much!!! XOXO